When it comes to focusing on a microscope, there are a few key things that you need to keep in mind.
The first is the magnification (or power) of your scope. This should be high enough to see clearly but not so high that you have difficulty handling the instrument.
Next, ensure that the eyepiece has good eye relief, allowing you to move your eyes without feeling strained or uncomfortable.
And finally, store and clean your microscope regularly for optimal performance.

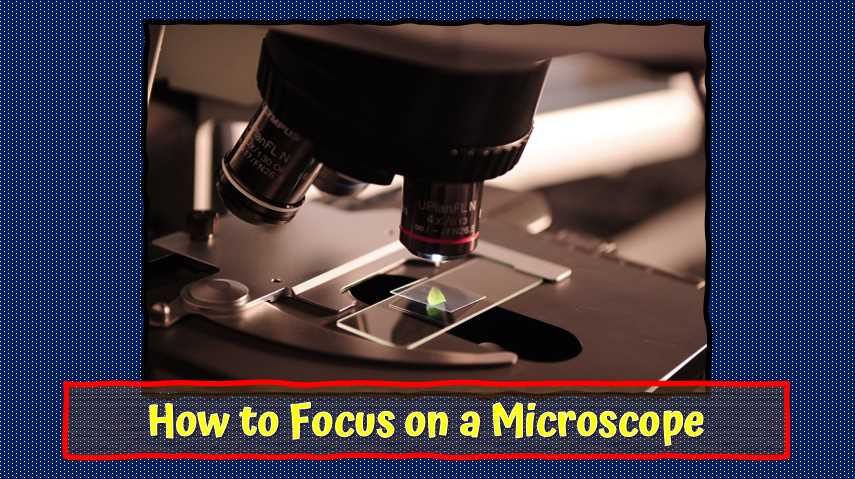
Microscopy, a cornerstone in scientific exploration, relies heavily on precise focus for accurate observations. This article delves into the nuances of focusing on a microscope, unraveling the intricacies of its components and providing practical tips. Understanding and mastering the art of focusing is not only fundamental for researchers but also for students and enthusiasts seeking clarity in their microscopic endeavors.
Techniques for Focusing Microscope
Achieving precise focus on a microscope is a skill that requires a systematic approach and an understanding of the microscope’s components. In this section, we explore the techniques involved in the focusing process, from initial setup to the fine-tuning adjustments that ensure clarity in microscopic observations.
A. Initial Setup and Preparation
Before delving into focusing techniques, it’s crucial to start with proper setup and preparation. This involves placing the sample on the stage and adjusting the illumination for optimal visibility. Adequate sample preparation, including proper mounting techniques, ensures that the specimen is positioned correctly and that potential obstacles to focusing, such as uneven surfaces or air bubbles, are minimized.
B. Coarse Focusing
Coarse focusing is the initial step in bringing the specimen into view. It involves using the coarse focus knob, which moves the stage or the objective lenses in larger increments. This step is crucial for rapidly approaching the focal plane and obtaining a clear image of the specimen. It’s important to note that coarse focusing should be done cautiously to avoid overshooting the optimal focus point.
Table: Coarse Focusing Guidelines
| Coarse Focusing Steps | Description |
|---|---|
| 1. Low Magnification | Begin with the lowest magnification objective lens for a broader field of view. |
| 2. Large Movements | Use the coarse focus knob for larger, rapid movements towards focus. |
| 3. Stop Before Clarity | As the specimen becomes clearer, slow down and stop before achieving full clarity. |
C. Fine Focusing
Fine focusing is the refinement stage that brings out the intricate details of the specimen. Using the fine focus knob, smaller adjustments are made to precisely define the focal plane. This step is crucial for achieving high-resolution images and ensuring that the observer can discern fine structures within the specimen. Fine focusing requires patience and a keen eye, as subtle adjustments make a significant difference in the clarity of the observed features.
Table: Fine Focusing Guidelines
| Fine Focusing Tips | Description |
|---|---|
| 1. High Magnification | Switch to higher magnification for finer details. |
| 2. Slow and Gradual | Turn the fine focus knob slowly for subtle adjustments. |
| 3. Observe Changes | Pay close attention to changes in clarity with each adjustment. |
D. Maintaining Focus During Observation
Once optimal focus is achieved, it’s essential to maintain it during the observation period. Microscopic observations often involve studying dynamic processes or capturing images, requiring a stable focus. Using the stage controls for XY movement and adjusting the condenser for optimal illumination can help maintain focus throughout the observation.
In conclusion, mastering the techniques for focusing a microscope involves a combination of initial setup, coarse focusing, fine adjustments, and maintaining focus during observation. Each step is integral to obtaining clear and accurate microscopic images, and practitioners should approach the process with precision and patience.
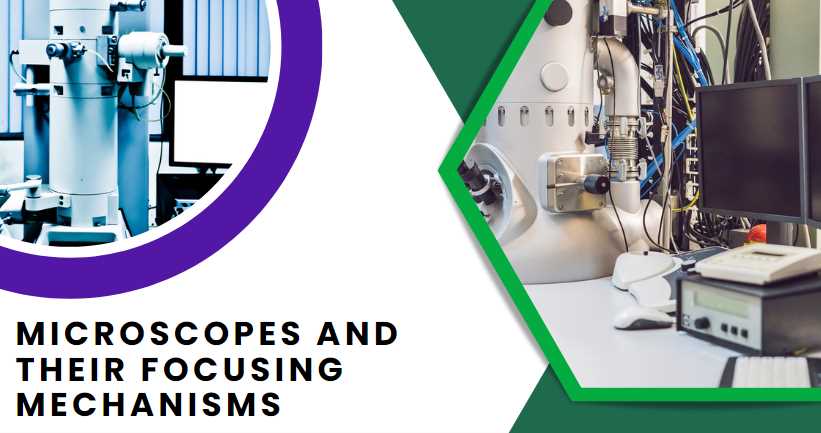
Types of Microscopes and Their Focusing Mechanisms
Microscopes come in various types, each equipped with unique mechanisms to facilitate focusing and enhance the quality of observations. Understanding these distinctions is crucial for users aiming to optimize their microscopic experiences.
| Microscope Type | Focusing Mechanism |
|---|---|
| Light Microscope | |
| – Brightfield | Utilizes visible light for imaging. |
| – Advantages: Simple and widely used for general observations. | |
| – Disadvantages: Limited contrast, especially for transparent specimens. | |
| – Phase Contrast | Enhances contrast in unstained cells. |
| – Advantages: Ideal for live cell imaging without staining. | |
| – Disadvantages: Requires special optics and can be complex. | |
| – Darkfield | Illuminates the specimen against a dark background. |
| – Advantages: Enhances contrast for transparent specimens. | |
| – Disadvantages: Limited to certain types of specimens. | |
| Electron Microscope | |
| – Transmission Electron Microscope (TEM) | Passes electrons through the specimen for detailed internal imaging. |
| – Advantages: High resolution and magnification. | |
| – Disadvantages: Complex sample preparation, limited depth perception. | |
| – Scanning Electron Microscope (SEM) | Scans the specimen surface with electrons for 3D imaging. |
| – Advantages: Detailed surface imaging. | |
| – Disadvantages: Limited to surface observations. |
Light microscopes, encompassing brightfield, phase contrast, and darkfield variations, are commonly used for a range of applications. Brightfield microscopy is straightforward but may lack contrast, while phase contrast and darkfield techniques address these limitations.
Electron microscopes, on the other hand, delve into the nanoscale. TEM provides detailed internal views but requires meticulous sample preparation, while SEM excels in surface imaging.
Understanding the strengths and limitations of each type allows users to choose the most suitable microscope for their specific applications, ensuring optimal results in microscopic observations.
Troubleshooting Common Focusing Issues
Achieving and maintaining proper focus on a microscope can be challenging, and various issues may impede the clarity of microscopic observations. In this section, we explore common focusing issues, their possible causes, and effective troubleshooting techniques to overcome these challenges.
A. Blurriness and Lack of Clarity
One of the most common issues encountered during microscopy is blurriness or a lack of clarity in the observed image. Several factors can contribute to this problem, and identifying the root cause is crucial for implementing effective solutions.
Table: Troubleshooting Blurriness and Lack of Clarity
| Issue | Possible Causes | Solutions |
|---|---|---|
| Dirty Lenses | Contaminants on the objective lenses | Clean lenses with appropriate solutions, such as lens cleaning solution and lens paper. Avoid using abrasive materials. |
| Improper Sample Prep | Specimen not properly mounted or prepared | Ensure proper mounting techniques, use clean slides and coverslips, and eliminate air bubbles. |
| Incorrect Illumination | Inadequate or uneven lighting | Adjust the illumination to ensure even lighting across the entire field of view. Check and replace the microscope bulb if necessary. |
B. Depth of Field Challenges
Depth of field challenges can hinder the observation of three-dimensional structures within a specimen. Addressing these challenges involves understanding the factors that contribute to depth of field limitations and implementing specific techniques to overcome them.
Table: Troubleshooting Depth of Field Challenges
| Issue | Possible Causes | Solutions |
|---|---|---|
| Optical Limitations | Inherent limitations of the microscope optics | Consider using objective lenses with higher numerical aperture for increased depth of field. |
| Sample Characteristics | Complex or thick specimens | Utilize techniques such as Z-stack imaging to capture multiple focal planes and reconstruct a 3D image. |
| Aperture Adjustment | Incorrect aperture settings | Adjust the aperture to control the amount of light reaching the objective lens, influencing depth of field. |
Troubleshooting these common focusing issues requires a systematic approach. Begin by assessing each potential cause and implementing the corresponding solution. Regular maintenance and attention to sample preparation details can significantly reduce the occurrence of these issues.
In conclusion, understanding and troubleshooting common focusing issues are essential skills for anyone working with microscopes. By addressing blurriness, lack of clarity, and depth of field challenges, researchers and enthusiasts can enhance the quality and accuracy of their microscopic observations. Regular checks, proper maintenance, and adherence to best practices contribute to a seamless and productive microscopy experience.
6 Tips and Best Practices for Focusing on a Microscope
Mastering the art of focusing on a microscope goes beyond technical know-how; it involves adopting specific tips and best practices that enhance the overall experience. Whether you are a seasoned researcher or a student in the laboratory, these six tips can significantly improve your proficiency in achieving precise focus.
- Proper Sample Preparation: Before diving into focusing, ensure your sample is well-prepared. Use clean slides and coverslips, eliminate air bubbles, and apply mounting techniques suitable for your specimen type. Proper sample preparation lays the foundation for successful focusing.
- Mindful Choice of Magnification: Selecting the appropriate magnification is crucial. Begin with low magnification for an overview and then gradually increase it for finer details. Choosing the right magnification at each stage ensures a balanced and clear view of the specimen.
- Gradual and Patient Adjustments: Focusing is not a race. Make adjustments to the focus knobs slowly and patiently. Rapid movements can lead to overshooting the optimal focus point, while gradual adjustments allow for precise control over the focal plane.
- Consistent Lighting Conditions: Illumination plays a vital role in achieving clarity. Ensure consistent and even lighting across the specimen. Adjust the microscope’s light source to avoid shadows or uneven illumination, which can impact the perception of details.
- Regular Maintenance Routine: Microscopes, like any other precision instruments, require regular maintenance. Clean lenses and optics routinely using appropriate solutions. Check for any signs of wear or damage and address them promptly. A well-maintained microscope performs optimally.
- Avoiding Vibrations and Disturbances: Maintain a stable environment around the microscope. Vibrations and disturbances can affect the clarity of your observations. Choose a stable surface, minimize movements, and be mindful of external factors that could impact the stability of the microscope.
By incorporating these tips into your microscopy routine, you not only enhance your ability to focus but also contribute to the longevity and reliability of the microscope. Whether you are a novice or an experienced microscopist, these best practices ensure a more rewarding and effective microscopic exploration.
Advanced Focusing Techniques
While mastering basic focusing techniques is essential, advanced microscopy often demands more sophisticated approaches to meet specific research requirements. Here, we explore advanced focusing techniques that push the boundaries of traditional observation methods, providing researchers with enhanced capabilities for in-depth analysis.
- Z-stack Imaging: Z-stack imaging involves capturing multiple focal planes at different depths within a specimen and subsequently reconstructing them into a three-dimensional image. This technique is particularly valuable when studying complex structures or dynamic processes, offering a comprehensive view that goes beyond traditional two-dimensional observations.
- Autofocusing Systems: In the realm of automation, autofocus systems have emerged as powerful tools. These systems use algorithms and sensors to continuously assess image sharpness and make real-time adjustments to maintain optimal focus. This is especially beneficial for time-lapse imaging or when observing samples with varying thickness. Autofocusing systems significantly reduce the manual workload and enhance the efficiency of microscopic experiments.
These advanced focusing techniques represent a paradigm shift in microscopy, offering researchers unprecedented capabilities. Z-stack imaging provides a holistic view of specimens in three dimensions, while autofocus systems leverage technology to ensure continuous clarity in dynamic imaging scenarios. Incorporating these techniques into your microscopy toolkit opens new possibilities for detailed and comprehensive analysis in various scientific disciplines.
Importance of Calibration in Microscopy
Calibration in microscopy is a fundamental practice that ensures the accuracy and reliability of observations, measurements, and imaging. The process involves aligning and adjusting various components of the microscope to standardize its performance. Here, we delve into the significance of calibration in microscopy and its impact on research reproducibility and data integrity.
Table: Key Aspects of Microscopic Calibration
| Calibration Aspect | Description |
|---|---|
| Objective Lens Calibration | Ensures that the magnification settings align with labeled values, preventing misinterpretation of specimen features and sizes. |
| Stage Calibration | Aligns the stage with the XY axis, ensuring accurate navigation and precise measurement of distances in the specimen. |
| Eyepiece Calibration | Verifies the accuracy of the eyepiece graticule or reticle, enabling reliable measurements aligned with true specimen dimensions. |
Calibration is crucial for maintaining the quality and integrity of microscopic observations. Its importance can be summarized in the following ways:
- Accuracy in Measurements: Calibration ensures that measurements taken with the microscope are precise and accurate. This is particularly critical in scientific research where precise dimensions are crucial for drawing conclusions and making comparisons.
- Reproducibility of Results: Calibrating the microscope ensures that experiments and observations can be reproduced consistently. Researchers can trust that their findings are not skewed by variations in the microscope’s performance.
- Quality Control in Imaging: Calibrating the microscope contributes to maintaining the quality of images produced. It prevents distortions and artifacts, allowing for clear and accurate documentation of microscopic features.
In conclusion, calibration is a cornerstone in microscopy, safeguarding the reliability and accuracy of data. The systematic alignment of microscope components ensures that observations are not only precise but also consistent, fostering confidence in scientific research.
1. Why is proper focus crucial in microscopy?
Proper focus in microscopy is paramount as it directly impacts the clarity and accuracy of observations. Achieving optimal focus ensures that researchers can discern fine details within a specimen, leading to more precise and reliable results. Without proper focus, the potential for misinterpretation and oversight of critical features increases, compromising the integrity of scientific findings.
2. What are the basic components of a microscope that contribute to focus?
Microscopes consist of key components that play vital roles in achieving focus. The objective lenses, fine and coarse focus knobs, eyepiece, and stage collectively contribute to the focusing process. Understanding how these components work together enables microscopists to manipulate the instrument effectively, ensuring a sharp and clear view of the specimen.
3. How do I troubleshoot blurriness in my microscope images?
Blurriness in microscope images can result from various factors, including dirty lenses or improper sample preparation. To troubleshoot, start by cleaning the lenses using appropriate solutions and techniques. Ensure the sample is well-prepared, with clean slides and coverslips, and eliminate air bubbles. Adjusting the illumination and confirming proper sample mounting can often resolve blurriness issues.
4. What role does the numerical aperture play in focus?
Numerical aperture (NA) is a crucial factor influencing focus. It determines the light-gathering ability of the objective lens, impacting the resolution and depth of field. Higher NA values contribute to improved focus, allowing for the visualization of finer details. Microscopists should select objective lenses with appropriate NA values based on their specific imaging requirements.
5. Can I use the same focusing techniques for different types of microscopes?
While basic focusing principles remain consistent, different types of microscopes may have unique mechanisms and considerations. Light microscopes, electron microscopes, and various imaging modalities may require specific adjustments. Adapting your focusing techniques to the characteristics of each microscope type is essential for achieving optimal results.
6. How does sample thickness affect focusing?
Sample thickness can impact focus, especially in light microscopy. Thick samples may exhibit variations in focus across different layers, requiring adjustments or advanced techniques such as Z-stack imaging to capture multiple focal planes. Understanding the relationship between sample thickness and focus is crucial for obtaining accurate and detailed observations.
7. What role does the condenser play in achieving focus?
The condenser in a microscope is instrumental in focusing by controlling the illumination. Proper condenser adjustments ensure even and adequate lighting, contributing to clarity in observations. Microscopists should optimize condenser settings to achieve the desired contrast and brightness for the specimen under examination.
8. How can I maintain focus during live observations or time-lapse imaging?
Maintaining focus during live observations or time-lapse imaging requires careful consideration. Utilize the microscope’s stage controls for XY movements to track dynamic changes in the specimen. Autofocusing systems can also be beneficial, continuously adjusting focus to ensure clarity during prolonged observations, allowing researchers to capture and analyze dynamic processes seamlessly.
9. Are there specific techniques for focusing on transparent or unstained specimens?
Focusing on transparent or unstained specimens presents unique challenges. Phase contrast or differential interference contrast (DIC) microscopy can enhance contrast in these specimens, aiding in focus. Adjusting the condenser and utilizing specialized illumination techniques can improve visibility, allowing for better focus on transparent structures without the need for staining.
10. How often should I calibrate my microscope for optimal focus?
Regular calibration is essential for maintaining optimal focus. Microscopes should be calibrated at regular intervals, especially when there are changes in environmental conditions, such as temperature or humidity. Additionally, after any repairs or modifications to the microscope, recalibration is necessary to ensure accurate measurements and reliable focus in microscopic observations.
Proper Use Of Compound Microscope
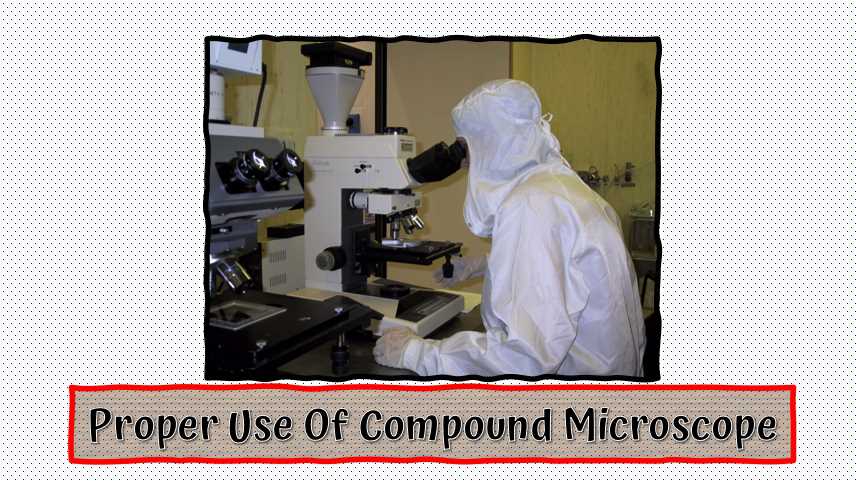
The microscope has to be placed on the table in a cool place.
The eyepiece and the object, and the mirror of the glass have to be cleaned with a piece of clean cloth.
Keeping an eye on the eyepiece, the low-power object has to be gradually swayed. When the object comes vertically to the hole in the stage, a click sound is made. The goal is to keep it that way.
The coverslip on the slide must be placed on the stage so that the part covered by the coverslip is just below the object lens and above the hole in the stage. The slide should be fastened with clips from both sides to stay still.
Now keep an eye on the eyepiece and turn the concave side of the mirror towards the light source so that the light beam is reflected and falls brightly on the object on the slide through the diaphragm, condenser, and stage holes.
The object has to be brought very close to the slide (about half an inch above the slide) by turning the coarse focus screw and turning the screw slowly up, and down the object, the pattern suddenly placed on the slide becomes clear. This method is called focusing. Now turn the fine focus screw to see the object more clearly and clearly.
Tricks: Almost all microscopes used everywhere are monocular, so when using them, you have to open both eyes and see with one eye. To avoid strain on the eyes, it is necessary to change the eyes from time to time to see the eyepiece. However, it is better to use a binocular microscope.
If you want to use natural light in a microscope: you have to place the microscope in a secluded laboratory. First, the mirror has to be placed so that the reflected light rays are reflected under the glass slide along the stage. And if the artificial light source is present as part of the microscope, it should only be lit.
Precaution:
The microscope should never be placed on the edge of the table.
The microscope must always be kept upright; otherwise, the slide placed on the stage may fall.
The first is to use low-power targets, later, high-power targets will be used as needed.
The object lens should never touch the slide cover slip.
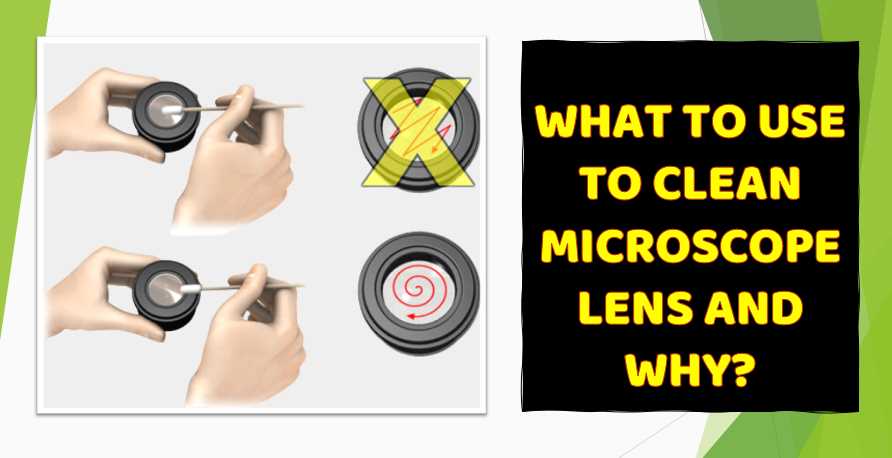
Always clean the lens with a soft cloth made of silk or fine cotton.
After using the microscope, it should be covered with a Belzer, cloth, or polythene. Putting calcium chloride in a small container in the Belzer keeps the Belzer dry. As a result, the fungus does not grow in the lens.

I am an enthusiastic student of optics, so I may be biased when I say that optics is one of the most critical fields. It doesn’t matter what type of optics you are talking about – optics for astronomy, medicine, engineering, or pleasure – all types are essential.
Table of Contents

Pingback: 5 Best Labomed Dental Microscope Review: A Complete Buying Guide 2022
Pingback: 5 Best Microscope For Veterinary Use: Reviews With Buying Guide
Pingback: 5 Best AmScope Microscope: Comparison With A Complete Buying Guide
Pingback: 5 Best Microscope For Laboratory: Reviews With Buying Guide in 2022
Pingback: A Quick Guide for Choosing Most Powerful Light Microscope For Your Research Needs: 5 Models We Tested
Pingback: 5 Best Most Commonly Used Microscopes We Tested in the Last 2 weeks: Comparison With Video
Pingback: which is the most Reliable Microscope for Coin Collectors and Numismatists
Pingback: What Does Giardia Look Like under Microscope: Unveiling the Invisible