Author: Mohammad

  • What is High power Objective in Microscope?

    What is High power Objective in Microscope?

    The high power objective is one of the objective lenses typically found on a revolving nosepiece of a microscope. These lenses are used to achieve higher levels of magnification, often ranging between 40x to 100x. Combined with the eyepiece lens (commonly 10x or 15x magnification), the effective magnification of the microscope increases substantially. For example, pairing a 40x high power objective with a 10x eyepiece results in an overall magnification of 400x.

    FeatureCommon Value/RangeDescription
    Magnification Power40x to 100xOffers detailed visualization of specimens.
    Numerical Aperture0.65 to 1.25Indicates resolving power; higher is better.
    Field of View (FOV)~0.18 to 0.40 mmField area visible at 40x or 100x magnification.
    Working Distance~0.1 to 0.6 mmDistance between lens and specimen; decreases as power increases.
    Use CasesBiology, Geology, ForensicsBest suited for cellular, mineralogical, and microscopic sample observation.
    Immersion MediumAir (40x), Oil (100x)Oil immersion (100x) enhances resolution.
    What is High power Objective in Microscope

    When using a compound microscope, the quality and clarity of the magnified image depend on the configuration and type of objective lenses. One of the most critical components of these instruments is the high power objective lens. This article explores the features, function, and significance of high-power objectives.

    4 Features of High Power Objective Lenses

    High power objectives are designed with several specialized features that enhance their imaging capabilities:

    1. Objective Magnification and Numerical Aperture
      High-power objective lenses have a greater numerical aperture (NA), which determines their resolving power. A larger NA allows the lens to collect more light, improving the image’s clarity. These objectives typically operate within a narrow wavelength range to minimize optical aberrations.
    2. Focused Spot Size
      The lenses are optimized for a smaller focused spot size, which is critical for observing minute details on a microscope slide. The actual spot size and the ability to form a sharp Airy disk intensity profile are essential for resolving fine structures in specimens.
    3. Dry Objectives vs. Immersion Objectives
      Many high power objectives, like plan apochromat objectives, are dry objectives, meaning they do not require immersion oil between the lens and the slide. However, for even higher magnification, some lenses are oil immersion objectives, enabling finer resolution at higher power levels.
    4. Spectral Ranges and Coatings
      High power objectives may be optimized for specific spectral regions, such as the blue region, which provides better resolution due to shorter wavelengths. To reduce light reflection and maximize transmission, they may also feature specialized optical coatings.

    How High Power Objectives Work

    High-power objective lenses work in conjunction with the other components of a microscope. Here’s how they function:

    1. Interaction with Light Microscopes
      In light microscopes, the high power objective focuses light from the illuminator through the specimen. The intensity minimum and maximum intensity in the focused intensity profile directly influence the resolution. Adjustments in light beam sizes or filters, such as a neutral density filter or absorptive filter, can fine-tune the imaging process.
    2. Balancing Spot Size and Intensity
      The relationship between the Gaussian spot size and intensity minimum plays a significant role in creating detailed images. In this context, achieving the minimum spot size is crucial for accuracy and clarity.
    3. Optics Cleaning and Maintenance
      Dirt on the optics reduces image quality through absorption by optics or scattering. Regular cleaning ensures a balance between high output power and effective transmission.
    4. Compatibility with Tube Lenses and Entrance Apertures
      A microscope’s design must allow compatibility between tube lenses and objectives. Correct entrance aperture alignment ensures the optical system functions efficiently across its operating wavelength range.

    Advantages of High Power Objectives

    1. Enhanced Details
      High power objectives excel at viewing intricate specimen structures. For example, observing the finer details of plant cells, bacterial colonies, or tissues at high magnifications can provide insights into biological functions.
    2. Increased Magnification
      As magnification increases, features like cell nuclei or organelles become more apparent. The design wavelength of the lens and the alignment of imaging optics directly affect the precision of this magnification.
    3. Precision in Scientific Studies
      Applications such as material science benefit from direct and specular-reflection viewing conditions, where objectives observe reflective or coated surfaces. Special tools like Laser Viewing Cards assist in these specialized studies.

    Practical Considerations When Using High Power Objectives

    Using high power objectives effectively requires attention to several factors:

    1. Light Intensity Management
      Since these lenses require strong illumination, maintaining consistent light intensity ensures a uniform image. Irregular nonuniform intensity profiles lead to poor imaging results.
    2. Objective Lens Placement
      To focus properly, the high power objective must be positioned just above the microscope slide. Care must be taken to avoid scratching the lens or damaging the specimen.
    3. Compatibility with Housing Material
      Microscope objective lenses are often enclosed in specific housing materials. This protects the lens while maintaining stability during magnification.

    Differences Between Low and High Power Objectives

    FeatureLow Power ObjectiveHigh Power Objective
    MagnificationTypically 4x to 10xTypically 40x to 100x
    Numerical ApertureLower NA, less resolving powerHigher NA, more resolving power
    Spot SizeLarger size beamSmaller, focused spot size
    ApplicationsOverview of specimensDetailed observation of finer structures
    Working DistanceGreater distance from slideShorter distance from slide

    Challenges with High Power Objectives

    Although high power objectives provide unmatched clarity for fine details, there are some challenges:

    1. Limited Depth of Field
      At higher magnifications, the depth of field reduces, making only a small portion of the specimen appear in focus.
    2. Chromatic Aberrations
      Issues arise if the lenses are not corrected for specific wavelength ranges, leading to blurred or discolored edges in images. Using plan apochromat objectives minimizes these effects.
    3. Light Loss and Reflections
      Light losses from factors like coating variances or improper alignment between direct viewing optics can interfere with observations. Reflective metal coatings on optics mitigate this problem.

    Why is my high power objective in the microscope not working?

    A malfunctioning high power objective can result from misalignment, dirt, or damage to the objective lens or related components. Ensure the microscope objective is properly secured, clean, and aligned. Verify the compatibility between tube lenses and the entrance aperture, as inconsistencies can hinder function.

    How do I troubleshoot the high power objective lens on a compound microscope?

    1. Inspect for Cleanliness:
      • Clean optics, particularly the objective lens and eyepiece lens.
      • Use lens cleaning paper to avoid scratches.
    2. Check for Alignment:
      • Ensure the high power objective clicks into place.
      • Examine the linear power density and constant with spot size adjustments for accurate placement.
    3. Examine Optical Components:
      • Verify the compatibility of the tube magnifications and operating wavelength.
      • Ensure absorptive filters or neutral density filters are correctly installed.

    Why does the high power objective result in a blurry image?

    A blurry image may arise from improper focus, unclean optics, or unsuitable light intensity. Ensure the wavelength range aligns with the spectral regions supported by the high power objective. Adjust the focused spot size and balance between spot size and beam sizes for clarity.

    What role does numerical aperture play in the performance of a high power objective?

    Numerical aperture determines the light-gathering ability and resolution of the objective. Higher numerical aperture leads to improved detail but requires appropriate alignment and clean imaging optics. Make sure adjustments match the intensity minimum and maximum intensity.

    How can I optimize the use of high power objectives with light microscopes?

    1. Prepare the Microscope Slide Correctly:
      • Use a dry objective for non-immersive viewing or compatible optical coating.
      • Position specimens within the focused intensity profile of the objective lens.
    2. Set Lighting and Filters:
      • Match the light intensity to the actual spot size and function of wavelength.
      • Avoid over-saturating light intensity for maximum power density.
    3. Verify Design Wavelength:
      • Align the microscope’s design wavelength with the beam’s spectral regions.
      • Ensure coatings (e.g., metal or optical coatings) suit the operating wavelength.

    How do I fix a loss in power with my high-powered microscopes?

    1. Assess the Incident Power:
      • Check for CW power (continuous wave) consistency.
      • Identify any loss in power due to absorption by optics or issues with the microscope’s housing material.
    2. Examine Components:
      • Verify that all optical and mechanical adjustments meet power application and power levels required.
      • Replace faulty products with power output issues.

    What should I know about compatibility between tube lenses and objectives?

    Incompatibility can lead to ineffective magnification increases. Ensure the balance between entrance aperture, tube magnifications, and effective magnification (e.g., 15X magnification) is maintained. Misalignment or mismatched magnifications can impact output power and the Airy disk intensity profile.

    Why is my compound microscope’s lowest power objective clearer than the high power objective?

    The lowest power objective generally has a larger size beam and less stringent focus requirements. When switching to the high power objective:

    • Adjust the focused spot size and diffraction ring intensity formulas.
    • Use the adjustment factor or correction factor for fine tuning.

    Are there specific materials I should avoid around a high power objective?

    Yes, avoid combustible material, incompatible magnetic material, or shaded regions not optimized for high-intensity applications. Always consult the microscope manufacturer for guidance on material safety.

    How do I prevent damage to the high power objective?

    • Avoid abrasive cleaning methods; only use soft lens cloths or lens cleaning solutions.
    • Ensure proper handling of the microscope slide to prevent scratches on the objective lens.
    • Monitor beam power, Gaussian spot size, and high linear power density to avoid exceeding operational limits.

    What is the importance of focused spot size and intensity in high power objectives?

    The focused spot size and intensity minimum ensure optimal imaging. Larger size beams can cause diffraction errors. Proper adjustments keep Gaussian intensity profiles and light intensity uniform.

    Can numerical aperture and objective magnification affect effective magnification?

    Yes, higher numerical aperture and appropriate objective magnification directly enhance the effective magnification. Ensure tube lenses and eyepiece magnifications are compatible for optimal imaging.

    Why is my light intensity nonuniform under a high power objective?

    Nonuniform intensity profiles can result from misaligned beam viewing conditions (direct viewing vs. specular-reflection viewing). Verify:

    • Beam sizes, Gaussian intensity profile, and entrance aperture.
    • Adjustment of neutral density filter or correction factors to balance intensity profiles.

    Should I consult the microscope manufacturer for persistent issues?

    Yes. Persistent problems may require professional adjustments to coating variances, beam power, or optic under consideration. A microscope manufacturer can address unique design wavelength or imaging issues.

    IssueLikely CauseSolution
    Blurry ImageImproper focus or dirty opticsClean lens; adjust focus; use appropriate wavelength range.
    Loss in PowerAbsorption by optics, beam power inconsistenciesVerify CW power and inspect optical coatings.
    Nonuniform IntensityMisaligned beam sizes, incompatibility with tube lensesAlign beam, adjust entrance aperture, and optimize light intensity levels.
    High-Power Not FocusingMisalignment or dirtClean optics; verify numerical aperture and spectral ranges compatibility.

    Final Thought

    The high power objective in a compound microscope is indispensable for tasks requiring precise and detailed imaging. Whether analyzing the structure of a single cell or inspecting micro-materials, the high power objective delivers reliable and clear results. This tool, when combined with proper tube magnifications, clean imaging optics, and well-calibrated eyepiece magnifications, becomes integral for microscopy.

    Effective use depends on understanding principles like numerical aperture, light management, and spot size calculations to maximize efficiency and minimize any loss in power during imaging. Whether working with biological specimens or material surfaces, these lenses continue to form an integral aspect of modern microscopy tools.

  • Which Microscope Does Not Use Light?

    Which Microscope Does Not Use Light?

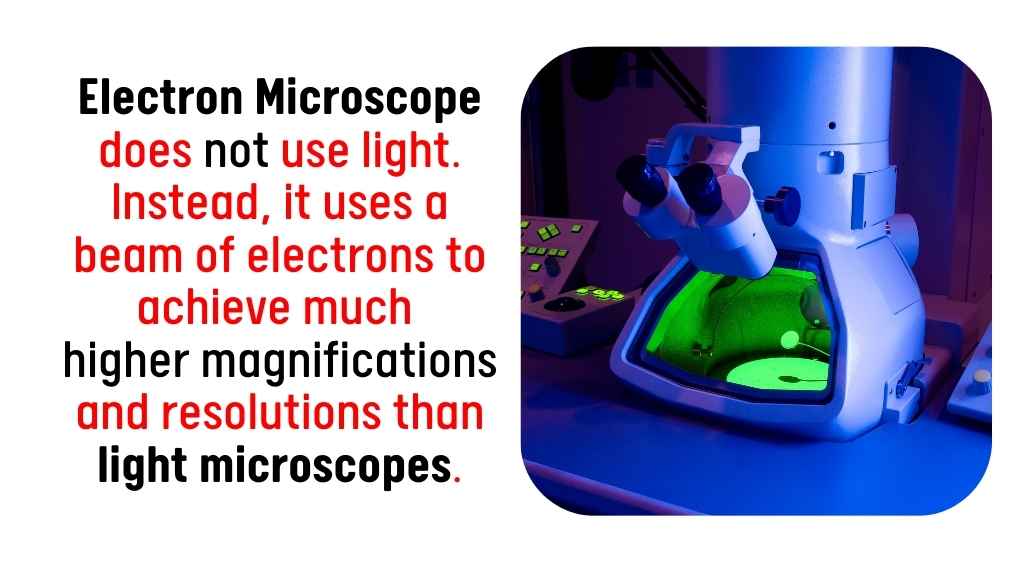
    Electron microscope does not use light. Instead, it uses a beam of electrons to achieve much higher magnifications and resolutions than light microscopes.
    Type of MicroscopeMethod of ImagingMagnificationKey Advantage
    Electron MicroscopeElectron beamUp to 50,000,000xUltra-high resolution
    Scanning Probe MicroscopePhysical probeAtomic resolutionSurface analysis at atomic scale
    X-ray MicroscopeX-raysHigh resolutionInternal imaging without sectioning
    Focused Ion Beam MicroscopeIon beamSimilar to electron microscopesHigh resolution with sample preparation capabilities
    which microscope does not use light_

    Types of Microscopes That Do Not Use Light

    There are several microscopes that do not use light. These microscopes rely on different principles and techniques to magnify and analyze specimens. Let’s take a closer look at the types of microscopes that do not use light:

    1. Electron Microscopes

    Electron microscopes (EMs) use electron beams instead of light to create an image. The electrons have much shorter wavelengths than visible light, allowing these microscopes to achieve much higher resolution and magnification. There are two main types of electron microscopes: the scanning electron microscope (SEM) and the transmission electron microscope (TEM).

    Scanning Electron Microscope (SEM)

    A SEM works by scanning a focused beam of electrons across the surface of a specimen. The electrons interact with the atoms on the surface, producing secondary electrons that are detected to form an image. SEMs provide detailed, three-dimensional images of surfaces, and they can magnify objects up to around 1,000,000x.

    Transmission Electron Microscope (TEM)

    TEMs work by transmitting electrons through a thin sample. The electrons pass through the sample and are detected on the other side, creating a two-dimensional image. TEMs provide ultra-high resolution and are used to observe the internal structure of specimens, such as cells, viruses, and nanomaterials. They can achieve magnifications of up to 50,000,000x.

    2. Scanning Probe Microscopes (SPMs)

    Scanning probe microscopes (SPMs) use a physical probe to interact directly with the surface of the sample. They do not rely on light or electron beams. Instead, they detect forces between the probe and the sample at an atomic level, allowing them to map out surface structures. The two main types of scanning probe microscopes are the atomic force microscope (AFM) and the scanning tunneling microscope (STM).

    Atomic Force Microscope (AFM)

    An AFM uses a sharp tip mounted on a cantilever to scan the surface of a specimen. As the tip moves across the surface, it detects forces such as van der Waals forces, magnetic forces, and electrostatic forces. These measurements are used to construct highly detailed, three-dimensional images of the surface at the atomic scale.

    Scanning Tunneling Microscope (STM)

    An STM works by scanning a sharp tip over the surface of a sample and measuring the tunneling current between the tip and the sample. The current is highly sensitive to the distance between the tip and the sample, allowing the microscope to map the surface with atomic resolution. STMs are particularly useful for studying conductive materials at the atomic level.

    3. X-ray Microscopes

    X-ray microscopes use X-rays, a form of electromagnetic radiation, instead of visible light or electron beams. X-ray imaging works similarly to traditional medical X-rays, but at a much higher resolution. This technique is particularly useful for studying the internal structure of materials and biological specimens without the need for sectioning or staining.

    X-ray microscopes operate by directing X-rays onto a sample and detecting the transmission or reflection of the X-rays. The variations in X-ray absorption across the sample create an image of its internal structure. This technique is valuable for imaging biological tissues, metals, and other materials with complex internal structures.

    4. Focused Ion Beam Microscopes (FIB)

    Focused ion beam microscopes use a beam of ions rather than light or electrons to create images. FIBs are often combined with scanning electron microscopes to provide both imaging and sample preparation capabilities. The ion beam can mill away layers of material to expose new features in a specimen, allowing for highly detailed imaging and analysis.

    FIBs work by focusing a beam of ions, such as gallium ions, onto the surface of the sample. The ions interact with the sample, causing the release of secondary electrons, which are detected to form an image. FIBs can achieve resolution similar to that of electron microscopes, and they are particularly useful in materials science and semiconductor research.

    Advantages of Microscopes That Do Not Use Light

    what is the range of magnification of the microscope

    Microscopes that do not rely on visible light offer significant advantages over traditional light-based microscopes. These alternative techniques allow researchers to achieve much higher levels of detail and access new kinds of data, especially in fields like materials science, biology, and nanotechnology. Below are some of the key benefits of using microscopes that do not use light:

    1. Higher Resolution

    One of the primary advantages of microscopes that do not use light is their ability to achieve much higher resolution. Electron microscopes, for instance, use electron beams with much shorter wavelengths than visible light, enabling them to resolve much smaller features at the nanometer or even atomic scale. This high resolution allows scientists to observe fine details of specimens, such as individual atoms in a material, the structures within cells, or the arrangement of molecules on surfaces. In comparison, optical microscopes are limited in their resolution due to the longer wavelength of visible light, typically achieving a resolution of around 200 nanometers, whereas electron microscopes can reach resolutions in the range of picometers (trillionths of a meter).

    2. Ability to Examine Internal Structures

    Many microscopes that do not use light, such as electron microscopes and X-ray microscopes, are capable of imaging the internal structures of samples without requiring the sample to be cut or altered. For example, transmission electron microscopes (TEM) can pass electrons through a thin specimen to generate images of its internal features, allowing researchers to observe structures at the cellular or sub-cellular level. X-ray microscopes also excel at revealing internal details, especially in materials like metals, plastics, or biological tissues, which would otherwise require invasive techniques such as slicing or staining. The ability to view these internal structures non-invasively is critical for studying delicate biological specimens, including viruses and bacteria, or understanding the internal properties of materials used in engineering and manufacturing.

    3. No Need for Staining or Sectioning

    Unlike light microscopes, which often require samples to be stained or sectioned to improve contrast and visibility, microscopes that do not use light can examine samples in their natural, unstained state. Staining techniques used in optical microscopy can sometimes distort or damage delicate structures, especially in biological samples. For instance, cell membranes, proteins, and other cellular structures may be altered during the staining process, leading to potential loss of critical information. Electron microscopes and scanning probe microscopes avoid this issue, as they operate on different principles, such as electron interactions or surface scanning, allowing them to preserve the sample’s natural state. This is particularly beneficial for biological specimens that need to be studied in their true form, without the risk of staining-related artifacts.

    Disadvantages of Microscopes That Do Not Use Light

    While microscopes that do not rely on light provide significant benefits, they also come with certain challenges and limitations that users must consider. These challenges can impact their usability and accessibility.

    1. Complex Sample Preparation

    Many of these advanced microscopes, particularly electron microscopes, require complex and precise sample preparation. In the case of electron microscopes, samples must be prepared by cutting them into thin slices, often just a few nanometers thick, to allow the electron beam to pass through. Additionally, biological samples often need to be coated with a thin layer of conductive material, such as gold or carbon, to ensure that they do not charge up under the electron beam, which could distort the image. Some samples also need to be placed in a vacuum environment, which adds further complexity to the process. This preparation can be time-consuming, requires specialized equipment, and demands a high level of skill and expertise, making it less straightforward than working with light microscopes.

    2. High Cost and Maintenance

    Electron microscopes, scanning probe microscopes, X-ray microscopes, and other advanced instruments that do not use light are typically expensive. The initial cost of purchasing such microscopes can be prohibitively high for many research labs and educational institutions. In addition to the purchase price, these microscopes also require ongoing maintenance, which can add to the total cost of ownership. Regular calibration, servicing, and replacement of parts can be costly, and the instruments often require specialized technicians to maintain them. Furthermore, operating these microscopes requires advanced training, and users must be well-versed in the intricacies of handling the equipment. This makes these types of microscopes less accessible to labs with limited funding or expertise.

    3. Limited Sample Size

    Many microscopes that do not use light, such as electron microscopes and scanning probe microscopes, are designed to work with very small samples. Electron microscopes, for example, typically require specimens to be extremely thin (often on the order of nanometers) in order to allow the electron beam to pass through or interact effectively. Scanning probe microscopes are limited by the size of the probe, which is very small and precise, and thus only suitable for imaging surfaces at the atomic scale. These size limitations can make such microscopes less practical for examining larger specimens, which may require slicing, preparation, or adjustments to fit into the microscope’s working area. Additionally, large specimens may require more complex setups or may not be suitable for analysis at all with certain types of non-light microscopes.

    Why Do Electron Microscopes Not Use Light?

    Electron microscopes do not use light because electrons have much shorter wavelengths than visible light. This allows electron microscopes to resolve much smaller details, offering magnifications up to several million times. Light, on the other hand, cannot achieve this level of resolution due to the limitations of its wavelength.

    Can Scanning Probe Microscopes Replace Light Microscopes?

    While scanning probe microscopes offer extremely high resolution, they are not typically used as replacements for light microscopes in most applications. Light microscopes are more versatile and can be used in many fields like biology and education for general purposes. Scanning probe microscopes are specialized tools used mainly for research and very high-resolution imaging of surfaces at the nanoscale.

    Are There Any Disadvantages to Microscopes That Don’t Use Light?

    Microscopes that do not use light, such as electron microscopes and scanning probe microscopes, generally come with high costs and require special sample preparation. Electron microscopes, for example, need samples to be in a vacuum and may also require coating with a conductive material. Scanning probe microscopes require the sample to be very flat, and the scanning process can be slow.

    Final Words

    In summary, several types of microscopes do not use light, including electron microscopes, scanning probe microscopes, X-ray microscopes, and focused ion beam microscopes. These microscopes offer advantages such as higher resolution and the ability to examine internal structures without the need for staining or sectioning. However, they also come with challenges such as complex sample preparation, high costs, and limited sample sizes. Each type of microscope has its unique applications, and their choice depends on the specific research needs and the type of specimen being examined.

  • What is the Magnification Range of a Microscope?

    What is the Magnification Range of a Microscope?

    The magnification range of a microscope typically spans from 40x to 1,000x for standard compound light microscopes. Specialized microscopes, such as electron microscopes, can achieve magnifications of up to 2 million times.

    Magnification Ranges of Common Microscopes

    Microscope TypeMagnification RangePrimary Use
    Compound Light Microscope40x – 1,000xBiological studies, cell analysis
    Stereomicroscope (Dissecting)10x – 40xObserving macroscopic specimens
    Scanning Electron MicroscopeUp to 1,000,000xSurface morphology of materials
    Transmission Electron MicroscopeUp to 2,000,000xAtomic-level structure analysis
    Digital Microscope20x – 2,000xEducation, quality control, hobbyist applications
    what is the range of magnification of the microscope

    Magnification refers to the ability of a microscope to enlarge the image of an object, allowing it to be seen in greater detail. The magnification range of a microscope depends on several factors, including the type of microscope, the lenses used, and the specimen being observed. Typically, magnification is expressed as a multiple of the original size of the object. For instance, a magnification of 40x means that the object appears 40 times larger than its actual size.

    Types of Microscopes and Their Magnification Ranges

    There are different types of microscopes, each with its own magnification range. Here’s a breakdown of common microscopes and their typical magnification ranges:

    Light Microscopes

    Light microscopes, also known as optical microscopes, are the most commonly used microscopes. They work by passing light through a specimen to create an image that is magnified. The magnification range of a light microscope generally falls between 40x and 1000x, with some advanced models reaching up to 2000x.

    Microscope TypeMagnification Range
    Light Microscope40x to 1000x
    Advanced Light Microscope2000x

    Electron Microscopes

    Electron microscopes use electron beams instead of light to create an image. This allows them to magnify objects much more than light microscopes. Scanning Electron Microscopes (SEM) and Transmission Electron Microscopes (TEM) can magnify objects up to 1,000,000 times or more. These microscopes are often used in research and industries that require a high level of detail, such as biology, materials science, and nanotechnology.

    Microscope TypeMagnification Range
    Scanning Electron Microscope (SEM)10x to 500,000x
    Transmission Electron Microscope (TEM)100x to 1,000,000x

    Stereo Microscopes

    Stereo microscopes, also called dissecting microscopes, are typically used for observing larger objects like insects, flowers, or small electronic components. They offer lower magnification, usually in the range of 10x to 50x. These microscopes provide a 3D view, which makes them ideal for examining the structure of larger objects.

    Microscope TypeMagnification Range
    Stereo Microscope10x to 50x

    Confocal Microscopes

    Confocal microscopes are advanced optical microscopes that use lasers to scan specimens. These microscopes are capable of providing very detailed images and have magnification ranges similar to light microscopes, typically up to 2000x. The advantage of confocal microscopes is that they can create sharp, high-contrast images by rejecting out-of-focus light.

    Microscope TypeMagnification Range
    Confocal MicroscopeUp to 2000x

    4 Factors Affecting Magnification Range

    While the type of microscope plays a large role in determining its magnification range, several other factors contribute to the overall magnification performance. Below are key elements that influence how much magnification you can achieve and the clarity of the resulting image.

    Objective Lenses

    Objective lenses are the primary components responsible for determining the magnification in a microscope. These lenses come in different magnification powers, typically ranging from 4x to 100x. The higher the objective lens power, the greater the magnification achieved. Users can adjust magnification by rotating the objective lenses, allowing them to choose the appropriate level of detail required for their observation. Advanced microscopes may have multiple objective lenses, enabling users to switch between different magnifications with ease.

    Objective Lens PowerMagnification Range
    Low Power (4x to 10x)40x to 100x
    Medium Power (20x to 40x)200x to 400x
    High Power (60x to 100x)600x to 1000x

    Eyepiece Lens

    The eyepiece lens, also known as the ocular lens, plays a key role in further magnifying the image produced by the objective lenses. Most standard eyepieces have a magnification of 10x, although eyepieces with other magnification powers are available. The total magnification of a microscope is calculated by multiplying the magnification of the objective lens by that of the eyepiece lens. For instance, with an objective lens of 40x and an eyepiece lens of 10x, the total magnification would be 400x.

    Eyepiece MagnificationTypical Use
    10xStandard viewing
    15xGreater magnification
    20xHigh detail observation

    Resolution

    Resolution refers to the ability of a microscope to distinguish between two closely spaced points. Higher magnification does not automatically equate to a clearer or more detailed image. If a microscope has low resolution, even at high magnification, the image may still appear blurry. A higher resolution allows for better clarity and more detail at higher magnifications. The ability to resolve fine details becomes more important as the magnification increases, particularly when observing very small structures like cells or bacteria.

    Resolution ImpactEffect on Viewing
    Low ResolutionBlurry image, less detail
    High ResolutionClearer, more detailed view

    Numerical Aperture (NA)

    Numerical aperture (NA) is a critical factor in determining a microscope’s resolution. It refers to the ability of the objective lens to gather light and resolve fine details at higher magnifications. A higher NA means the lens can capture more light, allowing for sharper and more detailed images. As the numerical aperture increases, the resolution improves, which is crucial for observing very fine details, such as the structures inside cells or the fine lines of a material.

    Numerical Aperture (NA)Effect on Resolution
    Low NA (e.g., 0.1 to 0.25)Less light, lower resolution
    High NA (e.g., 0.5 to 1.4)More light, higher resolution

    Practical Applications of Microscope Magnification

    Different magnification ranges are suited for different applications. Here are a few common examples of how microscope magnification is used in various fields:

    Biology

    In biology, microscopes with a range of magnifications are used to study cells, bacteria, viruses, and tissues. A standard light microscope is typically sufficient for examining cells and their structures, but electron microscopes are needed to explore viruses or the ultra-fine details of cell components like organelles.

    Medicine

    In the medical field, microscopes are often used to examine tissue samples for signs of disease. Pathologists use microscopes with high magnification to identify cancer cells or pathogens in blood or tissue samples. The magnification required depends on the type of examination being done.

    Material Science

    In material science, high-magnification electron microscopes are used to analyze the structure of materials at the atomic level. This can help engineers and scientists improve the properties of materials used in electronics, construction, and manufacturing.

    Forensic Science

    Forensic scientists often use microscopes to examine trace evidence such as hair, fibers, and gunshot residue. Low magnification may be used for broad inspection, while higher magnification is used to identify minute details that could be crucial for solving a case.

    How do you calculate the total magnification of a microscope?

    To calculate the total magnification, simply multiply the magnification power of the objective lens by the magnification power of the eyepiece. For example, if your microscope has an objective lens with 40x magnification and an eyepiece with 10x magnification, the total magnification would be:
    40x (objective lens) × 10x (eyepiece) = 400x total magnification.

    What is the highest magnification a microscope can have?

    The highest magnification of a microscope depends on its type and design. For light microscopes, the maximum magnification is typically around 1,000x to 2,000x. However, electron microscopes can provide much higher magnification, often exceeding 1 million times, allowing for detailed observations at the cellular or molecular level.

    Can you go beyond the maximum magnification of a microscope?

    While it is possible to increase the magnification of a microscope beyond its intended limits, doing so often results in a blurry or distorted image. This happens because microscopes have a limit to the amount of detail they can resolve, known as the resolving power. Going beyond this limit doesn’t provide clearer images and can make it harder to see the specimen clearly.

    Is higher magnification always better?

    Not necessarily. While higher magnification allows you to see smaller details, it does not always provide a clearer or more useful image. The quality of the lenses, the resolution, and the lighting also play key roles in determining the clarity of the image. Higher magnification may sometimes show more detail, but it can also magnify imperfections in the lens or specimen, leading to a blurry image if not used correctly.

    How do I choose the right magnification for my needs?

    Choosing the right magnification depends on the type of specimen you are studying. For general observations, lower magnifications (such as 10x or 40x) are sufficient. For detailed studies of small structures like cells, higher magnifications (100x or more) may be required. It’s also important to consider the resolution and clarity of the image, as these factors will influence how effectively you can observe fine details.

    How does the eyepiece magnification affect the total magnification?

    The eyepiece magnification contributes to the total magnification of the microscope. Common eyepiece magnifications are 10x or 15x. If your microscope has an objective lens with 40x magnification and you use an eyepiece with 10x magnification, the total magnification would be 400x. The eyepiece magnification allows you to see the sample more clearly and zoom in further on the image provided by the objective lens.

    Final Verdict

    The magnification range of a microscope is an essential factor to consider when choosing a microscope for your needs. Depending on the type of microscope, its magnification range can vary greatly, from the relatively low magnification of stereo microscopes to the extremely high magnification of electron microscopes. Understanding how magnification works and what factors affect it can help you choose the right microscope for your research or study. The key is to match the magnification range to the level of detail required for your specific task.

  • How Can You Adjust the Brightness on a Microscope?

    How Can You Adjust the Brightness on a Microscope?

    You can adjust the brightness on a microscope by manipulating the light intensity dial or knob, adjusting the diaphragm, and positioning the condenser lens. These controls regulate the amount of light reaching the specimen for optimal viewing.

    Factors Influencing Microscope Brightness Adjustment

    ControlImpact on BrightnessRecommended Use
    Light Intensity DialDirectly increases or decreases lightUse for general brightness control across all observations.
    Diaphragm AdjustmentAlters light quantity reaching specimenAdjust to enhance contrast or light for specific specimen types.
    Condenser Lens PositionFocuses or diffuses lightRaise for detailed views; lower for general illumination of opaque specimens.
    Stage PositionAffects light pathFine-tune based on specimen thickness and objective lens.
    External LightingInfluences visibility of the specimenEnsure a stable light environment for consistent viewing.

    The illumination system of a microscope is responsible for providing light to make the sample visible. The two main sources of light in microscopes are typically a built-in light source (often a halogen or LED bulb) and external light, depending on the model. The light needs to be bright enough to highlight the details of the sample but not so bright that it causes glare or washes out important structures.

    how can you adjust the brightness on a microscope_

    Role of the Condenser in Microscope Brightness Adjustment

    The condenser is a fundamental part of the microscope’s illumination system. Located beneath the stage, it directs and focuses light onto the sample. By concentrating light on the specimen, the condenser helps achieve an even distribution of light, which is essential for high-quality, detailed observations. Understanding how to adjust the condenser properly is key to optimizing microscope brightness and ensuring clear, sharp images.

    What Is the Function of the Condenser?

    The primary purpose of the condenser is to gather light from the microscope’s light source and focus it onto the specimen. Without a well-adjusted condenser, the light would be unevenly distributed, leading to poor contrast and blurry images. By using the condenser to focus the light, you can ensure that the sample is illuminated uniformly, which is critical for observing fine details in the specimen.

    The condenser also has several components that allow you to fine-tune the light. These include the condenser lens and the aperture diaphragm, both of which play significant roles in controlling the intensity and quality of the light.

    Adjusting Brightness Using the Condenser

    What Part of a Microscope Helps Adjust the Brightness

    There are two main ways to adjust brightness using the condenser: by moving the condenser up or down and by adjusting the aperture diaphragm. Each of these methods allows for control over the amount of light reaching the specimen, which directly impacts image clarity.

    Moving the Condenser Up or Down

    Most microscopes allow you to adjust the position of the condenser along the optical axis (up and down). The correct positioning of the condenser is critical for achieving optimal brightness and sharpness.

    • Raising the condenser: When you raise the condenser, the light from the illuminator is more focused and directed toward the specimen, increasing the intensity of the light hitting the sample. This adjustment is useful when you need brighter illumination, especially at higher magnifications.
    • Lowering the condenser: If the light is too intense or creating glare, lowering the condenser reduces the amount of light reaching the specimen. This is helpful for reducing excess brightness and improving image contrast, especially for samples that are transparent or have fine details that could be obscured by too much light.

    Adjusting the Aperture Diaphragm

    The aperture diaphragm is a component located on or near the condenser. It controls the diameter of the cone of light that passes through the sample. Adjusting the aperture diaphragm is another effective way to control light intensity and contrast.

    • Widening the aperture: Opening the aperture diaphragm allows more light to pass through, which increases brightness. This is especially important when using lower magnifications, as the larger field of view requires more light to maintain clarity.
    • Narrowing the aperture: Closing the aperture diaphragm reduces the amount of light entering the system, dimming the image. This can help improve contrast, particularly for samples that have high light reflectance, and can also prevent overexposure in cases where the light is too harsh.

    Together, the condenser’s position and the aperture diaphragm’s setting work in tandem to fine-tune the brightness and contrast of the image.

    Adjusting the Light Intensity Using the Illuminator

    Most modern microscopes are equipped with an illuminator located beneath the stage, which provides light for the sample. The light intensity can be adjusted through various mechanisms depending on the type of microscope. These adjustments are crucial for controlling the brightness and ensuring a clear view of the specimen.

    Turning the Brightness Dial

    Many microscopes have a brightness dial or knob that controls the intensity of the light emitted by the illuminator. This dial adjusts the voltage or power going to the light source, which in turn changes the amount of light produced. For microscopes with built-in light sources, turning the brightness dial is the most common method for adjusting light intensity.

    • Increasing the brightness: Turning the dial to the right (or clockwise) increases the light intensity. This is particularly useful when observing specimens at higher magnifications, where more light is needed to maintain image clarity.
    • Decreasing the brightness: Turning the dial to the left (or counterclockwise) lowers the light intensity. This can help prevent overexposure and reduce glare when observing delicate or transparent specimens.

    Using a Rheostat for More Precise Control

    In older or more advanced microscopes, a rheostat is used to control the current supplied to the light source. A rheostat is a variable resistor that allows you to fine-tune the intensity of the light. By adjusting the rheostat, you can control the amount of electrical current flowing to the illuminator, providing a more precise way to adjust brightness compared to the standard brightness dial.

    • Fine-tuning light intensity: The rheostat offers a greater level of control, allowing for more gradual adjustments in light intensity. This can be particularly helpful when working with samples that require subtle changes in lighting for optimal viewing.

    Rheostats are more commonly found in older microscopes or professional models, but they are still used in many high-end systems where precise light control is essential.

    Using the Field Diaphragm

    The field diaphragm plays a vital role in controlling the brightness and contrast of a microscope image. Located within the illuminator, it controls the size of the light field that reaches the specimen. By adjusting the field diaphragm, you can optimize both the brightness of the sample and its contrast, enhancing your ability to observe fine details.

    • Adjusting the field diaphragm for brightness: A properly adjusted field diaphragm prevents excess light from entering the optical system, which can reduce glare and overexposure. This allows you to better control the overall brightness of the sample without compromising contrast.
    • Enhancing contrast: By narrowing the field diaphragm, you can reduce the amount of light entering the optical system, which increases the contrast between different parts of the sample. This is particularly useful when you are working with specimens that have varying levels of transparency or reflectivity.

    The field diaphragm works in conjunction with the condenser and aperture diaphragm to create a balanced, clear image with optimal contrast.

    Adjusting Brightness for Different Magnifications

    As magnification increases, the amount of light that reaches the specimen decreases. This is due to the smaller field of view and the increased use of the microscope’s objective lenses. Therefore, adjusting the brightness is crucial when changing magnification levels to maintain a clear and sharp image.

    • Low magnification: At lower magnifications (such as 4x or 10x), the field of view is larger, and less light is required to see the specimen clearly. However, you may still need to adjust the light intensity slightly for optimal viewing.
    • High magnification: As you switch to higher magnifications (such as 40x or 100x), the field of view becomes smaller, and more light is needed to maintain image clarity. In these cases, increasing the light intensity is essential to compensate for the reduced light reaching the sample due to the smaller area being observed.

    The key is to adjust both the condenser and the illuminator, as well as the aperture diaphragm, to ensure that the sample is properly illuminated at each magnification level.

    Adjusting Brightness for Different Magnifications

    The brightness of the microscope image should be adjusted based on the magnification you are using. Higher magnifications, which involve using more powerful lenses, often require more light to maintain clarity and detail. When switching to higher magnifications, it’s essential to increase the brightness to compensate for the reduced amount of light that reaches the sample due to the smaller field of view.

    Brightness and Contrast: Striking the Balance

    While adjusting brightness is important, maintaining the right balance between brightness and contrast is crucial for effective observation. Too much light can cause the image to appear washed out, while too little light can make it hard to distinguish finer details. Therefore, it’s essential to fine-tune both brightness and contrast for optimal viewing.

    1. Increase contrast: To improve contrast without over-brightening, you can adjust the condenser aperture to reduce the light intensity slightly.
    2. Lower brightness gradually: Reducing the brightness slowly while observing the effect on your sample helps find the perfect balance.

    Common Problems with Brightness Adjustment on a Microscope

    While adjusting the brightness on a microscope is typically a straightforward task, several common problems may interfere with achieving optimal illumination. Understanding these issues and knowing how to troubleshoot them can help you resolve any difficulties and improve your microscope’s performance.

    Inconsistent Brightness Across the Field of View

    One of the most common issues users encounter when adjusting the brightness on a microscope is inconsistent illumination across the field of view. This can manifest as uneven brightness or dark areas in certain parts of the sample, which makes it harder to observe the specimen clearly.

    Causes and Solutions

    • Misaligned Condenser: If the condenser is not aligned correctly with the optical axis, the light may not be evenly distributed, leading to bright spots or areas with insufficient illumination.
      • Solution: Ensure that the condenser is positioned correctly. The condenser should be centered beneath the stage, and the light should be focused on the specimen. Adjust the condenser’s height to direct light properly onto the sample.
    • Faulty Light Source: An improperly positioned or malfunctioning light bulb may cause uneven illumination. If the bulb is not correctly aligned with the optical system, the light might be spread unevenly.
      • Solution: Check that the light bulb is seated properly and aligned with the optical axis. If the light source is a bulb, make sure it is functioning correctly, and replace it if necessary.
    • Defective Condenser Lens: A damaged or dirty condenser lens can scatter light in unintended directions, leading to uneven brightness.
      • Solution: Inspect the condenser lens for dirt or damage. If it’s dirty, clean it gently with a soft, lint-free cloth. If the lens is scratched or damaged, it may need to be replaced.
    • Inadequate Aperture Diaphragm Settings: If the aperture diaphragm is improperly set, it can cause uneven light distribution.
      • Solution: Adjust the aperture diaphragm to ensure it is not too wide or too narrow. A setting that is too narrow can limit light, while a setting that is too wide can cause overexposure in certain areas of the sample.

    Image Glare

    Glare occurs when too much light enters the microscope, overwhelming the sample and creating bright, washed-out areas that obscure delicate details. This is a common problem, especially when working with high-magnification lenses or samples that have high reflectivity.

    Causes and Solutions

    • Excessive Light Intensity: When the illuminator is set too bright, or the condenser is positioned too high, the excessive light can cause glare. This is particularly noticeable when using higher magnification objectives.
      • Solution: Reduce the light intensity by turning down the brightness dial or adjusting the rheostat. Additionally, lower the condenser slightly or close the aperture diaphragm to reduce the amount of light entering the system.
    • Incorrect Field Diaphragm Setting: An incorrectly adjusted field diaphragm can allow too much light to enter the optical system, resulting in glare.
      • Solution: Adjust the field diaphragm to control the size of the light field. A smaller opening will reduce the light entering the system, helping to reduce glare and enhance image contrast.
    • Specimen Characteristics: Some specimens are naturally reflective or transparent, which can amplify the amount of light passing through them and cause glare.
      • Solution: If possible, adjust the lighting to create softer illumination, or use filters to modify the light’s intensity. You may also try using dark-field illumination to enhance the contrast without overexposing the specimen.

    Poor Image Contrast

    Another common issue related to brightness adjustment is poor contrast. This typically occurs when the sample appears too washed out or lacks the necessary detail to be observed clearly.

    Causes and Solutions

    • Inappropriate Aperture Diaphragm Settings: The aperture diaphragm plays a key role in controlling contrast. If it is too wide, the image may lack contrast and appear overexposed. Conversely, if it is too narrow, the image might be too dim, reducing clarity.
      • Solution: Adjust the aperture diaphragm to achieve the optimal balance between brightness and contrast. A medium-sized aperture generally works best for most specimens.
    • Incorrect Condenser Position: If the condenser is not properly aligned or positioned too high or low, it can result in poor contrast, especially for transparent or thin specimens.
      • Solution: Fine-tune the position of the condenser to ensure it is properly aligned with the sample. Experiment with adjusting the height of the condenser to achieve the best contrast.

    Light Flickering or Uneven Brightness in Illuminator

    Another potential problem is flickering or uneven light from the illuminator. This may cause the sample to appear inconsistent or poorly illuminated, making it difficult to focus on the details.

    Causes and Solutions

    • Loose Connections: A loose connection between the light source and the power supply can cause flickering or fluctuations in brightness. This is common in microscopes with external power supplies or older models.
      • Solution: Check all connections to ensure they are secure. If the microscope has an external power supply, inspect the cords and plugs for any signs of damage or wear.
    • Faulty Bulb or Light Source: If the light bulb or light source is nearing the end of its life or is malfunctioning, it may cause inconsistent brightness or flickering.
      • Solution: Replace the light bulb with a new one. Be sure to use the correct type and wattage for your specific microscope model.
    • Power Supply Issues: Fluctuations in the power supply can affect the performance of the light source, causing flickering or uneven brightness.
      • Solution: Ensure that the power supply is stable and providing consistent voltage. If necessary, use a voltage regulator to prevent fluctuations that could affect the microscope’s performance.

    3 Tips for Optimal Brightness Adjustment

    To get the best viewing experience, here are some additional tips:

    1. Use the correct light source: Ensure that the light source is suitable for the type of microscope you are using. LED lights are often more energy-efficient and provide consistent brightness, while halogen bulbs tend to offer higher light intensity.
    2. Fine-tune the aperture: By adjusting the aperture diaphragm on the condenser, you can not only control the brightness but also improve the resolution of your sample.
    3. Check the bulb’s condition: Over time, the light bulb can lose brightness. If the image seems dimmer than usual, it may be time to replace the bulb.

    Microscope Brightness Adjustment Table

    ComponentPurposeAdjustment Method
    CondenserFocuses light on the sampleMove up or down to adjust brightness
    Aperture DiaphragmControls the amount of light entering the microscopeWiden to increase brightness, narrow to decrease
    IlluminatorProvides the light sourceUse the brightness dial or rheostat
    Field DiaphragmControls the field size of light reaching the specimenAdjust to improve contrast and reduce glare
    Light SourcePowers the illuminatorReplace or adjust for optimal brightness

    How do I adjust the brightness on a microscope?

    To adjust the brightness on a microscope, start by locating the illumination system. Depending on the microscope type, this could be controlled through the brightness dial, a rheostat, or by adjusting the condenser. If your microscope has an illuminator, you can turn the brightness dial to increase or decrease light intensity. Some microscopes also allow you to adjust the condenser’s height or use the aperture diaphragm to control how much light passes through. Adjust these components to achieve the desired level of brightness for clear viewing.

    What is the role of the condenser in adjusting brightness?

    The condenser focuses light onto the specimen, playing a key role in controlling the microscope’s brightness. By adjusting the height of the condenser, you can control the amount of light directed at the sample. Moving the condenser closer to the stage increases the brightness, while moving it away reduces it. Additionally, adjusting the aperture diaphragm on the condenser can control the amount of light entering the microscope, affecting both brightness and contrast.

    Why does my microscope image appear too bright or too dim?

    If your microscope image is too bright or too dim, it could be due to improper light intensity settings. First, check the brightness dial or rheostat to make sure it is set to the appropriate level. If the image is still not ideal, inspect the condenser and aperture diaphragm. An aperture that is too wide might result in too much light, while an aperture set too narrow could lead to insufficient illumination. Adjusting these components can help achieve the correct brightness.

    Can I adjust the brightness at different magnifications?

    Yes, brightness needs to be adjusted depending on the magnification used. Higher magnifications require more light because the field of view becomes smaller, and less light reaches the specimen. When switching to a higher magnification, increase the brightness by adjusting the illuminator or condenser. On lower magnifications, you might need less light, so you can decrease the brightness accordingly.

    What if the brightness remains uneven across the field of view?

    If the brightness is uneven, it could be due to misalignment of the light source or the condenser. Ensure the light bulb is correctly positioned and aligned with the optical system. Also, check if the condenser is centered and properly aligned with the specimen. In some cases, a dirty condenser lens can scatter light unevenly, so cleaning the lens might resolve the issue.

    How can I reduce glare while adjusting brightness?

    To reduce glare, which can happen when too much light is used, try adjusting the light intensity by decreasing the brightness or moving the condenser to a lower position. You can also close the aperture diaphragm slightly to limit the amount of light entering. Additionally, adjusting the field diaphragm can help control the light field, preventing excess light from causing glare.

    Why is adjusting the field diaphragm important for brightness?

    The field diaphragm controls the size of the light field reaching the specimen. Adjusting this diaphragm properly can help manage both brightness and contrast. A larger field of light increases the brightness, but it might also cause excess light to spill into the system, creating glare. By adjusting the field diaphragm, you can maintain a balanced level of light while ensuring the specimen is illuminated properly.

    How do I know if the microscope’s light source is faulty?

    If you notice flickering, uneven brightness, or poor illumination despite adjusting the microscope’s controls, the light source could be faulty. First, check the light bulb to ensure it is properly installed and not burnt out. If the bulb is working, but you still experience issues, there may be a problem with the electrical connection or the power supply, requiring further inspection or replacement of the light source.

    What should I do if my microscope’s brightness adjustment controls are not working?

    If the brightness adjustment controls are not responding, check if the microscope’s electrical connections are intact. Ensure that the power supply is functioning correctly, and inspect any dials, rheostats, or knobs for damage. If the light source is not turning on or the adjustment controls seem unresponsive, the problem could be related to internal wiring or a malfunctioning component, which may need professional repair or part replacement.

    Final Decision

    Adjusting the brightness on a microscope is an essential skill that helps ensure you get clear, detailed images of your specimens. By carefully managing the condenser, aperture diaphragm, illuminator, and field diaphragm, you can achieve the right balance between brightness and contrast. These adjustments not only improve the quality of your observations but also ensure the longevity and optimal performance of your microscope. Whether you’re a beginner or an experienced microscopist, understanding how to adjust brightness is a crucial part of your microscopy practice.