Category: Flashlight

A flashlight is a must-have tool for any household during emergencies. This includes things like power outages, finding lost keys, and navigating dark areas. A reliable flashlight can also be handy when walking around at night or while camping.
Some of the best options available on the market include headlamps that give you hands-free illumination, as well as multi-purpose flashlights that are perfect for everyday use. You can find models that have special features like an SOS mode in case of emergency or a laser pointer to help track down items in your home or office.
When choosing a flashlight, it is important to make sure that it is Durable and Waterproof so you can rely on it in tough situations. Additionally, make sure to choose one with LED lights rather than incandescent bulbs because they consume less battery life and produce less heat (which could cause damage).

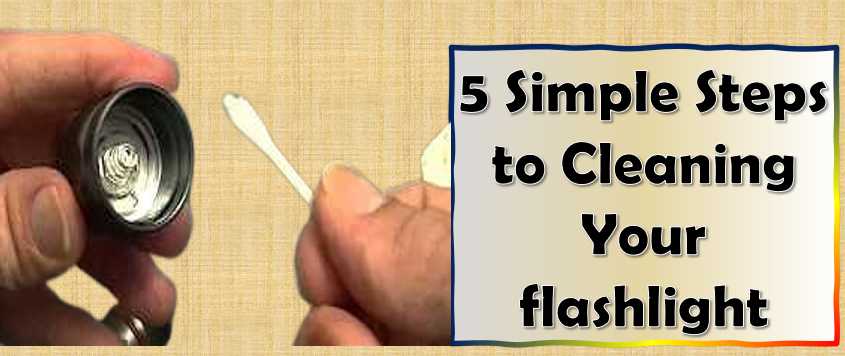
  • How to Clean Flashlight Lens: 3 Easy Ways to Follow

    Did you know that cleaning your flashlight lens is essential in keeping it functioning optimally? Not only does it help keep your flashlight shining brightly, but it can also help reduce the number of light spills that occur in your home.

    If you own a flashlight, you know that it can be helpful in various situations. From finding your way at night to camping, a flashlight is an essential piece of equipment. But like any other electronic device, a flashlight must be kept clean to work correctly.

    ImageProductDetailPrice
    13 in 1 Fiber Optic Cleaning Tool kit

    13 in 1 Fiber Optic Cleaning Tool kit

    • Optical Fiber Microscope
    • Fiber optic cleaning cotton swab
    See on Amazon
    YICIZOL Optic Fiber Cleaning Inspection Kits

    YICIZOL Optic Fiber Cleaning Inspection Kits

    • 400 Times Fiber Connector
    • Small size, one-handed, convenient and fast
    See on Amazon
    Camera Lens Cleaning Kit, 10-in-1 Camera Cleaning Kit

    Camera Lens Cleaning Kit, 10-in-1 Camera Cleaning Kit

    • Safety, Simple, Effective, Static-free, Multi-propuse, unique cleaning kit for your life!
    See on Amazon
    Professional DSLR Camera Cleaning Kit 

    Professional DSLR Camera Cleaning Kit 

    • High-Power Biological Microscope for Students
    See on Amazon
    AmScope MLA-Kim Microscope Maintenance Kit

    AmScope MLA-Kim Microscope Maintenance Kit

    • 1/4 Oz Type B medium viscosity immersion oil for better microscopy images and prolonged use
    See on Amazon

    In this article, we’ll discuss three easy ways to clean your flashlight lens. So don’t wait – get started cleaning your flashlight today!

    Understanding Flashlight Lens Materials

    Flashlight lenses come in various materials, each with its own characteristics and considerations for cleaning. Common materials include tempered glass, acrylic, and polycarbonate. The type of lens on your flashlight impacts the cleaning methods you should employ. Tempered glass, for example, is more resistant to scratches but may require gentle cleaning to avoid smudges. Acrylic and polycarbonate lenses are lighter and more impact-resistant but can be prone to scratches.

    Tips for Cleaning Specific Lens Types

    Lens TypeCleaning Tips
    Plastic LensesUse caution to avoid scratches; prefer mild cleaning solutions
    Coated LensesUse a mild cleaning solution to preserve the coating
    LED Flashlight LensHandle with care to avoid damage to sensitive components behind it

    What tools do I need to clean my Flashlight Lens?

    When it comes to flashlight lenses, it is essential to use the right tools for the job. Here are four things that you should keep in mind when cleaning your flashlight lens:

    1. Use a microfiber cloth or lint-free towel to clean off dirt and dust.

    2. Wipe the lens’s exterior with a wet paper towel to remove any excess moisture or sweat buildup.

    3. Swab around the perimeter of each light bulb with rubbing alcohol (90% concentration) mixed with water, then dry off completely before replacing bulbs/lens assembly). 

    4. If the lens is heavily stained with chemicals or oil, you may need to disassemble the flashlight and clean all parts using a cloth soaked in mild soap and water.

    How to Clean a Dirty Flashlight Lens?

    Many things can go wrong with a flashlight, and one of the most common is dirty lenses. When your flashlight lens becomes cloudy, it creates darkness inside the beam, making it difficult to see. Not only is this an inconvenience, but it also increases the chances of getting lost or injuring yourself while using your flashlight.

    1. Dispose of the flashlight safely and appropriately: If you can’t or don’t want to take it apart, try to get someone else who can before recycling it. 

    2. Clean the exterior lens with warm water and ammonia: Pour white vinegar into a bowl or glass cup, then add enough cool water to make a whiter solution (about 1/3 cup). Use this mixture to clean all sides of the lens using a soft cloth or sponge. Let dry completely before using again. Avoid getting any liquid inside the light bulb housing as this could damage it- wipe away dirt and bacteria instead! 

    3. Protect your lenses from future contaminants by dusting them off every time you use them: This will help prevent scratches, smudges, fingerprints, etc., that might lead to gradual degradation over time

    4 . Store your flashlight in a clean, dust-free environment: A cool, dry place is best.

    Essential Tools for Cleaning Flashlight Lenses

    ToolPurpose
    Microfiber ClothGentle cleaning and polishing
    Lens Cleaning SolutionRemoving dirt and stains
    Compressed AirRemoving loose particles
    Lens Cleaning Pen/BrushDetailed and targeted cleaning
    Lens Cleaning WipesTackling stubborn stains and residues

    Other Cleaning Methods and Considerations

    Here are a few other flashlight lens cleaning methods that you may want to consider:

    The Alcohol Method -If you’re inclined to drink alcohol, this is the method for you. Pour some vodka or whisky onto a cloth and wet it with water. Then, use the material to clean your flashlight lenses. Be sure not to apply too much pressure, as this might damage your lens finish.

    The Soap Method -This approach involves using soap and water together. Wet your cloth in hot soapy water, and then rub it around the outside of your lenses until they shine clean. Rinse the area thoroughly before putting the towel away next time.

    The Steel Wool Method -Steel wool can be used with liquid hand soap or an alcohol-based cleaner solution (be careful when handling steel wool). This method is similar to The Alcohol Method in that you will get the steel wool, dip it into the cleaner solution, and coat both sides of your lens with it; repeat as necessary until all surfaces have been treated. Remember always to wear safety glasses while using steel wool on optics!

    Step-by-Step Cleaning Process

    Using Compressed Air

    Begin by using compressed air to remove loose particles from the lens surface. Hold the flashlight upside down to prevent particles from falling back onto the lens.

    Applying Lens Cleaning Solution

    Next, apply a small amount of lens cleaning solution or a mild soap solution to a microfiber cloth. Ensure that the solution is suitable for the type of lens material. Avoid using harsh chemicals that can damage the lens coating.

    Using a Lens Cleaning Pen or Brush

    For more detailed cleaning, use a lens cleaning pen or brush. Gently sweep the brush or pen across the lens surface, paying attention to the edges and corners where dirt tends to accumulate.

    Wiping with Microfiber Cloth

    Wipe the lens with a microfiber cloth, using gentle circular motions. This helps remove any remaining residue and ensures a streak-free finish. If necessary, repeat the process until the lens is clean.

    Addressing Stubborn Stains

    For stubborn stains or residues, consider using specialized lens cleaning wipes. These pre-moistened wipes are designed to tackle tougher contaminants without causing damage to the lens.

    Common Mistakes to Avoid

    While cleaning your flashlight lens, it’s crucial to be aware of common mistakes that can lead to damage or diminished performance. Here are some key errors to avoid:

    1. Using Harsh Chemicals: Avoid using abrasive or corrosive chemicals, as they can damage the lens material and coatings. Stick to mild solutions recommended by the flashlight manufacturer.
    2. Improper Disassembly: Follow proper disassembly procedures outlined in the flashlight’s user manual. Incorrect disassembly can lead to damage or accidents, impacting the overall functionality of the flashlight.
    3. Ignoring Manufacturer Guidelines: Always adhere to the cleaning guidelines provided by the flashlight manufacturer. Deviating from these recommendations may void warranties or cause irreparable damage.
    4. Overlooking Lens Cleanliness: Neglecting regular lens cleaning can result in a buildup of dirt and contaminants, affecting both the light output and the longevity of the flashlight.

    Common Mistakes to Avoid During Flashlight Lens Cleaning

    MistakeConsequences
    Using Harsh ChemicalsDamages lens material and coatings
    Improper DisassemblyRisks damage or accidents during cleaning
    Ignoring Manufacturer GuidelinesMay void warranties or cause damage
    Overlooking Lens CleanlinessDiminished light output and reduced lifespan

    Why is it important to clean your Flashlight Lens?

    A dirty flashlight lens is not only a nuisance; it can also impair your vision. A study published in the journal Ophthalmology found that daily use of a dirty flashlight could result in impaired night vision up to 2 years later. In addition, dust and other debris on the lenses can reduce light transmission, causing difficulty reading even at close range.

    Here are five tips for cleaning your flashlight lens:

    1) Use a soft cloth moistened with rubbing alcohol or water to clean the lens’s exterior surface. Use moderate pressure while wiping to avoid scratching or harming the glass. Let dry completely before using again.- 

    2) Remove any dirt, fingerprints, or other pollutants by polishing with a fine-grade abrasive such as diamond powder (available online). Swab gently around each eye six times daily and then wipe off the residue. 

    3) To remove dried droplets from inside the light source unit housing where they may cause reflection problems when looking into an optical instrument such as binoculars or telescopes, immerse the unit in a gentle detergent solution, rinse thoroughly several times, and air dry. –

    4) If the lens is severely tarnished or does not respond to polishing, you may need to replace it.

    5) If your flashlight requires a new battery, clean and dry all connectors before replacing the battery. Although cleaning your flashlight lens is not particularly difficult, it can be time-consuming. If you follow these tips and procedures regularly, your flashlight will operate at its best for many years.

    What should NOT be used to clean a Flashlight Lens?

    A few things should not be used to clean a flashlight lens, including Windex, alcohol, ammonia, vinegar, or chlorine. These materials can damage the plastic lens and make it difficult to see in low-light situations. Additionally, all these chemicals will also corrode the metal parts of your flashlight.

    1. Windex: This is the worst thing you can use to clean a flashlight lens because it contains ammonia and other harsh chemicals that can damage the lens.

    2. Bleach: Bleaching your lenses with bleach will also damage them and may cause permanent blacking or distortion of the light output.

    3. Vinegar: Vinegar leaves an acidic residue that can further corrode your flashlight’s optics over time.

    4. Toothpaste: Toothpaste has abrasives that will scratch up your lens, causing clicking or hypersensitivity when used to shine a light on something; this is especially true if you have sensitive skin around your eyesight area.

    5. Alcohol: Alcohol will evaporate and leave a residue on your lens that can also cause damage.

    6. Chlorine: Chlorine bleach is extremely harsh and can easily strip away the phosphor coating from the lenses of lights, rendering them useless.

    How often should I clean my Flashlight Lens?

    How often should I clean my Flashlight Lens

    According to the Bureau of Land Management (BLM), a flashlight’s lens should be cleaned at least once every month or every two months if used regularly outdoors. When cleaning your flashlight lens, wipe it with a dry cloth or paper towel.

    How do I keep my Flashlight Lens clean?

    Keeping your flashlight lens clean is essential for two reasons: first, it prevents the light from being polluted, and second, it ensures that the light beam is as bright as possible. Here are five tips to help you keep your flashlight lens clean:

    1. always store your flashlight in a dry place

    2. use a cloth or microfiber towel to wipe down the exterior of the flashlight every time you use it

    3. avoid using canned air cleaner on plastic lenses – this can damage them over time

    4. periodically take off the front and back covers of your projector headlight unit to access all of its parts and clean them with a soft cloth and denatured alcohol wipes (alcohol will dissolve oil)

    5. use a fiberglass or plastic lens brush to clean the inside of the lens where light reflects from the illuminated object.

    Can I use alcohol to clean Flashlight Lens?

    While you may be able to use alcohol to clean other surfaces, it is not recommended for cleaning flashlight lenses. This is because alcohol can strip the lens’s protective coating and damage the light seal and Reflector. Too much alcohol will also cause smudging or fogging of your lens. Water or a non-alcoholic solution should always be used when cleaning any optics.

    How do I avoid getting dust on my Flashlight Lens?

    One of the most common problems that flashlight users face is getting dust on their lenses. This can reduce the brightness and visibility of your light, which can be dangerous if you need to use it in an emergency. There are a few simple steps that you can take to avoid this problem: 

    1) Make sure your flashlight is clean before each use. Remove any debris or fingerprints with a soft cloth or dry paper towel. 

    2) Store your flashlight in a cool, dark place where it will not be disturbed. Dust tends to accumulate on lenses over time, so keeping yours tidy will help prolong its lifespan and improve its performance.

    3) When you are traveling, make sure to pack a spare light bulb and battery. This will help avoid any unexpected repairs or replacements while away from home.

    How do you clean a flashlight reflector?

    If your flashlight reflector is not reflecting light as it should, you may need to clean it. Cleaning a flashlight reflector can be done using a cloth or microfiber pad soaked in mineral oil and water. Be sure to work the polish into the Reflector’s surface until the particles are removed.

    Do not use steel wool, carbide grit, ammonia cleaner, or other harsh chemicals; they could damage the plasticity of the Reflector.

    Final Words:

    As you can see, cleaning a flashlight lens is not that hard, and with just a few tips, the job becomes more accessible.

    Consider using baby oil instead of water for the stubborn case of grease on your flashlight. The oil will soak up all the dirt in no time and make it easy to clean your light. Just be careful before using oils; they’re not harmful to health but messy in aesthetic terms!

    If you are wondering what not to use while cleaning, we want to tell you that alcohol or other harmful substances can damage the flashlight and its parts. It is advisable to use a gentle brush or toothbrush since gentle scrubbing helps remove dust and dirt from tight spots like underneath caps of flashlights and battery compartments. Avoid using harsh abrasive materials as they might cause scratches on the lens surface.

    With some trial and error, most people keep their flashlights in great shape! 

    Click here if you like the post and want us to share it with your friends and family.

  • 5 Simple Steps to Cleaning Flashlight Properly – Choosing the Right Method

    5 Simple Steps to Cleaning Flashlight Properly – Choosing the Right Method

    Cleaning your flashlight is an essential part of keeping it in good condition. Not only will it perform better, but you’ll also be protecting your hands and eyes from harmful light rays. 

    Are your flashlights always ending up dirty? Well, it’s time to start cleaning them up! But which method should you use? In this post, we’ll outline five simple steps to help you properly clean your flashlight. We’ll also recommend the proper method for each type of flashlight so you can ensure you’re cleaning them the right way every time. Let’s get started!

    ImageProductDetailPrice
    13 in 1 Fiber Optic Cleaning Tool kit

    13 in 1 Fiber Optic Cleaning Tool kit

    • Optical Fiber Microscope
    • Fiber optic cleaning cotton swab
    See on Amazon
    YICIZOL Optic Fiber Cleaning Inspection Kits

    YICIZOL Optic Fiber Cleaning Inspection Kits

    • 400 Times Fiber Connector
    • Small size, one-handed, convenient and fast
    See on Amazon
    Camera Lens Cleaning Kit, 10-in-1 Camera Cleaning Kit

    Camera Lens Cleaning Kit, 10-in-1 Camera Cleaning Kit

    • Safety, Simple, Effective, Static-free, Multi-propuse, unique cleaning kit for your life!
    See on Amazon
    Professional DSLR Camera Cleaning Kit 

    Professional DSLR Camera Cleaning Kit 

    • High-Power Biological Microscope for Students
    See on Amazon
    AmScope MLA-Kim Microscope Maintenance Kit

    AmScope MLA-Kim Microscope Maintenance Kit

    • 1/4 Oz Type B medium viscosity immersion oil for better microscopy images and prolonged use
    See on Amazon

    7 Cleaning Steps to follow

    You can use flashlights in emergencies, but they can also be a breeding ground for bacteria and fungus. To keep your flashlight clean and free of contaminants, follow these simple steps:

    Disconnect the battery if it’s not in use.

    Wipe the entire light with a damp cloth or cotton ball. Make sure to clean all the crevices and corners.

    If the light has a lens cover, remove it and wipe the inside with a cloth or cotton ball.

    Wipe off any dirt or dust on the lens using a dry cloth or paper towel (don’t use water). 

    Replace the lens cover with a removable one and tighten using screws or bolts if necessary. 

    Reattach the battery if desired and turn on the flashlight to ensure everything is working correctly. 

    Store your flashlight in an area where it will not be exposed to moisture or sunlight (a dark place is best).

    8 Best Methods to Clean A flashlight 

    We’ll show you eight quick and easy ways to clean your flashlight, so you can keep it working its best. From removing fingerprints to cleaning the lens, there’s a method for everyone!

    1. Use warm water and soap

    Mix a tablespoon of soap with a full cup of warm water and pour it into the flashlight. Swirl the flashlight around in the water to clean all surfaces. Let it sit for a few minutes so the dirt and debris can be washed away, then dry it off.

    2. Use alcohol or Lysol spray

    Pour either alcohol or Lysol drizzle into the flashlight and turn it on full blast until the liquid has been sprayed throughout. Please turn off the light and allow it to air-dry completely before using it again. 

    3. Use a cloth wrung out in vinegar or lemon juice

    Wet a cloth with vinegar or lemon juice, wring it out well, and place it over the light bulb where you want to clean it. Please turn on the light while holding down on the cloth until dirt and debris fall onto it; then, hang up the cloth to dry completely before using it again. 

    4. Use baking soda mixed with water as a natural cleaner

    Mix 1/2 cup of baking soda with 1/2 cup of cold water in a bowl, then pour this solution into your flashlight’s lens area and let it sit for a few minutes. Use a tissue to clean off the baking soda and any dirt or debris dislodged. Let the flashlight air-dry before using it again.

    5. Buy a flashlight cleaning kit

    These kits typically contain a brush, disinfectant wipes, and a lens scraper. Use the brush to scrub dirt and debris off the light bulb; use the wipes to clean off any fingerprints or smudges on surfaces; and use the lens scraper to remove any specks or dust particles from lenses or reflectors.

    6. Use vinegar

    Vinegar effectively cleans all types of surfaces, including glass and plastic lenses. Mix equal vinegar and water, spray it on the lens and wipe it off with a cloth or paper towel. Be sure to rinse thoroughly after use.

    7. Use hydrogen peroxide

    Hydrogen peroxide is an excellent cleaner for all surfaces, including lenses. Mix three parts hydrogen peroxide with one part water, spray it on the lens, and wipe it off with a cloth or paper towel. Be sure to rinse thoroughly after use.

    8. Use a vacuum cleaner and dustpan

    Put the vacuum cleaner attachment on the dustpan and turn it on. Vacuum up all the dirt, debris, and oil accumulated on your flashlight. Make sure to avoid any contact with the lens or batteries.

    Why Cleaning Matters

    Maintaining a clean flashlight is integral to ensuring optimal performance and longevity. Dirt and debris accumulation, often overlooked, can significantly impact the functionality of your flashlight. This section explores the various aspects of why cleaning matters and sheds light on the consequences of neglecting flashlight cleanliness.

    A. The Impact of Dirt and Debris on Flashlight Performance:

    IssueDescription
    Reduced Light OutputAccumulated dirt on the lens or reflector can obstruct the light beam, leading to diminished brightness.
    Heat BuildupDebris around the LED or bulb can impede proper heat dissipation, potentially causing overheating and reducing the lifespan of the light source.
    Electrical ConnectivityDust and grime in the battery compartment may interfere with electrical connections, causing intermittent or complete failure of the flashlight.
    CorrosionMoisture and dirt can lead to corrosion on electrical contacts, affecting conductivity and potentially damaging internal components.

    B. Common Issues Arising from Neglecting Flashlight Cleanliness:

    IssueDescription
    Flickering or Inconsistent LightDirty or corroded contacts can result in unreliable electrical connections, leading to flickering or erratic light output.
    Lens ScratchesNeglecting to clean the lens properly can result in scratches, diffusing the light and reducing clarity.
    Internal Component DamageOver time, dirt and debris can accumulate inside the flashlight, causing damage to internal components such as the LED or bulb, compromising performance.

    C. Benefits of Regular Cleaning:

    BenefitDescription
    Improved PerformanceRegular cleaning ensures optimal light output, consistent performance, and a longer lifespan for your flashlight.
    Extended LifespanCleaning prevents the buildup of damaging elements, preserving the integrity of internal components and increasing the overall lifespan of the flashlight.
    Enhanced ReliabilityA well-maintained flashlight is more reliable during critical situations, providing consistent illumination when needed the most.
    Cost SavingsPreventive maintenance through regular cleaning reduces the likelihood of component failure, saving money on replacements and repairs.

    In summary, the impact of dirt and debris on flashlight performance is multifaceted, affecting light output, heat dissipation, and electrical connections. Neglecting cleanliness can lead to issues such as flickering, lens scratches, and internal component damage. On the other hand, regular cleaning brings a host of benefits, including improved performance, extended lifespan, enhanced reliability, and potential cost savings. It underscores the importance of incorporating flashlight cleaning into regular maintenance practices for users to enjoy the longevity and effectiveness of their lighting equipment fully.

    Effect of cleaning a flashlight on its beam life

    When it comes to cleaning your flashlight, it’s essential to understand the effect of cleaning on its beam life. To keep the beam strong and its light output consistent, choose the suitable method that suits your flashlight and follows the instructions carefully.

    Four methods effectively clean flashlights – dry cleaning, ultrasonic washing, air-drying, and manual cleaning.

    Dry cleaning is the most delicate and takes the longest time, but it is the most effective in preserving the light beam.

    Ultrasonic washing is the fastest and least delicate method, but it may not effectively remove all the dirt and debris.

    Air-drying is the least time-consuming and effective in removing most dirt and debris, but it may leave the flashlight with a film on the lens.

    Manual cleaning is the most time-consuming but the most effective in removing all the dirt and debris.

    Common Mistakes to Avoid

    Ensuring your flashlight’s proper care and maintenance involves avoiding common mistakes that could compromise its functionality. Here, we highlight some critical errors to steer clear of, providing insights into the potential consequences of each mistake.

    A. Using Abrasive Materials:

    Mistake DescriptionConsequences
    Cleaning with Rough MaterialsScratches on the lens or body of the flashlight can occur, impacting both the aesthetic and functional aspects of the device.
    Damaging Protective CoatingsAbrasive materials can remove protective coatings on the lens or body, making the flashlight more susceptible to future damage and reducing its overall durability.

    B. Neglecting to Check for Water Damage:

    Mistake DescriptionConsequences
    Internal Component DamageFailing to check for water damage may result in internal corrosion, electrical shorts, and damage to critical components such as the LED or bulb.
    Reduced Water ResistanceOver time, neglected water damage can compromise the flashlight’s water-resistant features, rendering it less effective in wet or humid conditions.

    C. Reassembling Incorrectly:

    Mistake DescriptionConsequences
    Electrical MalfunctionsIncorrect reassembly may lead to poor electrical connections, causing the flashlight to malfunction or fail altogether.
    Increased Risk of DamageReassembling parts improperly may put unnecessary stress on components, increasing the risk of damage during regular use or maintenance.

    Avoiding these common mistakes is crucial for maintaining the longevity and effectiveness of your flashlight. Using non-abrasive cleaning materials, regularly checking for water damage, and ensuring correct reassembly will contribute to the overall reliability and performance of your flashlight, keeping it in optimal condition for when you need it most.

    Things you should not do when cleaning a flashlight

    There are a few things you should never do when cleaning it. For example, never dry it with a cloth or a dryer – this will create moisture problems in the future. Instead, always dry it properly by using a towel or air-drying.

    Another no-no is using harsh chemicals or abrasives – these can damage the flashlight’s internals.

    Remember to choose the correct bulb for your flashlight before cleaning it, and ensure you know how to clean it properly.

    Finally, keep your flashlight clean by regularly cleaning the lens and the body – these are the most common areas that get dirty.

    How to choose the proper method of cleaning your flashlight

    Proper method of cleaning your flashlight

    There are a few things to consider when selecting the best way of cleaning your flashlight. The material, size, and shape of your flashlight all play a role in how you should clean it.

    If you’re like most people, your flashlight is one of your most-used items. And, with good reason – it’s convenient when you need to see in the dark or during a power outage.

    However, keeping your flashlight clean and free of bacteria is essential for its own sake and safety. That’s because dirty flashlights can cause eye injuries and even sickening infections.

    Purpose 

    Different flashlights are designed for various purposes. For example, some are intended as emergency lights, while others are meant for hunting or camping. Choosing a flashlight that suits your needs and uses would be best.

    Materials

    The material of the flashlight determines how you should clean it. If your flashlight is made of a hard material, like plastic, you should dry it using a cloth or air-drying. You should use ultrasonic wash if your flashlight is made of softer metal or glass.

    Body and Lens

    The size and shape of the flashlight also play a role in how you should clean it. If your flashlight has a large body and lens, you may want to clean them manually. If your flashlights are smaller and have limited storage space, try one of the other methods.

    Cleaning Materials 

    The best way to clean a flashlight is by using a safe and effective cleaner. Flashlights can be cleaned with many materials, but some of the best include water, soap, and oil.

    Cleaning Period

    It would help if you cleaned your flashlight every time you used it. It all depends on your flashlight and how often it’s used.

    For example, if you’re using a disposable flashlight, you should clean it after every use. If you’re using a reusable flashlight, you can clean it once a week or every two weeks, whichever works better for you.

    Why? Because dirt and dust can build up over time and eventually cause your flashlight to malfunction or even become dangerous. By regularly cleaning your flashlight, you’ll be able to keep it working perfectly for years to come.

    Waterproof or Water Resistant

    Flashlights are often used in environments where water is present, so you must ensure that your flashlight is waterproof and water-resistant. Waterproofing means the flashlight can be submerged in water up to a certain depth and still work, and water resistance means that the flashlight will not be damaged by water, even if it gets wet.

    If you’re looking for a waterproof flashlight, choose one rated. Read the manufacturer’s instructions carefully before using the flashlight, as some may require extra care when cleaning. For a water-resistant flashlight, you can choose either an entirely water-resistant one or one with a moisture-resistant coating.

    How to clean a flashlight: manual method

    The most common way of cleaning a flashlight is by hand. To clean it, first, ensure you have the right supplies. You will need soap, water, and a towel or cloth. Soap will help remove dirt and debris from the flashlight’s surface, while water will dissolve any soap residue.

    Wipe your light with a damp cloth until all the dirt and dust are gone. If your light has fingerprints or other grease buildup on its exterior, use an alcohol-based cleaner to remove it without harming the plastic.

    Inspection

    If your flashlight uses a battery, you should always clean it using water. Suppose the light emits an intense and long beam of light. You can use a chemical cleaner such as white vinegar or ammonia diluted with water to eliminate grease and oils on electronic parts (lamp modules, etc.). Alternatively, you can use a spin cleaning method to quickly spin the flashlight around in circles while rubbing its surface with a cloth or paper towel.

    5 Tips for cleaning a damaged flashlight

    Flashlight maintenance is essential to keep them working correctly and looking good. Here are five tips for cleaning a damaged flashlight:

    Remove the battery if possible, and this will help minimize the chance of accidental discharge.

    Wipe the light with a dry cloth to remove dust or debris.

    Blow out the light with a can of compressed air to remove any built-up dirt, dust, or saliva.

    Spray a little anti-bacterial cleaner inside and outside the light housing to kill any bacteria that may have grown during use.

    Finally, wipe down the lens with a dry cloth to remove any residual cleaner

    5 Steps to Clean Out the Battery and Corrosion:

    Flashlights can be handy when you need to see in the dark, but they can also take a lot of abuse. Over time, the battery will lose power and may even start eroding, leading to poor performance and dangerous electrical shocks.

    Here are five steps that will help you clean out your flashlight and keep it working correctly:

    Remove the battery if it’s possible. This is important because batteries contain chemicals that can damage electronics if left in them.

    Scrub the entire light with a wire brush or a toothbrush to remove any dirt, dust, or debris. Make sure to get into the crevices and corners!

    Rinse the light with water and dry it off completely before replacing the battery. Be sure to seal the battery compartment tightly with tape or silicone sealant when you’re done so that water cannot enter again during storage or use. 

    Store your light in a dry place away from direct sunlight and heat, which can cause damage over time. And last but not least, be sure to replace your flashlight every three years or when its battery shows signs of wear!

    This guide is designed to help you take care of your flashlight. If you ever notice anything wrong with it, don’t hesitate to contact the manufacturer or a qualified professional.

    Additional Tips and Ideas

    1. Lubricate and Protect Your Flashlight

    Keeping your flashlight clean and lubricated is essential to keep it working correctly.

    Here are five simple steps to follow:

    Store your flashlight in a dry location to prolong its life.

    Lubricate and protect your flashlight’s lens with an o-ring or silicone sleeve every time you use it.

    Choose a method to protect the lens using an o-ring or silicone sleeve.

    Ensure the lens is clean before lubricating and protecting it.

    Use a light coating of petroleum jelly on the threads of your flashlight’s head to protect them from dirt or dust.

    2. Store Your Flashlight Correctly

    Keeping your flashlight in good condition is essential for your safety. Follow these simple tips to make sure your flashlight is clean and safe to use:

    Always store your flashlight in a cool, dry place.

    When cleaning, use the correct method – either with a household cleaner or water and vinegar.

    If you break the light cover, replace it as soon as possible to keep your flashlight looking new.

    Always store your flashlight in a place that is easy to access – like a safe or cabinet.

    3. Take Safety Precautions

    Cleaning a flashlight is not as difficult as one might think, and a few simple steps will help make the process easier and safer for you.

    First, several options are available for cleaning a flashlight – choose the one best suited for the flashlight type and the flashlight’s cleaning needs.

    Second, store your flashlight safely where children and pets cannot reach it.

    And finally, when cleaning a flashlight, always be sure to use the correct method.

    Make sure to wear gloves to avoid injuries, and follow the cleaning instructions provided by the flashlight manufacturer. With these simple steps, you’ll clean your flashlight like a pro in no time!

    4. Take Out the Leaking Battery

    If your flashlight is not working as well as it did, there’s a good chance that one or more batteries will start to leak.

    To fix this problem, remove the leaking battery and replace it with a new one. Follow the manufacturer’s instructions for safely canning and installing batteries.

    5. Remove the Battery Acid

    If you notice any dirt buildup or corrosion, it’s time for an overhaul. This includes taking your flashlight apart and cleaning everything inside and out – make sure to clean the battery compartment too! To remove ink or grease, mix equal parts of rubbing alcohol and water and use it on the flashlight’s lens, body, or other areas that may be affected. Finally, always keep a toothbrush handy if you need to remove fingerprints or grease deposits!

    Testing After Cleaning

    A. Verifying Functionality Post-Cleaning:

    After the cleaning process, it is essential to verify the functionality of your flashlight to ensure that it operates at its full capacity. This involves checking various aspects, including turning it on and off, testing different modes (if applicable), and confirming that the light output is consistent. Pay attention to any irregularities and address them promptly.

    B. Troubleshooting Common Issues:

    If any issues arise during the post-cleaning functionality check, it’s crucial to troubleshoot systematically. Refer to the user manual for guidance, inspect internal components, and retrace the cleaning steps. Addressing problems promptly will help maintain the flashlight’s optimal performance and reliability.

    What are some of the dangers of cleaning a flashlight with solid chemicals?

    Strong acids and alkalis strip the protective outer coating from cells in your eyes, skin, or other exposed areas. These elements can lead to

    An eye injury

    Flushing of the face and neck due to accumulation of fluids behind the ear drums (otitis media)

    Chemical burns on skin or mucous membranes, excessive salivation or vomiting

    Pulmonary edema due to absorption through the lungs of hydrofluoric acid (HF)

    Stinging sensations on exposure because nicotine is an irritant contact sensitizer

    In extreme cases, it may even cause death! If you are cleaning a flashlight with any cleaner that contains corrosive ingredients such as sulfuric acid, lye solutions, ammonia, etc.

    First, test the cleaner on a small spot near where you will be using it. If there is no reaction within 30 minutes, then proceed. However, if there is evidence that irritation has occurred, discontinue use immediately!

    What is the best way to clean a CR2032 battery?

    I discovered that cleaning a CR2032 battery with this refined vinegar method is very simple and rarely needed. However, if the battery does become dirty, there are some easy steps that you can take to ensure its continued longevity.

    The first step is to rinse it off thoroughly with water.

    Next, immerse it in a container of distilled vinegar (5%-10%).

    Let the battery soak for several hours or overnight, and then remove it from the vinegar solution and dry it off completely.

    Finally, put on gloves while unscrewing the top of the battery housing so that you do not get any contact with acid or chemicals.

    Is it necessary to clean my light every time I use it, or can it be stored dirty and used later?

    It is not necessary to clean a light every time you use it, but it is recommended that you do so to maintain its brightness and luster. You can store a light dirty and use it at a later time. However, if you notice any signs of corrosion or damage, it is recommended that you clean the light immediately.

    What should I do if my flashlight doesn’t seem to get as dirty as it used to?

    Most flashlight owners are probably familiar with the issue of flashlights getting dirty relatively quickly. This is because many people use them to read or work in low-light situations, and as a result, the beam is constantly being drawn across all sorts of surfaces.

    To prevent your flashlight from becoming dirty too frequently, you can try these tips:

    Store it in an area where there is less dust and debris buildup. 

    Try using a different lens, if possible, to reduce the intensity of the beams. 

    Please keep it clean by wiping down its exterior every time you use it.

    Can I use a vacuum cleaner to clean my flashlight?

    Most likely not. Vacuum cleaners are designed to remove dirt and debris but are ineffective at cleaning delicate items like flashlights. Even if you use the highest setting on your vacuum cleaner, your flashlight will likely become damaged. Instead of using a vacuum cleaner, try using a cloth or paper towel to clean your flashlight.

    How do I clean my flashlight using just water?

    Cleaning your flashlight with water is a great way to keep it shining brightly and be sure it’s bacteria-free. All you need to do is fill a pot or basin with cold water and place the flashlight inside. Soak for at least 5 minutes, take the light out, and rinse any excess water thoroughly. Finally, dry it off using a cloth or paper towel.

    Is it safe to use bleach or harsh chemicals to clean my flashlight?

    When cleaning your flashlight, use a diluted solution of soap and water. Do not use bleach or harsh chemicals, as these can damage the light housing and lens. Always store your flashlight safely when not in use to avoid accidents.

    What are some of the best methods for cleaning a flashlight using oil or gel?

    There are various ways to clean a flashlight using oil or gel, but the best method depends on the type and configuration of your flashlight.

    You can use oils to remove dirt, dust, and fingerprints, while gels effectively remove grease and scuff marks. Both oils and gels require some time to work their magic, so it is essential to wait until the area is completely dry before putting your flashlight back together. Furthermore, ensure not to use harsh chemicals or abrasive cleaners when cleaning your flashlight – this could damage its finish.

    What is the best way to dry my flashlight after cleaning it?

    While there are many different ways to dry your flashlight, one of the simplest and most efficient is to use a paper towel. Place the flashlight on top of the paper towel and allow it to air-dry. This method is most effective if you cannot access fans or an electronic air cleaner.

    Do any special tools or supplies need to be purchased to clean a flashlight effectively?

    While most flashlights can be cleaned with a basic household cleaner, some models may require the purchase of specific tools or supplies. For example, sure lithium-ion batteries should not be boiled and must be soaked in water for several hours to dissolve the battery casing. You might also need to purchase an optic lens cloth if your flashlight uses one.

    Final Words

    Cleaning a flashlight is an important task that can help keep your flashlight operational for longer. Following the seven simple steps above, you can clean your flashlight effectively and safely. Make sure to store your flashlight correctly and take safety precautions when cleaning it. Finally, please take out the leaking battery and remove the battery acid before putting it back in the flashlight.

  • Most Important Things You Should Know Before Holding Gun and Flashlight

    Most Important Things You Should Know Before Holding Gun and Flashlight

    While mounting your flashlight on your pistol may provide an extra layer of safety, I would not recommend it for a few reasons. First and foremost, this can be dangerous if the light falls off or becomes dislodged during use.

    Secondarily, if you were to shoot your gun while the flashlight was mounted, it could potentially cause damage to both the firearm and the flashlight. And finally, Tiffany & Co.’s Flashlight Safety Tips state, “A brightly visible light lets people know where you are at all times-even in low-light conditions.” Keeping your flashlight, either handheld or embedded within a pocket or holster, will always remain highly visible and less likely to put you in danger.

    ImageProductDetailPrice
    Carson MicroBrite Plus 60x-120x LED Lighted Pocket Microscope

    Carson MicroBrite Plus 60x-120x LED Lighted Pocket Microscope

    • High Magnification – With a versatile magnification range
    • Compact and lightweight
    See on Amazon
    Elikliv LCD Digital Coin Microscope

    Elikliv LCD Digital Coin Microscope

    • Powerful 1000x Magnification
    • Suitable for circuit board inspection
    See on Amazon
    AmScope M150 Series Portable Compound Microscope

    AmScope M150 Series Portable Compound Microscope

    • Features all-metal framework and a 360 rotatable monocular head, ensuring reliable performance
    See on Amazon
    PalliPartners Compound Microscope for Adults & Kids

    PalliPartners Compound Microscope for Adults & Kids

    • High-Power Biological Microscope for Students
    See on Amazon
    Skybasic 50X-1000X Magnification WiFi Portable Handheld Microscopes

    Skybasic 50X-1000X Magnification WiFi Portable Handheld Microscopes

    • Lightweight and small size are convenient for taking them with you everywhere
    See on Amazon

    Which flashlight technique is most commonly used?

    While many flashlight techniques are available, the Harris Technique is perhaps the most commonly used. It was developed in 1958 by Dr. Kenneth S. Harris and has been adopted by law enforcement agencies worldwide for its effectiveness in apprehending criminals. In short, it involves using a circular motion to sweep an area with light while maintaining close contact with your subject.

    Recommended Flashlights for Different Situations

    SituationRecommended Flashlight
    Home DefenseSureFire X300 Ultra LED Weapon Light
    Everyday CarryOlight S2R Baton II Rechargeable Flashlight
    Outdoor ActivitiesFenix LD22 Flashlight
    Tactical/Self-DefenseStreamlight ProTac HL-X Tactical Flashlight

    Harris Technique

    Harris Technique is a simple and effective way to use a gun and flashlight to defend yourself. It is named after Colonel John Lamb Harries, who developed it in the early 1800s.

    The first step is to find a comfortable position to hold the gun. You can control it in your hands or holster it on your waist, but make sure it’s stable and doesn’t move around. Next, please take out your flashlight and aim it toward the person you’re trying to defend yourself against. Now, pull the trigger of the gun while still holding the flashlight in your hand. This will temporarily blind your attacker and give you enough time to run away or fight back!

    Table 1: Pros and Cons of Harries Technique

    ProsCons
    Stable platform for gun and lightRequires practice for muscle memory
    Effective target illuminationLimited movement flexibility
    Allows for simultaneous useMay not be suitable for all hand sizes

    Chapman and Ayoob Techniques

    The Chapman technique is the most basic and involves holding the gun in your dominant hand and the flashlight in your non-dominant hand. This allows you to keep your hands free, which is especially helpful when you focus on shooting or moving the flashlight. 

    The Ayoob technique is similar to the Chapman technique but emphasizes securing the gun so it doesn’t move around. It also involves wrapping your arm around the gun barrel so it’s tightly secured. Finally, it would help if you gripped the flashlight with both hands so it won’t move either. 

    Whichever one is easiest for you to do will work just fine!

    Rogers Technique

    A Rogers hold is a safe and effective way to hold a gun and flashlight. It’s also known as the “turtle hold” because it resembles the posture of a turtle laying its head on its shell.

    The Rogers Technique involves gripping the gun firmly in your dominant hand while keeping your non-dominant hand close to the flashlight so you don’t have to reach too far. Then, you can use your dominant hand to fire the gun if necessary.

    To perform the Rogers Technique, place your gun into your dominant hand so the barrel is pointed down at your feet. Point the light towards the ground so that its beam covers as much area as possible. Now slowly lift your gun until it’s pointing towards your target. Keep both hands close to the weapon at all times, and keep them away from the trigger!

    8 Steps to Hold a Gun and Flashlight Properly

    To effectively hold a gun and flashlight, it is essential to maintain a good grip. To do this, place the gun in your dominant hand so that your finger rests on the trigger while your Index finger and thumb are positioned next to each other close to the weapon’s muzzle. Your middle fingers should be curled around the barrel of the firearm.

    Finally, keep your arm straight by keeping your shoulder relaxed and putting weight into your Non-dominant Hand towards the opposite palm, which will help steady you against recoil if needed. When it comes to self-defense, arming yourself with the right tools is essential. Here are eight steps that you can take to hold a gun and flashlight properly:

    1) Stand tall with your feet shoulder-width apart, toes pointed forward, and arms at your side. Keep your back straight and shoulders down.

    2) Grip: Grasp the gun comfortably with both hands while keeping an eye on the target. Place the barrel of the gun in line with your eyes so that you have a clear sight picture before firing. If necessary, adjust your aim by moving either hand up or down to align the front of the chamber (where bullets go) with where you want them to hit when fired.

    3) Aim: Hold firm on focus while carefully squeezing off one round at a time as needed – never fire more than one shot per trigger pull! Always use bright lights when shooting in low light conditions or indoors instead of aiming directly at them for better visual clarity.– dimmer switches work too 

    4) Recoil Control: Don’t recoil excessively; keep everything under control, so there’s no accidental discharge.

    5) Aiming Techniques: While shooting, aim carefully by using a “peekaboo” or “stalker” technique. This involves holding the gun horizontally across your body with the barrel pointed down at waist level and looking through the sight hole until you see your target. Then raise the gun to eye level, center it in your sights, and fire.– alternatively

    6) Reloading: Reloading is crucial for any self-defense situation; practice reloading quickly and efficiently to fight effectively if interrupted.

    7) Trigger Control: Keep fingers off triggers until ready to fire. Let your finger do the work, not your muscle! Please confirm your battery support while performing.

    8) Social Media and Gun Safety: Don’t post pictures or videos of yourself with guns until you have real-world defensive experience. Always keep firearms unloaded and away from children. Remember, practice makes perfect!

    The Dynamic Duo: Integrating Gun and Flashlight

    A. The importance of simultaneous use

    Simultaneously using a gun and flashlight is crucial for personal safety, especially in low-light conditions. This practice enhances target identification and allows you to maintain situational awareness, a key factor in self-defense scenarios.

    B. Training for coordination

    Achieving proficiency in coordinating gun and flashlight use requires consistent training. Muscle memory plays a significant role, and regular drills focused on simultaneous handling will help develop the necessary coordination skills. Practice scenarios that simulate real-life situations to enhance decision-making under pressure.

    C. Scenario-based training

    Simulating real-world scenarios is an integral part of mastering the integration of a gun and flashlight. This type of training allows you to apply your skills in a controlled environment, preparing you for potential threats. It helps build confidence and ensures that you can react effectively in high-stress situations.

    Tips and Best Practices

    A. Importance of regular practice

    Consistency in training is key to maintaining proficiency. Regular practice ensures that your skills remain sharp, reducing the likelihood of fumbling in critical moments. Set aside dedicated time for drills and exercises to reinforce your muscle memory and improve overall performance.

    B. Equipment considerations

    Choosing the right equipment is essential for effective gun and flashlight handling. Select a firearm and flashlight combination that suits your needs and preferences. Regularly check and maintain your tools to ensure they function optimally when you need them the most.

    C. Mental preparedness

    In addition to physical skills, mental preparedness is crucial. Develop a mindset focused on personal safety and responsibility. Understand the legal and ethical aspects of using force, ensuring that your actions align with the law and uphold ethical standards.

    Why don’t you hold a gun sideways while using a flashlight?

    A gun’s grip provides stability while firing, while a flashlight can wiggle during recoil and affect accuracy.

    Hold the gun with your non-dominant hand close to the barrel, positioning your support hand behind the forearm near the upper end of the receiver. You can keep the gun stable by using your dominant hand to support the barrel.

    1. It can cause your hand and arm to fatigue quickly from the different motions involved, which could lead to injuries.

    2. It may not be as accurate when trying to shoot targets or defend yourself against an attacker because it’s challenging to keep your gun still while using a flashlight in this configuration.

    3. The light cast by the flashlight will also throw shadows on nearby objects, making it harder for you to see what is coming up behind you or shooting at you from a distance.

    4. If your firearm malfunctions while holding it sideways, the recoil could cause the weapon(s) to go off unintentionally and injure someone nearby (or even worse).

    Why do people put flashlights on guns?

    There are many reasons why people might put a flashlight on their gun, but the most common cause is to increase visibility when shooting. When using your firearm in low-light conditions, having a beam of light from the front of your weapon can make it easier to see and aim. If an intruder in your home or office has pulled out a gun, shining a bright light into his eyes may lower his guard long enough for you to respond with deadly force.

    Is there a correct way to hold a flashlight?

    Correct way to hold a flashlight

    Some standard techniques can help you to grip the device securely. One famous hold is called “hammer and nail,” which involves holding the light close to your chest with both hands, Hammer-style as you would use for pounding nails. This position allows you to aim the light where you want it without constantly adjusting your hand position.

    Another good technique is “the V.” In this position, your thumb and index finger are on top of each other near the middle of the light while your remaining three fingers form a triangle around it. This positioning simulates how humans naturally scan their environment with their eyes closed. Finally, two hands placed at arm’s length can also effectively grip a flashlight properly.

  • How to Change Batteries in a Coast Flashlight: A Complete Guide to Follow

    If you’re out and about during the night and need a light to help you see where you’re going, a Coast flashlight is a great option. But if you need to change the batteries more than once every few months, it might be time to consider an alternative light. This article will show you how to change batteries in a Coast flashlight using the simplest and most effective methods. So, whether you’re a beginner or an experienced flashlight user, read on to learn how to change batteries in a Coast flashlight!

    ImageProductDetailPrice
    Carson MicroBrite Plus 60x-120x LED Lighted Pocket Microscope

    Carson MicroBrite Plus 60x-120x LED Lighted Pocket Microscope

    • High Magnification – With a versatile magnification range
    • Compact and lightweight
    See on Amazon
    Elikliv LCD Digital Coin Microscope

    Elikliv LCD Digital Coin Microscope

    • Powerful 1000x Magnification
    • Suitable for circuit board inspection
    See on Amazon
    AmScope M150 Series Portable Compound Microscope

    AmScope M150 Series Portable Compound Microscope

    • Features all-metal framework and a 360 rotatable monocular head, ensuring reliable performance
    See on Amazon
    PalliPartners Compound Microscope for Adults & Kids

    PalliPartners Compound Microscope for Adults & Kids

    • High-Power Biological Microscope for Students
    See on Amazon
    Skybasic 50X-1000X Magnification WiFi Portable Handheld Microscopes

    Skybasic 50X-1000X Magnification WiFi Portable Handheld Microscopes

    • Lightweight and small size are convenient for taking them with you everywhere
    See on Amazon

    Battery Types for Coast Flashlights

    Battery TypeAdvantagesDisadvantages
    AlkalineReadily available, cost-effectiveShorter lifespan, prone to leakage
    LithiumLonger lifespan, lightweightMore expensive, limited availability
    RechargeableEnvironmentally friendly, cost-effectiveRequire charging infrastructure

    Understanding these differences will help you decide when selecting batteries for your Coast Flashlight.

    Signs Your Flashlight Batteries Need Replacement

    Even the most reliable batteries wear out over time. Recognizing the signs that your flashlight batteries need replacement is essential to prevent unexpected outages. Diminished brightness, flickering, or intermittent functionality are clear indicators. Additionally, inspect the battery compartment for corrosion, a common issue that can hinder proper battery connection.

    Corrosion occurs when batteries are left inside the flashlight for extended periods, especially in humid conditions. If you notice corrosion, it’s crucial to address it promptly to prevent damage to the flashlight. In the next section, we’ll cover the step-by-step process of changing batteries.

    5 Tips to put batteries in a Coast Flashlight

    Here are five tips to help you change batteries in a Coast Flashlight:

    1. Make sure the flashlight is completely turned off before you start.

    2. Open the battery cover by gently pushing down on one end and then pulling up. 

    3. Touch the positive (+) terminal to the positive (+) electrode and touch the negative (-) terminal to the negative (-) electrode. 

    4. Replace the cover and make sure it is securely closed before turning on your flashlight again. 

    5. Repeat these steps for any additional batteries that you need to replace

    Which is the best way to change batteries in a Coast flashlight?

    The best way to change batteries in a Coast flashlight will vary depending on the model and the type of battery it uses. However, some tips that may be useful include: 

    Remove the battery cover by unscrewing it from the flashlight body. 

    Loosen any screws or bolts holding the battery with a Phillips head screwdriver. 

    Lift the old battery and insert the new one. 

    Replace all screws and bolts, and put the battery cover back on.

    Turn the flashlight on and test to make sure it works properly.

    Troubleshooting Common Battery Issues

    Batteries are the lifeblood of your Coast Flashlight, but like any power source, they can encounter issues over time. Troubleshooting common battery problems is essential for ensuring your flashlight operates at its best when you need it most.

    A. Addressing issues like battery leakage

    Battery leakage is a relatively common problem, especially with older or expired batteries. If you notice leakage, taking immediate action is crucial to prevent further damage. Follow these steps:

    Table 2: Troubleshooting Battery Leakage

    IssueAction
    Identify the leakageLook for signs of corrosion or a white, powdery substance around the batteries.
    Remove the batteriesUsing non-conductive tools, carefully remove the leaked batteries, taking care not to touch the corrosive material.
    Clean the compartmentWipe the compartment with a mixture of vinegar and baking soda to neutralize the acidity.
    Inspect for damageCheck for any damage to the flashlight’s internal components. If extensive, seek professional repair.

    Addressing battery leakage promptly can prevent permanent damage to your flashlight and extend its lifespan.

    B. Dealing with battery compartment corrosion

    Preventing corrosion is key to maintaining your flashlight’s functionality. Here are steps to address battery compartment corrosion:

    Table 3: Preventive Measures for Battery Compartment Corrosion

    Preventive MeasureAction
    Remove batteries when not in useIf you anticipate not using the flashlight for an extended period, take out the batteries to prevent corrosion.
    Store in a dry placeKeep the flashlight in a dry environment to minimize the chances of moisture causing corrosion.

    Regularly implementing these preventive measures will significantly reduce the likelihood of encountering battery compartment corrosion issues.

    By understanding how to address these common battery problems, you can maximize the lifespan of your Coast Flashlight and ensure it remains a reliable source of illumination. Regular checks and timely interventions will keep your flashlight in optimal condition, ready to light up any situation.

    Is it difficult to change the battery in my coast flashlight?

    Not at all! Coast flashlight batteries are easy to change and can typically be done within a few minutes.

    First, locate the three screws that hold the battery cover in place (two on the front of the light and one on the back). Loosen these screws and then remove the cover.

    Next, please take out your old battery by gently pulling it out from its housing.

    Make sure to dispose of it properly according to local laws.

    Insert your new battery by reversing these steps: first, slide it into its housing until it clicks into place;

    Next, tighten down both screws using a coin or screwdriver.

    Finally, replace the cover and ensure that you snap it into place correctly before turning your coast flashlight on again!

    What are the consequences of not changing the battery in my coast flashlight?

    There are many consequences of not changing the battery in your coast flashlight, some of which can be quite serious.

    For example, if you do not change the battery regularly, the light may become dimmer and less effective.

    This can lead to safety issues as you will no longer be able to see what is ahead of you at night.

    Additionally, if the light fails due to a lack of power, it will be difficult for someone else to find you in case emergency personnel needs help.

    A Coast flashlight is intended for regular use and should always have a fresh battery installed to remain operational throughout its lifespan.

    Following these simple guidelines can prevent unnecessary hassle and potential danger.

    How often should I replace the battery in my coast flashlight?

    Coast flashlight owners should replace the battery every six months to ensure they have a fully charged device when needed. This is because batteries lose their power over time and may not be able to provide enough light when needed. Also, dead batteries can create potential safety hazards due to the fire risk.

    What is the voltage of a Coast flashlight battery?

    A Coast flashlight battery is typically rated at 3.6 volts and should be used with a Coast flashlight designed to operate off of this voltage.

    What is the capacity of a Coast flashlight battery?

    A Coast flashlight battery has a 3.6-volt lithium ion nominal capacity and can produce 2.1-watt hours of light per hour when fully charged (700 lumens).

    What are the common causes of batteries not holding a charge?

    Not use the coast flashlight as often as you should

    Batteries that have been stored incorrectly or at an improper temperature

    Old or corroded batteries

    Damaged or corroded connectors

    Damaged or corroded battery cases

    What should I do if the flashlight won’t turn on at all?

    If the flashlight doesn’t turn on at all, there are a few possible causes. One possibility is that the battery is flat. If this is the case, you’ll need to change the batteries. Another possibility is that there’s something wrong with the light bulb. In this case, you’ll need to take it into a workshop and have it replaced.

    Can I discharge the battery too much if I change it?

    Yes, it’s possible to discharge the battery too much if you change it. This may cause the new battery not to work as well and could even lead to a fire. To avoid this, make sure that you disconnect all of the cables before changing the battery. Also, keep an eye on how long the old battery lasts before replacing it with a new one.

    Is it dangerous to touch or discharge batteries too often?

    There is no real danger to touching or discharging batteries too often, but it’s always best practice to follow the manufacturer’s instructions. This way, you are sure that the battery will be in optimum condition and won’t go off accidentally. By following these guidelines, you can avoid potential safety issues.

    Final Words

    There are many ways to open a flashlight, which are all quite intuitive. But, if you have never done it before, the way we described it may be confusing at first. The secret is that there is nothing complicated about getting batteries inside that excellent light! Just follow the steps from above, and your Coast will always be ready for action.

    Changing batteries in a flashlight is not complicated. So, when it comes to procedure and safety tips, you should understand that these depend on the model of the flashlight. Some flashlights will have screws or covers over the battery compartment, whereas others may rotate open. Once you know how to access your new batteries properly, it is time for adventure!

    In our next blog post, we want to hear from all of our readers who have successfully changed their flashlight batteries! Share your experience by leaving a comment below and telling us what worked for you and what didn’t!