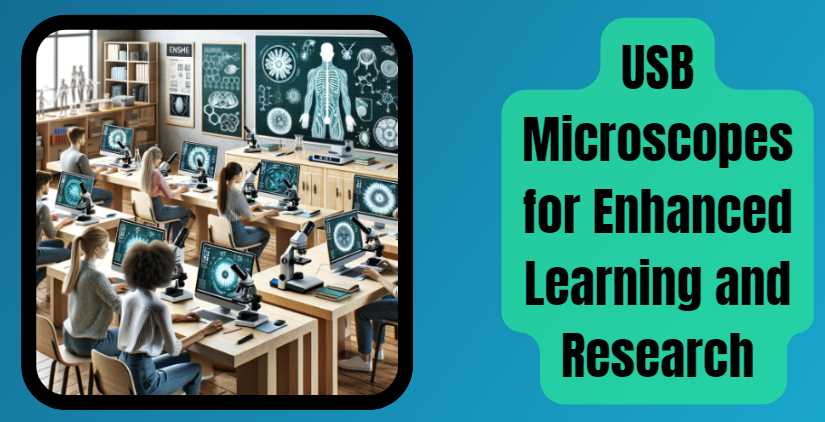
Author: Mohammad

  • What Part of a Microscope Helps Adjust the Brightness?

    What Part of a Microscope Helps Adjust the Brightness?

    The diaphragm or illuminator control of a microscope is used to adjust the brightness of the light illuminating the specimen.

    Microscopes require proper lighting to clearly view specimens. The diaphragm, often located beneath the stage, regulates the amount of light passing through the slide by adjusting its aperture size. Meanwhile, the illuminator control, typically an electronic dial or switch, directly adjusts the intensity of the light source. Together, these components help create the optimal lighting conditions needed for clear and detailed observations.

    Proper brightness adjustment is critical; too much light can wash out the image, while too little can obscure fine details.

    ParameterEffect on Image QualityOptimal Adjustment Method
    Illuminator Intensity (Lux)Too high: Washed out detailsUse the illuminator control to reduce brightness.
    Diaphragm Aperture (mm)Too large: Excessive lightGradually narrow the aperture for clarity.
    Brightness Setting (%)Ideal range: 40–70% for most samplesAdjust to balance contrast and visibility.
    Image Contrast (%)Poor with incorrect brightnessOptimize using both diaphragm and light intensity.
    Specimen TypeOpaque: Requires higher brightnessTransparent: Lower brightness for better contrast.
    What Part of a Microscope Helps Adjust the Brightness

    Brightness control is vital in microscopy as it ensures that the sample is neither underexposed nor overexposed. Proper illumination enhances image clarity and detail, making the observation process more efficient. Without adequate brightness adjustment, the sample may appear too dark or washed out, hindering the identification of important features.

    Parts of a Microscope That Help Adjust Brightness

    Microscopes are invaluable tools in scientific research, medicine, and education. Proper illumination is one of the most critical factors for effective microscopic observation. Brightness adjustments allow the user to illuminate specimens adequately, ensuring the best clarity and detail. Several components in a microscope work together to manage and adjust brightness. Below, we will explore these components in detail and their specific roles in brightness control.

    1. Light Source

    The light source is the primary provider of illumination in most modern microscopes. Typically, it consists of an LED or halogen bulb located beneath the microscope stage. These light sources are chosen for their brightness, energy efficiency, and durability.

    How the Light Source Works

    The light source emits light that passes upward through the condenser and onto the specimen. Modern microscopes often include an adjustable light source, allowing users to control the intensity of the light for optimal viewing. This adjustability is particularly useful when switching between different magnifications or specimen types, as each may require varying levels of brightness.

    Common Adjustments

    • Intensity Control: The light source is equipped with a rheostat or slider that modifies the brightness.
    • Angle Adjustments: In some advanced microscopes, the angle of the light source can be altered to provide oblique illumination, enhancing certain specimen details.

    Advantages of Modern Light Sources

    • LED Bulbs: These bulbs produce consistent, cool light, reducing the risk of heat damage to delicate specimens.
    • Halogen Bulbs: Known for their brightness and wide spectrum, they provide more natural illumination.

    2. Rheostat (Light Intensity Control Knob)

    The rheostat is an integral component of brightness adjustment. It is typically found near the base of the microscope and functions as a control dial or slider. The primary role of the rheostat is to regulate the intensity of the light source.

    How the Rheostat Adjusts Brightness

    By turning the rheostat, users can increase or decrease the voltage supplied to the light source, which directly affects its brightness. For example:

    • Turning the knob clockwise increases brightness.
    • Turning it counterclockwise decreases brightness.

    This control is essential for achieving the right illumination for different magnifications. Lower magnifications often require less light, while higher magnifications benefit from greater brightness.

    Why the Rheostat is Critical

    • Precision: Allows fine-tuning of brightness to avoid underexposure or overexposure.
    • Versatility: Adapts the microscope to different specimen types and viewing conditions.

    3. Condenser

    The condenser is positioned beneath the stage and above the light source. Its primary function is to focus the light beam onto the specimen. This focusing process ensures that the light is concentrated on the sample, enhancing brightness and clarity.

    Adjusting the Condenser

    The condenser is adjustable in height, which affects how the light is distributed across the specimen:

    • Lowering the Condenser: Spreads light more broadly, reducing brightness.
    • Raising the Condenser: Focuses the light more tightly, increasing brightness.

    Condenser Components

    The condenser often includes an internal lens system that directs light toward the specimen with precision. Additionally, it works in conjunction with the diaphragm to refine brightness and contrast.

    Applications of the Condenser

    • Brightfield Microscopy: A properly adjusted condenser is essential for even illumination.
    • Special Techniques: Advanced condensers can support methods like phase-contrast or darkfield microscopy.

    4. Diaphragm (Iris or Disc)

    The diaphragm is a critical component for managing the amount of light that passes through the specimen. Located as part of the condenser assembly, it works by adjusting the aperture size.

    Types of Diaphragms

    1. Iris Diaphragm: Consists of overlapping metal blades that form a circular aperture. It provides smooth and precise control over the aperture size.
    2. Disc Diaphragm: A rotating disc with multiple holes of different sizes that can be selected to adjust the aperture.

    How the Diaphragm Affects Brightness

    • Smaller Aperture: Reduces brightness but increases contrast, useful for detailed observations.
    • Larger Aperture: Increases brightness but reduces contrast, ideal for viewing larger or less detailed specimens.

    Tips for Using the Diaphragm

    • Start with a smaller aperture to observe finer details.
    • Gradually open the diaphragm to balance brightness and contrast as needed.

    5. Mirror (in Older Microscopes)

    Before the advent of built-in light sources, microscopes relied on mirrors to reflect external light toward the specimen. Though less common today, mirrors are still found in some basic or non-electric microscopes, particularly in educational settings or regions without reliable electricity.

    How the Mirror Works

    The mirror, usually a flat or concave surface, captures light from an external source (like a lamp or sunlight) and reflects it into the condenser. The angle of the mirror determines the direction and concentration of light.

    Adjusting the Mirror

    • Flat Side: Produces even illumination, suitable for most specimens.
    • Concave Side: Concentrates light for brighter illumination, useful for high-magnification observations.

    Advantages of Mirrors

    • Simplicity: Requires no power source, making it ideal for portable or field microscopes.
    • Durability: Less prone to malfunction compared to electrical components.

    Parts of a Microscope and Their Role in Brightness Adjustment

    ComponentFunction in Brightness AdjustmentAdditional Notes
    Light SourceProvides primary illumination.Typically an LED or halogen bulb.
    RheostatControls light intensity.Found near the base of the microscope.
    CondenserFocuses light onto the specimen.Adjusts concentration and focus of light.
    DiaphragmRegulates the amount of light passing through the sample.Impacts both brightness and contrast.
    MirrorReflects external light into the condenser.Found in older or non-electric microscopes.

    How These Components Work Together

    Achieving optimal brightness in a microscope involves coordination between several components. Each part has a unique role, but their combined adjustments ensure the specimen is adequately illuminated for detailed observation. Understanding how these components work together simplifies the process of brightness control. Below is an explanation of their interplay and a recommended sequence for adjustments.

    Coordination of Components

    1. Rheostat and Light Source
      • The rheostat manages the intensity of the light source by controlling the electrical supply to the bulb.
      • Adjusting the rheostat ensures the base illumination is appropriate for the sample and magnification level.
    2. Condenser and Diaphragm
      • The condenser focuses the light beam onto the specimen, determining the evenness and concentration of illumination.
      • The diaphragm fine-tunes the light by regulating the aperture size, balancing brightness and contrast.
    3. Overall Adjustment
      • These components interact dynamically; increasing light intensity with the rheostat may require adjustments to the condenser or diaphragm to avoid overexposure.
      • Conversely, changes to the diaphragm’s aperture size may necessitate altering the condenser’s position to maintain uniform illumination.

    Recommended Sequence for Adjustments

    Proper brightness adjustment is achieved by following a systematic sequence. This ensures that all components work in harmony:

    1. Turn on the Light Source
      • Activate the microscope’s light source and set it to a moderate intensity using the rheostat.
      • Avoid starting with maximum brightness to prevent glare or specimen damage.
    2. Adjust the Rheostat
      • Gradually increase or decrease the light intensity based on the specimen’s requirements and magnification level.
    3. Position the Condenser
      • Raise or lower the condenser to concentrate the light beam on the specimen. This step enhances clarity and minimizes uneven illumination.
    4. Fine-Tune the Diaphragm
      • Adjust the diaphragm’s aperture size to balance the light intensity with contrast.
      • Start with a smaller aperture for better contrast and expand as needed for increased brightness.
    5. Recheck and Refine
      • Revisit the rheostat, condenser, and diaphragm settings to ensure uniform and optimal illumination across the field of view.

    5 Tips for Proper Brightness Adjustment

    Achieving the right brightness in microscopy is essential for clear and accurate observations. Below are practical tips to help users effectively adjust brightness while avoiding common pitfalls:

    Start with Low Intensity

    • Why: Starting with the light source at its lowest intensity prevents overexposure and allows for gradual adjustments.
    • How: Turn on the light source and slowly increase the intensity using the rheostat until the specimen becomes visible without glare.

    Use the Diaphragm Effectively

    • Why: The diaphragm is key to balancing brightness and contrast. Proper adjustments enhance image quality without compromising detail.
    • How:
      • For high contrast, reduce the diaphragm aperture.
      • For brighter illumination, open the diaphragm slightly, ensuring that light does not wash out fine details.

    Consider the Magnification Level

    • Why: Higher magnifications require more light as the field of view becomes smaller and the specimen’s details are magnified.
    • How:
      • Increase the light intensity with the rheostat at higher magnifications.
      • Adjust the condenser to ensure the focused light beam matches the smaller field size.

    Avoid Glare

    • Why: Excessive brightness can cause discomfort and reduce the visibility of specimen details.
    • How:
      • Adjust the rheostat, condenser, and diaphragm in tandem to maintain balanced lighting.
      • Recheck for uniform illumination across the field of view.

    Common Issues with Brightness Adjustment and Solutions

    While adjusting brightness in microscopy, users may encounter common problems that hinder clear observation. Below are typical issues, their causes, and practical solutions to address them:

    Problem: Image Appears Too Dark

    • Cause:
      • Light intensity is set too low.
      • The diaphragm aperture is too small, restricting the amount of light passing through.
    • Solution:
      • Gradually increase the rheostat setting to boost light intensity.
      • Open the diaphragm slightly to allow more light through, ensuring the specimen remains adequately illuminated.

    Problem: Image Is Too Bright

    • Cause:
      • The light source intensity is excessively high.
      • The diaphragm is overly open, letting in too much light.
    • Solution:
      • Lower the rheostat setting to reduce light intensity.
      • Close the diaphragm slightly to balance brightness and avoid overexposure.

    Problem: Uneven Illumination

    • Cause:
      • The condenser is misaligned or not correctly positioned under the stage.
      • The light source is improperly positioned, leading to uneven light distribution.
    • Solution:
      • Adjust the condenser position to center the light beam on the specimen.
      • Verify that the light source is aligned with the condenser for uniform illumination.

    Problem: Glare on the Image

    • Cause:
      • Excessively intense light causes glare, obscuring specimen details.
      • The diaphragm setting is not optimized for contrast.
    • Solution:
      • Reduce the light intensity using the rheostat to eliminate excessive brightness.
      • Adjust the diaphragm aperture to improve contrast and minimize glare.

    How Does the Illuminator Work in a Microscope?

    The illuminator works by providing a steady light that illuminates the sample on the stage. In most microscopes, the light is directed through a lens called the condenser to focus the light onto the specimen. Some microscopes allow you to adjust the intensity of the light to enhance visibility, making it easier to see different features of the sample.

    Can the Brightness Be Adjusted on All Microscopes?

    Most modern microscopes come with a way to adjust the brightness, but the method may vary. Some have a rheostat dial that controls the intensity of the light. Others may have a knob to adjust the amount of light that enters the condenser or an external light source that can be dimmed or brightened as needed. Not all older microscopes offer the same level of brightness control.

    What Is the Difference Between Adjusting the Illuminator and the Condenser?

    The illuminator controls the overall light intensity, while the condenser focuses and directs the light onto the specimen. Adjusting the illuminator affects how much light is emitted, while adjusting the condenser optimizes the way light is focused on the sample, affecting the clarity and contrast of the image.

    What Should You Do if the Brightness Isn’t Working?

    If the brightness on your microscope isn’t working, first check the light source to ensure it’s functioning properly. If the light bulb is burnt out or the power is off, the brightness may not adjust. Next, check if the rheostat or light control dial is set correctly. If these steps don’t resolve the issue, inspect the condenser to make sure it’s properly aligned, as an improper setup could affect how the light is focused.

    Can Poor Brightness Affect Viewing Quality?

    Yes, poor brightness can significantly affect your ability to see the specimen clearly. If the light is too dim, it can be difficult to make out fine details or differentiate features of the sample. On the other hand, too much brightness can cause glare, making it harder to focus. Proper brightness adjustment ensures that you can observe the specimen in optimal conditions.

    Is There a Way to Increase the Brightness for High Magnification?

    At high magnifications, more light is needed to clearly view the sample. In this case, the aperture diaphragm and condenser should be adjusted to allow more light through. Increasing the light intensity through the illuminator can also help. However, it’s important to ensure that the light is evenly distributed to avoid overexposure, which could cause the image to wash out.

    Why Is It Important to Adjust the Brightness Correctly?

    Adjusting the brightness correctly is important because it allows for clearer, more accurate observations of the specimen. Proper lighting helps bring out the details of the sample, reducing eye strain and improving the quality of the work. Too little or too much light can distort the image, making it difficult to analyze or observe specific features.

    What If the Microscope Doesn’t Have an Adjustable Brightness Feature?

    If your microscope doesn’t have an adjustable brightness feature, you can try adjusting the light source itself. Some older models or basic microscopes might have a fixed light intensity, but adding an external light source or using a brighter bulb could help enhance visibility. Additionally, adjusting the condenser or using different objectives might help improve image quality without needing to change the light.

    Final Thoughts

    Brightness adjustment is a fundamental aspect of microscopy, directly impacting the quality and accuracy of observations. The ability to control light intensity ensures that the specimen is neither too bright nor too dim, allowing clear visibility of even the smallest details. Each component of the microscope, such as the illuminator, iris diaphragm, condenser, and light intensity control knob, plays a unique role in achieving optimal brightness. These elements work together to regulate and focus light, creating the perfect balance for effective viewing.

    Properly adjusting brightness not only enhances the clarity and contrast of the image but also reduces eye strain during prolonged use. This is especially important in fields like research, education, and medicine, where precision is critical. Regular practice and attention to technique help users fine-tune their skills in adjusting brightness, ensuring consistent results. Additionally, maintaining these components through cleaning and alignment contributes to the longevity of the microscope, preserving its functionality over time.

    By understanding and mastering brightness adjustment, users can maximize the potential of their microscope. This knowledge not only improves observation quality but also fosters confidence and proficiency in microscopy, making it an invaluable skill for both beginners and experienced users.

  • When Is My Image Blurry in My Microscope?

    When Is My Image Blurry in My Microscope?

    Your image in a microscope may appear blurry if the focus is off, the lens is dirty, the sample is not prepared correctly, or the magnification is too high for the specimen.
    FactorImpact on Image ClarityCommon Solutions
    Out of FocusMajorAdjust fine and coarse focus knobs
    Dirty LensesModerate to MajorUse lens wipes or air blower
    Sample PreparationModerateThin and evenly spread sample
    Magnification LevelMajorUse appropriate magnification for the sample size and clarity
    LightingModerate to MajorAdjust light source and condenser

    What Causes Blurry Images in a Microscope?

    Blurry images in a microscope can result from several factors, ranging from improper setup to technical limitations. Below are the most common causes:

    Poor Focusing Technique

    The most frequent reason for blurry images is incorrect focusing. When the microscope isn’t adjusted properly, the specimen cannot be brought into sharp focus.

    • Coarse Focus Misalignment: The coarse focus knob is intended for major adjustments to bring the specimen into approximate focus. Overusing it once close focus is achieved can distort the image, making it unclear.
    • Fine Focus Misuse: The fine focus knob refines the sharpness of the image. Skipping or underutilizing this critical adjustment step can leave the image subpar and less detailed.

    Dirty Lenses

    Accumulation of dust, smudges, or oil on the lenses is another common culprit. These contaminants obstruct light and scatter it, resulting in a blurry or unclear view. Regular cleaning with proper materials is crucial to preserve lens clarity.

    Improper Lighting

    Uneven or insufficient lighting is a significant factor in unclear microscopy images. Proper illumination ensures that the specimen is lit evenly, allowing for a clear and detailed view. Issues with lighting may include:

    • Misaligned Light Sources: A misaligned light source fails to properly illuminate the specimen, leading to uneven brightness and unclear regions.
    • Low-Intensity Illumination: Insufficient light intensity can reduce visibility and the sharpness of details in the image.
    • Incorrect Condenser Settings: A poorly adjusted condenser may fail to focus light onto the specimen effectively, resulting in reduced clarity and contrast.

    Specimen Issues

    The quality and preparation of the specimen significantly affect the clarity of the microscope image. If the slide is not prepared correctly, achieving a sharp focus can be difficult. Common issues include:

    • Uneven Thickness in the Sample: Variations in sample thickness prevent the entire specimen from being in focus at the same time.
    • Air Bubbles Trapped in Mounting Medium: Air bubbles distort light as it passes through, leading to blurry regions in the image.
    • Overly Thick Coverslip: A thick coverslip can cause refraction issues, making it harder to focus clearly on the specimen.

    Proper preparation of the slide, including careful placement of the coverslip and ensuring uniform sample thickness, is essential for clear imaging.

    Magnification Limits

    Using a microscope beyond its magnification capacity can lead to “empty magnification,” where the image appears larger but no additional detail is visible. This occurs because:

    • The resolving power of the objective lens is exceeded, causing details to become blurred instead of sharper.
    • Optical imperfections in the lens may be amplified, reducing image quality further.

    To avoid this, always use a magnification level appropriate for the lens being utilized. Match the magnification to the resolving power of your microscope for the best results.

    Misaligned Optical Path

    Blurry or distorted images can result from misalignment in the microscope’s optical system, which disrupts the path of light. This misalignment prevents light from focusing correctly on the specimen. Common causes include:

    • Loose Components: Parts such as lenses, eyepieces, or condensers that are not securely fixed can shift, causing misalignment.
    • Misaligned Mirrors or Prisms: Mirrors and prisms that direct light within the microscope can become misaligned, leading to uneven or distorted illumination.

    Regular checks and adjustments of optical components can help restore alignment and ensure a clear image.

    Mechanical Issues

    Over time, wear and tear in the microscope’s mechanical components can lead to blurry images. Precision is critical for maintaining focus and stability. Common issues include:

    • Loose Stage Clamps: If the stage clamps do not hold the slide securely, the specimen may shift during viewing, causing blurriness.
    • Unstable Focus Knobs: Worn or unstable focus knobs can make it challenging to achieve and maintain proper focus.

    Addressing these issues may require tightening screws, replacing worn parts, or seeking professional servicing to ensure your microscope operates smoothly.

    How to Fix a Blurry Microscope Image

    How to Fix a Blurry Image in a Microscope

    Now that the causes are clear, here are effective solutions to address each issue and restore clarity to your microscope images.

    Adjust the Focus Properly

    Proper focusing techniques are essential for clear images:

    • Begin with the coarse focus knob to bring the specimen roughly into view.
    • Fine-tune the image using the fine focus knob for sharp clarity.
    • Always adjust focus by moving the stage away from the objective lens to prevent damage to the slide and lens.

    Clean the Lenses

    Dirty lenses are a common reason for blurry images. Keep them clean with the following steps:

    • Use a lens cleaning solution and a microfiber cloth to gently clean the eyepiece, objective lenses, and condenser.
    • Avoid touching the lenses with your fingers, as skin oils can cause smudges.
    • Perform regular cleaning to maintain optimal clarity.

    Optimize Lighting

    Proper lighting ensures even illumination and sharp focus:

    • Verify that the light source is functioning and aligned correctly.
    • Adjust the condenser to focus light directly onto the specimen.
    • Use the diaphragm to control light intensity and improve contrast for better detail.

    Prepare the Slide Correctly

    Slide preparation significantly impacts image clarity:

    • Ensure the specimen is thin and evenly spread across the slide.
    • Avoid trapping air bubbles when placing the coverslip.
    • Use the appropriate coverslip thickness, typically 0.17 mm, for optimal performance.

    Match the Magnification

    Using the correct magnification helps avoid “empty magnification,” which reduces clarity:

    • Select the appropriate objective lens for the level of detail required.
    • Avoid over-magnifying, as higher magnification does not always mean better clarity. Stay within the limits of your microscope’s resolving power.

    Realign the Optical Path

    Misaligned optical components can distort the image. To fix this:

    • Inspect the lenses, mirrors, and prisms for misalignment.
    • Tighten any loose parts carefully to restore proper alignment.
    • Follow the microscope’s manual for alignment procedures to ensure precision.

    Address Mechanical Problems

    Regular maintenance of the mechanical components is crucial for consistent clarity:

    • Inspect parts like the stage clamps and focus knobs for wear or instability.
    • Tighten loose screws, knobs, or clamps to stabilize the microscope.
    • If issues persist, seek professional servicing to resolve mechanical defects.

    By following these steps, you can effectively fix blurry images and ensure your microscope performs at its best.

    4 Tips for Preventing Blurry Images

    How to Clean a Microscope

    Preventing blurry images starts with consistent care and correct usage. Follow these tips to keep your microscope functioning at its best:

    Regular Maintenance

    • Clean the lenses using appropriate solutions and microfiber cloths to prevent dust or smudges.
    • Periodically inspect and tighten mechanical parts such as focus knobs and stage clamps to ensure stability.

    Proper Storage

    • Store the microscope in a dust-free and dry environment when not in use to avoid damage from moisture or contaminants.
    • Use a protective cover to prevent debris accumulation on lenses and mechanical components.

    Calibration

    • Regularly calibrate the microscope to ensure proper alignment of optical components, such as the condenser and light source.
    • Follow the manufacturer’s guidelines for calibration to maintain accurate functionality.

    Training

    Familiarize yourself with the microscope’s parts and settings, including lighting adjustments and magnification limits, to optimize performance.

    Learn and practice proper focusing techniques to avoid over- or under-adjusting focus knobs.

    Common Scenarios for Blurry Images

    Essential Role of Microscopes in Electronics Repair

    Understanding when blurriness occurs can help identify the root cause. The table below summarizes some common scenarios and their likely causes.

    ScenarioLikely CauseSolution
    The image starts clear but gradually becomes blurrySlide shifts on the stageSecure the slide with stage clamps
    Blurriness at high magnificationPoor focus or empty magnificationUse the fine focus knob; reduce magnification
    Uneven brightness across the fieldMisaligned light source or condenserAdjust the light source and align the condenser
    Cannot focus on the entire specimenSpecimen too thick or improperly mountedPrepare a thinner sample and remount the slide
    Blurry spots in the fieldDust or smudges on lensesClean the lenses with a microfiber cloth

    Could Dirty Lenses Cause a Blurry Image?

    Yes, dirt, dust, or smudges on the lenses can cause blurriness. Use lens paper and a cleaning solution specifically designed for optical lenses to clean the eyepiece and objective lenses. Avoid using tissue or cloth, as these can scratch the lenses. Regular cleaning prevents debris from obstructing the view and maintains the microscope’s performance.

    What Role Does Magnification Play in Blurry Images?

    Using the wrong magnification can make an image appear blurry. If you magnify beyond the resolving power of the objective lens, the image will lose clarity. Start with a lower magnification to locate the sample, then gradually increase it while adjusting the focus to maintain sharpness. Remember that higher magnification requires precise focus and optimal lighting.

    How Can Poor Lighting Affect Image Quality?

    Inadequate or uneven lighting can make it challenging to see the specimen clearly. Ensure the microscope’s light source is functioning properly and adjust the diaphragm or condenser to control the amount of light. Too much light can cause glare, while too little light results in dim and blurry images. Balance the light for the best viewing experience.

    Does Improper Sample Preparation Cause Blurriness?

    Yes, a poorly prepared sample can lead to blurry images. Ensure the specimen is properly mounted, thinly sliced if necessary, and coverslipped to keep it flat. Air bubbles, uneven placement, or contamination on the slide can distort the view. Taking time to prepare the slide correctly improves image clarity significantly.

    Why Is My Microscope Still Blurry After Focusing?

    If the image remains blurry despite focusing, check for issues such as misaligned lenses, a loose stage, or a damaged focus knob. Test the microscope with a prepared slide known to produce clear images. If the problem persists, the microscope may need professional maintenance or repair.

    How Does Lens Alignment Affect Image Sharpness?

    Misaligned lenses can cause blurriness by disrupting the optical path. Ensure the objective lenses click securely into place when rotating the turret. Alignment issues are often resolved by checking the microscope’s mechanical adjustments and ensuring all parts are secure.

    Can a Wobbly Microscope Stage Create Blurriness?

    A wobbly or unstable stage can lead to difficulty focusing and blurry images. Tighten the stage and ensure it moves smoothly. When placing the slide, make sure it is secured with stage clips or a slide holder to prevent movement during observation.

    Is My Microscope’s Resolution Limiting the Image Quality?

    Yes, each microscope has a resolution limit based on its optical components. If your microscope’s resolution is insufficient for the level of detail you need, the image may appear blurry, especially at higher magnifications. Upgrading to a higher-resolution microscope may be necessary for advanced observations.

    How Can I Avoid Blurry Microscope Images in the Future?

    To avoid blurry images, regularly clean the lenses, prepare slides carefully, ensure proper lighting, and verify that all microscope components are in good working order. Familiarize yourself with the focus and magnification adjustments to optimize the viewing experience. Periodic maintenance of the microscope also ensures long-term clarity.

    Final Thoughts

    Achieving a sharp image with your microscope requires attention to detail and regular maintenance. By addressing the common causes of blurry images and adopting proper techniques, you can enhance your microscopy experience. Remember, clear imaging depends on the harmonious interplay of focus, lighting, and specimen preparation. A well-maintained and correctly used microscope will deliver precise and reliable results for your studies or work.

  • How to Fix a Blurry Image in a Microscope

    How to Fix a Blurry Image in a Microscope

    To fix a blurry image in a microscope, adjust the focus knobs (coarse and fine), ensure proper illumination, clean the lenses, and verify the correct positioning of the specimen on the stage. Additionally, use the appropriate objective lens for the desired magnification.

    Common Causes of Blurry Images in Microscopes

    CausePercentage of OccurrencesSolution
    Incorrect Focus Setting40%Adjust coarse and fine focus knobs
    Dirty Lenses25%Clean lenses with appropriate tools
    Poor Illumination20%Adjust light source and diaphragm
    Misaligned Specimen10%Center specimen on the stage
    Incorrect Magnification5%Use proper objective lens and re-focus

    Each of these issues requires a specific solution. Let’s explore these problems and their fixes in detail.

    How to Fix a Blurry Image in a Microscope

    Step 1: Check and Adjust the Focusing

    The focus mechanism is key to obtaining a sharp and clear image. If the image appears blurry, follow these steps:

    Start with the Coarse Focus Knob

    • Begin with the lowest magnification objective lens (e.g., 4x or 10x).
    • Turn the coarse focus knob slowly to bring the sample into approximate focus.
    • Stop adjusting as soon as the image becomes clearer, even if it’s not fully sharp.

    Fine-Tune with the Fine Focus Knob

    • After bringing the sample into view with the coarse knob, use the fine focus knob for precise adjustments.
    • Turn the knob gently until the image appears sharp and detailed.

    Switch to Higher Magnification

    • Once the sample is in focus at lower magnification, switch to a higher magnification objective lens (e.g., 40x or 100x).
    • Use only the fine focus knob for adjusting focus at higher magnifications to avoid losing sharpness.

    Step 2: Clean the Lenses

    Dirty lenses can significantly degrade the quality of your image. Here’s how to clean each type of lens:

    Lens TypeCleaning Method
    EyepieceRemove the eyepiece and clean with lens paper or a microfiber cloth. If needed, use a small amount of lens cleaner.
    Objective LensGently wipe with lens paper moistened with isopropyl alcohol. Avoid applying too much pressure to prevent scratches.
    Condenser LensClean in the same way as the objective lens, ensuring it is correctly aligned afterward.

    Important: Never use rough materials like tissue paper, as they can scratch lenses. Always handle all optical components with care.

    Step 3: Check the Alignment

    Misalignment of microscope parts can lead to blurry or distorted images. To ensure everything is correctly positioned:

    Inspect the Objective Lenses

    • Confirm that the objective lens is securely clicked into place. A misaligned lens can result in poor image quality.

    Check the Stage

    • Ensure the sample slide is flat and held firmly in place with stage clips. Reposition the slide if necessary to keep the sample within the viewing field.

    Align the Condenser

    • Check that the condenser lens is properly centered under the stage. Adjust it if needed using the condenser adjustment knobs.

    Step 4: Optimize Illumination

    Proper illumination is essential for clear imaging, as insufficient or uneven lighting can lead to a blurry image. Here are the steps to adjust the lighting:

    Adjust the Light Intensity

    • Use the light adjustment knob or dimmer to change the brightness of the light.
    • Ensure that the light source is uniformly illuminating the sample to avoid dark spots or uneven lighting.

    Set the Iris Diaphragm

    • Open or close the iris diaphragm to control the amount of light entering the lens.
    • Too much light can wash out details, while too little can make it hard to see finer structures.

    Check the Bulb or Light Source

    • Inspect the light bulb for any signs of malfunction, such as dimming or flickering.
    • If the bulb is not functioning properly, replace it to ensure consistent lighting, which is crucial for obtaining clear images.

    Step 5: Prepare the Sample Correctly

    Essential Role of Microscopes in Electronics Repair

    Improper sample preparation can distort the image. To ensure clarity, follow these tips:

    Use a Clean Slide and Coverslip

    • Make sure both the slide and coverslip are free from dust, smudges, or fingerprints.
    • If necessary, clean them with alcohol and a lint-free cloth to ensure there are no contaminants.

    Apply the Right Amount of Mounting Medium

    • Use an appropriate amount of mounting medium to preserve the sample.
    • Avoid applying too much or too little, as either can affect image quality by causing distortion.

    Secure the Coverslip Properly

    • Gently press the coverslip onto the slide to remove any air bubbles.
    • Air bubbles can refract light, leading to blurriness in the image.

    Step 6: Test and Adjust the Microscope

    If the previous steps don’t resolve the issue, perform a more detailed inspection of the microscope:

    Verify the Microscope Is Level

    • Place the microscope on a stable, flat surface to prevent tilting, which could interfere with the focus and alignment.

    Inspect for Mechanical Issues

    • Check for loose screws or damaged components in the focusing mechanism or stage.
    • Tighten or replace any parts as necessary. If parts are significantly worn, consider consulting a professional for servicing.

    Test with a Standard Slide

    • Use a prepared slide with known features to test the microscope’s focusing capabilities.
    • This will help you determine if the problem lies with the microscope itself or with the sample preparation.

    Troubleshooting Common Issues

    When you encounter issues with a blurry image under the microscope, it’s essential to identify the root cause before attempting any fixes. Below is a quick reference table that outlines some common problems, their possible causes, and solutions:

    IssuePossible CauseSolution
    Image won’t focusIncorrect magnificationStart with the lowest magnification (e.g., 4x or 10x), then adjust the focus.
    Persistent blurrinessDirty lensesClean all optical components (eyepiece, objective lenses, condenser) using appropriate cleaning materials.
    Uneven illuminationMisaligned light source or condenserCheck and adjust the position of the light source and condenser. Ensure the light is evenly distributed.
    Dark imageClosed iris diaphragmOpen the iris diaphragm slightly to allow more light to pass through, improving visibility.

    These solutions should resolve most common issues with blurry images. However, it’s important to perform each step methodically and check the alignment, focus, and cleanliness of your microscope. Regular maintenance and proper use of the microscope can prevent many of these issues from arising.

    Maintaining Your Microscope for Long-Term Clarity

    Regular maintenance prevents many issues. Follow these practices:

    1. Store Properly
      • Cover the microscope with a dust cover when not in use.
      • Store in a dry, stable environment to avoid humidity damage.
    2. Clean Regularly
      • Wipe down the body of the microscope with a soft, damp cloth.
      • Clean lenses periodically using appropriate materials.
    3. Check Mechanical Components
      • Inspect the focus knobs, stage, and other moving parts for wear or looseness.
      • Lubricate mechanical parts if they become stiff.

    When to Seek Professional Help

    If the image remains blurry despite your best efforts, it may indicate deeper problems, such as:

    • Internal lens damage
    • Faulty focus mechanisms
    • Misaligned internal components

    Contact a professional service technician to diagnose and repair the microscope. Attempting complex repairs without expertise can worsen the issue.

    Why is the image blurry in my microscope?

    A blurry image in a microscope can occur due to improper focus, dirty lenses, or incorrect alignment of components. Ensuring the objective lens is correctly selected and the coarse and fine focus knobs are adjusted can often resolve the issue. Additionally, checking for dust or smudges on the eyepiece or objective lens can improve clarity.

    How can I adjust the focus to fix a blurry image?

    To fix a blurry image, start by using the coarse focus knob to bring the specimen into rough focus. Once you see a faint outline of the specimen, switch to the fine focus knob for sharper clarity. Always start with the lowest magnification objective, as it provides a broader view and makes focusing easier.

    Could dirty lenses cause blurry images?

    Yes, dirty lenses are a common cause of blurry images. Dust, oil, or fingerprints on the eyepiece or objective lens can distort the view. To clean the lenses, use a soft lens tissue or microfiber cloth dampened with lens cleaner. Avoid using household cleaning products, as they can damage the optical coatings.

    What role does proper lighting play in image clarity?

    Proper lighting is essential for a clear image. Adjust the microscope’s light source or diaphragm to regulate the amount of light passing through the specimen. Too much or too little light can make the image appear blurry or washed out. Experiment with the settings to find the optimal brightness.

    How do I ensure the correct alignment of the microscope?

    Misaligned components can cause blurry images. Check that the eyepiece, objective lens, and stage are properly aligned. Make sure the specimen is centered over the light source, and all screws and adjustments are securely tightened. Regular maintenance can help prevent alignment issues.

    What should I do if the image is still blurry after focusing?

    If focusing and cleaning do not resolve the issue, inspect the microscope for mechanical problems. Loose or damaged parts can affect image quality. It may also help to recalibrate the microscope or consult the manufacturer’s manual for troubleshooting tips.

    Can improper use of magnification cause blurry images?

    Using a magnification that is too high for the specimen can result in a blurry image. Start with the lowest magnification and gradually increase as needed. Higher magnifications require precise focusing and proper preparation of the specimen.

    Should I check the slide for clarity?

    Yes, a poorly prepared slide can cause blurry images. Ensure the specimen is flat, thin, and properly mounted on the slide. Use a coverslip to prevent movement and provide even focus across the specimen.

    Is it necessary to adjust the condenser for a clear image?

    Adjusting the condenser can improve image sharpness. The condenser focuses light onto the specimen and should be positioned close to the slide for high magnifications. Experiment with the condenser height and aperture settings for the best results.

    Final Verdict

    Fixing a blurry image in a microscope is often straightforward when you address each potential issue methodically. By checking the focus, cleaning the lenses, aligning the components, optimizing the lighting, and ensuring proper sample preparation, you can restore clarity. Regular maintenance further ensures your microscope performs well over time.

    Whether you are a student, researcher, or hobbyist, these steps will help you make the most of your microscope. Keep this guide handy for troubleshooting and enjoy exploring the microscopic world with sharp, clear images.

  • How to Turn On a Microscope Light?

    How to Turn On a Microscope Light?

    To turn on the microscope light, find the power switch on the base or side and flip it on. If it’s a dimmable light, use the rheostat or brightness control knob to adjust the light intensity.

    Modern microscopes come equipped with built-in illumination systems, commonly using LED or halogen lights. Here’s a step-by-step guide:

    1. Locate the Power Source: Ensure the microscope is connected to an appropriate power supply. Some portable models might use batteries or USB charging.
    2. Turn On the Light: Find the power switch on the base or side of the microscope and flip or press it to activate the light.
    3. Adjust Brightness: If the light intensity is adjustable, use the rheostat or brightness control knob to achieve the desired illumination for your sample. Proper lighting enhances visibility and reduces eye strain.
    4. Check the Bulb and Connections: If the light doesn’t turn on, ensure the bulb is functional, securely connected, and the power supply is active.

    Understanding these steps ensures efficient use of your microscope and extends the lifespan of its components.

    Process AspectSuccess Rate (%)Common Issues ReportedResolution Time (Avg.)
    Locating Power Source95%Difficulty in identifying ports~1 minute
    Activating Light90%Faulty power switches or buttons~3 minutes
    Adjusting Brightness85%Misuse of rheostat/knobs~2 minutes
    Resolving Lighting Issues70%Burned-out bulb, loose connections~5-10 minutes
    How to Turn On a Microscope Light

    What You Need to Know Before Turning On the Light

    Microscope lighting systems vary, so it’s essential to understand the type of light source your microscope uses. Below is an overview of common types:

    Light Source TypeDescriptionCommon Uses
    LED LightEnergy-efficient, long-lasting, and produces minimal heat.Ideal for general microscopy.
    Halogen BulbProvides bright, intense light but generates heat.Suitable for detailed studies.
    Tungsten Filament BulbTraditional option, emits warm light.Often found in older microscopes.
    Fluorescent LightBright and uniform illumination.Used in specialized microscopy setups.

    Familiarize yourself with your microscope’s manual to identify the type of light source it uses and its power requirements.

    Safety Precautions Before Turning On the Light

    Before handling the microscope or powering the light, follow these safety steps:

    1. Check the Power Source
      Ensure the microscope is connected to a stable power outlet or the batteries are correctly installed. Unstable power sources can damage sensitive components.
    2. Inspect the Light Housing
      Look for signs of wear, such as loose wires or dust in the light housing. Clean with a soft, lint-free cloth if necessary.
    3. Adjust the Surroundings
      Work in a well-lit area to prevent strain on your eyes while preparing the microscope. Ensure your workspace is clear of hazards like spilled liquids or unstable objects.
    4. Understand the Controls
      Locate the power switch, brightness knob, and other controls. These are typically found near the base of the microscope or integrated into the stand.
    how to turn on a microscope

    Troubleshooting Common Issues

    If the microscope light doesn’t turn on, don’t panic. Use the following table to diagnose and resolve the problem:

    ProblemPossible CauseSolution
    Light doesn’t turn onPower switch not flipped.Ensure the switch is set to “ON”.
    Loose or unplugged cord.Securely plug in the power cord.
    Dead batteries.Replace with fresh batteries.
    Dim or flickering lightDust on the bulb or housing.Clean the light source gently.
    Bulb nearing the end of its life.Replace with a compatible bulb.
    Brightness control not workingInternal electrical issue.Consult a technician or manufacturer.

    4 Step-by-Step Guide to Turning On the Microscope Light

    Step 1: Connect to Power

    The first step in activating the microscope light is connecting it to a power source. Different microscopes may rely on distinct power systems. Here’s how to handle them:

    • For Plug-in Models
      Plug the microscope’s power cord into a grounded wall outlet. Ensure the cord is securely connected and free from damage, such as fraying or exposed wires.
    • For Battery-Powered Models
      Open the battery compartment, typically located at the microscope’s base. Insert fresh batteries, ensuring their orientation matches the polarity markings inside the compartment. Close the compartment tightly to ensure proper contact.
    • For USB-Powered Models
      Connect the USB cable to an appropriate power source, such as a computer, power bank, or wall adapter. Ensure the cable is undamaged for safe use.

    Step 2: Locate the Power Switch

    Most microscopes feature a power switch near the base or on the body. The switch is often labeled as “ON/OFF” or indicated with a light bulb icon. To activate the light:

    • Toggle the Switch
      Flip or press the switch to the “ON” position. The light should illuminate immediately. If not, check the power connection or battery condition.

    Step 3: Adjust the Brightness

    Once the light is on, adjust its brightness for optimal viewing. Illumination intensity is crucial for clarity and preventing eye strain. Most microscopes have a brightness control mechanism such as a knob, slider, or buttons near the light source or switch. Follow these tips:

    • For Low Magnification
      Begin with lower brightness settings to avoid over-illumination, which can cause glare or wash out the image.
    • For High Magnification
      Increase the brightness as needed to enhance the visibility of fine details on the specimen.

    Step 4: Direct the Light Path

    Properly directing the light ensures the specimen is evenly illuminated and details are visible. Modern microscopes are equipped with components like condensers and diaphragms to refine the light path:

    • Condenser
      Adjust the condenser so that it is positioned close to the slide. This focuses the light onto the specimen, providing brighter and more defined illumination.
    • Diaphragm
      Use the diaphragm to control the amount of light that reaches the specimen. Opening it wide allows more light, while narrowing it can enhance contrast for translucent specimens.

    These steps ensure that the light source is effectively used, enhancing the clarity of your observations. Following this structured approach will provide consistent results and protect your microscope from improper use.

    5 Tips for Prolonging the Light’s Lifespan

    Maintaining your microscope light properly ensures it remains effective and functional for a long time. Here are five simple tips to help prolong its lifespan:

    Turn Off When Not in Use

    One of the easiest ways to preserve the light source is to switch it off when it’s not actively being used. Leaving the light on unnecessarily:

    • Increases wear on the bulb or LED.
    • Wastes energy.
    • Shortens the life of the light source over time.

    Get into the habit of turning off the light during breaks or at the end of your session.

    Clean Regularly

    Dust and debris can accumulate on or around the light source, obstructing illumination and potentially damaging components. To keep it clean:

    • Use a soft, lint-free cloth to gently wipe the light housing and lens area.
    • Avoid using harsh chemicals or abrasive materials that could scratch surfaces.
    • Perform regular cleaning to ensure clear and bright light.

    Use Compatible Bulbs

    When replacing a bulb, always refer to the microscope’s manual to ensure compatibility. Using the wrong type of bulb can:

    • Lead to improper functioning or dim lighting.
    • Cause electrical or overheating issues.

    Stick to manufacturer-approved bulbs to maintain performance and prevent accidental damage.

    Avoid Overheating

    Certain types of bulbs, like halogen or tungsten, generate significant heat during operation. Overheating can reduce their lifespan or damage nearby components. To prevent this:

    • Allow the microscope to cool for a few minutes between extended uses.
    • Avoid placing the microscope in areas with poor ventilation.
    • Turn off the light source as soon as you’re done using it.

    Handle with Care

    Lights, particularly those in microscopes with fragile or intricate setups, require careful handling. To protect the light source:

    • Avoid bumping or jarring the microscope, which could damage the bulb or connections.
    • Check that the power supply is stable to prevent electrical surges.
    • Always follow the manufacturer’s instructions for light installation and maintenance.

    Additional Features to Consider

    Essential Role of Microscopes in Electronics Repair

    Modern microscopes often come with advanced lighting options that can significantly enhance your experience. Understanding and utilizing these features can improve clarity, reduce eye strain, and provide flexibility for various specimens. Here are some key features to consider:

    Variable Color Temperature

    This feature allows you to adjust the color temperature of the light source, providing either warm or cool illumination. It is especially useful when working with specimens that require different lighting conditions:

    • Warm Light: Ideal for observing tissues or organic specimens, where a softer glow enhances natural colors.
    • Cool Light: Best for inorganic or high-detail studies, as it provides sharper contrast.

    Adjusting the color temperature helps reduce eye fatigue during prolonged observations.

    Coaxial Lighting

    Coaxial lighting is designed to deliver even and consistent illumination, especially beneficial when studying reflective or opaque surfaces.

    • Advantages:
      • Minimizes shadows and glare, enhancing the clarity of reflective specimens like metal or glass.
      • Provides more uniform brightness across the field of view.

    This feature is commonly found in high-end microscopes used in materials science or advanced research.

    Built-in Timers

    Microscopes with built-in timers are designed to automatically switch off the light source after a pre-set duration.

    • Benefits:
      • Conserves energy by preventing unnecessary usage.
      • Extends the lifespan of the light source by avoiding prolonged operation.
      • Useful for users who may forget to turn off the light manually.

    Timers can often be customized to fit specific workflows or session lengths.

    Why Is My Microscope Light Not Turning On?

    If the microscope light isn’t working, check the power connection first. Ensure the power cord is securely plugged into an outlet and the microscope. For battery-operated models, replace or recharge the batteries. Verify that the bulb is properly installed and not burned out. Lastly, inspect the fuse if your microscope has one and replace it if needed.

    What Should I Do If the Microscope Light Bulb Is Burned Out?

    If the bulb is burned out, turn off the microscope and unplug it from the power source. Remove the old bulb carefully, avoiding direct contact with your fingers to prevent smudges. Replace it with a bulb of the same type and wattage. Consult the user manual for guidance if unsure about the correct bulb type.

    How Can I Troubleshoot Electrical Issues With the Microscope Light?

    Start by confirming the outlet works by plugging in another device. Check the power cord for damage, such as fraying or breaks. Inspect the light switch to ensure it’s not stuck or faulty. If the issue persists, consult a technician or contact the manufacturer for assistance.

    Is It Possible to Repair a Microscope Light That Isn’t Working?

    Yes, in many cases, you can repair a non-working light. Replace the bulb or batteries, check the fuse, and ensure all connections are secure. If the issue is electrical or involves internal components, professional repair might be necessary.

    How Do I Replace the Batteries in a Battery-Powered Microscope?

    Locate the battery compartment, typically on the base or side of the microscope. Open it by sliding or unscrewing the cover. Remove the old batteries, noting their orientation. Insert new batteries in the correct direction and close the compartment securely.

    Can Dust or Dirt Prevent the Microscope Light From Working?

    Yes, accumulated dust or dirt can interfere with the light. Clean the bulb, lens, and surrounding components with a soft, lint-free cloth. Avoid using harsh chemicals, and ensure the microscope is off and unplugged during cleaning.

    What Should I Do if the Microscope Light Flickers?

    If the light flickers, check for a loose bulb or poor connection. Tighten the bulb gently and inspect the power cord and plug for any damage. Replace the bulb if it continues to flicker. If the issue remains, consult a technician.

    Can I Use an External Light Source if the Built-In Light Is Not Working?

    Yes, an external light source like a desk lamp can be used temporarily. Position the light to illuminate the specimen adequately. Ensure the light doesn’t cast shadows or create glare on the slide.

    How Can I Prevent Future Issues With the Microscope Light?

    To prevent issues, regularly inspect and clean the microscope, including the light source. Use the correct replacement bulbs and batteries. Store the microscope in a clean, dry place and handle it carefully to avoid damage.

    Final Thought

    Turning on a microscope light is a simple yet crucial step in microscopy. By following the instructions above, you ensure proper illumination, which is essential for observing details accurately. Whether you’re a student, researcher, or hobbyist, understanding your microscope’s lighting system will enhance your experience and prolong the lifespan of your equipment. Remember to consult your microscope’s manual for specific instructions and always follow safety precautions.

    With practice and care, you’ll be ready to illuminate your microscopic world efficiently and effectively.