Despite its small size, the ATAK flashlight can light up a dark space with no hassle. Thus, don’t be afraid if you come across one at night. You can try replacing your old batteries to fix the flashlight!
For instructions on replacing batteries in an ATAK flashlight, please visit our website today and follow our step-by-step guide!

5 Tips to put batteries in an ATAK flashlight?
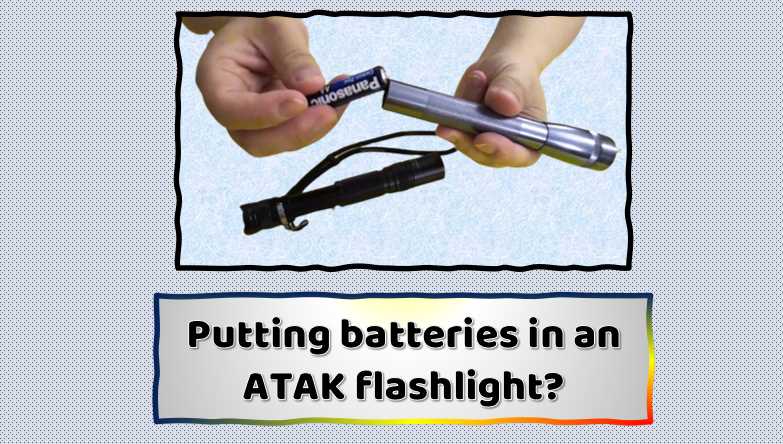
If your battery is not charging or you are experiencing other issues with the flashlight, it may be time to change the batteries. Here are five easy steps that should help:
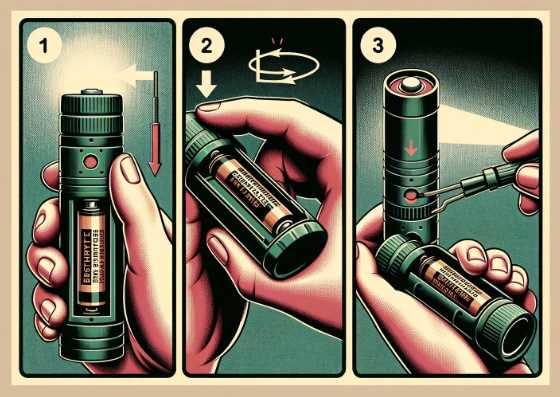
- 1. Remove the battery cover by pressing down on one side and pulling up on the other end.
- 2. Lift out the battery chamber with a coin or your finger.
- 3. Snap off any torn or damaged wrap around the cell using a straight edge such as a knife, screwdriver, or razor blade to expose shiny metal plates inside of it ּ- be very careful not to cut yourself when doing so!
- 4. Gently twist each plate until it falls off – especially if at least two Phillips head screws are still attached (some flashlights may have only one screw). You should now see two black cells exposed ּ- label them A and B according to their polarity in blue text near their edges.
- 5. Replace negative (-) cell with fresh CR2032 lithium-ion battery ̶ is usually white but could be different colors depending on brand/model number etc.; remove the plastic wrapper if present before insertion into a flashlight body cavity; do NOT install positive (+)cell yet!
Note that some models have reverse layouts where numbers 4 & 5 are 3 & 2 !! If unsure which way yours is, please look for the key ring attachment feature holding the flashlight onto jewelry, etc.
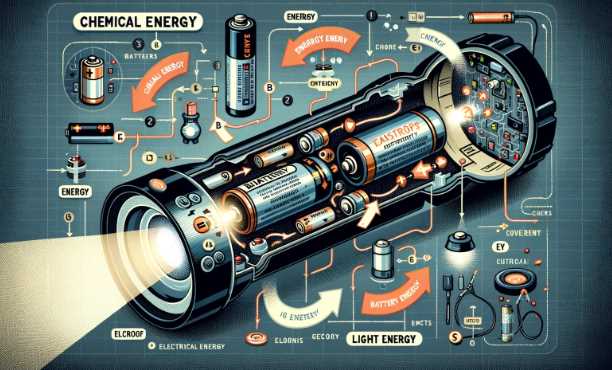
Understanding Your ATAK Flashlight
Before delving into the intricacies of battery replacement, it’s crucial to acquaint ourselves with the anatomy of the ATAK flashlight. This compact yet powerful tool comprises several components, with the battery playing a pivotal role in powering its luminosity.
The ATAK flashlight accommodates various battery types and sizes, allowing users flexibility in choosing the most suitable power source. Here’s a handy table summarizing the compatible batteries, their sizes, and recommended brands:
| Battery Type | Size | Recommended Brands |
|---|---|---|
| Alkaline | AA, AAA | Duracell, Energizer |
| Lithium | AA, AAA | Panasonic, Energizer |
| Rechargeable NiMH | AA, AAA | Eneloop, EBL |
Signs of a Dying Battery
Imagine relying on your flashlight during a crucial moment only to find its beam weakening. Recognizing the signs of a failing battery can save you from such predicaments. Keep an eye out for:
- Diminished brightness: A noticeable reduction in the intensity of the light.
- Inconsistent performance: Flickering or sudden shutdowns during use.
- Extended response time: Delays in turning the flashlight on or off.
Should you encounter any of these symptoms, it’s time to consider a battery change. Before diving into the replacement process, let’s explore some troubleshooting tips to ensure the issue indeed stems from the battery.
Selecting the Right Replacement Battery
Choosing the right battery is paramount for optimal flashlight performance. Understanding the specifications and nuances will guide you toward a seamless replacement. Here’s a comprehensive guide to aid your selection process:
- Capacity Matters: The higher the capacity (measured in milliampere-hours, mAh), the longer the battery lasts. Consider your usage patterns to determine the ideal capacity.
- Voltage Compatibility: Match the voltage of the replacement battery with the original to prevent damage to the flashlight.
- Rechargeable vs. Non-Rechargeable: Assess the pros and cons of rechargeable and non-rechargeable batteries. Rechargeables are eco-friendly but may require additional accessories.
For a detailed comparison, refer to the table below:
| Feature | Rechargeable Battery | Non-Rechargeable Battery |
| Environmental Impact | Lower | Higher |
| Initial Cost | Higher | Lower |
| Long-Term Cost | Lower | Higher |
| Convenience | Convenient | Disposable |
Safety Precautions
Safety should always be the top priority when dealing with any electronic device. Before diving into the battery replacement process, take the following precautions:
- Turn off the flashlight: Ensure the flashlight is switched off to avoid electric shock or accidental activation during the process.
- Wear protective gear: Consider using gloves to protect your hands from any potential hazards.
- Work in a well-lit area: Adequate lighting minimizes the chances of overlooking important details.
- Refer to the manual: Always consult the ATAK flashlight manual for manufacturer-specific safety guidelines.
Refer to the table below for a quick overview of safety tips:
| Safety Precaution | Description |
| Turn off the flashlight | Prevents accidental activation during work. |
| Wear protective gear | Gloves safeguard against potential hazards. |
| Work in a well-lit area | Ensures visibility for precision. |
| Refer to the manual | Manufacturer-specific safety guidelines. |
7 Step-by-Step Battery Replacement Guide
Now, let’s embark on the thrilling journey of replacing the battery in your ATAK flashlight. Follow these step-by-step instructions for a seamless experience.
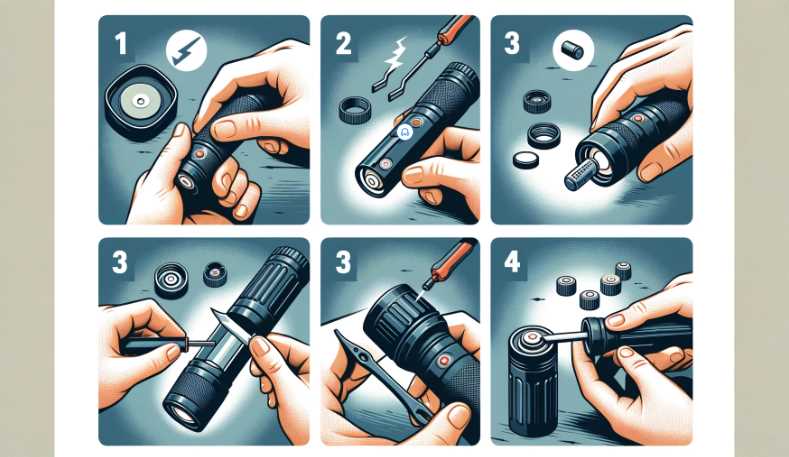
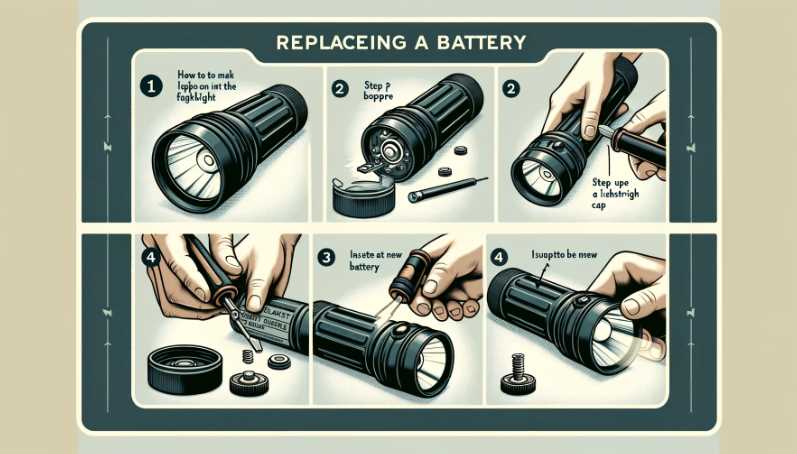
- Removing the Flashlight Casing : Begin by unscrewing or unlocking the casing of your ATAK flashlight. This step may vary slightly depending on the specific model, so consult your manual for precise instructions.
- Locating the Battery Compartment : Once the casing is off, identify the battery compartment. It’s typically situated near the head or tail of the flashlight. Look for any markings or indicators.
- Removing the Old Battery : Carefully extract the old battery, paying attention to its placement and orientation. Dispose of the old battery according to your local regulations, considering the environmental impact.
- Inserting the New Battery : Place the new battery in the compartment, ensuring it aligns with the correct polarity. Follow the markings inside the compartment or refer to the manual for guidance.
- Closing the Battery Compartment : Securely close the battery compartment, ensuring a tight seal. This step is crucial for maintaining the flashlight’s waterproof or water-resistant features.
- Testing the Flashlight : Power on the flashlight to confirm the new battery’s functionality. Check for consistent brightness and any irregularities in the beam. If everything looks good, your ATAK flashlight is ready for action.
- Troubleshooting Tips : In case the flashlight doesn’t work as expected, double-check the battery orientation, inspect for any debris or corrosion in the compartment, and retrace your steps.
Maintenance Tips for Prolonged Battery Life
Ensuring the longevity of your ATAK flashlight’s battery involves more than just replacement. Incorporate these maintenance tips into your routine to extend battery life and overall performance.
- Store in a cool, dry place: Extreme temperatures can impact battery life. Store your flashlight in a cool, dry place to preserve the battery’s efficiency.
- Periodic cleaning: Clean the battery contacts and the compartment regularly to prevent corrosion, ensuring a stable connection.
- Remove the battery during extended storage: If you don’t plan to use the flashlight for an extended period, remove the battery to prevent leakage and potential damage.
Refer to the table below for a concise summary of maintenance tips:
| Maintenance Tip | Description |
| Store in a cool, dry place | Preserves battery efficiency in varied climates. |
| Periodic cleaning | Prevents corrosion for a stable battery contact. |
| Remove battery during storage | Mitigates the risk of leakage during inactivity. |
How do you open an ATAK flashlight to change the battery?
ATAK flashlights are designed to be easily accessible and replaceable. To open the flashlight, remove the battery cover by inserting a flathead screwdriver into the two notches near the bottom of the body and twisting it counterclockwise. Next, use your fingers to gently pull down on both sides of the body until it pops off.
Finally, please take out your new battery and insert it into the correct location.
Can I put AA batteries in an ATAK flashlight?
No, it would be best if you did not put AA batteries in an ATAK flashlight, and this is because the plastic battery case can melt and cause a fire. Instead, use a lithium-ion or CR123A battery.
How do you know which way to put batteries in?
The easiest way to figure out how to put batteries in a device is usually by looking for the symbol that indicates which direction the battery should be inserted. This is typically a triangle with an arrow inside of it, and it will denote whether the positive (+) or negative (-) end of the battery goes into the device first.
For devices that use watch batteries, such as wristwatches or digital clocks, ensure you insert them in clockwise order so they’ll work correctly. And lastly, permanently remove any errant batteries from devices by gently pushing them down on both ends until they click out. Be sure not to pinch your fingers when doing this!
What side of the battery goes on first?
Most people know that the opposing side goes on first, but this is not always the case. It can depend on what type of battery you have. AA batteries typically go from the most significant to the most minor (bottom to top), while AAA batteries go in reverse order from strongest to weakest.
Final Words:
It’s time to use your newbie skills and try changing batteries for the first time. Always check the orientation of the battery and put it on correctly before turning on the flashlight. Once you are done, keep checking if the light is working correctly by holding down both the tail switch and button.
ATAK batteries are not only compatible with other brands of flashlights but also powerful and long-lasting. That’s why we recommend using them regularly.
Do you have any other questions about how to change the battery? Share your thoughts in the comments section below!

I am an enthusiastic student of optics, so I may be biased when I say that optics is one of the most critical fields. It doesn’t matter what type of optics you are talking about – optics for astronomy, medicine, engineering, or pleasure – all types are essential.
Table of Contents