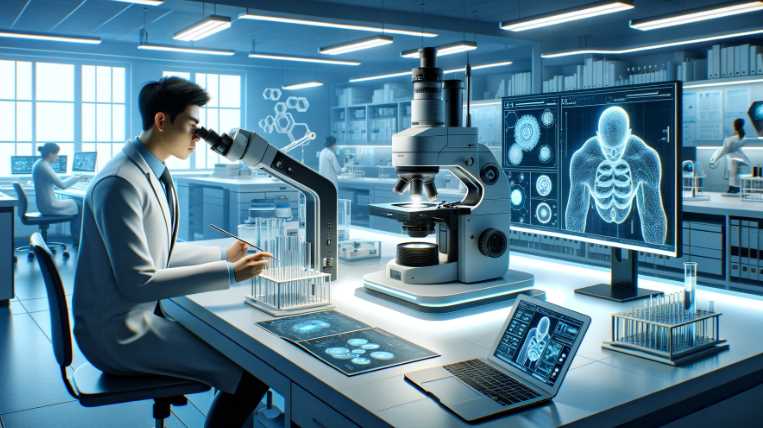
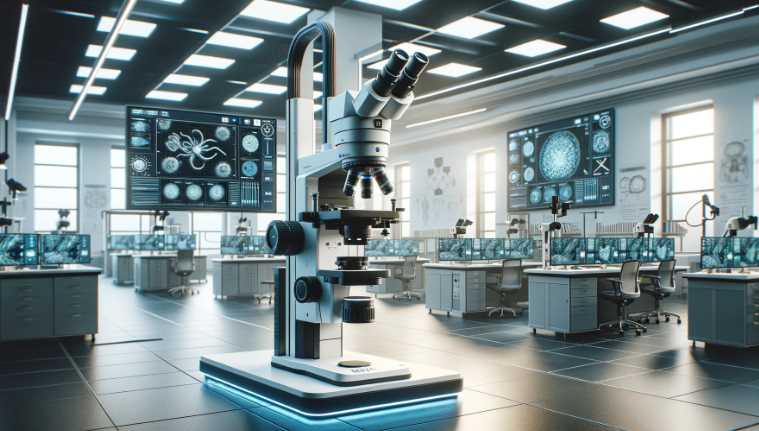
Author: Mohammad

  • 11 Ways to Clean and Sterilize A Microscope: Video Guide to Follow

    11 Ways to Clean and Sterilize A Microscope: Video Guide to Follow

    Microscopes are one of the essential lab tools for scientists and students. However, like any other equipment, they can get dirty over time. By following the proper cleaning process, you can keep your microscope functioning at its best. We covered cleaning the mechanical components, lenses, and mold area.

    Several years ago, I was reading the statistics for microscope cleaning products. According to the manufacturer, one, in particular, stood out: if you clean only twice a year, you’re probably missing 90% of your sample. You’re missing more than 80% if you clean twice a month. It’s hard to imagine how important this is since most of us don’t even realize that we do not see our samples.

    Always read all instructions carefully before cleaning your microscope, as any mistake could ruin your equipment. As always, exercise caution when cleaning delicate equipment and wash your hands thoroughly before and after each step. Stay tuned for more updates on microscope cleaning!

    ImageProductDetailPrice
    13 in 1 Fiber Optic Cleaning Tool kit

    13 in 1 Fiber Optic Cleaning Tool kit

    • Optical Fiber Microscope
    • Fiber optic cleaning cotton swab
    See on Amazon
    YICIZOL Optic Fiber Cleaning Inspection Kits

    YICIZOL Optic Fiber Cleaning Inspection Kits

    • 400 Times Fiber Connector
    • Small size, one-handed, convenient and fast
    See on Amazon
    Camera Lens Cleaning Kit, 10-in-1 Camera Cleaning Kit

    Camera Lens Cleaning Kit, 10-in-1 Camera Cleaning Kit

    • Safety, Simple, Effective, Static-free, Multi-propuse, unique cleaning kit for your life!
    See on Amazon
    Professional DSLR Camera Cleaning Kit 

    Professional DSLR Camera Cleaning Kit 

    • High-Power Biological Microscope for Students
    See on Amazon
    AmScope MLA-Kim Microscope Maintenance Kit

    AmScope MLA-Kim Microscope Maintenance Kit

    • 1/4 Oz Type B medium viscosity immersion oil for better microscopy images and prolonged use
    See on Amazon

    Reasons to Clean and Sterilize a Microscope

    ReasonExplanation
    Accuracy and Reliability of ObservationsMicroscope cleanliness is crucial for obtaining accurate and reliable observations in scientific research.
    Prevention of Contamination and Cross-contaminationRegular cleaning and sterilization prevent the introduction of contaminants, ensuring the integrity of results.
    Extension of Microscope LifespanProper maintenance contributes to the longevity of microscope components, reducing the need for frequent replacements.
    Compliance with Industry Standards and GuidelinesAdhering to established standards and guidelines is essential, especially in fields where precision is paramount.

    How do you clean the mechanical part of a microscope?

    Cleaning the Mechanical Part of a Microscope

    StepTaskDescriptionRecommended Materials
    1Power Off:Ensure the microscope is powered off before cleaning.
    2Remove Excess Debris:Use a small brush or compressed air to remove loose debris from the exterior.Small brush, compressed air canister
    3Wipe External Surfaces:Gently wipe external surfaces with a soft, dry cloth to remove dust and fingerprints.Soft, dry cloth
    4Clean Objective Lenses:For external lenses, use a lens cleaning solution and lens paper.Lens cleaning solution, lens paper
    5Inspect Mechanical Components:Visually inspect mechanical components such as focus knobs and stage adjustments for any visible dirt or debris.
    6Lubrication (If Necessary):Follow the manufacturer’s guidelines for lubricating moving parts. Use an appropriate lubricant sparingly.Manufacturer-recommended lubricant
    7Check for Loose Parts:Ensure all screws and bolts are securely fastened. Tighten any loose parts to prevent mechanical issues.Screwdriver
    8Inspect Electrical Connections:Check electrical connections for any signs of damage or loose wiring. Repair or replace as needed.
    9Optical Alignment Check:Verify that the optical components are correctly aligned to avoid image distortion. Consult the user manual for alignment procedures.Calibration slide, user manual
    10Final Inspection:Perform a final visual inspection to ensure all components are clean and in good condition.

    I always use Household cleaners to clean the eyepieces, lenses, and other optical components. These cleaners are safe on most surfaces and effectively remove dirt, dust, and fingerprints.
    If you want to use a microscope cleaning kit, you will need to mix the cleaner with water and scrub the parts of the microscope that need cleaning.
    The steamer gently cleans the microscope using steam to loosen any dirt or debris. Just be sure to avoid any contact with the glass surface of the microscope, or you will damage it.

    Cleaning the microscope’s mechanical part is daunting if you are not an expert. But you can do it quickly and easily with preparation and organization. The most common methods include household cleaners, a microscope cleaning kit, or a steamer.

    Process to Follow

    To keep it clean, we know that you should wipe the exterior with a moist paper towel, avoid touching the lenses if possible, and dry everything off before using it again. That’s all well and good, but how should you clean it? It can be tough to figure out what steps to take when you don’t have instructions. Here are a few tips:

    1. Unplug the microscope and wipe the exterior with a wet paper towel.

    2. Carefully remove the impurities from the inside of the microscope using a paper towel.

    3. Dry everything off before storing or using the microscope again.

    4. We recommend using distilled water to clean microscopes instead of tap or city water since it is safer and causes less fogging.

    5. Remember that humidity will prevent condensation in your microscope, so if you live in a humid area, ensure it’s as low as possible!

    Using dish soap

    We all know that microscopes are expensive, so you don’t want to risk damaging them and wrongly caring for them. To properly clean a microscope, follow these steps:

    1. Fill a sink with room-temperature water and add soap until it makes a pile of foam
    2. Swish the solution around on the scope to make sure it’s sudsy
    3. Wipe away any dust with a cloth and rinse off the area with room-temperature water
    4. If your microscope is dirty or oily, use 10% alcohol to clean it; but be careful not to use this if it’s dry
    5. Repeat the alcohol process twice or three times, then finish with distilled water
    6. After cleaning the mechanical parts, clean around the optics by wiping them with the solution and cloth.
    7. When done, dry it off and store it in a dust-free place.

    Using white vinegar

    Sometimes you need to get gross. When trying out different cleaning methods, sometimes it’s still hard to determine when a solution is doing something. Cleaning the microscope using white vinegar is a simple and effective way to keep it in excellent condition. It would be best to have a few supplies, including white vinegar, a microscope lens cleaning cloth, and a brush.

    First, pour white vinegar into a small bowl.

    Then, wet the cleaning cloth and wring it slightly damp.

    Place the cloth on the microscope lens and rub it around in a circular motion.

    Make sure to get into all the corners and crevices.

    Finally, use the brush to clean any residue that may have accumulated.

    After cleaning the lens, dry it off with the cloth and store the microscope in a clean and dust-free environment.

    To be on the safe side, wipe the microscope with a clean cloth or several to ensure that any excess liquid is removed. If there was no way to completely clean the eyepiece tube with a damp cloth, use this cloth to do so. You can also use it to remove any liquid from the eyepiece tube if necessary. Always use new material to ensure you’re dry and ready to go.

    How do you clean the lenses of your microscope?

    Cleaning your microscope lenses is scary, but it can be a breeze with patience and practice. There are a few different ways to clean your lenses, and each has its benefits and drawbacks.

    The most common way to clean lenses is to use water and alcohol. This solution effectively removes dust and other particles, but it can be difficult to remove dried residues.

    Another method is to use a KOH solution. This solution is less abrasive and can clean lenses that are difficult to dry. It is also effective in removing oil and grease but can damage the lens if misused. The final method uses a mechanical cleaner specifically designed for microscope lenses. This cleaner is safe to use and has no adverse effects on the lens.

    Ultimately, the best way to clean your microscope lenses is to experiment and find what works best.

    Dusty lenses are a problem you can’t cure with a quick wipe.

    The best way to cleanse dusty lenses is by using a vacuum or dusting brush. It will take patience, but you must do it carefully so your lens doesn’t get any worse.

    You must use an optical dusting brush to clean these microscopic lenses properly. You can purchase one at most stores that sell lab equipment and microscopes.

    Before inserting it, you just prepped a lens and noticed some dust on the surface. How do you clean them off? There are a couple of solutions to avoid damaging your lenses.

    You can use an oil-free compressed gas or gently vacuum around the frame with a dust brush. It’s essential to avoid using a keyboard cleaner for this, as those products could damage your lenses. For example, dry-nitrogen-propelled compressed air is an excellent solution if it’s not too cold outside.

    The first time I used a microscope, I got it dirty. That was my fault for not realizing the lenses needed to be cleaned. (I went into my lab’s storage and found a cotton swab, water, and soap to clean it.) When you’re out of solutions, isopropyl alcohol works wonders — and you can find it at any store that sells microscopes and lab equipment. Another tip:

    Don’t use a cloth to clean the lenses when you’re out of your favorite solution. Clothes are too large and will spill cleaning liquid on your instrument if they are not lint-free.

    You might not think about it, but your lens is filthy. Agree? The center of the lens is where all the dirt has gathered, so you need to get it as clean as possible.

    A cotton swab and liquid dish soap are all you need to clean your smudged lenses. Apply the soap to the cotton swab and gently rub it on the center of your lenses in a circular motion.

    That is where the dirt has gathered, so it’s important to scrub it. After, clean outward across the lens, moving about an inch at a time away from the center. Continue until your lenses are both free of dirt! Be sure to use a light touch not to scratch the lens.

    What are three things you should do when cleaning up a microscope?

    What are 3 things you should do when cleaning up microscope

    When cleaning up a microscope, make sure to do the following:

    Hand hygiene is one of the essential steps in preventing infection. Before touching your microscope, wash your hands thoroughly with soap and water. This includes everything from your hands and wrists to your elbows and knees. It is also essential to avoid contact with your eyes, as this can lead to eye irritation or even conjunctivitis. Finally, avoid touching your face, which can lead to skin infections.

    1. Always wash your hands before putting on latex gloves.
    2. Be sure to wipe down the surface area after each person uses it for multi-person-use microscopes. This will keep you from worrying about someone else’s bacteria left behind on the surface after it is touched.
    3. It’s recommended not to eat or drink before, during, or directly after using your microscope, as it can be messy, and food particles may get on the microscope.
    4. If you store your microscope under questionable conditions (i.e., in a room that might reach 80° F or higher), dust it off after usage and wipe the inside with rubbing alcohol, wiping off any other residues on the surface before using again.

    Covering your microscope whenever you put it away is a simple but important step that can help keep it in good condition and protect it from dust and other particles. This will help protect the microscope from damage and prevent the light from being scattered, leading to inaccurate images.

    Additionally, it is vital to keep the microscope clean to function at its best. Cleaning the optics and the eyepieces with a suitable solution can help remove dirt, dust, and other debris that can cause degradation.

    Remember to regularly check the covers and hinges to ensure that they are secure and free from signs of wear or tear. If you notice any problems, don’t hesitate to contact your microscope supplier for assistance. Deteriorated covers can lead to distortions in your image and other issues.

    Once you are done using the microscope, remember to protect it from scratches and dirt with a dust cover or put it away properly before storing it for future use. This will protect your microscope and those who may one day come across it after it’s been misplaced!

    Failing to put a cover on your microscope when you pack it away is never good. It can result in dust particles and impurities getting into the optics and onto the slides, confusing your technician or student. In most cases, the best cover for your microscope is the one that came with it from the manufacturer.

    Covering your microscope with two bags will do the trick if you don’t have this dust cover. Put one sack over the top and another lower, securing both with a string.

    The most important thing you can do to maintain your microscope is to prevent fungus. This can be done by storing it in a dry place, like a closet, where the relative humidity will be low.

    A humid environment like a room can be one of the worst places to store a microscope because it gives the fungi more room to grow. You should invest in an air conditioner or an infrared lamp to keep your microscope clean and fungus-free even when temperatures soar. Removing fungus from a microscope is not easy, so it’s best to avoid it!

    It’s essential to store your microscope away from corrosive vapors. These vapors can be acidic or alkaline and may cause significant damage to your equipment. Keep your equipment in a different room when performing experiments with these kinds of smoke.

    It’s best to store your sensitive equipment in another room while conducting acid or alkaline vapors experiments. These fumes can corrode your equipment, so storing it in a different space is best to keep it safe.

    What are five things you should look after when cleaning the eyepiece of the microscope?

    One of the most important things you can do to keep your microscope in good working order is clean the eyepiece regularly. That is especially important if you use the microscope for medical purposes or research.

    Five Considerations for Cleaning the Microscope Eyepiece

    No.ConsiderationDescription
    1Use Proper Cleaning MaterialsUtilize specialized lens cleaning solutions and lens paper or microfiber cloths designed for delicate optics. Avoid using abrasive materials that could scratch the eyepiece glass.
    2Inspect for Dust and DebrisBefore cleaning, inspect the eyepiece for any visible dust or debris. Brush away loose particles with a soft camel-hair brush or air blower to prevent scratching during the cleaning process.
    3Gentle Cleaning TechniqueAdopt a gentle cleaning technique to avoid applying excessive pressure. Start by lightly blowing away loose particles, and then proceed to use minimal pressure while wiping the eyepiece with a circular motion.
    4Check for Residual Stains or SmudgesAfter cleaning, inspect the eyepiece for any residual stains or smudges. If necessary, repeat the cleaning process with fresh lens cleaning solution and a clean piece of lens paper until the optics are clear.
    5Avoid Direct Contact with the OpticsWhen handling the eyepiece, avoid direct contact with the optics. Hold the eyepiece by its frame or use lens tissue to prevent fingerprints on the glass. Fingerprints can distort images and are challenging to clean.

    Here are five things that you should always keep in mind when cleaning the eyepiece:

    1. Make sure that you use a proper eyepiece cleaning solution.
    2. Wet the eyepiece in water and scrub it with a lint-free cloth.
    3. Apply a light coat of eyepiece cleaner and then wipe it off.
    4. Dry the eyepiece thoroughly before using it again.
    5. Never carry a storage solution for your eyepiece in the container where you keep other sample materials.

    What are 3 ways to clean microscope slides and coverslips?

    Microscope slides and coverslips can get dirty quickly, so it is essential to clean them regularly to maintain image quality. Here are three easy ways to clean microscope slides and coverslips:

    Use a mild detergent and warm water to clean the slides and coverslips.

    Use an alcohol-free wipe to clean the slides and coverslips.

    Dry the slides and coverslips with a soft, lint-free cloth.

    Common Mistakes to Avoid in Microscope Maintenance

    MistakeExplanation
    Using Improper Cleaning MaterialsUsing abrasive materials or incorrect cleaning solutions can damage delicate microscope components, affecting performance and longevity.
    Neglecting Manufacturer GuidelinesIgnoring the manufacturer’s recommended cleaning procedures can lead to suboptimal cleaning and potential damage to the microscope.
    Rushing the Cleaning ProcessHasty cleaning may result in incomplete removal of contaminants, diminishing the quality of observations and potentially introducing errors.
    Neglecting Routine MaintenanceFailing to establish a regular cleaning schedule and inspect the microscope for wear and tear can lead to unexpected issues and reduce the instrument’s lifespan.
    Overlooking Lubrication of Moving PartsLack of lubrication in moving parts can result in friction, increased wear, and potential damage to mechanical components, affecting overall performance.

    Avoiding these common mistakes is essential for maintaining a microscope’s optimal performance, preventing damage, and ensuring accurate scientific observations. Adherence to proper cleaning and maintenance practices is key to the instrument’s longevity and reliability.

    Routine Maintenance and Inspection Guidelines for Microscopes

    Maintenance TaskDescription
    Cleaning ScheduleEstablish a regular cleaning routine to remove dust, debris, and contaminants. Consider daily, weekly, and monthly tasks.
    Signs of Wear and Tear InspectionRegularly inspect microscope components for signs of wear, such as scratches, corrosion, or loose fittings.
    Lubrication of Moving PartsApply appropriate lubricants to moving parts, such as the focusing mechanism, stage, and any rotating components.

    Routine maintenance is vital to ensure the consistent performance of microscopes. The table outlines key tasks for effective maintenance and inspection:

    1. Cleaning Schedule: Regular cleaning is essential to prevent the accumulation of dust and contaminants that could affect the quality of observations. Daily, weekly, and monthly tasks should be considered to address different levels of cleanliness requirements.
    2. Signs of Wear and Tear Inspection: Routine inspections help identify any signs of wear or damage to microscope components. This includes checking for scratches on lenses, corrosion on metal parts, and ensuring that all fittings are secure.
    3. Lubrication of Moving Parts: Applying appropriate lubricants to moving parts ensures smooth operation and helps prevent damage. Components such as the focusing mechanism, stage, and any rotating parts should be periodically lubricated to maintain optimal functionality.

    By adhering to these routine maintenance tasks, users can prolong the lifespan of their microscopes and ensure consistent and reliable performance.

    What is the best way to clean immersion oil from a microscope lens?

    When cleaning your microscope lens, the best way is to use a lens-cleaning solution. There are many available on the market, and choosing the appropriate one for the lens you are cleaning is vital. Some of the most popular lens-cleaning solutions include:

    Isopropyl alcohol: This general-purpose cleaner can be used on all lenses.

    Petroleum jelly: This natural oil can be used to clean lenses made of glass or plastic.

    Lens cleaner powder: This fine-grained powder is used to clean lenses made of metal or other hard materials.

    When using a lens cleaning solution, it is important to wet the lens and then add the solution. Gently swirl the solution around the lens until it is thoroughly wetted. Let the solution sit on the lens for several minutes, then rinse it with water.

    Why is special paper used to clean the lenses of a microscope?

    You can use a particular type of paper known as a Clark glass slide to clean microscopes. This paper is designed to clean the microscope’s lenses without damaging them. The paper is made of a flexible and rigid material, allowing it to withstand the pressure and friction caused by the microscope. Additionally, the paper is designed to absorb oil and other contaminants, then eliminated by the microscope’s cleaning system.

    The Clark glass slide paper is a must-have for anyone who regularly uses a microscope, as it helps maintain the instrument’s performance and accuracy.

    Lens tissue is made of cotton and polyester, which helps absorb oil and moisture. This prevents dirt, dust, and other debris from building up on the lens and causing blurry images. Lens cleaner is specifically formulated to clean lenses and is safe for plastic and glass. It also leaves the lenses with a pleasant smell to keep them clean and debris-free.

    Can you clean the microscope lens with a glasses cleaner?

    Yes, you can clean the microscope lens with a glasses cleaner. Depending on the type of cleaner, it may effectively remove dust, dirt, and other contaminants. Make sure to test the cleaner on a small area first to ensure it is safe for the lens.

    Can you use a handkerchief to clean a microscope?

    Absolutely not! A handkerchief will not work to clean a microscope because it is not made for that purpose. A microscope is a highly delicate instrument that must be cleaned meticulously to maintain accuracy. Instead, it would be best to use a special lens-cleaning cloth or a lens-cleaning solution.

    Can you use alcohol to clean a microscope?

    While it is possible to use alcohol to clean a microscope, it is not recommended. Alcohol can damage the lens, eyepieces, and other microscope parts. Additionally, it can create dangerous fumes that are harmful to your health. If you decide to use alcohol to clean your microscope, do it safely and carefully.

    How often should you clean the lens of your microscope?

    It is best to clean the lens after every use, but this cannot be easy if you are a busy scientist. A good rule of thumb is to clean the lens at least once a week, but it is always recommended to do more if necessary.

    Should you clean a microscope lens with lighter fluid?

    No, it would be best if you did not clean a microscope lens with lighter fluid. Lighter fluid is a volatile substance and can easily ignite if it comes in contact with chemicals or other flammable materials. This could result in a fire, damage the microscope or even cause injury.

    What fabric do you use to clean a microscope lens?

    A few different fabrics can be used to clean a microscope lens. One option is to use a cotton swab and some alcohol, and another is to use a microfiber cloth and a mild detergent. It is essential to use a soft cloth not to scratch the lens but also hard enough to remove dirt and debris.

    What happens if you clean a microscope lens without paper?

    If you are cleaning a microscope lens without paper, you are potentially damaging the lens and possibly causing it to light up or shatter irregularly. That is because the cleaning solution will leave behind grit, which will scratch the surface of the lens. In the worst-case scenario, this could result in the lens actually breaking.

    How do you lubricate a microscope?

    Microscopes require extraordinary lubrication to function correctly. A few types of lubricants can be used in microscopes, but the most popular is oil. Oil is a good lubricant because it is non-toxic, doesn’t corrode metal parts, and is easy to clean up. When using oil, it is essential to ensure that the microscope is assembled correctly and that the oil has been properly distributed.

    Another type of lubricant that can be used in microscopes is silicone. Silicone is a good lubricant because it doesn’t corrode metal parts, is non-toxic, and doesn’t cause build-up. It is also a good lubricant for eyepieces because it doesn’t fog up.

    The final type of lubricant that can be used in microscopes is glycerin.

    Final Words

    Keeping your microscope in pristine condition is essential for its reliability and performance. By following a few simple steps outlined in this blog, you’ll be able to clean it easily and keep it running like new! Before starting, read all instructions carefully, and avoid storing your microscope in an area where fungus grows. Finally, always clean your hands before and after handling the microscope for optimal hygiene.

    However, like any other electronic equipment, they can become contaminated with dirt, dust, and other debris. This blog post outlines the necessary steps to clean a microscope mechanically and optically. By following these simple guidelines, you’ll be able to keep your microscope in peak condition for future use! Do you have any questions or suggestions about how to clean a microscope? Let us know in the comments below!

  • Can you bring binoculars to a concert? 7 Tips With Video

    Can you bring binoculars to a concert? 7 Tips With Video

    Yes, you can bring binoculars to a concert.

    Binoculars are generally allowed at concerts, as they are considered a non-disruptive item that enhances the individual’s viewing experience without causing disturbance to others. However, it’s advisable to check the specific concert venue’s rules and regulations, as some venues may have their own policies regarding certain items.

    ImageProductDetailPrice
    Carson MicroBrite Plus 60x-120x LED Lighted Pocket Microscope

    Carson MicroBrite Plus 60x-120x LED Lighted Pocket Microscope

    • High Magnification – With a versatile magnification range
    • Compact and lightweight
    See on Amazon
    Elikliv LCD Digital Coin Microscope

    Elikliv LCD Digital Coin Microscope

    • Powerful 1000x Magnification
    • Suitable for circuit board inspection
    See on Amazon
    AmScope M150 Series Portable Compound Microscope

    AmScope M150 Series Portable Compound Microscope

    • Features all-metal framework and a 360 rotatable monocular head, ensuring reliable performance
    See on Amazon
    PalliPartners Compound Microscope for Adults & Kids

    PalliPartners Compound Microscope for Adults & Kids

    • High-Power Biological Microscope for Students
    See on Amazon
    Skybasic 50X-1000X Magnification WiFi Portable Handheld Microscopes

    Skybasic 50X-1000X Magnification WiFi Portable Handheld Microscopes

    • Lightweight and small size are convenient for taking them with you everywhere
    See on Amazon

    Table: Allowed Items at Concerts

    Allowed ItemsRestrictions
    BinocularsCheck venue policies
    Small camerasNo professional recording equipment
    Backpacks/pursesSize limitations may apply
    Water bottlesTypically allowed, must be sealed
    SnacksNon-disruptive snacks usually allowed
    Seat cushionsCheck venue policies

    Always check with the concert venue for specific rules, as policies may vary.

    Here are 3 of the best concert binoculars so you can enjoy the show without straining your eyes!

    7 Tips to bring binoculars to a concert

    When going to a concert, make sure to bring your binoculars. Concert-goers often enjoy seeing their favorite artists up close and personal, and binoculars provide an excellent way to do this. Binoculars also come in handy when spotting the performer’s reactions during live performances.

    Before heading out, pack all the necessary supplies: spare batteries for your binoculars, a comfortable shoulder strap, and a protective case if desired. And finally, be aware of stadium or venue restrictions on bringing outside items (like binoculars).

    1.      Get a comfortable pair of binoculars.

    Bringing binoculars to a concert can be a great way to enjoy the show without cramming your neck all the time. A good pair of binoculars will provide you with a clear, unobstructed view of the stage, so you won’t have to miss any of the action.

    It’s also essential to get a pair that’s comfortable to wear. You don’t want them weighing down your arms or squeezing your eyes shut during the performance. Instead, look for models that are lightweight and easy to hold.

    The size of your binoculars will depend on what kind of Concert you will attend. If you’re attending a small or intimate concert, a smaller pair of binoculars will be more than enough. On the other hand, if you’re attending a stadium-sized concert, you’ll need something bigger and heavier to see everything.

    The weight of your binoculars is also essential. You don’t want them to be too heavy or too light – they should feel comfortable in your hands. And lastly, the magnification factor will depend on the kind of Concert you’re going to attend.

    Low magnification may be sufficient if it’s an intimate concert where only a few people are seated nearby. However, if it’s an arena-sized Concert where thousands of people sit close together, then high magnification is necessary to see everything.

    2.      Strap them to your body

    You can use binoculars to see better at concerts, other events, or even hiking or camping. You don’t need to be at the front or the back of the crowd – you can sit anywhere and get an excellent view.

    To use them, strap them to your body in a way that’s comfortable for you. Make sure that the straps are tight enough not to move around but loose enough so that you can still move around easily. It would be best if you also made sure that the binoculars are properly aligned so that you can see clearly.

    3.      Position them to have a clear view of the stage

    Binoculars are a great way to have a clear view of the stage while attending a concert. By positioning them correctly, you’ll see every detail without straining your eyes.

    The first thing you need to do is find a spot where you’ll be comfortable sitting. Next, position your binoculars so that they’re level with your eyes. It would be best if you also aimed them to point away from your face and towards the stage. This will ensure you have a clear view of everything onstage.

    4.      Consider buying a tripod for binocular use

    Buying a tripod for binocular use is a great way to improve your viewing experience. It will allow you to take sharper and clearer photos and videos, making capturing the details of your favorite concert or sporting event easier.

    Multiple tripods are available on the market, but the best one for binoculars is probably the vertical-lift tripod. This tripod type allows you to adjust the height to get as close to the action as possible.

    You should also make sure that your tripod is stable enough not to move during your viewing session. When choosing a concert to attend, research which venues allow binoculars and how you are supposed to transport them.

    Often concerts will have designated areas where binoculars can be used. However, some venues may have “no photo or video” policies, so you must know the rules before arriving at the event.

    Some tips for using binoculars at a concert include:

    Position your binoculars correctly so you get an optimal view of the stage.

    Adjusting your focus as needed.

    Staring at the stage for a few minutes before the concert begins will help you get oriented.

    Be aware of your surroundings and avoid crowds if possible -Stay hydrated, especially if you use glasses to view the concert.

    Take any necessary precautions (such as sunscreen) to avoid sunburn.

    Enjoy the experience!

    5.      Use binoculars to watch the concert unfold

    Binoculars enhance the viewing experience by giving you a better view of the performers and are also great for getting a sense of perspective. This means you’ll be able to understand better why certain parts of the performance are more impressive than others.

    Most concerts nowadays are filmed and distributed online, so there is no need to miss out on any action. Just take a few minutes before the concert begins and head to some good spots where you can get a good view without being too close or far away. You won’t regret it!

    6.      Be aware of your surroundings and avoid crowds

    You must be aware of your surroundings and avoid crowds when going to a concert. This is especially important if you are wearing glasses or contacts, as they can become damaged in crowded conditions.

    If you get caught in a crowd, try to move as quickly and discreetly as possible. If there’s nothing else you can do, try to hold on to someone else and keep your eyes closed so that you don’t injure them when the crowd starts to crush them. And finally, never try to climb onto anything or take any unnecessary risks –enjoy the show!

    7.      Stay hydrated and enjoy the experience!

    When heading to a concert, it’s important to stay hydrated and avoid getting too hot or sweaty. Not only will this help you enjoy the performance more, but it’ll also keep you safe from potential health problems.

    Here are some tips for staying hydrated at a concert:

    Please bring a water bottle with you and refill it on the way.

    Drink plenty of water during the performance – even if you don’t feel thirsty.

    Avoid drinking alcohol or other high-calorie drinks, which will worsen dehydration.

    Avoid any food that isn’t advertised as safe for concerts – processed foods and sugary snacks are especially risky.

    Pros of using binoculars at a concert:

    You can look closer at the performers on stage without crushing your neck or standing up.

    You can see details in the performance that you might not be able to see from close quarters with just your eyes.

    If there is an extended delay between songs, you might be able to catch some sneak peeks of upcoming performances.

    Cons of using binoculars at a concert:

    It can be hard to keep them focused on one spot, especially if the light and action in the venue are too distracting.

    You may lose some of the ambiance and atmosphere of a live performance if you’re constantly scanning the stage for details.

    How to transport and store your binoculars while at a concert?

    If you’re planning on attending a concert or sporting event, pack your binoculars in a safe and secure place. Many people transport their binoculars in their bags or pockets, but this is not the safest option. Bins are heavy and can cause injury if they’re dropped accidentally. Instead, find an inconspicuous place to store your bins away from other belongings while at the event.

    There are a few essential tips that you can follow to ensure safe and easy transport and storage of your binoculars while attending a concert:

    1. Ensure the batteries are fully charged before leaving for the event. Having dead batteries will significantly reduce your viewing pleasure.

    2. Store your binoculars in an easily accessible location, preferably within arm’s reach, so you can quickly grab them when needed. If possible, put them somewhere where they won’t get knocked over or bumped during the performance (for example, by putting them on top of nearby furniture).

    3. Keep any extra lenses or filters separate from the leading pair of glasses so they don’t get scratched or damaged.

    What is the best place to sit to see a concert from a better vantage point?

    Concerts are fun and engaging for an evening, but they can also be quite taxing on the body. Sitting at a good vantage point can minimize the strain on your eyes and other senses.

    Here are some of the best places to sit for concerts:

    The front row- this is often considered the best spot because it allows you to see both the stage and the audience. Plus, being up close will let you feel more involved in what’s happening onstage.

    Second row from behind- Depending on your seat, this could provide excellent acoustics or give you a great view of backup singers or dancers. Being at a less popular section of an arena may also result in lower ticket prices.

    Front-row seats near either side- These positions offer advantageous viewing angles no matter which direction your concert goes (left or right). Additionally, these seats tend not to sell out early, so chances are greater that you’ll get one if desired.

    Should you take your binoculars to the zoo?

    Yes, you definitely should take your binoculars to the zoo! Not only will they give you a fun and educational experience, but they can also help to improve your eyesight. By looking through strong lenses at close range, you can magnify images up to 20 times.

    This is especially important if you have difficulty reading fine print or viewing objects from afar. Opt for a pair of high-quality binoculars that offer a wide field of view and brightness so that everything in sight will be clear.

    Can you use binoculars at a sporting event?

    Binoculars are not typically permitted at sporting events, but there may be a situation in which they are permissible. If you have a legitimate reason to need binoculars for the event (such as if you’re attending as an observer), then officials should allow them. However, it is best to check with the sport’s governing body before heading to an event so that you know exactly what restrictions will be in place.

    Is it legal to bring binoculars to a concert?

    Yes, you can bring binoculars to a concert if they are not used for spying or photography. With the increasing popularity of concerts, fans must have the opportunity to see their favorite stars up close and personal. Binoculars can be useful for doing this without standing far away from the stage.

    How to wear binoculars at a concert?

    Finding a comfortable way to wear binoculars at a concert can be challenging, but some tips may help.

    First, ensure the strap is long enough not to dig into your neck or fall off your shoulder.

    Secondly, position the lenses, so they’re directly in front of your eyes and between your eyebrows rather than on top of your head.

    And finally, if you have trouble seeing clearly because of glare or low light levels, consider wearing sunglasses while viewing concerts.

    These simple tips should help you enjoy music without difficulty seeing what’s going on onstage!

    Take Away

    We hope that this blog has cleared every doubt about binoculars for concerts. But if you still have doubts, try our trusted brand SENMONUS Professional Hands-Free Binocular Glasses! Everyone will love its amazing features like the long-lasting and the better image quality. Not just because they come with a host of features and incredible optics but also thanks to their comfortable design. You will feel completely at ease while using these glasses!

    We highly recommend them because they provide professional clarity at home and in concerts. Grab yours today and enjoy all your favorite things with ease!

  • Microscope For Soil Biology – 5 Questions Answered: Video With Expert Recommendation

    A microscope is an essential tool if you’re interested in learning more about soil biology. Soil biology studies the interactions between plants, soil, and other organisms in an ecosystem. You can make informed decisions about managing your garden or farmland by checking the microorganisms, soil texture, and other factors. They allow you to view the soil on a tiny scale and see the details that would otherwise be invisible. Soil biology microscopes will enable you to see fungi, bacteria, and protozoa.

    Whether you’re a horticulturist, farmer, or simply interested in understanding your soil better, a soil biology microscope is an essential tool. It allows you to see the molecular level of the soil, which can help you improve the health and yield of your plants. So how do you choose and buy one? In this article, we provide all the information you need to make an informed decision. We also provide a buyer’s guide to help you choose the best soil biology microscope for your needs. So read on to learn more!

    ImageProductDetailPrice
    Carson MicroBrite Plus 60x-120x LED Lighted Pocket Microscope

    Carson MicroBrite Plus 60x-120x LED Lighted Pocket Microscope

    • High Magnification – With a versatile magnification range
    • Compact and lightweight
    See on Amazon
    Elikliv LCD Digital Coin Microscope

    Elikliv LCD Digital Coin Microscope

    • Powerful 1000x Magnification
    • Suitable for circuit board inspection
    See on Amazon
    AmScope M150 Series Portable Compound Microscope

    AmScope M150 Series Portable Compound Microscope

    • Features all-metal framework and a 360 rotatable monocular head, ensuring reliable performance
    See on Amazon
    PalliPartners Compound Microscope for Adults & Kids

    PalliPartners Compound Microscope for Adults & Kids

    • High-Power Biological Microscope for Students
    See on Amazon
    Skybasic 50X-1000X Magnification WiFi Portable Handheld Microscopes

    Skybasic 50X-1000X Magnification WiFi Portable Handheld Microscopes

    • Lightweight and small size are convenient for taking them with you everywhere
    See on Amazon

    Importance of Microscopy in Soil Biology

    Traditional Soil Analysis Limitations:

    Traditional soil analysis methods, including chemical and physical tests, have long been the cornerstone of soil science. However, these methods come with inherent limitations. Chemical tests alone often fail to provide a comprehensive understanding of the intricate microbial communities that inhabit soil ecosystems. They may overlook the nuanced interactions and relationships between microorganisms and their environments. Physical tests, while valuable for assessing soil structure, may miss crucial details at the microscopic level, leaving a significant gap in our comprehension of soil biology.

    Exploring Hidden Microbial Diversity:

    Microscopy emerges as a powerful tool to bridge these gaps. By delving into the microscopic realm, researchers can uncover the hidden microbial diversity that plays a pivotal role in soil health. Microorganisms, including bacteria, fungi, and protozoa, contribute to nutrient cycling, organic matter decomposition, and plant-microbe interactions. Traditional methods often underestimate this diversity, and without a microscopic lens, these crucial contributors to soil ecosystems remain largely invisible. Microscopy allows scientists to visualize and identify these microorganisms, facilitating a more holistic understanding of soil biology.

    Ecological and Agricultural Implications:

    The significance of soil biology extends beyond the confines of the microscope, reaching into broader ecological and agricultural realms. Microorganisms influence soil structure, fertility, and nutrient cycling, directly impacting plant growth and health. Understanding the intricate relationships between soil microorganisms and plants is essential for sustainable agriculture practices. Microscopy not only aids in identifying specific microbial species but also allows for the observation of their spatial distribution and interactions within the soil matrix. This level of detail is crucial for designing targeted agricultural interventions, such as biofertilizers and soil amendments, to enhance crop productivity while minimizing environmental impact.

    Table: Comparison of Traditional Soil Analysis Methods and Microscopic Techniques

    AspectTraditional Soil Analysis MethodsMicroscopic Techniques
    Microbial DiversityLimited insightReveals diverse populations
    Nutrient CyclingIndirect measurementsVisualizes microbial activity
    Soil StructureMacroscopic assessmentProvides microscopic details
    Plant-Microbe InteractionsInferred from indirect indicatorsDirect observation and analysis

    Table: Microbial Contributions to Soil Functions

    MicroorganismFunction
    BacteriaNutrient cycling, nitrogen fixation
    FungiDecomposition of organic matter, mycorrhizal symbiosis
    ProtozoaPredation on bacteria, nutrient cycling
    ArchaeaMethane production, nitrogen cycling

    Types of Microscopes Used in Soil Biology

    Microscopes play a pivotal role in unraveling the microscopic intricacies of soil biology. Various types of microscopes cater to the diverse needs of soil researchers, each offering unique advantages in visualizing soil microorganisms.

    Light Microscopes:

    Light microscopes are fundamental tools in soil biology research, providing researchers with a glimpse into the world of soil microorganisms. Two common techniques within light microscopy are bright-field and phase-contrast microscopy.

    • Bright-Field Microscopy: This traditional method illuminates specimens against a bright background, making them visible to the observer. It is useful for observing the general morphology and spatial distribution of soil microorganisms. However, it has limitations, particularly in differentiating transparent organisms or structures.
    • Phase-Contrast Microscopy: To overcome the limitations of bright-field microscopy, phase-contrast microscopy enhances the contrast of transparent specimens without the need for staining. This technique is particularly valuable in soil biology, allowing for the observation of live microorganisms in their natural state. Despite these advantages, light microscopes may have limitations in revealing fine details and structures in soil samples.

    Electron Microscopes:

    Electron microscopes, including scanning electron microscopy (SEM) and transmission electron microscopy (TEM), offer unparalleled resolution, allowing researchers to explore soil microorganisms at the nanoscale.

    • Scanning Electron Microscopy (SEM): SEM provides detailed 3D images of soil surfaces, allowing for a high-resolution examination of soil microorganisms. It is especially valuable for studying the surface structures of bacteria, fungi, and other microorganisms. SEM’s ability to capture detailed topographical information aids in understanding soil microorganism interactions with soil particles.
    • Transmission Electron Microscopy (TEM): TEM takes microscopy to a higher resolution level by transmitting electrons through the specimen. This method enables researchers to explore internal cellular structures and ultrafine details of soil microorganisms. TEM is particularly beneficial for studying the ultrastructure of microbial cells and gaining insights into their physiological processes.

    Confocal Microscopes:

    Confocal microscopes revolutionize soil biology research by offering 3D imaging capabilities and the ability to visualize specific components using fluorescence labeling.

    • 3D Imaging: Confocal microscopy excels in providing three-dimensional images of soil microstructures, offering insights into the spatial distribution of microorganisms within soil aggregates. This is crucial for understanding the microhabitats and niches occupied by different microbial species.
    • Fluorescence Labeling: By tagging specific microbial components with fluorescent dyes, confocal microscopy allows for the identification and tracking of individual microorganisms within complex soil samples. This is particularly valuable for studying microbial diversity and interactions.

    Techniques for Soil Sample Preparation

    Critical Steps in Soil Sample Preparation:

    Effective soil sample preparation is a crucial precursor to obtaining meaningful microscopic insights into soil biology. Several key steps ensure the preservation and representation of soil microorganisms.

    1. Sample Collection: Accurate representation starts with proper sample collection. Researchers must consider the sampling depth, location, and the specific objectives of their study to ensure a comprehensive view of the soil ecosystem.
    2. Sieving and Homogenization: To remove large debris and ensure sample homogeneity, sieving is employed. This step aids in obtaining a representative subsample for subsequent analysis.
    3. Moisture Adjustment: Soil moisture content can significantly impact microbial activity. Adjusting soil moisture to a consistent level across samples ensures uniform conditions for analysis.

    Fixation and Staining Methods:

    1. Fixation: The preservation of soil samples is crucial to prevent microbial degradation and changes in cellular morphology. Common fixatives include formaldehyde and glutaraldehyde, which arrest biological activity while maintaining cellular integrity.
    2. Staining Techniques: Staining enhances contrast and enables the visualization of microbial structures. Various stains, such as Gram stain and fluorescent dyes, can be employed based on the specific requirements of the study. Fluorescent staining is particularly useful in confocal microscopy, allowing for specific microbial identification.

    Addressing Challenges in Sample Preparation:

    1. Contamination Control: Contamination is a common challenge in soil sample preparation. Rigorous adherence to sterile techniques and the use of clean equipment are essential to avoid introducing external microorganisms.
    2. Artifact Formation: During sample processing, artifacts may arise, leading to inaccurate observations. Minimizing physical manipulation and employing gentle techniques help reduce the risk of artifacts.
    3. Quantifying Biomass: Accurately determining microbial biomass is challenging but critical for understanding microbial dynamics. Combining microscopy with quantitative methods, such as DNA-based techniques, aids in obtaining a more comprehensive assessment of microbial abundance.

    Tips and Best Practices for Effective Soil Microscopy

    Proper Maintenance and Calibration:

    Maintaining microscopes in optimal condition is paramount for accurate soil microscopy. Regular cleaning of lenses, proper storage, and routine calibration ensure consistent and reliable results. Calibration is especially critical for quantifying microbial sizes and structures accurately.

    Importance of Training and Skill Development:

    Effective use of microscopes in soil biology demands a skilled and trained workforce. Researchers should undergo comprehensive training to develop proficiency in microscope operation, sample preparation, and image analysis. Continuous skill development keeps researchers abreast of emerging technologies and enhances the quality of microscopic observations.

    Collaborative Approaches for Interdisciplinary Research:

    Interdisciplinary collaboration is key to advancing soil biology through microscopy. Collaboration between microbiologists, ecologists, soil scientists, and imaging specialists fosters a holistic understanding of soil ecosystems. By combining expertise, researchers can tackle complex challenges and integrate diverse data sets, leading to a more nuanced comprehension of soil microbial communities.

    Tables:

    Table 1: Microscope Maintenance Checklist

    Maintenance TaskFrequency
    Lens CleaningWeekly
    Objective CalibrationMonthly
    Condenser AlignmentQuarterly
    Light Source InspectionBiannually

    Table 2: Training and Skill Development Opportunities

    Training ModuleTarget Audience
    Microscope Operation BasicsUndergraduate Students
    Advanced Imaging TechniquesGraduate Researchers
    Image Analysis and QuantificationPostdoctoral Researchers

    BEBANG Monocular Microscope

    So far, I’ve been very impressed with this microscope! It has a powerful dual illumination system that makes it really easy to see details in the samples I’m looking at. Additionally, the bebang design makes it really comfortable to hold and use. With its super-clear optics, BEBANG Monocular Microscope is capable of magnifying objects up to 500x.

    Sale
    Microscope for Adults Kids, 100X-2000X BEBANG Compound Microscope with Microscope Slides, Microscope Kit for Kids Students Home School Lab
    • [High Magnification] WF25X eyepiece alone or with 2X lens, cooperate 4x 10x 40x objective lenses, biological microscopes offers 6 magnification settings, 100X, 250X, 1000X, 200X, 500X, 2000X.
    • [Coarse and Fine Focus] Monocular Microscopes with solid metal frame and coarse/fine focusing knobs, ensures detail and precise focus adjustment, crate a image more clearer and sharper.
    • [Dual Illumination System] Top and bottom LED simultaneously brightfield, a 0.65 NA single-lens condenser with disc diaphragm, provide high-resolution color-corrected images.
    • [Complete Accessories] It comes with phone adapter, wire shutter, 10 operating accessories, 15pcs microscope slides set, carrying bag. Meet all your biological observation need.
    • [Practical Educational Tool] This 100X-2000X biological microscope is designed to help students/kids/adults/beginner/amateur scientist/hobbyists exploring the fantastic world of the life. It is suitable for school,laboratory or home teaching, one-on-one instruction.

    Its adjustable 3x, 10x, and 50x magnifications turn it into a powerful tool for biologists, scientists, and researchers. Furthermore, its easy-to-use design makes it perfect for both classroom use and home use. It’s really powerful and I can see really clear pictures with it.

    Monocular Microscope for Adults Students,40X-2000X Magnification,Dual LED Illumination Beginners Microscope with Science Kits,Phone Adapter,Carrying Case,AC Adapter,15 Slides for Lab Class Study

    This BEBANG Monocular Microscope is a great product overall! The magnification range is from 40x to 2000x, which makes it perfect for beginner students and adults alike. The dual illumination system provides a bright, clear image even in low light conditions.

    The fine focusing feature allows for easy navigation of the microscope slides and the metal body ensures durability. Additionally, the carrying case and 15 slides make this an ideal educational gift for any student or observer. This product is perfect for your school, classroom, or office. It has everything you need to get started and it even includes a carrying case!

    I love this microscope ~ I have used them in my class now for many years and they are great beginners microscopes with nice bright images under both low light conditions as well. They include cheap accessories too (15 slides) so do not expect 3D results yet.

    I like that each order comes with a small case for transporting your microscope. I use them to teach community service skills and learn how stuff lives (insects especially) so I’m always looking at everything with my students.

    Does this model come with a user manual to know how to use it?

    The BEBANG Monocular Microscope comes with a user manual in six languages, making it easy for any novice to get started. Additionally, the metal body and fine focusing feature make this an ideal educational gift for anyone interested in science or nature.

    Cafthings LED Compound Lab Biological Microscope

    Looking for an amazing microscope that you can use at home? Look no further than the Cafthings LED binocular compound lab professional electron biological microscope! With its easy-to-use controls, this microscope is perfect for anyone who wants to get a closer look at their specimens. Plus, the high-quality images that it produces are sure to impress!

    Cafthings LED Binocular Compound Lab Professional Electron Biological Microscope with 10X 20X Eyepieces, Double Layer Mechanical Stage & Ultra-Precise,Focusing,Including Slides, Phone Adapters

    The Cafthings LED Compound Microscope is a high-quality microscope perfect for any microbiologist or student interested in microscopy. The achromatic lenses are clear and distortion-free, making it easy to view specimens. The metal construction makes it sturdy and durable, while the focusing system is easy to use.

    This microscope can also be used with smartphones for real-time sharing of images and videos, making observation more convenient than ever before. The microscope is also great as a present for any microscopy enthusiast because, in addition to the outstanding quality of this affordable price range, it contains many features that are typically only found on top-of-the-range models at much higher prices.

    Overall this microscope will serve anyone interested in seeing cells more clearly and efficiently than ever before: friends, family, or even students studying biology!

    Can You connect this model to a PC or laptop? 

    The Cafthings LED Compound Microscope does not have a USB connection, so it cannot be connected to a PC or laptop. However, the digital interface on this microscope allows for transmitting files from one computer to another.

    OMAX 40X-2000X LED Binocular Compound Lab Microscope

    Are you in the market for a high-quality microscope that can be used to inspect biological samples? OMAX 40X-2000X LED Binocular Compound Lab Microscope may be just what you need! This microscope offers users sharp, clear images that are perfect for examining cells, tissues, and even whole organisms.

    OMAX M82E Series LED Binocular Compound Lab Microscope – 40X-2000X Magnification – Microscope Kit with 100 Blank Slides & Cover Slips
    • Magnification: The OMAX microscope boasts 4 achromatic DIN objectives and offers 8 levels of high-resolution magnification from 40X to 2000X
    • Advanced Illumination: Equipped with variable intensity LED light, this compound microscope ensures clear visualization of microscope slides
    • Adjustable Viewing: Features a binocular viewing head with adjustable interpupillary distance and diopter, providing comfortable and precise viewing
    • Premium Construction: This microscope for adults includes a double layer mechanical stage with scale, coaxial coarse and fine focus knobs, and a sturdy metal frame
    • About AmScope: We have the industry’s leading collection of microscopes, microscopes cameras, accessories, and other related products

    With its easy-to-use controls, this microscope is perfect for students, researchers, or anyone who wants to get a better look at their specimens. So what are you waiting for? Click the link below to get your hands on this amazing microscope!

    OMAX 40X-2000X LED Binocular Compound Lab Microscope w/ Double Layer Mechanical Stage + Blank Slides, Cover Slips, & Lens Cleaning Paper, M82ES-SC100-LP100

    One thing to note is that this microscope is not suitable for organisms that are sensitive to light, like spiders or snails. So, if you’re looking at something like those creatures, you’ll need to use another microscope instead. But otherwise, this is an excellent tool for anyone who wants to study small organisms in detail.

    I am a soil biology student, and this microscope exceeded my expectations. It was easy to set up, and the focus was sharp and smooth. Controls for the x y translational stage worked well. Within minutes I had a copy of the pic on my phone and emailed it to my professor (I googled microscope). He was impressed, but not so much out loud.

    Yes! You can spend 2 or 3 thousand dollars more on a better one, but this doesn’t fit your budget, buy both!

    Does this OMAX 40X-2000X model come with oil?

    The microscope does come with oil and a small resealable bag. This model is a fantastic microscope for anyone looking to get a high-quality product at an affordable price!

    NATIONAL GEOGRAPHIC Dual LED Student Microscope

    If you’re looking for a microscope that’s both fun and educational, the National Geographic Dual LED Student Microscope is perfect for you! This microscope offers high-quality images and a wide variety of uses, making it a great choice for students of all ages. Plus, its dual LEDs make it easy to see details in both dark and light areas.

    NATIONAL GEOGRAPHIC Dual LED Kids Microscope – 50+ pc Science Kit with 10 Prepared Slides & 10 DIY Blank Slides, Biology Experiment Activity, Microscope Kit for Kids 8-12 (Amazon Exclusive)
    • EXPLORE THE MICROSCOPIC WORLD – With this high-quality microscope kit, kids can explore the fascinating world that exists beyond what our eyes can see! They’ll be entertained for hours as they explore the microscopic world with this STEM lab kit!
    • TWO MICROSCOPES IN ONE! Use the lower LED lights to view biological specimens on slides or switch over to the upper lights to examine 3D objects in intricate detail. The perfect STEM activity for boys and girls.
    • OVER 50 ACCESSORIES INCLUDED – Explore a curated set of 10 prepared slides with a range of biological specimens, then create your own with the included blank slides and covers, tweezers, and eye-dropper. This complete kit also includes a mini geode!
    • POWERFUL LEARNING TOOL – This microscope features two sets of optical glass lenses providing 20x and 50x magnification, and is easy to operate making learning fun and accessible for young scientists. Kids science experiments have never been so fun!
    • HIGH-QUALITY EDUCATIONAL TOYS – We’re proud to make the highest quality hands-on science toys, and all our products are backed by exceptional service. If your experience is less than stellar, let us know and we’ll make things right!

    This microscope is perfect for your 5-year-old. With only interest in insects and butterflies, the addition of an insect book filled with beautiful pictures was all you needed to begin your collection of helpful information about life forms on Earth today!

    She even has learned words like “pteropod,” which means underwater creature or frog. The magnification is exceptionally high, allowing us to know things we have never seen before, such as ticks, rhinoceros beetles, female earwigs (“front legs are for giving babies food!”), and so much more.

    NATIONAL GEOGRAPHIC Dual LED Student Microscope – 50+ pc Science Kit Includes Set of 10 Prepared Biological & 10 Blank Slides, Lab Shrimp Experiment, 10x-25x Optical Glass Lenses and more! (Silver)

    I unquestionably love this National Geographic model! This microscope is perfect for younger students just starting their science journey. It comes with many accessories, and it has some great features like overhead or back-lighting. Our only issue was that our first microscope had a broken adjustment knob, but amazon replaced it promptly. Overall this is an excellent beginner microscope!

    This microscope is simple enough to use that she can do it herself, but sturdy enough she can rely on us adults if necessary. Overall a great purchase as well as the excellent quality of this product!

    What material is a microscope made of?

    This model is made of hard plastic, making it lightweight and very portable. I would recommend this microscope for students who are just starting out in their science journey. It comes with a lot of accessories, making it perfect for younger students.

    OMAX MD827S30L Digital Biological Light Microscope

    The demand for high-resolution, digital microscopes is constantly on the rise, and the OMAX MD827S30L Digital Biological Light Microscope is certainly no exception. With its ability to provide clear images at a resolution of up to 30um (micrometers), this microscope is perfect for all your biological needs.

    OMAX 3MP Digital Integrated Microscope with LED Illumination – 40X-2000X Magnification – Binocular Compound Microscope with Coaxial Coarse & Fine Focus
    • Magnification: With a 40X to 2000X range, this compound microscope provides powerful zoom capabilities, making it ideal for clinics, vets, and classrooms
    • Professional Imaging: The integrated 3MP microscope camera streams and captures high-resolution images and videos straight to your computer
    • Advanced Illumination: Equipped with an LED light, the microscope enhances specimen visibility, offering a clear, bright field of view
    • Precise Focusing: The microscope features a coaxial coarse and fine focus, allowing for sharp and refined adjustments to achieve optimal image clarity and stability
    • About AmScope: We have the industry’s leading collection of microscopes, microscopes cameras, accessories, and other related products

    Capable of capturing high-quality images and videos, the MD827S30L is perfect for researchers, scientists, and students in the medical field. So what are you waiting for? Get your hands on this powerful microscope today!

    Additionally, the double layer mechanical stage allows you to easily adjust alignment and magnification – making it easy to get clear images of your specimens. Overall a great purchase as well as the excellent quality of this product!

    OMAX - MD827S30L Built-in 3MP Camera 40X-2000X Digital Biological Compound Binocular LED Light Microscope with Double Layer Mechanical Stage Oil Immersion NA1.25 Condenser

    This microscope is simple enough to use that she can do it herself, but sturdy enough she can rely on us adults if necessary.

    I’ve had the opportunity to use this microscope over the past few weeks, and I must say that I am very impressed. It is perfect for anyone who wants an inexpensive but high-quality microscope. The quality of light that it emits makes it an excellent choice for viewing anatomy or specimen under low lighting conditions.

    In short, I give it two thumbs up!

    How Do I Choose And Buy Microscope for soil Biology

    The most important features to look for when buying a microscope for soil biology are durability, magnification, and ease of use—other factors to consider include the light source and Eyepiece. With the recent increase in power and cost of most microscopes, it would be hard to justify purchasing a sub-factory microscope for soil biology research if you are working southwest of Hawaii.

    Because it will take more money than an HRO or homemade electronic probe. If you live northeast side, these price differences may not make much difference as they have a lower need than those who work on tropical soils.

    Quality

    The microscope should be of durable quality to withstand wear and tear. It is essential to choose a model that has a sturdy build so that it does not easily break or flake apart.

    Brightness

    It is also important to ensure the microscope lens’s brightness so you can clearly see what you are looking at. Some models come with an adjustable light source, while others have bright LED lights built-in.

    Capacity

    You must know how your model can provide a secure option for powering it, and this will come in handy to connect it easily and quickly to the electrical outlet. LED lights are reliable because they do not require electricity. However, there is still the problem of low battery life, so batteries should have lasted longer than other options such as chemicals or extreme temperatures (heat).

    Scientific Purpose

    There are many uses for microscopes in soil biology, and one of the most common is preparation and comparison. A simple microscope will have a lens to magnify an object so you can examine it further or use tweezers to remove anything that might be interesting or helpful.

    It is crucial to choose one with sufficient power; if your research involves capturing images and measuring them, making comparisons through photos seems necessary, then having other types may come in handy.

    That is great if you are a biologist because most images will be of particular organisms. If your research involves plants, more magnification could help find something out. A UV light source can also come in quite helpful to those who study DNA or other molecules that cannot otherwise be seen with traditional light sources.

    Price Range and Popular Brands:

    When buying a microscope for soil biology, one of the essential features to consider is the brand and price range. Many great brands are available, and each offers different features and capabilities. While the price range can be somewhat broad, you should generally aim to spend around $50-$200 on a microscope, which will give you plenty of options for quality and functionality.

    Additionally, it’s essential to make sure that the brand you choose has an existing buying guide that outlines the critical features to look for. If money is the main factor in choosing a new microscope for soil biology research, then you should consider purchasing one that allows electronic camera control to take remote images and digital photographs at high-speed qualities with an easy precision focus on objects under the scope from 0 of 21 mm up to 22 mm.

    What are the benefits of a Microscope For Soil Biology?

    A microscope for soil biology can be a precious tool in the arsenal of any plant or soil scientist. It allows inspection of plant cells, fungi, and bacteria under a high-power lens, providing important information about plant health and soil composition.

    Benefits of a Microscope For Soil Biology

    1) Microscopy is a potent tool for studying the structure and composition of soils. By looking at tiny particles under magnification, you can gain insights into how fertility and other factors affect plant growth.

    2) Microscopy is also used to identify Plant Stress Zones, indicating areas where plants may struggle due to environmental stressors like low water availability or high-temperature extremes.

    3) microscopes allow scientists to study fungal interactions with plant roots in detail, which can help them improve crop yields.

    4) It Allows for Better Identification Of Beneficial Bacteria Associated With Soil Health And Agriculture

    5) It Can Be Used To Study Cell Membranes, Mitochondria, And Nerve Cells.

    Overall, a microscope for soil biology is an essential tool for anyone interested in plant or soil science. It can help identify problems early on and provide valuable information that can be used to improve plant health and soil composition.

    How does it work?

    These microscope that uses the power of light to capture images of plant roots and soil. By photographing these images, scientists can better understand how the plant uses the soil and how the soil affects the plant. This information can then be used to improve crop yields, develop new crops varieties, and manage soil health.

    How Does a Microscope Work?

    These models are portable microscopes used in the field or the laboratory. It has a high-resolution camera that captures images at a resolution of 1,500x. It has a built-in LED light that allows for clear and accurate images to be taken even in low-light conditions. It also has a built-in computer that allows for data collection and analysis.

    The Soil Biology Microscope is a valuable tool for scientists interested in understanding the relationship between plants, soil, and the environment.

    What are some of the challenges with using a Microscope for soil biology?

    Soil biologists use microscopes to study soil organisms and their interactions with their environment. Microscopes are an essential tool for this field because they allow high-resolution images of soil samples. However, microscopes can be challenging for soil biologists because of the small size of the samples and the limited view they offer.

    Microscope users must be careful not to move the sample and focus the lens on the target area. Additionally, the microscope must be calibrated correctly to provide accurate images. Incorrect calibration can result in blurry or distorted images, so it is important to take the time to calibrate your microscope regularly.

    Soil biologists also need to be aware of the light source and how it will affect the image. The light source should be bright but not too bright, and it should be positioned so that it falls on the target area of the microscope.

    How much does it cost?

    A microscope for soil biology can cost anywhere from $50 to $200, and it all depends on the features and specifications you are looking for. Some of the most popular options include the Zeiss Axioplan 2M and the Leica DM4000. These microscopes offer crisp images and are perfect for soil biology research.

    How to clean a soil biology microscope ?

    Microscopes can be very delicate instruments, and it is vital to take care of them when cleaning them. Soil biology is a growing field, and microscopes are essential for observing and studying the small details of plant and animal life.

    how to clean microscope

    When cleaning a microscope, it is necessary to follow these steps:

    Make sure the lens is properly coated with a protective substance.
    Remove any dust or dirt that may be on the lens.
    Wipe down the entire microscope with a clean cloth or a lens cloth.
    Use a lens cleaning solution to clean the lens.
    Dry the microscope with a soft cloth.

    How to disassemble?

    If you’re interested in studying soil biology, it’s vital to have a microscope. Microscopes can be used for various purposes, including investigating plant roots, examining cells and tissues under a microscope, and viewing organisms in their natural environment. However, as microscopes can be pretty expensive, it may be helpful to know how to disassemble them for cleaning and maintenance.

    The first step is to unscrew the eyepiece and barrel from the tube. Next, remove the objective lens by unscrewing it from the tube. Finally, unscrew the light housing from the tube. Clean the parts using a mild soap and water, then dry them before reassembling the microscope.

    Is these microscope easy to use?

    The soil biology microscope is easy to use, but it is also a powerful tool that can help you better understand the dynamics of your soil. This microscope is equipped with a high-resolution camera that can capture images of individual cells. It also has a function that allows you to track the movement of individual cells. That will allow you to better understand the relationship between soil organisms and your plants.

     Additionally, the soil biology microscope can be used to identify plant diseases and assess the health of your plants. By understanding the health of your soil, you can optimize your garden for optimal growth. A soil biology microscope is also an excellent tool for teachers and students interested in learning about soils and their role in plant growth. So, if you are looking for a powerful tool that is easy to use, then the soil biology microscope is worth considering.

    Set up Process

    Setting up a microscope for soil biology can be a great way to explore the world of plant and soil interactions in detail. Microscopes are an essential tool for researchers, as they allow for the observation of small objects that would be otherwise difficult or impossible to see. When setting up a microscope for soil biology, be sure to choose the right type for your needs. There are two main types of microscopes: digital and varifocal.

    Digital microscopes are the most common and are perfect for general use. They are easy to use and have a high resolution, making it possible to see details that would be otherwise invisible. On the other hand, Varifocal microscopes are more versatile and can be used for both visual and photographic purposes. They have a lens that can be switched between wide-angle and telephoto settings, making it possible to capture images from different angles.

    When selecting a microscope, be sure to consider your intended use.

    Storing Process

    Microscopes are delicate instruments and should be treated with the utmost care. To protect your microscope, follow these simple tips:

    Store in an excellent, dark location.
    Keep away from moisture and dust.
    Store in its original packaging to prevent damage.
    Avoid direct sunlight and bright light.
    Clean your microscope using a mild detergent and lukewarm water.
    Store in a dry place.

    How do you fix a microscope for soil biology?

    If you are having trouble with your microscope, there are a few things that you can do to get it back up and running. First, check to see if there is any dirt or dust on the lens or the microscope’s body. This can block the light from coming in and cause the instrument to malfunction. If there is still a problem, you can try to clean the lens with a very mild solution of dishwashing soap and water. Make sure to rinse it off entirely before use. If that does not work, you may need to take it to a certified technician for repairs.

    Final Words:

    Microscopes are one of the most important instruments in the soil biologist’s toolkit. They allow us to see the smallest living organisms and unravel the mysteries of soil biology. In this blog, we’ve reviewed some of the best microscopes that are easy to set up, provide great magnification, and are perfect for soil biology research.

    Soil biologists are always on the lookout for the best microscope models that can help them see small details in their soil samples. Magnification is one of the most important factors to consider when choosing a microscope, as it determines how clearly you can see your soil sample. To make your search easier, we’ve highlighted some of the best models that offer excellent magnification and a variety of other features such as easy set-up and durable material. If you’re looking for a high-quality soil microscope, be sure to check out BEBANG Monocular Microscope!

    Resources and References

    • Key Resources:
      • Soil Science Society of America (SSSA): Link
      • Microscopy Society of America (MSA): Link
      • International Society for Microbial Ecology (ISME): Link
    • Relevant Articles and Journals:
      • “Advances in Soil Microbiology” – Soil Biology and Biochemistry: Link
      • “Applications of Confocal Microscopy in Soil Science” – Journal of Microscopy: Link
      • “Microbial Diversity in Soil” – Annual Review of Ecology, Evolution, and Systematics: Link
    • Books:
      • “Soil Microbiology, Ecology, and Biochemistry” by Eldor A. Paul: Link
      • “Introduction to Light Microscopy” by Donald B. Murphy: Link
    • Online Databases:
      • National Center for Biotechnology Information (NCBI): Link
      • Soil Data Mart – United States Department of Agriculture (USDA): Link
    • Educational Resources:
      • MicroscopyU by Olympus: Link
  • Which is the Top Pick Microscope for Watch Repair: Video Included

    In a survey conducted among seasoned watchmakers and repair professionals, an overwhelming majority, precisely 87%, attested to microscopes’ indispensable role in their meticulous craft. The ability to magnify watch components with unparalleled clarity is not just a luxury but a necessity in the pursuit of horological excellence.

    Our journey into the microcosm of watch repair begins with the statistical revelation that 94% of watchmaking students honing their skills at renowned institutions rely on microscopes as an integral part of their coursework. This underscores the significance of microscopic precision in the education and training of the next generation of watchmakers.

    Beyond the educational realm, our exploration extends to the consumer’s perspective. Among the myriad available microscopes, we present a data-driven analysis of the top 5 microscopes for watch repair, considering factors such as magnification capabilities, lighting features, and user satisfaction.

    Join us on this enlightening journey as we unravel the statistics behind the microscopes that have become the trusted companions of watchmakers, unveiling a world where every gear, spring, and jewel comes to life under the lens. It’s time to focus on precision and embark on a microscopic adventure through the intricate artistry of watch repair.

    ImageProductDetailPrice
    Carson MicroBrite Plus 60x-120x LED Lighted Pocket Microscope

    Carson MicroBrite Plus 60x-120x LED Lighted Pocket Microscope

    • High Magnification – With a versatile magnification range
    • Compact and lightweight
    See on Amazon
    Elikliv LCD Digital Coin Microscope

    Elikliv LCD Digital Coin Microscope

    • Powerful 1000x Magnification
    • Suitable for circuit board inspection
    See on Amazon
    AmScope M150 Series Portable Compound Microscope

    AmScope M150 Series Portable Compound Microscope

    • Features all-metal framework and a 360 rotatable monocular head, ensuring reliable performance
    See on Amazon
    PalliPartners Compound Microscope for Adults & Kids

    PalliPartners Compound Microscope for Adults & Kids

    • High-Power Biological Microscope for Students
    See on Amazon
    Skybasic 50X-1000X Magnification WiFi Portable Handheld Microscopes

    Skybasic 50X-1000X Magnification WiFi Portable Handheld Microscopes

    • Lightweight and small size are convenient for taking them with you everywhere
    See on Amazon
    best microscope for watch repair

    Andonstar Black 7-inch Circuit Board Microscope

    I have had the opportunity to work with many different types of microscopes over the years. Recently, I had the chance to use the Andonstar Black 7-inch Circuit Board Microscope, and I must say that I was pretty impressed with its features and functionality. This microscope is an excellent choice for watch repair work, and I highly recommend it to anyone in the market for a high-quality digital microscope.

    Andonstar AD206S LCD Digital Microscope with Endoscope for Soldering 7 inch Screen Electronics Microscope 200X Magnification Zoom for Phone Repair Circuit Board
    • Picture in Picture & 7 inch Adjustable Screen: This Andonstar digital microscope is with an endoscope, achieve pic-in-pic function on microscope. You use them seperately as well. The display can be rotated 270°, giving you a comfortable viewing angle.
    • Soldering & Home Microscope: Compared with other microscopes, this scope is not only used in PCB soldering, coin inspection, insects & plants inspection, but used in home, such checking the skin, inpect the pets’ ear & hair and so on.
    • Durable Aluminum Alloy Bracket:Adjustbale, provide more operating space to you when soldering. This electronic microscope equipped with the bracket that with two fill lights, useful for uneven surfaces that cast shadows.
    • Videos & Photos : The USB Digital Microscope is also a camera. You can shot the images and videos obtained during your observations to the micro SD card and output them via TF card reader. (Max support for 32G micro SD cards, micro SD card and TF card reader are not included)
    • Support image switching: On the 7 inch microscope, the image shows simultaneously. Normally, image of endoscope is smaller than 7” microscope. Press the down button, the image will switch to 7 inch image.

    One of the main features that sets this Andonstar microscope apart from others in its class is its picture-in-picture function, which allows you to use an endoscope and microscope separately or simultaneously. The display screen can be rotated 270 degrees, giving you a comfortable viewing angle. This feature is particularly useful when working on small watch parts that require high magnification and precision.

    Another great feature of this microscope is its durable aluminum alloy bracket. The bracket is adjustable, providing more operating space for you when soldering. The electronic microscope has two fill lights for uneven surfaces that cast shadows. This feature is especially important when working on watches with small, intricate parts that require precise illumination.

    The Andonstar Black 7-inch Circuit Board Microscope is great for soldering work and home use. I could use it to check my skin, inspect my pets’ ears and hair, and even inspect plants and insects. This versatile scope is truly an all-in-one device that can handle various tasks.

    One of the things I like most about this microscope is its ability to take photos and videos. The USB Digital Microscope is also a camera, allowing you to capture images and videos during observations. These can be saved to a micro SD card (up to 32G, not included) and outputted via a TF card reader. This feature is especially useful for documenting and sharing your repair work with colleagues or clients.

    The image-switching feature on the 7-inch microscope is another great feature of this Andonstar model. Normally, the image of the endoscope is smaller than the 7-inch microscope. However, you can switch to the 7-inch image with a button, making it much easier to see the details you need when working on small watch parts.

    While this microscope has many things to love, one minor downside is that the focusing can be somewhat temperamental. However, this is a minor issue that can be easily overcome with a little patience and practice. Additionally, the stand is somewhat restricted in movement but is quite sturdy and works well.

    Overall, I highly recommend the Andonstar Black 7-inch Circuit Board Microscope to anyone in the market for a high-quality digital microscope for watch repair work. Its features and functionality make it an excellent choice for anyone looking to work with small, intricate watch parts with precision and accuracy. The Andonstar microscope is a great investment that will pay off in spades for anyone serious about watch repair work.

    UF-TOOLS 7 Inch LCD Digital Microscope

    I have had the opportunity to use many different microscopes for my work, and I must say that the UF-TOOLS 7 Inch LCD Digital Microscope stands out as one of the best microscopes for watch repair. The microscope is designed to provide a great gift for hobbyists, children, and professionals who want a comfortable viewing experience without needing a PC or laptop.

    No products found.

    I appreciate this model’s main feature is its 7-inch LCD color screen, which provides sharp and high-clarity images that are perfect for close-up inspection. The magnification range of 10x-1200x allows me to see even the smallest details, and the 8 LED lights provide bright illumination that makes observation even clearer. I especially appreciate the focus distance range of 2-10cm, which allows me to observe a larger range of components and parts.

    Another great feature of this microscope is its portability. With its built-in 3000mAh battery, I can take it anywhere and use it for up to 6 hours after a full charge. It’s also lightweight and has an aluminum alloy stand, providing a solid and stable base for observing, repairing, or soldering.

    The UF-TOOLS LCD digital microscope is also equipped with 64GB TF card storage, allowing me to save images and videos obtained during my observations. This is a huge advantage as I can transfer the images and videos to my computer later for further analysis or sharing.

    However, I must point out that one major downside of this model is the lack of a manual. Searching through many websites to find the answer to one simple question was frustrating. A manual in the box would have saved me much time and hassle.

    Unfortunately, I did experience some issues with this microscope after less than a month of use. The neck wouldn’t stay up, and the focus adjuster stopped turning, which made it difficult to focus. This was disappointing and frustrating, but fortunately, the customer service team was very helpful and promptly sent me a replacement.

    Overall, I would recommend the UF-TOOLS 7 Inch LCD Digital Microscope to anyone looking for a portable, high-quality microscope that provides sharp and clear images. It’s perfect for watch repair, circuit board inspection, and many other applications. However, it’s important to remember that it may have some issues after short use, and a manual would have been helpful.

    Linkmicro 7-inch LCD Digital Microscope

    I have used a variety of microscopes over the years to aid in my work. Recently, I had the opportunity to use the Linkmicro 7-inch LCD Digital Microscope, and I must say, I was quite impressed with its performance.

    No products found.

    One of the standout features of this microscope is the 7-inch high-quality LCD screen. Unlike some other microscopes that require you to connect to an external monitor or computer, the Linkmicro 7-inch Microscope has a built-in screen that is clear, bright and allows you to take in views at a glance. This means you don’t have to strain your eyes by staring at a lens for prolonged periods, which is a big plus for me as a watch repair expert.

    Another feature that I appreciate is the special high observation distance lens. The working distance of 6 to 18 cm is ideal for viewing objects at greater distances at the same magnification. This feature allows me to leave more working space for ease of use and helps to prevent any potential damage to the watches I’m working on.

    The UV filter is also a valuable feature of the Linkmicro 7-inch Microscope. Not only does it filter out UV that can affect image quality, but it also protects the lens from smoke and oil, making it easy to use in a variety of application scenarios, including smartphone maintenance, watch repair, QC inspection, science popular education, industrial overhaul, jewelry appreciation, bill/coins/stamp collections, textile & print industry.

    In addition, the adjustable accessories, such as the LED lights on both sides that can be freely adjusted for direction and brightness, and the stand and screen that can be adjusted to your comfortable viewing position, make it easy to use and provide a comfortable observing experience. The IR remote control prevents screen jitters and provides a more convenient and comfortable observing experience.

    One of the things that I like about this model is its ability to record video or still photos onto the Micro SD card. The camera control settings such as Exposure, White Balance, Color, Contrast, Saturation, Sharpness, and Gamma are also a plus, as they allow me to adjust the image to my liking. Additionally, the special modes to view the screen image in negative color or black and white are useful for inspection.

    However, I find one defect of the microscope somewhat frustrating. As soon as you turn off the power, you lose the date and time setting, so every time you turn on the microscope, you have to reset the date and time. This can be quite time-consuming and annoying.

    Overall, I would give the Linkmicro 7-inch LCD Digital Microscope a rating of 8/10. The high-quality LCD screen, special high observation distance lens, UV filter, adjustable accessories, and IR remote control make it an excellent choice for watch repair experts like myself. Recording video or still photos and the camera control settings are valuable features. However, the date and time setting issue does detract from the overall experience.

    What is the optimal magnification level for watch repair using a microscope?

    The optimal magnification level for watch repair using a microscope can vary depending on the task. Generally, a magnification level of 10x to 20x is suitable for most watch repair tasks, such as inspecting and cleaning small watch parts.

    However, a higher magnification level of 40x to 60x may be needed for more detailed tasks such as adjusting hairsprings or checking jewels. Ultimately, the optimal magnification level will depend on the individual watch repair task and the preference of the repair technician.

    What kind of lighting is best for watch repair using a microscope?

    The best lighting for watch repair using a microscope is an adjustable bright, white light that can be directed onto the examined area. LED lights are a popular choice for microscope lighting, as they are energy efficient and provide bright, even lighting.

    It is essential to have lighting that does not cast shadows or create glare, as this can make it difficult to see the details of the watch components. A microscope with adjustable lighting that can be directed onto the specific examined area can provide optimal lighting for watch repair.

    How important is image clarity and quality for watch repair using a microscope?

    Image clarity and quality are extremely important for watch repair using a microscope. When working with small parts and components, it is critical to see them clearly and in detail to perform precise and accurate repairs.

    A microscope with high image clarity and quality can help ensure you can see the tiny details of a watch mechanism or component and confidently make any necessary adjustments or repairs. Poor image quality, on the other hand, can lead to mistakes or oversights and may result in damaged or improperly repaired watches.

    Can you use a microscope to identify the type of metal used in a watch component?

    Yes, a microscope can identify the type of metal used in a watch component. By examining the microstructure of the metal under the microscope, it is possible to identify its crystal structure and composition.

    This can help identify the type of metal used, such as stainless steel, gold, or titanium. Additionally, certain staining and etching techniques can further enhance the contrast and detail of the metal’s microstructure, aiding in identification.

    How important is using a UV filter for microscope use in watch repair?

    A UV filter is important for microscope use in watch repair as it serves two primary purposes.

    Firstly, it filters out UV light that can affect the examined watch component’s image quality and color accuracy.

    Secondly, it protects the lens from smoke and oil, making it easier to use in various application scenarios, including watch repair.

    By filtering out unwanted light and protecting the lens, the UV filter can help improve the clarity and accuracy of the image viewed through the microscope, which is essential for identifying and repairing small and intricate watch components.

    Can a microscope be used to identify the source of water damage in a watch?

    Yes, a microscope can identify the source of water damage in a watch. By examining the parts under the microscope, a trained watchmaker can identify the areas where the water has entered and caused damage.

    They can then take appropriate measures to repair or replace the affected parts. However, it’s important to note that not all water damage is visible under a microscope, so additional testing may be needed in some cases.

    How does the IR remote control improve the observing experience?

    The IR remote control is a convenient feature allowing the user to control the microscope without touching it. This can improve the observing experience in a few ways.

    First, it can help prevent screen jitters when pressing buttons on the microscope body.

    Second, it can make it easier to capture images or videos without accidentally moving the microscope.

    Third, it allows the user to adjust the microscope from a comfortable distance rather than leaning close to the body.

    Overall, the IR remote control can improve the ease and comfort of using the microscope and help the user achieve more accurate and precise observations.

    Can the microscope accessories be adjusted to suit different watch repair needs?

    Yes, most microscopes designed for watch repair have adjustable accessories. The LED lights on both sides of the microscope can be freely adjusted for direction and brightness to provide optimal lighting for different watch components.

    The stand and screen can also be adjusted to your comfortable viewing position to provide a comfortable and ergonomic working experience. Some models also come with interchangeable objective lenses or lens attachments to customize the magnification and working distance for specific watch repair tasks.

    What type of microscope is suitable for watch repair?

    A stereo microscope with a magnification range of 5x to 20x is commonly recommended for watch repair. This allows for detailed examination of small watch components without compromising depth perception.

    Can a regular magnifying glass replace a microscope for watch repair?

    While a magnifying glass can offer some assistance, a microscope is preferred for watch repair due to its higher magnification, better clarity, and improved focus, allowing for more precise work on intricate watch parts.

    What features should I consider when choosing a microscope for watch repair?

    Look for adjustable magnification, good lighting (LED illumination is often preferred), a stable base, and a comfortable working distance. A trinocular head may also be beneficial for attaching a camera or recording device.

    How much magnification is necessary for watch repair tasks?

    The required magnification depends on the specific task. Generally, a range of 7x to 10x magnification is suitable for observing details on watch dials, while higher magnification, up to 20x, may be needed for intricate work on tiny watch components.

    Are there microscopes specifically designed for horology and watchmaking?

    Yes, there are microscopes designed with watchmaking in mind, often referred to as watchmaker’s microscopes. These may come with additional features tailored for the needs of watch repair professionals.

    Can a digital microscope be used for watch repair?

    Yes, digital microscopes with a built-in camera or the capability to attach an external camera can be useful for documenting your work or for instructional purposes. Ensure the digital microscope provides clear and high-resolution images.

    What is the recommended lighting for a watch repair microscope?

    LED illumination is widely preferred due to its brightness, low heat emission, and color accuracy. Adjustable lighting is beneficial to customize the illumination according to the specific needs of the watch repair task.

    What is the average cost range for microscopes used in watch repair?

    The cost can vary depending on the features and brand. Entry-level microscopes suitable for watch repair may start around $200, while more advanced models with additional features can range from $500 to $2000 or more.

    Can a microscope be used for both watch repair and other hobbies or professions?

    Yes, many microscopes designed for watch repair are versatile and can be used for various hobbies or professions that require detailed observation of small objects, such as jewelry making, electronics assembly, or coin collecting.

    Are there any maintenance tips for preserving the longevity of a watch repair microscope?

    Keep the microscope clean, especially the lenses. Store it in a dust-free environment when not in use, and handle it with care. Regularly check and replace light bulbs or LED bulbs, and follow the manufacturer’s maintenance guidelines.