Author: Mohammad

  • How To Choose A Lens: A Complete Camera Lenses Explained

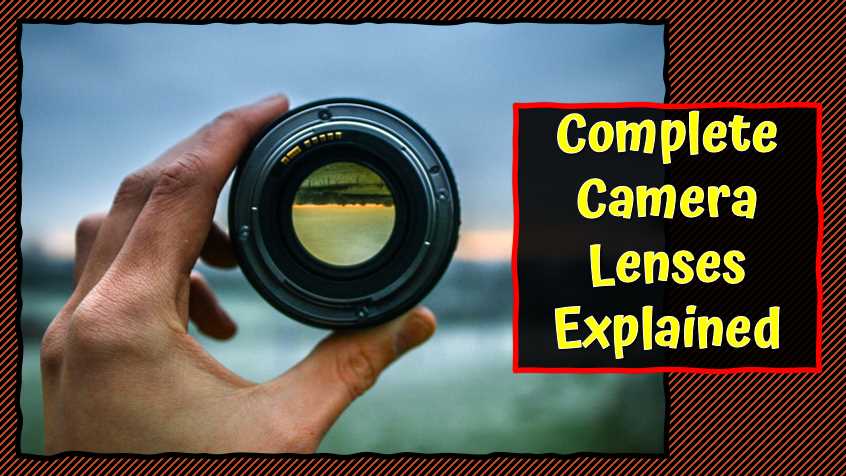
    How To Choose A Lens: A Complete Camera Lenses Explained

    In the vast realm of photography, the lens you choose can make or break your shot. Understanding the nuances of camera lenses is crucial for any photographer aiming to capture that perfect moment. As someone who has navigated the maze of lens choices, let me guide you through the process of choosing the right lens for your camera.

    Camera lenses are the eyes of your photographic vision, each with its unique characteristics and capabilities. In this article, we will delve into the intricacies of lens selection, covering everything from types of lenses to key features, and providing valuable tips for making an informed decision.

    Understanding Camera Lenses: A Comprehensive Overview
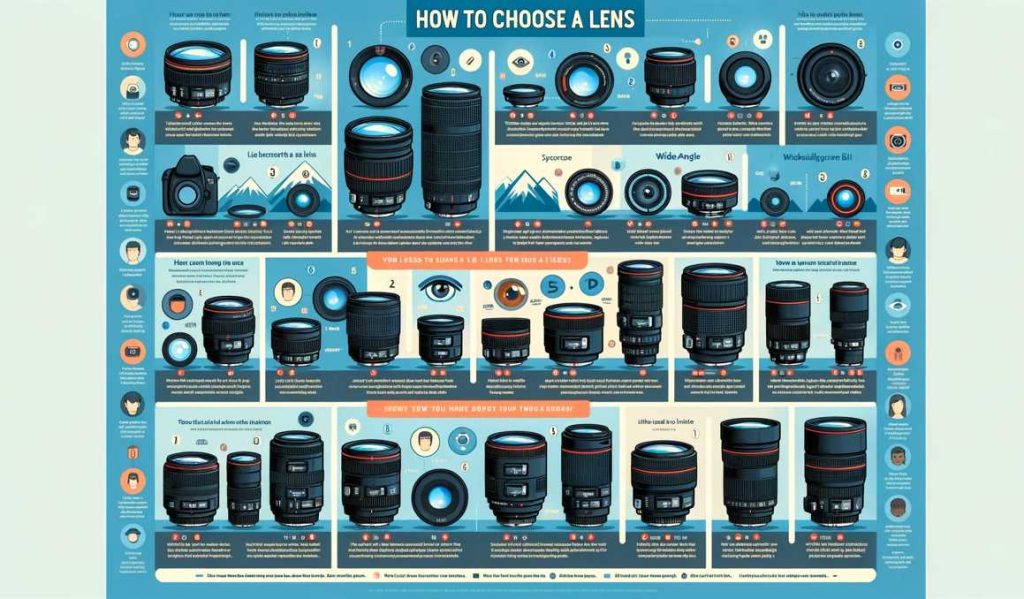
    Camera lenses are the eyes of a photographer, translating their creative vision into captivating images. Understanding the diverse types of lenses, their compatibility with different camera bodies, and the intricate relationship between aperture and focal length is crucial for any photographer looking to master their craft.

    Types of Camera Lenses

    1. Prime Lenses: Prime lenses have a fixed focal length, meaning they don’t zoom in or out. These lenses are renowned for their exceptional image quality, wide apertures, and suitability for low-light conditions. A 50mm prime lens, for instance, is a popular choice for its versatility and ability to produce stunning background blur.
    2. Zoom Lenses: Zoom lenses offer variable focal lengths, allowing photographers to zoom in and out on a scene. They provide flexibility in composition, making them a go-to choice for various situations. From the wide-ranging 24-70mm to the powerful 70-200mm, zoom lenses are versatile workhorses.
    3. Wide-Angle Lenses: Wide-angle lenses have short focal lengths, capturing a broader field of view. Ideal for landscape and architectural photography, these lenses emphasize depth and perspective. A 16mm wide-angle lens, for example, can transform ordinary scenes into dramatic vistas.
    4. Telephoto Lenses: Telephoto lenses, with long focal lengths, bring distant subjects closer. These lenses are indispensable for wildlife, sports, and portrait photography, providing a magnifying effect without compromising image quality. A 300mm telephoto lens, for instance, can capture distant wildlife with remarkable detail.
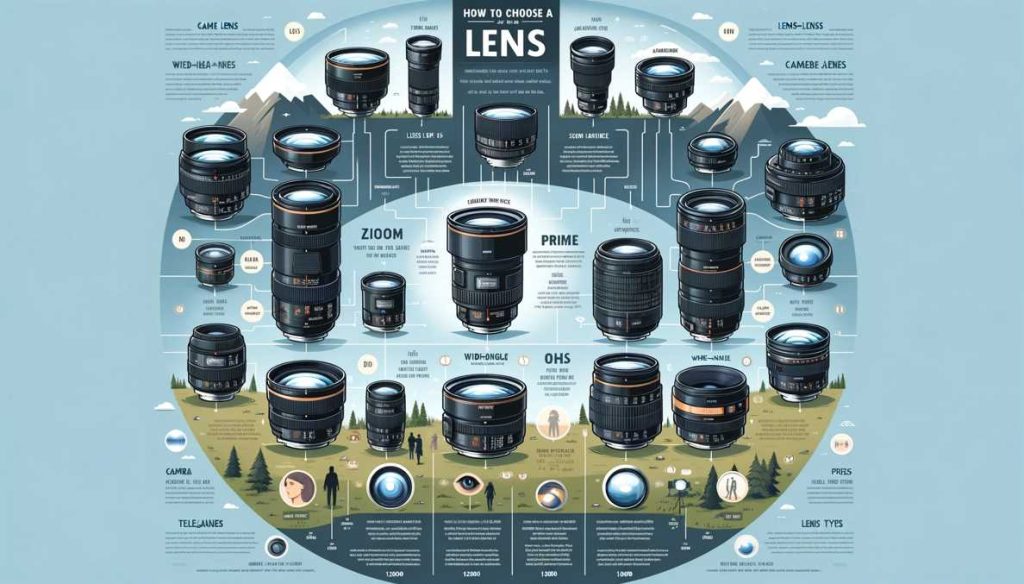
    Lens Mount Compatibility

    Ensuring compatibility between your lens and camera body is paramount. Different camera manufacturers use distinct lens mounts, making it crucial to choose lenses that fit your specific camera model. For instance, Canon and Nikon have proprietary mounts, while mirrorless systems like Sony’s E-mount have gained popularity for their adaptability.

    Aperture and Focal Length Explained

    1. Aperture Settings: Aperture, measured in f-stops, controls the amount of light entering the lens. A lower f-number, such as f/1.4, represents a wider aperture, allowing more light and producing a shallower depth of field. This is advantageous for creative effects like bokeh in portrait photography.
    2. Focal Length and Its Impact: Focal length dictates the magnification and compression of a scene. A shorter focal length, like 35mm, is considered wide-angle, capturing more of the scene. In contrast, a longer focal length, such as 85mm, is telephoto, bringing distant subjects closer and compressing the background.

    To aid in understanding the technical specifications, let’s consider a comparative table showcasing popular lenses:

    Lens TypeExample ModelAperture RangePopular Uses
    Prime LensCanon 50mm f/1.4f/1.4-f/16Portraits, Low-light
    Zoom LensNikon 24-70mm f/2.8f/2.8Versatile, Events
    Wide-Angle LensSony 16mm f/2.8f/2.8-f/22Landscapes, Architecture
    Telephoto LensSigma 300mm f/4f/4-f/32Wildlife, Sports

    12 Tips to Follow: Choose A Lens

    When choosing a lens, it is essential to consider your needs and wants. Given the many available options, it can be challenging to determine what lenses are best for you. We’ve put together some tips on choosing the perfect lens for your shooting style to make things easier.

    Purpose of Photography

    Before delving into the technical specifications of a lens, it’s essential to define the purpose of your photography. Different genres demand specific characteristics in a lens. Portrait photographers, for instance, often prioritize wide apertures (low f-number) for achieving a beautiful bokeh effect, while landscape photographers may opt for wide-angle lenses to capture expansive scenes.

    Budget Considerations

    Your budget plays a crucial role in determining the range of lenses available to you. High-end lenses with advanced features often come with a premium price tag. However, there are also excellent mid-range and budget-friendly options that deliver impressive performance. Establishing a budget early in your lens selection process helps narrow down your options and prevents unnecessary financial strain.

    Camera Compatibility

    Not all lenses are compatible with every camera body. Understanding the lens mount of your camera is crucial to ensure a seamless fit. For example, Canon and Nikon have different proprietary mounts, and the rise of mirrorless cameras introduces additional considerations. Researching your camera’s specifications and compatibility with specific lens mounts ensures a harmonious integration between your camera and lens.

    Understanding focal length

    When you take a photo, the lens on your camera is focused on an object in front of it. This object becomes the image’s focal point, and everything else is blurry.

    Many different focal length lenses are available, affecting photos differently. A short focal length lens will focus on close objects far away, while a long focal length lens will focus on distant objects close up. Each has its advantages and disadvantages.

    If you’re looking to take photos of people or things that are far away, a long focal length lens is best because it will create less distortion in the image. On the other hand, if you want to take close-up photos of people or things, a short focal length lens is preferable because it won’t distort the image as much.

    So which one should you buy? It all depends on what you plan to photograph and what effect you want your photos to have. You can’t just buy any old lens; each has a specific purpose of considering when choosing it.
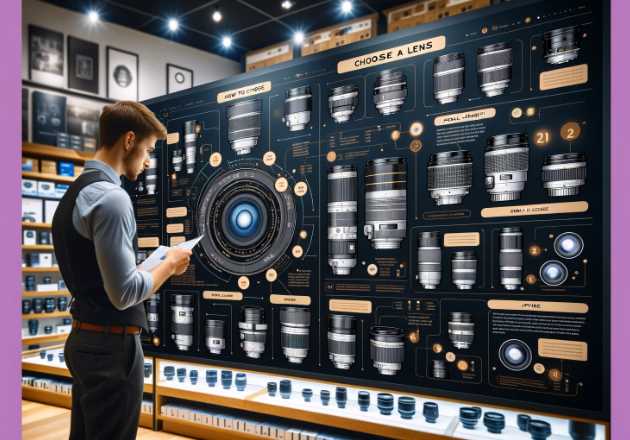
    Point and shoot vs. DSLR camera lenses

    Point-and-shoot camera lenses are designed for simple shots that don’t require a lot of control. They usually have a short focal length and a wide-angle lens, which makes them ideal for capturing landscapes, close-ups of people, and other similar scenes.

    On the other hand, DSLR camera lenses are geared toward more advanced photography. They typically have a longer focal length and a narrower aperture (which helps to achieve better low-light shooting). They’re also perfect for photos that require more control (like portraits or action shots).

    If you’re new to photography, it’s probably best to start with a point-and-shoot camera lens. This will give you enough experience to learn the ropes before moving on to DSLR camera lenses.

    Lens Filters

    Lens filters are one of the essential components of a camera lens. They help to improve image quality by removing unwanted light and noise from the photo signal. Without them, photos would be blurry and contain a lot of noise.

    There are many different lens filters like contact lenses, but Neutral Density (ND) and Circular Polarizer (CP) are the most common. ND filters let less light into the camera lens, while CP filters reduce reflections and reflections from water surfaces. You can also use graduated ND and polarizer filters to boost or minimize intensities in specific directions.

    Choosing the right filter for the conditions you’re shooting in is essential. For example, if you’re shooting outdoors in bright sunlight, you’ll need an ND filter to reduce glare and reflections. If you’re taking a portrait, however, an off-the-shoulder dress may reflect too much light into your subject’s face, so using a polarizing filter will help reduce this problem.

    Warranty and support

    When you buy a camera lens, make sure to read the warranty and support information carefully. Most lenses come with a guarantee that covers defects in materials and workmanship for a period of either one or two years. In addition, most lenses come with some form of support, such as online tutorials or phone support.

    If you have any problems with your lens, be sure to contact the manufacturer immediately. They will be able to help you get your lens replaced or fixed as needed. And don’t forget to register your lens with the manufacturer so that you can receive updates and advice on how to use it properly.

    Testing Lenses Before Buying

    Before you buy a lens, it’s essential to test it out first. This is because lenses can often be incompatible with different cameras, and you don’t want to spend money on something that won’t work.

    The best way to do this is by shooting photos or videos with your camera and comparing them to those taken using the lens in question. You can also use online photo comparison platforms like Image Quality Database or LensHunter to see how various lenses perform. 
    It’s also a good idea to read online reviews of the lens before buying it, as this will give you an idea of how other people have used it and their thoughts about it.

    Ideally, it would be best if you aimed to buy a lens that has positive reviews and has been tested on multiple devices to know it will work with your particular camera model.

    Image stabilization

    Image stabilization is an essential feature because it will help reduce the effects of camera shake, making your photos and videos look blurry.

    Some lenses come with built-in image stabilization, while others require you to attach an extra lens or mount to your camera to achieve the same effect. Whichever route you choose, buy a lens with excellent image stabilization capabilities so that your photos and videos will look smooth and precise.

    Weight and Size

    The weight and size of a lens can impact your overall shooting experience, especially if you plan to be on the move frequently. While a compact prime lens might be lightweight and easy to carry, a large telephoto lens may require additional support and contribute to the overall weight of your camera setup. Consider the balance between portability and the specific needs of your photography style.

    Low-Light Performance

    For photographers who often find themselves shooting in low-light conditions, such as indoor events or night photography, the lens’s low-light performance becomes crucial. Lenses with wider apertures (e.g., f/1.4 or f/2.8) allow more light to enter, enabling better performance in dimly lit environments.

    Autofocus Capabilities

    The autofocus capabilities of a lens influence its responsiveness and accuracy in acquiring focus. Fast and reliable autofocus is particularly important in genres like sports or wildlife photography, where capturing fast-moving subjects requires precision. Consider the type of autofocus motor used in a lens (e.g., ultrasonic or linear) and its impact on speed and noise.

    To facilitate your decision-making process, let’s create a comparative table outlining key factors for popular lenses:

    Lens ModelPurposeBudgetCompatibilityImage StabilizationWeightLow-Light PerformanceAutofocus Capabilities
    Canon 50mm f/1.4PortraitsModerateCanon EF MountNo290gExcellentUltrasonic
    Sigma 24-70mmVersatileHighCanon/Nikon/Sony EFYes835gGoodHyper Sonic (HSM)
    Sony 16-35mmLandscapesHighSony E-MountYes680gGoodLinear
    Nikon 70-200mmWildlife/SportsHighNikon F MountYes1.5kgExcellentSilent Wave (SWM)

    Lens Features and Terminology: A Comprehensive Exploration

    Understanding the features and terminology associated with camera lenses is essential for photographers seeking to maximize the potential of their gear. From lens coatings to the elusive bokeh effect, each aspect contributes to the overall performance and creative possibilities of a lens.

    A. Lens Coatings

    Lens coatings play a vital role in enhancing image quality by minimizing unwanted optical phenomena. Coatings, typically applied to lens elements, serve several purposes:

    • Anti-Reflective Coating: Reduces lens flare and ghosting caused by reflections off lens surfaces, especially when shooting against bright light sources.
    • Water-Repellent Coating: Provides an additional layer of protection against water droplets, making it easier to clean and ensuring unobstructed image capture during adverse weather conditions.

    Popular Lens Coatings

    Coating TypePurpose
    Anti-Reflective CoatingMinimizes lens flare and ghosting
    Water-Repellent CoatingEnhances durability, facilitates cleaning
    Fluorine CoatingRepels water, oil, and dirt for easy cleaning
    Nano CoatingImproves light transmission and reduces reflections

    Optical Image Stabilization (OIS)

    Optical Image Stabilization is a technology designed to counteract the effects of camera shake, providing sharper images, especially at slower shutter speeds. This feature is particularly valuable in situations where a stable platform, such as a tripod, is not practical.

    Lens Image Stabilization Comparison

    Lens ModelImage StabilizationAdvantages
    Canon 70-200mm f/2.8YesHandheld stability, improved low-light performance
    Nikon 24-70mm f/2.8YesEnhanced sharpness at slower shutter speeds
    Sony 85mm f/1.4YesReduction of motion blur, especially in telephoto ranges
    Sigma 50mm f/1.4 ArtYesVersatility in low-light conditions, handheld shooting

    Focus Motor Types

    The focus motor is responsible for driving the autofocus mechanism in a lens. Different types of focus motors offer varying levels of speed, precision, and noise control.

    Lens Focus Motor Types

    Lens ModelFocus Motor TypeAdvantages
    Canon 50mm f/1.4Ultrasonic (USM)Fast and quiet autofocus for discreet shooting
    Nikon 85mm f/1.8Silent Wave (SWM)Smooth and near-silent autofocus for video recording
    Sony 24-70mm f/2.8LinearQuick and precise autofocus suitable for diverse scenes
    Sigma 70-200mm f/2.8Hyper Sonic (HSM)High-speed autofocus for capturing fast-moving subjects

    Depth of Field (DoF)

    Depth of Field refers to the range of distances within a scene that appears acceptably sharp. It is influenced by factors such as aperture size, focal length, and subject distance.

    Aperture and Depth of Field

    Aperture (f-number)Depth of Field Characteristics
    f/1.4 – f/2.8Shallow depth of field, ideal for portraits
    f/4 – f/8Balanced depth of field, suitable for landscapes
    f/11 and aboveDeep depth of field, advantageous for group shots

    Bokeh Effect

    Bokeh refers to the aesthetic quality of the out-of-focus areas in an image. Achieving a pleasing bokeh effect is often a goal in portrait and macro photography.

    Bokeh Characteristics of Popular Lenses

    Lens ModelBokeh Characteristics
    Canon 85mm f/1.2Creamy and smooth bokeh circles
    Nikon 50mm f/1.8Soft and rounded bokeh highlights
    Sony 135mm f/1.8Smooth and well-defined bokeh spheres
    Fujifilm 56mm f/1.2Artistic and appealing bokeh rendition

    Lens Speed

    Lens speed refers to the maximum aperture of a lens, impacting its ability to gather light. Faster lenses with wider apertures are advantageous in low-light conditions.

    Lens Speed Comparison

    Lens ModelMaximum Aperture (f-number)Low-Light Performance
    Sigma 35mm f/1.4 Artf/1.4Excellent, ideal for night and indoor shooting
    Tamron 24-70mm f/2.8f/2.8Good, suitable for versatile lighting conditions
    Panasonic 42.5mm f/1.2f/1.2Outstanding, excels in challenging light situations
    Zeiss 50mm f/0.95f/0.95Exceptional, unparalleled low-light capabilities

    Understanding these lens features and terminology empowers photographers to make informed decisions based on their specific needs and creative preferences. By exploring the nuances of coatings, stabilization, focus motors, depth of field, bokeh, and lens speed, you can elevate your photography to new heights, capturing moments with precision and artistic flair.

    Comparing Popular Lens Brands and Models: A Comprehensive Analysis
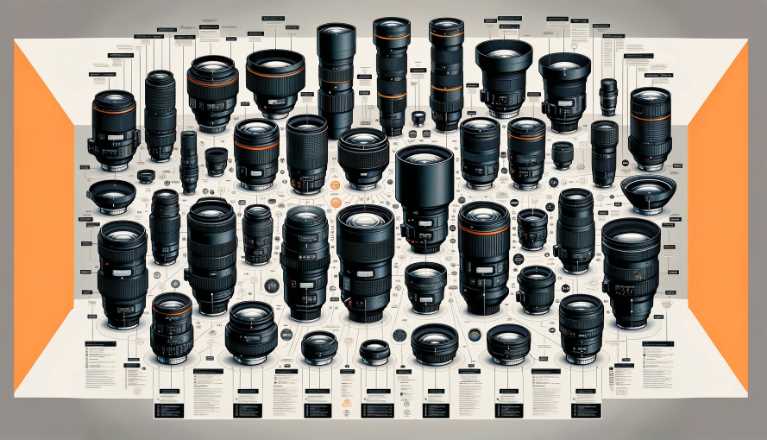
    When it comes to camera lenses, the market offers a diverse range of options from various manufacturers. Each brand brings its unique strengths, and understanding the key models they offer is essential for photographers seeking the perfect fit for their camera systems.

    Canon

    Canon, a stalwart in the imaging industry, has consistently delivered lenses known for their exceptional optical quality and innovation. Popular models include:

    Canon Lens Comparison

    Lens ModelFocal LengthAperture RangeNotable Features
    Canon EF 50mm f/1.450mmf/1.4-f/16Versatile prime for portraits
    Canon EF 24-70mm f/2.824-70mmf/2.8Versatility for various shooting scenarios
    Canon EF 70-200mm f/2.870-200mmf/2.8Ideal for wildlife, sports, and portraits

    Nikon

    Nikon, synonymous with high-quality optics, offers a robust lineup of lenses catering to diverse photographic needs. Key models include:

    Nikon Lens Comparison

    Lens ModelFocal LengthAperture RangeNotable Features
    Nikon 50mm f/1.850mmf/1.8-f/16Prime lens for portraits and low-light
    Nikon 24-70mm f/2.824-70mmf/2.8Versatile zoom for a wide range of scenes
    Nikon 70-200mm f/470-200mmf/4-f/32Lightweight telephoto for portability

    Sony

    Sony has transformed the camera industry with its mirrorless cameras and a growing selection of high-performance lenses. Notable models include:

    Sony Lens Comparison

    Lens ModelFocal LengthAperture RangeNotable Features
    Sony FE 85mm f/1.485mmf/1.4-f/16Ideal for portraits with stunning bokeh
    Sony FE 24-70mm f/2.824-70mmf/2.8Professional zoom lens for diverse needs
    Sony FE 200-600mm f/5.6-6.3200-600mmf/5.6-6.3Super-telephoto for wildlife and sports

    Sigma

    Sigma, a third-party manufacturer, has gained acclaim for producing lenses that offer a compelling balance of quality and affordability. Notable models include:

    Sigma Lens Comparison

    Lens ModelFocal LengthAperture RangeNotable Features
    Sigma 35mm f/1.4 Art35mmf/1.4-f/16Excellent image quality and bokeh
    Sigma 24-70mm f/2.824-70mmf/2.8Versatile zoom with consistent sharpness
    Sigma 150-600mm f/5-6.3150-600mmf/5-6.3Long telephoto reach for wildlife

    Tamron

    Tamron is another third-party manufacturer known for producing lenses that offer a balance of performance and value. Key models include:

    Tamron Lens Comparison

    Lens ModelFocal LengthAperture RangeNotable Features
    Tamron 17-50mm f/2.817-50mmf/2.8Versatile zoom for crop-sensor cameras
    Tamron 24-70mm f/2.824-70mmf/2.8Popular choice for all-around shooting
    Tamron 70-200mm f/2.870-200mmf/2.8Telephoto zoom with image stabilization

    Fujifilm

    Fujifilm, renowned for its mirrorless cameras, has developed a dedicated lineup of lenses for its X-series cameras. Notable models include:

    Fujifilm Lens Comparison

    Lens ModelFocal LengthAperture RangeNotable Features
    Fujifilm XF 35mm f/1.435mmf/1.4-f/16Classic focal length for various genres
    Fujifilm XF 18-55mm f/2.8-418-55mmf/2.8-4Versatile zoom with optical image stabilization
    Fujifilm XF 56mm f/1.256mmf/1.2-f/16Portrait lens with creamy bokeh

    Pentax

    Pentax, though less mainstream, has a loyal following and offers a selection of lenses for its DSLR and mirrorless cameras. Notable models include:

    Pentax Lens Comparison

    Lens ModelFocal LengthAperture RangeNotable Features
    Pentax HD DA 35mm f/2.8 Macro Limited35mmf/2.8Macro capability with high-resolution optics
    Pentax HD DA 20-40mm f/2.8-4 Limited20-40mmf/2.8-4Compact and weather-resistant zoom lens
    Pentax HD D FA 70-200mm f/2.8 ED DC AW70-200mmf/2.8Professional telephoto zoom with weather sealing

    3 Tips for Buying a Used Lens: A Comprehensive Guide
    When considering the purchase of a used lens, a careful evaluation is crucial to ensure you’re getting a quality product that meets your expectations. Follow these tips to make an informed decision:

    Inspecting Physical Condition

    1. Examine the Exterior: Check for scratches, dents, or signs of wear on the lens body. A well-maintained exterior often indicates careful usage.
    2. Inspect Mount and Contacts: Ensure the lens mount aligns correctly with your camera, and the electrical contacts are clean and undamaged for seamless communication.

    Table: Physical Inspection Checklist

    AspectInspection
    Exterior ConditionScratches, dents, signs of wear
    Lens MountAlignment with camera body, no damage
    Electrical ContactsClean, undamaged for proper communication

    Checking Optical Quality

    1. Look for Scratches or Fungus: Examine lens elements for scratches, cracks, or fungus. These issues can significantly impact image quality.
    2. Test Autofocus and Manual Focus: Ensure smooth and accurate autofocus performance. Check the manual focus ring for any resistance or unusual noises.

    Table: Optical Quality Checklist

    AspectInspection
    Lens ElementsScratches, cracks, fungus
    Autofocus PerformanceSmooth and accurate
    Manual FocusNo resistance or unusual noises

    Researching the Lens History

    1. Check Serial Numbers: Research the lens’s serial number to verify its authenticity and determine its age.
    2. Ask for Maintenance Records: If available, inquire about any previous repairs or maintenance. A well-documented history is a positive sign.

    Table: Lens History Research Checklist

    AspectInspection
    Serial NumberVerify authenticity and determine age
    Maintenance RecordsInquire about repairs or maintenance history

    By carefully assessing the physical condition, optical quality, and history of a used lens, you can confidently make a purchase that aligns with your photography needs.
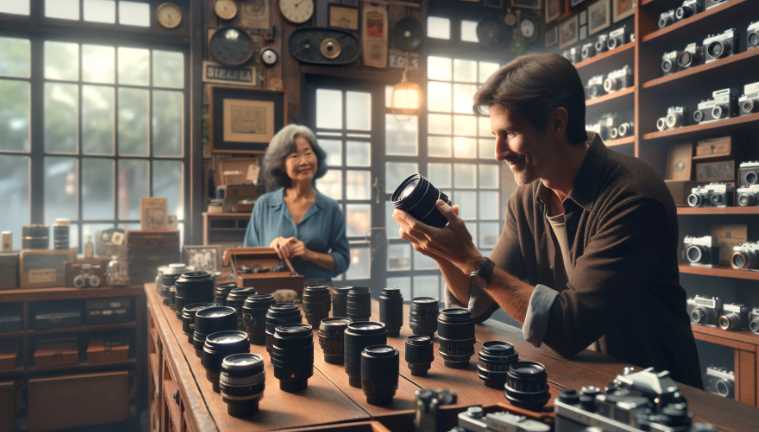
    Expert Tips and Tricks: Elevating Your Lens Game

    Cleaning and Maintaining Your Lenses
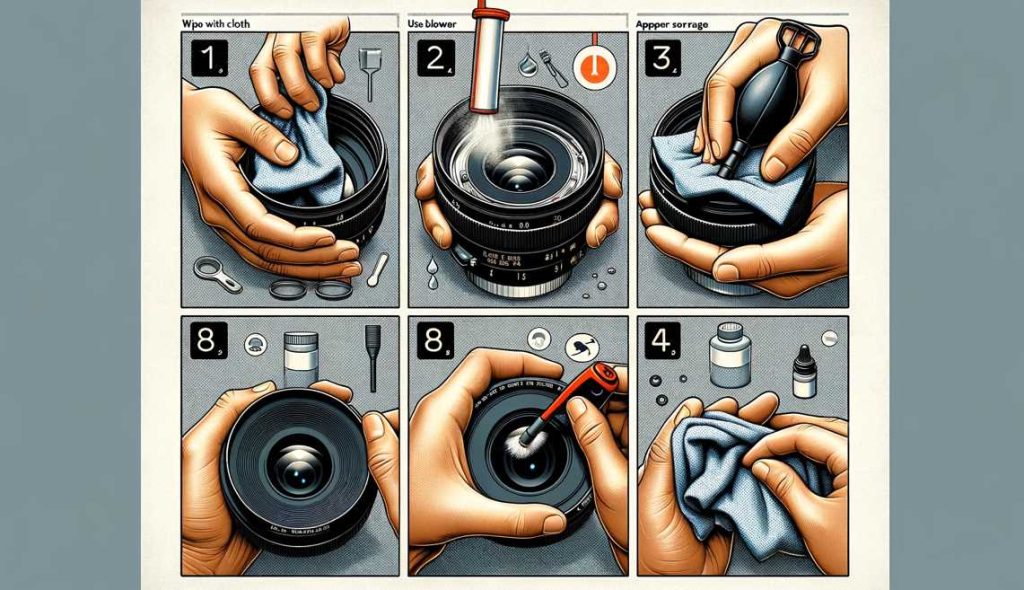
    1. Use a Gentle Touch: Clean lens elements with a microfiber cloth and a lens-cleaning solution. Apply gentle pressure to avoid scratches.
    2. Protect with Lens Hoods: Invest in lens hoods to shield your lens from stray light, reduce lens flare, and provide physical protection.

    Table: Cleaning and Maintenance Tips

    TipRecommendation
    Cleaning ClothMicrofiber cloth for gentle lens cleaning
    Lens-Cleaning SolutionUse a specialized solution for effective cleaning
    Lens HoodsInvest in hoods for protection against flare and damage

    Lens Accessories and Add-ons

    1. Filters for Creativity: Experiment with UV, ND, or polarizing filters to add creative effects and protect your lens simultaneously.
    2. Lens Caps and Rear Caps: Always use lens caps and rear caps when the lens is not in use to safeguard against dust and scratches.

    Table: Lens Accessories Tips

    TipRecommendation
    Creative FiltersUV, ND, and polarizing filters for effects
    Lens CapsUse front and rear caps for comprehensive protection

    Maximizing Lens Performance

    1. Understand Your Lens: Experiment with different settings and understand the intricacies of your specific lens to unlock its full potential.
    2. Adapt to Shooting Conditions: Be versatile in adapting to various shooting conditions. Familiarize yourself with your lens’s strengths and limitations.

    Table: Maximizing Lens Performance Tips

    TipRecommendation
    Experiment and LearnUnderstand your lens through trial and error
    AdaptabilityBe versatile in adapting to different scenarios

    By adopting these expert tips, you’ll not only maintain the longevity of your lenses but also unlock their full potential, ensuring each shot is a masterpiece in itself.

    Last words

    We think now you are pretty much clear about every lens. So, choosing the DSLR lens for your demands will not confuse you anymore. But remember, buying a lens is too much of an affordable thing. So, you should select the best lens which will be perfect for you. And buy the best brand’s lens. We recommend Canon and Nikon lenses, world-class lenses, and DSLR companies. Every professional photographer uses their products. 

    After reading this article, we hope you all will know all kinds of lenses’ advantages and disadvantages. Thank you so much for reading this article. Have a good day.

    Resources and References

    1. Lens Buying Guides:
    2. Educational Websites:
    3. Lens Reviews:
    4. Online Communities:
    5. Manufacturer Websites:
    6. Photography Blogs:
    7. Video Tutorials:
  • How Does a Radio Telescope Work: Full Process in a Super Understandable Way?

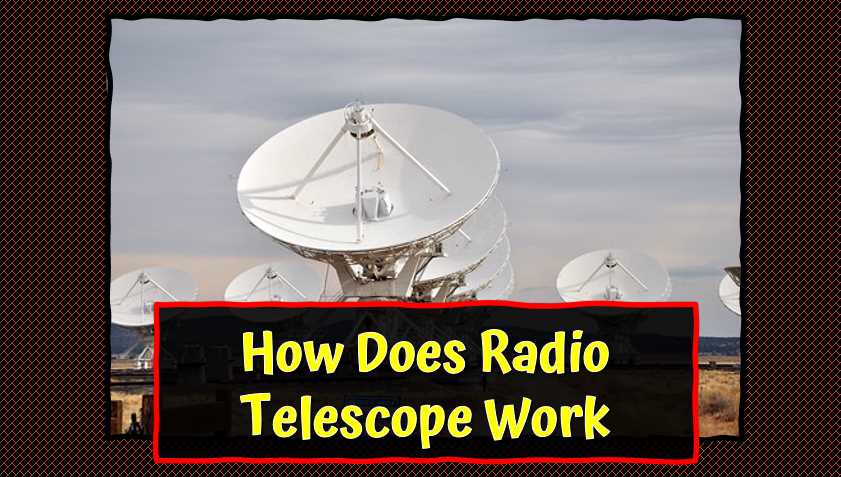
    How Does a Radio Telescope Work: Full Process in a Super Understandable Way?

    As an avid stargazer, I’ve always been captivated by the mysteries of the universe. The realm beyond our planet holds secrets waiting to be uncovered, and one technological marvel that has played a pivotal role in unveiling these cosmic wonders is the radio telescope. In this article, we’ll delve into the intricate workings of these celestial detectives, exploring their significance and the breathtaking discoveries they have facilitated.

    Scientists invented a radio telescope to collect radio waves and analyze them. Knowing all of the above, a deep curiosity in your mind is how does a radio telescope work? How has such a large telescope continued to contribute to science? Follow this article to learn how a radio telescope works; here, we have outlined the process understandably.

    Basic Principles of Radio Telescopes

    Electromagnetic Spectrum Overview

    Understanding the fundamental principles of radio telescopes requires a grasp of the electromagnetic spectrum, an invisible orchestra of energy waves. From gamma rays to radio waves, this spectrum encompasses a vast range of frequencies, each revealing unique aspects of the universe. What sets radio telescopes apart is their specialization in the radio frequency range, typically spanning from a few kilohertz to several gigahertz.

    Let’s break down the electromagnetic spectrum into its key components:

    Type of WaveFrequency Range (Hz)
    Gamma Rays10^19 – 10^24
    X-Rays10^16 – 10^19
    Ultraviolet10^14 – 10^16
    Optical4.3 x 10^14 – 7.5 x 10^14
    Infrared3 x 10^11 – 4.3 x 10^14
    Microwave10^9 – 10^11
    Radio10^3 – 10^9

    The emphasis here is on the radio frequency range, where radio telescopes operate, opening a unique window to explore celestial phenomena.

    How Radio Telescopes Collect Data

    1. Antenna Systems and Their Role: Imagine a radio telescope’s antenna system as a colossal ear tuned to the whispers of the cosmos. These antennas come in various shapes, with parabolic dishes being the most common. Their concave shape allows them to focus incoming radio waves onto a receiver situated at the dish’s focal point. The size of the dish is crucial; a larger dish captures more radio waves, enabling the detection of fainter signals.
    2. Signal Reception and Amplification: Once the antennas collect radio waves, the next crucial step involves signal reception and amplification. The collected signals are directed to a receiver, which typically includes a low-noise amplifier (LNA). This component plays a pivotal role in boosting the weak signals received from space, ensuring they are strong enough for further analysis.

    Detection and Conversion

    1. Overview of Detectors: Radio telescopes employ various detectors to capture and measure the incoming radio waves. Bolometers, for instance, are sensitive devices that measure the heat generated when radio waves are absorbed. Masers (Microwave Amplification by Stimulated Emission of Radiation) are also utilized, acting as amplifiers to boost weak signals. These detectors serve as the telescope’s eyes, converting cosmic whispers into tangible data.
    2. Conversion of Radio Waves into Electrical Signals: The culmination of the process involves converting the detected radio waves into electrical signals. These signals, now amplified and enhanced, undergo further processing. The intricate dance of technology and physics transforms the analog signals into digital data, paving the way for astronomers to decode the language of the universe.

    Main Parts of Radio telescope: What are the main parts of a radio telescope?

    Before learning how a radio telescope works, you must know its main parts. Knowing the main features and their functions will make it easier to understand the working process of a radio telescope.

    Antennas

    1. Parabolic Dish vs. Other Antenna Types: Radio telescopes, at their core, rely on antennas to capture and focus radio waves. The most iconic design is the parabolic dish, known for its ability to reflect and concentrate incoming signals. This design ensures optimal signal reception and enables the telescope to detect faint cosmic whispers. Other antenna types, such as dipole and horn antennas, cater to specific observational needs. Here’s a comparison of antenna types:Antenna TypeAdvantagesDisadvantagesParabolic DishExcellent signal focusing, suitable for faint signalsLimited field of view, complex maintenanceDipole AntennaSimple design, wide field of viewLess signal focusing, lower sensitivityHorn AntennaBroad bandwidth, versatileBulky design, challenging for precise aiming
    2. Design Considerations for Optimal Signal Reception: The design of a radio telescope’s antenna is critical for optimal signal reception. Factors such as the size of the dish, its surface accuracy, and the frequency range it covers impact its performance. Larger dishes capture more radio waves, enhancing sensitivity. Precision in surface construction ensures accurate signal reflection. Design considerations are tailored to the specific wavelength range a telescope aims to observe, making it a delicate balance between size, shape, and operational requirements.

    Receivers

    1. Low Noise Amplifiers and Their Importance: Receivers in radio telescopes play a pivotal role in extracting meaningful data from the collected signals. Central to this is the low noise amplifier (LNA), a component that boosts weak signals while introducing minimal additional noise. LNAs are crucial for preserving the integrity of the faint signals received from space. Here’s a glimpse of the importance of LNAs in the signal chain:Without LNAWith LNASignal weakensSignal remains strong, noise minimizedGreater susceptibility to noiseImproved signal-to-noise ratio
    2. Frequency Filters and Signal Processing: Frequency filters within the receiver system help isolate specific bands of interest, allowing astronomers to focus on particular aspects of the electromagnetic spectrum. Signal processing then comes into play, where the raw data undergoes various stages of analysis. The combination of frequency filters and signal processing enhances the telescope’s ability to discriminate between cosmic signals and unwanted interference.

    Data Processing Systems

    1. Role of Computers in Handling Vast Amounts of Data: The sheer volume of data collected by modern radio telescopes necessitates sophisticated data processing systems. Powerful computers are employed to handle the influx of information, enabling astronomers to sift through terabytes of data efficiently. These computers play a crucial role in real-time processing during observations and subsequent data analysis.
    2. Integration with Other Observatories and Databases: Radio telescopes are not solitary entities; they thrive on collaboration. Data collected is often shared and integrated with other observatories and databases worldwide. This collaborative approach enhances the scientific community’s ability to conduct comprehensive studies and cross-verify findings. Here’s a glimpse of the interconnected nature of radio astronomy:Observatory IntegrationBenefitsShared DataEnhanced scientific understandingCross-VerificationValidation of findings through multiple sourcesGlobal CollaborationAccelerated progress in astronomical research

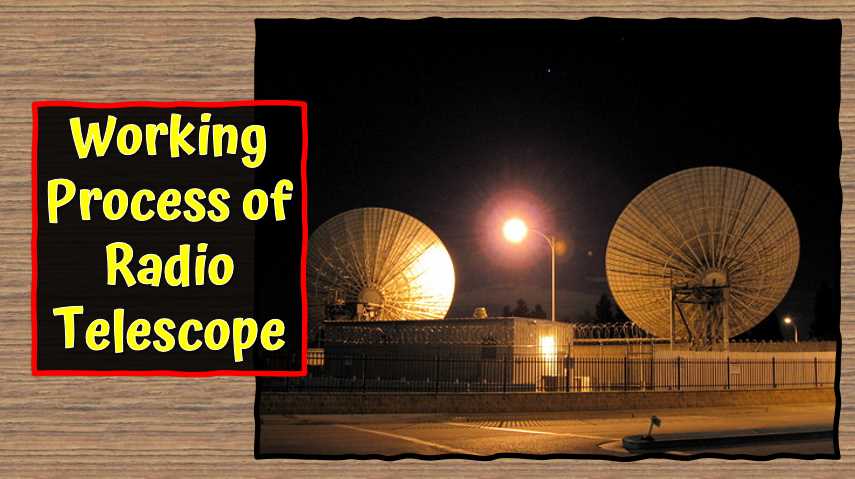
    Working Process of Radio Telescope

    Observing Celestial Objects

    1. Target Selection and Tracking: The enchanting dance of a radio telescope begins with the meticulous process of selecting and tracking celestial objects. Astronomers carefully choose targets based on scientific objectives, whether it’s studying distant galaxies, pulsars, or enigmatic cosmic phenomena. The precision with which a telescope can lock onto a specific point in the sky is a testament to the advanced tracking systems in place.Celestial ObjectObservational ObjectiveDistant GalaxyStudying galactic evolution and dynamicsPulsarInvestigating neutron star propertiesGalactic CenterProbing the heart of our Milky Way
    2. Challenges of Radio Observation: Despite the marvels of modern technology, radio observation is not without its challenges. Earth’s atmosphere, while transparent to radio waves, introduces interference that can distort signals. Weather conditions, particularly precipitation, can further impact data quality. To mitigate these challenges, observatories are strategically located in regions with minimal atmospheric interference, and advanced signal processing techniques are employed to filter out unwanted noise.ChallengeMitigation StrategyAtmospheric InterferenceSite selection in radio-quiet zonesWeather ConditionsReal-time monitoring and data correctionSignal DistortionAdvanced signal processing algorithms

    Imaging and Mapping

    1. Creating Detailed Radio Maps of Celestial Bodies: The magic unfolds as radio telescopes transform raw data into detailed maps, unveiling the radio emissions of celestial bodies. These maps provide astronomers with a visual representation of the intensity and distribution of radio signals. The process involves scanning the sky systematically and stitching together the data points to construct comprehensive images.Celestial BodyRadio Map ObjectiveOrion NebulaMapping molecular clouds and star-forming regionsCygnus A GalaxyInvestigating powerful radio jetsCrab PulsarStudying pulsar emissions and dynamics
    2. Multi-Wavelength Observations for Comprehensive Data: To unravel the complete story of celestial objects, radio telescopes often collaborate with observatories operating at different wavelengths, such as optical or X-ray telescopes. This multi-wavelength approach enhances the richness of the data and provides a holistic understanding of the observed phenomena.WavelengthObservational AdvantageOpticalCaptures visible light and details of structureX-rayReveals high-energy processes and emissionsInfraredPenetrates dust clouds, revealing hidden features

    7 steps to follow

    Working Process of Radio Telescope

    Step 1: Collecting Radio Waves

    Dish antenna collects radio waves of different sizes. But since the radio waves are fragile and oversized, the dish surface is much larger.

    Step 2: Reflecting the Radio Waves to Sub-reflector

    The radio’s first waves come to the dish antenna. Since the dish surface is of parabolic shape, this curved shaped dish surface reflects the radio waves to the sub-reflector or secondary reflector.

    Step 3: Reflecting the Radio Waves on the Feed Horn

    After all the radio waves are reflected from the dish surface to the sub-reflectors, the curved sub-reflectors reflect these radio waves to the feed horn.

    Step 4: Detecting the Radio Waves

    After all the waves arrive at the feed horn, the feed horn detects the required radio waves from these radio waves. Every signal is not essential for the researchers. So, they attached a feed horn to a radio telescope to detect vital signs.

    Step 5: Receiving the Radio Waves by the Receiver

    These identified radio waves then go to the receiver. A radio telescope can have many receivers because the shapes or types of radio waves differ. There are separate receivers for collecting these different types of waves. Since radio waves are fragile, you need sensitive receivers.

    Step 6: Recording

    This time the radio telescope will record these stored radio waves. A radio telescope is a recording device that is attached to a computer. After the receiver receives the waves, it sends them to this recorder. The recorder records the waves and creates the required images.

    Step 7: Analyzing

    That is the last step. Here you will do the work of analysis. The primary purpose of using a radio telescope is done in this step. In other words, scientists invented the radio telescope for this step.

    Advancements in Radio Telescope Technology

    Single-Dish vs. Array Configurations

    1. Advantages and Limitations of Single-Dish Telescopes: Single-dish telescopes, characterized by a solitary large dish, have been instrumental in radio astronomy for decades. Their primary advantage lies in their simplicity and versatility. They are adept at observing large areas of the sky and are well-suited for surveying tasks.
      However, these telescopes have limitations, particularly in terms of spatial resolution. The larger the dish, the better the resolution, but constructing extremely large dishes becomes impractical. Additionally, single-dish telescopes are susceptible to atmospheric interference.
    2. Power of Interferometry in Array Configurations: The evolution of radio telescope technology has seen a paradigm shift towards array configurations, where multiple telescopes work in unison to act as a singular, powerful instrument. This technique, known as interferometry, enables astronomers to overcome the limitations of single-dish telescopes. By combining signals from multiple telescopes, interferometry enhances spatial resolution, providing unprecedented clarity in radio observations.

    Radio Telescopes in Space

    1. Overview of Space-Based Radio Telescopes: The quest for clearer skies and an unobstructed view of the cosmos has propelled radio telescopes beyond Earth’s atmosphere. Space-based radio telescopes, such as the RadioAstron and the upcoming Square Kilometre Array (SKA) in space, offer unparalleled advantages. These telescopes operate above the interference caused by Earth’s atmosphere, providing a pristine environment for radio observations.
    2. Benefits and Challenges of Space Observatories: Space observatories present a myriad of benefits, including the elimination of atmospheric interference and the ability to observe a broader range of frequencies. However, these come at a cost. Deploying and maintaining instruments in space is a complex and expensive endeavor. Additionally, space-based telescopes have constraints on size and power, limiting the scale of the instruments.

    Applications of Radio Telescopes

    The applications of radio telescopes span a vast and diverse array of astronomical studies, contributing significantly to our understanding of the cosmos. As powerful tools in the realm of radio astronomy, these telescopes offer unique insights into various celestial phenomena. Here are some notable applications:

    1. Cosmology and Astrophysics: Radio telescopes play a crucial role in unraveling the mysteries of the universe at large scales. By observing cosmic microwave background radiation, the residual heat from the Big Bang, astronomers gain valuable insights into the early stages of our universe. Additionally, radio telescopes contribute to studying large-scale structures such as galaxy clusters, aiding in our understanding of cosmic evolution.
    2. Exoplanet Detection: The quest for habitable exoplanets is a forefront area of research, and radio telescopes contribute by detecting and characterizing these distant worlds. By observing the radio emissions associated with magnetic activity on exoplanets, astronomers can infer details about their atmospheres and potential habitability.
    3. Pulsar and Neutron Star Studies: Pulsars, rapidly rotating neutron stars, emit intense beams of radio waves. Radio telescopes are essential in studying these celestial lighthouses, allowing astronomers to probe extreme physical conditions and test theories of gravity. Pulsar timing observations, in particular, contribute to the detection of gravitational waves and the study of the fabric of spacetime.
    4. Mapping Galactic Magnetic Fields: Radio telescopes are instrumental in mapping the magnetic fields within our Milky Way and other galaxies. These maps provide crucial information about the interstellar medium, star formation processes, and the dynamics of cosmic structures. Observations of synchrotron radiation, emitted by charged particles spiraling in magnetic fields, help create detailed maps of these magnetic fields.
    5. Studying Active Galactic Nuclei (AGN): Active Galactic Nuclei, powered by supermassive black holes, emit intense radio waves. Radio telescopes contribute to the study of AGN, revealing details about the accretion processes, jets, and surrounding environments. This research aids in understanding the energetic processes that govern the behavior of these cosmic powerhouses.
    6. Astrochemistry and Molecules in Space: Radio telescopes enable astronomers to explore the chemistry of space by detecting radio emissions from molecules. These observations contribute to understanding the composition of interstellar clouds, star-forming regions, and even the organic molecules that serve as the building blocks of life.

    What are the uses of the Radio telescope?

    The radio telescope is an incredible invention for space research. Because of this, a significant change has occurred in space research. Scientists can now easily perceive different objects in the universe.

    Radio astronomy is an excellent subject for school or university students. Learning to use a radio telescope is very important for radio astronomy. And these are the reasons why schools and universities use radio telescopes for radio astronomy.

    Various science institutes use radio telescopes because radio telescopes play a vital role in learning astronomy.

    Radio telescopes are used in museums or planetariums to attract the general public to astronomy. Here the radio telescope is set up so ordinary people can use it without skill.

    What are the advantages of a radio telescope?

    Clouds cannot interfere with the radio telescope’s signal collection because the radio waves that come to the antenna of the radio telescope are free from obstacles. The earth’s atmosphere can’t stop them.

    You have known for so long that telescopes must be used in deep darkness during the day. Yes, you heard right; you should use your optical telescope only at night. But day and night are all the same for a radio telescope. Because you can use a radio telescope any time of the day or night, you will get equal performance at both times.

    You know that pollution occurs in the universe at different times for various reasons; at this time, you can’t see with a standard optical telescope. But with a radio telescope, you can perceive space at any time because no pollution can prevent the observation of the radio telescope.

    With a radio telescope, you can also see the star’s birthplace, the cold cloud of hydrogen gas. Clouds of cold hydrogen gas do not emit any visible light. But radio waves are generated so radio telescopes can collect them.

    You would be surprised to know that a radio telescope can detect any hot object, such as hot gas, rotating next to black holes.

    What are the disadvantages of a radio telescope?

    The first bad aspect is that radio waves are fragile and have very low frequencies, which is why radio telescopes are so large. And because these waves are so weak, telescopes must be set up in uninhabited areas to collect them because the noise sinks the radio wave.

    How much does a radio telescope cost?

    The high-frequency dish antenna radio telescope is expensive. It costs around $500000. Too much, right? Yes, amateur astronomers do not use any radio telescope. Optical telescopes (Reflector telescope, Refractor telescope, Catadioptric telescope) are for everyday uses. Different astronomical research agencies use radio telescopes for their research purposes.

    Final Words

    These were the details about the radio telescope. Here we have tried what a radio telescope is and how it works. In summary, a radio telescope collects radio waves from the electromagnetic spectrum of an object through a dish antenna.

    Its parabolic dish surface reflects the stored radio waves towards the secondary reflector. This secondary reflector reflects the waves at the feed horn, detects the feed horn waves, and sends them to the receiver. Then the analyzer analyzes the image.

    Resources and References

    1. Thompson, A. R., Moran, J. M., & Swenson, Jr., G. W. (2001). “Interferometry and Synthesis in Radio Astronomy.”
    2. Kellermann, K. I. (2009). “New Horizons of Radio Astronomy in the Next Century.”
    3. National Radio Astronomy Observatory (NRAO): https://public.nrao.edu/

    These resources provide in-depth insights into the principles, technologies, and applications of radio telescopes, offering a comprehensive foundation for further exploration.

  • Mastering Interpupillary Adjustment and Diopter Settings: How to Use Binoculars

    Binoculars are one of the most versatile and valuable tools that an outdoors person or birdwatcher can have. They can help you observe wildlife more intimately. Still, they can also be used for various other purposes, such as viewing scenic landscapes and architecture, watching ships and boats at sea, and much more.

    Understanding their basic features and how to use them effectively is essential to get the most out of your binoculars. This article will cover 12 tips to help you get started with binoculars and use them to their full potential.

    Understanding Binoculars: You need to know before using your Binoculars.

    Anatomy of Binoculars

    Binoculars are marvels of optical engineering, comprising several key components that work harmoniously to deliver stunning visual experiences.

    1. Objective Lens: The first window into the world, the objective lens, is the front lens responsible for capturing light. Its diameter influences the amount of light entering the binoculars, affecting brightness and image clarity.
    2. Eyepiece: The eyepiece magnifies the focused image formed by the objective lens, bringing distant scenes closer. Understanding the eyepiece’s design and specifications contributes to the overall viewing experience.
    3. Diopter Adjustment: A crucial feature for those with varying eyesight, the diopter adjustment allows users to fine-tune the focus for one eye independently, ensuring a crisp and personalized view.

    Types of Binoculars

    Binoculars come in various types, each designed for specific purposes and preferences.

    1. Porro Prism vs. Roof Prism: Porro prism binoculars boast a classic design with offset objective and eyepiece lenses, offering a wider field of view. On the other hand, roof prism binoculars feature a straight-barrel design, providing a more compact and streamlined profile.
    2. Magnification and Objective Lens Diameter: The balance between magnification and objective lens diameter is pivotal. Higher magnification brings distant objects closer, while a larger objective lens captures more light, enhancing image brightness, especially in low-light conditions.

    Choosing the Right Binoculars

    Selecting the perfect binoculars requires a thoughtful approach, considering both purpose and specifications.

    1. Consideration of Purpose: Tailoring binoculars to your intended use is paramount. Whether it’s birdwatching, stargazing, or sports events, each activity demands specific features for an optimal experience.
    2. Understanding Binocular Specifications: Dive into the technical details, such as magnification power, objective lens diameter, field of view, and exit pupil. These specifications are the key to matching binoculars with your unique preferences and requirements.

    Binocular Specifications Comparison

    Binocular ModelMagnificationObjective Lens DiameterField of ViewExit Pupil
    ‎Canon8x42mm400 ft/1000 yd5.25mm
    ‎Celestron10x50mm330 ft/1000 yd5mm
    ‎Vortex12x32mm420 ft/1000 yd2.67mm

    Understanding these specifications ensures you make an informed decision, aligning your binoculars with your specific needs and preferences.

    Adjusting Your Binoculars for Optimal Performance: Precision for Crystal-Clear Views

    Interpupillary Distance Adjustment

    1. Measurement and Adjustment: Before delving into the world beyond, start by measuring and adjusting the interpupillary distance—the distance between your eyes. Proper adjustment ensures the binoculars align perfectly with your eyes, delivering a comfortable and immersive viewing experience.

    Diopter Adjustment for Individual Eyesight

    1. Setting Diopter for Clear Vision: The diopter adjustment is your personal touch to binocular clarity. Customize the focus for each eye independently, compensating for any vision disparities. Once set, this feature transforms your binoculars into a tailored optical instrument, ensuring a crisp and detailed view.

    Focusing Mechanism

    1. Central Focus vs. Individual Eyepiece Focus: The focusing mechanism is the bridge between you and the scene. Central focus systems adjust both barrels simultaneously, ideal for scenarios where rapid adjustments are crucial. In contrast, individual eyepiece focus allows you to fine-tune each eyepiece independently, catering to nuanced differences in vision between your eyes. Choose the mechanism that aligns with your preferred style of observation for a seamless and focused adventure.

    Binocular Adjustment Features

    FeatureDescription
    Interpupillary Distance AdjustmentMeasure the distance between your eyes and adjust for a snug fit, enhancing comfort during prolonged use.
    Diopter AdjustmentFine-tune focus for individual eyesight, compensating for vision differences and ensuring crystal-clear views.
    Focusing MechanismChoose between central focus for simultaneous adjustments or individual eyepiece focus for personalized clarity.

    Mastering these adjustments transforms your binoculars into a personalized gateway to the world, ensuring every detail is vivid and every moment unforgettable.

    Exploring Features and Functions: Elevating Your Observations

    Image Stabilization

    1. Benefits and Limitations: Image stabilization in binoculars is a game-changer. It counters hand tremors, delivering steady views, especially at higher magnifications. While it enhances the overall experience, it’s essential to acknowledge its limitations—optimal performance may vary in extreme conditions or with rapid movements.

    Lens Coatings

    1. Anti-reflective Coatings: The magic behind pristine images lies in anti-reflective coatings. These coatings reduce glare and ensure maximum light transmission, resulting in vivid and contrast-rich visuals even in challenging lighting conditions.
    2. Waterproof and Fogproof Features: Nature is unpredictable, but your binoculars don’t have to be. Waterproof and fogproof features shield your optics from the elements, allowing you to confidently explore diverse environments without compromising performance.

    Field of View

    1. Understanding and Adjusting: The field of view is your panoramic window to the world. Understanding this parameter is crucial—the wider the field, the more you can observe. Some binoculars allow adjustments to tailor the field to your preference, offering versatility for different scenarios.

    Binocular Features Comparison

    Binocular ModelImage StabilizationLens CoatingsField of View Adjustment
    Zeiss TerraYesMulti-coated, WaterproofFixed
    ‎Nikon ProstaffNoFully-coated, FogproofAdjustable
    ‎VortexYesFully-multi-coatedFixed

    Understanding these features empowers you to choose binoculars that align with your specific needs and preferences. Whether you’re capturing a stable image, combating challenging lighting conditions, or customizing your field of view, these features enhance your observational prowess.

    Stargazing with Binoculars: Navigating the Cosmos

    Astronomy Basics

    1. Identifying Constellations: Stargazing with binoculars opens a celestial atlas above. Learn to identify constellations, connecting stars into mythical shapes that have captivated humanity for centuries.
    2. Observing Celestial Bodies: Beyond constellations, binoculars unveil the beauty of celestial bodies. Witness the dance of planets, marvel at the intricate details of the moon’s surface, and catch fleeting glimpses of distant galaxies.

    Choosing Binoculars for Stargazing

    1. Aperture and Magnification Considerations: Stargazing demands precision. Choose binoculars with a larger aperture to capture more light, revealing faint celestial objects. Optimal magnification balances detail and field of view, allowing you to appreciate both broad constellations and intricate planetary features.

    2 Tips for Stargazing Success

    1. Dark Sky Locations: Escape urban lights to dark sky locations, where the cosmos shines in all its glory. Binoculars, in tandem with a pristine night sky, reveal celestial wonders with unparalleled clarity.
    2. Ideal Conditions for Stargazing: Stargazing success hinges on ideal conditions. Time your observations during clear nights, avoiding haze or excessive moonlight. Patience is key; allow your eyes and binoculars to adjust to the darkness for optimal celestial exploration.

    Table: Binoculars for Stargazing Comparison

    Binocular ModelAperture (mm)MagnificationSuitable for Planetary ObservationBest for Deep-Sky Objects
    Nikon Monarch5010xYesNo
    Carson7015xYesYes
    Vortex428xNoNo

    Maintenance and Care: Preserving the Clarity of Your Vision

    Cleaning and Storage

    1. Cleaning Optics Safely: Safeguard the integrity of your optics by adopting gentle cleaning practices. Microfiber cloths and lens cleaning solutions ensure thorough yet delicate removal of smudges and debris, preserving the crispness of your view.
    2. Storing Binoculars Properly: Binoculars are your windows to the world; treat them with care. Store them in a protective case, shielding them from dust, moisture, and potential impacts. Avoid exposing them to extreme temperatures, ensuring they’re ready for action whenever adventure calls.

    Regular Check-ups

    1. Inspecting for Damage: Conduct regular visual inspections to catch any signs of wear or damage. Scrutinize the body, lenses, and mechanisms for any abnormalities. Prompt identification allows for timely repairs, preventing potential issues from escalating.
    2. Lubrication and Adjustments: Keep the gears of your binoculars well-oiled. Periodic lubrication ensures smooth adjustments and prolongs the life of moving parts. Perform adjustments as needed, aligning your binoculars for optimal performance and maintaining the precision that defines a stellar viewing experience.

    12 Tips to Follow

    1.  Always use a carrying case

    Most binoculars do not come with a carrying case. The best way to transport your binoculars is to use either a small or medium-sized bag or box that will fit them snugly. If you do not have a suitable bag or box, you can often find cases or bags made explicitly for binoculars on sale or online.

    When transporting your binoculars, it is essential to ensure that they are protected from dust and dirt and that the lenses are clean and free of any scratches.

    The best way to carry binoculars while hiking is by attaching them to a backpack. This way, they will be close at hand, and you won’t have to worry about losing them. Some hikers also opt to strap their binoculars to their helmets for easy access. Be sure to consider the weight of your binoculars, as this will impact how much you can carry.

    2.  Holding a Binocular

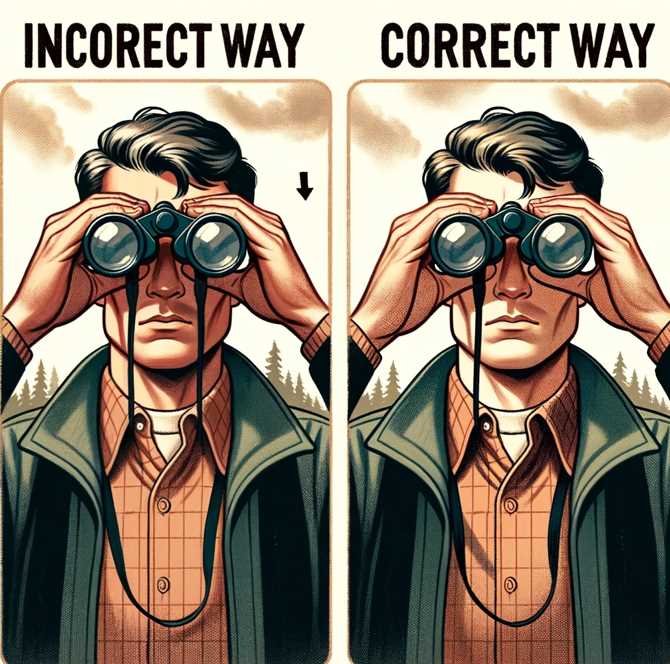
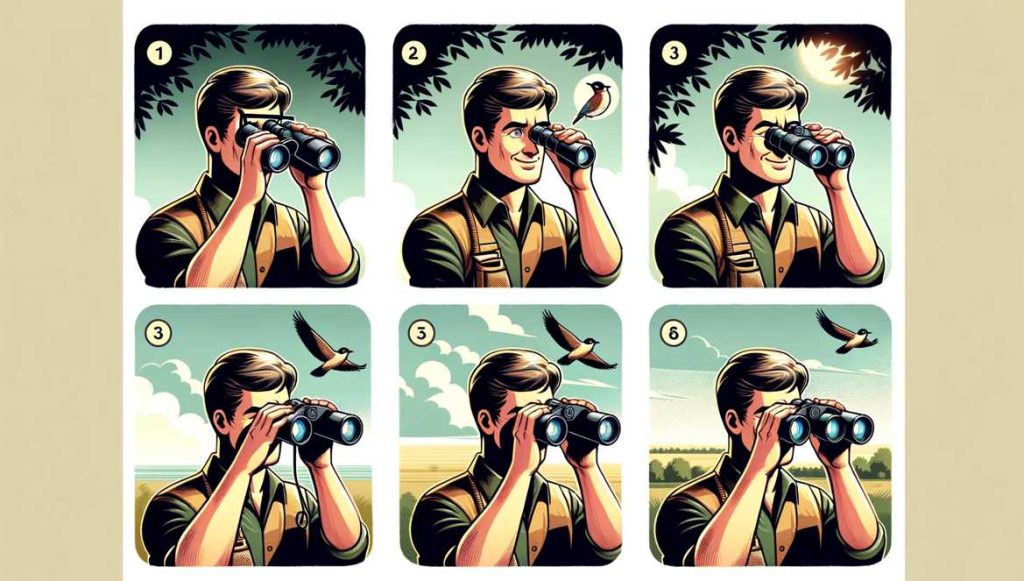
    Holding the binoculars is essential because it can predict your expertise with the device. If you’re not holding it correctly, then you won’t be able to see the object in view. Properly holding your binoculars is an art form — with a better grip comes steadiness.

    With steadiness, people can see an item much more quickly. Sometimes, people need to see an item from a distance. You might be unable to maintain stability if you don’t have a good grip on your binoculars.

    If you’re starting and want to hold your binoculars, I recommend holding them in both hands. This will allow you to brace the barrels with your thumbs. To do this, you should use your fingertips and palms. If that’s too difficult, try using a baseball cap.

    Hold onto the binoculars and the cap together to get some steadiness. If you hold your binoculars properly, you’ll have a much more stable image. So, there are many ways to get the proper stability.

    3.  Focusing is the key

    The ultimate goal is to see an object from far away more accurately. Some people use them for enjoyment, while others use them as professional tools. But while they may have different purposes, they all want the same thing—to see the object. Zoom is one of the essential functions of a binocular, and it allows you to adjust the focus and get a sharper view of the object.

    You can’t see things clearly unless you focus your binoculars correctly. You need to know what lenses, eyecups, pivots, and diopters are and how to use them. Now that you know what you need, it’s time to look at something with your binoculars. Primarily, you want to balance the focal point to match the width of your space in the middle of your eyes. To do this, you have to adjust the pivot by bending it in or out. Once you’re finished balancing, it’s time to find the perfect object to view!

    Step 1: Close your right eye or cover the photograph on the right side without touching the glass.

    Step 2: Rotate the dial until the left eye is sharp.

    Step 3: Close your left eye and balance the right eye’s vision.

    Step 4: If the view is unclear or blurry, turn the dial a little to remove blurriness.

    Step 5: Repeat this step periodically, as you might need to repeat it until it’s clear.

    Step 6: Dialing the center wheel will be the only task to get a fantastic view of any object you want to see.

    4.  Be Careful while using

    You may wear glasses, and when it comes to your binocular eyecups, you need extra space to bend them up or down. You should wear hand gloves in the wintertime. Before buying your binoculars, you must find the power best suits you.

    And for beginners, starting with less powerful binoculars is better because they are easier to learn. Remember to keep them clean — replace the lens cap and put it away in a bag after using them.

    5.  Try to Use the less magnification

    When using binoculars to view distant objects, it’s best to keep magnification low, and it’s better to see picture-clear images than fuzzy ones higher in magnification. Binoculars with low magnification levels are also lighter and easier to use.

    Someone might want 8-10x magnification when viewing sweeping vistas in the distance, like nature, or watching a game far away.

    10×42 binoculars are better for terrestrial viewing, while 10×50 binoculars are better for bird-watching.

    Both binoculars offer excellent resolution and detail and are waterproof and fog proof. However, 10×42 binoculars are lighter, less expensive, and smaller and easier to carry around. 10×50 binoculars offer better magnification, but they are heavier and may be more challenging to use, and they are also larger and may not be suitable for everyone.

     Ultimately, it is crucial to test out both binoculars before purchasing. You may be surprised at just how different they are!

    6.  Objective Lens Size Matters

    Birding is most fun when it’s done in low-light environments. It’s vital to have binoculars with a long objective lens. Some are heavier than others, but the size isn’t the only factor that matters — you want a giant lens possible while maintaining a small form.

    Your binoculars’ objective lens is the furthest away from your eye, and a good lens is about 8x at retail. The binocular lens should be between these two bounds.

    Objective lens size plays a significant role in binoculars, as the more extensive the lens, the better the optics. It is essential to understand that binoculars are designed for use in close quarters, such as birdwatching or hunting. As a result, the objective lens should be as large as possible to provide a clear and crisp image.

    The larger the lens, the more light can reach the eye. That means binoculars with a larger objective lens can see clearer in low-light environments and view objects at a greater distance. In addition, larger lenses are less likely to be affected by peripheral vision, which can be a problem with smaller lenses. Additionally, larger lenses are more comfortable to wear for extended periods.

    7.  Rotating center hinge accurately

    The center hinge can rotate by about 120 degrees for most binoculars. It would be best to turn the eyepiece in the correct direction – clockwise for eyeglasses users and counterclockwise for those who wear contact lenses.

    To adjust the screws, first, loosen them by turning them counterclockwise. Then, use a flathead screwdriver to pry the hinge apart gently. Tighten the screws by turning them clockwise until they are snug.

    Be sure to tighten them evenly so that the hinge is evenly tensioned. It would help if you changed depending on your focal length — and never an 8, which you would see in movies.

    8.  Adjusting the binocular eyecup properly

    If the eyecup on your binoculars is not adjusted correctly, you may not get the best view possible. There are a few ways to change the binocular eyecup, depending on your binoculars. For example, if you use a pair of open-field binoculars, you can adjust the eyecups by turning them clockwise or counterclockwise.

    Using a pair of roof prism binoculars, you can adjust the eyecups by tilting them up. Finally, if you use a couple of monoculars, you can adjust the eyecups by rotating them around their vertical or horizontal hinges.

    9.  Testing binocular collimation

    Testing binocular collimation is an essential step in maintaining optimum performance and accuracy. Binoculars should be aligned so that the image seen through the eyepieces is the same size and shape from one eyepiece to the next.

    You can do it by aligning the center of the objective lenses and adjusting the eyepieces until the image is in sharp focus.

    You can also use a simple test to check your binoculars’ collimation. This involves looking through the eyepieces at a distant object and then moving your head until the thing is in focus at each eyepiece. If the object is not in the direction at one eyepiece, it will likely be out of focus at the other eyepiece.

    Maintaining accurate collimation will help to ensure that your images are sharp and clear. If your collimation is off, your pictures may be fuzzy or distorted.

    To check if binoculars are out of collimation, you must isolate the problem by trying different viewing angles. If the problem persists, it is time to bring a professional to adjust the lenses. Ideally, it would help if you did this every few years to ensure optimal performance.

    Remember that binoculars can also suffer damage if they are not taken care of properly, so be sure to store them in a cool, dry place and avoid dropping them.

    10. Don’t forget about the diopter adjustment

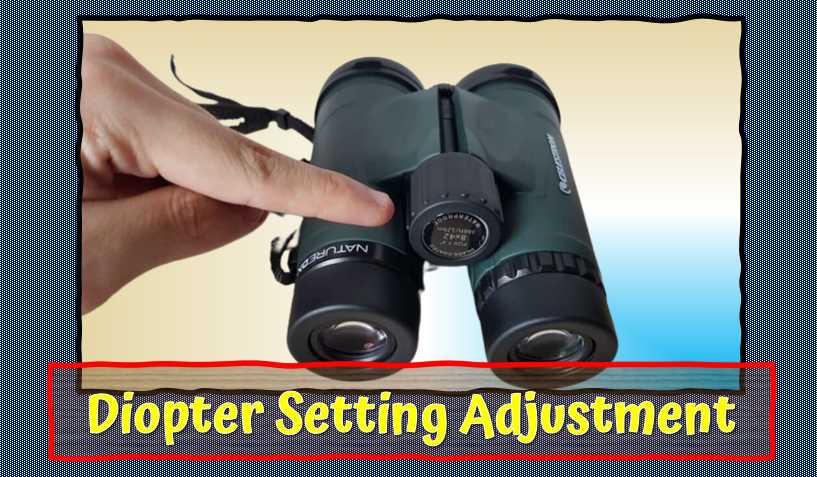
    Diopter Setting Adjustment

    Yes, diopter adjustment is an integral part of eyeglasses prescription. Binocular diopters are the eyeglasses adjustment that allows you to change the focus of your glasses. This is useful if you have prescription glasses and need to change the distance between your eyes and the eyepieces for optimal viewing.

    To adjust your binocular diopter, ensure that your glasses are on and your diopter set to the correct focal length. Next, tilt your head back so the eyepieces are at your nose, and slowly move your head up until you reach the focal point. Finally, look down through the eyepieces and adjust the diopter until they are in focus.

    11. Use the naked eye to focus

    You can use your naked eye to focus on the object you want to see. Bring the binoculars to your eyes once you focus on your intended purpose. But it is essential to be aware of their limitations. Binoculars magnify distant objects but also reduce nearby objects’ clarity, leading to confusion and difficulty in accurately targeting distant objects.

    Additionally, binoculars can cause a person to look up too much, which can cause neck and back strain. While they can be a helpful tool for practicing the naked eye, it is vital to consider their limitations before using them.

    12. Maintain binoculars in good condition

    Maintaining binoculars in good condition is vital for two reasons. First, if they are not in good condition, they will not perform as well. Second, if they are not performing well, you will risk damage to your eyes.

    It is essential to clean them regularly To keep binoculars in good condition. Use a mild soap and water solution and rinse them thoroughly. Make sure to store them in a clean and dry place. If you notice that they are not performing as well as they should, you should check to ensure they are clean. If they are not, you may need to take them to a binoculars specialist for inspection.

    Please don’t use your shirt to clean them. Binoculars are optical instruments and should be treated with the same care and attention you would give to a camera or a telescope. Keep them clean and free of dust and debris to ensure optimal performance.

    Can you use binoculars without glasses?

    Yes, you can use binoculars without glasses if you use them for a specific purpose, such as bird watching or hunting. You will need glasses to avoid injury if you use them for general viewing.

    How to look through binoculars?

    There are a few simple steps that can help you to look through binoculars effectively.

    First, adjust the eyepieces to get a comfortable viewing angle.

    Next, focus the binoculars on what you want to see and carefully center the image in the eyepieces.

    Finally, relax your eyes and enjoy the view!

    How close do you hold binoculars to your eyes?

    For general viewing, it is recommended that you hold binoculars about 18 inches (45 cm) from your eyes. If you are viewing a close-up object, you may need to move them closer to your eyes. Be aware that if you use a magnifying glass with your binoculars, you should move them closer to your eyes.

    How to take lenses out of binoculars?

    The most common way is to use a lens removal tool. This tool can push and twist the lens until it comes out. Another way to take lenses out of binoculars is to use needle-nose pliers. Grasp the lens near the hinge and bend it until it snaps off. Finally, you can use a knife to cut the lens off. Ensure to wear gloves when performing any of these methods to avoid injury.

    What are the best-size binoculars for general use?

    There are various sized binoculars on the market, and it can be challenging to decide which is the best for you. Here are some tips to help you choose the perfect size:

    -If you are a beginner, consider getting a smaller pair of binoculars. This will allow you to use binoculars and learn the basics before investing in a more expensive pair.

    -If you are an avid hunter or fisherman, you will likely want to get a pair of binoculars larger than necessary for general use. These will allow you to see more details and improve your hunting or fishing experience.

    -If you are looking for a pair of binoculars for general use, it is best to get a pair between these two extremes. This will allow you to use them for both hunting and general observation.

    Can I use binoculars for astronomy?

    Yes, you can use binoculars for astronomy! Using binoculars, you can view stars and planets much closer than you would with a telescope, allowing you to see more detail and learn more about the objects you are viewing. Plus, binoculars are portable to take with you wherever you go.

    Before using binoculars for astronomy, be sure to adjust the optical alignment. You can use the diopter adjustment to align the eyes properly. After alignment is complete, focus the eyepieces on the object of interest and then press the eyepieces together to view the image. If you are using a telescope, be sure to use the correct eyepieces and focus it properly.

    Remember to take care of your binoculars! Store them in a cool, dry place and avoid direct sunlight.

    Can night vision binoculars be used in daylight?

    Yes, You can use night vision binoculars in daylight. They use a particular optical sensor that can see in low light levels. This makes them an excellent choice for hunters and wildlife enthusiasts who need to use binoculars during the daytime without suffering from the sun’s glare. Additionally, they are perfect for security personnel monitoring activity at night.

    Can you use a camera tripod for binoculars?

    Yes, you can use a camera tripod for binoculars because a camera tripod can be used to steady the binoculars so that you can take steadier images.

    Can you connect a camera to binoculars?

    Yes, you can connect a camera to binoculars using a USB cable. This way, you can take photos and videos of whatever you view. You can also use the camera to capture live views of things happening in the environment.

    Why is a prism used in binoculars?

    Prism is used in binoculars to improve the clarity and definition of images. Adding the prism to the eyepieces allows the viewer to see more details and distinguish more delicate objects. This is helpful when viewing things at a distance or in low-light conditions. Additionally, the prism ensures that the image is displayed correctly in the eyepiece, no matter its angle.

    Prism is also used to correct astigmatism, a common problem with binoculars. Astigmatism occurs when the eye’s lens is not symmetrical and results in blurry or distorted images. By adding a prism to the eyepiece, the viewer can correct for astigmatism and see clear images with no distortion.

    What strength of binoculars is best for stargazing?

    When it comes to choosing the right binoculars for stargazing, the strength of the optics is key. Stronger optics = clearer images. So, what is the strongest strength of binoculars that is still appropriate for daytime use?

    The best strength of binoculars for stargazing is 8x42mm binoculars. These binoculars magnify 8x and provide a detailed image at 42 feet. They are also appropriate for daytime use since they are not too powerful or bulky.

    If you want something more robust, 10x50mm binoculars may be a better option. These binoculars magnify 10x and provide an image 50 feet away. Additionally, they are great for everyday use since they are not too bulky or expensive.

    How to use a smartphone with binoculars?

    Using a smartphone with binoculars is a great way to get a closer look at something far away. With a few simple steps, you can get your phone in close range to view whatever is happening up close. First, find the camera mode on your phone, and this can be found by swiping up from the bottom of the screen and selecting camera from the menu.

    Once you are in camera mode, you will need to adjust the focus so that it is in focus on what you want to view.

    Next, use the zoom feature to get a closer look, and hold down the button to keep the zoom level consistent. You can also use the pan feature to move around the scene.

    Finally, use the screen capture button to take a picture of what you are looking at.

    How to use Bushnell binoculars?

    Bushnell binoculars are one of the most popular brands on the market today, and for a good reason. They are well-made and offer excellent performance. Here are a few tips on how to use Bushnell binoculars:

    1. Always use a Tripod: A tripod is essential for stabilizing the binoculars, and it also allows you to take closer and more detailed pictures.

    2. Clean the Binoculars: Make sure to clean the lenses and eyepieces every time you use them to prevent bacteria and other contaminants from forming.

    3. Calibrate the Binoculars: Every time you use your Bushnell binoculars, it is essential to calibrate them to ensure accurate image viewing.

    4. Use the Right Diopter: A diopter is a device you can buy to adjust your binoculars. There are different kinds of dioptres, most notably eye and diopters for glasses wearers such as women.

    Final Words

    After reading this blog, you will know how to use binoculars like a pro! By following the tips provided, you will be able to get the most out of your viewing experience and improve your accuracy significantly. Ensure to focus appropriately, adjust the eyecup and eyepieces properly, and take care of your binoculars by maintaining them in good condition.

    To conclude this article, we suggest you know your binoculars by the book. First, hold it properly. Afterward, point it at your desired object. Finally, adjust the vision to suit your preferences using binoculars appropriately.

    If you can’t do any of those things on your first try, keep practicing, and you will learn to do it. Remember, you can be an expert binocular user if you correctly use binoculars.

    Do you have any other tips that you would like to share? Let us know in the comments below!


    Resources and References:

    Recommended Reading:

    Online Resources:

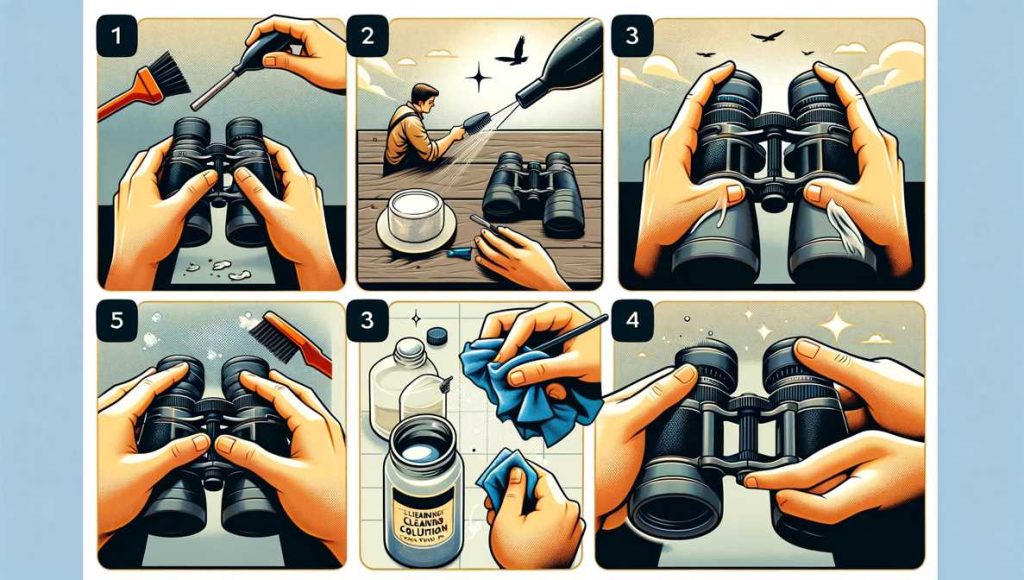
  • A Complete Guide to Cleaning Binoculars: How to Keep Them Looking Like New!

    Keeping binoculars in good condition is very important, and it keeps them ready for use and ensures that you can focus them quickly and safely on your target. A dirty or unclean binocular is one that you cannot enjoy to the full potential of its capabilities. As a result, if you don’t keep your binoculars clean and well-maintained, they may break down faster than expected.

    Keeping the lenses clean is essential to get a clear view of your surroundings. To do this, you should use a binocular lens cleaner. This will remove any dust and grime that builds up on your lenses over time, so you can see things clearly when you look through the binoculars.
    Check out the link below if you haven’t already purchased a lens cleaner.

    Tools and Materials Needed

    To embark on your binocular cleaning journey, assembling the right tools and materials is crucial. Here’s a concise list of essentials that I’ve found indispensable:

    Tools and MaterialsPurpose
    Lens Cleaning SolutionEffectively removes smudges and debris.
    Microfiber ClothsGentle, lint-free cloths for lens cleaning.
    Lens BrushIdeal for removing loose dirt and particles.
    Compressed AirSafely blows away dust from hard-to-reach areas.
    Lens Cleaning PenOffers a precise and convenient cleaning option.
    Lens Cleaning TissuesSoft tissues for delicate lens cleaning.
    Lens Cleaning WipesConvenient for on-the-go cleaning.

    These tools work in harmony to ensure a thorough cleaning process without risking damage to your binoculars. Assembling a complete kit with these essentials will empower you to maintain your binoculars with confidence.

    Step-by-Step Cleaning Process

    Cleaning your binoculars is essential to maintain their optical performance and extend their lifespan. Here’s a step-by-step guide on how to clean binoculars:

    Removing Loose Debris

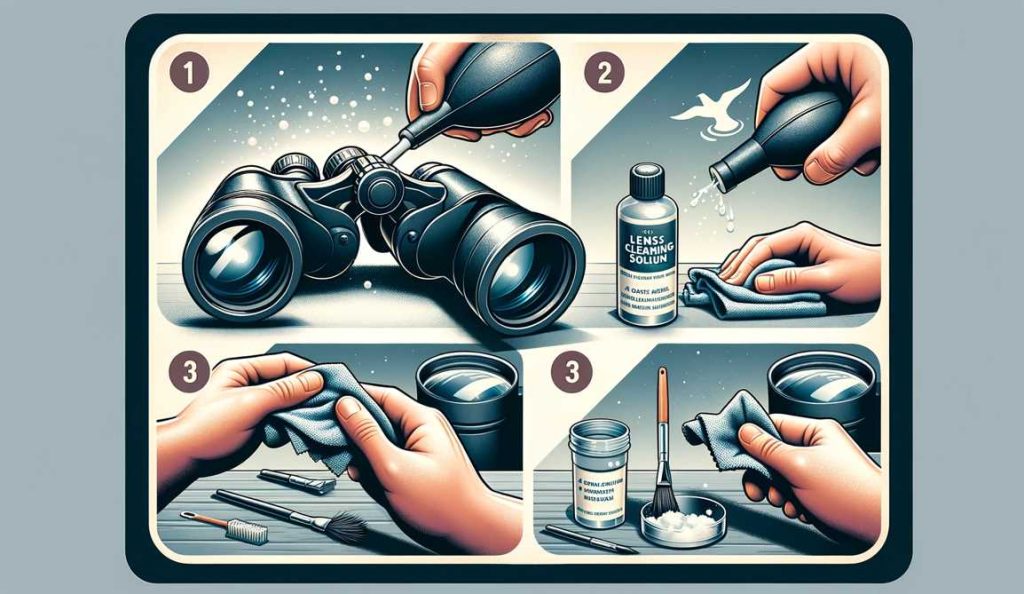
    1. Using a Lens Brush

    The initial step in your binocular cleaning process involves delicately removing loose debris that may have found its way onto your lenses. A lens brush, featuring soft bristles, is an invaluable tool for this task. Gently sweep the brush across the objective lenses and eyepieces, ensuring any loose particles are whisked away without risking scratches on the glass surface.

    It’s crucial to adopt light and sweeping motions, allowing the brush to do the work without applying undue pressure. This method is particularly effective for outdoor enthusiasts who often encounter dust and dirt during their adventures.

    Tools NeededProcedure
    Lens BrushLightly brush across objective lenses and eyepieces.
    Ensure gentle, sweeping motions to avoid scratches.

    2. Blowing Away Dust with Compressed Air

    For more persistent particles nestled in those hard-to-reach areas, enter compressed air. Hold your binoculars at a downward angle to prevent any dislodged debris from falling back onto the lenses. Utilizing short bursts, blow away dust and particles, ensuring a clean and clear optical path.

    It’s crucial to maintain a reasonable distance while using compressed air to prevent potential damage to the delicate lens surfaces.

    Tools NeededProcedure
    Compressed AirHold binoculars downward; blow away dust with bursts.
    Keep a reasonable distance to prevent potential damage.

    Cleaning the Exterior

    1. Wiping Down the Body

    Moving beyond the lenses, it’s time to address the exterior of your binoculars. The body, often exposed to the elements, can accumulate dirt and grime during outdoor excursions. To tackle this, dampen a microfiber cloth with a small amount of lens cleaning solution or a mild detergent solution.

    Gently wipe down the body of the binoculars, paying special attention to textured or hard-to-reach areas. The objective here is to strike a balance—effectively removing dirt while ensuring excess moisture doesn’t seep into the interior.

    Tools NeededProcedure
    Microfiber ClothDampen with cleaning solution; wipe down the body.
    Lens Cleaning SolutionUse a small amount for effective cleaning.

    2. Cleaning Eyecups and Focus Wheel

    Eyecups and the focus wheel, though often overlooked, can harbor oils and debris. A cotton swab or a small brush proves instrumental in cleaning these components. If needed, a touch of lens cleaning solution on the swab can provide a thorough cleaning without causing any damage.

    Tools NeededProcedure
    Cotton Swab or Small BrushClean eyecups and focus wheel.
    Lens Cleaning SolutionApply a small amount if necessary.

    Cleaning the Lenses

    1. Applying Lens Cleaning Solution

    Now, we delve into the heart of your binoculars—the lenses. Applying a small amount of lens cleaning solution to a microfiber cloth, ensure that the cloth is damp but not dripping. Adopting a gentle touch, wipe the lenses in a circular motion, commencing from the center and extending outward.

    The objective is to dislodge and lift away any dirt or smudges that may have accumulated on the lens surfaces.

    Tools NeededProcedure
    Microfiber ClothApply lens cleaning solution; wipe in a circular motion.
    Lens Cleaning SolutionUse a small amount for effective cleaning.

    2. Using a Microfiber Cloth

    The microfiber cloth, a versatile tool in your kit, plays a dual role in this process. After applying the cleaning solution, switch to a dry section of the cloth to buff the lenses. This ensures the removal of any remaining solution and leaves your lenses streak-free.

    Tools NeededProcedure
    Microfiber ClothDry section; buff lenses for a streak-free finish.

    3. Using a Lens Cleaning Pen (if applicable)

    Lens cleaning pens, with their fine brushes, are excellent for tackling small and hard-to-reach areas. Gently brush the lenses in a circular motion, ensuring that the brush is clean and free of debris before each use.

    Tools NeededProcedure
    Lens Cleaning PenBrush lenses in a circular motion; remove fingerprints.

    4. Addressing Stubborn Stains or Spots

    Occasionally, stubborn stains or spots may require extra attention. If persistent debris persists, consider a lens cleaning solution specifically formulated for tougher stains. Apply a small amount to a cotton swab or the microfiber cloth and gently work on the affected area.

    Tools NeededProcedure
    Cotton Swab or Microfiber ClothApply solution; work on stubborn stains.

    Cleaning the Eyepieces

    1. Carefully Removing Dirt and Grime

    Moving to the eyepieces, which are in close contact with your eyes, calls for a delicate approach. Utilize a clean cotton swab or a small brush to carefully remove any buildup. Exercise caution to avoid damage to the delicate lens surfaces.

    Tools NeededProcedure
    Cotton Swab or Small BrushCarefully clean eyepieces.

    2. Avoiding Scratches on Eyepiece Lenses

    Cleaning eyepieces requires extra care to prevent scratches due to their proximity to the eyes. Employ gentle, circular motions with a microfiber cloth and avoid applying excessive pressure. This ensures thorough cleaning without compromising the integrity of the eyepiece lenses.

    Tools NeededProcedure
    Microfiber ClothGently clean eyepieces; avoid excessive pressure.

    Common Binocular Cleaning Myths

    In the realm of binocular maintenance, misinformation abounds, and debunking common cleaning myths is essential for preserving the longevity and performance of your optical companions.

    1. Myth: Using Household Cleaners for Lenses: It’s a common misconception that household cleaners can substitute for specialized lens cleaning solutions. In reality, these cleaners often contain harsh chemicals that can damage lens coatings, leading to irreparable harm over time.
    2. Myth: Cleaning Binoculars with Clothing Items: While it may seem convenient to use a shirttail or a tissue, these materials can inadvertently scratch the delicate surfaces of your lenses. Microfiber cloths designed for optics provide a gentle and lint-free solution.
    3. Clarifying Misconceptions for Safe Cleaning: Proper cleaning methods involve precision and care, dispelling the notion that aggressive cleaning is necessary. This section will provide clarity, ensuring that your cleaning routine aligns with best practices, debunking myths that may compromise the integrity of your binoculars.

    Troubleshooting and Problem-Solving

    No journey in binocular maintenance is without its challenges, and addressing issues promptly is crucial to maintaining optimal performance. Drawing from my experiences, here’s a troubleshooting guide to common problems and effective problem-solving techniques.

    ProblemSolution
    Internal FoggingPlace the binoculars in a warm, dry area to dissipate moisture. If persistent, seek professional assistance.
    Water DamageRemove excess water immediately. Let binoculars air-dry completely, and store them with desiccant packs to prevent future damage.
    Scratches on LensesMinor scratches may be mitigated with a lens repair kit. For major scratches, consult a professional for lens replacement.

    Recommended Cleaning Frequency

    Establishing a regular cleaning routine is key to sustaining the longevity and performance of your binoculars. The recommended cleaning frequency depends on usage and environmental factors. Here’s a general guide:

    FrequencyCriteria
    After Every UseLight use in dusty or humid conditions.
    WeeklyRegular outdoor activities.
    MonthlyOccasional use in clean environments.

    Factors like exposure to saltwater, extreme temperatures, or heavy dust may necessitate more frequent cleaning. Regular inspection ensures you address minor issues before they escalate, maintaining the clarity and functionality of your binoculars over time.

    Which is the best option to clean the cloudy binocular lens? 

    Soap is a safe and effective solution to clean off the lens with water. Rubbing alcohol is not recommended, as it can cause damage to your eyes if used too much and has a lasting effect on the binocular lens. Hydrogen peroxide is not recommended as it will also negatively impact the lenses. Water helps to clean the lens and is more carefree than alcohol.

    How to clean cloudy binocular lens: Best Lens cleaning solution

    Blow away any wobbly dirt particles on the larger lenses with compressed air or a soft camel hair brush. The safest way to remove stubborn dust particles is with a lens cleaning pen, whether as a cleaning device or as a tool for documenting an object (getting up close and personal would be a bonus).

    No matter which lens cleaner you use, ensure it doesn’t contain any isopropyl alcohol. These are often bad for your lenses in the long run (even if they’re effective for cleaning in the short term). Use a soft cloth or swab to clean your lenses, as this is gentler and more effective.

    The air blower pump is a nifty solution to remove dust from your larger lens, and it’s a cheap fix, and you can pick one up quickly.

    Cleaning the lens with a lens pen is essential. To get it to shine, you should brush off any dirt particles with the help of some cleaning solution.

    How do you remove water from inside binoculars?

    Removing water from inside a pair of binoculars is called drying out. To do this, evacuate all the air from inside the binoculars and place them on something like an upside-down pot to catch any excess water that drips out. It can take several hours to dry completely, but once the binoculars are ready, wipe them off with a cloth and store them away for future use.

    The process of removing water from a pair of binoculars can be completed relatively quickly with the use of an inexpensive mini vacuum cleaner. This way, you don’t need to wait for them to dry out, and make sure not to damage your binoculars.

    Binoculars can get saltwater on them. If so, rinse off the binocular in fresh water. It’s crucial to clean the binocular before it dries and becomes difficult to remove. You can move it around in a circular motion and apply a little pressure.

    You can use a few different types of liquid-based cleaning fluid kits to clean your binocular lenses. Most of these kits are designed to be sprayed onto a clean lens cleaning tissue or cotton-tilted applicators. It would be best to pour the liquid onto the lenses and then wiped it off with the cleaning cloth.

    Next up: How do you get water bubbles from inside eyeglasses?

    It is easy to create water bubbles when the glasses are filled with liquid. They can start by a small bubble at the corner or around the arm of the lens and make their way up, tumbling through oxygen-rich air. Bubbles exist only because there is not enough force on one side of the menu to collapse entirely into its mirror anded twin.

    The pressure increases inside eyeglasses as more fluid fills them, and gravity allows them to push out. The pressure changes are caused by the bubbles and when this force is enough, there starts a chain reaction that causes a glass pane or triangle to shatter in half with tiny cracks spread underneath the opaque piece of the glass removing bits of oxygen into space preventing them from coming back (like on those highway signs)

    Eventually, all three pieces will collapse, which triggers fractures in other glasses allowing water and air molecules. The bubbles cause the pressure changes potential to become a lifetime of eye saver.

    The process is slow, so it takes days, if not weeks sometimes, for glasses to dry and be ready for use again. Still, once they are, there will be no more water bubbles around your lenses anymore since their air escape valve shattered hundreds of years ago, along with most other rare occurrences that go down in history as facts when in reality, all was just speculation flying by on the wings of the wind.

    How do you clean the inside of your binoculars?

    How do you clean the inside of your binoculars

    To clean binoculars, you should dry them well after each use, wiping down any parts touching the ground. Make sure you have all components and lenses on securely, and after drying well, you can carefully remove any dirt and grit by hand.

    It’s not hard to clean your binoculars, but it is a bit of a tedious job because the parts are nearly inaccessible on most models. Use lens tissues or ultra-fine sandpaper to gently buff away stains and allow them to dry out just enough for resubmission as long as possible with minimum scratching (you shouldn’t scratch heavy lenses anyway). If you do manage to get any sap off, ultratough grade sandpaper will remove it instantly.

    Brush off the dirt particles with the lens pen.

    Rub off the impurities using a microfiber cloth.

    Cleaning your binoculars is an essential step for optimum performance. Wipe off dirt particles with a soft, damp cloth, paper towel, or facial tissue.

    Then carefully use a mild cleaner on the binocular body, careful not to touch the lenses. It’s also crucial to keep your lenses clean and covered with a lens cap.

    In most cases, these binoculars will come with a neck strap that also doubles as a protective case. They are typically quick, easy, and comfy, but they are just as helpful in preventing potential accidents.

    How do you remove fungus from a binocular lens?

    If there is a fungal attack on your binoculars, here is what you should do to clean the lenses:

    When you find fKeepingmportant to removings possible is also crucial. You can do this is essential detaching the lenses and rotating the knob. However, if your binocular is old, you will need a lens wrench to scrape them off. Remove the lenses by placing one side on each of the tools and moving back and forth.

    To know the amount of fungus, hold a light source from the back of the lens.

    To treat fungus, shake the lens to unscrew it.

    Now place it on some paper towels and pour a mild dishwashing liquid over the lens.

    Next, pour some vinegar over the lens — the acid will help remove dirt or impurities that remain in your glasses .

    How do you fix sticky binoculars?

    It may be due to humidity if your binoculars have gotten sticky and you can’t use them. Do not try to clean them by using a dry cloth or place that has high air pressure, this will make the process more challenging as the water will drip out of them, making them even more likely to fall apart.

    You should then proceed with moistening a cotton ball soaked in rubbing alcohol; if they are still too stiff to work with, then put them in a bag of rubbing alcohol and leave it there for as long as you can.

    Here are some tips that you should do to be rid of the stickiness:

    Damp a soft cloth with rubbing alcohol, Windex, or ammonia. Be careful when using rubbing alcohol because it may destroy the rubber surface.

    Rub the cloth over the lens surface, which is sticky.

    If the surface is sticky, add baking soda and water to form a thin paste. The consistency should be like that of toothpaste. Rub the paste over the body of the binocular with the cloth. Then wash it off with water.

    This method, on the other hand, will not completely solve the problem. Because when the rubber on binoculars starts to crumble, it will begin to remain so. As a result, whenever feasible, change the parts.

    Seven things to avoid performing while cleaning the lenses’ cleaning process

    Don’t blow on your lenses. It can cause water spots, create dirt elsewhere, and push particles toward the edges of the lens. Not good!

    Using your shirt, t-shirt, or tissue paper is not recommended. The fibers that make up these fabrics can scratch the special coatings on your lenses over time. This will reduce the quality of your service and may lead to permanent damage.

    Avoid impatiently cleaning your eyeglasses because it can damage the lens. Cleaning carefully is essential for protecting your eyeglasses and preventing them from breaking. Hold your eyeglasses by their earpieces when you put them on or take them off to hold them in place without bending them. Avoid watching distant objects with only one eye while an eyeglass covers your other eye.

    Storing your binoculars in direct sunlight will make them worse rather than better because it will heat the lenses which can alter how they work. If you leave your binoculars out of their case, put them on a hygienic surface, like the table where you eat or use your phone.

    Remember to wear gloves and clean with care — it may seem obvious, but these are easy to forget. These are key in preventing damaging your lenses, something you’ll want to avoid at all costs! After all, eyesight is precious.

    Avoid using excessive amounts of water to prevent rusting. Even if your binoculars are waterproof, you don’t want water seeping into the eyepiece and creating a foggy mess. Use a microfiber cloth that is soft, lint-free, and smooth. Don’t wipe in circular motions – follow the natural curve from the center of the lens.

    Never leave your binoculars to dry on the kitchen table. Cleaning lenses should be done separately from food-eating and beverage-drinking. Never pour water directly onto your binoculars’ lenses.

    You will notice an air gap between the two lenses of your binoculars. The purpose of this space is to keep these lenses from scratching each other. Because as we all know, scratches on the lens surface affect how clear the image you are viewing through the binoculars will appear.

    Now we will discuss how to take care of your binocular lens.

    Steps to Follow:

    Start lubricating the lenses to prevent rusting. Grease that is colorless and odorless is the best.

    In a humid region, apply a water-absorbent silica gel.

    Try to keep your binoculars as clear as possible. To wash the inner part of the objective lenses, extract the base plate.

    Binocular Cleaning Kits:

    The two most chosen cleaning kits are the Vortex Optics Fog-Free Lens Cleaning Kit and the Zeiss Lens Cleaning Kit.

    Vortex Optics Fog-Free Lens Cleaning Kit includes-

    Soft brush

    Anti-Fog Lens Cleaner [for anti-fog protection and effective cleaning]

    A piece of cloth (cotton)

    These are the best for sports-type purposes. While shooting, you Extract the base plate ton using these models.

    Zeiss Lens Cleaning Kit includes-

    Soft brush

    Cleaning tissue

    Air blower Cleanser (you can blow off the dirt from the lenses and the binocular body using this tool).

    Cotton cloth

    Lens Cleanser

    Instead of being dropped, most binoculars are wrecked by sloppy cleaning. As a result, before cleaning, it is crucial to observe the cleaning methods closely and read the manual thoroughly.

    The lens cleaning kit will save you the hassle of getting suitable materials to wash binocular lenses, making your binocular cleaning much more comfortable and well-organized.

    6 Mistakes You’ll Avoid When clean and service Binoculars

    Clean your binoculars often, and keep them neat and in good condition, so they last a lifetime.

    Ask yourself the following questions before you start cleaning:

    Do I need to clean my binocular lenses? (only if they are dirty, blue, or streaked with smudges)

    Does it require special chemicals/cleaning agents? (ammonia solution is perfect as long as diluted)   

    Will photos suffice to show what items I need to clean? (if yes, write down the details)

    Can I quickly see into the eyepiece whether it needs cleaning or not? 

    Once you have solved these questions, make time for a phone consultation with one of our trained technicians if necessary. We would be more than happy to help at any stage of your microscopy career, relying on your relationship with us as a customer in-store for your microscopy needs. 

    For best results, the procedure should be done before news work or after observing some processes and events that require minutes (a forgotten photograph to remind yourself what you have been watching, etc.).

    Once cleaned, put them back in shape with this simple technique:  

    Place a brillo pad on a clean towel so it can absorb any excess lubricant

    Heat source like water or steam and run a soapy pad over the eyepieces

    Place a clean, dry brillo pad on top of the soaked ones.

    Repeat steps 2 to 4 for each eyepiece, or keeps in mind that it is most likely one pair will be cleaned this way (1st job)  

    Place one hand into the eyepiece while holding an applanar mask in front of binoculars

    While keeping a steady hold on the mask, pull the eyepiece and stay attached to it with that hand until both are back in place.

    Is it reasonable to wear glasses while using binoculars?

    Optometrists recommend wearing eye protection while using binoculars because you could accidentally look at something closer up than your eyes are meant to see, potentially damaging your eyes.

    The lens would deteriorate and prevent you from seeing properly. For the same reason, binoculars with a short-focus setting should be avoided. Without eye protection, you could get too close to an object which is way more intimate than what your eyes can see, and accidentally damage it.

    Wearing glasses when using binoculars helps in two ways:

    First, if you already wear glasses for better vision then why wouldn’t you give them to use for clear sight?

    Secondly, as a reference point about how much to crank up the power. On nights where I need to use a 100X or higher, with glasses on my eyes it is hard for me to think about looking at something very close-up that much would awaken some eye strain from using too big of magnifications.

    First, will they damage if you do not wear glasses and your binoculars have extra wide-angle lenses? Why? The answer depends on how fast you are cranking them out. If you turn it way up to 100X, or even 125x or higher (most of the brands now have 2X to 12X magnifications), then wearing glasses would allow your center of vision some protection from being squished together by too much light and ruining its peripheral vision behind.

    The second will you damage your eyesight if you need fine focussing but don’t wear reading specs. They are bignce with minimal squishing.

    The other issue with eyeglasses is that they will hide the stereoscopic binocular image to a degree and because they aren’t really at wide angles, most of their undereye protection is in the sides or on top of your eyes instead, depending on what kind you are using, i.e., rectangular reading glasses.

    When I’m looking through big 12″ long eye-viewers like those sold for convenience store checkout counters but being used as binoculars, my eyes are in sunlight when using the 50mm and more. With magnification I only need light on one part of them, so wearing glasses will protect half their field from being squished together by direct sunlight, essentially blinding me if I rotate any harder as suggested above.

    If you wear reading specs outside, use something more significant, like 30 mm instead of 25mm, which is pretty standard for men’s sports sunglasses.

    What magnification is best for birdwatching?

    The best magnification for bird watching is 10x. Because binoculars with a magnification of 10x will give you a better view of the birds, you are trying to spot.

    Additionally, since the eyes of humans and birds are at similar focal lengths, your binoculars will have no trouble adjusting focus to accommodate different distances.

    How do you clean Vortex binoculars?

    Cleaning your Vortex binoculars is a straightforward process that requires using a simple rag and cleaning solution.

    First, you should remove the caps on both ends of the binoculars to expose the objective lenses.

    Then rinse them with warm water and mild soap to remove any dirt or debris stuck between the lens surfaces.

    Finally, use a cloth or soft paper towel to dry them off, so they are ready for use again!

    How often should you clean your binoculars?

    If you are using your binoculars for bird watching, then you should clean them at least once a month. It is best to clean them for general use every 3-4 uses.

    How to clean hazy binoculars?

    If you want to clean these hazy lenses, you can take some alcohol and wipe them properly. You can use 70% alcohol and rub them. After that, take a soft tissue and rinse them correctly.

    How do you remove scratches from binocular lenses?

    There are many ways to remove scratches from binocular lenses. Some of the best methods include:

    Use a toothbrush and toothpaste – Dip a clean, soft toothbrush into toothpaste and scrub the surface of your lens with it in circular motions until all marks have been removed. Rinse off the paste with water and let it dry before using it again.

    Use dish soap – Take a clean, wet cloth or sponge and dip it into dish soap to create a thick paste that can be applied directly onto your lens’s surface. Rub gently in circular motions until all of the scratches are gone, and rinse off with water afterward for a streak-free finish.

    Use glycerin – Pour 1/4 cup (60 ml) of glycerin onto a clean cloth or paper towel, then dab at your lens’s surface in circular motions until all of the scratches are gone and rinse off with water afterward for a streak-free finish as well as being able to use this method without having to worry about any side effects on your eyesight because glycerin is natural!

    Can I use alcohol to clean binoculars?

    No, alcohol is not recommended to clean binoculars. It can cause permanent damage to the lenses and internal parts of the binoculars.

    The best way to clean your optics is using a lens tissue, or a cloth soaked in water and wrung out. If you need to use alcohol, it should be diluted with distilled water (one part alcohol, three parts distilled water).

    How do you get the fog out of binoculars?

    Fog can quickly accumulate on your binoculars, so the best way to get rid of, and its by wiping them down with a clean cloth. You can also spray a little bit of dish soap onto the cloth and use that to wipe down the lenses.

    How do you get mold out of binoculars?

    The first thing you need to do is to find out if the binoculars are made of metal or plastic. If they are made of metal, use a blow dryer to remove any moisture trapped in the eyepieces.

    If they are made of plastic, then using the towel trick can help by placing the binoculars inside a dampened cloth and wringing it out. The towel will remove all excess water from the optics and evaporate it with minimal transfer onto your skin.

    Can you use glasses cleaner on binoculars?

    Binoculars are usually made of delicate materials sensitive to solvents and chemicals. Therefore, using cleaners containing ammonia or other strong chemical substances on binoculars is not recommended.

    However, if you would like to clean your glasses with the help of a cleaner, then you can still do so without any issue.

    Final Words:

    Binoculars are an essential part of any birding or wildlife enthusiast’s equipment. Whether you are a professional ornithologist or just an amateur birder, keeping your binoculars in good condition is necessary. Here we have provided you with some tips on how to clean your binoculars and keep them looking like new!

    As you can see, there are several ways to clean your binoculars. The best way is to use a cleaning kit with a cleaning cloth and pen. You can use a material to wipe the lenses and ensure they are dust-free. If the binoculars have water marks, remove them using the cleaning pen. This will also help remove fingerprints from your binoculars.

    Resources and References

    To further enrich your knowledge and ensure you’re equipped with the latest insights, explore the following resources:

    1. Online Tutorials and Videos: Visual guides for hands-on learning.
    2. Manufacturer’s Cleaning Guidelines: Manufacturer-specific tips and recommendations.
    3. Recommended Reading and Guides: In-depth materials for a deeper dive into binocular maintenance.