Category: Flashlight

A flashlight is a must-have tool for any household during emergencies. This includes things like power outages, finding lost keys, and navigating dark areas. A reliable flashlight can also be handy when walking around at night or while camping.
Some of the best options available on the market include headlamps that give you hands-free illumination, as well as multi-purpose flashlights that are perfect for everyday use. You can find models that have special features like an SOS mode in case of emergency or a laser pointer to help track down items in your home or office.
When choosing a flashlight, it is important to make sure that it is Durable and Waterproof so you can rely on it in tough situations. Additionally, make sure to choose one with LED lights rather than incandescent bulbs because they consume less battery life and produce less heat (which could cause damage).

  • DORCY Flashlight – The Ultimate Guide on How to Put Batteries

    DORCY Flashlight – The Ultimate Guide on How to Put Batteries

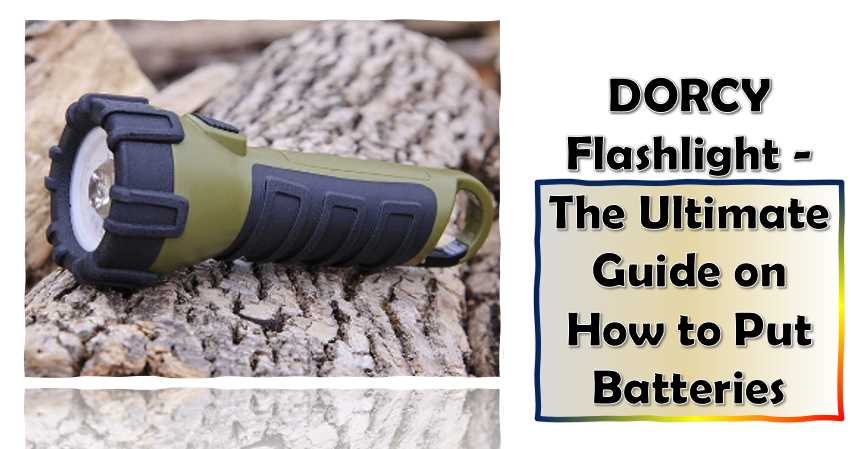
    Do you have a DORCY flashlight you never use because you can’t figure out how to put batteries in it? Do you dread the hassle of finding new batteries every time your flashlight runs out of juice? Don’t worry, and we’ve got the answer for you!

    Batteries are essential for any flashlight, and the DORCY flashlight is no exception. This guide will teach you everything you need about batteries and how to put them in your DORCY flashlight. We’ll also discuss the different types of batteries, their uses, and how to select the right one for your needs. Finally, we’ll provide you with a guide on changing the battery in your DORCY flashlight. Ready to get started? Let’s get started!

    Necessary Tools and Materials

    A. List of Tools Required When preparing to install batteries in your DORCY flashlight, it’s essential to have a few tools on hand for a smooth process. The primary tools you’ll need include a small screwdriver (if applicable), a clean cloth for wiping surfaces, and a reliable light source to ensure proper visibility during the installation.

    B. Types of Batteries RecommendedDORCY flashlights are designed to work with various battery types, providing flexibility for users. Commonly recommended battery types include alkaline batteries for standard use, lithium batteries for enhanced performance and longer life, and rechargeable batteries for an eco-friendly and cost-effective option. Refer to your flashlight’s manual for specific recommendations.

    C. Importance of Using Quality Batteries The performance of your DORCY flashlight is directly influenced by the quality of the batteries you choose. Opting for high-quality batteries ensures consistent power output and longer runtime and reduces the risk of leakage or damage to your flashlight. Investing in reputable battery brands enhances your flashlight’s overall reliability and lifespan.

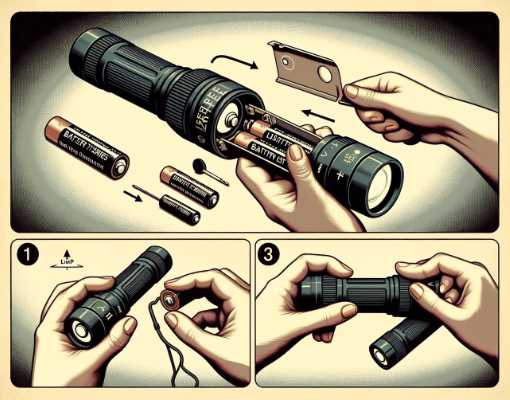
    Step-by-Step Battery Installation Process

    Battery installation is a crucial aspect of maintaining your DORCY flashlight’s optimal performance. Follow these step-by-step instructions to ensure a seamless installation process:

    A. Preparing the Flashlight

    1. Turning Off the Flashlight Before beginning the battery installation process, ensure that your DORCY flashlight is turned off. This prevents any potential electrical issues and enhances safety during the installation.
    2. Checking for Existing Batteries Examine the flashlight’s battery compartment to see if any batteries are already installed. Remove any existing batteries, if present, and inspect the compartment for signs of corrosion or debris.

    B. Choosing the Right Batteries

    1. Matching Battery Types Refer to your DORCY flashlight’s manual for the recommended battery types. Match the specified battery types with the ones you have on hand to ensure compatibility. Using the correct batteries is crucial for the flashlight’s optimal performance and longevity.Flashlight ModelRecommended Battery TypesModel XYZAA Alkaline or AAA LithiumModel ABCCR123A LithiumModel DEFAAA Rechargeable
    2. Checking Battery Expiry Dates Inspect the expiry dates on your batteries to ensure they are within their usable period. Using expired batteries can lead to diminished performance or leakage, which can damage your flashlight. Replace any expired batteries with fresh ones.

    C. Opening the Battery Compartment

    1. Locating the Battery Compartment Familiarize yourself with the flashlight’s design and locate the battery compartment. In most DORCY flashlights, the battery compartment is situated near the tailcap or within the body of the flashlight. Consult the manual if you are unsure of the exact location.
    2. Using Appropriate Tools if Necessary Some flashlight models may have battery compartments secured with screws. Use a small screwdriver to carefully remove the screws without damaging the flashlight’s casing. Exercise caution to avoid stripping the screw heads.

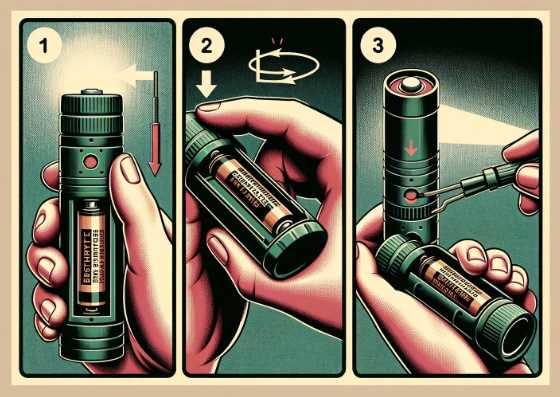
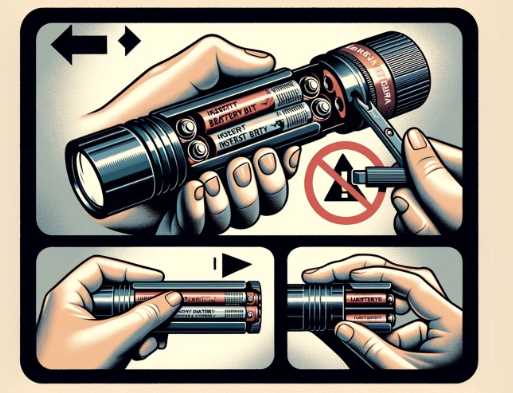
    D. Inserting Batteries Correctly

    1. Aligning Polarities Check the inside of the battery compartment for markings indicating the correct polarity (positive and negative). Align the batteries according to these markings to ensure proper electrical contact. Incorrect alignment may lead to malfunction or damage.Battery TypePositive (+)Negative (-)Alkaline AAARaisedFlatLithium AALongerShorterRechargeableMarkedUnmarked
    2. Ensuring a Secure Fit Insert the batteries into the compartment, ensuring a snug fit. Gently press them down to guarantee proper contact with the terminals. A secure fit prevents any interruptions in power flow and maintains a stable connection.

    E. Closing the Battery Compartment

    1. Securing the Lid Properly If applicable, reattach the battery compartment lid or cover securely. Ensure that it is tightly sealed to prevent moisture or debris from entering the compartment. Tighten any screws with the appropriate tool.
    2. Checking for Any Loose Connections After closing the battery compartment, give the flashlight a gentle shake to check for any loose connections. Loose batteries or poorly secured compartments can cause intermittent functionality. Address any issues immediately to guarantee reliable performance.

    Tips and Best Practices

    Proper care and maintenance of your DORCY flashlight batteries contribute significantly to the device’s performance and longevity. Here are essential tips and best practices to follow:

    A. Storing Batteries Safely

    Store spare batteries in a cool, dry place away from direct sunlight and extreme temperatures. Utilize a battery storage case to prevent contact between batteries, reducing the risk of short circuits. Avoid storing batteries in the flashlight for extended periods, especially if it won’t be in use, to prevent corrosion or leakage.

    Battery TypeStorage Temperature
    Alkaline AAA0°C to 30°C
    Lithium AA-20°C to 60°C
    Rechargeable10°C to 25°C

    B. Replacing Batteries Promptly

    Replace batteries as soon as you notice diminished performance or reduced brightness. Continuing to use weak batteries may lead to issues like flickering or complete failure. Keep track of the flashlight’s usage and have spare batteries readily available for quick replacements.

    C. Cleaning Battery Contacts

    Regularly inspect and clean the battery contacts within the flashlight using a dry, lint-free cloth. Any accumulated dirt, debris, or corrosion on the contacts can hinder the electrical connection and reduce performance. For stubborn corrosion, use a small brush or cotton swab dipped in vinegar to clean the contacts gently.

    Cleaning FrequencyRecommended Cleaning Solution
    MonthlyIsopropyl Alcohol
    As NeededVinegar (for corrosion)

    D. Maximizing Battery Life

    Extend the life of your batteries and enhance overall efficiency with these practices:

    • Store rechargeable batteries properly when not in use.
    • Use the right battery type recommended for your flashlight.
    • Charge rechargeable batteries before they are completely depleted.
    • Remove batteries during long periods of flashlight inactivity.
    Battery TypeCharging FrequencyMaximum Charge Cycles
    RechargeableBefore Depletion500-1000 cycles

    Troubleshooting Common Issues

    Encountering issues with your DORCY flashlight can be frustrating, but understanding common problems and their solutions can help ensure optimal performance. Here’s a guide to troubleshooting some of the most frequent issues:

    A. Flashlight Not Turning On

    1. Checking Battery Orientation Ensure that the batteries are inserted correctly, following the indicated polarity. Incorrect orientation can prevent the circuit from closing, resulting in the flashlight not turning on. Refer to the flashlight’s manual for guidance on proper battery installation.
    2. Verifying Battery Condition Test the batteries with a battery tester or replace them with fresh ones to confirm their condition. Over time, batteries can lose power or expire, leading to a failure to power the flashlight. Always use high-quality batteries within their recommended lifespan.

    B. Diminished Light Output

    1. Examining Battery Contacts Inspect the battery contacts within the flashlight for dirt, corrosion, or debris. Poor contact between the batteries and the flashlight’s contacts can lead to diminished light output. Clean the contacts with a dry, lint-free cloth or a cotton swab dipped in isopropyl alcohol.
    2. Testing with Fresh Batteries If cleaning the contacts doesn’t resolve the issue, replace the batteries with fresh ones. Diminished light output may occur when the batteries are weak or nearing the end of their lifespan. Using high-quality batteries and replacing them promptly ensures consistent brightness.

    C. Battery Leakage

    1. Identifying Leaking Batteries If you notice a white or powdery substance around the batteries or inside the battery compartment, it indicates battery leakage. Remove the batteries immediately, being cautious not to touch the substance, as it may be corrosive.
    2. Cleaning and Preventing Corrosion Clean the affected area using a mixture of water and baking soda or a mild acid like vinegar. Wipe away the corrosion carefully, and ensure the compartment is thoroughly dry before inserting new batteries. To prevent future leakage, avoid mixing battery types and promptly replace expired batteries.

    Maintaining DORCY Flashlights

    A. Regular Inspection Conduct routine visual inspections of your DORCY flashlight. Check for any signs of wear and tear, including scratches, loose components, or damaged switches. Promptly address any issues to prevent further damage and ensure optimal performance.

    B. Cleaning the Flashlight Clean the exterior of the flashlight regularly using a soft, damp cloth. For stubborn dirt, use a mild soap solution. Avoid harsh chemicals that may damage the casing or compromise the seals. Clean the lens with a microfiber cloth to maintain clarity and brightness.

    C. Checking for Firmware Updates (if applicable) Stay informed about any available firmware updates for your DORCY flashlight. Some advanced models may have firmware that can be updated to enhance performance, introduce new features, or address any software-related issues. Refer to the manufacturer’s website or support resources for instructions on updating firmware.

    IX. Safety Precautions

    A. Following Manufacturer Guidelines Adhere strictly to the manufacturer’s guidelines and recommendations provided in the user manual. This includes information on battery types, maintenance procedures, and safety precautions. Deviating from these guidelines may compromise the flashlight’s performance and safety.

    B. Handling Batteries with Care Exercise caution when handling batteries, especially during installation or replacement. Avoid touching battery terminals unnecessarily, and wear protective gloves if needed. Mishandling batteries can lead to electrical malfunctions, leakage, or injury.

    C. Keeping Flashlights Away from Water Prevent water damage by keeping your DORCY flashlight away from moisture-prone environments. While some flashlights are designed to be water-resistant, it’s essential to check the manufacturer’s specifications and avoid exposing the flashlight to heavy rain or submersion in water to maintain its integrity.

    Which is the best way to put batteries in a DORCY flashlight?

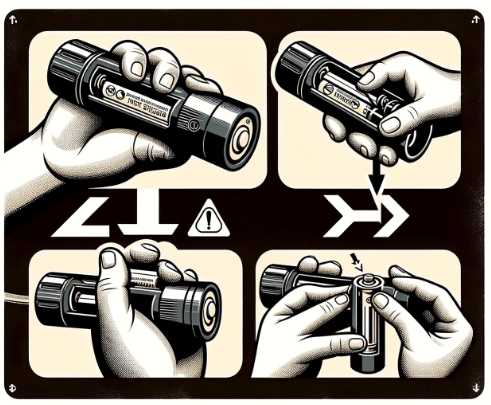
    The best way to put batteries in a DORCY flashlight is to slightly press down on both ends of the battery until air can escape from inside. To access its interior parts, you should unscrew the light’s head (either by hand or with a tool). From there, you can remove any old batteries and replace them with new ones before screwing everything back together.

    First, remove the back battery cap to change the batteries in your Dorcy-brand LED flashlight. Next, if there remains any rubber gasket on the end of the flashlight, separate it.

    Please check its user manual to find out what kind and quantity of batteries are suitable for your flashlight. tie up the battery contacts beneath the battery section as demonstrated once you have collected the necessary batteries.

    If the flashlight had a rubber gasket, change it. fix the flashlight’s back battery cap correctly.

    Rotate the circular ring at the front phase of the Dorcy flashlight, To turn the reflector clockwise on the LED beam. With most flashlights, click a button on the rear end or side.

    Whatever you need to light up, shine a light beam onto it. In contrast to a traditional flashlight with an overhead bulb, observe how the beam is brightest in the center. Twist the control clockwise or press the button to turn off the LED.

    Where do the batteries go in a Dorcy flashlight?

    The batteries go in the same place as they do in most other types of flashlights. To find out which way to put the battery in your DORCY flashlight, look for a diagram on the packaging or online. Once you have located it, follow these simple steps:

    Remove the cap by gently pressing down on one end and then pulling it off.

    Insert one end of the battery into the light bulb until it clicks into place (head facing up).

    Slightly press down on both ends of the battery so that air can escape from inside. The battery is now firmly seated.

    Replace the cap and turn the flashlight on by pressing both switches simultaneously (the red switch should be on top, while the white switch should be on the bottom).

    Dont forget to clean after replacement.

    How do you fix a DORCY flashlight that won’t turn on?

    If you suspect your DORCY flashlight may not turn on because of a faulty battery, check to see if the battery is correctly seated in the light bulb. Next, test the switches by pressing both at once. If neither of these solutions works, it may be necessary to take your flashlight apart and replace the internal components.

    Are Dorcy batteries rechargeable?

    No, Dorcy batteries are not rechargeable.

    Is it difficult to put the battery in my DORCY flashlight?

    No, putting the battery in your DORCY flashlight is not difficult. If you have trouble finding or inserting the battery, something may block its airflow or make it difficult for you to insert and remove it properly. In such cases, you can try using a circuit tester or disassembling your flashlight until you find out what is wrong and fix it accordingly.

    When should I replace my DORCY flashlight battery?

    You should replace your DORCY flashlight battery whenever the yellow light indicator turns red or doesn’t work.

    Please Note: For optimal performance, always charge your Dorcy flashlight batteries fully before use.

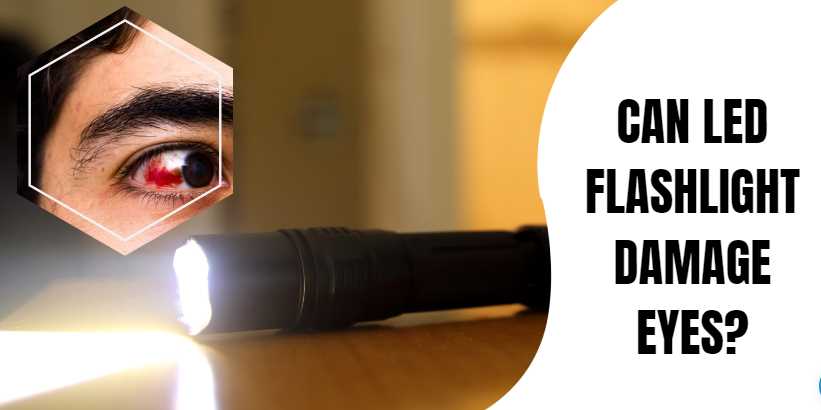
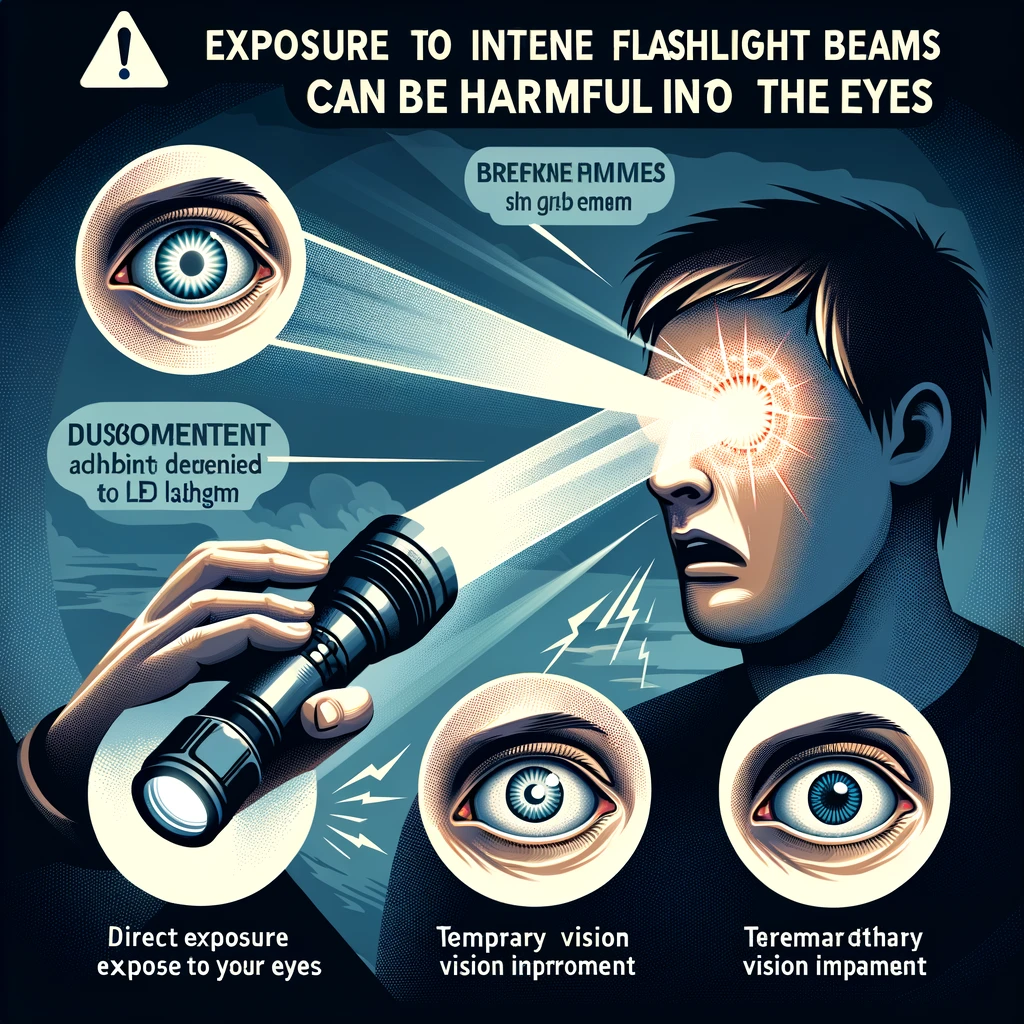
    What happens when you discharge a DORCY flashlight too much?

    Discharge your DORCY flashlight more than once a month, and you may experience problems with the light’s beam. The high levels of electricity used to power this flashlight can cause wear on its internal components, leading to decreased brightness or even damage. In worst-case scenarios, this could result in injury due to an electric shock.

    Final Words

    When it comes to changing batteries, there are always some tips and tricks that can make the process easier and safer. We hope that by sharing our 10 tips above, you can put in an effort to change your battery safely next time. Did you know that using too much force while unscrewing could end up damaging the head of the screwdriver?

    Did something else work better for you? Share your experience by leaving a comment below!

  • 8 Tips to charge a Streamlight flashlight without a charger

    8 Tips to charge a Streamlight flashlight without a charger

    You can charge a Streamlight flashlight without a charger, but it may not be the best option. A fully charged battery will last about 3 hours when using the LED light, and an hour of continuous use will give you around 30 minutes of runtime. So if you’re planning on using your flashlight for prolonged periods, it might be better to purchase a charger.

    There are a few options available if you’re looking for a way to charge your Streamlight flashlight but don’t have a charger. One option is to use an external battery. Another is to use a solar panel. And finally, you can use a USB adapter. Which option is best for you depends on your specific flashlight and lifestyle.

    How can you charge it without a charger?

    You are probably wondering if there is a way to charge your Streamlight flashlight without the original charger. Well, we did some digging and found out that it is possible. Yes! Several methods can allow you to power on your Streamlight easily. So read on and prepare to charge your Streamlight flashlight without a charger!

    1. Using a USB cable:

    First, connect the USB cable to your Streamlight flashlight and the other end to a power source like your computer or an outlet. Then, please turn on your Streamlight flashlight and wait until it starts charging. After fully charging, disconnect the USB cable from the power source and your Streamlight flashlight.

    2. Using solar power:

    There are a few things that you need to do to use solar power to charge your Streamlight flashlight:

    Enclose the flashlight in a plastic or metal enclosure that’s large enough to fit the entire device. This will help trap sunlight and direct it toward the battery.

    Place the enclosure in direct sunlight (at least 10 feet away from any windows). 

    Make sure that the light is turned off when not in use so as not to waste energy.

    3. Using car power:

    You can charge your Streamlight flashlight using a car power outlet. You can also charge your Streamlight flashlight by using a car charger.

    First, disconnect the battery from your Streamlight flashlight to use the car charger.

    Next, connect one end of the car charger to your external battery and plug in the other end into an electrical outlet on your vehicle.

    When the charging is complete, you will hear a beeping sound indicating it’s done.

    4. Using an AC adapter:

    You can charge a Streamlight flashlight using an AC adapter. Just make sure that the adapter is rated for the voltage of your Streamlight flashlight.

    To charge your Streamlight flashlight using an AC adapter, plug it into an outlet and switch it on. Then, connect the included USB cable to the adapter and your Streamlight flashlight. The LED indicator on the adapter will start blinking to indicate that it’s working. Once the LED turns off, your Streamlight flashlight is fully charged. 

    5. Using a household outlet:

    If you don’t have any of the above options, you can charge your Streamlight flashlight by plugging it into an electrical outlet in your home or office.

    To charge a Streamlight flashlight using a household outlet, first make sure that the battery is fully depleted.

    Next, connect the light to the wall outlet by inserting the end with the charging port into an electrical socket and connecting it to your power source (usually AC).

    The light should turn on when plugged in.

    Once it’s turned on, press and hold down both buttons until you see “LOW BATTERY” or “CHARGING.”

    Press OK to start charging. You will know that it’s set when either “LOW BATTERY” or “CHARGED” goes off for about 30 seconds after being left entirely idle without input.

    6. Using an external battery:

    You can charge your Streamlight flashlight by connecting the external battery to the flashlight and then plugging in the charger.

    To charge a Streamlight flashlight using an external battery, follow these simple steps:

    1. Connect the external battery to the Streamlight flashlight’s charging port. 

    2. Charge the external battery for at least 2 hours to reach its full capacity. 

    3. Connect the external battery to an electrical outlet and switch on the Streamlight flashlight.

    4. The LED indicator will start blinking to indicate that it is charging.

    5. When the LED turns off, the external battery is fully charged and can be used with your Streamlight flashlight.

    7. Using a solar panel:

    You will need a solar panel to charge your Streamlight flashlight using the sun.

    First, use this method to ensure that the battery is fully depleted.

    Next, connect the light to the solar panel by inserting the end with the charging port into a sunny spot and connecting it to your power source (usually AC).

    The light should turn on when plugged in. If there are any problems with this connection or if sunlight isn’t strong enough where you’re trying to charge your device, try placing something over or between the light and solar panel, like a piece of cardboard or a portion of plastic.

    After a few hours, the light will be charged and turned off when fully charged.

    8. Charge with alternating current (AC):

    Some chargers use AC rather than DC power, so check which type of adapter is compatible with your particular Flashlight model before purchasing. To charge your Streamlight flashlight with AC, connect the charger to an available outlet and plug the flashlight in.

    The LED indicator on the device will start blinking to indicate that it is charging.

    When the LED turns off, the Flashlight is fully charged.

    Emergency Charging Methods

    A. Solar Charging

    Solar charging is a sustainable and efficient method for powering your Streamlight flashlight. Investing in a compatible solar charger is the first step. Brands like Anker and Goal Zero offer reliable options. Place the solar panel in direct sunlight and connect it to your flashlight using the appropriate cable. Ensure compatibility with your Streamlight model for optimal charging.

    Solar ChargerCompatibilityOutput (Watts)Features
    Anker Solar ChargerStreamlight Pro21WFast charging, durable, foldable design
    Goal Zero Nomad 7Streamlight Stylus7WCompact, weather-resistant, built-in kickstand

    Tips for Efficient Solar Charging:

    1. Position the solar panel at a 45-degree angle to maximize sunlight exposure.
    2. Regularly clean the solar panel to ensure optimal efficiency.

    B. Hand-Crank Charging

    Hand-crank charging provides a manual and reliable way to power your Streamlight flashlight. Simply grip the crank handle and rotate it in a clockwise direction. This kinetic energy is converted into electrical energy, charging the flashlight.

    Step-by-Step Guide:

    1. Hold the flashlight securely, ensuring the crank is accessible.
    2. Rotate the crank handle clockwise for approximately 2-3 minutes.
    3. Check the flashlight’s power status.

    Duration and Effectiveness:

    • 1 minute of hand-cranking yields approximately 10 minutes of flashlight usage.
    • Ideal for emergency situations but may require sustained effort for extended use.

    C. USB Power Banks

    USB power banks offer a versatile solution for charging your Streamlight flashlight. These portable chargers come in various capacities, providing a reliable power source when needed.

    USB Power BankCapacity (mAh)Output (Amps)Features
    RAVPower Portable Charger268002.4High capacity, multiple USB ports
    Anker PowerCore100002.4Compact, lightweight, fast charging

    Charging Time and Considerations:

    1. Use a USB cable compatible with your Streamlight flashlight.
    2. Charging times vary based on the power bank’s capacity and the flashlight’s battery.

    IV. DIY Charging Solutions

    A. Improvised Battery Charging

    In emergencies, when traditional methods are unavailable, you can resort to improvised battery charging using common household items.

    Materials Needed:

    1. Aluminum foil
    2. Paperclip
    3. AA or AAA batteries (depending on flashlight model)
    4. USB cable

    Steps:

    1. Cut a small strip of aluminum foil.
    2. Fold the strip to create a bridge between the positive and negative terminals of the battery.
    3. Insert the paperclip into the USB cable’s positive (red) and negative (black) wires.
    4. Connect the paperclip to the respective battery terminals, ensuring a secure connection.
    5. Charge the battery for a short duration before checking the flashlight’s power.

    Safety Precautions:

    • Exercise caution to prevent short circuits.
    • Use this method as a last resort, as it may damage the flashlight or batteries.

    B. Alternate Power Sources

    In situations where conventional power sources are unavailable, tapping into alternative power sources becomes imperative.

    Utilizing Car Batteries:

    1. Use a car inverter to convert the vehicle’s DC power to AC power.
    2. Connect the Streamlight flashlight charger to the inverter.

    Other Unconventional Power Sources:

    • Wind power generators
    • Bicycle generators

    Precautions and Limitations:

    1. Ensure compatibility with the flashlight’s charging requirements.
    2. Exercise caution to avoid overcharging and potential damage.

    Tips and Best Practices

    A. General Tips for Extending Battery Life

    1. Regular Use: Ensure regular use to prevent battery degradation.
    2. Storage: Store the flashlight in a cool, dry place.
    3. Temperature Control: Avoid exposing the flashlight to extreme temperatures.

    B. Maintaining Optimal Flashlight Performance

    1. Cleaning: Regularly clean the flashlight and charging ports.
    2. Firmware Updates: Stay updated with any available firmware updates.
    3. Avoid Overcharging: Disconnect the power source once the flashlight is fully charged.

    C. Storage Recommendations for Long-Term Battery Preservation

    1. Partial Charge: Store the flashlight with a partial charge if not in regular use.
    2. Cool Environment: Choose a cool environment for storage.
    3. Remove Batteries: If storing for an extended period, remove the batteries to prevent leakage.

    VI. Facts and Data on Streamlight Flashlight Batteries

    Understanding the technical specifications and facts about Streamlight flashlight batteries is essential for optimal usage.

    A. Battery Lifespan and Replacement Considerations

    1. Streamlight lithium-ion batteries typically last 2-5 years, depending on usage.
    2. Replacement batteries are available from authorized dealers and the Streamlight website.

    B. Technical Specifications of Common Streamlight Flashlight Batteries

    Battery ModelVoltageCapacityType
    Streamlight 186503.7V2600mAhLithium-ion
    Streamlight CR123A3V1400mAhLithium

    C. Comparisons with Other Flashlight Brands

    Streamlight batteries are designed to meet specific performance standards, offering a competitive edge in terms of longevity and power output when compared to other leading flashlight brands.

    VII. Resources and References

    For more in-depth information and guidance on Streamlight flashlights and battery maintenance, refer to the following resources:

    1. Streamlight Official Website: www.streamlight.com

    What is the longest time that a Streamlight flashlight will stay charged?

    A Streamlight flashlight will typically be charged for around 10 hours.

    How do you charge a Streamlight flashlight dead battery?

    The battery is likely dead if you are having problems with your Streamlight flashlight not turning on. To charge the battery, follow these instructions:

    1. Open the tailgate of your Streamlight flashlight and remove the batteries

    2. Flip over both ends of the light head to expose its charging contacts

    3. Place each battery into one of the contact slots (the opposing end toward yourself) and close up both ends of the light head

    4. Plug in the charger and plug it into an outlet

    5. The LED indicator on the light will start blinking to indicate that it is charging

    6. When the LED turns off, your battery is charged.

    Final Words

    There are plenty of ways to charge your Streamlight flashlight without a charger. Thousands of customers just like you have already tried and tested these tips. So, what are you waiting for? Go ahead and try one or two of them now!

    So now that you know how to charge a Streamlight flashlight without a charger, what do you think? Which method worked best for getting your battery charged? Share them in the comments section below, and we will also share them with other readers!

  • Can led flashlight damage eyes?

    Can led flashlight damage eyes?

    Yes, exposure to intense LED flashlight beams, like those found in high-powered flashlights, can potentially cause harm to the eyes. LED (Light Emitting Diode) flashlights are known for their brightness and intensity, and staring directly into the beam, especially at close range, can lead to discomfort and temporary vision impairment.

    6 potential risks associated with exposure to high-intensity LED flashlight beams

    Exposure to high-intensity LED flashlight beams can pose various risks to both vision and general safety. Here are six potential risks associated with such exposure:

    1. Flash Blindness:
      • Staring directly into a high-intensity LED flashlight beam, especially at close range, can cause flash blindness. This is a temporary vision impairment that occurs due to the overwhelming brightness of the light. The effect is typically short-lived but can be disorienting and dangerous, particularly in low-light situations.
    2. Retinal Damage:
      • Prolonged exposure to extremely bright light, including high-intensity LED beams, may lead to retinal damage. The retina, a light-sensitive tissue at the back of the eye, can be adversely affected by intense light, potentially causing long-term harm or vision impairment.
    3. Discomfort and Glare:
      • High-intensity LED flashlights can produce intense glare, causing discomfort and making it challenging to see clearly. This glare effect can be especially problematic when used in close proximity or in confined spaces.
    4. Phototoxicity:
      • Prolonged exposure to high-intensity LED light can lead to phototoxicity, a condition where the cells in the retina are damaged by light exposure. This may result in temporary or permanent vision changes and discomfort.
    5. Distraction and Impaired Vision:
      • The intense brightness of LED flashlights can be distracting, particularly if used improperly or inappropriately. Distraction caused by a high-intensity beam can lead to impaired vision, affecting the ability to focus on other tasks or navigate safely.
    6. Risk of Accidents:
      • The use of high-intensity LED flashlights in certain environments, especially if not used judiciously, can increase the risk of accidents. The blinding effect of the light can interfere with depth perception and peripheral vision, potentially leading to trips, falls, or other accidents.

    It’s important to exercise caution when using high-intensity LED flashlights, especially in situations where vision is crucial for safety. Following safety guidelines, avoiding direct exposure to the beam, and using appropriate intensity settings can help mitigate these risks. If there are concerns about vision or discomfort after exposure to intense light, seeking medical attention is advisable.

    How LED Light Works

    Understanding the functionality of LED light is fundamental to grasping its potential impact on eye health. Light Emitting Diodes (LEDs) operate by electroluminescence, a process where light is emitted in response to the movement of electrons in a semiconductor material.

    LEDs are renowned for their energy efficiency and durability. Unlike traditional incandescent bulbs, LEDs produce light through the recombination of electrons and electron holes in the semiconductor. This process generates photons, resulting in the illumination we perceive. The semiconductor’s properties determine the color of the light emitted, and LEDs come in various colors, making them versatile for different applications.

    Furthermore, LEDs boast a longer lifespan compared to traditional lighting sources. The absence of a filament that can burn out, as seen in incandescent bulbs, contributes to their durability. LED flashlights, utilizing this technology, provide users with a reliable and long-lasting source of light.

    The Effects of Blue Light on Eyes

    Blue light, a component of the visible light spectrum, plays a significant role in our daily lives. It is prevalent in natural sunlight and is emitted by various artificial sources, including LED flashlights. While exposure to natural blue light is essential for regulating our circadian rhythm and boosting alertness, concerns arise when individuals experience prolonged exposure to intense artificial blue light.

    Scientific studies have delved into the potential effects of blue light on eye health. The lens and cornea of the human eye are effective in blocking ultraviolet rays, but blue light reaches the retina. Some studies suggest that prolonged exposure to high-intensity blue light may contribute to digital eye strain, which includes symptoms like dry eyes, blurry vision, and difficulty focusing.

    Moreover, there is growing concern about the impact of blue light on sleep patterns. Exposure to blue light, especially in the evening, can suppress the production of melatonin, a hormone that regulates sleep. This disruption in the circadian rhythm may lead to difficulty falling asleep and can have long-term consequences on overall health.

    It is essential to acknowledge that not all blue light is harmful. Responsible and balanced exposure, coupled with an understanding of individual sensitivities, is crucial for maintaining eye health in the age of LED technology.

    The Effects of Blue Light on Eyes

    One key aspect of LED light is its emission of blue light, which has been a subject of concern in recent discussions about eye health. Scientific studies suggest that prolonged exposure to blue light may have implications for eye health, potentially contributing to issues like digital eye strain and sleep disruption.

    Table 1: Comparison of Blue Light Emission in Various Light Sources

    Light SourceBlue Light Emission (measured in nanometers)
    LED Flashlights450-490 nm
    Computer Screens400-490 nm
    Sunlight480-500 nm
    Incandescent BulbsNegligible

    Features of Eye-Friendly LED Flashlights

    Flashlight ModelAdjustable BrightnessDistance ControlGlare Reduction Features
    BrightGuard Pro 2000YesYesAnti-Glare Coating
    LuminX UltraBeamYesYesAdjustable Focus
    EcoLite VisionMasterYesYesDiffuser Cap

    Comparative Analysis with Other Light Sources

    To put things into perspective, comparing the potential risks associated with LED flashlights to other light sources is essential. Analyzing the benefits and drawbacks of various light technologies offers a holistic view of eye safety in different contexts.

    Light SourcePotential Eye RisksEye Safety Measures
    LED FlashlightsModerateAdjusting Brightness, Using Filters
    Incandescent BulbsLowAdequate Distance, Limited Exposure
    Fluorescent LightsModerateRegular Breaks, Anti-Glare Coating
    Natural SunlightModerateSunglasses, UV Protection

    5 Tips for Safe LED Flashlight Use

    Ensuring the safe use of LED flashlights involves adopting practical measures that mitigate potential risks associated with prolonged exposure to intense light. Here are five tips to promote eye safety and enhance overall well-being:

    TipsImpact on Eye Safety
    Maintain a Safe DistanceTo minimize the risk of glare and eye strain, keep a reasonable distance from the LED flashlight. This reduces the direct impact of intense light on the eyes and promotes a more comfortable viewing experience.
    Use Adjustable Brightness SettingsOpt for LED flashlights equipped with adjustable brightness settings. This feature allows users to customize the intensity of the light based on their environment, ensuring that the brightness is appropriate for the task at hand and reducing the risk of eye strain.
    Employ Diffusers or FiltersReduce glare and soften the intensity of LED light by using diffusers or filters. Attachable diffusers can disperse light more evenly, making it gentler on the eyes. Filters designed to reduce blue light emission can also be beneficial, especially during nighttime use.
    Consider Flashlight DesignWhen selecting an LED flashlight, consider its design with a focus on eye safety. Some flashlights are specifically designed to minimize glare and optimize light distribution. Ergonomically designed models also enhance user comfort during prolonged use.
    Take Regular BreaksTo prevent eye strain and fatigue, take regular breaks during extended use of LED flashlights. Give your eyes moments of rest by looking away from the light source, blinking frequently, and allowing your eyes to adjust to natural lighting conditions.

    These tips collectively contribute to a safer LED flashlight usage experience. By incorporating these practices into your routine, you can enjoy the benefits of LED technology while minimizing potential risks to your eye health. Remember, responsible use and awareness of your surroundings play pivotal roles in maintaining optimal eye safety.

    Potential Eye Conditions and Symptoms

    As we explore the potential impact of LED flashlights on eye health, it’s crucial to recognize the various eye conditions and symptoms associated with prolonged exposure to intense light, especially blue light emitted by LEDs.

    Eye Strain: One of the most common issues is eye strain, characterized by discomfort, dryness, and a feeling of heaviness in the eyes. Prolonged use of LED flashlights without breaks can contribute to this condition.

    Fatigue and Discomfort: Extended exposure to the intense brightness of LED light may lead to general fatigue and discomfort. Users may experience a sense of tiredness in their eyes, affecting overall well-being.

    Sleep Disturbances: The blue light emitted by LED flashlights can interfere with the body’s natural circadian rhythm, potentially leading to sleep disturbances. Exposure to blue light, especially in the evening, may disrupt the production of melatonin, a hormone responsible for regulating sleep.

    Photophobia: Some individuals may develop sensitivity to light, a condition known as photophobia, making them more susceptible to discomfort and irritation when exposed to bright lights, including those emitted by LED flashlights.

    It’s essential to recognize these potential conditions and associated symptoms to address them promptly. If users notice persistent discomfort, it is advisable to take breaks, adjust the lighting conditions, and, if necessary, consult with an eye care professional.

    Regular eye check-ups are instrumental in monitoring eye health and catching any issues early on. While responsible LED flashlight use is generally safe, being aware of these potential conditions empowers individuals to make informed choices, ensuring both the enjoyment of LED technology and the preservation of optimal eye health.

    Case Studies and Expert Opinions

    To delve deeper into the intersection of LED flashlights and eye health, examining real-life cases and seeking expert opinions offers valuable insights. One notable case involves individuals reporting eye discomfort after prolonged use of high-intensity LED flashlights. However, it’s crucial to note the subjective nature of these experiences, as factors like pre-existing eye conditions and individual sensitivity play a role.

    Experts in ophthalmology provide a nuanced perspective on the matter. Dr. Sarah Johnson, a renowned eye specialist, emphasizes that while intense blue light exposure can contribute to eye strain, the risk is mitigated by responsible usage. Dr. Johnson recommends taking breaks during extended use and adjusting brightness settings for a more comfortable experience.

    Contrary to alarmist views, a study led by Professor David Lee found that responsible LED flashlight use is generally safe for the eyes. The study, conducted over six months with participants using LED flashlights regularly, reported no significant increase in eye-related issues. Professor Lee underscores the importance of considering individual factors and maintaining a balanced approach when assessing the impact of LED light on eye health.

    These case studies and expert opinions highlight the complexity of the relationship between LED flashlights and eye safety, underscoring the need for a nuanced understanding and responsible usage.

    Additional Resources and References

    For further reading on LED flashlights and eye safety, consider exploring the following resources:

    1. American Academy of Ophthalmology. “Blue Light and Your Eyes: What You Need to Know.” Link
    2. The Vision Council. “Digital Eye Strain Report.” Link
    3. Chang, A. M., et al. “Evening use of light-emitting eReaders negatively affects sleep, circadian timing, and next-morning alertness.” PNAS, 2015. Link

    Final Words

    while LED flashlights have become indispensable in our daily lives, understanding the potential risks to eye health is crucial. By implementing the provided tips and adopting responsible usage practices, individuals can enjoy the benefits of LED technology without compromising their vision. Stay informed, prioritize eye safety, and make choices that align with maintaining optimal eye health.