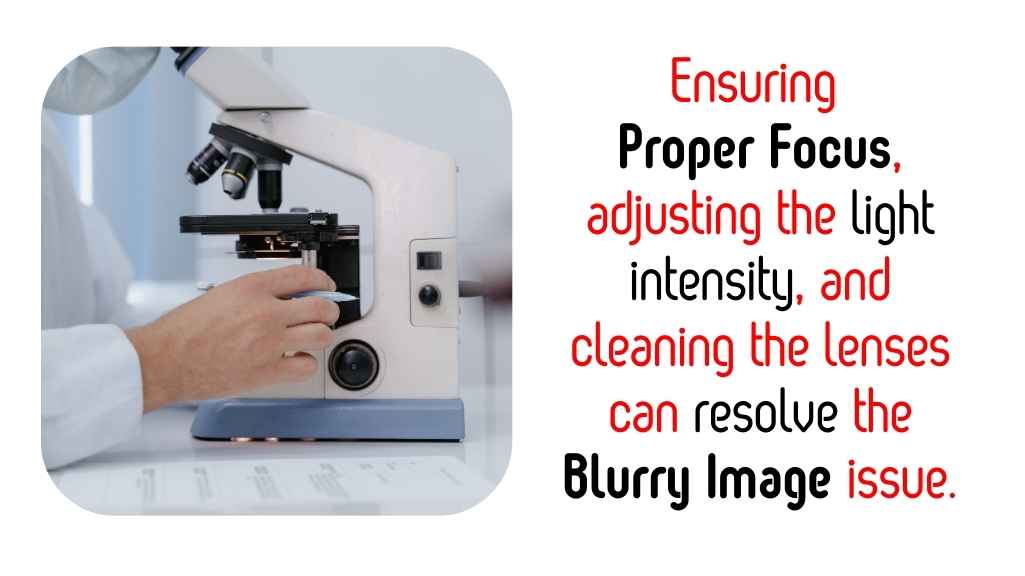
Category: Info

  • Are Microscope Objectives Interchangeable?

    Are Microscope Objectives Interchangeable?

    Microscope objectives are often interchangeable, but compatibility depends on factors like the thread type, tube length, correction standards, and optical design.

    The majority of modern microscopes use the DIN (Deutsche Industrie Norm) or RMS (Royal Microscopical Society) standard for threading, allowing interchangeability across brands that adhere to these specifications. However, for specialized systems or manufacturers, proprietary designs may limit compatibility.

    Common standards include metric 25-millimeter and metric 32-millimeter objective threads. Differences in optical qualities, numerical aperture objectives, and specialized coatings for specific applications also limit interchangeability.

    Are Microscope Objectives Interchangeable
    FactorDetailsCommon Standards
    Thread TypeConnection between microscope and lens.RMS (0.8” diameter, 36 TPI), DIN (M25)
    Tube LengthDetermines optical path length.160mm (DIN Standard), Infinity Systems
    Correction TypeCorrects spherical/ chromatic aberration.Achromatic, Semi-apochromatic, Apochromatic
    MagnificationDetermines level of detail seen.4x, 10x, 40x, 100x (oil immersion)
    Parfocal DistanceDistance from focus plane to mount.45mm (DIN Standard), varies otherwise.
    Brand-Specific DesignsProprietary limits to interchangeability.Olympus UIS2, Nikon CFI60, Zeiss ICS

    For consistent performance, verify the system specifications and test objectives on your microscope.

    5 Key Factors Affecting Interchangeability

    The design of microscope objectives plays a significant role in their compatibility with different microscopes. Below are the critical parameters to evaluate:

    1. Thread Size and Compatibility

    Most microscopes use standardized thread sizes to mount objectives on the nosepiece turret. The most common threads are metric 25-millimeter (RMS thread) and metric 32-millimeter DIN threads. Ensuring the objective’s thread size matches the nosepiece threading is essential for successful mounting.

    Different manufacturers may use proprietary thread sizes for specific models, making some objectives incompatible without adapters. It’s recommended to consult the objective manufacturer’s specifications for thread size information.

    2. Parfocal Distance

    Parfocal distance refers to the distance between the objective’s mounting thread and its focal plane when focused. Microscope objectives commonly have parfocal distances of 45 mm (DIN standard) or 60 mm (JIS standard). If the parfocal distance does not match the mechanical tube design, users may encounter focusing issues.

    Parfocal Distance StandardTypical Value
    DIN Objectives45 mm
    JIS Objectives60 mm

    3. Tube Lens and Infinity Correction

    Modern microscopes often use infinity-corrected objectives, where light passes through the objective and continues parallel until it converges at the intermediate image plane with a tube lens. Older models may rely on finite objectives, which focus light directly to the intermediate image plane without a tube lens.

    Objectives must match the optical tube design. Using a finite objective in an infinity-corrected microscope can result in image degradation and a loss of optical qualities.

    4. Numerical Aperture Values and Imaging Medium

    Numerical aperture (NA) defines an objective’s light-gathering power and resolution potential. Differences between immersion objectives and dry objectives can influence their compatibility with certain microscopes. For example:

    • Dry objectives operate without immersion liquids.
    • Immersion objectives utilize specific media such as water, oil, or glycerin for focusing light waves more effectively.
    • Homogeneous immersion ensures refractive indices are matched, minimizing spherical aberration.

    Selecting the correct numerical aperture objectives for your application ensures image quality across a wide range of biological or optical microscopy tasks.

    5. Color Code Identification and Markings

    Microscope manufacturers utilize color-coded markings on objectives for quick identification. For instance:

    • Black indicates dark field objectives.
    • Blue represents a 40x objective.

    Knowing the color codes enables easy identification of objectives when assembling or replacing lenses, reducing compatibility confusion.

    Magnification ObjectiveColor Code
    4xRed
    10xYellow
    40xBlue
    100xWhite

    Optical Corrections in Objectives

    Optical aberrations like chromatic aberration and spherical aberration are significant concerns. Microscope objectives incorporate advanced designs to address these issues.

    Achromatic Objectives

    Achromatic objectives correct chromatic aberration for two colors and spherical aberration for one color, offering basic correction. They are suitable for standard applications requiring economical choices.

    Apochromatic Objectives

    Apochromatic objectives correct chromatic aberration for three colors and spherical aberration for two. These high-performance objectives deliver sharp, high-contrast images and are suitable for advanced biological applications.

    Plan Achromat and Plan Apo Objectives

    These objectives provide a flat field of focus across the intermediate image plane, improving imaging media compatibility in cases requiring flatness of field.

    Advances in Antireflection Coating Technology

    To improve light transmission and minimize reflection losses, objective manufacturers apply antireflection coating technology. Below are the advancements:

    • Single-Layer Coatings: Suitable for narrow spectral ranges and basic objectives.
    • Multilayer Antireflection Coatings: Offering improved transmittance values and reduced internal reflections across visible wavelengths.
    • Magnesium Fluoride Coating: A common material for quarter-wavelength thick antireflection layers.
    • Advanced Thin-Layer Coatings: Enhance transmission over a broad range of imaging media and optical qualities.

    These coatings significantly improve transmission band performance and are especially useful in high-magnification applications requiring precise light cone control.

    Other Design and Mechanical Considerations

    Objective Magnification and Barrel Design

    Objectives come in various magnifications such as 10x, 40x, and 100x, with barrels often engraved with green or blue color codes for identification. Modern microscope optics incorporate mechanical features like adjustable objectives and correction collars to fine-tune focus for differences between glass or specimens with air.

    Magnification ObjectiveEngraved Barrel Color
    Low magnificationGreen
    Medium magnificationBlue

    Working Distance and Aperture Size

    Objectives are also categorized by their working distance values.

    • Ultra-long Working Distance: Enables imaging specimens where extra space is required.
    • Shorter Working Distances: Provide greater resolution through wider light acceptance angles.

    Infinity Optics and Field Sizes

    Infinity optics support imaging across a wide field size with sharp resolution, beneficial for circuit inspection, biomedical microscopes, or light fluorescence tasks.

    Specialized Objectives for Unique Applications

    Some objectives cater to unique needs with specialized coatings and optical elements. Examples include:

    • Phase Contrast Objectives: Enhance contrast in specimens with air or in biological applications lacking natural fluorite.
    • Dark Field Objectives: Highlight specimens against a dark medium background.
    • Reflective Objectives: Optimize performance across irregular surface layers in advanced microscopy settings.

    Ensuring Compatibility and Best Practices

    Referencing Manufacturers

    Checking the degree of correction can help avoid image degradation. Consulting guides from reputable entities like the Royal Microscopical Society or authoritative researchers such as Michael W. Davidson from the National High Magnetic Field Laboratory can improve the interchangeability experience.

    Matching Antireflection Coatings with Imaging Needs

    Advanced thin-layer optical coatings mitigate unwanted reflections and light intensity fluctuations, allowing improved objectives to deliver high-contrast images. Combining these features ensures the optical microscopy setup supports dynamic needs.

    What are infinity-corrected objectives, and are they compatible across microscopes?

    Infinity-corrected objectives project light rays into an infinite focal plane, requiring a tube lens to create an intermediate image. Compatibility depends on the mechanical tube length, imaging medium, and specific design parameters, like light path alignment. Some microscopes adhere to international standards, improving the potential for interchangeability.

    What factors affect the interchangeability of objectives?

    Several factors affect whether objectives can be swapped:

    FactorDetails
    Thread SizeDetermines fit with the microscope nosepiece; common sizes include metric 25-mm and 32-mm threads.
    Parfocal DistanceRefers to the distance from the objective mounting thread to the focal plane. Differences can misalign focus.
    Numerical Aperture (NA)Influences the light-gathering ability and resolution; higher NA objectives may not align with all systems.
    Optical Tube RequirementsSystems may require infinity optics or specific tube lens designs for proper imaging.
    Coating TechnologyMultilayer antireflection coatings or single-layer lens coatings impact light transmission and compatibility.

    How do manufacturers indicate compatibility of objectives?

    Manufacturers use color-coded rings and engraved information to denote numerical aperture, magnification, and imaging media. For example:

    • Black Color Code: Denotes specific numerical aperture settings.
    • Blue Color Code: Indicates compatibility with certain magnification plans.
    • Green Barrel Engravings: Highlight infinity optics.

    Can objectives with specialized coatings be swapped between microscopes?

    Objectives with advanced multilayer antireflection coatings or thin-layer optical antireflection coatings may not perform optimally across different systems. Optical elements designed for specific spectral ranges or wavelengths of incident light could result in chromatic aberration or image degradation when used incorrectly.

    Why does an objective not focus properly?

    Common causes of improper focus include:

    IssueSolution
    Incorrect Parfocal DistanceAdjust the focus or use objectives with matching parfocal distances.
    Thread Size MismatchVerify the nosepiece’s metric thread size (e.g., 25-mm or 32-mm).
    Light Path MisalignmentCheck for alignment in the optical tube or microscope tube.
    Improper Immersion MediumUse the correct liquid for immersion lenses, such as homogeneous immersion or dry lenses.
    Damaged Optical SurfacesInspect the objective barrel or external lens surfaces for scratches or dirt.

    What should I check if image quality deteriorates?

    Reduced image quality can result from internal reflections, spherical aberration, or incorrect alignment. Verify:

    1. The light source image intensity and brightness of illumination.
    2. The alignment of the intermediate image plane and rear aperture.
    3. That the objective magnification matches the tube lens requirements.

    How does the imaging medium affect performance?

    Incorrect imaging media (e.g., using air instead of an immersion liquid) can cause dramatic improvement or deterioration in image brightness and quality. Refer to manufacturer guidelines for proper use.

    How to choose an objective for specific applications?

    Selecting an objective depends on several application-specific requirements:

    ApplicationRecommended Objectives
    Biological ApplicationsApochromat objectives or fluorite objectives for high-magnification imaging and color correction.
    Epi-IlluminationPlan achromat or infinity-corrected objectives for flat field imaging.
    Circuit InspectionLong working distance or adjustable working distance objectives for hard-to-reach specimens.

    What role do advanced coatings play in objective performance?

    Multilayer coatings, such as those using magnesium fluoride, enhance light transmission and reduce internal reflections. Single-layer coatings or quarter-wavelength antireflection layers are often suitable for standard achromats. Objectives featuring advancements in lens design and antireflection coating technologies achieve higher transmission values and minimize reflection losses.

    Can interchangeable objectives improve performance?

    Swapping objectives for high-performance objectives or those with apochromatic aberration correction can provide:

    1. Improvement in light-gathering power.
    2. High-contrast images across a broad range of visible wavelengths.
    3. Enhanced flatness of field and field curvature correction.

    For example, using a 60x apochromat objective with a high numerical aperture can yield finer, diffraction-limited optical microscopy results.

    Additional Insights

    How are objectives maintained for optimal performance?

    To maintain objectives:

    • Clean external lens surfaces with approved solutions to avoid damaging specialized coatings.
    • Store objectives properly to prevent damage to the objective barrel or internal lens elements.
    • Ensure alignment of the microscope nosepiece and turret objectives.

    References and Notes

    For comprehensive insights, visit authoritative sources like the National High Magnetic Field Laboratory led by Michael W. Davidson at East Paul Dirac Dr. They provide extensive knowledge on advanced objectives, specialized coatings, and optical microscopy best practices.

    Final Takeaways

    Microscope objectives are conditionally interchangeable, requiring alignment of thread size, parfocal distance, numerical apertures, and tube lengths to maintain optimal performance. Matching objectives with the microscope tube type and application ensures reliable outcomes.

    Consider improvements in antireflection coating, field curvature correction, and light transmission properties when selecting objectives. Whether for basic biological imaging or advanced high-magnification applications, an understanding of design parameters and specialized objective types will result in effective compatibility.

  • Are Microscopes Bad for Your Eyes

    Are Microscopes Bad for Your Eyes

    No, microscopes are not inherently bad for your eyes when used properly.

    However, prolonged use without breaks or improper focusing may strain your eyes. It’s important to take regular breaks, adjust the microscope’s focus to avoid strain, and maintain appropriate lighting while using it to protect your eye health.

    FactorStatistic (%)Impact on EyesRecommendation
    Eye Strain from Overuse30%Fatigue, discomfortTake breaks every 20-30 minutes
    Correct Microscope Adjustment85%Prevents fatigueEnsure correct focus and angle
    Eye Health Awareness in Users60%Prevents damageRegularly check for eye discomfort
    Proper Lighting Impact on Eyes70%Reduces strainUse appropriate, non-glare lighting
    Duration of Microscope Use20-30 minsPrevents eye strainLimit sessions to 30 minutes max
    Are Microscopes Bad for Your Eyes

    The magnification and clarity offered by microscopes are made possible through adjustments such as focal lengths, light intensity, and the interpupillary distance between the eyepieces. Some modern designs, such as eyepiece-less microscopes or stereo microscopes, use a broader range of features to aid in viewing and comfort.

    Primary Risks of Extended Use

    Eye Strain and Fatigue

    One of the most significant concerns when using a microscope for an extended period is the risk of eye strain. The act of focusing on tiny, detailed images for long periods places a great deal of stress on the eyes, causing discomfort. Factors that contribute to eye strain include:

    • Poor posture: Maintaining an incorrect head or body position can affect how users view images and lead to eye discomfort.
    • Inappropriate lighting: Poor lighting conditions, such as the absence of proper microscope lamp illumination, fluorescent lighting, or direct light exposure, can strain the eyes and increase the risk of eye fatigue.
    • Misaligned eyepieces: The wrong interpupillary distance can cause blurry or double images, forcing the eyes to work harder.
    • High-intensity light sources: Excessively bright lighting or extended exposure to high-grade light sources can cause direct eye damage.

    Eye Damage from Excessive Exposure to Light

    Light microscopes often rely on internal microscope light sources, such as halogen or LED lights, to illuminate specimens. Exposure to bright light over an extended period can cause discomfort and, in some cases, long-term damage to the eyes, especially if the light intensity is not properly adjusted.

    In the worst-case scenarios, using powerful light sources such as lasers in laser vision correction tools or medium-power lasers in microscopes for an extended period can pose direct risks of eye injury. Excessive light exposure in the 320-400 nm range, especially from lasers used in advanced imaging, increases the risk of permanent eye damage.

    Ergonomic Risks

    Posture and Head Position

    Aside from the light sources, another factor contributing to eye strain is poor posture. If the user fails to maintain neutral body posture or sits in awkward postures for long periods, this can cause muscle strain. Misaligned head position or awkward neck postures reduce user comfort, leading to increased stress on the eyes and overall discomfort.

    Over time, bad posture may cause back pain, neck pain, and tension, further increasing the risk of fatigue. To prevent strain, adjusting the microscope body, head position, and chair to suit ergonomic requirements is necessary.

    Microscope Design and Ergonomics

    The comfort of microscope users heavily depends on the design of the microscope and its ergonomic features. For instance, adjustable eyepieces or extended eye tubes make it easier for users to focus comfortably without having to strain their neck or eyes. Some microscope manufacturers create ergonomic microscopes that can be tailored to fit the needs of the user.

    In traditional setups, operators often face difficulty with comfort. While using conventional microscopes for prolonged periods, the risk of muscle strain and visual fatigue is high due to awkward viewing angles or poorly adjusted eyepieces. On the other hand, modern microscope optics and adjustable eyepieces in ergonomic microscopes allow users to customize their settings to improve comfort.

    The use of lab stools and anti-fatigue mats is also essential for increasing overall user comfort. This reduces the incidence of eye and body stress.

    Preventing Eye Damage and Strain

    There are several practices that can help microscope operators avoid the negative effects of extended use:

    1. Adjust the microscope eyepieces and interpupillary distance: Users should ensure that the distance between the eyepieces is set correctly to avoid double images or blurry vision.
    2. Use appropriate lighting: When using light microscopes, ensure that the light sources are not too bright or dim. Using adjustable lighting settings helps to reduce glare and limit eye strain.
    3. Take regular breaks: If working with microscopes for extended periods, users should take short breaks (a couple of minutes) every 20 to 30 minutes. This reduces eye stress and helps rest both the eyes and muscles.
    4. Correct posture: Maintaining a neutral body posture is one of the most effective ways to prevent strain. Keep forearms parallel to the surface, feet flat on the floor, and avoid slouching. The microscope should also be at the correct height to prevent neck or eye strain. Awareness of posture can help reduce risk factors related to ergonomics.
    5. Use eye protection: If the microscope uses laser systems, the microscope operator should ensure that they use proper eye protection, such as UV filters or safety glasses, to guard against intense light.
    6. Use digital alternatives: While traditional microscopes are commonly used in labs and classes, the rise of digital and optical microscopes has led to alternatives such as eyepiece-less microscopes or microscopes with image sensors. Digital processing and the use of computer monitors to view microscope images allow users to avoid looking into small eyepieces for extended periods. This reduces eye strain and allows for better focus on the image without using the human eye’s intense magnification capabilities.

    Differences Between Microscope Types

    It’s important to recognize that not all microscopes are the same. The design and features of different types of microscopes can influence their effect on eye health.

    Light Microscopes vs. Advanced Microscopes

    Traditional light microscopes use visible light as an illumination source. However, modern microscopes may employ advanced features such as confocal microscopy with lasers, digital chips, or high-grade lenses. While advanced optical and digital imaging offers clearer and sharper images, the use of high-intensity light or laser confocal systems may increase the risk of eye damage if proper precautions aren’t taken.

    While light microscopes are generally considered safe when used with basic protective measures, microscopes with more sophisticated light sources and higher magnification settings, such as dental operating microscopes or industrial microscopes, can be potentially dangerous if misused.

    Stereo Microscopes and Industrial Microscopes

    Stereo microscopes and industrial microscopes offer a wider field of vision compared to other microscopes. These microscopes often come with features like larger field diaphragms, which enhance depth of field. The wider viewing angle provides more comfortable observation and reduces eye strain caused by narrowing of the field size and reduced focus depth.

    On the other hand, compound microscopes often have narrow fields and may strain users as they try to focus on specific regions. This requires more frequent adjustment of focus knobs, which can lead to eye stress or fatigue if used for long periods.

    How to Maximize Comfort and Safety

    Regular Eye Exams and Consultation with an Eye Doctor

    Regular visits to the eye doctor are crucial for anyone who regularly uses a microscope. The doctor can evaluate eye health and check for any signs of eye stress or damage. Eye professionals can also recommend specific glasses or contact lenses designed to protect against eye strain.

    For heavy users of microscopes, especially those in college biology classes, or anyone using microscopes for industrial or professional purposes, a specialized set of eyeglasses may be recommended to minimize eye fatigue and ensure optimal visual clarity.

    Microscope Maintenance and Adjustments

    Maintaining proper microscope maintenance helps ensure both the longevity of the equipment and the safety of the user. Proper cleaning of the optical lens and light sources, calibrating the settings, and replacing damaged parts like focus knobs or microscope objectives are all steps that should be followed. Keeping the device in good condition minimizes risk factors such as blurry images, uneven illumination, or exposure to harmful light intensities.

    Future Microscope Designs

    With ongoing advancements in microscope designs, there is hope for ergonomic improvements in the coming years. These future microscope designs may integrate additional safety features such as automatic lighting adjustments, more precise interpupillary distance controls, and eye safety features like built-in UV filters to protect the user’s eyes from potential harm.

    What are the risks associated with microscope use for my eyes?

    The primary risks of microscope use for eye health include eye strain and permanent eye damage. Prolonged use of a microscope, especially for an extended period, can lead to tired or strained eyes. Factors that contribute to eye strain are improper posture, misalignment of microscope eyepieces, incorrect interpupillary distance, or focusing too hard on narrow fields or blurry microscope images. Additionally, excessive bright light from the internal microscope light or high-intensity light sources like laser confocal systems can cause significant stress and even direct eye damage if exposure is not properly controlled.

    Can the lighting settings affect my vision when using a microscope?

    Yes, lighting settings play a critical role in ensuring optimal comfort while using a microscope. Inappropriate lighting conditions, such as too bright light or improper illumination sources like a weak microscope lamp or fluorescent lighting, can contribute to eye stress and discomfort. Using a UV filter can protect the eyes from potentially harmful laser light or UV rays, reducing the risk of permanent eye damage over time. Ensuring your lighting is not too harsh or dim will enhance image quality and comfort during observation.

    Does poor posture contribute to eye strain while using a microscope?

    Absolutely. Maintaining neutral body posture is crucial. Bad posture or awkward postures can strain not only the eyes but also your neck, back, and shoulders. When using a microscope, it’s vital to avoid awkward positions or leaning forward, which could lead to increased head position strain. User comfort can be significantly improved with tools designed to promote correct posture, such as lab stools, adjustable microscopes, and anti-fatigue mats. Paying attention to ergonomic designs and maintaining forearms parallel to the work surface can help reduce the likelihood of eye stress and physical discomfort.

    How can I adjust my microscope eyepieces to reduce eye strain?

    If you’re using a microscope for an extended period, adjusting the microscope eyepieces for the correct interpupillary distance is essential. Misaligned eyepieces can lead to blurred vision or eye stress as your eyes work harder to focus. Many modern microscopes and microscope manufacturers offer adjustable eyepieces or extended eye tubes, which allow you to align the viewfinder with the natural focus of your eyes, minimizing strain. Keeping the interpupillary distance in line with the natural position of your eyes will help maintain proper eye comfort.

    Are digital imaging chips or eyepiece-less microscopes better for my eyes?

    Eyepiece-less microscopes or microscopes with digital imaging chips offer distinct advantages in terms of reducing eye strain. By displaying the image on a screen instead of through an eyepiece, these microscopes can minimize the pressure on the eyes caused by staring through microscope eyepieces for long periods. Additionally, digital microscopes with intuitive access to image sensors may provide clearer, more ergonomic viewing options, reducing the need for frequent focus adjustments. If you experience strain from focus knobs or uncomfortable viewing angles, switching to a digital or extended microscope could improve overall comfort.

    Can microscope objectives or microscope optics cause eye fatigue?

    Yes, microscope objectives play a part in how much effort your eyes need to focus on images. Different focal lengths and field sizes can strain your eyes if the microscope is not adjusted properly. Narrow fields or flat fields can cause more focusing difficulty, especially over extended observation periods. To reduce strain, use microscopes with larger field diaphragms, which enhance comfort and focus, or consider using adjustable eyepieces to customize the setup to your preferences. Also, microscope optics should be of high quality, as low-grade lenses could distort images, forcing the eyes to work harder.

    How do environmental factors contribute to eye strain when using a microscope?

    Environmental factors such as the surrounding lighting, workspace ergonomics, and even air quality can exacerbate eye strain. Poorly lit spaces with inadequate illumination sources lead to frequent focusing and squinting, which tires the eyes quickly. Similarly, poor posture and incorrect head position increase the likelihood of physical strain. For example, sitting too close to the microscope with your eyes positioned too near the objective lens could increase the risk of contact stress or eye strain.

    Is there a risk of permanent eye damage with microscope use?

    While microscope optics and illumination sources are generally safe, overexposure to strong light sources, such as intense microscope lamps or lasers in confocal microscopes, can potentially lead to eye injury or permanent eye damage. Users should always wear protective eye protection or UV filters when using these advanced tools. When using a microscope with high-powered laser light or lasers in educational or research settings, exposure to such light sources should be limited and guided by safety protocols.

    What are the best ways to prevent eye stress when using a microscope for a long time?

    Here are some key tips for preventing eye stress when using a microscope:

    TipDescription
    Adjust the eyepiecesAlign the interpupillary distance properly and set the focal lengths to match your vision.
    Take breaksRest your eyes every 20–30 minutes to reduce strain and allow your eyes to refocus.
    Optimize lightingUse appropriate light intensity, such as adjusting the microscope lamp to an optimal level, and using a UV filter for protection against harsh lighting.
    Correct postureSit in a neutral posture with forearms parallel to the work surface to avoid fatigue in the entire body.
    Use ergonomic equipmentEnsure the microscope has adjustable features, such as eyepieces and focus knobs, to suit your comfort.

    Should I see an eye doctor if I experience discomfort or strain from microscope use?

    If you experience prolonged discomfort, blurred vision, or consistent eye stress from microscope use, it’s advisable to consult an eye doctor. They can provide an assessment of your eye health, suggest corrective lenses, or help address any issues caused by prolonged exposure to high-intensity light sources. Regular eye exams are especially important for heavy users of microscopes in research or medical environments, as these individuals may be exposed to risk factors like fluorescent lighting, powerful lasers, or extended observation periods.

    How do microscope ergonomics affect the safety and comfort of users?

    The ergonomic design of a microscope plays an important role in user comfort and long-term eye health. Microscopes with features such as adjustable eyepieces, stereo microscopes with larger field diaphragms, and comfortable lab stools improve posture and ease of use. By positioning the body properly and ensuring the microscope controls are within easy reach, discomfort is significantly reduced. Following basic guidelines like keeping the monitor or eyepieces at the proper viewing angle and maintaining neutral posture minimizes the risk of contact stress and eye stress.

    Final Words

    Microscopes are invaluable tools that serve a wide range of industries and fields, enabling users to examine objects in great detail. While microscopes themselves do not inherently harm the eyes, the risks of extended use or improper use, such as eye strain, poor posture, and exposure to excessive light, can cause discomfort and even damage over time.

    However, with proper ergonomic setups, correct lighting, periodic breaks, and regular eye care, users can significantly reduce the risks associated with microscope use. Whether it’s for studying samples in a college biology class, working in medical research labs, or inspecting objects with a microscope in industrial settings, being aware of eye safety is an important part of using these tools for an extended period. With correct care and attention, microscope use can be safe and effective without compromising eye health.

  • Which Microscope Does Not Use Light?

    Which Microscope Does Not Use Light?

    Electron microscope does not use light. Instead, it uses a beam of electrons to achieve much higher magnifications and resolutions than light microscopes.
    Type of MicroscopeMethod of ImagingMagnificationKey Advantage
    Electron MicroscopeElectron beamUp to 50,000,000xUltra-high resolution
    Scanning Probe MicroscopePhysical probeAtomic resolutionSurface analysis at atomic scale
    X-ray MicroscopeX-raysHigh resolutionInternal imaging without sectioning
    Focused Ion Beam MicroscopeIon beamSimilar to electron microscopesHigh resolution with sample preparation capabilities
    which microscope does not use light_

    Types of Microscopes That Do Not Use Light

    There are several microscopes that do not use light. These microscopes rely on different principles and techniques to magnify and analyze specimens. Let’s take a closer look at the types of microscopes that do not use light:

    1. Electron Microscopes

    Electron microscopes (EMs) use electron beams instead of light to create an image. The electrons have much shorter wavelengths than visible light, allowing these microscopes to achieve much higher resolution and magnification. There are two main types of electron microscopes: the scanning electron microscope (SEM) and the transmission electron microscope (TEM).

    Scanning Electron Microscope (SEM)

    A SEM works by scanning a focused beam of electrons across the surface of a specimen. The electrons interact with the atoms on the surface, producing secondary electrons that are detected to form an image. SEMs provide detailed, three-dimensional images of surfaces, and they can magnify objects up to around 1,000,000x.

    Transmission Electron Microscope (TEM)

    TEMs work by transmitting electrons through a thin sample. The electrons pass through the sample and are detected on the other side, creating a two-dimensional image. TEMs provide ultra-high resolution and are used to observe the internal structure of specimens, such as cells, viruses, and nanomaterials. They can achieve magnifications of up to 50,000,000x.

    2. Scanning Probe Microscopes (SPMs)

    Scanning probe microscopes (SPMs) use a physical probe to interact directly with the surface of the sample. They do not rely on light or electron beams. Instead, they detect forces between the probe and the sample at an atomic level, allowing them to map out surface structures. The two main types of scanning probe microscopes are the atomic force microscope (AFM) and the scanning tunneling microscope (STM).

    Atomic Force Microscope (AFM)

    An AFM uses a sharp tip mounted on a cantilever to scan the surface of a specimen. As the tip moves across the surface, it detects forces such as van der Waals forces, magnetic forces, and electrostatic forces. These measurements are used to construct highly detailed, three-dimensional images of the surface at the atomic scale.

    Scanning Tunneling Microscope (STM)

    An STM works by scanning a sharp tip over the surface of a sample and measuring the tunneling current between the tip and the sample. The current is highly sensitive to the distance between the tip and the sample, allowing the microscope to map the surface with atomic resolution. STMs are particularly useful for studying conductive materials at the atomic level.

    3. X-ray Microscopes

    X-ray microscopes use X-rays, a form of electromagnetic radiation, instead of visible light or electron beams. X-ray imaging works similarly to traditional medical X-rays, but at a much higher resolution. This technique is particularly useful for studying the internal structure of materials and biological specimens without the need for sectioning or staining.

    X-ray microscopes operate by directing X-rays onto a sample and detecting the transmission or reflection of the X-rays. The variations in X-ray absorption across the sample create an image of its internal structure. This technique is valuable for imaging biological tissues, metals, and other materials with complex internal structures.

    4. Focused Ion Beam Microscopes (FIB)

    Focused ion beam microscopes use a beam of ions rather than light or electrons to create images. FIBs are often combined with scanning electron microscopes to provide both imaging and sample preparation capabilities. The ion beam can mill away layers of material to expose new features in a specimen, allowing for highly detailed imaging and analysis.

    FIBs work by focusing a beam of ions, such as gallium ions, onto the surface of the sample. The ions interact with the sample, causing the release of secondary electrons, which are detected to form an image. FIBs can achieve resolution similar to that of electron microscopes, and they are particularly useful in materials science and semiconductor research.

    Advantages of Microscopes That Do Not Use Light

    what is the range of magnification of the microscope

    Microscopes that do not rely on visible light offer significant advantages over traditional light-based microscopes. These alternative techniques allow researchers to achieve much higher levels of detail and access new kinds of data, especially in fields like materials science, biology, and nanotechnology. Below are some of the key benefits of using microscopes that do not use light:

    1. Higher Resolution

    One of the primary advantages of microscopes that do not use light is their ability to achieve much higher resolution. Electron microscopes, for instance, use electron beams with much shorter wavelengths than visible light, enabling them to resolve much smaller features at the nanometer or even atomic scale. This high resolution allows scientists to observe fine details of specimens, such as individual atoms in a material, the structures within cells, or the arrangement of molecules on surfaces. In comparison, optical microscopes are limited in their resolution due to the longer wavelength of visible light, typically achieving a resolution of around 200 nanometers, whereas electron microscopes can reach resolutions in the range of picometers (trillionths of a meter).

    2. Ability to Examine Internal Structures

    Many microscopes that do not use light, such as electron microscopes and X-ray microscopes, are capable of imaging the internal structures of samples without requiring the sample to be cut or altered. For example, transmission electron microscopes (TEM) can pass electrons through a thin specimen to generate images of its internal features, allowing researchers to observe structures at the cellular or sub-cellular level. X-ray microscopes also excel at revealing internal details, especially in materials like metals, plastics, or biological tissues, which would otherwise require invasive techniques such as slicing or staining. The ability to view these internal structures non-invasively is critical for studying delicate biological specimens, including viruses and bacteria, or understanding the internal properties of materials used in engineering and manufacturing.

    3. No Need for Staining or Sectioning

    Unlike light microscopes, which often require samples to be stained or sectioned to improve contrast and visibility, microscopes that do not use light can examine samples in their natural, unstained state. Staining techniques used in optical microscopy can sometimes distort or damage delicate structures, especially in biological samples. For instance, cell membranes, proteins, and other cellular structures may be altered during the staining process, leading to potential loss of critical information. Electron microscopes and scanning probe microscopes avoid this issue, as they operate on different principles, such as electron interactions or surface scanning, allowing them to preserve the sample’s natural state. This is particularly beneficial for biological specimens that need to be studied in their true form, without the risk of staining-related artifacts.

    Disadvantages of Microscopes That Do Not Use Light

    While microscopes that do not rely on light provide significant benefits, they also come with certain challenges and limitations that users must consider. These challenges can impact their usability and accessibility.

    1. Complex Sample Preparation

    Many of these advanced microscopes, particularly electron microscopes, require complex and precise sample preparation. In the case of electron microscopes, samples must be prepared by cutting them into thin slices, often just a few nanometers thick, to allow the electron beam to pass through. Additionally, biological samples often need to be coated with a thin layer of conductive material, such as gold or carbon, to ensure that they do not charge up under the electron beam, which could distort the image. Some samples also need to be placed in a vacuum environment, which adds further complexity to the process. This preparation can be time-consuming, requires specialized equipment, and demands a high level of skill and expertise, making it less straightforward than working with light microscopes.

    2. High Cost and Maintenance

    Electron microscopes, scanning probe microscopes, X-ray microscopes, and other advanced instruments that do not use light are typically expensive. The initial cost of purchasing such microscopes can be prohibitively high for many research labs and educational institutions. In addition to the purchase price, these microscopes also require ongoing maintenance, which can add to the total cost of ownership. Regular calibration, servicing, and replacement of parts can be costly, and the instruments often require specialized technicians to maintain them. Furthermore, operating these microscopes requires advanced training, and users must be well-versed in the intricacies of handling the equipment. This makes these types of microscopes less accessible to labs with limited funding or expertise.

    3. Limited Sample Size

    Many microscopes that do not use light, such as electron microscopes and scanning probe microscopes, are designed to work with very small samples. Electron microscopes, for example, typically require specimens to be extremely thin (often on the order of nanometers) in order to allow the electron beam to pass through or interact effectively. Scanning probe microscopes are limited by the size of the probe, which is very small and precise, and thus only suitable for imaging surfaces at the atomic scale. These size limitations can make such microscopes less practical for examining larger specimens, which may require slicing, preparation, or adjustments to fit into the microscope’s working area. Additionally, large specimens may require more complex setups or may not be suitable for analysis at all with certain types of non-light microscopes.

    Why Do Electron Microscopes Not Use Light?

    Electron microscopes do not use light because electrons have much shorter wavelengths than visible light. This allows electron microscopes to resolve much smaller details, offering magnifications up to several million times. Light, on the other hand, cannot achieve this level of resolution due to the limitations of its wavelength.

    Can Scanning Probe Microscopes Replace Light Microscopes?

    While scanning probe microscopes offer extremely high resolution, they are not typically used as replacements for light microscopes in most applications. Light microscopes are more versatile and can be used in many fields like biology and education for general purposes. Scanning probe microscopes are specialized tools used mainly for research and very high-resolution imaging of surfaces at the nanoscale.

    Are There Any Disadvantages to Microscopes That Don’t Use Light?

    Microscopes that do not use light, such as electron microscopes and scanning probe microscopes, generally come with high costs and require special sample preparation. Electron microscopes, for example, need samples to be in a vacuum and may also require coating with a conductive material. Scanning probe microscopes require the sample to be very flat, and the scanning process can be slow.

    Final Words

    In summary, several types of microscopes do not use light, including electron microscopes, scanning probe microscopes, X-ray microscopes, and focused ion beam microscopes. These microscopes offer advantages such as higher resolution and the ability to examine internal structures without the need for staining or sectioning. However, they also come with challenges such as complex sample preparation, high costs, and limited sample sizes. Each type of microscope has its unique applications, and their choice depends on the specific research needs and the type of specimen being examined.

  • What is the Magnification Range of a Microscope?

    What is the Magnification Range of a Microscope?

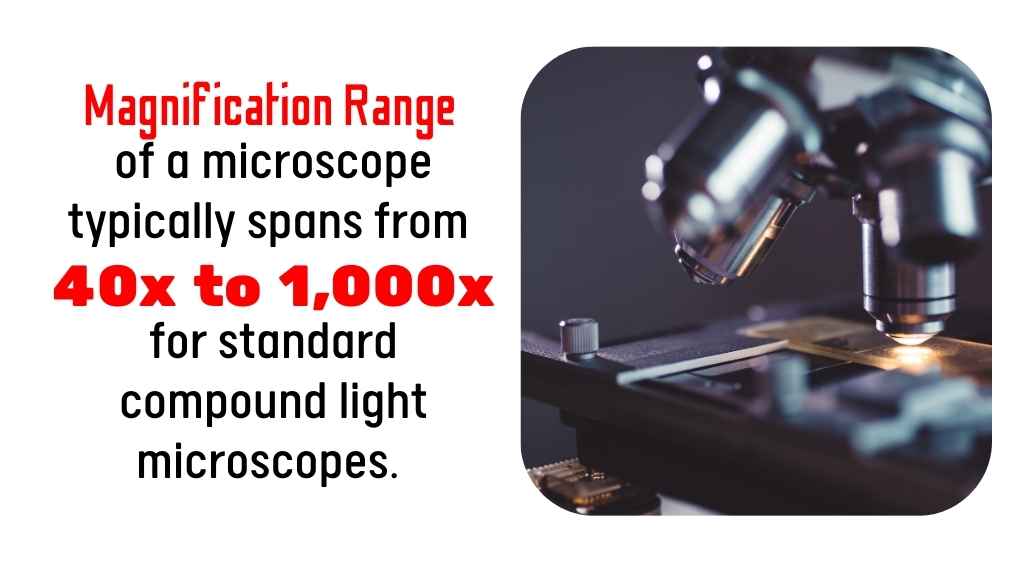
    The magnification range of a microscope typically spans from 40x to 1,000x for standard compound light microscopes. Specialized microscopes, such as electron microscopes, can achieve magnifications of up to 2 million times.

    Magnification Ranges of Common Microscopes

    Microscope TypeMagnification RangePrimary Use
    Compound Light Microscope40x – 1,000xBiological studies, cell analysis
    Stereomicroscope (Dissecting)10x – 40xObserving macroscopic specimens
    Scanning Electron MicroscopeUp to 1,000,000xSurface morphology of materials
    Transmission Electron MicroscopeUp to 2,000,000xAtomic-level structure analysis
    Digital Microscope20x – 2,000xEducation, quality control, hobbyist applications
    what is the range of magnification of the microscope

    Magnification refers to the ability of a microscope to enlarge the image of an object, allowing it to be seen in greater detail. The magnification range of a microscope depends on several factors, including the type of microscope, the lenses used, and the specimen being observed. Typically, magnification is expressed as a multiple of the original size of the object. For instance, a magnification of 40x means that the object appears 40 times larger than its actual size.

    Types of Microscopes and Their Magnification Ranges

    There are different types of microscopes, each with its own magnification range. Here’s a breakdown of common microscopes and their typical magnification ranges:

    Light Microscopes

    Light microscopes, also known as optical microscopes, are the most commonly used microscopes. They work by passing light through a specimen to create an image that is magnified. The magnification range of a light microscope generally falls between 40x and 1000x, with some advanced models reaching up to 2000x.

    Microscope TypeMagnification Range
    Light Microscope40x to 1000x
    Advanced Light Microscope2000x

    Electron Microscopes

    Electron microscopes use electron beams instead of light to create an image. This allows them to magnify objects much more than light microscopes. Scanning Electron Microscopes (SEM) and Transmission Electron Microscopes (TEM) can magnify objects up to 1,000,000 times or more. These microscopes are often used in research and industries that require a high level of detail, such as biology, materials science, and nanotechnology.

    Microscope TypeMagnification Range
    Scanning Electron Microscope (SEM)10x to 500,000x
    Transmission Electron Microscope (TEM)100x to 1,000,000x

    Stereo Microscopes

    Stereo microscopes, also called dissecting microscopes, are typically used for observing larger objects like insects, flowers, or small electronic components. They offer lower magnification, usually in the range of 10x to 50x. These microscopes provide a 3D view, which makes them ideal for examining the structure of larger objects.

    Microscope TypeMagnification Range
    Stereo Microscope10x to 50x

    Confocal Microscopes

    Confocal microscopes are advanced optical microscopes that use lasers to scan specimens. These microscopes are capable of providing very detailed images and have magnification ranges similar to light microscopes, typically up to 2000x. The advantage of confocal microscopes is that they can create sharp, high-contrast images by rejecting out-of-focus light.

    Microscope TypeMagnification Range
    Confocal MicroscopeUp to 2000x

    4 Factors Affecting Magnification Range

    While the type of microscope plays a large role in determining its magnification range, several other factors contribute to the overall magnification performance. Below are key elements that influence how much magnification you can achieve and the clarity of the resulting image.

    Objective Lenses

    Objective lenses are the primary components responsible for determining the magnification in a microscope. These lenses come in different magnification powers, typically ranging from 4x to 100x. The higher the objective lens power, the greater the magnification achieved. Users can adjust magnification by rotating the objective lenses, allowing them to choose the appropriate level of detail required for their observation. Advanced microscopes may have multiple objective lenses, enabling users to switch between different magnifications with ease.

    Objective Lens PowerMagnification Range
    Low Power (4x to 10x)40x to 100x
    Medium Power (20x to 40x)200x to 400x
    High Power (60x to 100x)600x to 1000x

    Eyepiece Lens

    The eyepiece lens, also known as the ocular lens, plays a key role in further magnifying the image produced by the objective lenses. Most standard eyepieces have a magnification of 10x, although eyepieces with other magnification powers are available. The total magnification of a microscope is calculated by multiplying the magnification of the objective lens by that of the eyepiece lens. For instance, with an objective lens of 40x and an eyepiece lens of 10x, the total magnification would be 400x.

    Eyepiece MagnificationTypical Use
    10xStandard viewing
    15xGreater magnification
    20xHigh detail observation

    Resolution

    Resolution refers to the ability of a microscope to distinguish between two closely spaced points. Higher magnification does not automatically equate to a clearer or more detailed image. If a microscope has low resolution, even at high magnification, the image may still appear blurry. A higher resolution allows for better clarity and more detail at higher magnifications. The ability to resolve fine details becomes more important as the magnification increases, particularly when observing very small structures like cells or bacteria.

    Resolution ImpactEffect on Viewing
    Low ResolutionBlurry image, less detail
    High ResolutionClearer, more detailed view

    Numerical Aperture (NA)

    Numerical aperture (NA) is a critical factor in determining a microscope’s resolution. It refers to the ability of the objective lens to gather light and resolve fine details at higher magnifications. A higher NA means the lens can capture more light, allowing for sharper and more detailed images. As the numerical aperture increases, the resolution improves, which is crucial for observing very fine details, such as the structures inside cells or the fine lines of a material.

    Numerical Aperture (NA)Effect on Resolution
    Low NA (e.g., 0.1 to 0.25)Less light, lower resolution
    High NA (e.g., 0.5 to 1.4)More light, higher resolution

    Practical Applications of Microscope Magnification

    Different magnification ranges are suited for different applications. Here are a few common examples of how microscope magnification is used in various fields:

    Biology

    In biology, microscopes with a range of magnifications are used to study cells, bacteria, viruses, and tissues. A standard light microscope is typically sufficient for examining cells and their structures, but electron microscopes are needed to explore viruses or the ultra-fine details of cell components like organelles.

    Medicine

    In the medical field, microscopes are often used to examine tissue samples for signs of disease. Pathologists use microscopes with high magnification to identify cancer cells or pathogens in blood or tissue samples. The magnification required depends on the type of examination being done.

    Material Science

    In material science, high-magnification electron microscopes are used to analyze the structure of materials at the atomic level. This can help engineers and scientists improve the properties of materials used in electronics, construction, and manufacturing.

    Forensic Science

    Forensic scientists often use microscopes to examine trace evidence such as hair, fibers, and gunshot residue. Low magnification may be used for broad inspection, while higher magnification is used to identify minute details that could be crucial for solving a case.

    How do you calculate the total magnification of a microscope?

    To calculate the total magnification, simply multiply the magnification power of the objective lens by the magnification power of the eyepiece. For example, if your microscope has an objective lens with 40x magnification and an eyepiece with 10x magnification, the total magnification would be:
    40x (objective lens) × 10x (eyepiece) = 400x total magnification.

    What is the highest magnification a microscope can have?

    The highest magnification of a microscope depends on its type and design. For light microscopes, the maximum magnification is typically around 1,000x to 2,000x. However, electron microscopes can provide much higher magnification, often exceeding 1 million times, allowing for detailed observations at the cellular or molecular level.

    Can you go beyond the maximum magnification of a microscope?

    While it is possible to increase the magnification of a microscope beyond its intended limits, doing so often results in a blurry or distorted image. This happens because microscopes have a limit to the amount of detail they can resolve, known as the resolving power. Going beyond this limit doesn’t provide clearer images and can make it harder to see the specimen clearly.

    Is higher magnification always better?

    Not necessarily. While higher magnification allows you to see smaller details, it does not always provide a clearer or more useful image. The quality of the lenses, the resolution, and the lighting also play key roles in determining the clarity of the image. Higher magnification may sometimes show more detail, but it can also magnify imperfections in the lens or specimen, leading to a blurry image if not used correctly.

    How do I choose the right magnification for my needs?

    Choosing the right magnification depends on the type of specimen you are studying. For general observations, lower magnifications (such as 10x or 40x) are sufficient. For detailed studies of small structures like cells, higher magnifications (100x or more) may be required. It’s also important to consider the resolution and clarity of the image, as these factors will influence how effectively you can observe fine details.

    How does the eyepiece magnification affect the total magnification?

    The eyepiece magnification contributes to the total magnification of the microscope. Common eyepiece magnifications are 10x or 15x. If your microscope has an objective lens with 40x magnification and you use an eyepiece with 10x magnification, the total magnification would be 400x. The eyepiece magnification allows you to see the sample more clearly and zoom in further on the image provided by the objective lens.

    Final Verdict

    The magnification range of a microscope is an essential factor to consider when choosing a microscope for your needs. Depending on the type of microscope, its magnification range can vary greatly, from the relatively low magnification of stereo microscopes to the extremely high magnification of electron microscopes. Understanding how magnification works and what factors affect it can help you choose the right microscope for your research or study. The key is to match the magnification range to the level of detail required for your specific task.