Category: Info

  • How to Turn On a Microscope Light?

    How to Turn On a Microscope Light?

    To turn on the microscope light, find the power switch on the base or side and flip it on. If it’s a dimmable light, use the rheostat or brightness control knob to adjust the light intensity.

    Modern microscopes come equipped with built-in illumination systems, commonly using LED or halogen lights. Here’s a step-by-step guide:

    1. Locate the Power Source: Ensure the microscope is connected to an appropriate power supply. Some portable models might use batteries or USB charging.
    2. Turn On the Light: Find the power switch on the base or side of the microscope and flip or press it to activate the light.
    3. Adjust Brightness: If the light intensity is adjustable, use the rheostat or brightness control knob to achieve the desired illumination for your sample. Proper lighting enhances visibility and reduces eye strain.
    4. Check the Bulb and Connections: If the light doesn’t turn on, ensure the bulb is functional, securely connected, and the power supply is active.

    Understanding these steps ensures efficient use of your microscope and extends the lifespan of its components.

    Process AspectSuccess Rate (%)Common Issues ReportedResolution Time (Avg.)
    Locating Power Source95%Difficulty in identifying ports~1 minute
    Activating Light90%Faulty power switches or buttons~3 minutes
    Adjusting Brightness85%Misuse of rheostat/knobs~2 minutes
    Resolving Lighting Issues70%Burned-out bulb, loose connections~5-10 minutes
    How to Turn On a Microscope Light

    What You Need to Know Before Turning On the Light

    Microscope lighting systems vary, so it’s essential to understand the type of light source your microscope uses. Below is an overview of common types:

    Light Source TypeDescriptionCommon Uses
    LED LightEnergy-efficient, long-lasting, and produces minimal heat.Ideal for general microscopy.
    Halogen BulbProvides bright, intense light but generates heat.Suitable for detailed studies.
    Tungsten Filament BulbTraditional option, emits warm light.Often found in older microscopes.
    Fluorescent LightBright and uniform illumination.Used in specialized microscopy setups.

    Familiarize yourself with your microscope’s manual to identify the type of light source it uses and its power requirements.

    Safety Precautions Before Turning On the Light

    Before handling the microscope or powering the light, follow these safety steps:

    1. Check the Power Source
      Ensure the microscope is connected to a stable power outlet or the batteries are correctly installed. Unstable power sources can damage sensitive components.
    2. Inspect the Light Housing
      Look for signs of wear, such as loose wires or dust in the light housing. Clean with a soft, lint-free cloth if necessary.
    3. Adjust the Surroundings
      Work in a well-lit area to prevent strain on your eyes while preparing the microscope. Ensure your workspace is clear of hazards like spilled liquids or unstable objects.
    4. Understand the Controls
      Locate the power switch, brightness knob, and other controls. These are typically found near the base of the microscope or integrated into the stand.
    how to turn on a microscope

    Troubleshooting Common Issues

    If the microscope light doesn’t turn on, don’t panic. Use the following table to diagnose and resolve the problem:

    ProblemPossible CauseSolution
    Light doesn’t turn onPower switch not flipped.Ensure the switch is set to “ON”.
    Loose or unplugged cord.Securely plug in the power cord.
    Dead batteries.Replace with fresh batteries.
    Dim or flickering lightDust on the bulb or housing.Clean the light source gently.
    Bulb nearing the end of its life.Replace with a compatible bulb.
    Brightness control not workingInternal electrical issue.Consult a technician or manufacturer.

    4 Step-by-Step Guide to Turning On the Microscope Light

    Step 1: Connect to Power

    The first step in activating the microscope light is connecting it to a power source. Different microscopes may rely on distinct power systems. Here’s how to handle them:

    • For Plug-in Models
      Plug the microscope’s power cord into a grounded wall outlet. Ensure the cord is securely connected and free from damage, such as fraying or exposed wires.
    • For Battery-Powered Models
      Open the battery compartment, typically located at the microscope’s base. Insert fresh batteries, ensuring their orientation matches the polarity markings inside the compartment. Close the compartment tightly to ensure proper contact.
    • For USB-Powered Models
      Connect the USB cable to an appropriate power source, such as a computer, power bank, or wall adapter. Ensure the cable is undamaged for safe use.

    Step 2: Locate the Power Switch

    Most microscopes feature a power switch near the base or on the body. The switch is often labeled as “ON/OFF” or indicated with a light bulb icon. To activate the light:

    • Toggle the Switch
      Flip or press the switch to the “ON” position. The light should illuminate immediately. If not, check the power connection or battery condition.

    Step 3: Adjust the Brightness

    Once the light is on, adjust its brightness for optimal viewing. Illumination intensity is crucial for clarity and preventing eye strain. Most microscopes have a brightness control mechanism such as a knob, slider, or buttons near the light source or switch. Follow these tips:

    • For Low Magnification
      Begin with lower brightness settings to avoid over-illumination, which can cause glare or wash out the image.
    • For High Magnification
      Increase the brightness as needed to enhance the visibility of fine details on the specimen.

    Step 4: Direct the Light Path

    Properly directing the light ensures the specimen is evenly illuminated and details are visible. Modern microscopes are equipped with components like condensers and diaphragms to refine the light path:

    • Condenser
      Adjust the condenser so that it is positioned close to the slide. This focuses the light onto the specimen, providing brighter and more defined illumination.
    • Diaphragm
      Use the diaphragm to control the amount of light that reaches the specimen. Opening it wide allows more light, while narrowing it can enhance contrast for translucent specimens.

    These steps ensure that the light source is effectively used, enhancing the clarity of your observations. Following this structured approach will provide consistent results and protect your microscope from improper use.

    5 Tips for Prolonging the Light’s Lifespan

    Maintaining your microscope light properly ensures it remains effective and functional for a long time. Here are five simple tips to help prolong its lifespan:

    Turn Off When Not in Use

    One of the easiest ways to preserve the light source is to switch it off when it’s not actively being used. Leaving the light on unnecessarily:

    • Increases wear on the bulb or LED.
    • Wastes energy.
    • Shortens the life of the light source over time.

    Get into the habit of turning off the light during breaks or at the end of your session.

    Clean Regularly

    Dust and debris can accumulate on or around the light source, obstructing illumination and potentially damaging components. To keep it clean:

    • Use a soft, lint-free cloth to gently wipe the light housing and lens area.
    • Avoid using harsh chemicals or abrasive materials that could scratch surfaces.
    • Perform regular cleaning to ensure clear and bright light.

    Use Compatible Bulbs

    When replacing a bulb, always refer to the microscope’s manual to ensure compatibility. Using the wrong type of bulb can:

    • Lead to improper functioning or dim lighting.
    • Cause electrical or overheating issues.

    Stick to manufacturer-approved bulbs to maintain performance and prevent accidental damage.

    Avoid Overheating

    Certain types of bulbs, like halogen or tungsten, generate significant heat during operation. Overheating can reduce their lifespan or damage nearby components. To prevent this:

    • Allow the microscope to cool for a few minutes between extended uses.
    • Avoid placing the microscope in areas with poor ventilation.
    • Turn off the light source as soon as you’re done using it.

    Handle with Care

    Lights, particularly those in microscopes with fragile or intricate setups, require careful handling. To protect the light source:

    • Avoid bumping or jarring the microscope, which could damage the bulb or connections.
    • Check that the power supply is stable to prevent electrical surges.
    • Always follow the manufacturer’s instructions for light installation and maintenance.

    Additional Features to Consider

    Essential Role of Microscopes in Electronics Repair

    Modern microscopes often come with advanced lighting options that can significantly enhance your experience. Understanding and utilizing these features can improve clarity, reduce eye strain, and provide flexibility for various specimens. Here are some key features to consider:

    Variable Color Temperature

    This feature allows you to adjust the color temperature of the light source, providing either warm or cool illumination. It is especially useful when working with specimens that require different lighting conditions:

    • Warm Light: Ideal for observing tissues or organic specimens, where a softer glow enhances natural colors.
    • Cool Light: Best for inorganic or high-detail studies, as it provides sharper contrast.

    Adjusting the color temperature helps reduce eye fatigue during prolonged observations.

    Coaxial Lighting

    Coaxial lighting is designed to deliver even and consistent illumination, especially beneficial when studying reflective or opaque surfaces.

    • Advantages:
      • Minimizes shadows and glare, enhancing the clarity of reflective specimens like metal or glass.
      • Provides more uniform brightness across the field of view.

    This feature is commonly found in high-end microscopes used in materials science or advanced research.

    Built-in Timers

    Microscopes with built-in timers are designed to automatically switch off the light source after a pre-set duration.

    • Benefits:
      • Conserves energy by preventing unnecessary usage.
      • Extends the lifespan of the light source by avoiding prolonged operation.
      • Useful for users who may forget to turn off the light manually.

    Timers can often be customized to fit specific workflows or session lengths.

    Why Is My Microscope Light Not Turning On?

    If the microscope light isn’t working, check the power connection first. Ensure the power cord is securely plugged into an outlet and the microscope. For battery-operated models, replace or recharge the batteries. Verify that the bulb is properly installed and not burned out. Lastly, inspect the fuse if your microscope has one and replace it if needed.

    What Should I Do If the Microscope Light Bulb Is Burned Out?

    If the bulb is burned out, turn off the microscope and unplug it from the power source. Remove the old bulb carefully, avoiding direct contact with your fingers to prevent smudges. Replace it with a bulb of the same type and wattage. Consult the user manual for guidance if unsure about the correct bulb type.

    How Can I Troubleshoot Electrical Issues With the Microscope Light?

    Start by confirming the outlet works by plugging in another device. Check the power cord for damage, such as fraying or breaks. Inspect the light switch to ensure it’s not stuck or faulty. If the issue persists, consult a technician or contact the manufacturer for assistance.

    Is It Possible to Repair a Microscope Light That Isn’t Working?

    Yes, in many cases, you can repair a non-working light. Replace the bulb or batteries, check the fuse, and ensure all connections are secure. If the issue is electrical or involves internal components, professional repair might be necessary.

    How Do I Replace the Batteries in a Battery-Powered Microscope?

    Locate the battery compartment, typically on the base or side of the microscope. Open it by sliding or unscrewing the cover. Remove the old batteries, noting their orientation. Insert new batteries in the correct direction and close the compartment securely.

    Can Dust or Dirt Prevent the Microscope Light From Working?

    Yes, accumulated dust or dirt can interfere with the light. Clean the bulb, lens, and surrounding components with a soft, lint-free cloth. Avoid using harsh chemicals, and ensure the microscope is off and unplugged during cleaning.

    What Should I Do if the Microscope Light Flickers?

    If the light flickers, check for a loose bulb or poor connection. Tighten the bulb gently and inspect the power cord and plug for any damage. Replace the bulb if it continues to flicker. If the issue remains, consult a technician.

    Can I Use an External Light Source if the Built-In Light Is Not Working?

    Yes, an external light source like a desk lamp can be used temporarily. Position the light to illuminate the specimen adequately. Ensure the light doesn’t cast shadows or create glare on the slide.

    How Can I Prevent Future Issues With the Microscope Light?

    To prevent issues, regularly inspect and clean the microscope, including the light source. Use the correct replacement bulbs and batteries. Store the microscope in a clean, dry place and handle it carefully to avoid damage.

    Final Thought

    Turning on a microscope light is a simple yet crucial step in microscopy. By following the instructions above, you ensure proper illumination, which is essential for observing details accurately. Whether you’re a student, researcher, or hobbyist, understanding your microscope’s lighting system will enhance your experience and prolong the lifespan of your equipment. Remember to consult your microscope’s manual for specific instructions and always follow safety precautions.

    With practice and care, you’ll be ready to illuminate your microscopic world efficiently and effectively.

  • How to Turn On a Microscope: A Step-by-Step Guide for Beginners

    How to Turn On a Microscope: A Step-by-Step Guide for Beginners

    To turn on a microscope, ensure that the power switch is set to the “on” position. This is typically located on the base or side of the microscope. Next, adjust the light intensity using the brightness control to your preference.
    StepDuration (Approx.)Key ConsiderationsCommon Mistakes
    Power On1-2 secondsEnsure proper power source and switchForgetting to connect power
    Light Adjustment1-3 minutesAdjust for brightness according to magnificationSetting light too high/low
    Objective Lens Positioning2-5 secondsStart with the lowest magnificationNot rotating the nosepiece fully
    Focusing (Coarse)5-10 secondsCoarse focus for general image clarityOverturning the coarse focus
    Focusing (Fine)3-5 secondsFine adjustments for detailMoving the stage too much
    how to turn on a microscope

    Setting Up the Microscope

    The first step in using a microscope is to properly set it up on a stable, flat surface. Make sure you place it on a table or bench that is free of any clutter and can hold the weight of the microscope securely.

    • Place the Microscope on the Table: Place the microscope on a sturdy table or workstation. Ensure that it’s positioned close to a light source or plug point if it requires an external light.
    • Adjust the Lighting: If your microscope has a built-in light, ensure it is plugged in or has fresh batteries. If not, prepare to use an external light source.

    Turning on the Microscope

    Now that your microscope is set up and all components are in place, it’s time to turn it on. Here’s how:

    Powering On the Light Source

    • Locate the Power Switch: On most modern microscopes, the power switch for the light source is either a button or a dial located on the base or side of the microscope. The switch might be near the power cord or the condenser.
    • Turn on the Light: Flip the switch or turn the dial to the “on” position. When the light is activated, it should illuminate, shining through the condenser lens and onto the specimen placed on the stage.
    • Adjust the Brightness: Many microscopes feature a dimmer or adjustable light intensity. Start with a medium brightness setting to avoid overwhelming the specimen with too much light. High-intensity lighting may cause glare, while insufficient light can make it hard to see the specimen clearly. Gradually increase or decrease the brightness to find the most suitable lighting for your observations.

    Adjusting the Diaphragm

    • Adjust the Diaphragm: The diaphragm is a component that regulates the amount of light passing through the slide. It is typically located underneath the stage. If your microscope has a rotating diaphragm, rotate it to open or close the aperture. A wide aperture allows more light to pass through, which is useful when observing thicker specimens or low-magnification views. A smaller aperture can improve contrast and allow more precise observation of fine details when using higher magnification.
    • Use the Condenser: Many microscopes feature a condenser lens located beneath the stage. The condenser focuses the light coming from the light source onto the specimen. Depending on your specimen and magnification, you may need to adjust the condenser to concentrate the light properly. Some microscopes allow you to raise or lower the condenser to achieve the best focus and lighting effect for clearer, more defined images. Adjusting both the diaphragm and condenser in tandem will help ensure optimal illumination for your observations.

    Placing the Slide

    Once your microscope is powered on and the light source is adjusted, it’s time to place the slide containing your specimen on the microscope stage. Here’s how to do it:

    Prepare the Slide

    • Ensure the Slide is Prepared: Before placing the slide on the stage, make sure it is properly prepared for observation. If your specimen is not yet mounted, place it carefully in the center of the slide. If required, add a cover slip to prevent the specimen from drying out and to help achieve a clearer image. Ensure that the cover slip is applied without air bubbles to avoid distortion in the image.
    • Use Proper Staining (if needed): For certain specimens, you may need to use stains or dyes to enhance contrast and make details more visible. This step will depend on the type of specimen and the level of detail required for your observation.

    Position the Slide on the Stage

    • Place the Slide on the Stage: Carefully place the slide onto the stage of the microscope. The stage is the flat platform that holds the slide in place. Align the slide so that the specimen is positioned directly over the light source, which will allow the light to pass through the sample for better visibility.
    • Secure the Slide: Use the stage clips to hold the slide in place. These clips keep the slide from moving while you’re adjusting the focus or changing magnification. Ensure that the slide is securely positioned, but avoid applying excessive pressure that could damage the slide or specimen.
    • Align the Specimen with the Light Path: Before focusing, double-check that the specimen is aligned with the light path, ensuring that the light will pass directly through it. This alignment is crucial for achieving a clear and bright image. You can make adjustments to the position of the slide using the stage knobs.

    Adjust the Stage Position

    • Use the Stage Knobs: Most microscopes have two stage knobs that allow you to move the slide horizontally or vertically. These knobs help you center the specimen under the objective lens and light path. Gently adjust the stage until the specimen is properly aligned and within your desired field of view.

    Once the slide is positioned and secured, you’re ready to begin focusing the microscope to view the specimen.

    Essential Role of Microscopes in Electronics Repair

    Choosing the Objective Lens

    Microscopes come with different objective lenses, each providing different levels of magnification. Before turning on the microscope, make sure the lowest-power objective lens (typically 4x or 10x) is in position.

    • Select the Objective Lens: Rotate the nosepiece (the rotating part of the microscope) to select the objective lens. Start with the lowest magnification to make it easier to locate the specimen.
    • Check the Eye Relief: If your microscope has an adjustable eyepiece, make sure it is set to the correct position for your eye comfort.

    Focusing the Image

    Now that the light is on and the specimen is in place, you’re ready to focus the microscope. Focusing involves adjusting both the coarse and fine focus knobs to get a clear image of the specimen.

    Coarse Adjustment

    • Start with the Coarse Focus: Use the coarse adjustment knob to bring the specimen into focus. Turn the knob slowly and steadily while looking through the eyepiece. Move the stage up or down to bring the specimen closer or farther from the lens.
    • Adjust the Distance: If the image is blurry, adjust the distance by turning the coarse knob again.

    Fine Adjustment

    • Use the Fine Adjustment: Once the image is in focus with the coarse knob, use the fine adjustment knob for precise focus. This will allow you to get a sharp, detailed image of your specimen.
    • Fine-tune the Image: Turn the fine adjustment slowly to achieve the clearest possible image, especially when using higher magnification lenses (e.g., 40x or 100x).

    Changing the Objective Lens

    If you need to observe the specimen at higher magnifications, you can rotate the nosepiece to switch to a higher-power objective lens.

    • Switch to Higher Magnification: Rotate the nosepiece to select a higher objective lens (such as 40x or 100x). Keep in mind that higher magnifications require a more focused image, so you may need to adjust the fine focus again after switching lenses.
    • Avoid Crashing the Objective into the Slide: When switching to higher magnifications, be cautious not to let the objective lens touch the slide. Always ensure that the objective lens is far enough away from the specimen before rotating the nosepiece.
    Consider When Buying An Ophthalmic Microscope

    Final Adjustments

    Once your microscope is on, and the specimen is focused and ready to be observed, you may need to make additional adjustments depending on your goals.

    • Adjust the Condenser and Diaphragm: Depending on the details you wish to observe, you may need to adjust the diaphragm and condenser again for better clarity or contrast.
    • Examine the Specimen: Take time to carefully examine your specimen under the different magnifications, and take notes or photos as needed.

    Turning Off the Microscope

    When you’re done using the microscope, it’s important to turn it off properly to preserve its lifespan.

    • Lower the Stage: Before turning off the microscope, lower the stage and return the coarse adjustment to its lowest setting to avoid damage to the lenses.
    • Turn Off the Light: Switch off the light source to save energy and prolong the life of the bulb.
    • Store the Microscope: Cover the microscope with a dust cover to protect it from dust and debris. Store it in a safe, dry place.

    Maintenance Tips for Your Microscope

    Regular maintenance will help extend the life of your microscope and ensure it performs optimally:

    • Clean the Lenses: Use a microfiber cloth and lens cleaner to wipe down the eyepiece and objective lenses.
    • Avoid Fingerprints: Be careful not to touch the lenses with your fingers. If necessary, use lens paper to remove smudges.
    • Check the Power Source: For microscopes with bulbs or batteries, check periodically to ensure they are working properly.

    Why Is My Microscope Not Turning On?

    If your microscope isn’t turning on, first check the power source. Ensure the plug is firmly connected to an outlet or extension cord, and verify the outlet is functional by testing it with another device. For battery-powered models, confirm the batteries are properly installed and not depleted. Additionally, inspect the power cord for damage or loose connections, which could interfere with power delivery.

    Could a Faulty Power Cord Be the Issue?

    Yes, a damaged or faulty power cord can prevent the microscope from turning on. Inspect the cord for visible wear, fraying, or breaks. If any damage is present, avoid using the microscope until the cord is replaced. If the cord appears intact, try wiggling it gently at the connection points to see if this resolves the issue.

    What Should I Check for in Battery-Powered Microscopes?

    For battery-powered microscopes, ensure the batteries are installed in the correct orientation, with the positive and negative terminals aligned as indicated. Replace old or low-charge batteries with fresh ones. If the microscope still does not power on, examine the battery compartment for corrosion or debris that might interfere with contact.

    Can a Blown Fuse Cause My Microscope to Malfunction?

    Yes, some microscopes have internal fuses that protect against power surges. If the fuse blows, the microscope will not turn on. Refer to the user manual to locate and inspect the fuse. Replace it with one that matches the specifications provided in the manual if it appears damaged.

    How Can I Reset the Microscope if It Has a Safety Lock?

    Some microscopes feature a safety lock mechanism that may need resetting after prolonged inactivity or power surges. Consult the user manual to locate the reset button or follow the recommended procedure. Typically, this involves turning the microscope off, waiting a few seconds, and turning it back on.

    What If the Microscope Bulb Is Burnt Out?

    A burnt-out bulb can sometimes cause the microscope to appear unresponsive, even if the power is on. Check the bulb and replace it with a compatible one if needed. Ensure the replacement bulb is securely installed before turning the microscope back on.

    When Should I Contact a Technician?

    If none of the troubleshooting steps resolve the issue, it might indicate a more significant internal problem. In such cases, contacting a qualified technician is recommended. Avoid disassembling the microscope yourself, as this could void the warranty or cause further damage.

    Can Regular Maintenance Prevent Power Issues?

    Yes, regular maintenance can help avoid problems with your microscope. Clean the power connections, inspect cords for wear, and replace worn-out parts promptly. Proper storage in a dust-free, dry environment also prolongs the device’s lifespan and functionality.

    Final Verdict

    Turning on and using a microscope properly may seem complex at first, but by following these simple steps, you can get the most out of your microscope and observe the world in incredible detail. Always take the time to familiarize yourself with your specific model, adjust the light settings, focus carefully, and handle the instrument with care. Whether you’re a student learning the basics or a researcher performing complex observations, a well-maintained microscope can be a powerful tool in your scientific endeavors.

  • How to Use a USB Microscope for Coins: A Complete Guide

    How to Use a USB Microscope for Coins: A Complete Guide

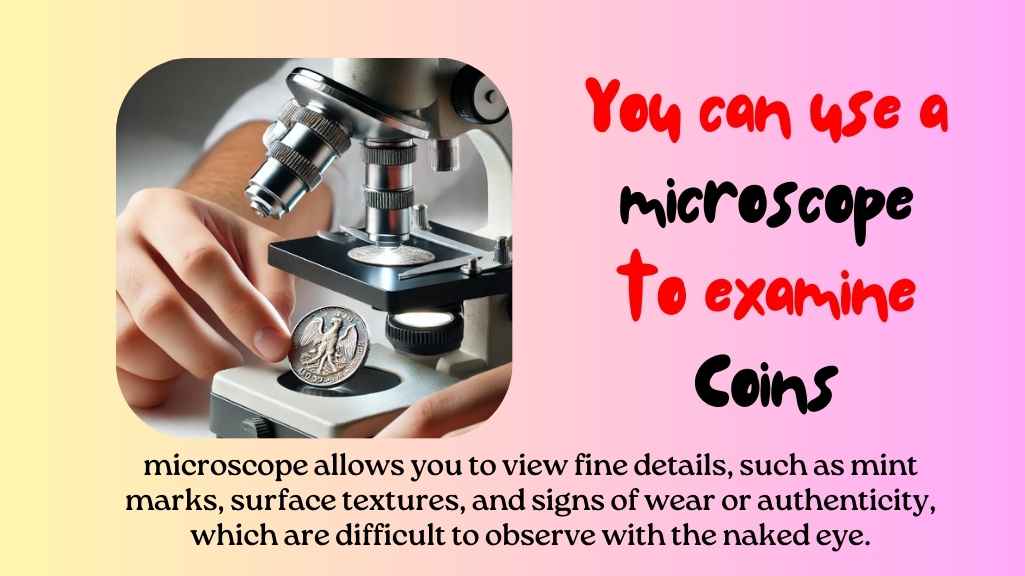
    To use a USB microscope for coins, simply connect the microscope to your computer via the USB port, open the microscope’s software, and position the coin under the lens. Adjust the focus and lighting as needed for clear and detailed views.

    For those interested in photographing or documenting their coins, USB microscopes often offer features for capturing high-resolution images and videos, which can then be analyzed further or stored for collection purposes.

    StepTime EstimateTools/Equipment RequiredTips for Success
    Connect Microscope1-2 minutesUSB cable, Computer, Microscope SoftwareEnsure software is installed before connecting
    Position Coin1-3 minutesFlat surface, Coin holder (optional)Use a steady surface to avoid shifting
    Adjust Focus & Magnification2-5 minutesMicroscope controls (focus, zoom)Start with lower magnification to find coin features
    Adjust Lighting1-3 minutesMicroscope LED light (if available)Set light to avoid glare, use diffusers if needed
    Capture Image/Video2-5 minutesSoftware capture tool, Storage spaceSave images in high resolution for detail analysis
    how to use usb microscope for coins

    Why Use a USB Microscope for Coin Collecting?

    A USB microscope offers numerous advantages for coin collectors, enhancing the process of examining, documenting, and understanding the finer details of coins. Here’s why incorporating a USB microscope into your coin-collecting toolkit can be invaluable:

    High Magnification

    Coins are intricate objects, with fine details like mint marks, inscriptions, and wear patterns that may not be visible to the naked eye. A USB microscope offers the ability to magnify these features, allowing for a much closer inspection of your coins. Whether you’re trying to identify a rare minting mark or examining the depth of the design, the high magnification power (ranging from 100x to over 1000x) makes it easy to see even the smallest details clearly. This level of detail is especially crucial when assessing a coin’s authenticity or evaluating its condition.

    Preserving Coin Condition

    Handling coins too frequently or incorrectly can lead to scratches, discoloration, or wear, which can significantly affect a coin’s value. By using a USB microscope, you can reduce the need to physically handle your coins for close inspections. The ability to examine coins digitally means that you can preserve their condition and keep them safe from unnecessary damage. Additionally, a USB microscope allows you to capture images of a coin’s current state, which is essential for documenting its condition over time. This is particularly useful when you want to track a coin’s wear or assess its market value based on its grade and condition.

    Educational Tool

    For those new to coin collecting, a USB microscope is an excellent educational tool. It provides an opportunity to study the various elements of coins, such as the designs, engravings, and wear patterns, that might otherwise be overlooked. With detailed magnification, you can better understand the minting process, identify different types of coins, and learn how to spot fake or altered coins. The ability to study coin details up close also enhances your knowledge of numismatics, providing insight into how coins are produced, their historical context, and their unique features.

    Recording and Sharing

    One of the standout features of a USB microscope is its ability to capture high-resolution still images and videos. These digital recordings are incredibly valuable for documenting your collection, especially for rare or valuable coins. You can keep a visual record of each coin’s condition, as well as capture specific details like unique engravings or minting anomalies. Sharing these images with fellow collectors or numismatists can also be an enjoyable part of the hobby. Whether you’re discussing your collection in online forums, social media groups, or at coin shows, having high-quality digital images will help you share your discoveries and foster meaningful discussions with others. Additionally, images and videos can be used for appraisals, insurance purposes, or selling coins to potential buyers.

    Setting Up the USB Microscope for Coin Inspection

    Setting up a USB microscope for inspecting your coins is a simple process that ensures you’re ready to begin detailed examination and documentation. Follow these steps for a smooth and efficient setup:

    Unbox and Inspect

    Start by carefully unboxing your USB microscope. Check the contents of the box to ensure you have all necessary components, such as:

    • The Microscope: The main unit with the camera lens.
    • USB Cable: For connecting the microscope to your computer, tablet, or smartphone.
    • Software (If Applicable): Some models come with software to enhance the microscope’s functionality. If included, ensure you have the installation CD or download link.
    • Stands or Accessories: Many USB microscopes include stands, clips, or adjustable platforms to hold the coin steady during inspection. Ensure these accessories are present and in good condition.

    Make sure everything is accounted for and undamaged before proceeding to the next steps.

    Install Software (If Required)

    Some USB microscopes come with specialized software to help you capture images, videos, and adjust the microscope’s settings more precisely. If your model requires software, follow these steps:

    • Insert the installation CD into your computer, or follow the download link if the software is available online.
    • Run the installation process and follow the on-screen prompts to complete the setup.
    • If your microscope is plug-and-play, it will work with your computer’s default camera or imaging software without the need for additional software. In this case, skip this step and proceed to the next.

    Tip: Before installing any software, check the manufacturer’s website for any driver or software updates that may improve performance.

    Connect the Microscope

    Next, connect the USB microscope to your computer, tablet, or smartphone. Here’s how to do it:

    • Plug the USB cable into an available USB port on your computer or tablet.
    • If your device detects the microscope automatically, you may see a pop-up notification confirming that it’s connected.
    • If the microscope is not detected, check for any software or driver installation issues, and ensure that your device’s operating system is compatible with the microscope.

    Tip: If you’re using a tablet or smartphone, check the device’s compatibility with USB peripherals or whether you need an adapter (such as USB-C to USB-A) to make the connection.

    Position the Microscope

    Position the microscope on a flat, stable surface to ensure a steady examination. Follow these steps to achieve the optimal setup:

    • Place the microscope on a clean, flat surface like a desk or table.
    • If your microscope includes a stand or platform, set it up according to the manufacturer’s instructions.
    • Position the microscope directly above your coin. The camera lens should be aligned in a way that allows you to see the coin’s surface clearly.
    • Many USB microscopes have adjustable stands or flexible arms that let you change the height and angle of the microscope. Use these features to achieve the best viewing position and ensure that the coin is in focus.

    Tip: If your microscope doesn’t have a built-in stand, you can use a separate coin holder or place the coin on a small, dark-colored platform to make it easier to see.

    Adjust Lighting

    Proper lighting is crucial to getting clear, detailed images of your coins. Most USB microscopes come equipped with built-in LED lights, which can be adjusted to suit your needs. Here’s how to optimize the lighting:

    • Adjust the Intensity: If your microscope has adjustable lighting, set it to a level that brightens the coin without causing glare. Too much light can wash out details, while too little light can make it difficult to see fine features.
    • Change the Angle: Many USB microscopes allow you to adjust the direction of the LED light. Experiment with different angles of light to see how it highlights features like mint marks, scratches, or wear patterns on the coin’s surface.
    • Use Diffused Lighting: If your microscope doesn’t have adjustable lighting, you can use an external light source, such as a desk lamp with a diffuser, to reduce harsh reflections and create even illumination.

    Tip: Avoid using direct light sources like overhead lights, which can cast shadows or create reflections that obscure details. A consistent, soft light will help reveal the finest features of the coin.

    Using the USB Microscope for Coin Inspection

    Now that your USB microscope is set up, it’s time to start examining your coins. Here’s how to get the most out of your microscope:

    1. Place the Coin Under the Microscope: Gently place the coin on the stand or platform under the microscope. If your microscope has a flexible stand, you may need to adjust the focus by raising or lowering the lens.
    2. Adjust Focus: Most USB microscopes allow you to adjust the focus either manually or using software controls. Slowly bring the lens closer to the coin until the image sharpens. Fine-tune the focus for the clearest view of the coin’s details.
    3. Zoom In or Out: If your microscope offers variable magnification, use the zoom function to get a closer or wider view of the coin. For detailed inspection, you’ll likely need to use higher magnification, but for overall examination, lower magnification is often better.
    4. Inspect Key Details: Focus on specific areas of the coin, such as the mint mark, date, edge, and relief features. Look for wear patterns, scratches, and any irregularities that could affect the coin’s value. Use the microscope to inspect both the obverse (front) and reverse (back) of the coin.
    5. Capture Images: Most USB microscopes allow you to capture still images or record video. Take screenshots of the coin’s details or record a video of your inspection. This is especially useful for documenting the condition of rare coins, which can help in appraising their value.
    6. Rotate and Examine Different Angles: Move the coin gently on the stand to inspect it from various angles. This will help you identify different features or signs of wear that may not be visible from one perspective.

    Tips for Coin Inspection with a USB Microscope

    To get the best results from your USB microscope, keep these tips in mind:

    • Clean the Coin Before Inspection: Gently clean your coin using a soft cloth to remove dirt or debris. Be cautious not to scrub too hard, as this can scratch the coin’s surface.
    • Use a Black or Dark Background: Placing your coin on a black or dark-colored background will help make the details stand out, especially in areas with low contrast.
    • Adjust the Lighting: Experiment with different lighting angles and intensities to highlight specific features. Avoid using too much light, which can cause reflections that obscure details.
    • Take Your Time: Inspecting a coin thoroughly can take time. Don’t rush the process, and ensure you’ve examined all the critical features of the coin.

    Why isn’t my USB microscope showing an image?

    If your USB microscope isn’t displaying an image, check these common issues:

    1. Ensure that the microscope is properly plugged into the USB port.
    2. Make sure the software or app you are using is correctly set to display the microscope’s feed.
    3. Try using a different USB port on your computer to rule out any connection problems.
    4. Ensure that the lens and camera are clean, as dirt or smudges can cause blurry or no images.
    5. Restart your computer to reset the connection.

    How do I adjust the focus on my USB microscope?

    Most USB microscopes have a focus ring or knob that you can adjust to bring the image into sharp focus. Begin by placing the coin under the microscope and slowly turn the focus ring while looking at your screen until the details of the coin are clearly visible. Some models also allow for digital focusing, which you can control through the software or app.

    Why is my USB microscope showing a blurry image of the coin?

    A blurry image can be caused by several factors:

    1. Incorrect focus: Ensure that you have properly focused the microscope by adjusting the focus ring or software settings.
    2. Dirty lens: Wipe the lens carefully with a microfiber cloth to remove any dust or smudges.
    3. Low-resolution settings: Check the resolution settings in the software to ensure they are set to the highest quality.
    4. Too much distance: Make sure the coin is placed at the correct distance from the lens. If it’s too far, the image will be blurry.

    How do I adjust the lighting on my USB microscope?

    Many USB microscopes come with built-in LED lights. You can adjust the brightness of these lights either through a control dial on the microscope itself or through the software, depending on your model. Proper lighting is essential for examining coins, as it highlights fine details. Make sure the lighting is neither too bright nor too dim, and experiment with different angles to avoid glare.

    Can I use my USB microscope to take pictures or videos of coins?

    Yes, most USB microscopes come with built-in cameras that allow you to capture images or record videos. Check the software or app for options to capture still images or videos. Typically, there will be a button or menu within the software to start recording or take a snapshot. You can save the images or videos directly to your computer for future reference or analysis.

    Why does my USB microscope show a flickering image?

    If your USB microscope is showing a flickering image, this could be due to a few reasons:

    1. Power supply issues: Ensure that the USB port is providing enough power for the microscope. Try plugging it into a different port, preferably one directly on your computer, not through a USB hub.
    2. Interference from other devices: Disconnect any other USB devices to prevent interference.
    3. Software glitches: Restart the software or try a different program to see if the flickering stops.

    My USB microscope is not recognized by my computer. What should I do?

    If your USB microscope isn’t recognized, follow these steps:

    1. Check the connection: Ensure the USB cable is securely plugged into both the microscope and the computer.
    2. Try a different USB port: Some USB ports may not provide enough power or might not function properly.
    3. Reinstall drivers: If the microscope requires specific drivers, reinstall them by following the instructions that came with the device.
    4. Update your operating system: Ensure your computer’s operating system is up to date, as this can sometimes resolve compatibility issues.

    How do I properly set up my USB microscope for coin examination?

    To set up your USB microscope for coin examination:

    1. Place the coin under the microscope: Position the coin on a stable surface under the microscope lens.
    2. Adjust the focus: Use the focus ring to make the image clear and sharp.
    3. Adjust the lighting: Ensure the built-in LED lights illuminate the coin evenly, and adjust the brightness if necessary.
    4. Open the software: Launch the accompanying software or app to view the image on your computer screen.
    5. Start examining: You can now zoom in on specific details of the coin, capture images, or record videos for closer inspection.

    Why does my USB microscope only work intermittently?

    Intermittent functionality could be caused by:

    1. Connection issues: Try using a different USB port or cable, as poor connections can cause the microscope to cut in and out.
    2. Power issues: Make sure your computer’s USB port is providing enough power or try connecting to a powered USB hub.
    3. Software glitches: Restart the software or reinstall it to fix any software-related issues.
    4. Overheating: If the microscope is overheating, it may shut down intermittently. Ensure it has adequate ventilation.

    Can I use a USB microscope with a tablet or smartphone?

    Some USB microscopes are compatible with tablets and smartphones, but this depends on the device’s operating system and the microscope’s connectivity options. For Android or iOS devices, you may need an OTG (On-The-Go) adapter to connect the USB microscope. Check the manufacturer’s instructions to confirm compatibility and installation steps. Many microscopes also have apps available that can be downloaded to your mobile device for easy viewing and capturing of images.

    Final Decision

    USB microscope is an essential tool for coin collectors who want to examine their coins in detail. Whether you’re investigating mint marks, assessing a coin’s condition, or documenting your collection, this tool provides an affordable and easy way to get closer to the small but fascinating world of coin collecting. By following the steps outlined above and practicing with your microscope, you’ll be able to enhance your collecting experience and uncover new details that might have otherwise gone unnoticed. Happy collecting!

  • What is the Best Magnification for a Microscope for Coins?

    What is the Best Magnification for a Microscope for Coins?

    The best magnification for a microscope used to examine coins typically ranges from 20x to 50x, depending on the level of detail you require. For general coin examination, 20x magnification is often sufficient, while higher magnifications (40x to 50x) are useful for identifying fine details such as mint marks, wear patterns, or errors.

    When choosing a microscope for coin collecting or numismatics, the goal is to find a magnification that allows you to clearly see the details of a coin’s surface without distortion. Lower magnifications, such as 20x, are ideal for viewing the overall design and identifying larger features like date markings, portraits, and inscriptions. Higher magnifications, such as 40x to 50x, are useful when you want to closely inspect minute features, such as scratches, cracks, or rare errors that may affect a coin’s value.

    FeatureValue/RangeDescription
    Magnification Range20x to 50xIdeal range for examining coins in detail
    Optimal Magnification30x to 40xProvides a good balance between detail and field of view
    Working Distance100mm to 200mmDistance between lens and object, ensuring clear focus
    Illumination TypeLED LightingCommon for providing clear, even lighting
    Field of View15mm to 30mmRange visible at the chosen magnification
    Type of MicroscopeOptical or DigitalDigital offers more versatility with zoom and image capture
    Resolution1080p (Digital)Higher resolution provides better clarity at higher magnifications
    Price Range$50 to $500+Depends on the microscope’s features and quality
    What is the Best Magnification for a Microscope for Coins

    What Magnification is Ideal for Examining Coins?

    The best magnification for coins typically ranges between 5x and 100x. This range allows you to view both the large features and intricate details on a coin. Let’s break this down further.

    Low Magnification (5x to 10x)

    At the lower end of the spectrum, a 5x to 10x magnification is often sufficient for general coin examination. For instance, you’ll be able to see the overall design, text, and larger imperfections such as scratches or smudges. This level of magnification is particularly useful when looking at the coin from a broader perspective—identifying the coin’s year, mint mark, and overall condition.

    • Advantages: Lower magnification is less likely to distort the image, offering a more natural and undistorted view of the coin’s surface. It is also ideal for inspecting large areas like the background of the coin or identifying visible wear and tear.
    • Ideal For: This magnification is good for general collectors who want to inspect the coin’s overall appearance, condition, and larger features without zooming in on the fine details.

    Medium Magnification (20x to 40x)

    A magnification in the 20x to 40x range provides a more detailed view of the coin’s surface. This is ideal for examining smaller features, such as the text, smaller mint marks, and detailed engravings. It also allows for detecting hairline scratches, worn areas, and other imperfections that are not visible at lower magnification levels. This range is common for intermediate collectors or for those who are looking for more precision.

    • Advantages: Offers a good balance between magnification power and image clarity. You can see enough detail without losing focus on the overall coin.
    • Ideal For: Collectors who are serious about identifying specific features, such as die marks, flaws, and other characteristics relevant for valuing or authenticating a coin.

    High Magnification (50x to 100x)

    For detailed work, such as examining a coin’s surface for rare die errors, intricate engravings, or microscopic scratches that may affect the coin’s value, higher magnifications (50x to 100x) come into play. At this level, you can zoom in on the smallest features of the coin, like tiny cracks, minute differences between coin varieties, or imperfections that could determine its authenticity.

    • Advantages: Provides an incredible amount of detail, helping collectors spot rare errors or unique features. It also allows for a closer inspection of surface wear or corrosion that can affect the coin’s grading.
    • Ideal For: Advanced collectors, dealers, or numismatists who need to examine fine details for authenticity, condition, or errors, which can significantly impact the value of the coin.

    Very High Magnification (200x to 1000x)

    Magnifications over 200x are typically used for highly specialized work. At this level, you’re able to see features that are invisible to the naked eye, such as microscopic markings, die clashes, and other extremely fine details. However, such high magnifications are not generally necessary for most coin collectors and can be excessive unless you are dealing with rare coins or need to authenticate very small, detailed aspects.

    • Advantages: This magnification is incredibly useful for identifying minuscule die flaws, hairline cracks, and microscopic features that could affect coin authenticity or value.
    • Ideal For: Experts or professional numismatists dealing with highly specialized coins or conducting very detailed examinations. It’s also used in forensic examinations of coins.

    5 Factors to Consider When Choosing Magnification

    When selecting a microscope for coin examination, magnification is certainly a crucial factor. However, there are other key considerations that can greatly influence your experience. These include optical quality, lighting, field of view, camera options, and ease of use. Let’s explore how these factors compare across four popular digital microscopes: the Elikliv Microscope, LCD Digital Coin Microscope 1000x, TOMLOV DM9 7″ LCD Digital Microscope 1200X, Aopick LCD Digital Microscope 1000X, and Hayve 4.3” IPS Coin Microscope.

    Optical Quality and Resolution

    The resolution is a defining feature when it comes to determining how clear and detailed your view will be. Both the Elikliv and Aopick offer magnifications up to 1000x, but it’s the clarity of their lenses that will truly make a difference. The Elikliv Microscope stands out due to its high-resolution camera that ensures clear images even at higher magnifications, producing sharp details for coin analysis. The TOMLOV DM9, with its 1200x magnification, boasts a slightly higher resolution than the others. This makes it ideal for examining intricate coin details, such as fine engravings and small errors. Meanwhile, the Hayve Microscope offers a 4.3-inch IPS display, which is noted for producing vibrant and clear images. However, while its resolution is good, it may not match the fine detail clarity seen in the TOMLOV or Elikliv models.

    Lighting

    Lighting is essential for coin examination, as it brings out the surface details of the coin. The Elikliv microscope is equipped with adjustable LED illumination, allowing you to adjust the brightness to your preference, ensuring a well-lit field of view. The TOMLOV DM9 also features built-in LED lighting, but it additionally offers a flexible arm with a ring light that can be adjusted to prevent shadows, providing more control over the illumination of the coin. Aopick features similar LED lighting, although its design doesn’t offer as much adjustability as the TOMLOV. The Hayve model, with its built-in light, does a good job at lighting up the coin, though it lacks the versatility and adjustability of the other models.

    Field of View

    Field of view is another important factor when examining a coin, as it determines how much of the coin you can see at once. The TOMLOV DM9, with its 7-inch LCD screen, offers a larger field of view, making it easier to inspect a whole coin before zooming into smaller areas. The Aopick and Elikliv models both have a 4.3-inch screen, which can feel more cramped when trying to get an overall look at the coin, especially at higher magnifications. While the Hayve also offers a 4.3-inch display, it may not provide the same level of detail clarity when viewing larger areas of the coin compared to the TOMLOV.

    Eyepiece and Camera Options

    For collectors looking for more functionality, the inclusion of a camera or digital eyepiece is a big advantage. All four models in this comparison come with built-in cameras, allowing you to connect the microscope to a computer or smartphone to view or capture images. However, the TOMLOV DM9 stands out with its larger 7-inch LCD screen and its ability to capture images directly onto a microSD card for easy access and sharing. This is a plus for those who want to document their findings or share their analysis with others. The Elikliv and Aopick models, while functional, offer smaller screens and don’t have as extensive image capture capabilities as the TOMLOV. The Hayve has a smaller 4.3-inch screen but is more compact and portable, which is a plus for those who need to transport their microscope to coin shows.

    Ease of Use and Portability

    Portability and user-friendly design are important when selecting a coin microscope. The Hayve is the most portable of the models, featuring a compact 4.3-inch screen that makes it easy to take on the go. The Aopick and Elikliv are also relatively portable but are bulkier due to their larger stands and more complex designs. The TOMLOV DM9, with its larger screen and stand, may not be as convenient for travel but offers superior ease of use with its flexible stand and adjustable focus. For those who plan on using their microscope frequently at home or in fixed locations, the TOMLOV offers the best functionality.

    What Magnification Do I Need for Basic Coin Examination?

    For general coin examination, a magnification of 5x to 10x is usually sufficient. At this level, you can clearly see the coin’s design, mint marks, and basic details, such as the year and larger imperfections like scratches or wear. This magnification is great for everyday collectors who want to get an overview of their coins without focusing on the finest details.

    Is Higher Magnification Always Better for Coins?

    Not necessarily. While higher magnification provides more detail, it can also make it harder to see the entire coin at once. A magnification between 20x and 40x is often ideal for examining more intricate features like small engravings or minor flaws, such as hairline scratches. For most collectors, magnification higher than 100x may not be necessary unless you are looking for very fine details or rare coin errors.

    How Much Magnification Is Needed for Error Identification?

    To spot errors like die cracks, double strikes, or minting flaws, a magnification of 50x to 100x is typically recommended. This range allows you to closely examine the coin’s surface for tiny imperfections that could affect its value or authenticity. For highly specialized coin examinations, such as identifying rare errors, higher magnifications (up to 200x) may be necessary.

    What’s the Best Magnification for Viewing the Text on Coins?

    To clearly read the text or inscriptions on coins, a magnification of at least 10x to 20x is ideal. This magnification lets you read small lettering or mint marks with ease without losing clarity. Anything higher might be overkill unless you’re examining coins with very small engravings.

    Should I Use a 1000x Microscope for Coin Collecting?

    A 1000x magnification microscope is usually unnecessary for most coin collectors. At this level, the image can become too zoomed in, making it difficult to view the entire coin. Higher magnifications are typically used for detailed work, such as examining minute die errors or surface textures at a microscopic level. Unless you’re an advanced numismatist or a professional dealing with highly specialized coins, you won’t need a microscope with this level of magnification for typical coin collection purposes.

    Can I Examine Coins with a Simple Hand Lens Instead of a Microscope?

    Yes, a simple hand lens or magnifying glass can be useful for basic coin examination. Lenses with magnifications around 5x to 10x will help you see the overall design and basic features. However, for more detailed inspection, especially for identifying small flaws or errors, a microscope offers much better clarity, especially at magnifications between 20x and 100x.

    can i use a microscope to look at coins_

    What Other Factors Should I Consider When Choosing a Microscope for Coins?

    Apart from magnification, factors like optical quality, lighting, and field of view are crucial. Good lighting helps bring out the details on a coin’s surface, while a wider field of view allows you to see more of the coin at once. High optical quality ensures clear, sharp images without distortion. It’s also important to consider ease of use and portability if you plan to take the microscope to coin shows or meetings with other collectors.

    Is Digital or Optical Magnification Better for Coins?

    Both digital and optical microscopes have their advantages. Optical microscopes provide natural, real-time magnification without the need for a digital screen. However, digital microscopes allow you to connect to a monitor or capture images and videos of your findings, which can be useful for sharing or documenting your collection. The best choice depends on whether you prefer the simplicity of optical magnification or the added functionality of digital features.

    Can I Use a Higher Magnification for Better Resolution?

    Higher magnification doesn’t automatically mean better resolution. Resolution refers to the microscope’s ability to display fine details clearly. A microscope with high magnification but low resolution will show blurry or pixelated images. When choosing a microscope, it’s important to balance both magnification and resolution to get sharp, clear images that reveal the fine details of the coin.

    How Do I Know If a Microscope’s Magnification is Right for Me?

    The right magnification depends on what you want to examine on the coin. For general coin inspection, a 10x magnification is usually enough. If you’re looking for smaller details, a 20x to 40x range is ideal. For highly detailed analysis of surface imperfections, minting errors, or engravings, magnifications of 50x to 100x are typically best. It’s important to choose a microscope that offers the magnification range you’ll use most often based on your collecting interests.

    Final Verdict

    The ideal magnification for coin examination depends on your level of experience and what details you are looking to observe. For general examination, 5x to 10x magnification is usually sufficient. For more detailed work, such as inspecting smaller imperfections, mint marks, or die errors, 20x to 40x is typically the sweet spot. Advanced collectors and numismatists may benefit from magnifications of 50x to 100x, and in rare cases, magnifications as high as 1000x can be used for extreme detail.

    Ultimately, the best microscope for you is one that offers a balance of magnification, optical quality, lighting, and ease of use. Choose one that suits your needs and allows you to appreciate the beauty and intricacies of your coin collection fully.