The organelles that are visible under a light microscope include the nucleus, cytoplasm, and some larger structures like mitochondria, endoplasmic reticulum, and Golgi apparatus. However, due to their small size, many cellular structures, such as individual proteins and smaller organelles like ribosomes, are generally not visible under a light microscope. Scientists often use electron microscopes to observe these smaller structures, which have higher magnification capabilities than light microscopes.
| Image | Product | Detail | Price |
|---|---|---|---|
 | Carson MicroBrite Plus 60x-120x LED Lighted Pocket Microscope |
| See on Amazon |
 | Elikliv LCD Digital Coin Microscope |
| See on Amazon |
 | AmScope M150 Series Portable Compound Microscope |
| See on Amazon |
 | PalliPartners Compound Microscope for Adults & Kids |
| See on Amazon |
 | Skybasic 50X-1000X Magnification WiFi Portable Handheld Microscopes |
| See on Amazon |
The identification of organelles is essential for understanding their functions in the cell. Organelles are the specialized structures within a cell that perform specific functions, such as energy production, protein synthesis, and waste removal. Microscopy is used to observe and identify organelles, with the light microscope being the most commonly used.
During my biology lab classes, I had the opportunity to observe and identify different organelles under a light microscope. One of the key challenges I faced was identifying the different organelles, as they can have similar shapes and sizes, making it difficult to differentiate between them.
To overcome this challenge, I had to be patient and focused while observing the samples under the microscope. I learned to adjust the focus and lighting of the microscope to ensure that the organelles were visible and distinguishable from one another. Additionally, I had to rely on my knowledge of cell biology and the functions of the different organelles to help me in my identification process.
Observing and identifying organelles can be a rewarding experience as it provides a better understanding of the structure and function of the cell. By properly observing and identifying organelles, we can gain insights into cellular processes and how they are regulated. It is an essential skill for students of biology and researchers alike, and one that requires practice and dedication to master. Through personal experience, I have learned the importance of this skill and the rewards it can bring.
Which organisms are visible under a light microscope?
A light microscope is an essential tool for observing and studying the structure of cells. With proper techniques and sample preparation, observing many organelles within a cell is possible. In this part, I will discuss the visible organelles under a light microscope, their structure and function, and provide examples of when they can be seen in different cell types.
Nucleus:
The nucleus is the largest organelle in most eukaryotic cells and is surrounded by a double membrane called the nuclear envelope. The nucleus contains the genetic material, DNA, which regulates the cell’s activities. The nucleus is typically visible under the light microscope as a dark, round structure in the center of the cell.
Examples of when the nucleus can be seen include in human cheek cells, where it appears as a large, round structure in the center of the cell.
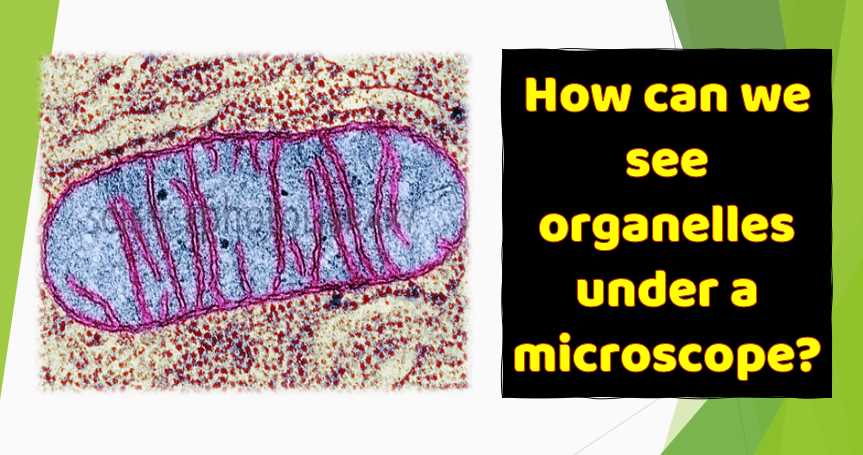
Mitochondria:
Mitochondria are the organelles responsible for generating most of the cell’s energy in the form of ATP through cellular respiration. Mitochondria are visible under the light microscope as small, rod-shaped structures with a double membrane.
Examples of when mitochondria can be seen include in muscle cells, where they are abundant due to the high energy demands of muscle contractions.
Endoplasmic Reticulum:
The endoplasmic reticulum (ER) is a network of membrane-bound tubes and sacs that transport molecules throughout the cell. The ER is divided into two types: rough ER, which is studded with ribosomes and is involved in protein synthesis, and smooth ER, which is involved in lipid synthesis and detoxification.
Examples of when the ER can be seen include in pancreatic cells, where the rough ER is involved in the synthesis and secretion of digestive enzymes.
Golgi Apparatus:
The Golgi apparatus is a stack of flattened membranes that processes and sorts proteins and lipids synthesized in the ER and packages them for transport to their final destinations.
Examples of when the Golgi apparatus can be seen include in secretory cells, such as those in the salivary gland, where it is involved in the production and secretion of saliva.
Lysosomes:
Lysosomes are membrane-bound organelles that contain enzymes capable of breaking down macromolecules and cellular debris. Lysosomes are visible under the light microscope as small, round structures.
Examples of when lysosomes can be seen include in white blood cells, where they are involved in the destruction of invading bacteria and other pathogens.
Peroxisomes:
Peroxisomes are membrane-bound organelles that contain enzymes involved in the breakdown of fatty acids and the detoxification of harmful substances. Peroxisomes are visible under the light microscope as small, round structures.
Examples of when peroxisomes can be seen include in liver cells, where they are involved in the breakdown of toxins and bile production.
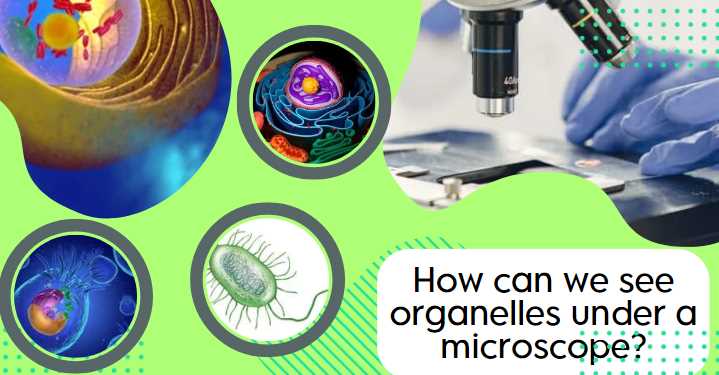
How can we see organelles under a microscope?
When I was in college, I took a cell biology course that required us to use a light microscope to observe various organelles in cells. One of the most memorable experiments was observing cheek cells that we collected from ourselves.
The first step was to collect the cells. To do this, we swished a small amount of saline solution in our mouths and then spat it into a sterile container. We then transferred a small drop of the cell suspension onto a microscope slide and allowed it to air dry.
Observing organelles under a light microscope requires careful sample preparation and handling. Here are the steps involved:
- Sample preparation: The first step is to obtain a sample of the tissue or cells you wish to observe. Depending on the type of sample, you may need to perform additional steps to prepare it for observation. For example, if you are observing cells from a tissue culture, you may need to fix and stain the cells to enhance their contrast.
- Mounting the sample: Once the sample is prepared, it needs to be mounted onto a microscope slide. A drop of mounting medium is added to the slide, and then a small piece of the sample is placed onto the medium. The sample is then covered with a coverslip to prevent it from drying out.
- Adjusting the microscope: Before you can observe the sample under the microscope, you need to adjust the microscope to optimize the image quality. This involves adjusting the focus, brightness, and contrast of the image.
- Observing the sample: Once the microscope is adjusted, you can observe the sample under the lowest magnification first. This allows you to find the area of interest and focus on it. Then, you can increase the magnification to observe the organelles in greater detail.
- Identifying organelles: To identify organelles, you need to know what they look like and where they are located within the cell. Different organelles have unique shapes and functions, which can help you identify them. For example, the nucleus is typically large and round, while mitochondria are small and rod-shaped.
Some of the organelles that can be visualized under a light microscope include the nucleus, mitochondria, endoplasmic reticulum, Golgi apparatus, lysosomes, and peroxisomes. By observing these organelles, you can gain insights into the structure and function of cells.
In summary, observing organelles under a light microscope requires careful sample preparation, adjustment of the microscope, and identification of the organelles. By following these steps, you can observe and study the structure of cells and gain a deeper understanding of their function.
Why can’t you see organelles with a light microscope?
There are several limitations to using a light microscope to visualize organelles.
One major limitation is the resolution of the microscope. The resolution of a light microscope is limited by the wavelength of light used to image the sample. This means that the smallest distance between two points that can be distinguished by the microscope is approximately 200-300 nanometers. As a result, structures smaller than this limit may not be visible under a light microscope.
Another limitation is the contrast of the sample. Certain organelles may be difficult to distinguish from one another due to their similar properties, such as size and shape. Additionally, the use of stains and dyes may introduce artifacts that can obscure the true structure of the organelles.
Finally, the preparation of the sample for observation can also limit what can be visualized. Certain organelles may be damaged or altered during the fixation and staining process, which can affect their appearance under the microscope.
Despite these limitations, light microscopy can still provide valuable information about organelles within cells. For example, it is possible to visualize the nucleus, mitochondria, and Golgi apparatus using a light microscope. These organelles are large enough to be resolved by the microscope and can be stained to provide contrast.
However, there are several organelles that cannot be seen under a light microscope due to their small size or lack of contrast. These include ribosomes, lysosomes, and peroxisomes. These organelles are essential for cellular function and play important roles in processes such as protein synthesis, degradation, and detoxification.
To overcome these limitations, scientists often turn to electron microscopy. Electron microscopy uses a beam of electrons to visualize samples, which provides much higher resolution than light microscopy. Electron microscopy can also provide greater contrast and can be used to visualize organelles that are too small to be seen with a light microscope.
For example, ribosomes, which are too small to be seen with a light microscope, can be visualized with electron microscopy. In fact, electron microscopy has been used to visualize the complex structures of ribosomes in atomic detail. Similarly, lysosomes and peroxisomes can also be visualized with electron microscopy.
How does confocal microscopy differ from traditional light microscopy?
Confocal microscopy is a type of light microscopy that differs from traditional light microscopy in several ways:
- Optical sectioning: Confocal microscopy uses a pinhole to block out-of-focus light, which allows for optical sectioning of the sample. This means that only a thin section of the sample is illuminated and detected at any given time, resulting in higher resolution images.
- Laser illumination: Confocal microscopy uses lasers to illuminate the sample, which provides higher intensity and more specific excitation wavelengths than traditional light sources. This allows for better signal-to-noise ratios and increased sensitivity.
- Three-dimensional imaging: Confocal microscopy can generate three-dimensional images by scanning the sample through a series of optical sections. This allows for visualization of the sample in three dimensions, which can provide a more complete understanding of the structure.
- Fluorescence detection: Confocal microscopy often uses fluorescent dyes to label specific structures within the sample. The confocal microscope can then detect only the emitted light from the fluorescent molecules, allowing for specific visualization of the labeled structures.
Overall, confocal microscopy allows for higher resolution, three-dimensional imaging of fluorescently labeled structures within a sample, providing a more detailed view of the sample than traditional light microscopy.
How is fluorescence microscopy used to study organelles?
Fluorescence microscopy is a powerful tool for studying organelles in cells. This technique takes advantage of the natural or artificially induced fluorescence of molecules to label specific organelles or proteins of interest, allowing for their visualization and tracking within cells.
There are several ways fluorescence microscopy can be used to study organelles:
- Direct labeling: Fluorescent dyes or proteins can be directly attached to specific organelles or proteins of interest to label them for visualization. For example, fluorescent dyes such as DAPI can be used to label the nucleus, while GFP-tagged proteins can be used to label specific organelles or proteins.
- Indirect labeling: Fluorescently labeled antibodies can indirectly label organelles or proteins of interest. The antibodies recognize and bind to specific proteins, which can be visualized through the attached fluorescent dye.
- Live-cell imaging: Fluorescence microscopy can be used to track the movement of organelles in live cells. This technique can provide insights into organelle dynamics and their interactions with other cellular components.
- Colocalization studies: Fluorescence microscopy can determine the spatial relationships between different organelles or proteins within a cell. By labeling multiple structures with different fluorescent dyes, colocalization studies can reveal which organelles are near one another and may be involved in specific cellular processes.
Overall, fluorescence microscopy provides a powerful tool for studying cell organelles, allowing for their visualization, tracking, and analysis. By combining this technique with other methods, researchers can better understand organelle structure, function, and dynamics within living cells.
What are the advantages of using a light microscope to study organelles?
There are several advantages of using a light microscope to study organelles:
- Accessibility: Light microscopes are widely available and easy to use, making them accessible to a broad range of researchers. This means that studies of organelles can be conducted in a variety of settings, from research labs to classrooms.
- Versatility: Light microscopes can be used to observe a wide range of organelles, from large structures like nuclei and mitochondria to smaller structures like ribosomes and vesicles. This means that researchers can study a broad range of cellular processes using this technique.
- Low cost: Light microscopes are relatively low cost, especially when compared to other imaging techniques like electron microscopy. This makes them a practical option for many researchers, especially those on a budget.
- Live cell imaging: Light microscopes can be used to observe living cells in real-time, allowing for the study of dynamic processes like cell division and organelle movement.
- Non-destructive: Light microscopes use non-invasive techniques to observe cells, meaning that the sample is not damaged or altered during imaging. This makes it possible to observe the same sample over time, allowing for longitudinal studies of organelle behavior.
Overall, light microscopes offer a practical and versatile tool for studying organelles in living cells. While they have some limitations, such as limited resolution and the inability to visualize very small structures, light microscopes remain an essential tool for many researchers in the field.
What is the minimum distance between two points that can be resolved by a light microscope?
The minimum distance between two points that can be resolved by a light microscope is determined by the theoretical limit of resolution, which is the smallest distance between two points that can be distinguished as separate objects. This limit of resolution is determined by the wavelength of the light used and the numerical aperture of the lens system.
The theoretical limit of resolution for a conventional light microscope using visible light is approximately 200 nanometers (nm), which means that two points must be separated by at least 200 nm in order to be resolved as separate objects. This limit is known as the Abbe limit of resolution, named after the German physicist Ernst Abbe who developed the formula for calculating the theoretical limit of resolution.
However, it’s important to note that this theoretical limit of resolution is often not achieved in practice due to factors such as lens aberrations, sample preparation, and the quality of the microscope system. In general, the actual limit of resolution for a light microscope is often around 300-400 nm, depending on the specific microscope system and imaging conditions.
More advanced techniques such as super-resolution microscopy, which utilize fluorescent dyes and complex imaging algorithms, can achieve resolutions below the Abbe limit of resolution and are capable of resolving features as small as a few nanometers. However, these techniques are more complex and expensive than conventional light microscopy and require specialized training and equipment.
What is the diameter of the Golgi apparatus that can be seen under a light microscope?
The diameter of the Golgi apparatus that can be seen under a light microscope typically ranges from 0.5 to 1.0 micrometers (µm). However, the actual size of the Golgi apparatus can vary depending on the cell type, the specific stage of the cell cycle, and the experimental conditions used.
It’s important to note that while light microscopy can provide a general visualization of the Golgi apparatus, more detail is needed to fully understand the structure and function of this organelle. More advanced imaging techniques, such as electron microscopy and super-resolution microscopy, can provide higher resolution images and more detailed information about the structure and function of the Golgi apparatus.
What is the largest organelle visible under a light microscope?
The largest organelle visible under a light microscope is the nucleus. The diameter of a typical animal cell nucleus is around 5-10 micrometers (µm), which is several times larger than other organelles such as mitochondria or lysosomes. The nucleus can be easily visualized using basic staining techniques and magnification with a light microscope, allowing for the examination of its structure and contents.
Other organelles such as the endoplasmic reticulum (ER) or the Golgi apparatus can also be seen under a light microscope, but they are generally smaller in size and require higher magnification or specialized techniques such as fluorescent labeling or immunostaining to visualize them clearly.
It’s important to note that the size and shape of organelles can vary depending on the cell type, stage of the cell cycle, and environmental conditions. Additionally, some organelles may be more difficult to visualize than others due to their location within the cell or their low abundance.
FACTS
- Nucleolus Size:
- The nucleolus, a distinct structure within the nucleus, has an average diameter of about 1-2 micrometers.
- Microfilaments, Intermediate Filaments, and Microtubules:
- Microfilaments: These structures, part of the cytoskeleton, have a diameter of about 7 nanometers.
- Intermediate Filaments: Diameter ranges from 8 to 12 nanometers.
- Microtubules: These are larger, with a diameter of approximately 25 nanometers.
- Centrioles:
- Centrioles, involved in cell division, have a cylindrical shape and typically measure around 200-250 nanometers in length.
- Endoplasmic Reticulum (Smooth ER):
- The smooth endoplasmic reticulum (SER) is also part of the endomembrane system and may be visible under a light microscope, although less prominently than the rough ER.
- Plasma Membrane Thickness:
- The plasma membrane is extremely thin, with a thickness of about 7-10 nanometers.
- Organelle Movement:
- Light microscopy enables the observation of dynamic processes, such as the movement of organelles. For instance, the transport of vesicles within the cell can be visualized.

I am an enthusiastic student of optics, so I may be biased when I say that optics is one of the most critical fields. It doesn’t matter what type of optics you are talking about – optics for astronomy, medicine, engineering, or pleasure – all types are essential.
Table of Contents
Pingback: Top 5 Most Powerful Light Microscope for Life Sciences and Biotechnology Applications: Video Explained
Pingback: Which is the Most Effective Microscopes for Geology Students and Professionals: Precision in Geoscience
Pingback: Can a Light Microscope See Viruses
Pingback: Which Microscope Does Not Use Light?