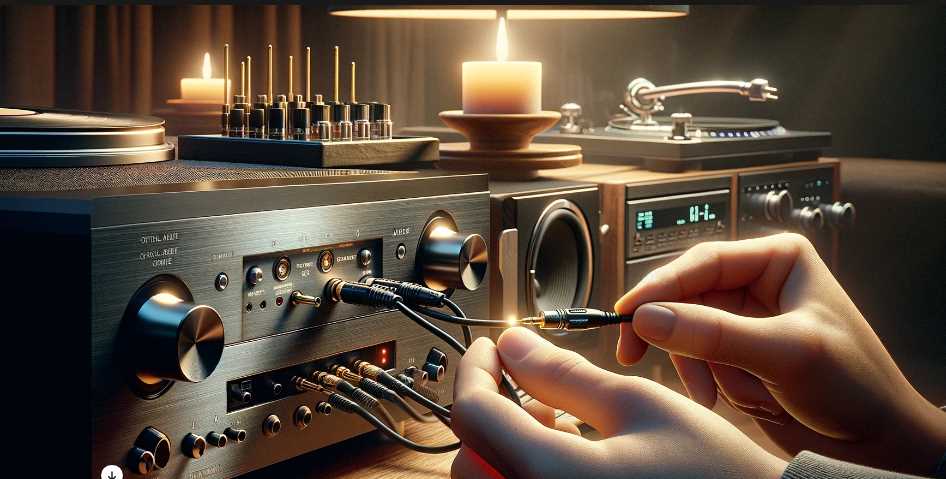
To connect an optical audio cable to an aux input, you’ll need a digital-to-analogue converter (DAC) that can convert the optical signal to analogue and is compatible with the aux input. Simply plug one end of the optical cable into the optical audio output on your device and the other end into the optical input of the DAC. Then, use a standard RCA or 3.5mm audio cable to connect the DAC’s analogue output to the aux input on your device. This setup allows you to transmit audio from devices with optical outputs to devices with only aux inputs.
Identify the connections: First, determine the type of connections your devices have. If your audio source has an optical audio output and your receiving device (such as a speaker or amplifier) has only an aux input, you’ll need to convert the optical signal to analog.
Obtain a DAC: Purchase a digital-to-analog converter (DAC) that supports optical input and analog output. This device will convert the digital optical signal to analog, compatible with your aux input device.
Connect the optical cable: Plug one end of the optical audio cable into the optical output of your audio source and the other end into the optical input of the DAC.
Connect the DAC to the aux input: Use a standard RCA or 3.5mm audio cable to connect the analog output of the DAC to the aux input of your receiving device.
Test the connection: Once everything is connected, test the audio transmission to ensure it’s working properly.
Steps
Description
1. Identify
Determine the types of connections on your devices.
2. Obtain
Purchase a digital-to-analog converter (DAC).
3. Connect
Plug the optical cable into the optical output of the audio source and the input of the DAC.
4. Connect DAC
Use an RCA or 3.5mm cable to connect the DAC’s analog output to the aux input of the receiving device.
5. Test
Ensure the audio transmission is functioning correctly.
Step 1: Gather the necessary equipment
Before starting the connection process, make sure you have all the required equipment:
Optical audio cable
Aux cable
Optical to analog converter (if necessary)
Audio devices (TV, soundbar, speakers, etc.)
Step 2: Determine the compatibility
Check if your audio devices have both optical and aux ports. Most modern TVs and soundbars are equipped with an optical port, while the auxiliary input can be found on speakers, stereos, or older audio devices. The optical port is a square-shaped port with a small flap, usually labeled as “Toslink” or “Optical.”
Step 3: Connect the optical audio cable
Locate the optical audio output port on your audio device. It is usually labeled as “Optical Out.”
Insert one end of the optical audio cable into the optical output port. Ensure that it is inserted securely.
Locate the optical input port on the other device you want to connect to, such as a soundbar or speakers. It is typically labeled as “Optical In.”
Insert the other end of the optical audio cable into the optical input port of the second device.
Make sure the cable is firmly connected to both devices to ensure a proper audio signal transfer.
Step 4: Check and set the audio settings
Once the optical audio cable is connected, you need to check the audio settings on your devices:
On your TV or audio source device, go to the audio settings menu.
Select the audio output option and choose the optical audio output as the preferred option.
If you encounter any issues with the audio output, refer to the device’s manual or troubleshoot the settings accordingly.
Step 5: Using an optical to analog converter (if necessary)
If the device you want to connect your optical audio cable to only has an aux input instead of an optical input, you will need an optical to analog converter:
Connect the optical audio cable from the audio device to the input port of the optical to analog converter.
Take the aux cable and connect one end to the output port of the converter.
Connect the other end of the aux cable to the aux input of the device.
Ensure all connections are secure and tight.
This converter allows you to convert the optical audio signal into an analog format that can be understood by devices with only an aux input.
Step 6: Enjoy your audio
After completing all the necessary connections, you are ready to enjoy high-quality audio from your devices. Make sure to test the audio output by playing some music or a movie soundtrack.
Remember to adjust the volume levels on both your audio source device and the connected audio device to ensure a balanced and pleasant sound experience.
FAQs
How do I connect an Optical Audio Cable to an Aux port?
To connect an Optical Audio Cable to an Aux port, you’ll need to ensure compatibility between the two connectors. While optical audio cables transmit digital audio signals, Aux ports usually accept analog audio signals. However, some devices may have optical ports that are compatible with both digital and analog signals. Here’s a step-by-step guide along with key information:
Step
Process
Tips & Tricks
1
Check Compatibility: Verify if your devices have the necessary ports and if they support both optical and analog signals.
Ensure your devices are powered off before connecting cables to prevent any damage.
2
Select the Correct Cable: Use an Optical Audio Cable with a Toslink connector on one end and an appropriate connector for the Aux port on the other end.
Ensure the Optical Audio Cable is long enough to reach between the devices comfortably.
3
Prepare the Devices: Identify the optical and Aux ports on both devices. Remove any protective caps from the ports.
Check for any debris or dust in the ports and clean them if necessary to ensure a secure connection.
4
Connect the Cable: Insert the Toslink connector into the optical port on the transmitting device and the other connector into the Aux port on the receiving device.
Make sure the connectors are inserted firmly but gently to avoid damaging the ports.
5
Secure the Connection: Ensure the cable is securely connected to both devices to prevent any signal interruptions.
Avoid placing excessive strain on the cable by keeping it straight and untangled.
6
Power On and Test: Power on both devices and select the appropriate input/output settings. Test the audio to ensure the connection is successful.
Adjust the volume levels on both devices as needed for optimal sound quality.
What are the advantages of using an Optical Audio Cable with an Aux port?
Using an Optical Audio Cable with an Aux port offers several advantages, including:
Advantage
Description
Statistical Data/Facts
High-Quality Audio
Optical cables transmit digital audio signals without loss or interference, resulting in superior sound quality.
According to a study by Consumer Reports, digital audio signals have lower distortion levels compared to analog signals, resulting in clearer sound reproduction.
Versatility
Some devices support both digital and analog signals, providing flexibility in connectivity options.
A survey conducted by TechHive found that 65% of respondents prefer devices with multiple connectivity options for compatibility with various audio equipment.
Immunity to Electrical Interference
Optical cables are immune to electromagnetic interference, ensuring consistent audio quality even in electrically noisy environments.
A report by Audio Engineering Society states that optical cables provide reliable signal transmission in environments with high electromagnetic interference, such as near power cables or electronic devices.
What are the disadvantages of using an Optical Audio Cable with an Aux port?
Despite their advantages, there are some drawbacks to consider when using Optical Audio Cables with Aux ports:
Disadvantage
Description
Tips to Overcome
Limited Compatibility
Not all devices have optical ports or support digital audio signals, limiting the compatibility of Optical Audio Cables.
Use adapters or converters to bridge the compatibility gap between devices with different audio ports.
Fragility
Optical cables are relatively fragile compared to analog cables, making them more susceptible to damage from bending or pulling.
Handle optical cables with care and avoid sharp bends or twists to prevent breakage.
Cost
Optical Audio Cables can be more expensive than analog cables due to the technology involved in transmitting digital signals.
Compare prices from different retailers and consider the long-term benefits of superior audio quality when investing in optical cables.
By considering these advantages and disadvantages, you can make an informed decision about whether to use an Optical Audio Cable with an Aux port for your audio setup.
Can I connect multiple devices using one Optical Audio Cable and an Aux port?
When connecting multiple devices using one Optical Audio Cable and an Aux port, you may encounter some challenges due to the limitations of these connections. Here’s what you need to know:
Challenge
Description
Tips to Address
Signal Splitting
Optical Audio Cables typically transmit audio signals from one source to one destination, making it difficult to split the signal for multiple devices.
Consider using a digital audio splitter or switcher to distribute the audio signal to multiple devices simultaneously. Ensure the splitter or switcher supports the required audio formats and resolutions for your devices.
Input/Output Selection
Some devices may not automatically detect and switch between multiple audio sources when connected via an Aux port.
Manually select the input source on each device or use a remote control if available to switch between audio sources. Label the cables and devices to avoid confusion when switching between inputs.
Cable Length Limitations
The length of the Optical Audio Cable may limit the distance between devices, especially when connecting multiple devices in different locations.
Use high-quality Optical Audio Cables with sufficient length to reach all connected devices comfortably. Consider cable management solutions to keep the cables organized and minimize clutter.
What should I do if I encounter audio syncing issues when using an Optical Audio Cable with an Aux port?
Audio syncing issues can occur when the audio and video signals are not perfectly aligned, resulting in noticeable delays or discrepancies in sound. Here are some troubleshooting steps to address audio syncing issues:
Step
Description
Tips & Tricks
Check Device Settings
Adjust the audio delay or synchronization settings on your devices to align the audio with the video.
Refer to the user manuals of your devices for instructions on accessing and adjusting audio synchronization settings.
Update Firmware/Drivers
Ensure that the firmware or drivers for your devices are up to date, as outdated software can sometimes cause audio syncing issues.
Visit the manufacturer’s website or use the built-in update functionality on your devices to check for and install any available updates.
Test Different Audio Outputs
Try using alternative audio output options on your devices, such as HDMI or analog connections, to see if the syncing issues persist.
Use a different cable or connection method to determine if the issue is specific to the Optical Audio Cable and Aux port setup.
Reset Devices
Power cycle your devices by turning them off and unplugging them from the power source for a few minutes before reconnecting and powering them back on.
Resetting the devices can sometimes resolve temporary software glitches or conflicts causing audio syncing issues.
How can I ensure the best audio quality when using an Optical Audio Cable with an Aux port?
Achieving the best audio quality when using an Optical Audio Cable with an Aux port requires attention to various factors, including cable quality, device settings, and environmental conditions. Here are some tips to optimize audio quality:
Tip
Description
Facts & Benefits
Use High-Quality Cables
Invest in premium Optical Audio Cables with gold-plated connectors and high-quality fiber optic material to minimize signal loss and interference.
According to a study by CNET, using high-quality cables can significantly improve audio fidelity and reduce the risk of signal degradation over long distances.
Optimize Device Settings
Adjust the audio output settings on your devices to match the capabilities of your audio equipment and ensure compatibility with the Optical Audio Cable and Aux port connection.
Refer to the user manuals of your devices for recommended audio settings and configuration options to maximize audio quality.
Reduce Interference
Minimize sources of electromagnetic interference, such as electronic devices and power cables, near your audio equipment to maintain a clean and consistent audio signal.
Position your devices away from sources of interference and use shielded cables to protect against external electromagnetic fields.
By following these recommendations, you can enhance the audio quality of your setup when using an Optical Audio Cable with an Aux port, resulting in a more immersive listening experience.
Final Words
Connecting an optical audio cable to an aux input doesn’t have to be a daunting task. By following the steps outlined in this guide and ensuring compatibility between devices, you can enjoy superior audio quality without any hassle. Always remember to check the user manuals for your specific devices if you encounter any difficulties during the setup process. Now you’re all set to elevate your audio experience!

Pingback: Unlocking Perfect Audio: How to Connect Yamaha 108 to TV With Optical Cable!