Embarking on a microscopic journey into the heart of diamonds has been nothing short of an enchanting experience. As a gem enthusiast, the allure of these precious stones had always captivated me, but it wasn’t until I peered through the lens of a powerful microscope that the true magic unfolded. Join me as we unravel the hidden world of diamonds, discovering the intricate details that lie beneath their sparkling façade
Inclusions and Blemishes
One of the most fascinating features to look for in a diamond under magnification is the presence of inclusions and blemishes. These are imperfections that occur naturally and can take various forms. Inclusions are internal characteristics, while blemishes are found on the surface of the diamond. Both play a crucial role in the clarity grading of the diamond.
Common Types Of Inclusions
- Clouds are clusters of tiny pinpoints that can appear hazy under magnification.
- Feathers: These are small cracks within the diamond that can sometimes reflect light in unique ways.
- Crystal: A crystal inclusion is another mineral trapped inside the diamond, which can be visible as a small colored dot or a tiny crystal.
Typical Surface Blemishes
- Scratches: Fine lines on the surface, usually caused by wear or the cutting process.
- Pits: Small holes that can occur naturally or as a result of the diamond being cut and polished.
- Nicks: Small chips along the edges or facets of the diamond.

Credit: www.itshot.com
Internal Graining and Growth Patterns
Another aspect that can be seen under a microscope is the internal graining and growth patterns. These are lines or waves that reflect the diamond’s growth history and can impact its optical properties. Sometimes, these features are not visible to the naked eye, but under magnification, they can be quite prominent.
Grades of Diamond Clarity
Inclusions and blemishes affect a diamond’s clarity, which is one of the 4Cs (Cut, Color, Clarity, and Carat Weight) used to assess the quality of a diamond. The Gemological Institute of America (GIA) classifies diamond clarity into the following grades:
| Clarity Grade | Description |
|---|---|
| Flawless (FL) | No inclusions or blemishes visible under 10x magnification. |
| Internally Flawless (IF) | No inclusions visible under 10x magnification. |
| Very Very Slightly Included (VVS1 and VVS2) | Inclusions so slight they are difficult for a skilled grader to see under 10x magnification. |
| Very Slightly Included (VS1 and VS2) | Inclusions are observed with effort under 10x magnification but can be considered minor. |
| Slightly Included (SI1 and SI2) | Inclusions are noticeable to a skilled grader under 10x magnification. |
| Included (I1, I2, and I3) | Inclusions are obvious under 10x magnification and may affect transparency and brilliance. |
Why Examine Diamonds Under a Microscope?
My journey into the microscopic world of diamonds began with a burning question: why bother examining these precious gems under a microscope when their brilliance is evident to the naked eye? The answer lies in the hidden stories and unique characteristics that only reveal themselves when magnified.
Unveiling Impurities and Inclusions
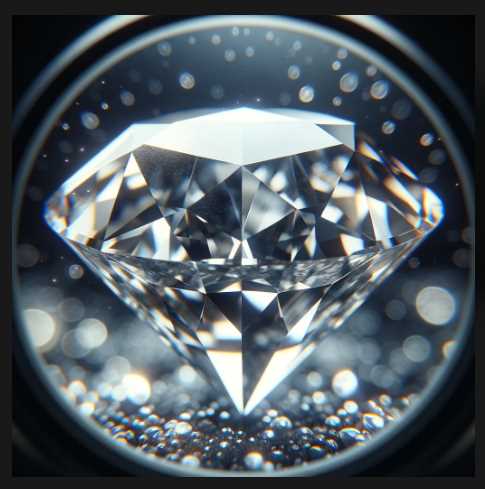
Under the microscope, diamonds expose a world of imperfections that are invisible to casual observation. These imperfections, often termed “inclusions,” are like nature’s fingerprints, providing a distinct identity to each diamond. Pinpoint inclusions, clouds, and feathers, when viewed closely, tell a tale of the diamond’s geological journey and the intense pressures it endured deep within the Earth. Examining these features is not about finding flaws but appreciating the natural history inscribed within the gem.
Assessing Quality and Value
While a diamond’s size and sparkle are key factors in its allure, true connoisseurs understand that microscopic features significantly influence its overall quality and value. Scrutinizing a diamond under magnification allows for a precise evaluation of clarity, one of the Four Cs (carat, cut, color, and clarity) that determine a diamond’s worth. The presence or absence of inclusions, their type, size, and location all contribute to the unique fingerprint of each stone.
Scientific Research Applications
Beyond the realm of gemology, the microscopic examination of diamonds serves vital scientific purposes. Researchers delve into the microscopic structure to gain insights into the Earth’s geology and the processes that lead to diamond formation. The study of diamonds under a microscope contributes to a broader understanding of the planet’s history, providing a window into the geological forces that shaped our world.
Importance in the Jewelry Industry
For jewelers and craftsmen, a microscope is not merely a tool but a window into perfection. Polishing marks, surface blemishes, and any minute irregularities are magnified, allowing artisans to refine their work and ensure that each facet reflects light flawlessly. The meticulous craftsmanship, observed at a microscopic level, elevates the artistry of jewelry-making and sets the standard for excellence in the industry.
Microscopic Examination Table
| Microscopic Feature | Significance |
|---|---|
| Inclusions | Provide a unique identity and reveal the diamond’s history |
| Clarity Assessment | Affects the diamond’s overall quality and monetary value |
| Scientific Insights | Contributes to geological research and understanding of Earth |
| Craftsmanship Observation | Ensures perfection in jewelry-making at a microscopic level |
In essence, examining diamonds under a microscope transcends the surface glamour, offering a deeper understanding of these extraordinary gems. It’s a journey into the unseen, where the beauty lies not just in what meets the eye but in the microscopic intricacies that make each diamond an unparalleled work of art.
Microscopic Features of Diamonds

The microscope, my trusted companion in this exploration, unveiled a world of wonders. Surface characteristics, normally invisible to the naked eye, were laid bare. Scratches and abrasions, the scars of a diamond’s encounters with the earth, became apparent. Polishing marks, like delicate brushstrokes, told a story of the meticulous craftsmanship involved in enhancing the gem’s brilliance.
Delving deeper, the internal features emerged—tiny inclusions that resembled nature’s fingerprints. Each imperfection, a testament to the diamond’s natural origin, added character and uniqueness. The blemishes, far from diminishing the gem’s allure, became the signature strokes in a masterpiece, making each diamond a one-of-a-kind creation.
Microscopic Tips for Diamond Examination
As I delved deeper into the microscopic exploration of diamonds, I quickly learned that a magnified view reveals a world of intricacies that escape the naked eye. Here, I share invaluable tips gathered through my journey, offering insights into the nuances of using a microscope for an enriching diamond examination experience.
1. Choosing the Right Microscope
Selecting an appropriate microscope is the first crucial step in this journey. Opt for a microscope with sufficient magnification capabilities, typically ranging from 10x to 40x. Additionally, ensure that the microscope has adequate lighting options for a detailed examination. A well-lit view is essential for spotting surface features, inclusions, and assessing the overall quality of the diamond.
2. Proper Lighting Techniques
Lighting plays a pivotal role in revealing the microscopic features of a diamond. Experiment with different lighting angles to highlight surface characteristics and internal features. Side lighting can bring out scratches and abrasions, while top lighting emphasizes the brilliance of the gem. Use diffused light to minimize glare, allowing for a clearer view of the diamond’s details.
3. Adjusting Magnification Levels
The art of diamond examination lies in mastering magnification levels. Start with a lower magnification to appreciate the diamond’s overall appearance. As you become more accustomed to the microscope, gradually increase the magnification to explore finer details. Focus on specific areas of interest, such as inclusions or polishing marks, to uncover the nuances that define the diamond’s character.
4. Recognizing Common Features and Abnormalities
Familiarizing yourself with common features visible under the microscope is essential. This includes pinpoint inclusions, cloud-like formations, and feather-like fractures. Understanding these features helps in distinguishing between natural characteristics and potential irregularities that may impact the diamond’s clarity. Note any anomalies that deviate from the expected patterns, as these may influence the gem’s overall quality.
5. Tips for Microscopic Examination
-
Clean the Diamond: Before placing the diamond under the microscope, ensure it is clean. Dirt or residue can obscure microscopic features, affecting the accuracy of your observations.
-
Stabilize the Diamond: Use a stable holder or a gem clamp to secure the diamond in place. This minimizes movement and allows for a steady examination.
-
Use Different Lighting Angles: Rotate the diamond under the microscope to view it from various angles. This helps in capturing different facets, revealing a comprehensive picture of the gem’s features.
-
Document Your Observations: Take notes or use a camera attached to the microscope to document your findings. This serves as a valuable reference for future comparisons or discussions with fellow gem enthusiasts.
Microscopic Examination Table
| Microscopic Tip | Description |
|---|---|
| Choosing the Right Microscope | Opt for a microscope with 10x to 40x magnification and adequate lighting options. |
| Proper Lighting Techniques | Experiment with side and top lighting to emphasize different features. |
| Adjusting Magnification Levels | Start with lower magnification, gradually increasing to explore finer details. |
| Recognizing Common Features | Familiarize yourself with pinpoint inclusions, clouds, and feather-like fractures. |
| Clean the Diamond | Ensure the diamond is free from dirt or residue before microscopic examination. |
| Stabilize the Diamond | Use a stable holder or gem clamp to prevent movement during examination. |
| Use Different Lighting Angles | Rotate the diamond to capture various facets and angles under the microscope. |
| Document Your Observations | Take notes or use a camera to record your findings for future reference. |
Armed with these tips, my own journey into the microscopic world of diamonds became not just a visual exploration but a methodical and insightful adventure. Each adjustment of the microscope, each change in lighting, revealed new facets of the diamonds, transforming the examination into a personal discovery of the gems’ hidden intricacies.
Notable Facts and Data about Diamonds Under a Microscope
In my quest for understanding, I stumbled upon fascinating facts and data that shed light on the microscopic world of diamonds. Statistical insights into diamond clarity grades provided a framework for assessing their quality. The frequency of inclusions in natural diamonds, like tiny time capsules, hinted at the geological processes that shaped these gems over millions of years.
| Frequency Chart: Common Inclusions in Diamonds |
|---|
| Inclusion Type | Frequency |
|---|---|
| Pinpoint Inclusions | High |
| Cloud Inclusions | Moderate |
| Feather Inclusions | Variable |
Moreover, the impact of microscopic features on diamond pricing became evident. Diamonds, like art, derive value not just from their size and brilliance but from the intricate details discernible only through a microscope. Exploring examples of famous diamonds and their microscopic characteristics added a historical dimension, connecting the present to the rich tapestry of diamond lore.
| Microscopic Characteristics Influencing Diamond Grading |
|---|
| Characteristic | Influence on Grading |
|---|---|
| Inclusions | Lower clarity grades |
| Surface Blemishes | Lower clarity grades |
| Polishing Marks | Evaluation of craftsmanship |
Comparative Analysis: Natural vs. Synthetic Diamonds
As my journey progressed, I found myself drawn to the intriguing realm of synthetic diamonds. The microscope became a tool for differentiation, revealing subtle disparities between natural and synthetic counterparts. Through comparative analysis, it became evident that while synthetic diamonds mimicked nature’s brilliance, microscopic distinctions set them apart.
Tables:
| Comparison Table: Natural vs. Synthetic Diamond Features |
|---|
| Feature | Natural Diamonds | Synthetic Diamonds |
|---|---|---|
| Crystal Lattice | Distinctive natural crystal lattice | Uniform, consistent synthetic lattice |
| Inclusions | Varied, nature-induced inclusions | Rare, if any, artificial inclusions |
| Formation Process | Geological processes over millions of years | Created in controlled laboratory environments |
Continuing the exploration, I delved into the manufacturing processes behind synthetic diamonds. The microscope, a discerning eye, exposed the nuances that betrayed their artificial origin. The significance of microscopic examination became paramount in distinguishing between the two, safeguarding the integrity of the diamond market.
Final words
I am left in awe of the intricate world concealed within diamonds. The microscopic features, once abstract concepts, have become tangible wonders, adding depth and character to these timeless gems. The journey has been more than a visual feast; it’s been a revelation of the stories etched within the heart of each diamond.
As we step away from the microscope, let us carry a newfound appreciation for the complexity of diamonds. Whether you’re a gem enthusiast, a jeweler, or a curious soul, the microscopic exploration of diamonds is a journey that promises perpetual fascination. So, go ahead, peer through the lens, and uncover the secrets that diamonds are so eager to share.
References and Additional Reading
To further your understanding of diamonds and what they look like under a microscope, you may consider these resources:
- Gemological Institute of America (GIA) – Diamond Education
- American Gem Society (AGS) – Diamond Information
- European Gemological Center (EGC) – Diamond Clarity

Fahim Foysal is a well-known expert in the field of binoculars, with a passion for exploring the great outdoors and observing nature up close. With years of experience in the field, Fahim has honed his skills as a binocular user and has become a go-to resource for those seeking advice on choosing the right binoculars for their needs.
Fahim’s love for the natural world began during his time at The Millennium Stars School and College and BIAM Laboratory School, where he spent much of his free time exploring the outdoors and observing the wildlife around him. This passion for nature led him to pursue a degree in Fine Arts from the University of Dhaka, where he gained a deep understanding of the importance of observation and attention to detail.
Throughout his career, Fahim has used his expertise in binoculars to help others discover the beauty of the natural world. His extensive knowledge of binocular technology and optics has made him a trusted advisor for amateur and professional wildlife observers alike. Whether you’re looking to spot rare birds or observe animals in their natural habitats, Fahim can help you choose the perfect binoculars for your needs. With his guidance, you’ll be able to explore the outdoors with a newfound appreciation for the beauty of the natural world.
Table of Contents