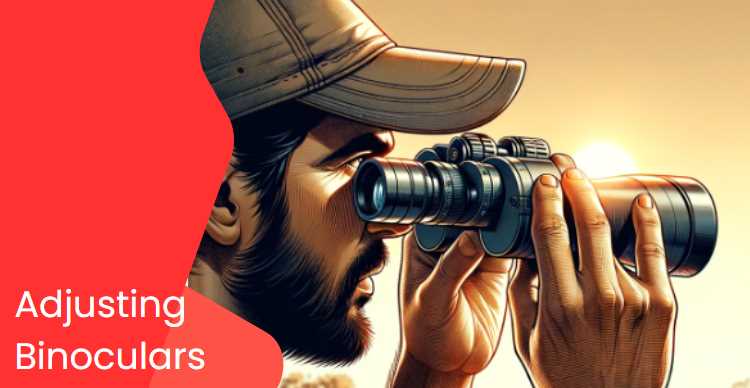
Adjusting binoculars may seem like a straightforward task, but the impact it has on your viewing experience is profound. Picture this: you’re on a nature hike, the rustling leaves, the distant calls of birds, and there, in the distance, a magnificent eagle soars. Now, imagine your disappointment if the view through your binoculars is blurred, distorted, or gives you a splitting headache. This guide aims to unravel the mysteries of adjusting binoculars, ensuring you never miss a moment of the awe-inspiring beauty around you.
When you look at something through binoculars, two different images are formed in your eyes. The left eye views the same image as the right eye. But, for a few seconds after looking through binoculars, both images merge into one and disappear. This is called double vision. The merging of images creates an optical illusion that you can use to your advantage while using binoculars to get a better view of things.
| Image | Product | Detail | Price |
|---|---|---|---|
 | Carson MicroBrite Plus 60x-120x LED Lighted Pocket Microscope |
| See on Amazon |
 | Elikliv LCD Digital Coin Microscope |
| See on Amazon |
 | AmScope M150 Series Portable Compound Microscope |
| See on Amazon |
 | PalliPartners Compound Microscope for Adults & Kids |
| See on Amazon |
 | Skybasic 50X-1000X Magnification WiFi Portable Handheld Microscopes |
| See on Amazon |
The fundamentals of a good binocular are that it should be bright, clear, and regular as you view an object from afar. This is only possible if both lenses of the binoculars are correctly focused. This process is complicated because your eyesight also affects how the binoculars are adjusted. If the binoculars are not appropriately focused, they may be better or worse than another person’s binoculars.
Understanding Binocular Anatomy
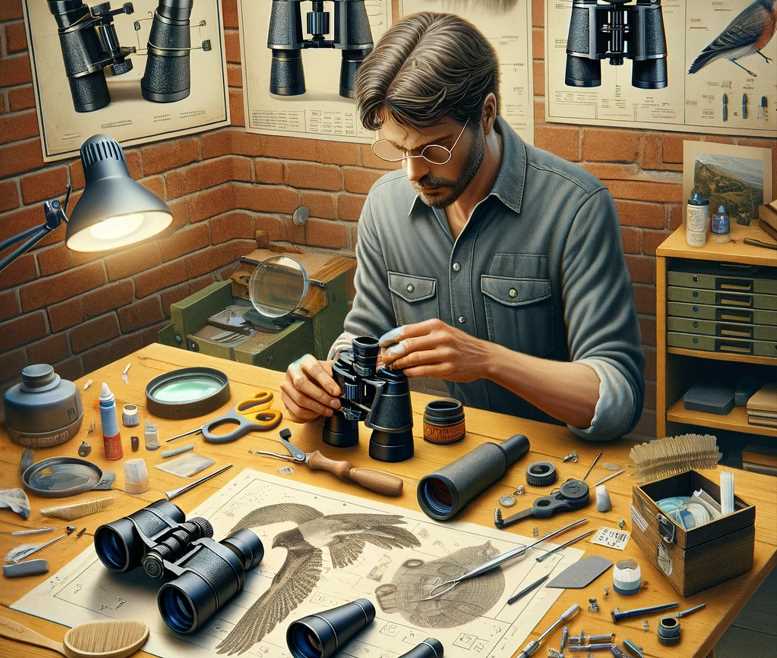
Before embarking on the journey of adjustment, let’s dissect the binocular itself. It’s not just a device; it’s a marvel of engineering. Binoculars consist of objective lenses, prisms, and eyepieces intricately woven to bring the world closer to your eyes. The focusing mechanism and the elusive diopter adjustment add layers to this optical symphony. Understanding these components is the first step towards unleashing the full potential of your binoculars.
Basic Setup and Initial Inspection
Choosing the Right Stage: Setting Up for Success
The first step before you embark on the exciting journey of adjusting your binoculars is finding the perfect stage. Think of it like preparing for a grand performance. Choose a stable surface that minimizes vibrations. A sturdy table or a specialized tripod designed for binoculars can be your stage. This seemingly simple decision lays the foundation for an uninterrupted exploration of the world through your lenses.
The Importance of a Clear Canvas: Initial Inspection
Now that your stage is set, it’s time to inspect your binoculars. This step is akin to preparing your canvas for a masterpiece. Cleanliness is not just a virtue; it’s the key to a clear vision. Invest in a good lens cleaning kit, and delicately rid your lenses of smudges or dust. Imagine spotting a rare bird in flight, only to have the image distorted by a fingerprint on your lens. Prevention is the key to uninterrupted visual bliss.
Binocular Inspection Checklist
| Checklist Item | Action |
|---|---|
| Cleanliness of Lenses | Use a lens cleaning kit |
| Physical Damage Check | Inspect for dents or misalignment |
| Stability of Surface | Choose a vibration-free setting |
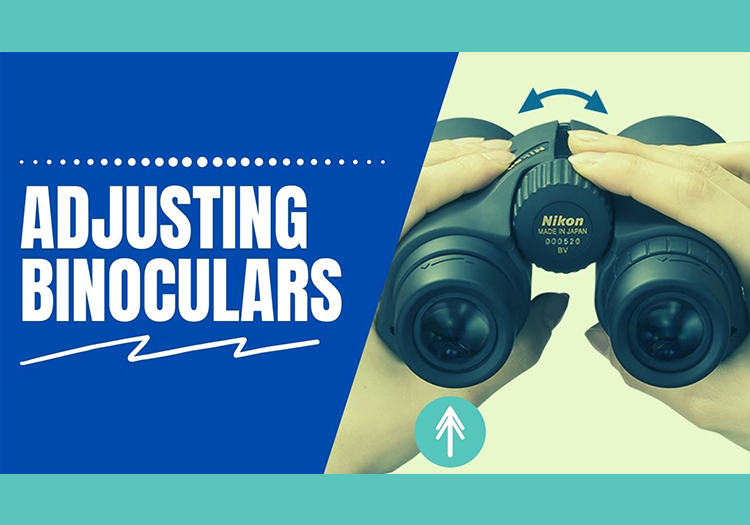
C. Interpupillary Distance Adjustment: Tailoring to Your Eyes
Now that your stage is set, and your lenses are pristine, it’s time to customize the show for your eyes. Interpupillary Distance (IPD) is the key to this personalization. Imagine your eyes as the audience, and adjusting the IPD is like ensuring everyone gets the best seat in the house. Look through your binoculars at a distant object, adjust the width until you see a single, unified image, and voilà – the stage is set for a personalized spectacle.
Interpupillary Distance Adjustment Steps
- Look through binoculars at a distant object.
- Adjust the width until you see a single image.
- Ensure the fit is comfortable for your eyes.
This process ensures that your binoculars align perfectly with the unique distance between your eyes, providing a comfortable and immersive viewing experience.
In this crucial phase of the adjustment journey, imagine yourself as a conductor fine-tuning the instruments before the grand symphony. With your stage set, lenses pristine, and the IPD customized, you’re now ready to dive into the heart of the optical masterpiece that awaits.
Interpupillary Distance Adjustment
Finding Your Optical Sweet Spot: The Importance of Interpupillary Distance
Adjusting the Interpupillary Distance (IPD) of your binoculars is a personalized touch, like customizing a suit to fit perfectly. Your eyes are unique, and so is the distance between them. The IPD is the bridge that connects the optical world to your eyes, and finding the right setting ensures a seamless viewing experience.
Imagine you’re in a theatre – a binocular is like having your own pair of opera glasses. Now, picture the discomfort of having those glasses set too wide, forcing your eyes into a strained position. Alternatively, envision them set too narrow, causing double vision and a perplexing viewing experience. Adjusting the IPD is the magical moment when you transform your binoculars into bespoke eyewear, tailored specifically for your eyes.
The Dance of Alignment: Step-by-Step Guide to IPD Adjustment
Let’s delve into the practical steps of adjusting the Interpupillary Distance. It’s a delicate dance where precision matters.
Interpupillary Distance Adjustment Steps
- Look through binoculars at a distant object: Choose a focal point that allows your eyes to relax and focus effortlessly.
- Adjust the width until you see a single image: Slowly move the binoculars closer or farther apart until the images merge into one, creating a seamless view.
- Ensure the fit is comfortable for your eyes: The goal is not just a unified image but a setting that feels natural and strain-free for your eyes.
This process ensures that your binoculars align perfectly with your unique eye distance, providing not only a clear and unified image but also a comfortable and enjoyable viewing experience.
Focusing Mechanism: Sharpening Your View
A. Unveiling the Optical Magic: The Central Focus Wheel
As you stand on the brink of a breathtaking landscape, your binoculars transform into a magical gateway with the central focus wheel as the key. Picture it as the wizard’s staff, ready to conjure clarity from the blur. The central focus wheel is your bridge to a sharper, more detailed world. Understanding and mastering its use is the next step in your journey towards binocular expertise.
The Symphony of Clear Imagery: Step-by-Step Guide to Focusing
Let’s demystify the process of using the central focus wheel, the maestro orchestrating the symphony of clarity in your binoculars.
Focusing Mechanism Guide
| Step | Action |
|---|---|
| 1 | Locate the central focus wheel |
| 2 | Look at a distant object |
| 3 | Turn the wheel until the image is sharp and clear |
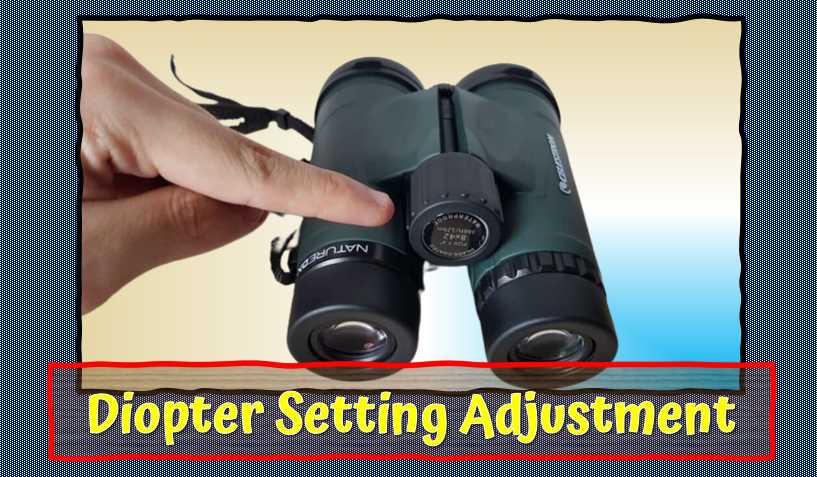
Adding Your Note: The Diopter Adjustment
Let’s introduce the diopter adjustment, the personalized note in this optical symphony. It’s akin to tuning a musical instrument, ensuring harmony in the varied strengths of your eyes. This added step is the final touch to tailor your binoculars to your unique vision.
Diopter Adjustment Steps
- Locate the diopter adjustment ring: Often positioned on one of the eyepieces.
- Keep one eye closed: Focus on a distant object with the open eye.
- Adjust the diopter until the image is sharp: This compensates for any difference in vision between your eyes.
This trifecta of adjustments – central focus wheel, diopter adjustment, and Interpupillary Distance – transforms your binoculars from mere optical instruments into personalized windows to the world. As you turn the central focus wheel, witness the once-blurred landscape crystallize before your eyes.
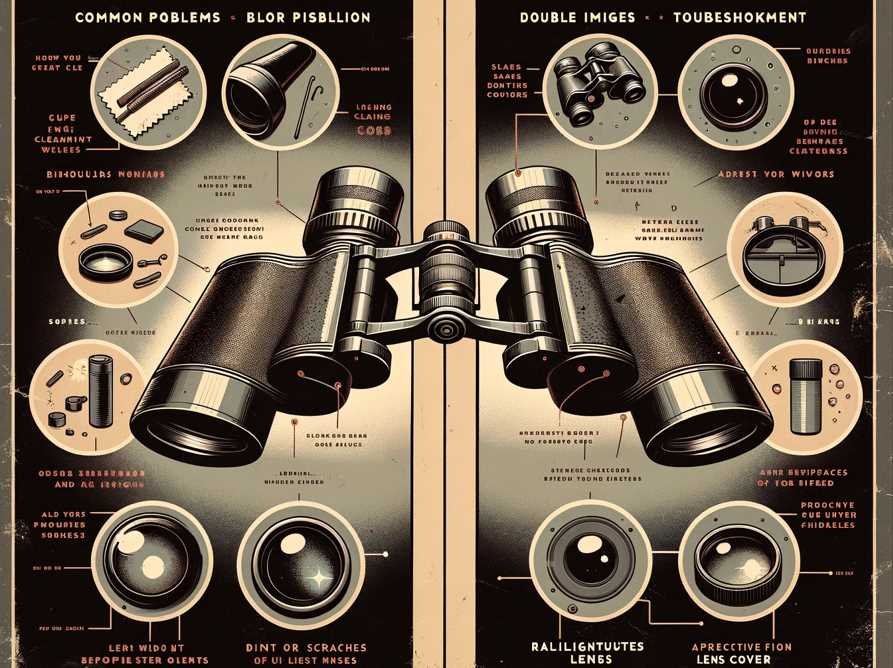
Common Issues and Troubleshooting
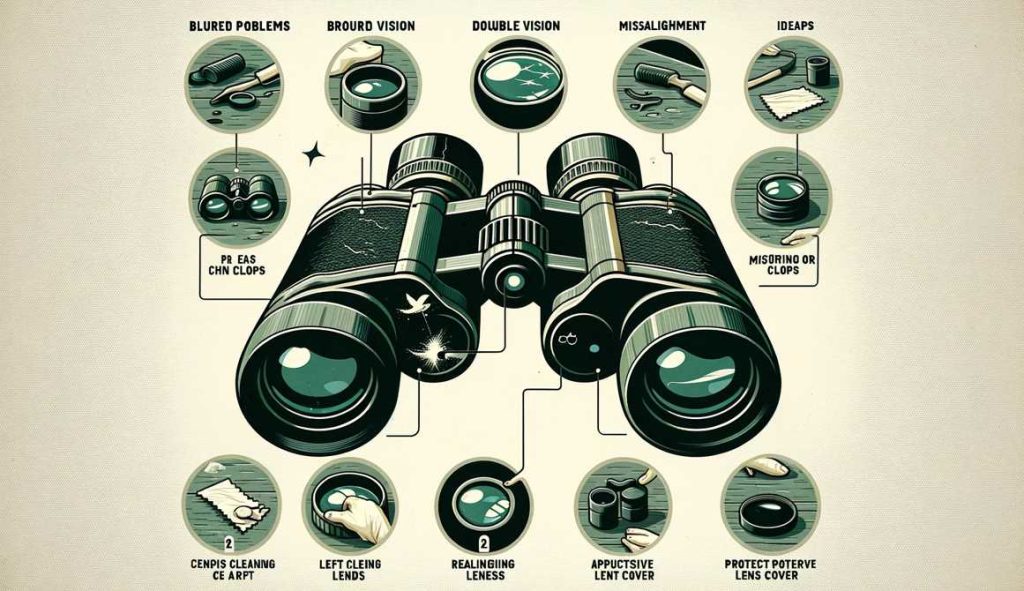
A. Navigating the Optical Maze: Identifying Common Issues
In the midst of your binocular adventure, you may encounter common issues that could momentarily cloud your optical joy. Picture this: you’re tracking a distant eagle, and suddenly, the view blurs, or you see double. Fear not, for these are challenges with straightforward solutions. Identifying these issues is the first step in the troubleshooting journey.
B. Troubleshooting Binocular Issues: A Practical Guide
Troubleshooting Binocular Issues
| Issue | Solution |
|---|---|
| Double Vision | Adjust Interpupillary Distance (IPD) |
| Blurriness | Fine-tune central focus and diopter adjustment |
| Headache or Eye Strain | Ensure IPD matches your natural eye distance |
- Double Vision: Adjust Interpupillary Distance (IPD): If you’re seeing double, it’s likely that the IPD isn’t set correctly. Go back to the personalized adjustment of IPD, ensuring a single, merged image.
- Blurriness: Fine-tune central focus and diopter adjustment: Blurriness may result from misalignment in both the central focus and diopter settings. Turn the central focus wheel and adjust the diopter until the image is clear.
- Headache or Eye Strain: Ensure IPD matches your natural eye distance: If prolonged use of binoculars leads to discomfort, double-check that the IPD setting matches your natural eye distance. This simple adjustment can alleviate strain and headaches.
By systematically troubleshooting these common issues, you become the master of your optical fate. It’s akin to being a detective, solving mysteries in the world of optics. Now, armed with these solutions, continue your exploration with the confidence that, even if a challenge arises, you have the tools to swiftly overcome it and revel in the wonders of the world through your binoculars.
Advanced Adjustments for Specialized Use
A. Beyond the Basics: Unlocking Advanced Features
As you delve deeper into the realm of binocular mastery, you’ll encounter advanced features that elevate your viewing experience to new heights. Imagine stabilizing your view on a shaky boat or exploring a vast landscape without distortion. These advanced adjustments are not mere embellishments but tools designed to enhance your binoculars for specialized scenarios.
Advanced Binocular Adjustments
| Feature | Purpose |
|---|---|
| Image Stabilization | Minimizes shakes and vibrations for a steady viewing experience |
| Field Flattener | Reduces distortion towards the edges, providing a flat field of view |
- Image Stabilization: If you find yourself in motion, be it on a boat or while tracking a moving subject, activate image stabilization. This feature minimizes shakes and vibrations, ensuring a steady and clear view.
- Field Flattener: Especially useful for wide-field observations, a field flattener reduces distortion towards the edges of your view. This results in a flat field of view, allowing you to enjoy every detail of a panoramic landscape without optical distortions.
B. Tips for Optimal Use in Specialized Scenarios
Consider these tips as you venture into utilizing advanced features:
- Experiment and Learn: Take the time to experiment with these advanced adjustments in various scenarios to understand their impact fully.
- Refer to Manufacturer’s Guide: Consult your binocular manufacturer’s guide for specific instructions and tips tailored to your model.
- Adjust as Needed: Fine-tune settings based on the specific conditions of your observation, whether it’s a rocking boat or an expansive field.
5 Tips for Aligning Prisms
Aligning prisms in your binoculars is like tuning the instruments in an orchestra; each adjustment brings you closer to the perfect harmony of a clear, crisp image. Here are five tips to guide you through the delicate process of prism alignment:
- Understanding Prism Alignment Importance: Before diving into the adjustments, comprehend the role of prisms in delivering a pristine image. Misaligned prisms can distort the view and lead to discomfort, so aligning them is crucial for an optimal visual experience.
- Start with a Distant Object: Choose a distant, well-defined object as your focal point. This provides a clear reference point for aligning the prisms, allowing you to notice even subtle changes in the image as you make adjustments.
- Adjust One Prism at a Time: Begin the alignment process by focusing on one prism at a time. This methodical approach ensures that you have precise control over each adjustment, preventing overcorrection and maintaining a balanced view.
- Use Natural Light for Reference: Take advantage of natural light sources, such as the sun or the sky, to illuminate your chosen object. This enhances the visibility of details and aids in more accurate prism alignment.
- Fine-Tune for Comfort: As you align the prisms, pay attention to the overall comfort of the view. The goal is not just alignment but an adjustment that feels natural to your eyes, providing a comfortable and immersive experience.
Adjusting Space: How do I change the distance between the eyepiece?
There are two ways to change the distance between the eyepiece in binoculars.
First, you can use a compass and measure the angle of your head to find the distance between your eyes.
Second, you can attach another piece of paper or card to each eyepiece and place them so that they are parallel, and then mark where they meet on the other side.
The average eye-to-eye distance between two people is called the interpupillary distance (IPD). The IPD usually ranges from 65mm to 75mm, with 66mm being the most common. Find the closest eye-to-eye distance using your binoculars at the typical viewing place.
Hold the barrel of the binoculars firmly and slide them closer or farther until you can see a complete circular view of what you are viewing. You’ll need to switch the left eye with the right look to check for barrel alignment. If there is an IPD value, write it down so you can refer to it later.
You might need to readjust the binoculars when looking at a nearby object. With practice, it’s a matter of a few seconds.
Adjusting Eyecups: How do I adjust my binocular eyecups?
There are two different ways to adjust your binocular eyecups.
On the left, you will see a small button that can be pushed in and twisted clockwise or counterclockwise.
On the right, there is a knob that can be turned up or down to tighten or loosen the tension on the eyecup.
The eyecups on binoculars can be adjusted by either twisting the eyecup itself or the barrel.
To adjust your eyecups, you will need to twist the barrel of your binoculars. This is done by gripping the binoculars’ bodies with one hand and gently turning them so that you are confusing the barrel in one direction and then another. The adjustment knob should have a “click” as it turns, indicating that it has been set into place.
If adjusting your eyecups is too tricky, they may be changed by using a screwdriver to loosen or tighten each side of each socket until they are both aligned properly with your eyes.
Eyecaps can be adjusted to the user’s needs to achieve a better viewing performance. With the great variety of eyecaps, such as rubber eyecaps, pop-up eyecaps, and twist-up eyecaps, it is easier to adjust them to one’s needs. Eyeglass wearers should use twisted down or folded eyecaps, and non-eyeglass wearers should use twisted up or unfolded eyecaps.
Focusing the lenses: How do I adjust the focus on my binoculars?
You need to use a focusing ring to adjust the focus on your binoculars. There are two types of focusing rings: fixed and continuous.
The first type is a circular or arc-shaped metal ring that can be used to focus in any direction on an extensive range of distances. This type is usually called a “magnifying” lens because it enlarges the image when focused at close ranges.
The second type is an adjustable system with two screws that allow for fine focus adjustment over short or large distances by turning either screw clockwise or counterclockwise, depending on the amount of adjustment needed. These types are often called “azimuthal” lenses because they allow you to view objects in any direction without changing the focal length of the lenses.
If the object appears cloudy, the lens’s focus must be changed. Try seeing a thing that is 10-20 yards away.
There are three types of focusing systems:
Center focus with diopter adjustment
Individual focus, in which each eyepiece is focused separately
Fixed focus, which is permanently prefocused for a striking distance of view.
The most typical type is the center-focusing binoculars. Most of the time, there is a separate diopter.
The most common type of binoculars is the center-focusing binoculars. They usually have a diopter adjustment knob beside the center-focus wheel. This adjustment is used to make up for the difference in how each of the viewer’s eyes sees the surrounding area.
The diopter adjustment is a scale with a plus or minus sign for the setting on the opposite of the zero markers. It might be on the opposite side of the eyepiece and adjusts the lens based on your eye’s needs. Some models might have a different function of the central focusing system, but it all depends on the model and where it lies.
In the case of Non-Diopter Focusing Side
By putting your hand or a lens cover, cover the front of the objective lens on the binocular side that does not have the diopter setting (the left side). The left side, which should be the diopter setting, focuses on a distant object by turning the center-focus wheel until the image of the object viewed becomes clear and sharp.
Diopter Setting Adjustment: How do you adjust binocular diopters?
Binocular diopters are the individual lenses that sit in front of each eye. You can use it to correct any vision problems caused by refractive errors, and these can be adjusted on a microscope or binoculars.
To adjust binocular diopters:
Take the glasses off and remove the center cover lens from one of the eyepieces (the one you want to adjust).
Look through your eyepiece at an object as close as possible without having it touch your face or nose so that you see two things simultaneously and focus on one while adjusting the other.
With your thumb, turn both pieces clockwise until they come into sharp focus with no blurriness (you will know when this happens because it will feel different).
To change the center-focus wheel setting, use the objective lens on the side with the diopter. Cover up the back of the lens, and that object should be in focus on the left eye. Then, use the diopter to get it sharp again.
Adjust the diopter to sharpen your images. When you can see things well, your diopter is not adjusted correctly. The process begins by finding the right setting for the left eye, then the right eye. If this process is reversed, you will never get perfect focus.
We recommend adjusting the focus in the following order: left, right, up, and down. This way, if your focus is off when you change the diopter setting in the opposite direction, you will at least have a better starting point than when you adjusted it one way.
How to adjust binoculars with double vision?
This term refers to the incorrect perception of additional images when viewing through binoculars or other vision-limiting devices. Great care should be exercised when adjusting binoculars with the double vision to ensure that adjustment does not worsen the issue. Any unnecessary strain on the eye’s muscles can potentially cause micro-perforations, leading to double vision.
When adjusting binoculars with double vision, the observer must ensure that along both horizontal and vertical axes, there are no tension spots; only when moving from side to side should any adjustments be applied toward increasing or decreasing magnification. It is also important not to adjust because this could result in either one or both eyes being immobile, which can cause even steeper anteroposterior displacement.
The following are the methods most commonly used to help combat double vision:
Addressing Vertical Bifocal Avoidance (aka Dyaneums ). Binoculars with this setting allude to their users so that they will be less likely to suffer from double vision when attempting double-vision correction for astigmatism or hyperopia. This can be done by covering the optics with a piece of cotton wool or tissue paper and applying some pressure to the eyes. This is better than using mobile binoculars because it reduces friction for both eye movements.
Using Parallel Bifocals (aka Zwiebacks ). In some instances, many people find that they have difficulty reading print when wearing bifocal lenses because there may be a residual disparity between each lens, making it difficult to distinguish between letters or, even worse, they may experience double vision between each lens, which confuses as to whether the lenses are reading 30/60 or 20/80.
To help reduce this incompatibility with bifocals there is a practice of using parallel prisms to aid better optics during viewing. Refracting prisms have particular benefits when used in conjunction with field glasses because although anisometropic individuals may not be able to work out exactly if they are using a negative or positive lens they will still have better optical relief, especially when the distance between each is approximately equal.
The more pressure one places on the left eye can induce parallel prismatic action, giving rise to a ‘crossed prism’ effect resulting in no side-to-side disparity during reading. Although using this method it becomes important that head movements are handled properly so as not to give rise to acuity loss.
By utilizing this method, it is only possible to obtain bifocal and not multifocal benefits, but with the advent of non-discriminatory lenses since 1989 users can now use both together if they so desire. And although most contact wearers need a large lens (between 9–15 diopters), field glasses can be designed in such a way that they are virtually unnoticeable.
How do you stop seeing doubles through binoculars?
If you are looking through binoculars and see double images, the first thing to do is take a break from them.
Another solution is to change the distance between the binoculars and the object you are trying to view. If you need a closer view, move closer and vice versa.
If none work, try wiping your lenses with a dry cloth or tissue. You may also need to adjust your eye alignment so that each eye sees one image instead of two images.
What are the reasons for binoculars going bad?
Binoculars can go bad for several reasons. The most common reason is that the lenses are fogged or dirty and need to be cleaned or replaced. Another possible cause is that the ocular lens has detached from the binocular body due to damage.
Unreasonable use of ultraviolet light: The lenses are fragile and susceptible to damage from UV light rays that can come from a sun lamp or the sun itself.
Excessive humidity: Too much moisture in the air can cause condensation on the lenses, which leads to mold growth and eventual decay.
Neglecting cleaning: It is important to clean your binoculars regularly as well as store them in a cool, dry place away from sources of heat and sunlight.
The manufacturer will usually cover if the binocular creates any damage within its guaranteed time as accidental damage.
How does adjusting a diopter in one eye affect the other eye’s image?
Adjusting a diopter in one eye affects the other eye’s image because it changes the distance between your eyes.
This is because the optic nerve sends signals to both eyes, but each signal travels at different speeds. So when you adjust your diopter in one eye, the optic nerve sends signals to both eyes at different speeds, so they will not be able to distinguish an image from each other.
Which way does a diopter move when turned?
You can adjust a diopter as a lens to focus the view through binoculars. When turning it, the diopter moves away from or towards your eye, depending on which way you turn it.
So basically, when adjusting binoculars, you will have to move the diopter in one direction or another, depending on which way you turn it.
What is the best way to focus binoculars with or without a diopter?
Focus the binoculars by using your thumb to rotate the objective lens ring. The magnification is increased when you are looking through the eyepiece, but it decreases when you are looking through the ocular.
The best way to focus binoculars with or without a diopter is:
Place one hand on each eyepiece and objective lens ring, respectively, then gently rotate them until they click into place.
Next, tilt both lenses upwards, so their barrels are parallel to each other and adjust them until they are perfectly focused on an object at least 10 feet away from you.
Is it possible to adjust binoculars with glasses?
Yes, it is possible to adjust binoculars with glasses.
First, put on your glasses and then use the strap around your head to tighten them as much as possible. Then loosen the strap and turn it around, so it goes over your head. The strap should now be in front of you instead of behind you. This will give you enough slack to adjust the binoculars with your glasses on comfortably.
Do you look through binoculars with both eyes?
No, it is recommended to look through binoculars with one eye at a time. This will ensure that both eyes stay focused on the same point and you don’t end up straining your neck or looking like a fool.
What happens when you look through binoculars backward?
When you look through binoculars backward, you can see the reverse of what you are seeing. So if you were to look at a tall building, you would see the shorter side of the building and not the top of it.
How to adjust vortex binoculars?
Vortex Binoculars are very precise regarding FOV and magnification, but they may be bulky to carry.
To adjust the angle of the binoculars, you will need to rotate them forwards or backward on their hinge.
If you look down at your Vortex Binocular, it should appear as a vertical line. Position the high-end of this line under your hand like an “L”. It’s easy to tell if you are aiming correctly or not by looking up from below.
If the viewing angle is too broad (appears lopsided), rotate the binoculars forward until they match roughly in height. They are entirely horizontal, where each image meets across axes on both glass surfaces.
If you’re aiming for axis correct, your view should appear very even in width and height across the binoculars’ viewing area. The two images of a star or faint object will “bug out” at various angles to each other because they do not sit symmetrically on either glass surface more than 15 degrees off-axis. Viewing angle too narrow: rotate down 15 degrees.
How to adjust the diopter on your Vortex binoculars?
The diopter adjustment on the ground glass of your binoculars will let you change how much the image seems to be in focus. This can help alleviate eye strain, increase visibility and compensate for eyeglasses or contact lenses that may not be clear.
You should adjust carefully and then check on the road. All RVV binoculars have a diopter adjustment that can also be performed with an eyeglass screwdriver, a fore-and-aft punch (or any object of similar length), and some good eyesight after adjusting the focus according to standard procedure.
Be sure not to damage or scratch your Vortex glass during this process!
An eyeglass screwdriver is needed to understand better how you move these tiny but essential parts. You will need to work out how far forward or aft you want the adjustment with this tool and then use a standard screwdriver to bring these associated tools together by sliding them into one another through their centers. Use your thumb on top of both screws (marked in red) but do not try to turn the head of either!
How to adjust Swarovski binoculars?
Adjusting Swarovski binoculars is not particularly difficult despite their high price tag and optical quality. Getting them into the perfect focus for your eyesight takes a few minutes.
There are many ways to adjust Swarovski binoculars. Some of the most common processes include:
First, remove the eyepiece covers from your Swarovski binoculars’ eyes by gently pulling them out with your fingers and hands until they click into place.
Next, turn each eyepiece fully counterclockwise until you feel it lock into place (it should be tight).
Turn each eye individually clockwise while holding down the power button simultaneously to ensure that they remain locked in place before proceeding to step 4 below.
Now adjust one eyepiece by turning it clockwise one-half or one full rotation at a time until you achieve your desired level of focus and brightness in both eyes (this will vary depending on how many settings you have on your Swarovski binoculars).
How to adjust binoculars for the right and left eyes?
To adjust binoculars for the right and left eyes, you need to do the following:
Adjust the objective lens of the binoculars by moving it in or out until the cross hairs are positioned on a distant object.
Adjust eye focus by adjusting eyepieces to a comfortable position that simultaneously provides clear vision through both lenses.
Align the eyepiece with their respective objective lenses so that they are parallel to each other and perpendicular to the ground at eye level when looking through them at infinity (parallel) or near point-of-view (perpendicular).

I am an enthusiastic student of optics, so I may be biased when I say that optics is one of the most critical fields. It doesn’t matter what type of optics you are talking about – optics for astronomy, medicine, engineering, or pleasure – all types are essential.
Table of Contents
Pingback: How to Fix Binoculars: With Double Vision (Infographic)
Pingback: Top 10 Things to Consider Before Buying Your First Set of Binoculars (Video Included)
Pingback: Can you bring binoculars to a concert? 7 Tips With Video