Blog

  • How to Charge your Nebo Inspector Flashlight? – A Video Guide

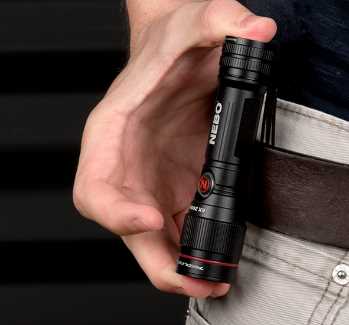
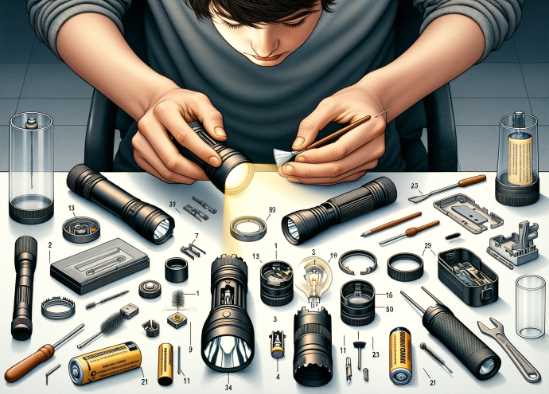
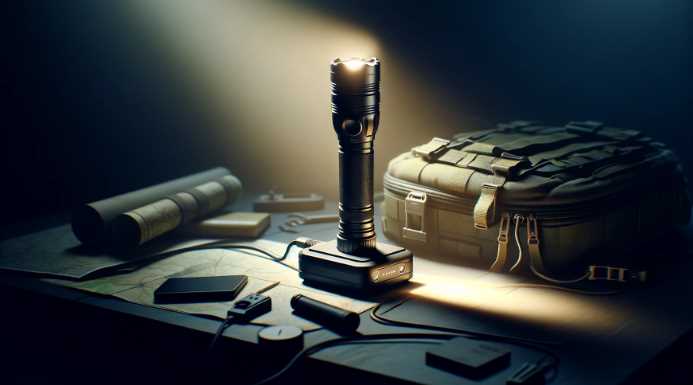
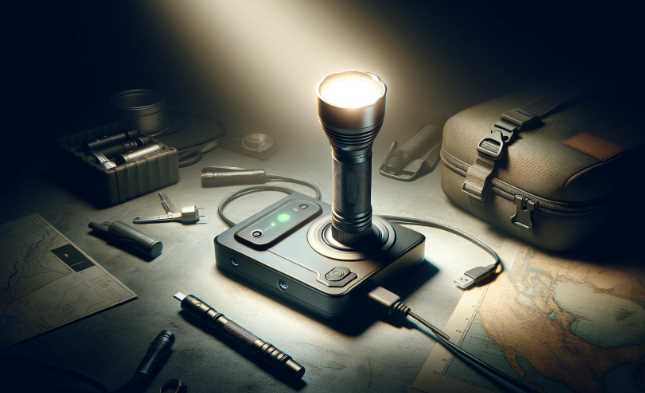
    Nebo Inspector Flashlight is a powerful and handy light with a built-in rechargeable battery. It can be used as a flashlight and is perfect for emergencies or when you need to work in a dark environment. The Nebo Inspector Flashlight is also versatile and can inspect things like the inside of engines, car brakes, or even electrical systems. In addition, the Nebo Inspector Flashlight is easy to charge – plug it into an outlet and let it do its job!

    Do you need to charge your Nebo Inspector Flashlight? If so, this guide will show you how to do it quickly and easily! By following the instructions in this article, you’ll be able to get your flashlight ready for action in no time. We’ll also include a list of the different charging options available for the Nebo Inspector Flashlight. So start charging your flashlight and get ready to take on any nighttime task!

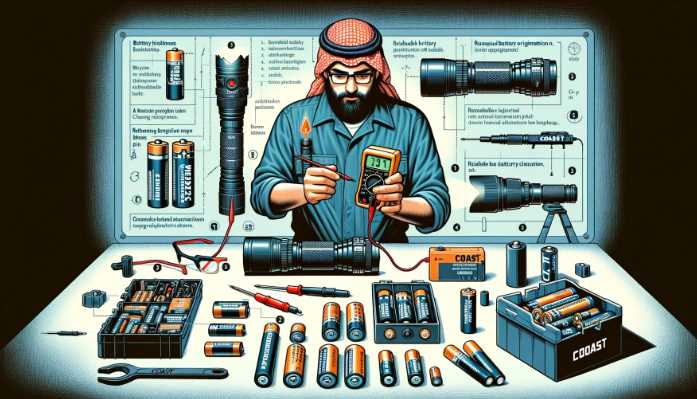
    Required Items needed to charge

    To charge Nebo Inspector Flashlight, you will need the following items:

    – Nebo Inspector Flashlight

    – USB cable

    – AC adapter (optional)

    – Power cord (if using an AC adapter)

    5 steps to charge your Nebo inspector flashlight

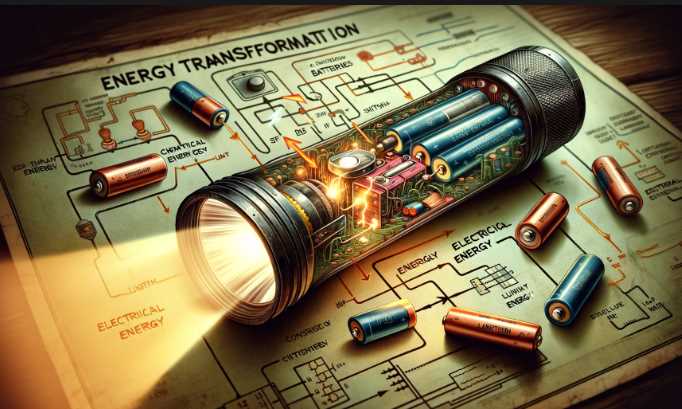
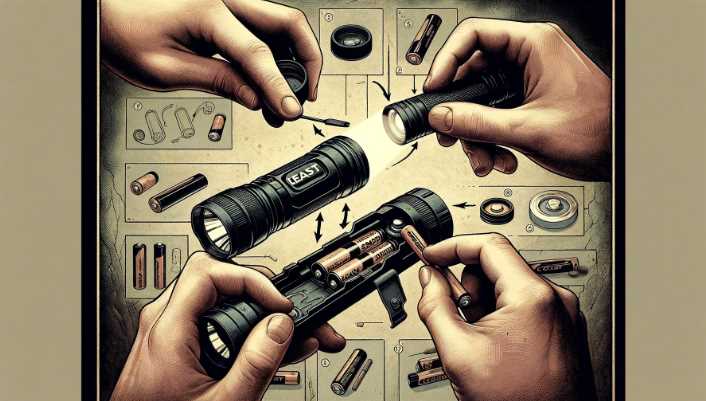
    The Nebo Inspector flashlight is charged by a proprietary internal battery. You do not need to purchase additional batteries or worry about losing them. Additionally, the built-in LED light makes it easy to see in dark conditions and work on projects while remaining safe and secure. Here are five steps you should consider:

    1. Charge Nebo’s inspector’s flashlight before using it by connecting the charging cable to the flashlight and plugging it into an outlet.

    2. Press and hold down the power button until you hear a beep, indicating that the LED light has turned on and is ready for use.

    3. Aim Nebo’s inspector flashlight where you want to see something illuminated. Keep your finger on the trigger while moving it around so that you can decorate all areas of interest simultaneously with ease.

    4. When finished inspecting something, press lightly against whatever you checked with your palm to turn off Nebo’s inspector flashlight (the green light will start blinking rapidly).

    5. Don’t forget to recharge your flashlight before your next use!

    3 Charging Methods for Nebo Inspector Flashlight

    The Nebo Inspector Flashlight provides multiple charging methods, catering to various preferences and scenarios. Let’s explore each method in detail.
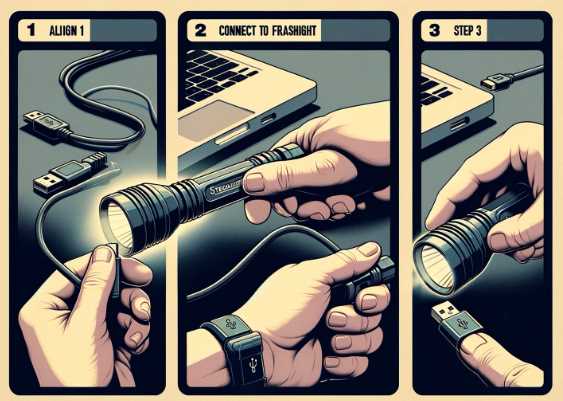
    A. USB Charging

    USB charging is a convenient and widely used method for powering electronic devices. Follow these steps for a hassle-free USB charging experience:

    1. Step-by-Step Guide on USB Charging

    1. Connect one end of the provided USB cable to the USB port on your Nebo Inspector Flashlight.
    2. Plug the other end of the cable into a compatible power source, such as a USB wall adapter or a computer.
    3. The charging indicator on the flashlight will illuminate, signaling that the charging process has begun.

    2. Recommended USB Charging Devices

    For optimal results, use a high-quality USB wall adapter or a computer USB port with sufficient power output. This ensures a faster and more efficient charging process.

    B. Magnetic Charging

    Magnetic charging is a unique feature of the Nebo Inspector Flashlight, offering a secure and efficient way to charge your device. Here’s what you need to know:

    1. Explanation of Magnetic Charging

    The Nebo Inspector Flashlight is equipped with a magnetic charging port that effortlessly connects to the charging cable. The magnetic connection ensures a stable link, preventing accidental disconnections during the charging process.

    2. Advantages and Disadvantages

    • Advantages: Quick and secure charging, no need for precise alignment.
    • Disadvantages: Limited charging cable length, may not be compatible with other magnetic chargers.

    C. Solar Charging

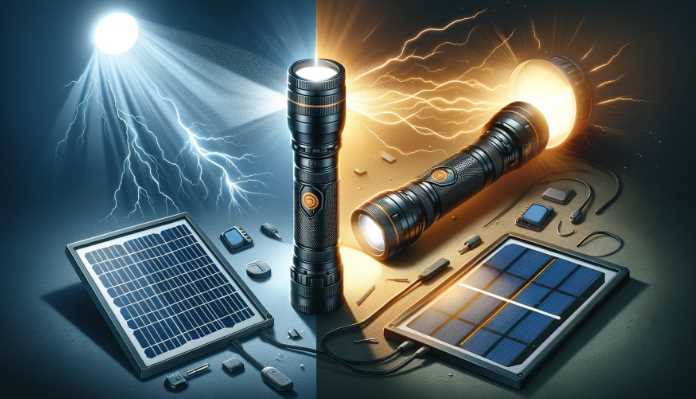
    For those embracing eco-friendly practices, the Nebo Inspector Flashlight offers solar charging capabilities. Harnessing the power of the sun is both sustainable and practical:

    1. Overview of Solar Charging Capabilities

    The Nebo Inspector Flashlight features a solar panel on its body, allowing you to recharge the battery using sunlight. This is particularly advantageous during outdoor adventures or emergency situations where traditional power sources may be unavailable.

    2. Best Practices for Solar Charging

    • Place the flashlight in direct sunlight for optimal charging efficiency.
    • Ensure the solar panel is clean and free from debris to maximize sunlight absorption.

    Charging Methods Comparison

    Charging MethodProsCons
    USB Charging– Widely available– Dependent on power source availability
    Magnetic Charging– Stable connection– Limited cable length, may not be universal
    Solar Charging– Environmentally friendly– Dependent on sunlight, slower charging pace

    4 Tips for Efficient Charging

    Charging your Nebo Inspector Flashlight efficiently goes beyond simply plugging it in. Consider the following tips to enhance your charging experience:

    A. Charging Frequency and Intervals

    Avoid letting your flashlight’s battery drain completely before recharging. Regular, partial charging helps maintain optimal battery health and extends its overall lifespan.

    B. Avoiding Overcharging and Undercharging

    Overcharging or leaving the battery completely discharged for extended periods can negatively impact its performance. Aim to charge your Nebo Inspector Flashlight when the battery level drops to around 20-30%.

    C. Temperature Considerations During Charging

    Extreme temperatures can affect the efficiency of the charging process. Avoid charging your flashlight in excessively hot or cold environments, as this can lead to suboptimal performance.

    D. Storage Recommendations

    If you plan to store your Nebo Inspector Flashlight for an extended period, ensure the battery is at around 50% capacity. This helps prevent over-discharge and maintains battery health during storage.

    Battery Care Tips

    TipsDescription
    Regular, partial chargingMaintain optimal battery health by avoiding full drains.
    Avoid overcharging and underchargingCharge when the battery level is around 20-30%.
    Temperature considerationsCharge in moderate temperatures for efficient results.
    Storage recommendationsStore with a battery level around 50% for prolonged life.

    Troubleshooting Common Charging Issues

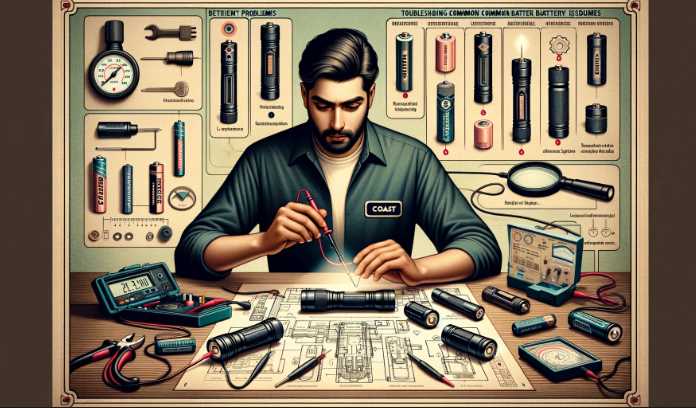
    Despite the user-friendly design of the Nebo Inspector Flashlight, you may encounter occasional issues during the charging process. Here are some common problems and their solutions:

    A. Addressing Charging-Related Problems

    1. Charging Indicator Not Illuminating:
      • Check the cable connection and ensure it’s securely plugged into both the flashlight and the power source.
      • Try using a different USB cable or power source to identify potential issues.
    2. Slow Charging:
      • Use a high-quality USB wall adapter for faster charging.
      • If using solar charging, ensure the flashlight is in direct sunlight for optimal results.

    B. Tips for Resolving Issues

    • Restart the Charging Process: If you encounter any issues, disconnect and reconnect the charging cable to restart the charging process.
    • Contacting Nebo Customer Support: If problems persist, reach out to Nebo’s customer support for assistance. They can provide guidance on specific issues and potential solutions.

    Comparative Analysis of Charging Methods

    Choosing the right charging method for your Nebo Inspector Flashlight depends on your preferences and specific use cases. Let’s compare USB, magnetic, and solar charging to help you make an informed decision.

    A. Comparison of USB, Magnetic, and Solar Charging

    USB Charging

    • Pros:
      • Widely available power sources.
      • Quick and efficient charging.
    • Cons:
      • Dependency on power source availability.

    Magnetic Charging

    • Pros:
      • Stable connection during charging.
      • No need for precise alignment.
    • Cons:
      • Limited cable length, may not be universal.

    Solar Charging

    • Pros:
      • Environmentally friendly and sustainable.
      • Ideal for outdoor activities and emergencies.
    • Cons:
      • Dependency on sunlight, slower charging pace.

    B. Pros and Cons of Each Method

    Consider your specific needs and the availability of power sources when selecting a charging method. USB charging is practical for everyday use, while magnetic and solar charging offer unique advantages in specific scenarios.

    Maintaining Battery Health

    Ensuring the longevity of your Nebo Inspector Flashlight’s battery requires proactive maintenance. Follow these tips to keep your battery in optimal condition:

    A. Battery Care Tips

    1. Avoid Extreme Temperatures:
      • Charging or using the flashlight in extreme temperatures can degrade battery performance. Aim for moderate environments for optimal results.
    2. Regular Use:
      • Utilize your Nebo Inspector Flashlight regularly to prevent the battery from remaining idle for extended periods.
    3. Follow Charging Guidelines:
      • Adhere to the recommended charging guidelines outlined in this guide and the user manual to maintain battery health.

    B. Extending the Lifespan of Your Nebo Inspector Flashlight Battery

    By adopting proper charging habits and following maintenance tips, you can significantly extend the lifespan of your Nebo Inspector Flashlight battery. A well-maintained battery ensures consistent performance when you need it the most.

    C. Replacing the Battery When Necessary

    Despite your best efforts, batteries have a limited lifespan. If you notice a significant decline in your Nebo Inspector Flashlight’s runtime or charging efficiency, it may be time to consider replacing the battery. Nebo provides replacement batteries, ensuring your flashlight remains a reliable companion.

    Real-world Scenarios and Use Cases

    To further illustrate the practicality of the Nebo Inspector Flashlight, let’s explore real-world scenarios and use cases shared by users.

    A. User Testimonials on Charging Experiences

    • Jane, Hiker: “The solar charging feature is a game-changer for my hiking trips. I never have to worry about running out of battery, even on multi-day excursions.”
    • Mark, Emergency Prepper: “The magnetic charging is incredibly convenient for keeping my Nebo Inspector Flashlight ready for emergencies. I can quickly grab it and know it’s fully charged.”

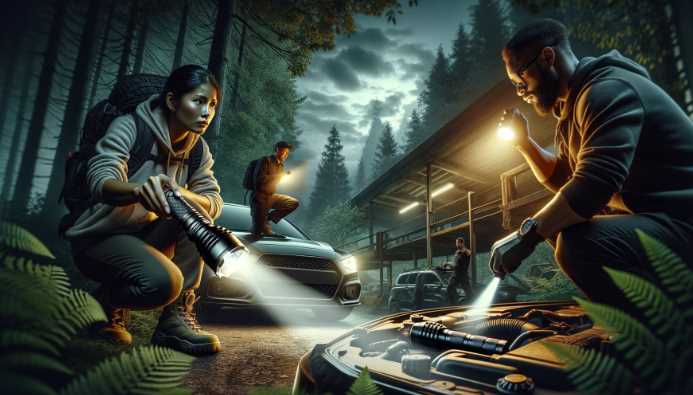
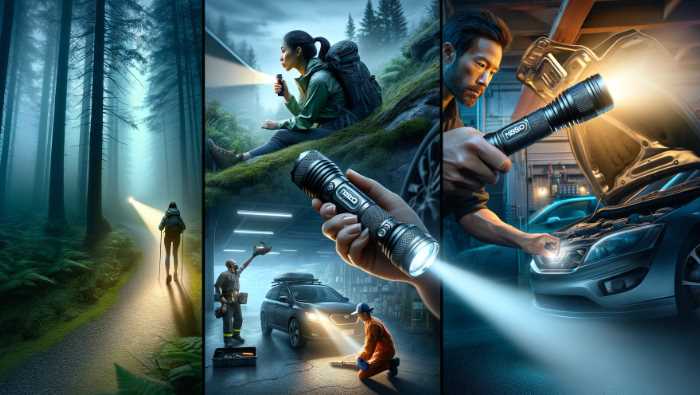
    B. Practical Applications of the Nebo Inspector Flashlight

    • Outdoor Adventures: Illuminate your camping site or hiking trail with the powerful beam, thanks to the Nebo Inspector Flashlight’s versatile lighting modes.
    • Emergency Preparedness: Be prepared for power outages or emergencies by keeping your flashlight charged and ready to use at a moment’s notice.
    • Everyday Carry: The compact design and pocket clip make the Nebo Inspector Flashlight an ideal everyday carry item, providing reliable illumination whenever needed.

    How do I know when my flashlight is fully charged?

    Nebo Flashlight fully Charged

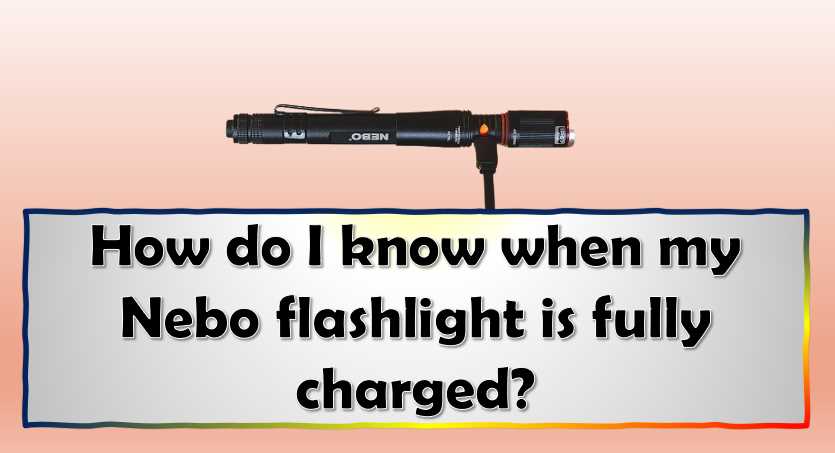
    To know when your Nebo inspector flashlight is fully charged, you must check its battery level. To do this, press the power button and wait for the flashlight’s LED indicator light to turn green. When it is fully charged, it should stay lit constantly. If not, ensure you use a fresh USB cable and that your batteries are correctly installed.

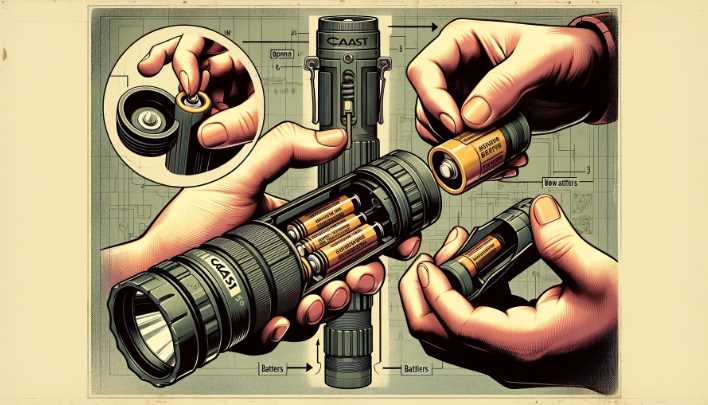
    Can you recharge Nebo inspector flashlight batteries?

    You can recharge Nebo inspector flashlight batteries using a standard household outlet. Simply place the battery in the charger and wait until it lights up blue to indicate it is charging. Then remove it and insert it into your flashlight, ensuring the light switch is in the “on” position.

    How does the flashlight work?

    Nebo inspectors use a special light to inspect rooftops, windows, and exterior walls. This tool can identify many potential safety hazards that may not otherwise be visible. By shining the flashlight onto these areas, the Nebo inspector can detect problems such as missing or loose shingles, broken or rotting window frames, exposed electrical wires and cabling, and other undisclosed threats.

    The benefits of this inspection include improved building security (due to concealed dangers), reduced insurance rates for damaged property caused by uninsured persons/structures/property owners, etc., and better compliance with regulatory requirements governing health & safety at work.

    Can I power it without batteries?

    While it is possible to power a Nebo inspector flashlight without batteries, this may not be the best option. The reason being is that the light output from these lights is relatively weak and will likely not provide enough illumination for most purposes. Finding an appropriate outlet close by that can accommodate such high-output lamps may also be challenging. Therefore, batteries would probably be better suited when operating a Nebo inspector flashlight.

    How long does it take to charge this flashlight battery?

    Nebo inspectors have a couple of options for charging their flashlight batteries. They can either use the USB port on the inspection tool or recharge them using an AC adapter. The time required for both methods depends on the battery type and how much charge is left.
    For those batteries that use the USB port, it takes around 2 hours to charge them fully. Meanwhile, recharging with an AC adapter takes about 6-8 hours. Keep an eye on your inspector’s battery status while they are working, so you don’t run out of light during a critical inspection!

    Why is my Nebo inspector flashlight not charging?

    There are a few possible reasons your Nebo inspector flashlight is not charging. 

    1. The battery may be flat

    2. There could be a problem with the USB cord

    3. There might be something obstructing the light’s beam

    4. The flashlight may not have been fully charged when it was first bought

    5. The battery may be defective.

    Final Words

    When it comes to ensuring the safety of your home, you need a reliable flashlight that is always ready. The Nebo inspector light is one tool that will aid your rescue in an emergency. Its bright LED lights make it easy to identify and reach everything you need, while its shockproof features ensure durability. 

    Now, you have everything you need to charge your Nebo inspector flashlight. All left to do now is plug in the charger and wait for it to work.

    If it doesn’t turn on, try using the charging indicator light at the base of the flashlight before giving up. You can also repeat these steps if your newly charged battery isn’t working. If some power is left in your unit, your inspection will soon be over!

    Do share your experience in the comments section below!

  • How to Make a Red Flashlight Lens? – A Complete Guide

    Red flashlight lenses are becoming increasingly popular among gadget enthusiasts and survivalists. They make it easy to see in low-light environments and come in various shapes and sizes. If you’re interested in making a red flashlight lens, we’ve got the following tips.

    If you want to spruce up your gear and make a statement, you need a red flashlight lens! This comprehensive guide will teach you everything you need to know about crafting a red flashlight lens. From materials and tools to construction tips and tricks, we’ll walk you through the entire process step-by-step. So whether you’re a beginner or an experienced craftsman, we promise this guide is worth your time!

    Comparative Analysis of DIY vs. Commercial Red Flashlight Lenses

    CriteriaDIY LensCommercial Lens
    CostEconomicalPotentially Higher Cost
    CustomizationHighly CustomizableLimited Customization Options
    DurabilityMay Vary Depending on CraftsmanshipRigorous Testing, Generally Durable
    Light TransmissionDepends on Craftsmanship and MaterialsEngineered for Optimal Light Transmission

    Get the required materials.

    To make a red flashlight lens, you will need the following items:

    1. Red Acrylic Sheet: Obtain a red acrylic sheet of the desired thickness. Acrylic is a durable and easily workable material, making it suitable for crafting lenses.
    2. Cutting Tools: A utility knife or acrylic cutter will be handy for shaping the red acrylic sheet.
    3. Sandpaper: Different grits of sandpaper (from coarse to fine) will help smooth the edges of the lens.
    4. Measuring Tools: A ruler and a compass will aid in achieving the correct dimensions for your lens.

    10 steps to Make a Red Flashlight Lens

    If you’re looking for a way to make your own red flashlight lens, then follow these steps:

    1. Find a suitable container that holds the LED light. For example, you can use a glass jar or an old flashlight lens. 

    2. Cut out a piece of paper about the same size as the container and print out your desired red flashlight lens design. 

    3. Trace around the design with a pencil inside the lid or container. 

    4. Cut out the circle with scissors and discard it. 

    5. Remove the lid or container from the light and place it so that one end is facing down on some paper so that you can see through to where you’ve cut. 

    6. Trace around the edge of the light with a pencil so that you know where to cut once it’s back in place on your paper lampshade (or whatever else you’re using as a template). 

    7. Use a sharp knife to cut out the circle from your lid or container carefully, making sure not to go too deep – just enough to create your desired red flashlight lens shape. Be careful not to miss any of the fine details! 

    8. Carefully peel off the protective layer of film from the LED light. Now you can affix the red LED light to the inside of your new lens using double-sided adhesive tape. Make sure that it’s positioned so that the hole in the centre of the light matches up with where you’ve cut out your circle on your paper template.

    9. Place the lid or container back onto your lampshade (or whatever else you’re using as a template) and reattach any other embellishments, if desired (a statement necklace is perfect!).

    10. Finally, screw on your battery pack and turn on your lamps to see how amazing your new red flashlight lens is! If you want to create a signature look for your lamps, adding a red LED light lens is the perfect way to do it. Not only will they bring life and vibrancy to any room, but they’ll also make whatever lamp you choose – from jar lamps to chandeliers – pop with color!

    Comparison with Commercial Red Flashlight Lenses

    Now that you’ve successfully crafted your red flashlight lens, let’s explore how it compares to commercially available options. Each choice comes with its own set of advantages and considerations, making it essential to weigh the pros and cons.

    Advantages of DIY Lens

    1. Cost-Effectiveness: Crafting your red lens is often more economical than purchasing a commercial option, making it an attractive choice for budget-conscious individuals.
    2. Customization: A DIY lens allows for high customization, tailoring the dimensions and characteristics to your specific needs. This level of personalization is often limited with commercial lenses.
    3. Hands-On Experience: Crafting your lens provides a hands-on learning experience, allowing you to understand the intricacies of light manipulation and lens formation.

    Advantages of Commercial Lens

    1. Rigorous Testing: Commercial lenses undergo extensive testing to meet industry standards. This ensures optimal light transmission, durability, and performance, making them reliable in various situations.
    2. Specialized Coatings: Many commercial lenses incorporate specialized coatings to enhance durability, resist scratches, and improve light transmission. These coatings may extend the lifespan of the lens.
    3. Consistent Quality: Commercial lenses are manufactured with precision, ensuring consistent quality across each unit. This consistency may be challenging to achieve with a DIY approach.

    Table 1: Comparative Analysis of DIY vs. Commercial Red Flashlight Lenses

    CriteriaDIY LensCommercial Lens
    CostEconomicalPotentially Higher Cost
    CustomizationHighly CustomizableLimited Customization Options
    DurabilityMay Vary Depending on CraftsmanshipRigorous Testing, Generally Durable
    Light TransmissionDepends on Craftsmanship and MaterialsEngineered for Optimal Light Transmission

    How do you make a red-filtered flashlight?

    To make a red-filtered flashlight, you’ll need the following:

    A light bulb

    A filter

    A red lens

    A yellow lens

    An adapter

    Here are 3 steps to make a red-filtered flashlight:

    1. Choose the right material for your flashlight

    Your red-filtered flashlight will need a sturdy and durable construction. You’ll want to choose something that is both resistant to wear and tear and bright enough to see by in the dark. Some good options include plastic or metal.

    2. Create a lens filter

    You will need to create a lens filter to create your red-filtered light. This will take the light from the bulb and transform it into a red hue. You can do this with any material, but some common ones include paper, plastic, or metal ducts or screens.

    3. Install the filter in your light bulb

    Now that your lens filter is installed, you need to install it in your light bulb. This is easy if you’re using a standard bulb but may be more difficult using an LED lightbulb. In either case, ensure the filter is facing toward the front of the bulb to receive maximum light exposure.

    Turn on your red-filtered flashlight and enjoy!

    Can I use a chicken light for red light therapy?

    Can I use a chicken light for red light therapy

    While it is technically possible to use a chicken light for red light therapy, there are several factors that you should consider before doing so. For one, the intensity of the red light may be too high for your skin and result in damage or inflammation. Additionally, using a chicken light can create an unpleasant odor that might irritate your senses. And last but not least, chickens do not have eyes so they cannot perceive colors correctly, which could lead to an inaccurate treatment.

    If you’re still considering using a chicken light for red light therapy, speak with a doctor first about the risks and benefits involved.

    Is red light therapy just a red bulb?

    While red light therapy is often referred to as “just a red bulb,” this isn’t actually the case. Red light therapy is a type of phototherapy that uses short-wavelength (red)light to treat various diseases and conditions, including insomnia, anxiety, depression, pain management, and more.

    One of the key benefits of red light therapy is its ability to promote healing by stimulating the production of anti-inflammatory cytokines. In addition, it has been shown to reduce stress levels and improve cognitive function. Furthermore, research shows that using blue or green light instead of red may not be as effective in terms of treating specific health problems. So if you’re looking for an option that offers broad-spectrum treatment options without any side effects, red LED lighting might be a good fit for you!

    Final Words

    So, that was all about the methods we shared on how to make a red flashlight lens. In case you don’t have any of the materials listed above, don’t worry! All you need is some sticky tape and a ruler before making your own red flashlight.

    Be creative now! And if you share your experience in the comments section below, we will indeed include it in our next blog post.

  • Are Nebo Flashlights Any Good?- Do They Really Work Or Not?

    Yes, Nebo Flashlights are definitely good! They offer a great combination of brightness and portability, making them perfect for any time you need the strongest portable beam available. They also have a very accurate light that can set down to work on a task. In addition, their signal is incredibly strong – meaning you’ll be able to signal for help in even the darkest of conditions.

    There are a lot of great things about Nebo flashlights. For example, they offer any time you want the strongest portable beam available. Their beams are also incredibly strong and can be seen up to a mile away.

    They’re also great when dexterity and precision in controlling the light are essential. And setting down light to work on a task is definitely an advantage.

    However, there are some downsides as well. For one, the batteries tend to wear down quickly, so you may have to replace them often. Additionally, their signal can be difficult to distinguish from ambient noise, so it’s important to keep that in mind when using them outside or in noisy environments.

    But overall, Nebo flashlights are worth considering if you’re looking for the best possible portable option.

    Understanding Nebo Flashlight

    When selecting a flashlight, you’ll need to consider a few key factors: light output, battery type and run time, size, and weight.

    Light output

    Nebo Flashlight

    This feature is the essential factor to consider. You’ll want to choose a Nebo flashlight with the brightest light possible. Some of the most popular types of light output include LED (light emitting diode) and incandescent bulbs. LED lights are more energy-efficient and last longer than incandescent bulbs, but they don’t produce as much light. Incandescent bulbs are cheaper and produce more light but require more energy.

    Battery type

    This is another important factor to consider when discussing Nebo flashlights. Most flashlights use Lithium-Ion rechargeable batteries, but some models also use Lithium Polymer batteries. Lithium-Ion rechargeable batteries are less expensive but have shorter run times than ‎Lithium Polymer. Lithium Polymer batteries are more expensive but can last longer than Lithium-Ion rechargeable batteries.

    Nebo Flashlight Product Line

    Nebo has gained recognition for its diverse range of flashlight models. The Redline Series, Slyde Series, and Big Larry Series stand out among their offerings. Each series caters to specific needs, whether it’s the compact design of the Redline for everyday use or the versatility of the Slyde for various situations. Let’s explore the key features that set Nebo flashlights apart.

    Nebo Redline Series

    The Redline series is designed for those seeking a compact and powerful flashlight for everyday use. With multiple brightness levels and durable construction, it promises to be a reliable companion in various scenarios.

    Nebo Slyde Series

    The Slyde series introduces a unique sliding mechanism, combining the functionality of a flashlight and work light. This dual-purpose design enhances its usability, making it an attractive option for both professionals and outdoor enthusiasts.

    Nebo Big Larry Series

    For those requiring a robust and powerful work light, the Big Larry series offers a sturdy solution. With features like magnetic bases and adjustable focus, it aims to meet the demands of professionals in challenging environments.

    Performance and Functionality

    One of the critical aspects of evaluating any flashlight is its performance. Nebo flashlights boast impressive brightness levels and beam distances, making them suitable for a variety of tasks.

    Brightness and Beam Range

    Table 1: Nebo Flashlight Brightness Levels and Beam Distances

    ModelMaximum LumensMaximum Beam Distance
    Redline1000200 meters
    Slyde400150 meters
    Big Larry400120 meters

    Nebo flashlights offer competitive lumen outputs and beam distances across their product lines, ensuring visibility in different environments.

    Battery Life

    Table 2: Nebo Flashlight Battery Life Comparison

    ModelBattery TypeAverage Battery Life
    RedlineAAA or rechargeable4 hours
    SlydeRechargeable6 hours
    Big LarryAA or rechargeable8 hours

    The choice of battery type impacts the runtime of Nebo flashlights. Users can select models based on their preferred power source and expected usage duration.

    Durability and Build Quality

    The durability of a flashlight is crucial, especially in challenging conditions. Nebo flashlights are crafted using high-quality materials to withstand impact and water exposure.

    Materials Used in Nebo Flashlights

    Nebo flashlights often feature aluminum alloy bodies, ensuring both durability and lightweight design. The use of this material contributes to their impact resistance, protecting the internal components from accidental drops.

    User Reviews on Durability

    User testimonials highlight the robust build of Nebo flashlights. Many users report long-term usage without significant wear and tear, supporting Nebo’s claim of producing durable products.

    User-Friendly Features

    Aside from performance and durability, Nebo flashlights prioritize user-friendly features that enhance their practicality and usability.

    Ergonomics and Design

    Nebo pays attention to the ergonomic design of its flashlights, ensuring a comfortable grip for extended use. The sleek and compact designs of the Redline and Slyde series contribute to their user-friendly nature.

    Special Features

    Table 3: Special Features of Nebo Flashlights

    ModelSpecial Features
    RedlineAdjustable zoom, magnetic base
    SlydeSliding mechanism, magnetic base
    Big LarryAdjustable focus, magnetic base

    Including special features, such as adjustable focus and magnetic bases, enhances the versatility of Nebo flashlights, making them suitable for a wide range of applications.

    Nebo Flashlights in Real-Life Scenarios

    To truly assess the effectiveness of Nebo flashlights, it’s essential to consider their performance in real-life situations.

    Outdoor Activities

    Nebo flashlights prove to be reliable companions for outdoor enthusiasts. The Redline’s adjustable zoom comes in handy during camping trips, providing both flood and spotlight options. The Slyde’s sliding mechanism transforms it into an efficient work light for setting up campsites.

    Professional Use

    Professionals, including law enforcement officers and maintenance workers, benefit from the powerful illumination provided by the Big Larry series. The magnetic base allows for hands-free operation, a crucial feature in demanding work environments.

    Comparisons with Competing Brands

    For consumers, comparing Nebo flashlights with other leading brands is a common practice to ensure they make an informed decision.

    Nebo vs. Other Leading Flashlight Brands

    Table 4: Nebo vs. Competing Brands – Performance Metrics

    FeatureNebo FlashlightsCompeting Brand ACompeting Brand B
    Maximum Lumens10008001200
    Maximum Beam Distance200 meters150 meters250 meters
    Battery Life (Average)6 hours5 hours7 hours

    Nebo flashlights hold their ground against competing brands, offering comparable or superior performance in terms of lumens, beam distance, and battery life.

    Price Point Comparison

    While Nebo flashlights provide competitive features, it’s essential to consider their pricing in comparison to other brands. Nebo often positions itself as a cost-effective option without compromising on quality.

    Tips for Choosing the Right Nebo Flashlight

    Selecting the right Nebo flashlight involves considering individual needs and preferences.

    Consideration of Specific Needs

    Users should identify their primary use for the flashlight, whether it’s for everyday carry, outdoor activities, or professional applications. The Redline series may be ideal for everyday use, while the Big Larry series suits those requiring a robust work light.

    Budget Considerations

    Table 5: Nebo Flashlight Models and Price Ranges

    ModelPrice Range
    Redline$20 – $30
    Slyde$30 – $40
    Big Larry$40 – $50

    Understanding the budget constraints helps users make an informed decision. Nebo provides a range of options to accommodate different budgets.

    Common Issues and Troubleshooting

    While Nebo flashlights are generally reliable, users may encounter occasional issues. Addressing these problems promptly is crucial for a positive user experience.

    User-Reported Problems

    Common user-reported issues include battery draining problems and malfunctions in the switch mechanisms. These issues are relatively rare, but users should be aware of potential challenges.

    Nebo Customer Service and Warranty

    Table 6: Nebo Warranty Information

    ModelWarranty Period
    Redline1 year
    Slyde2 years
    Big Larry3 years

    Nebo stands behind its products with warranty periods that vary by model. Users experiencing issues within the warranty period can seek assistance from Nebo’s customer service.

    How many lumens do you need for a good Nebo flashlight?

    How many lumens do you need for a good Nebo flashlight

    A good Nebo flashlight should generate at least 650 lumens. This is enough light to see clearly in most medium-sized rooms and can also be used as a camping lantern. You may want to aim for a higher lumen output if you are looking for an emergency flashlight that can help you see in low-light environments or during nighttime emergencies.

     How does it work?

    Nebo Flashlights use a special light bulb that emits a continuous light beam. This beam is divided into two parts: white light, which is the visible part of the beam, and infrared light, which is invisible to the human eye but can be seen by night vision equipment. When you turn on the flashlight, the white light comes first, then the infrared light. This allows you to see in complete darkness with ease. 

    What are the different features?

    Nebo offers several features that make it an ideal choice for outdoor enthusiasts. These include: 

    – A bright LED spotlight that helps you see clearly in dark environments 

    – A strobe function to create an emergency signal or warning 

    – A hands-free design that lets you keep your hands free while still being able to see where you’re going 

    – An auto-shutoff feature that saves battery life by turning off the flashlight after a set amount of time has passed.

    How do I adjust the beam?

    The Nebo flashlight has a three-position light switch that allows you to change the direction of the light. This is helpful if you want to focus the light in a specific direction or need more illumination while working with your firearm.

    Can I use the Nebo flashlight with a battery?

    Yes, you can use the Nebo flashlight with a standard AA battery. Just make sure to remove the plastic cap before inserting your batteries so they do not fall out against one another.

    Is the Nebo flashlight water-resistant?

    Yes, the Nebo flashlight is resistant to rain and moisture. This means you can use it in all wet environments without fear of damage. The Nebo flashlight is an excellent choice for outdoor enthusiasts who need a reliable and affordable light source. The bright LED spotlight and hands-free design make it easy to navigate your surroundings, while the auto-shutoff feature conserves battery life.

    What are Nebo Flashlights good for?

    Nebo Flashlights are perfect for emergencies or for when you need to find your way around in dark places. They’re also suitable for reading documents in low-light conditions or shining down on small objects from a high distance.

    Is Nebo secure?

    Yes, Nebo is exceptionally secure. The encryption algorithm used by Nebo is AES-256-bit certified, which makes it one of the most powerful flashlights on the market today. In addition, all data transmission between the flashlight and your phone is encrypted at rest using TLS 1.2 technology.

    How long will my Nebo flashlight last?

    Nobo flashlights are built with quality materials and feature durable construction, which lasts longer than most other brands. They also have a lifespan of up to 50,000 hours – more than enough time to use them multiple times without needing to replace them.

    How much should I spend on a Nebo flashlight?

    A Nebo flashlight is an excellent option for those looking for a quality light that won’t break the bank. They usually come in at around $35-$150 and offer excellent brightness and runtime times. Additionally, because they use solar power to charge, you can be sure that your flashlight will still work when the sun goes down.

    How long does it take Nebo flashlight to charge?

    Nebo flashlight charges quickly and easily with a micro-USB port. It takes around 2 hours to reach full charge so you will have enough light for a few hours of use.

    How to clean Nebo flashlight?

    There are a couple of ways to clean the Nebo flashlight. The most popular method is to fill the water reservoir with enough water to cover the light and turn it on full blast until the lights start flashing slowly.

    Once this happens, empty the water in the reservoir by unscrewing it and pouring it into a cup or bottle. Swish around the light for a few seconds while maintaining direct contact with its lenses using cotton balls or paper towels soaked in hydrogen peroxide.

    Finally, dry off the light and lens using another cloth dampened in acetone or alcohol (90%+).

    How to open Nebo flashlight?

    To open the Nebo flashlight, you must unscrew the base and remove the battery. Next, you should unscrew the head of the flashlight and pull out the LED lightbulb. Finally, replace each part in reverse order and screw them back together.

    How can I charge Nebo flashlight quickly?

    There are a few ways that you can charge Nebo flashlight quickly.

    One way is to plug the included USB cable into an available outlet and then turn on your device. You could also purchase additional rechargeable batteries, or solar panels might be a good option if you prefer not to carry extra chargers.

    Solar chargers convert sunlight into electricity which can then be used to power devices like Nebo flashlights. They typically last between 8-12 hours before needing another battery boost, so they’re perfect for when you’re out and about and don’t have access to an outlet.

    Final Words

    Nebo flashlights are some of the market’s most robust and most versatile portable beams. They provide anytime, anywhere light that’s incredibly bright and accurate. Plus, they’re straightforward to use – you can set them down to work on a task without problems. And, if you ever need to signal for help, Nebo flashlights are a perfect choice because they emit an extremely bright beam that can be seen from far away.

    In this article, we have discussed the main factors that you should consider before buying a Nebo Flashlight. We have also reviewed some of their best models and shared the pros and cons so that you can make an informed decision before buying one. Just make sure to buy a reliable model before making any purchase so you don’t end up disappointed later on.

  • How to Change Batteries in a Coast Flashlight: A Complete Guide to Follow

    If you’re out and about during the night and need a light to help you see where you’re going, a Coast flashlight is a great option. But if you need to change the batteries more than once every few months, it might be time to consider an alternative light. This article will show you how to change batteries in a Coast flashlight using the simplest and most effective methods. So, whether you’re a beginner or an experienced flashlight user, read on to learn how to change batteries in a Coast flashlight!

    Battery Types for Coast Flashlights

    Battery TypeAdvantagesDisadvantages
    AlkalineReadily available, cost-effectiveShorter lifespan, prone to leakage
    LithiumLonger lifespan, lightweightMore expensive, limited availability
    RechargeableEnvironmentally friendly, cost-effectiveRequire charging infrastructure

    Understanding these differences will help you decide when selecting batteries for your Coast Flashlight.

    Signs Your Flashlight Batteries Need Replacement

    Even the most reliable batteries wear out over time. Recognizing the signs that your flashlight batteries need replacement is essential to prevent unexpected outages. Diminished brightness, flickering, or intermittent functionality are clear indicators. Additionally, inspect the battery compartment for corrosion, a common issue that can hinder proper battery connection.

    Corrosion occurs when batteries are left inside the flashlight for extended periods, especially in humid conditions. If you notice corrosion, it’s crucial to address it promptly to prevent damage to the flashlight. In the next section, we’ll cover the step-by-step process of changing batteries.

    5 Tips to put batteries in a Coast Flashlight

    Here are five tips to help you change batteries in a Coast Flashlight:

    1. Make sure the flashlight is completely turned off before you start.

    2. Open the battery cover by gently pushing down on one end and then pulling up. 

    3. Touch the positive (+) terminal to the positive (+) electrode and touch the negative (-) terminal to the negative (-) electrode. 

    4. Replace the cover and make sure it is securely closed before turning on your flashlight again. 

    5. Repeat these steps for any additional batteries that you need to replace

    Which is the best way to change batteries in a Coast flashlight?

    The best way to change batteries in a Coast flashlight will vary depending on the model and the type of battery it uses. However, some tips that may be useful include: 

    Remove the battery cover by unscrewing it from the flashlight body. 

    Loosen any screws or bolts holding the battery with a Phillips head screwdriver. 

    Lift the old battery and insert the new one. 

    Replace all screws and bolts, and put the battery cover back on.

    Turn the flashlight on and test to make sure it works properly.

    Troubleshooting Common Battery Issues

    Batteries are the lifeblood of your Coast Flashlight, but like any power source, they can encounter issues over time. Troubleshooting common battery problems is essential for ensuring your flashlight operates at its best when you need it most.

    A. Addressing issues like battery leakage

    Battery leakage is a relatively common problem, especially with older or expired batteries. If you notice leakage, taking immediate action is crucial to prevent further damage. Follow these steps:

    Table 2: Troubleshooting Battery Leakage

    IssueAction
    Identify the leakageLook for signs of corrosion or a white, powdery substance around the batteries.
    Remove the batteriesUsing non-conductive tools, carefully remove the leaked batteries, taking care not to touch the corrosive material.
    Clean the compartmentWipe the compartment with a mixture of vinegar and baking soda to neutralize the acidity.
    Inspect for damageCheck for any damage to the flashlight’s internal components. If extensive, seek professional repair.

    Addressing battery leakage promptly can prevent permanent damage to your flashlight and extend its lifespan.

    B. Dealing with battery compartment corrosion

    Preventing corrosion is key to maintaining your flashlight’s functionality. Here are steps to address battery compartment corrosion:

    Table 3: Preventive Measures for Battery Compartment Corrosion

    Preventive MeasureAction
    Remove batteries when not in useIf you anticipate not using the flashlight for an extended period, take out the batteries to prevent corrosion.
    Store in a dry placeKeep the flashlight in a dry environment to minimize the chances of moisture causing corrosion.

    Regularly implementing these preventive measures will significantly reduce the likelihood of encountering battery compartment corrosion issues.

    By understanding how to address these common battery problems, you can maximize the lifespan of your Coast Flashlight and ensure it remains a reliable source of illumination. Regular checks and timely interventions will keep your flashlight in optimal condition, ready to light up any situation.

    Is it difficult to change the battery in my coast flashlight?

    Not at all! Coast flashlight batteries are easy to change and can typically be done within a few minutes.

    First, locate the three screws that hold the battery cover in place (two on the front of the light and one on the back). Loosen these screws and then remove the cover.

    Next, please take out your old battery by gently pulling it out from its housing.

    Make sure to dispose of it properly according to local laws.

    Insert your new battery by reversing these steps: first, slide it into its housing until it clicks into place;

    Next, tighten down both screws using a coin or screwdriver.

    Finally, replace the cover and ensure that you snap it into place correctly before turning your coast flashlight on again!

    What are the consequences of not changing the battery in my coast flashlight?

    There are many consequences of not changing the battery in your coast flashlight, some of which can be quite serious.

    For example, if you do not change the battery regularly, the light may become dimmer and less effective.

    This can lead to safety issues as you will no longer be able to see what is ahead of you at night.

    Additionally, if the light fails due to a lack of power, it will be difficult for someone else to find you in case emergency personnel needs help.

    A Coast flashlight is intended for regular use and should always have a fresh battery installed to remain operational throughout its lifespan.

    Following these simple guidelines can prevent unnecessary hassle and potential danger.

    How often should I replace the battery in my coast flashlight?

    Coast flashlight owners should replace the battery every six months to ensure they have a fully charged device when needed. This is because batteries lose their power over time and may not be able to provide enough light when needed. Also, dead batteries can create potential safety hazards due to the fire risk.

    What is the voltage of a Coast flashlight battery?

    A Coast flashlight battery is typically rated at 3.6 volts and should be used with a Coast flashlight designed to operate off of this voltage.

    What is the capacity of a Coast flashlight battery?

    A Coast flashlight battery has a 3.6-volt lithium ion nominal capacity and can produce 2.1-watt hours of light per hour when fully charged (700 lumens).

    What are the common causes of batteries not holding a charge?

    Not use the coast flashlight as often as you should

    Batteries that have been stored incorrectly or at an improper temperature

    Old or corroded batteries

    Damaged or corroded connectors

    Damaged or corroded battery cases

    What should I do if the flashlight won’t turn on at all?

    If the flashlight doesn’t turn on at all, there are a few possible causes. One possibility is that the battery is flat. If this is the case, you’ll need to change the batteries. Another possibility is that there’s something wrong with the light bulb. In this case, you’ll need to take it into a workshop and have it replaced.

    Can I discharge the battery too much if I change it?

    Yes, it’s possible to discharge the battery too much if you change it. This may cause the new battery not to work as well and could even lead to a fire. To avoid this, make sure that you disconnect all of the cables before changing the battery. Also, keep an eye on how long the old battery lasts before replacing it with a new one.

    Is it dangerous to touch or discharge batteries too often?

    There is no real danger to touching or discharging batteries too often, but it’s always best practice to follow the manufacturer’s instructions. This way, you are sure that the battery will be in optimum condition and won’t go off accidentally. By following these guidelines, you can avoid potential safety issues.

    Final Words

    There are many ways to open a flashlight, which are all quite intuitive. But, if you have never done it before, the way we described it may be confusing at first. The secret is that there is nothing complicated about getting batteries inside that excellent light! Just follow the steps from above, and your Coast will always be ready for action.

    Changing batteries in a flashlight is not complicated. So, when it comes to procedure and safety tips, you should understand that these depend on the model of the flashlight. Some flashlights will have screws or covers over the battery compartment, whereas others may rotate open. Once you know how to access your new batteries properly, it is time for adventure!

    In our next blog post, we want to hear from all of our readers who have successfully changed their flashlight batteries! Share your experience by leaving a comment below and telling us what worked for you and what didn’t!