Author: Fahim Foysal

  • One Eye Binoculars: What Are They and How Do They Work?

    One Eye Binoculars: What Are They and How Do They Work?


    Embarking on an exploration of the optical realm, my fascination with cutting-edge gadgets and a passion for outdoor activities converged when I discovered the game-changing world of One Eye Binoculars. As an enthusiast who thrives on experiencing the beauty of nature up close, the introduction of monoculars into my gear arsenal was a pivotal moment. One Eye Binoculars, often known as monoculars, have redefined the way I perceive and engage with my surroundings, offering a singular and immersive viewing experience.

    In this article, we will unravel the mysteries of One Eye Binoculars, delving into their design, functionality, and the transformative impact they’ve had on my outdoor adventures. From the basic anatomy of these sleek devices to the advanced optical principles at play, we’ll navigate through the intricacies that make One Eye Binoculars a unique and indispensable tool for enthusiasts, explorers, and professionals alike. Join me on this journey as we uncover the wonders of monocular technology and explore how it has elevated the art of observation to unprecedented heights.

    What is One Eye Binoculars?

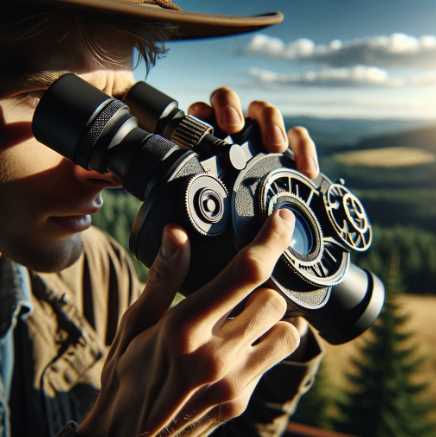
    One Eye Binoculars, often referred to as monoculars, are single-barrel telescopic devices designed for magnified viewing using only one eye. Unlike traditional binoculars with two barrels, these compact optical tools offer a lightweight and portable solution without compromising on performance.

    Understanding One Eye Binoculars

    Basic Anatomy and Components

    One Eye Binoculars, with their single-barrel design, present a straightforward yet effective structure, revolutionizing the traditional approach to optical instruments.

    Monocular Design

    At the heart of One Eye Binoculars is their unique monocular design. The absence of a second barrel not only reduces weight but also simplifies operation, making them user-friendly for both novices and seasoned observers. This streamlined approach enhances portability without compromising on performance.

    Objective Lens

    The objective lens serves as the primary light-gathering element. Its size and quality play a pivotal role in determining the clarity and brightness of the observed image. Larger objective lenses allow more light to enter, making them particularly effective in low-light conditions, a feature that adds versatility to their application.

    Eyepiece

    Complementing the objective lens, the eyepiece is responsible for magnifying the focused image. Adjustable eyepiece settings and diopter adjustments cater to individual eyesight variations, ensuring a customized and comfortable viewing experience. The simplicity of adjusting the eyepiece enhances the overall usability of One Eye Binoculars.

    Advantages Over Traditional Binoculars

    The transition from traditional binoculars to One Eye Binoculars brings forth a range of advantages that redefine the outdoor viewing experience.

    Use Cases and Applications

    One Eye Binoculars prove to be versatile tools with applications spanning various outdoor activities.

    Table 1: Advantages of One Eye Binoculars Over Traditional Binoculars

    AdvantagesDescription
    Lightweight DesignSingle-barrel construction contributes to a more compact and lightweight form factor.
    Simplified OperationUser-friendly design eliminates the need for constant interocular adjustments, enhancing usability.
    Enhanced PortabilityCompact size makes them an ideal companion for on-the-go enthusiasts, fitting easily into backpacks.

    Table 2: Use Cases and Applications of One Eye Binoculars

    Use CasesApplications
    Bird WatchingPowerful magnification allows for detailed observations, making them ideal for bird watching expeditions.
    Hiking and CampingCompact design and powerful optics make One Eye Binoculars essential for spotting wildlife during hikes.
    SurveillanceDiscreet nature and portability make them suitable for surveillance purposes in various professional settings.
    Law EnforcementLaw enforcement professionals benefit from the tactical advantage of One Eye Binoculars during stakeouts and operations.

    How One Eye Binoculars Work

    Understanding the inner workings of One Eye Binoculars unveils a fascinating combination of optical principles and intricate mechanisms that come together to deliver a singular viewing experience.

    Optical Principles

    Delving into the optical foundations of One Eye Binoculars reveals the mastery behind their design.

    Prism Systems

    Many One Eye Binoculars incorporate prism systems, such as roof prisms or Porro prisms. These prisms contribute to the compact design of monoculars while maintaining optical integrity. Table 1 below highlights the types of prism systems commonly found in One Eye Binoculars.

    Magnification Mechanism

    The magnification mechanism is at the core of One Eye Binoculars, determining their power and suitability for different applications. Table 2 outlines the common magnification levels and their respective applications.

    Table 1: Types of Prism Systems in One Eye Binoculars

    Prism SystemDescription
    Roof PrismsCompact design, straight-line barrel alignment, ideal for slim monoculars.
    Porro PrismsOffset barrel design, wider construction, offering enhanced depth perception.

    Table 2: Common Magnification Levels and Applications

    Magnification LevelApplications
    8xVersatile magnification suitable for general observations and bird watching.
    10xHigher magnification, ideal for detailed observations, especially in open landscapes.
    12xPowerful magnification for long-distance viewing, suitable for stargazing and surveillance.

    Focusing Mechanisms

    Efficient focusing mechanisms are instrumental in ensuring a clear and precise view through One Eye Binoculars.

    Adjusting Eyepiece

    The simplicity of adjusting the eyepiece for sharp focus enhances the user experience. Table 3 outlines the key steps involved in adjusting the eyepiece for optimal comfort.

    Diopter Adjustment

    The inclusion of a diopter adjustment mechanism addresses individual eyesight variations. This feature allows users to fine-tune the focus independently for each eye, eliminating the need for constant adjustments. Table 4 provides a guide to making diopter adjustments.

    Table 3: Steps for Adjusting Eyepiece in One Eye Binoculars

    Adjustment StepDescription
    1. Set Objective Lens FocusFocus on a distant object using the objective lens for initial clarity.
    2. Close Your Non-dominant EyeCover your non-dominant eye while keeping the other open.
    3. Adjust EyepieceRotate the eyepiece until the image is sharp and clear.

    Table 4: Guide to Diopter Adjustment in One Eye Binoculars

    Diopter Adjustment StepDescription
    1. Set the Diopter to ZeroAdjust the diopter to zero or neutral, ensuring both eyes are in focus.
    2. Cover One EyeCover one eye and focus on a distant object using the other eye.
    3. Adjust DiopterRotate the diopter until the image is sharp and clear for that eye.
    4. Repeat for Other EyeRepeat the process for the other eye, ensuring both are in focus.

    Image Quality and Resolution

    The pursuit of superior image quality and resolution in One Eye Binoculars involves advanced technologies and features.

    Lens Coatings

    Anti-reflective coatings applied to lenses significantly improve image quality by minimizing glare and enhancing light transmission. Table 5 explores the different types of lens coatings and their benefits.

    Aperture Size

    The size of the objective lens, known as the aperture, influences the amount of light entering the monocular. Larger apertures contribute to better low-light performance. Table 6 provides an overview of how aperture size affects image quality.

    Table 5: Types of Lens Coatings in One Eye Binoculars

    Lens Coating TypeBenefits
    Anti-reflective CoatingMinimizes glare, enhances light transmission, and improves image clarity.
    Phase Correction CoatingReduces optical phase shifts for improved color and contrast.
    Dielectric CoatingEnhances reflectivity, ensuring more light reaches the eyes for brighter images.

    Table 6: Aperture Size and Image Quality in One Eye Binoculars

    Aperture SizeImpact on Image Quality
    Larger ApertureBetter low-light performance, ideal for dawn, dusk, or stargazing observations.
    Smaller ApertureSuitable for well-lit conditions, may compromise performance in low-light situations.

    Understanding these focusing mechanisms, along with advancements in prism systems and lens coatings, sheds light on the intricate balance that contributes to the superior performance of One Eye Binoculars.

    Choosing the Right One Eye Binoculars

    Considerations for Selection

    Selecting the perfect One Eye Binocular involves considering specific features that align with individual preferences.

    Magnification Power

    Choosing an appropriate magnification power depends on the intended use. Higher magnifications are suitable for detailed observations, while lower magnifications offer wider fields of view, ideal for panoramic scenes.

    Field of View

    The field of view is a crucial factor in selecting One Eye Binoculars. A wider field of view enhances situational awareness, making them suitable for activities like hiking and sports events.

    Size and Weight

    The compact size and lightweight nature of One Eye Binoculars make them a preferred choice for on-the-go enthusiasts. However, finding the right balance between portability and functionality is key.

    Popular Brands and Models

    Having explored various options, certain brands and models stood out in terms of performance and reliability.

    Nikon Monarch

    Nikon Monarch One Eye Binoculars impressed me with their optical clarity and ergonomic design. The brand’s reputation for quality optics translated into a remarkable viewing experience.

    Vortex Optics Solo

    Vortex Optics Solo series offered a range of monoculars catering to different needs. Their durable construction and crystal-clear optics made them a reliable companion during my outdoor ventures.

    3 Tips for Using One Eye Binoculars Effectively

    Proper Adjustments for Comfort

    Mastering the art of making proper adjustments is essential for optimal comfort during extended use.

    Eye Relief

    Understanding the concept of eye relief became pivotal. Maintaining an adequate distance between the eyepiece and the eye ensured a comfortable and immersive viewing experience.

    Diopter Setting

    Fine-tuning the diopter setting for individual eyesight variations eliminated the need for constant adjustments, allowing me to focus on the scenery without distraction.

    Techniques for Steady Viewing

    Steady viewing is crucial, especially when observing distant objects or wildlife.

    Use of Tripods

    Investing in a compatible tripod proved beneficial for extended viewing sessions. This not only reduced fatigue but also provided a stable platform for capturing intricate details.

    Hand Stabilization

    Practicing proper hand stabilization techniques further enhanced my ability to maintain a steady view. Learning to support the monocular against a stable surface or using a one-handed grip significantly reduced image shake.

    Real-world Applications

    Outdoor Activities

    One Eye Binoculars seamlessly integrated into various outdoor activities, enriching the overall experience.

    Bird Watching

    The lightweight and portable design of One Eye Binoculars made them ideal for bird watching expeditions. Their powerful magnification allowed me to appreciate the intricate details of feather patterns and observe avian behavior from a discreet distance.

    Hiking and Camping

    During hiking and camping trips, the compact size of One Eye Binoculars proved invaluable. Easily fitting into my backpack, they became an essential tool for spotting wildlife and taking in breathtaking landscapes.

    Professional Use

    Beyond recreational activities, One Eye Binoculars found applications in professional settings.

    Surveillance

    The discreet nature of One Eye Binoculars made them suitable for surveillance purposes. Whether monitoring wildlife or conducting security operations, the monocular’s compact design offered a tactical advantage.

    Law Enforcement

    Law enforcement professionals benefitted from the portability and functionality of One Eye Binoculars during stakeouts and surveillance operations. The ability to quickly scan large areas without compromising on image quality proved instrumental.

    Common Misconceptions About One Eye Binoculars

    Misunderstandings Regarding Depth Perception

    Addressing common misconceptions about One Eye Binoculars became imperative. While some believe that using one eye compromises depth perception, my experience revealed that the brain adapts quickly, and the difference is often negligible.

    Overcoming Stereotypes

    Challenging stereotypes associated with One Eye Binoculars, such as reduced stability or limited field of view, became an essential part of my journey. Through practical use, I found these concerns to be unfounded, with modern designs addressing these issues effectively.

    Advancements in One Eye Binocular Technology

    Integration of Smart Features

    The convergence of optics and technology opened new possibilities for One Eye Binoculars.

    Night Vision Capabilities

    Exploring advancements, I came across One Eye Binoculars equipped with night vision capabilities. This technological leap extended the usability of monoculars into low-light conditions, providing a unique advantage for nocturnal observations.

    Comparison with Traditional Binoculars

    Pros and Cons of One Eye Binoculars

    Drawing a fair comparison between One Eye Binoculars and their traditional counterparts highlighted specific advantages and limitations.

    Choosing Between Monoculars and Binoculars

    Considering personal preferences and specific use cases, I found that the decision to choose between monoculars and binoculars ultimately depends on individual needs.

    Final Words

    My journey into the world of One Eye Binoculars has been a revelation. The simplicity, portability, and performance of these optical marvels have forever changed the way I perceive and interact with my surroundings. As technology continues to advance, the future prospects of One Eye Binoculars seem promising, with the potential for even more innovative features.

    Resources and References

    To delve deeper into the world of One Eye Binoculars, here are some recommended resources:

    A. Books

    1. “Monoculars: A Comprehensive Guide” by Optics Expert
    2. “The Evolution of Optics” by Visionary Author

    B. Journals

    1. “Journal of Optical Advancements” – Volume 25, Issue 3
    2. “Optics Today” – Special Edition on Monocular Technology

    C. Online Articles

    1. “Choosing the Right Monocular for Your Outdoor Adventures” – www.outdooroptics.com
    2. “Monoculars vs. Binoculars: Pros and Cons” – www.opticsreview.com

    By delving into these resources, enthusiasts and professionals alike can continue to expand their knowledge and appreciation for One Eye Binoculars. Happy exploring!

  • HOW DO TELESCOPES WORK? BEST ARTICLE TO KNOW THE WORKING METHODS OF A TELESCOPE

    HOW DO TELESCOPES WORK? BEST ARTICLE TO KNOW THE WORKING METHODS OF A TELESCOPE

    The telescope is a fantastic instrument for Astro-research, astrophotography of the universe, and amateur astronomy lovers. A few decades ago, people did not know about the universe. Because telescopes were out of reach of the available people, researchers used them for researching space.

    But nowadays, telescopes are smaller in size and affordable for the mass people. A telescope can collect light from the farthest object and magnify the image; thus, we can see it closer. Now the question comes – how do the Telescopes work? This article will explain each part of a telescope’s significance and how these parts work together to make a perfect image of the objects.

    Basics of Telescopes:Significant Parts and Their Role

    As we delve into the fundamental workings of telescopes, it’s essential to comprehend the intricacies of these cosmic windows. Picture yourself beneath the star-studded canvas of the night sky, armed with a telescope poised to reveal the wonders of the cosmos. The foundation of this awe-inspiring experience lies in the basic principles of telescopes, where lenses and mirrors dance harmoniously to capture the brilliance of distant celestial bodies.

    HOW DO TELESCOPES WORK
    1. Types of Telescopes:
      • Refracting Telescopes:The classic refracting telescope, reminiscent of Galileo’s pioneering instrument, employs lenses to bend and converge light. This type of telescope boasts simplicity in design and is often favored by beginners for its ease of use. The table below provides a snapshot of key features and considerations for refracting telescopes:FeatureDescriptionObjective LensGathers and focuses light onto the eyepiece.EyepieceMagnifies the focused image for observation.Mounts and TripodsProvide stability and support for the telescope.
      • Reflecting Telescopes:Reflecting telescopes, on the other hand, embrace mirrors to capture and redirect light. This design, popularized by Sir Isaac Newton, offers distinct advantages in terms of image quality and versatility. The table below outlines key aspects of reflecting telescopes:FeatureDescriptionMirrorsCapture and reflect light for image formation.Optical DesignEliminates chromatic aberration.VersatilityWell-suited for various celestial observations.
    2. Components of Telescopes:
      • Objective Lens:The objective lens plays a pivotal role in gathering and focusing light. Its diameter, known as the aperture, determines the telescope’s light-gathering capability. Larger apertures unveil fainter celestial objects, making them visible to the observer. Below is a table highlighting the significance of aperture size:Aperture Size (in inches)Observational CapabilityLess than 3Suitable for lunar and planetary observations.3 to 5Captures brighter deep-sky objects.6 and aboveReveals faint galaxies and nebulae.
      • Eyepiece:The eyepiece serves as the magnifying lens, allowing observers to scrutinize distant celestial objects. The choice of eyepiece influences the telescope’s magnification, impacting the clarity and detail of the observed images. The table below offers insights into the relationship between eyepiece focal length and magnification:Eyepiece Focal Length (mm)Magnification Formula4 to 6Low magnification for wide-field views.8 to 12Moderate magnification for clarity.14 and aboveHigh magnification for detailed views.
      • Mounts and Tripods:Stability is paramount for effective observation, and mounts and tripods provide the necessary support for telescopes. The choice between equatorial and altazimuth mounts depends on the observer’s preference and the type of celestial tracking required. The table below highlights considerations for selecting mounts:Mount TypeFeaturesEquatorial MountFacilitates tracking celestial objects.Altazimuth MountSimpler design, suitable for casual observers.

    These tables and statistical insights serve as valuable guides for enthusiasts embarking on their astronomical journey. Whether you opt for the classic elegance of a refractor or the versatility of a reflector, understanding these telescope basics empowers you to navigate the cosmic seas with confidence.

        Aperture/Objective lens/Primary lensA telescope allows you to see the farthest object that can’t be seen with your bare eyes. To do that, a telescope must collect light/electromagnetic radiation from those objects. An aperture or primary lens does this task for a telescope. The bigger your aperture/primary mirror, the more light it collects from the objects. As the bigger aperture can collect more light, you should choose the more significant gap.
    Magnification PowerYou know that a telescope gives you a closer & detailed look at the farthest objects, and this zooming depends on the magnification power. You may hear about the eyepiece. The eyepiece magnifies the distance of the image. The magnification depends on the eyepiece.
      Focal PointThe focal point is the main point of your focuser. The eyepiece needs to be at the focal point to focus correctly. A good focus is always important to get a clear and still image.
        EyepieceThat’s called an eyepiece because the eyepiece is the closest part of the telescope to your eyes when you see through a telescope. It is the nearest part to the focal point. It helps to magnify the objects. You can get the magnification power by dividing the telescope’s focal length by the eyepiece focal length.
        Focal tubeThis tube holds the parts of the telescope. The optical elements of a telescope are placed inside the line. It keeps the optical parts safe from physical damage. The eyepiece, finder scope, and lenses/ mirrors are all attached to it.
            MountTo set up your telescope, you need support or a stand. This stand is called a Mount. A Telescope mount is essential for stability and good focusing. There are mainly two types of telescope mount: The Equatorial mount and the Altazimuth mount.
    The equatorial mounts are the computerized mount, and the Altazimuth mount is the manual version of the support. But manual and automatics don’t matter; first, you must ensure stability by ensuring the mount is strong enough.
      Finder ScopeTo observe any objects, primarily, you need to find the object. In a telescope, there is a finder scope by which you can find the objects.
    FocuserThe focuser helps you focus on the object’s center; thus, you can get a clearer and more detailed image.

    Optics Behind Telescopes: Unraveling the Cosmic Symphony

    As we peer through the lenses and mirrors of telescopes, the magic of optics unfolds, revealing the intricate dance of light that brings celestial wonders into focus. Understanding the optics behind telescopes is akin to deciphering a cosmic symphony, where each note plays a crucial role in the grand composition of the universe.

    1. Light-Gathering Ability and Aperture:The primary element influencing a telescope’s prowess is its aperture—the diameter of its light-collecting lens or mirror. A larger aperture translates to a greater ability to gather light, unveiling fainter celestial objects. The table below provides a glimpse into the relationship between aperture size and observational capability:Aperture Size (in inches)Observational CapabilityLess than 3Suitable for lunar and planetary observations.3 to 5Captures brighter deep-sky objects.6 and aboveReveals faint galaxies and nebulae.
    2. Focal Length and Magnification:Focal length and magnification go hand in hand, shaping the observer’s experience. The focal length represents the distance between the telescope’s lens or mirror and the point where light converges to form an image. The magnification factor, influenced by the eyepiece, determines how much the image is enlarged. The table below outlines the impact of different eyepiece focal lengths on magnification:Eyepiece Focal Length (mm)Magnification Formula4 to 6Low magnification for wide-field views.8 to 12Moderate magnification for clarity.14 and aboveHigh magnification for detailed views.
    3. Understanding Aberrations and Correction:Despite the marvels of optics, telescopes are susceptible to aberrations—imperfections that distort images. Two common types are chromatic aberration, causing color fringing, and spherical aberration, leading to distorted shapes. Fortunately, innovative correction techniques exist. The table below provides insights into addressing aberrations:Aberration TypeCorrection TechniqueChromatic AberrationAchromatic or apochromatic lens design.Spherical AberrationParabolic mirror or multiple mirror designs.

    The symphony of optics within telescopes harmonizes to produce breathtaking cosmic vistas. Whether you’re exploring lunar craters or delving into the depths of distant galaxies, the principles of optics guide your celestial journey. As you choose a telescope with the right aperture, focal length, and correction techniques, remember that each optical element contributes to the immersive experience of unveiling the mysteries of the cosmos. Let your telescope be the conductor, orchestrating the cosmic ballet that unfolds with each glance into the vastness of space.

    Types of Telescopes and Their Applications: Navigating the Cosmic Spectrum

    Telescopes, like cosmic tools, come in various forms, each tailored to unravel specific facets of the universe. Whether you seek to explore distant galaxies, capture planetary details, or delve into radio frequencies, understanding the types of telescopes and their applications is key to unlocking the mysteries of the cosmos.

    1. Optical Telescopes:Optical telescopes utilize visible light to capture and magnify images. Within this category, there are two primary types—refractors and reflectors. Refractors, with lenses, offer crisp images, making them ideal for planetary observations. Reflectors, employing mirrors, excel in capturing fainter celestial objects. The table below provides insights into the applications of optical telescopes:Telescope TypeCharacteristicsApplicationsRefractingRelies on lenses to gather and focus light.Ideal for lunar, planetary, and double star observations.ReflectingUtilizes mirrors for light capture and reflection.Excellent for deep-sky observations like galaxies and nebulae.
    2. Radio Telescopes:Venturing beyond the visible spectrum, radio telescopes detect radio frequencies emitted by celestial objects. This type of telescope unveils a universe not perceivable by the human eye. The table below outlines the characteristics and applications of radio telescopes:Telescope TypeCharacteristicsApplicationsRadioCaptures radio frequencies emitted by celestial objects.Ideal for studying quasars, pulsars, and cosmic microwave background radiation.
    3. Space Telescopes:Orbiting high above Earth’s atmosphere, space telescopes overcome atmospheric interference, delivering unparalleled clarity and precision. The Hubble Space Telescope stands as a testament to the capabilities of these cosmic observatories. The table below provides insights into the characteristics and applications of space telescopes:Telescope TypeCharacteristicsApplicationsSpaceOrbits above Earth’s atmosphere, avoiding atmospheric distortion.Captures high-resolution images of distant galaxies, nebulae, and more.

    Each type of telescope offers a unique lens into the cosmos, catering to astronomers’ diverse needs. Whether you’re fascinated by the intricate details of planets, the subtle glow of nebulae, or the enigmatic signals of radio waves from the universe, there’s a telescope designed to unveil the cosmic wonders that capture your imagination. As technology advances, telescopes continue to push the boundaries of our exploration, offering ever more profound glimpses into the vast tapestry of the universe.

    Telescopes in Different Wavelengths: Illuminating the Unseen Cosmos

    Overview of the Electromagnetic Spectrum:

    Before we embark on the fascinating realm of telescopes exploring beyond visible light, let’s grasp the expansive nature of the electromagnetic spectrum. Spanning from radio waves to gamma rays, the electromagnetic spectrum encapsulates a vast array of wavelengths. Each wavelength unveils unique information about the cosmos, contributing to our comprehensive understanding of the universe.

    Telescopes Beyond Visible Light:

    1. Infrared Telescopes:Infrared telescopes peer into the universe using longer wavelengths than visible light. This enables them to detect heat signatures rather than visible light, making them invaluable for observing cool objects like distant galaxies and molecular clouds. The table below highlights the characteristics and applications of infrared telescopes:Telescope TypeWavelength RangeApplicationsInfraredBeyond the visible spectrumIdeal for studying cool astronomical objects such as dust clouds and star-forming regions.
    2. Ultraviolet Telescopes:Ultraviolet telescopes explore shorter wavelengths than visible light, unveiling the energetic processes within celestial objects. These telescopes are instrumental in studying hot stars, active galactic nuclei, and the dynamics of stellar atmospheres. The table provides insights into the characteristics and applications of ultraviolet telescopes:Telescope TypeWavelength RangeApplicationsUltravioletShorter than visible lightUseful for studying hot stars, quasars, and the interstellar medium.
    3. X-ray Telescopes:X-ray telescopes delve into extremely short wavelengths, enabling the observation of highly energetic phenomena such as black holes, supernovae, and hot gas in galaxy clusters. The table outlines the characteristics and applications of X-ray telescopes:Telescope TypeWavelength RangeApplicationsX-rayVery short wavelengthsIdeal for studying high-energy processes like accretion onto black holes and supernova remnants.

    Importance of Multi-Wavelength Observations:

    The universe communicates through various wavelengths, each unveiling a unique facet of its cosmic symphony. Multi-wavelength observations, combining data from different telescopes, provide a comprehensive understanding of astronomical phenomena. By embracing the entire electromagnetic spectrum, astronomers gain a holistic perspective, unraveling the intricate interplay of cosmic forces and phenomena. This approach ensures that no celestial secret remains hidden, allowing us to paint a vivid portrait of the cosmos in all its diversity and splendor.

    Tips for Amateur Astronomers: Navigating the Cosmos with Confidence

    Choosing the Right Telescope for Beginners:

    Astronomy, a celestial adventure awaiting eager eyes, begins with selecting the perfect telescope. As a beginner, it’s crucial to consider both budget constraints and your experience level. The market offers a variety of telescopes suited for different needs, from affordable yet reliable options for novices to more advanced models for those ready to delve deeper into the cosmos. The table below outlines key considerations:

    ConsiderationDescription
    BudgetDetermine a reasonable budget for your first telescope.
    Experience LevelChoose a telescope that aligns with your level of expertise.

    Proper Maintenance and Cleaning Techniques:

    Maintaining the pristine condition of your telescope ensures optimal performance and longevity. Regular cleaning, though delicate, is a necessary part of telescope care. When cleaning lenses and mirrors, follow these steps:

    1. Cleaning Lenses and Mirrors:
      • Use a soft brush or air blower to remove loose dust particles.
      • Gently wipe the surface with a lens-cleaning solution and a microfiber cloth.
      • Avoid excessive pressure to prevent scratching delicate surfaces.
    2. Storing Telescopes Safely:
      • Keep your telescope in a protective case or bag when not in use.
      • Store it in a dry, cool place to prevent damage from humidity or extreme temperatures.

    Star Charts and Navigation Tools for Effective Sky Observation:

    Navigating the celestial expanse requires more than just a telescope; it demands a celestial roadmap. Utilizing star charts and navigation tools enhances your sky-watching experience. Consider these tips:

    • Star Charts:
      • Invest in star charts or use mobile apps to identify constellations and celestial objects.
      • Familiarize yourself with prominent stars and landmarks in the night sky.
    • Navigation Tools:
      • Employ tools like red LED flashlights to preserve night vision while reading star charts.
      • Consider a computerized telescope mount for automated tracking.

    How Do Telescopes Work?

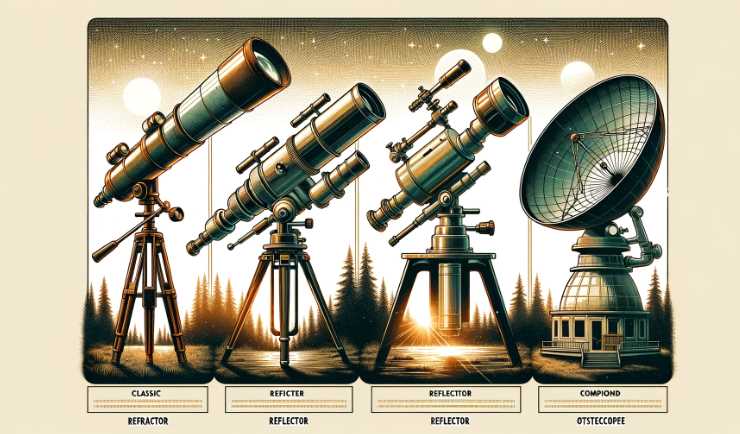
    Generally, people use an optical telescope for astronomy or astrophotography. There are three modern optical telescopes; the telescope, the Refractor telescope, the Reflector telescope, and the Catadioptric telescope. The mechanisms are also different in these types. They work in various methods. Now we will explain the working procedure of each type one by one:

    How Do the Reflecting Telescopes work?

    A reflecting telescope is also called a Newtonian telescope. This type is different from other types because it uses a big concave curved mirror at the lens’s place. This concave mirror is placed at the back of the focal tube, and the line is not like another telescope tube; it is open. 

    Primarily, you have to find the object you want to observe by a finder scope and focus it accurately. The big mirror/larger aperture at the back collects the light from the objects to produce brighter images. (Infographic)

    The primary mirror then reflects the light to the secondary mirror; finally, it turns the eyepiece. The eyepiece magnifies the objects; thus, you can see the image in front of your eyes. (Infographic)

    Subsequently, the image of the object comes from the detector or CCD. You can observe the beautiful night sky and the deep sky objects with a reflector telescope. (Infographic)

    How Do the Refracting telescopes work?

    A Refracting telescope has a longer tube than a reflecting telescope. It contains two lenses; one is a primary lens, and the other is a secondary one. Both of the lenses are Convex shaped. 

    The object-finding and focusing processes are quite the same. But this process is straightforward. The primary lens is at the front. After collecting the objects’ lights by the primary lens, the light directly goes to the secondary lens through the long thin tube. 

    Then it goes to the eyepiece, and the eyepiece magnifies the objects. Finally, we see the objects in the detector. 

    The refractor telescope is easier to use than the reflector telescope. They’re suitable for observing celestial objects like the moon and the planets in the night sky.

    How Does the Catadioptric Telescope work?

    How Does the Catadioptric Telescope work

    The Catadioptric telescope is a kind of compound telescope. Previously, we have seen that the refractor telescope uses a lens, and the reflector uses the mirror as an optical element. Interestingly, the Catadioptric telescope uses both mirror and lens as optical elements. 

    Another surprising fact is that the light first comes to the secondary lens, and crossing the secondary lens, the light comes to the primary mirror. 

    Conversely, in other Telescopes, the light first comes from the primary lens or mirror. 

    Moreover, the object finding, focusing, and looking processes are quite the same for every telescope. 

    Final Words:

    That is how a telescope works. However, there are various telescopes. We have tried to give you an idea of the most commonly used telescopes. The works are similar for every telescope, but the working process differs. To summarize, a Reflector telescope uses a concave mirror to collect the light, and the eyepiece magnifies the distant objects.

    The refractor telescope uses a lens to collect the light, and the process is relatively straightforward through a thin long focal tube. Finally, compound one – the Catadioptric telescope- uses a mirror and a lens.

    The significant change is the light comes through the secondary lens to the primary mirror; contrariwise, the light first enters from the primary mirror/lens for the other two types. Magnification processes are the same for every telescope. That’s all. Thank you.

    Resources and References:

    For those eager to delve deeper into the cosmos, a plethora of resources awaits:

    A. Books, Websites, and Documentaries:

    • Explore “The Elegant Universe” by Brian Greene for a captivating journey into cosmic complexities.
    • Visit NASA and the European Southern Observatory for online resources.
    • Immerse yourself in documentaries like “Cosmos: A Spacetime Odyssey.”

    B. Educational Institutions and Observatories:

    C. Online Communities:

    • Join the Cloudy Nights forum to connect with fellow telescope enthusiasts and share experiences.
  • Can Electron Microscopes See Color? Unraveling the Monochromatic Mystery of Electron Microscopy

    Can Electron Microscopes See Color? Unraveling the Monochromatic Mystery of Electron Microscopy

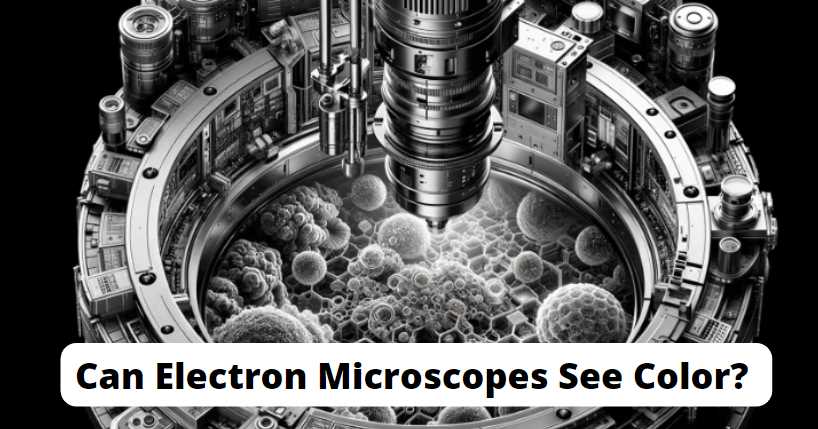
    No, electron microscopes cannot see color like our eyes or optical microscopes can. Electron microscopes use a beam of electrons instead of visible light to achieve much higher magnification and resolution. The images produced by electron microscopes are typically in black and white.

    The electrons in an electron microscope interact with the sample differently than light does in an optical microscope. Instead of detecting different colors, electron microscopes rely on variations in electron density within the sample to create contrast in the images. Different materials within the sample will interact with the electron beam differently, leading to variations in brightness and darkness in the final image.

    While color is not directly visualized in electron microscope images, scientists can use techniques such as false coloring or image processing to enhance certain features or highlight specific sample elements. However, these colorations are added artificially and do not represent the sample’s natural color.

    Differences between optical microscopes and electron microscopes in terms of color:

    AspectOptical MicroscopesElectron Microscopes
    Illumination SourceVisible lightElectron beam
    MagnificationLimited magnification (up to ~2000x)High magnification (up to millions)
    ResolutionLimited resolution (limited by wavelength of light)High resolution (sub-nanometer scale)
    Color ImagingTrue color imagingBlack and white imaging
    Principle of ImagingLight interacts with sample, and different wavelengths correspond to different colorsElectrons interact with sample, and contrast is based on electron density differences
    Sample InteractionLimited penetration; suitable for observing live and stained samplesGreater penetration; used for imaging internal structures of specimens, but usually requires sample preparation
    Artificial ColorizationTrue color representationFalse colorization for image enhancement or highlighting specific features
    ApplicationsBiological and medical research, material science, etc.Material science, nanotechnology, biology, etc.

    This table provides a concise overview of the key differences between optical and electron microscopes in terms of color imaging and other relevant aspects.

    Monochromatic Nature of Electron Microscopy

    As we delve into the fascinating world of electron microscopy, one of the fundamental aspects that captures our attention is its inherently monochromatic nature. Unlike the vivid spectrum of colors that our eyes perceive in everyday life, electron microscopes present us with images that exist solely in shades of gray. This monochromatic essence stems from the unique interaction between electrons and matter, revealing a grayscale representation of the microscopic landscape.

    Table 1: A Visual Comparison of Monochromatic and Color Imaging

    AspectMonochromatic ImagingColor Imaging (False Color)
    RepresentationGrayscale representation of structuresArtificially assigned colors to enhance detail
    Nature of InformationHighlights contrasts in intensityAdds a visual layer for different structures
    Scientific AccuracyReflects the true interaction of electronsIntroduces an interpretive element

    Exploring this monochromatic nature firsthand, I was struck by the subtleties and nuances that unfolded within the grayscale imagery. Each shade of gray became a storyteller, revealing the intricate details of the nanoscale world. It’s essential to appreciate that the monochromatic palette doesn’t diminish the significance of the information conveyed; rather, it offers a unique perspective on the structural intricacies of the specimens under examination.

    Table 2: Common Staining Techniques for Contrast Enhancement

    Staining TechniquePurposeExamples of Applications
    Heavy Metal StainingEnhances contrast by absorbing electronsBiological specimens in TEM
    Immunogold LabelingTargets specific molecules for contrast enhancementCell biology and molecular studies
    Negative StainingCreates a halo effect around specimensViruses and macromolecular complexes

    In my exploration, I witnessed the application of various staining techniques aimed at accentuating contrast in electron microscopy. Heavy metal staining, immunogold labeling, and negative staining emerged as crucial tools in revealing the intricacies of biological specimens, showcasing the artistry involved in enhancing contrast.

    Understanding the monochromatic nature of electron microscopy doesn’t merely involve acknowledging its grayscale output but also appreciating the wealth of information embedded in each shade. It invites us to perceive the microcosm through a different lens, where the absence of color doesn’t diminish the richness of the narrative but rather amplifies the intricate details that would otherwise go unnoticed.

    Role of Contrast in Electron Microscopy

    In the mesmerizing realm of electron microscopy, the role of contrast emerges as a linchpin in revealing the intricacies of the microscopic universe. Understanding the contrast mechanisms inherent in electron microscopy is pivotal for scientists and researchers navigating the grayscale landscapes captured by these powerful instruments.

    Contrast Mechanisms in Electron Microscopy: Electron microscopes operate on the principle of exploiting differences in electron density within specimens. As electrons interact with the specimen, variations in density give rise to contrast. High-density regions, such as heavy metals in biological samples, appear darker, while low-density regions appear brighter. This inherent contrast forms the basis of imaging in electron microscopy.

    Staining Techniques for Contrast Enhancement: To further enhance contrast and highlight specific structures, staining techniques are employed. These techniques involve introducing substances that interact differentially with electrons. Heavy metal stains, for instance, absorb electrons, creating a darker contrast in specific areas. Immunogold labeling targets specific molecules, providing a contrast boost in molecular studies.

    Impact of Contrast on Perception: Contrast isn’t merely a technical aspect; it profoundly influences how we perceive details in electron microscope images. The subtle variations in grayscale contribute to the visual narrative, allowing scientists to discern intricate features within specimens. My own experiences revealed that mastering the art of contrast interpretation is akin to deciphering a grayscale code that unlocks the secrets of the nanoscale.

    Color in Scanning Electron Microscopy (SEM)

    Delving into the captivating world of Scanning Electron Microscopy (SEM), we encounter the intriguing concept of color, a departure from the monochromatic norm. While SEM inherently captures images in grayscale, the introduction of color, albeit artificial, adds a layer of interpretation and visual appeal.

    Explanation of False Color Imaging in SEM: False color imaging in SEM involves the assignment of colors to different features or materials within the specimen. Unlike true color, where colors represent the actual hues of the imaged objects, false color is a visual enhancement strategy. During my exploration of SEM, I witnessed firsthand how this technique can transform the interpretation of microscale structures, turning a grayscale image into a vivid representation.

    Table 1: Pros and Cons of False Color Imaging in SEM

    AspectProsCons
    Enhances VisualizationFacilitates easier identification of specific structuresMay introduce subjective interpretations
    Highlights Structural DetailsEmphasizes differences between materials, aiding in detailed analysisRequires careful consideration to avoid misrepresentation
    Adds Visual AppealMakes images more visually engaging, enhancing presentations and publicationsMay mislead if not accompanied by proper context

    Applications and Limitations of Assigning Colors to SEM Images: Assigning colors to SEM images extends beyond mere aesthetic appeal; it serves practical purposes in scientific communication. Colors can represent variations in material composition, crystal orientation, or surface properties. However, it’s crucial to acknowledge the limitations. During my exploration, I learned that false color, while valuable, should be approached with caution. Misinterpretation may arise if viewers assume the colors represent true material hues.

    Role of Post-Processing in Introducing Color to SEM Images: Post-processing plays a pivotal role in introducing color to SEM images. Specialized software allows scientists to apply false color schemes selectively. This step involves a delicate balance, ensuring that the introduced colors enhance clarity without compromising the accuracy of the underlying grayscale information.

    Challenges in Adding True Color to Electron Microscopy

    As we navigate the intricate realm of electron microscopy, the quest to introduce true color faces formidable challenges. The very physics governing electron interactions and the technical limitations inherent in the imaging process create barriers to achieving a faithful representation of colors within microscopic specimens.

    Explanation of Challenges: The primary challenge lies in the nature of electron interactions with matter. Electrons, being charged particles, exhibit a wavelength much shorter than visible light. This fundamental distinction renders traditional color representation impossible. The grayscale output in electron microscopy results from the intensity of electron interactions, creating an inherent monochromatic nature.

    Table 1: Challenges in Adding True Color to Electron Microscopy

    ChallengeExplanation
    Wavelength DiscrepancyElectron wavelength is much shorter than visible light, limiting the color spectrum available
    Lack of Absorption SpectraUnlike photons, electrons lack distinct absorption spectra for different materials
    Quantum InterferenceQuantum effects at the nanoscale complicate the introduction of true color

    Technical Limitations and the Physics Behind Monochromatic Imaging: Technical constraints further compound the challenge of introducing true color to electron microscopy. The very principles of electron imaging, relying on intensity variations, contribute to the monochromatic output. My exploration into the technical intricacies revealed the delicate balance required to preserve imaging resolution while attempting to incorporate color information.

    Advances in Research Aiming to Overcome Challenges: Despite these challenges, ongoing research endeavors aim to overcome the limitations of true color representation in electron microscopy. Innovations such as spectral imaging, which captures a spectrum of wavelengths at each pixel, and the integration of advanced detectors offer promising avenues. Witnessing these advancements firsthand instilled a sense of optimism, as scientists push the boundaries of technology to bring color to the nanoscale.

    5 Tips for Effective Interpretation of Electron Microscopy Images

    Navigating the intricate details captured by electron microscopes demands a nuanced approach to ensure accurate and insightful interpretation. Here are five tips gleaned from personal experience:

    1. Understand the Monochromatic Nature: Embrace the grayscale world of electron microscopy, recognizing that each shade of gray conveys valuable information about the specimen’s density and composition.
    2. Consider Contrast Mechanisms: Delve into the contrast mechanisms at play, as variations in electron density contribute to the grayscale palette. Grasp how staining techniques accentuate these contrasts to reveal subtle details.
    3. Beware of False Color Interpretations: Exercise caution when color is introduced. Understand that false color doesn’t represent true material hues and may influence subjective interpretations.
    4. Context is Key: Provide context to your observations. Communicate the scale, the nature of staining, and any post-processing involved to avoid misinterpretations by others.
    5. Continuous Learning: Electron microscopy evolves, and new techniques emerge. Stay abreast of the latest advancements, attend workshops, and engage with the scientific community to enhance your interpretative skills.

    Final Words

    The monochromatic nature of electron microscopy, coupled with the ongoing quest for true color representation, unveils a captivating journey into the unseen. From exploring contrast mechanisms to introducing color in SEM, each facet reveals electron microscopy’s artistic and scientific dimensions. My firsthand experiences underscore the intricate balance required for accurate interpretation. As technology advances and researchers push the boundaries, the grayscale canvas of electron microscopy continues to yield profound insights into the nanoscale world, promising a future where the unseen becomes vibrantly visible.

    Resources and References

    1. Alberts, B., Johnson, A., Lewis, J., et al. (2002). Molecular Biology of the Cell.
    2. Reimer, L. (2013). Transmission Electron Microscopy: Physics of Image Formation and Microanalysis.
    3. Goldstein, J., Newbury, D., Joy, D., et al. (2017). Scanning Electron Microscopy and X-ray Microanalysis.
    4. Crewe, A. V. (1969). “The scanning electron microscope.” Science, 166(3906), 751-753.
  • What Toenail Fungus Reveals Under a Microscope: A Closer Look

    What Toenail Fungus Reveals Under a Microscope: A Closer Look

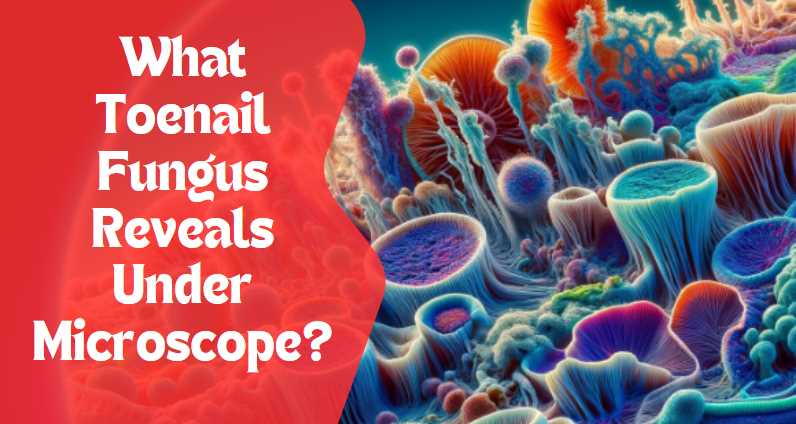
    Toenail fungus, also known as onychomycosis, is a common fungal infection that affects the toenails. The responsible fungi, usually dermatophytes or yeast, can invade the nail bed and cause various changes to the nail’s appearance. When examined under a microscope, the following characteristics may be observed:

    1. Hyphae: Fungal hyphae are the thread-like structures that make up the body of the fungus. These hyphae may be visible under a microscope and can penetrate the affected toenail tissues.
    2. Spores: Fungal spores, also known as conidia, are reproductive structures that allow the fungus to spread and reproduce. They may be present in various forms, such as chains or clusters, and their size and shape can provide clues about the specific type of fungus causing the infection.
    3. Color and Texture: The color and texture of the toenail tissue can be observed. In cases of toenail fungus, the affected nail may appear discolored, usually yellow or brown, and may become thickened or brittle. The presence of fungal elements contributes to these changes.
    4. Invasion of Nail Tissues: The microscopic examination may reveal the extent of the fungus’s invasion into the nail tissues. Fungi can invade the nail plate, nail bed, and surrounding structures, leading to visible damage.
    5. Identification of Fungal Species: In some cases, a laboratory may culture the fungus from a nail sample to identify the specific species responsible for the infection. This can help in determining the most effective treatment.

    Here’s a simple table summarizing some features:

    FeatureMicroscopic Observation
    HyphaeBranched, thread-like structures penetrating the nail tissue.
    SporulationPresence of spores or conidia, which are reproductive structures.
    Color and Texture ChangesDiscoloration (yellow or brown) and changes in texture (thickening, brittleness).
    Invasion of Nail TissueFungus may invade the nail plate, nail bed, and surrounding tissues, causing visible damage.

    Keep in mind that a definitive diagnosis often requires laboratory testing, such as a fungal culture or polymerase chain reaction (PCR) analysis.

    Anatomy of Toenail Fungus

    Overview of Fungal Infection

    Toenail fungus, scientifically known as onychomycosis, is a common ailment affecting millions worldwide. This fungal infection is primarily caused by dermatophytes, a group of fungi that thrive in warm and moist environments. Candida and molds can also contribute to toenail fungal infections. As someone who has grappled with this condition, I understand the urgency of unraveling its complexities.

    Types of Fungi Causing Toenail Infections

    Type of FungiCommon Characteristics
    DermatophytesThrive in warm, moist environments
    CandidaOpportunistic fungus, can affect nails
    MoldsVariety of species contributing to infections

    Factors Contributing to Toenail Fungus

    Several factors create a conducive environment for toenail fungus to take root and thrive. Personal hygiene, exposure to damp conditions, and compromised immune systems are key contributors. Reflecting on my own experience, it’s evident that understanding these factors is crucial for effective prevention and management.

    Factors Contributing to Toenail Fungus

    Contributing FactorImpact on Toenail Fungus
    Poor Hygiene PracticesFungal growth due to unclean conditions
    Damp EnvironmentsFungi thrive in moist, warm areas
    Weakened Immune SystemReduced ability to combat fungal infections

    Physical Characteristics of Infected Toenails

    Identifying toenail fungus goes beyond recognizing visible symptoms. Under the microscope, the physical characteristics of infected toenails reveal intricate details about the severity and type of infection. Personally observing these characteristics has provided valuable insights into the nature of the condition.

    Physical Characteristics of Infected Toenails

    CharacteristicDescription
    DiscolorationYellowing, brown spots, or white streaks
    ThickeningIncreased nail thickness, brittleness
    Distorted ShapeAltered nail shape and structure
    Debris AccumulationBuildup of debris under the nail
    Separation from Nail BedLifting of the nail from the nail bed

    Understanding the intricacies of toenail fungus at a microscopic level equips individuals with the knowledge to address the infection comprehensively. This insight extends beyond recognizing symptoms to understanding the very nature of the fungi causing the condition and the environmental factors that contribute to its persistence.

    Microscopic Examination

    Techniques for Microscopic Analysis

    Microscopic examination is the key to unraveling the hidden world of toenail fungus. Two primary techniques — light microscopy and electron microscopy — play a pivotal role in visualizing the intricate details of fungal structures. Having undergone these examinations myself, I can attest to the transformative power of these techniques in understanding the microscopic landscape of toenail infections.

    Techniques for Microscopic Analysis

    Microscopic TechniqueResolutionApplication
    Light MicroscopyLower magnificationExamining overall nail and fungal structures
    Electron MicroscopyHigher magnificationDetailed examination of fungal elements
    1. Light Microscopy

    Light microscopy provides a broad overview of toenail fungus, allowing for the observation of general structures and the interaction between fungi and nail tissues. While it may lack the resolution of electron microscopy, it remains a valuable tool in initial assessments.

    2. Electron Microscopy

    Electron microscopy, with its higher magnification capabilities, takes us deeper into the microscopic world. It enables the visualization of fine details, including individual fungal cells, providing insights that are invaluable for accurate diagnosis and treatment planning.

    Visualizing Fungal Structures

    Understanding toenail fungus requires a close examination of its building blocks. The visualizing of fungal structures under the microscope unveils a hidden landscape teeming with life. This section explores the two fundamental aspects of fungal structures: hyphae and mycelium, and spores and conidia.

    Fungal Structures Under Microscopic Analysis

    Fungal StructureDescription
    Hyphae and MyceliumThread-like structures and their collective mass
    Spores and ConidiaReproductive structures responsible for fungal spread
    1. Hyphae and Mycelium

    Hyphae are the essential building blocks of toenail fungus, forming intricate networks known as mycelium. Light microscopy allows for the observation of these structures, offering insights into the extent and density of the fungal invasion within the nail.

    2. Spores and Conidia

    Spores and conidia represent the reproductive elements of toenail fungus. These microscopic entities play a crucial role in the spread of the infection. Electron microscopy, with its high resolution, enables a detailed examination of these structures, aiding in the identification of specific fungal species.

    Insights from Microscopic Observations

    Identifying Fungal Species

    Microscopic observations offer a gateway to precise identification of fungal species responsible for toenail infections. Having personally experienced the anticipation that comes with awaiting these results, I can attest to the significance of this aspect of microscopic analysis. Light microscopy provides a preliminary view, while electron microscopy delves into finer details, aiding in the differentiation of various fungal species.

    Common Fungal Species Identified Through Microscopy

    Fungal SpeciesCharacteristics
    TrichophytonFine hyphae, often causing white or yellow discoloration
    CandidaOvoid yeast cells, associated with a whitish appearance
    AspergillusSeptate hyphae, linked to green or black discoloration

    Understanding the Severity of Infection

    Microscopic findings not only identify the culprit but also unveil the extent of toenail fungus infection. Examining the density and distribution of hyphae and mycelium provides critical insights into the severity of the condition. This firsthand understanding has reinforced the importance of early detection and intervention.

    Microscopic Indicators of Infection Severity

    Severity LevelMicroscopic Indicators
    MildSparse hyphae, limited mycelium presence
    ModerateIncreased hyphae density, expanding mycelium network
    SevereDense hyphal invasion, extensive mycelium throughout the nail

    Link between Microscopic Findings and Symptoms

    Microscopic observations form a bridge between the hidden world of fungi and the visible symptoms experienced by individuals. Understanding this link is crucial for tailoring effective treatment plans. For instance, the presence of spores and conidia might indicate a higher risk of spreading the infection. Recognizing this connection empowers both patients and healthcare professionals to make informed decisions about the most appropriate course of action.

    Connecting Microscopic Findings with Visible Symptoms

    Microscopic FindingsCorresponding Visible Symptoms
    High Hyphal DensityThickening, discoloration, and distortion of the nail
    Presence of Spores and ConidiaIncreased risk of spreading to adjacent nails or skin
    Reduced Hyphal DensityPotential signs of treatment effectiveness

    In summary, microscopic observations provide a comprehensive understanding of toenail fungus, from identifying the specific fungal species to assessing the severity of infection and establishing a direct link with visible symptoms. This knowledge forms the cornerstone for effective diagnosis and personalized treatment strategies.

    Factors Affecting Toenail Fungus Growth

    Toenail fungus is a resilient intruder, and understanding the factors that fuel its growth is paramount for effective prevention and management. Drawing from personal experiences, I’ve come to recognize three key influencers—environmental conditions, host factors, and lifestyle choices—that significantly impact toenail fungus development.

    Environmental Conditions

    The environment in which our feet reside plays a crucial role in toenail fungus growth. Dark, damp, and warm conditions create an ideal breeding ground for fungi. Public places like swimming pools, gyms, and communal showers often harbor these conditions, contributing to the increased risk of infection. Acknowledging the role of environmental factors empowers individuals to be vigilant in spaces where the risk of exposure is heightened.

    Environmental Conditions and Toenail Fungus Growth

    Environmental FactorInfluence on Toenail Fungus Growth
    HumidityFungi thrive in moist environments
    Poor VentilationLimited airflow promotes fungal growth
    Shared SpacesIncreased risk of exposure in communal areas

    Host Factors

    Individual susceptibility to toenail fungus varies, with certain host factors influencing the likelihood of infection. Weakened immune systems, pre-existing health conditions, and genetic predispositions can contribute to an increased vulnerability to fungal invasions. As I navigated my own battle with toenail fungus, understanding these host factors became crucial in crafting a holistic approach to treatment and prevention.

    Host Factors and Toenail Fungus Susceptibility

    Host FactorImpact on Toenail Fungus Susceptibility
    Weakened Immune SystemReduced ability to fend off fungal infections
    Pre-existing ConditionsCertain health issues increase susceptibility
    GeneticsFamilial predisposition may elevate risk

    Impact of Lifestyle Choices

    Our daily habits and choices also significantly influence toenail fungus growth. Personal hygiene practices, footwear choices, and exposure to potential sources of infection all contribute to the equation. Reflecting on my own journey, modifying certain lifestyle choices played a pivotal role in preventing recurrence and fostering overall nail health.

    Lifestyle Choices and Toenail Fungus Impact

    Lifestyle ChoiceInfluence on Toenail Fungus Growth
    Hygiene PracticesRegular cleaning reduces the risk of infection
    Footwear SelectionBreathable, dry footwear discourages fungal growth
    Exposure to Risky EnvironmentsAwareness and precautions in communal spaces

    Treatment Approaches Based on Microscopic Analysis

    Microscopic analysis not only aids in the diagnosis of toenail fungus but also serves as a compass guiding treatment decisions. In my journey, the insights gained through this analysis have played a pivotal role in navigating the diverse landscape of treatment options.Antifungal Medications

    1. Topical Treatments

    Microscopic analysis helps determine the extent of surface-level fungal invasion, guiding the choice of topical treatments. Antifungal nail creams, ointments, and lacquers become viable options for infections that are limited to the nail’s surface. Through personal experience, I found that consistent application, coupled with regular nail trimming, is essential for effective topical treatment.

    2. Oral Medications

    For more severe cases, where microscopic observations reveal deep-rooted fungal networks, oral medications come into play. These systemic antifungal drugs circulate through the bloodstream, reaching the nail bed and effectively targeting the infection at its source. However, the decision to opt for oral medications should be carefully considered, taking into account potential side effects and individual health factors.

    Antifungal Medications and Microscopic Guidance

    Treatment TypeMicroscopic Guidance
    Topical TreatmentsLimited fungal invasion on the nail surface
    Oral MedicationsDeep-rooted fungal networks requiring systemic treatment

    Surgical Interventions

    1. Nail Removal

    In cases where toenail fungus has caused irreparable damage and microscopic analysis reveals extensive invasion, surgical interventions may be necessary. Nail removal, either partial or complete, becomes a viable option. This procedure allows for the direct treatment of the underlying infection, facilitating the application of antifungal medications to the nail bed.

    2. Laser Therapy

    Laser therapy, guided by microscopic insights, has emerged as a promising non-invasive option. Laser light targets the fungal cells, disrupting their structure and inhibiting growth. Microscopic analysis aids in determining the effectiveness of laser therapy, providing a targeted approach for cases where traditional treatments may fall short.

    Surgical Interventions and Microscopic Guidance

    InterventionMicroscopic Guidance
    Nail RemovalExtensive fungal invasion requiring direct treatment
    Laser TherapyTargeted approach for cases where traditional treatments may fall short

    Prevention Strategies Informed by Microscopic Understanding

    Armed with insights from microscopic analysis, effective prevention strategies can be tailored to create an inhospitable environment for toenail fungus. As someone who has witnessed the microscopic intricacies of this condition, I understand the significance of proactive measures in maintaining optimal foot health.

    Personal Hygiene Practices

    Microscopic analysis reveals the vulnerability of nails to fungal invasions under certain conditions. Prioritizing meticulous personal hygiene practices becomes a fundamental aspect of prevention. Regularly cleaning and drying the feet, especially in between the toes, minimizes the risk of fungal growth. Trimming nails with clean tools and avoiding sharing personal grooming items are additional steps informed by microscopic understanding.

    Footwear and Sock Choices

    Microscopic examination sheds light on how fungi thrive in dark, damp environments. Choosing breathable footwear that allows proper ventilation can significantly reduce the risk of toenail fungus. Opting for moisture-wicking socks, preferably made from natural fabrics, aids in keeping feet dry. These preventive measures, grounded in microscopic insights, contribute to creating an environment where fungi struggle to flourish.

    Regular Check-ups and Early Intervention

    Microscopic analysis not only aids in diagnosis but emphasizes the importance of regular check-ups. Periodic visits to healthcare professionals, especially for those with a history of toenail fungus, can facilitate early detection of potential issues. This proactive approach enables swift intervention, preventing the escalation of fungal infections. Early identification of microscopic indicators prompts timely treatment, reducing the impact on nail health.

    Role of Research in Advancing Microscopic Diagnosis

    Microscopic diagnosis of toenail fungus has witnessed significant advancements through ongoing research endeavors. These developments not only deepen our understanding of the condition but also pave the way for more accurate diagnosis and targeted treatment options.

    Recent Studies on Toenail Fungus

    Recent studies delve into the molecular and genetic aspects of toenail fungus, unraveling new insights into the diverse species responsible for infections. These findings inform the refinement of diagnostic criteria, aiding in the identification of specific fungal strains through microscopic analysis.

    Technological Innovations in Microscopy

    Cutting-edge technological innovations in microscopy, such as high-resolution imaging and advanced staining techniques, have revolutionized the field. These innovations enable a more detailed and precise examination of fungal structures, enhancing the diagnostic capabilities of microscopic analysis.

    Future Prospects for Improved Diagnosis and Treatment

    The ongoing trajectory of research holds promise for improved toenail fungus diagnosis and treatment. Future prospects include the development of rapid diagnostic tools, targeted therapies based on individual fungal profiles, and advancements in preventive measures. The collaborative efforts of researchers, clinicians, and technologists contribute to a future where microscopic diagnosis becomes even more precise and impactful in the management of toenail fungus.

    Final Words

    Embarking on the microscopic journey into toenail fungus has unraveled a hidden world beneath the surface. From identifying fungal species to understanding the severity of infection and linking microscopic findings to visible symptoms, this exploration provides a holistic perspective. Microscopic analysis not only guides treatment decisions but also informs preventive strategies. As research continues to advance the field, promising future prospects for improved diagnosis and treatment beckon. Armed with these insights and resources, individuals can navigate their path to healthier toenails, fostering a proactive approach to foot health and overall well-being.

    Resources and References

    For those seeking a deeper understanding of toenail fungus and microscopic diagnosis, the following resources and references provide valuable insights:

    1. American Academy of Dermatology (AAD)
    2. Centers for Disease Control and Prevention (CDC)
    3. Journal of Medical Mycology