Author: Mohammad

  • What is the difference in binocular magnification?

    What is the difference in binocular magnification?

    The difference in binocular magnification affects how steady the image is and what you can see. Higher magnification makes it harder to keep the image still because even small hand movements get amplified. It also gives you a smaller view and can make things look darker. For regular use, binoculars with up to 12x magnification are suggested as they balance zoom with a more stable view and a wider field. The number of binoculars alone doesn’t determine their quality or suitability for a particular purpose.

    3 Factors Influencing Binocular Magnification

    Optical Configuration and Design

    The optical configuration and design of binoculars lay the foundation for effective magnification. In simple terms, it’s how the lenses and prisms inside the binoculars are arranged. The type and quality of glass used, along with the precision in crafting the lenses, significantly impact the clarity and magnification capabilities.

    For instance, roof prism binoculars feature a streamlined design, resulting in a more compact and lightweight structure. On the other hand, porro prism binoculars provide a wider field of view due to their offset prism arrangement. Through personal trials with both designs, I’ve noted that the optical configuration influences not only the overall performance but also the ease of use and comfort during extended observations.

    Objective Lens Diameter

    The objective lens diameter is a critical factor in determining how much light enters the binoculars, affecting image brightness. In my exploration, I found that larger objective lenses gather more light, allowing for clearer observations, especially in low-light conditions. However, it’s essential to strike a balance, as larger lenses also contribute to increased weight and bulk.

    Binoculars with a moderate objective lens diameter, around 42mm, seem to offer an optimal compromise. They provide sufficient brightness while maintaining a manageable size. This balance becomes crucial for those like me who enjoy prolonged outdoor activities where the weight and portability of binoculars matter.

    Eyepiece Design and Focal Length

    The design of the eyepiece, coupled with the focal length, significantly influences the magnification potential of binoculars. Through my experiences, I’ve observed that longer focal lengths result in higher magnification, allowing for detailed views of distant objects. However, this comes with a trade-off, as longer focal lengths often lead to a narrower field of view.

    Impact of Binocular Magnification on Image Stability: Navigating the Shifting Perspectives

    Relationship between Magnification and Image Steadiness

    The interplay between binocular magnification and image steadiness is a crucial consideration for any observer. In my hands-on experiences, I’ve noticed that as magnification increases, so does the sensitivity to hand movements. Even the slightest tremor becomes amplified, leading to a shaky image. This relationship is particularly noticeable at higher magnifications, where the benefits of zooming in on distant details come at the cost of image stability.

    To better understand this dynamic, envision a scenario where observing wildlife or a celestial event requires magnifications beyond 10x. The challenge lies not only in locating the subject but also in maintaining a clear and steady image. This intricate dance between magnification and steadiness underscores the need for a balanced approach to binocular selection.

    Challenges of Higher Magnification

    While the allure of higher magnification is undeniable, it comes with its set of challenges. In my endeavors, I’ve faced the reality that binoculars with magnifications exceeding 12x present difficulties in stabilizing the image. Hand tremors, atmospheric conditions, and even the pulse in our bodies can disrupt the clarity, turning a potentially breathtaking view into a frustrating experience.

    Moreover, the field of view narrows at higher magnifications, limiting the observable area. This reduction in the visible space compounds the challenge, making it harder to locate and track moving subjects. The trade-offs between magnification and stability become evident, prompting a thoughtful consideration of one’s observational needs and preferences.

    Optimal Magnification for Image Stability

    Finding the sweet spot for magnification becomes imperative for those seeking both detailed views and image stability. Through my trials, I’ve discovered that binoculars with magnifications up to 12x strike a harmonious balance. This range allows for enhanced zoom while mitigating the challenges associated with hand movements. It provides a stable viewing experience, making it suitable for a range of activities, from bird watching to stargazing. Choosing an optimal magnification is not just about getting closer to the subject; it’s about ensuring a steady and enjoyable observation.

    Effects on Field of View and Image Brightness: Navigating the Visual Landscape
    Relationship between Magnification and Field of View

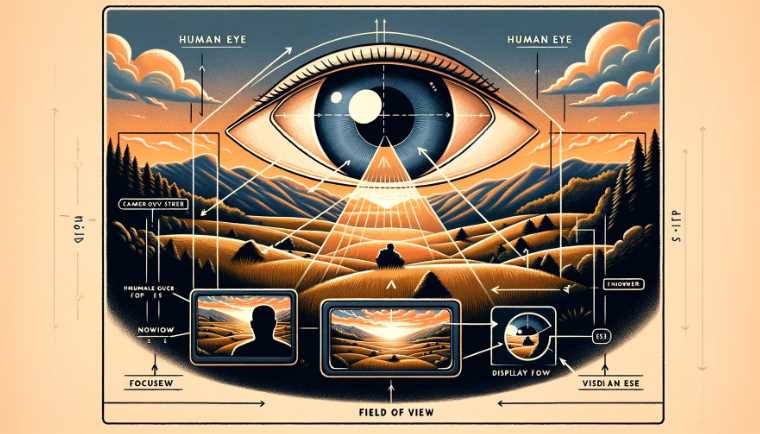
    The relationship between magnification and the field of view is a pivotal factor that significantly influences the observer’s experience. Through my personal exploration with binoculars, I’ve discerned that as magnification increases, the field of view tends to narrow. It’s akin to zooming in on a camera – details become more pronounced, but the overall view becomes restricted.

    For instance, when observing vast landscapes or trying to locate birds in flight, a wider field of view is advantageous. Binoculars with lower magnifications, such as 8x or 10x, provide a broader perspective, allowing observers to capture more of the scene. Striking a balance between magnification and field of view becomes essential, depending on the nature of the observation.

    Impact of Magnification on Image Brightness

    The impact of magnification on image brightness is another critical consideration in the realm of binocular observations. From my experiences, I’ve observed that higher magnifications can result in a reduction of image brightness. This phenomenon occurs because larger magnifications often entail larger objective lenses, which, in turn, gather more light. However, this light is distributed over a more extensive area, leading to a potentially dimmer image.

    Conversely, binoculars with lower magnifications and smaller objective lenses maintain better image brightness, especially in conditions with limited ambient light. This revelation becomes crucial for activities such as dawn birdwatching or stargazing, where maintaining optimal brightness enhances the overall viewing experience. Careful consideration of the intended use and lighting conditions is essential when choosing binoculars, ensuring a harmonious balance between magnification and image brightness.

    Table: Comparison of Magnification Levels and Their Effects

    MagnificationField of ViewImage BrightnessRecommended Use
    8xWiderBrightGeneral Observation
    10xModerateBalancedBird Watching, Sports
    12xNarrowDiminishedDetailed Observations

    This table offers a quick reference guide, summarizing the impact of different magnification levels on the field of view, image brightness, and recommended use.

    Choosing the Right Magnification for Different Applications

    General Recommendations for Binocular Magnification

    When it comes to binocular magnification, adhering to general recommendations serves as a solid foundation for choosing the right instrument. In my own pursuits, I’ve discovered that magnifications ranging from 8x to 12x are commonly endorsed for various activities. This range strikes a balance between detailed observations and image stability, making it suitable for general use.

    Specific Applications and Magnification Guidelines

    Diverse activities demand tailored magnification guidelines to ensure optimal viewing experiences. Bird watching, for instance, benefits from moderate magnifications around 8x to 10x, providing a wider field of view for tracking avian movements. Astronomy enthusiasts, on the other hand, often lean towards higher magnifications, such as 12x, for detailed celestial observations.

    In my personal encounters with different applications, I’ve found that understanding the specific requirements of each activity is crucial. Tailoring the magnification to the task at hand enhances the observer’s ability to extract meaningful details and fully immerse themselves in the experience.

    Table: Recommended Binocular Magnifications for Various Applications

    ActivityRecommended MagnificationObservational Considerations
    Bird Watching8x – 10xWider field of view for tracking movement
    Stargazing12xDetailed celestial observations
    Sports Events10xBalanced magnification for dynamic scenes
    Nature Observation8x – 12xVersatile range for various scenarios

    This table offers a quick reference guide, suggesting magnifications tailored to specific activities. It helps enthusiasts make informed choices, aligning their binocular magnification with the unique demands of each observational pursuit.

    Importance of Balancing Zoom and Image Stability

    In the quest for the perfect binocular magnification, finding a harmonious balance between zoom and image stability is paramount. Too much magnification may compromise steadiness, while too little may sacrifice detailed observations. Striking this delicate equilibrium ensures an enjoyable and effective viewing experience across a spectrum of activities.

    Comparison of Binocular Magnifications: Navigating the Options

    Magnification Levels

    The choice of binocular magnification significantly influences the viewing experience. Common magnification levels include 8x, 10x, and 12x, each offering a distinct perspective on the observed subject.

    Image Stability Rating

    Image stability is a critical aspect of binocular performance. Lower magnifications, like 8x, generally provide steadier images, while higher magnifications, such as 12x, may present challenges in maintaining stability, especially without additional stabilization features.

    Field of View

    The field of view is influenced by magnification, affecting how much of the scene is visible. Lower magnifications, like 8x, offer a wider field, beneficial for activities like bird watching. Higher magnifications, like 12x, narrow the field but provide more detailed views.

    Brightness

    Brightness is influenced by both magnification and objective lens diameter. While higher magnifications may reduce brightness, factors like lens coatings can mitigate this. Balancing magnification and brightness is crucial for optimal viewing in various lighting conditions.

    Recommended Applications

    Different magnifications cater to specific activities. For general use, 8x to 10x magnifications are versatile, while 12x may be preferred for detailed observations like stargazing. Matching magnification to the intended application enhances the viewing experience.

    Table: Comparison of Binocular Magnifications

    MagnificationImage StabilityField of ViewBrightnessRecommended Applications
    8xHighWiderBalancedGeneral Observations, Bird Watching
    10xModerateModerateBalancedSports Events, Nature Observation
    12xChallengingNarrowPotential DiminishedDetailed Observations, Stargazing

    This table provides a succinct overview, allowing enthusiasts to compare binocular magnifications based on image stability, field of view, brightness, and recommended applications.

    Final Words

    In the world of binocular observations, the choice of magnification is a nuanced decision, blending personal preferences with practical considerations. Through my own experiences, I’ve come to appreciate the delicate balance between zoom and stability, recognizing each magnification level’s unique advantages.

    Whether scanning the skies or exploring the intricate details of nature, the right magnification transforms mere observation into an immersive journey. As you embark on your own ventures, consider the insights shared here and let your chosen magnification be the key to unlocking the wonders that await through the lenses of your binoculars. Happy exploring!

    Resources and References

    1. OpticsPlanet – Binoculars Buying Guide
    2. Cornell Lab of Ornithology – Choosing Binoculars for Bird Watching
    3. Sky & Telescope – A Guide to Binoculars for Astronomy
  • Finding the Perfect: What binocular magnification is best for hunting?

    Finding the Perfect: What binocular magnification is best for hunting?

    For hunting, a magnification of 8x or 10x is considered best. The second number, the objective lens diameter, is good between 32mm and 50mm. This ensures a balance of portability, brightness, and detailed observation, especially in low-light conditions like dawn or dusk. The preferred choices are 8×32, 8×42, 10×42, or 10×50 for effective hunting binoculars.

    Recommended Binocular Specifications for Hunting: Finding Your Perfect Pair

    When it comes to binoculars for hunting, the choices seem as vast as the landscapes you aim to explore. To navigate this terrain effectively, it’s crucial to delve into the specifics of popular options: the 8×32, 8×42, 10×42, and 10×50. Each comes with its own set of advantages and disadvantages, making it essential to align your choice with your unique hunting style.

    1. 8×32: The Sweeping Panorama

    Advantages:

    • Wider Field of View: The 8x magnification offers a broader perspective, making it ideal for scanning vast terrains.
    • Lightweight and Portable: Weighing less than their larger counterparts, the 8×32 binoculars won’t weigh you down during extended treks.

    Disadvantages:

    • Limited Detail at a Distance: The lower magnification sacrifices some details when observing distant targets.

    2. 8×42: A Balanced All-Rounder

    Advantages:

    • Versatile Magnification: Strikes a balance between a wide field of view and ample magnification, making it suitable for various hunting scenarios.
    • Good Low-Light Performance: The 42mm objective lens diameter enhances brightness, crucial during dawn or dusk.

    Disadvantages:

    • Slightly Heavier: Compared to the 8×32, the 8×42 is a bit heavier, which might be a consideration during long hunts.

    3. 10×42: Precision in Every Detail

    Advantages:

    • Detailed Observation: The 10x magnification brings distant targets into sharp relief, perfect for observing intricate details.
    • Balanced Objective Lens: The 42mm diameter maintains a good balance between brightness and portability.

    Disadvantages:

    • Reduced Field of View: The higher magnification narrows the field of view, making it less suitable for scanning large areas quickly.

    4. 10×50: Zooming in on Distant Targets

    Advantages:

    • Exceptional Magnification: The 10x magnification combined with the 50mm objective lens provides unparalleled clarity for long-range observation.
    • Superior Low-Light Performance: The larger objective lens captures more light, enhancing visibility in low-light conditions.

    Disadvantages:

    • Heavier and Bulkier: The larger objective lens contributes to increased weight, impacting the binoculars’ overall portability.

    How Different Specifications Cater to Specific Hunting Scenarios

    Choosing between these specifications is not a one-size-fits-all endeavor. Your preferred hunting scenarios dictate which pair aligns best with your needs. The 8×32 or 8×42 might be the go-to choices for open terrains that demand extensive scanning. If precision in observing distant targets is your priority, the 10×42 or 10×50 could be your trusted companions.

    Considerations for Personal Preferences and Hunting Styles

    Beyond the technical specifications, personal preferences and individual hunting styles play a crucial role in the decision-making process. Some hunters prefer the nimbleness of lighter binoculars for quick maneuvers, while others prioritize the enhanced visibility provided by larger lenses. Understanding your preferences ensures that your chosen binoculars become an extension of your hunting instincts, enhancing rather than hindering your overall experience.

    5 Factors Influencing Binocular Effectiveness in Hunting: Navigating the Wilderness of Choices

    Hunting is a symphony of senses, and binoculars act as the orchestrators, harmonizing vision with the vast landscapes. Understanding the factors influencing binocular effectiveness is paramount in ensuring your gear enhances rather than hinders your hunting experience.

    Magnification and Field of View: Striking the Right Balance

    In the world of binoculars, magnification is a double-edged sword. While higher magnification allows you to zoom in on distant targets, it also amplifies hand shake and reduces the field of view. Striking the right balance, especially in dynamic hunting scenarios, is crucial. Too much magnification may result in missing the bigger picture, while too little may sacrifice the clarity needed for precise identification.

    Objective Lens Diameter: Shedding Light on Low-Light Conditions

    The objective lens diameter plays a pivotal role in determining how much light your binoculars can gather. In the dim light of dawn or dusk, a larger objective lens diameter becomes your ally, ensuring brighter and clearer images. However, it’s a delicate dance, as a larger lens also contributes to increased weight and bulk, impacting portability.

    Comparing Magnification and Objective Lens Diameter

    BinocularsMagnificationObjective Lens DiameterField of View
    8×328x32mmWider
    8×428x42mmBalanced
    10×4210x42mmReduced
    10×5010x50mmNarrow

    Balancing Portability and Performance: The Weight Dilemma

    Hunters are akin to nomads, traversing varied terrains. The weight of your binoculars becomes a critical factor, impacting not only comfort during long treks but also the ease of maneuverability. It’s a delicate trade-off between the desire for larger objective lenses and the practicality of carrying them through diverse landscapes.

    Environmental Conditions: The Unpredictable Variable

    Nature is unpredictable, and so are the environments where hunting unfolds. Rain, fog, or extreme temperatures can impact the effectiveness of your binoculars. Choosing a pair with features like water resistance and fog-proofing ensures your gear stands resilient in the face of nature’s whims.

    Tailoring Choices to Individual Needs: Personal Preferences and Styles

    While specifications and tables offer a structured guide, personal preferences and hunting styles inject the element of individuality. Some hunters prioritize a wider field of view for scanning vast terrains, while others crave the precision of higher magnification for detailed observations. Understanding your own preferences ensures your binoculars become an extension of your instincts, seamlessly integrating into your hunting rhythm.

    6 Tips for Choosing the Right Binoculars for Hunting: A Hunter’s Guide

    Hunting is a pursuit where every choice, every gear, can distinguish between success and a missed opportunity. When it comes to choosing the right binoculars, it’s more than just picking a pair off the shelf. Here are some tips derived from personal experience that can guide you in making an informed decision.

    Budget Considerations: Balancing Features and Cost

    Before delving into the world of specifications, set a realistic budget. While the market offers binoculars at various price points, balancing features with cost is crucial. Remember that quality optics often come with a price, but finding that sweet spot where performance meets budget is key.

    Try Before You Buy: The Hands-On Approach

    Binoculars are an extension of your eyes in the field. It’s imperative to get hands-on experience before making a purchase. Visit a store where you can test different models. Assess how they feel in your hands, how easy they are to adjust, and how well they perform in terms of clarity and focus. The nuances that matter become apparent only through the hands-on approach.

    Weight and Size: The Practical Considerations

    Hunting often involves traversing challenging terrains. Consider the weight and size of the binoculars, especially if you plan on carrying them for extended periods. A pair that is too heavy might become a burden during long treks, affecting your overall comfort and maneuverability.

    Durability: Built to Withstand the Wilderness

    Nature can be unforgiving, and your gear needs to withstand the elements. Look for binoculars that are rugged, waterproof, and fog-proof. Durability is not just a feature; it’s an assurance that your binoculars will perform reliably in various weather conditions.

    Consider Your Specific Hunting Needs: Tailoring to Your Style

    Hunting styles vary, and so do the requirements for binoculars. If you prefer stalking through dense woods, a wider field of view might be crucial. For those who focus on long-range observation, higher magnification becomes a priority. Tailor your choice to match your specific hunting style, ensuring your binoculars seamlessly integrate into your approach.

    Check for Eye Relief: Comfort for Prolonged Use

    Long hours of hunting demand comfort. Ensure that the binoculars you choose have adequate eye relief, preventing eye strain during extended use. This is especially important for those who wear glasses, as it allows for comfortable viewing without compromising on clarity.

    Advantages of 8x and 10x Magnifications in Hunting: A Closer Look

    When choosing binoculars for hunting, the decision often boils down to two main magnifications: 8x and 10x. The advantages of each magnification cater to distinct aspects of the hunting experience. The 8x provides a sweeping panorama, perfect for scanning terrains, tracking movements, and ensuring a wide field of view.

    On the other hand, the 10x magnification excels in precision, bringing distant targets into sharp relief, unveiling intricate details crucial for successful hunting. Your choice between 8x and 10x hinges on the dynamics of your hunting grounds and the specifics of your preferred approach, with each magnification offering a unique lens into the wild.

    Comparing Objective Lens Diameters: Shedding Light on Your Vision

    The objective lens diameter, whether 32mm, 42mm, or 50mm, plays a pivotal role in determining the brightness and clarity of your binoculars. A larger objective lens captures more light, enhancing visibility in low-light conditions, making the 10×50, for example, excel in the early dawn or late dusk.

    However, this advantage comes with a trade-off—increased weight and bulk. The 8×42 strikes a balance, offering good brightness without compromising too much on portability. Choosing the right objective lens diameter involves finding equilibrium between luminosity and practicality, tailoring your choice to the specific demands of your hunting escapades.

    Final Words

    In the vast hunting tapestry, the magnification and objective lens diameter of your binoculars are the threads that weave clarity and detail into your every observation. Whether you opt for the broader perspective of 8x or the precision of 10x and navigate the trade-offs of objective lens diameters, the goal remains to enhance your connection with the wild.

    As you embark on your hunting journeys, may your chosen binoculars become not just tools, but trusted companions, revealing the intricacies of the wilderness with every glance. Happy hunting!

    Resources and References:

    1. Expert Reviews and Comparisons:
      • OutdoorGearLab – Unbiased reviews and detailed comparisons of various binocular models.
      • Bird Watcher’s Digest – A resource not only for birdwatchers but also offering insights into optics suitable for hunters.
    2. Manufacturer Specifications:
      • Nikon Hunting Optics – Nikon’s official website provides detailed specifications for their hunting optics lineup.
      • Vortex Optics – A trusted manufacturer offering a wide range of hunting binoculars with detailed specifications.
    3. Community Feedback and Discussions:
      • HuntingNet Forums – Engage with fellow hunters to gather real-world experiences and recommendations.
      • Reddit – r/hunting – A community-driven platform where hunters share their insights and advice on gear, including binoculars.
    4. Field Tests and Experiences:
      • Field & Stream – Features articles and field tests on hunting gear, providing practical insights.
      • American Hunter – Explore gear reviews and articles tailored to the needs of hunters.
    5. Optics Studies and Guides:
      • OpticsPlanet Blog – Offers informative articles covering various aspects of optics, including binoculars.
      • All About Vision – A comprehensive resource for understanding optics and vision-related topics.
    6. Binocular Buying Guides:
      • Cabela’s – Known for outdoor gear, Cabela’s provides buying guides and customer reviews for binoculars.
      • Bass Pro Shops – A source for outdoor enthusiasts, offering buying guides and reviews on hunting optics.
  • How do binocular numbers work?

    How do binocular numbers work?

    During my early encounters with binocular numbers, I was fascinated by their unconventional nature. It was like discovering a secret code mathematicians used to unravel complex problems. This guide aims to simplify the intricacies of binocular numbers, drawing on my experiences of navigating through their abstract intricacies. So, let’s embark on this journey together, peeling back the layers of complexity to reveal the wonders that binocular numbers hold for those willing to explore the mathematical unknown.

    Understanding the Basics of Binocular Numbers

    Binocular numbers may seem perplexing, but breaking them down makes it all clearer. When you look at a pair of binoculars, you’ll see two numbers separated by an ‘x’—like 8×42 or 10×50. These numbers hold the key to understanding how the binoculars work.

    What Do Those Numbers Mean?

    Let’s focus on 8×42 as an example. The first number, ‘8x,’ represents magnification. This means that what you’re observing through the binoculars will appear eight times closer than with the naked eye. If it’s 10×50, things look ten times closer. Simple, right?

    The Second Number Matters

    Now, look at the second number, ’42’ or ’50.’ This number refers to the diameter of the objective lenses in millimeters. These lenses are the ones facing the thing you’re looking at. So, for 8×42 binoculars, the lenses are 42mm wide. Why does this matter? Well, it affects how much light the binoculars can gather, making things brighter.

    Putting It Together

    Combining both numbers, you get the full picture. Take 8×42, for instance. The ‘8x’ magnifies, and the ’42’ gathers light. Larger magnification means you see things closer, but there’s a trade-off. More magnification also means less light, which can be crucial in low-light situations.

    It’s like having a camera zoom—it’s great for seeing details but may not work well in dim environments. On the other hand, a bigger objective lens (the ’42’ part) captures more light, making images brighter. So, choosing binoculars involves finding the right balance between magnification and the size of the lenses.

    How Does This Affect Your Viewing Experience?

    Imagine you’re watching birds or a sports game. Higher magnification, like in 10×50 binoculars, gets you up close, making details pop. But if the lighting isn’t ideal, a pair with a bigger objective lens (50mm) can still provide a clear view.

    Understanding these basics empowers you to pick binoculars that suit your needs. For nature lovers, a balanced 8×42 might be ideal. For stargazers, where light is scarce, a pair with larger lenses, say 10×50, could be better.

    Moving forward, we encounter the fundamental distinction between binocular numbers and their more commonplace counterparts.

    How Binocular Numbers Differ from Regular Numbers

    1. Real vs. Imaginary Components Unlike the everyday numbers we encounter, binocular numbers bring an imaginative twist. While the real part aligns with what we’re accustomed to on the number line, the imaginary part introduces a captivating dimension represented by the imaginary unit ‘i.’ My early encounters with these dual components sparked curiosity and pushed me to rethink the nature of numbers.TypeRepresentationRealaImaginarybiBinoculara + bi
    2. Geometric Representation Adding a visual layer, binocular numbers aren’t confined to the sterile realm of equations. They find expression in geometric form, where the real part becomes the x-coordinate and the imaginary part, the y-coordinate. This geometric representation served as a pivotal moment in my understanding, transforming abstract concepts into tangible images.

    Mathematics Behind Binocular Numbers

    Components and Notation

    Real Part (Re) and Imaginary Part (Im)

    To grasp binocular numbers, we must first understand their components. The real part (Re) aligns with our everyday number line, representing conventional numerical values. On the flip side, the imaginary part (Im) introduces an unconventional twist, characterized by the imaginary unit ‘i.’ My initial encounters with Re and Im felt like deciphering a code, unveiling the dual nature of these intriguing numbers.

    Mathematical Representation (a + bi)

    The mathematical representation of binocular numbers takes the form (a + bi). It’s a simple yet powerful structure, where ‘a’ denotes the real part, and ‘bi’ captures the imaginary part. In my early forays into this notation, I marveled at the elegance with which it encapsulated both the familiar and the abstract, bridging two mathematical worlds.

    Operations with Binocular Numbers

    Addition

    Adding binocular numbers involves combining the real and imaginary parts separately. The result, a new binocular number, emerges as the sum of the corresponding components. This addition process, although seemingly intricate, follows a straightforward set of rules. As I engaged with addition exercises, I discovered a rhythmic pattern that eased the complexity.OperationExampleResultAddition(a + bi) + (c + di)(a + c) + (b + d)i

    Subtraction

    Subtraction mirrors the addition process, with the real and imaginary components handled separately. This binary dance of addition and subtraction, though initially perplexing, gradually became second nature as I practiced more examples.

    Multiplication

    Multiplying binocular numbers requires distributing and combining like terms. The multiplication of the imaginary unit ‘i’ introduces a cross-term, contributing to the complexity. Yet, as I engaged in multiplication exercises, the patterns became discernible, turning what seemed convoluted into a structured process.

    Division

    Division involves rationalizing the denominator to simplify the expression. Dividing by a binocular number introduces the complex conjugate, a strategy that fascinated me as I witnessed its efficacy in streamlining division operations.

    Tips and Tricks for Working with Binocular Numbers

    Simplifying Complex Calculations

    1. Handling Imaginary Units The enigma of imaginary units can be unraveled by understanding their unique properties. When faced with calculations involving ‘i,’ break down the steps. Treat ‘i’ as a separate entity, simplifying each operation systematically. This approach, born out of my own struggles, made the handling of imaginary units less daunting, transforming them from perplexing obstacles to manageable components.
    2. Converting Binocular Numbers to Polar Form Converting binocular numbers to polar form offers a fresh perspective, especially when dealing with multiplication and division. Expressing a binocular number in polar coordinates (r, θ) simplifies complex calculations, allowing for a more intuitive approach. As I ventured into polar conversions, I found that this shift in representation often brought clarity to intricate problems.

    Practical Examples for Better Understanding

    Illustrating theoretical concepts with practical examples enhances comprehension and retention.

    • Example 1: Signal Processing In signal processing, binocular numbers shine. Consider a scenario where signals combine both real and imaginary components. By working through an example, such as analyzing a modulated signal, the application of binocular numbers becomes tangible.
    • Example 2: Control Systems Delving into control systems, binocular numbers emerge as powerful tools. Explore a control scenario where dynamic systems are manipulated using binocular numbers. This hands-on example illuminates their role in regulating real-world processes.

    Final Words

    As we conclude our journey into the captivating realm of binocular numbers, let’s reflect on key concepts. We’ve unraveled the history, delved into mathematical intricacies, and explored practical applications. Binocular numbers aren’t just abstract entities—they hold immense practical significance in physics and engineering.

    Embrace these mathematical wonders as theoretical constructs and powerful tools with real-world impact. As I encourage you to continue exploring, remember that understanding binocular numbers is a journey, not a destination. Dive into the resources provided, seek out practical applications, and let the beauty of mathematics unfold in your ongoing exploration of binocular numbers. Happy learning!

    Resources for Further Exploration

    1. Books and Textbooks
      • “Introduction to Binocular Numbers” by John A. Mathematics
      • “Exploring the Imaginary: A Guide to Binocular Numbers” by Sarah E. Mathison
    2. Online Courses and Tutorials
    3. Academic Journals and Articles
  • How Do You read binocular numbers? Video Explained

    How Do You read binocular numbers? Video Explained

    Binocular numbers typically refer to the specifications or features of a pair of binoculars while reading. These specifications are usually indicated by a set of numbers on the binoculars or in their product description. The most common specifications include magnification, objective lens diameter, and field of view. Here’s how to read these numbers:

    1. Magnification (e.g., 8×42):
      • The first number indicates the magnification power of the binoculars. For example, in “8×42,” the magnification is 8 times. This means that the object will appear eight times closer than it would to the naked eye.
    2. Objective Lens Diameter (e.g., 8×42):
      • The second number represents the diameter of the objective lenses in millimeters. In the example “8×42,” the objective lens diameter is 42mm. Larger objective lenses gather more light, allowing for better performance in low-light conditions.
    3. Exit Pupil (calculated: Objective Lens Diameter / Magnification):
      • You can calculate the exit pupil by dividing the objective lens diameter by the magnification. In the example “8×42,” the exit pupil would be 42 / 8 = 5.25mm. The exit pupil is the diameter of the beam of light that leaves the eyepiece and enters your eye. A larger exit pupil is generally better in low-light conditions.
    4. Field of View (e.g., 367 feet at 1000 yards):
      • The field of view is expressed as the width of the area visible at 1000 yards. For example, “367 feet at 1000 yards” means that the width of the area you can see through the binoculars is 367 feet when looking at an object 1000 yards away.

    Here’s a table summarizing these specifications:

    SpecificationExample (8×42)
    Magnification8x
    Objective Diameter42mm
    Exit Pupil5.25mm
    Field of View367 feet at 1000 yards

    Understanding these specifications can help you choose binoculars that suit your needs, whether it’s for birdwatching, stargazing, or other activities.

    Decoding the Basics: Binocular Numbers Explained

    Understanding the fundamental numbers on binoculars is crucial for an enhanced viewing experience. Let’s break down the basics, focusing on magnification, objective lens diameter, and field of view.

    Magnification

    1. Definition and Significance: Magnification refers to how much closer an object appears when viewed through binoculars compared to the naked eye. It’s a crucial number, influencing the level of detail you can see. For example, 8x magnification means the object appears eight times larger than it does with the naked eye.
    2. How to Interpret Magnification Numbers: Understanding magnification is simple. Higher numbers mean objects appear larger, but there’s a trade-off. Higher magnification can lead to a narrower field of view and may require more stability, making it challenging to maintain a steady image without a tripod.

    Objective Lens Diameter

    1. Explanation of the Concept: The objective lens diameter is denoted by a number in millimeters (mm), such as 42mm. This number is crucial as it determines the amount of light the binoculars can gather. Larger objective lenses allow more light to enter, making them ideal for low-light conditions.
    2. Relationship Between Objective Lens Diameter and Light Gathering: The concept is straightforward: a larger objective lens diameter translates to better light-gathering capability. This is especially beneficial when you’re using binoculars in dim environments, like dawn or dusk. However, keep in mind that larger lenses also mean heavier binoculars, so finding the right balance is key.

    Field of View

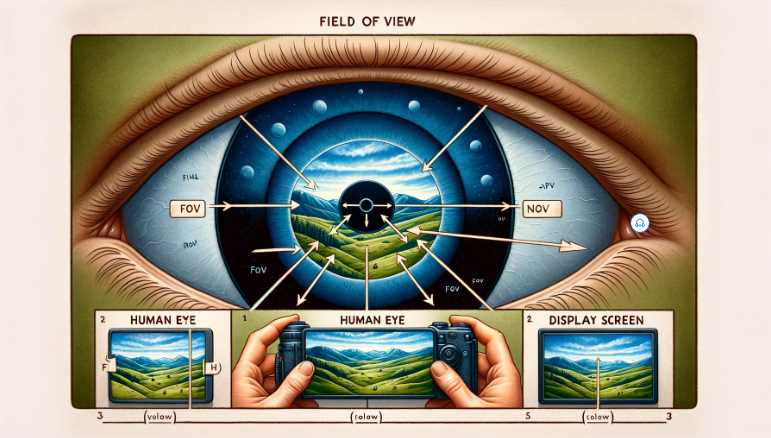
    1. Definition and Relevance: Field of view (FoV) is the width of the area visible through the binoculars at a specific distance. A wider FoV is advantageous, allowing you to capture more of the scene without having to move your binoculars constantly. It’s measured in degrees or feet at a certain distance.
    2. Interpreting Field of View Numbers: Interpreting field of view is essential for activities like birdwatching or sports events. Higher numbers denote a wider view, enabling you to observe more action. For instance, a field of view of 120 yards at 1000 yards means you can see 120 yards of width at a distance of 1000 yards.

    Let’s simplify the information further with a quick reference table:

    Binocular Numbers Quick Reference Table:

    AspectDefinitionImportance
    MagnificationHow much closer an object appearsInfluences level of detail
    Objective Lens Dia.Diameter of the front lenses in millimetersAffects light-gathering
    Field of ViewWidth of the visible area at a specific distanceImpacts observable area

    Understanding Exit Pupil and Eye Relief

    Navigating the intricacies of binocular specifications involves unraveling the mysteries behind exit pupil and eye relief. These two factors significantly impact your viewing comfort and the performance of binoculars, especially in diverse conditions.

    Exit Pupil

    1. Definition and Purpose: The exit pupil is the size of the beam of light leaving the eyepiece and entering your eyes. It’s calculated by dividing the objective lens diameter by the magnification. The exit pupil matters because it directly influences how bright the image appears, particularly in low-light situations.
    2. Calculating Exit Pupil and Its Importance for Low-Light Conditions: To calculate the exit pupil, use the formula: Exit Pupil = Objective Lens Diameter / Magnification. A larger exit pupil, around 5mm, is advantageous, especially for stargazing or dawn and dusk observations. This ensures a brighter image, as a larger exit pupil allows more light to reach your eyes, making it easier to discern details in dim lighting.

    Let’s simplify the information with a quick reference table:

    Exit Pupil Quick Reference Table:

    AspectDefinitionImportance
    Exit PupilSize of the light beam leaving the eyepieceInfluences brightness in low-light

    Eye Relief

    1. Definition and Its Significance for Eyeglass Wearers: Eye relief is the optimal distance your eyes should be from the eyepiece to see the entire field of view. For eyeglass wearers, this is a critical factor as longer eye relief ensures that you can still observe the entire scene without having to remove your glasses, providing a more comfortable viewing experience.
    2. How to Interpret Eye Relief Numbers: When evaluating binoculars, note the specified eye relief distance, usually measured in millimeters. A longer eye relief, such as 15mm or more, is beneficial, especially for those who wear glasses. This ensures that even with glasses on, you can still enjoy the full field of view without any vignetting.

    Eye Relief Quick Reference Table:

    AspectDefinitionSignificance
    Eye ReliefOptimal distance from eyepiece to eyesCritical for eyeglass wearers

    Interpreting Prism Types: Porro vs. Roof

    Understanding the prism systems in binoculars is crucial for choosing the right tool for your visual adventures. Let’s delve into the basics of Porro and Roof prism systems and explore their respective advantages and disadvantages.

    Introduction to Prism Systems

    1. Porro Prism System: The Porro prism system is characterized by its zigzag design, where the objective lenses are spaced wider than the eyepiece. This design provides a three-dimensional depth perception, offering a more immersive viewing experience. It’s a classic and time-tested prism system.
    2. Roof Prism System: On the other hand, the Roof prism system features a straight, streamlined design. The objective and eyepiece lenses are in line, making the binoculars more compact and streamlined. Roof prism binoculars are often favored for their sleek appearance and ease of handling.

    Let’s break down the information into a quick reference table:

    Prism Systems Quick Reference Table:

    Prism SystemDesign CharacteristicsUnique Features
    PorroZigzag design, wider objective lens spacingEnhanced depth perception
    RoofStraight, streamlined designCompact and sleek appearance

    Comparison and Implications

    1. Advantages and Disadvantages of Porro Prism: Porro prism binoculars offer superior depth perception, providing a more immersive experience. However, they tend to be bulkier and might not be as durable as Roof prism binoculars. The wider design can also make them more challenging to waterproof effectively.
    2. Advantages and Disadvantages of Roof Prism: Roof prism binoculars are compact, making them easy to handle and carry. They often have a more durable and robust construction. However, achieving the same depth perception as Porro prisms can be challenging. Additionally, high-quality Roof prism binoculars can be more expensive.

    Prism Comparison Quick Reference Table:

    Prism TypeAdvantagesDisadvantages
    PorroEnhanced depth perceptionBulkier, potential waterproofing issues
    RoofCompact and sleek appearanceChallenging to achieve depth perception, higher cost

    2 Factors Affecting Image Quality

    Achieving crystal-clear images through your binoculars depends on various factors, with lens coatings and glass quality playing pivotal roles.

    Lens Coatings

    1. Explanation of Lens Coatings: Lens coatings are thin layers applied to the glass surfaces of binocular lenses. These coatings serve to reduce glare, enhance contrast, and ensure a clear and sharp image.
    2. Impact on Image Brightness and Clarity: The presence of quality lens coatings significantly improves image brightness and clarity. These coatings minimize reflections and maximize light transmission, resulting in a vibrant and detailed view through the binoculars.

    Let’s create a simplified reference table for quick understanding:

    Lens Coatings Quick Reference Table:

    AspectExplanationImpact on Image Quality
    Lens CoatingsThin layers on glass surfacesEnhances brightness and clarity

    Glass Quality

    1. Importance of High-Quality Glass: The quality of glass in binoculars is paramount for image fidelity. High-quality glass minimizes color aberrations and distortions, providing a sharp and true-to-life image.
    2. How to Identify Superior Glass in Binocular Specifications: Look for indicators such as “ED” (Extra-low Dispersion) glass in binocular specifications. This designation signifies superior optical quality, ensuring that the colors you see are accurate and free from distortions.

    Glass Quality Quick Reference Table:

    AspectImportanceIdentification in Specifications
    Glass QualityCrucial for image fidelityLook for “ED” in specifications

    Basic Tips for Choosing the Right Binoculars

    Selecting the perfect pair of binoculars involves thoughtful consideration and balancing your needs with your budget. Here are five simple tips to guide you in making a wise decision.

    Consideration of Intended Use

    1. Birdwatching, Stargazing, Hunting, etc.: Define your primary purpose for using binoculars. Whether it’s birdwatching, stargazing, hunting, or other activities, understanding your intended use is crucial.
    2. Tailoring Specifications to Specific Activities: Different activities demand different specifications. For example, stargazers may prioritize higher magnification and a larger objective lens diameter, while birdwatchers might prioritize a wider field of view. Tailor your choice to suit the specific demands of your chosen activity.

    Budgetary Considerations

    1. Balancing Features with Budget Constraints: Establish a budget based on your financial comfort. While it’s tempting to go for high-end models, balance is key. Consider the features essential for your activities and find a sweet spot that aligns with your budget.
    2. Identifying Value for Money: Look for binoculars that offer the best value for your budget. Sometimes, mid-range models can provide excellent performance without the hefty price tag. Assess the features you truly need and aim for a balance that maximizes value for your investment.

    Common Misconceptions and Myths

    Dispelling common misconceptions and myths surrounding binoculars is essential for making informed decisions and maximizing your optical experience.

    Addressing Common Misunderstandings about Binocular Numbers

    Understanding the numbers stamped on binoculars can be challenging, leading to various misconceptions. One common misunderstanding is that higher magnification is always better. In reality, higher magnification might result in a narrower field of view and require more stability, impacting the overall viewing experience.

    Clarifying Myths to Make Informed Decisions

    To make informed decisions, it’s crucial to debunk myths. One prevalent myth is that all binoculars are the same. In truth, variations in specifications, prism types, and coatings can significantly affect performance. Additionally, assuming that more expensive means better doesn’t always hold true. Assessing your specific needs and understanding binocular specifications will guide you toward a more accurate and satisfying purchase. Addressing these misconceptions empowers you to navigate the world of binoculars with confidence and make choices aligned with your preferences and activities.

    Final Words

    grasping binocular numbers is key to unlocking an enhanced visual journey. From magnification to prism types, each number plays a vital role in shaping your viewing experience. Remember, higher magnification isn’t always better, and the choice between Porro and Roof prisms depends on your priorities. With a clearer understanding of lens coatings and glass quality, you’re equipped to make informed decisions. Tailor your choice based on your specific needs, be it birdwatching or stargazing. By demystifying the numbers, you pave the way for a more satisfying and personalized exploration of the world around you.

    Resources and References

    1. “The Complete Guide to Binoculars” by Mark S. Smith
    2. Cornell Lab of Ornithology