Author: Mohammad

  • 8 Things You Need to Know About Using a Light Microscope in Biology Class

    Using a light microscope is a great way to learn about the world around you. When students first begin learning about biology, they usually focus on using microscopes to examine individual cells. However, a light microscope is also an excellent way to understand biological processes such as photosynthesis and cellular respiration.

    A light microscope is a device that magnifies objects many times, up to 10,000x. A cheap and simple alternative to these costly microscopes is the essential handheld microscopes that you can buy for under $10. These magnifications range from 4x to 400x and can be used to inspect various materials such as food, insects, fossils, and minerals. 

    In this article, we will discuss how to use a light microscope and provide step-by-step instructions on how to start with basic microscopy in just 10 minutes. We will teach you what equipment you need and how to use it.

    Understanding the Basics of Light Microscopy: Illuminating the Foundations

    Definition and Principles of Light Microscopy

    Light microscopy, at its essence, is the art of magnifying and observing specimens using visible light. This powerful technique relies on the fundamental principles of optics to unravel the mysteries of the microcosm. By leveraging the interaction of light with specimens, scientists can delve into a world otherwise hidden to the naked eye.

    TermDefinition
    Light MicroscopyA technique utilizing visible light to magnify and observe specimens, revealing details not perceptible to the naked eye.
    OpticsThe study of light behavior, essential in understanding how light interacts with specimens and lenses to produce magnified images.
    SpecimenThe object under observation, which can range from biological samples like cells to inanimate materials such as crystals.

    Components of a Light Microscope: Unveiling the Mechanism

    The heart of any light microscope lies in its components, each playing a crucial role in the magnification and visualization process.

    ComponentFunction
    ObjectivesA set of lenses closest to the specimen, responsible for magnifying the image. Microscopes often come with multiple objective lenses, each offering different levels of magnification.
    EyepieceThe lens closest to the observer’s eye, further magnifying the image produced by the objective. Typically, microscopes have eyepieces with 10x magnification.
    StageThe platform where the specimen is placed for observation. It often includes stage clips or a mechanical stage to secure and manipulate the specimen easily.
    CondenserPositioned beneath the stage, the condenser focuses and concentrates light onto the specimen, enhancing contrast and brightness. Adjustable diaphragms control the amount of light reaching the specimen.
    LightThe light source, illuminating the specimen for observation. It can be built into the microscope or an external source, ensuring proper illumination for clear imaging.

    Understanding these components provides the foundation for mastering the art of light microscopy. Each element harmoniously contributes to the creation of detailed and vivid microscopic images. As we delve deeper into the microscopic world, these components will prove to be our guiding lights.

    Uses of Light Microscope Parts:

    Light microscopes are invaluable tools that enable scientists, researchers, and students to explore the hidden intricacies of the microcosm. Understanding the uses of each microscope part is paramount to harnessing the full potential of this scientific instrument.

    Objectives: Magnifying the Microscopic Landscape

    Objectives, the primary lenses closest to the specimen, are pivotal in determining the level of magnification. Microscopes typically come with multiple objective lenses, each serving a unique purpose and magnification level.

    TypeMagnificationUse
    Low Power4x to 10xIdeal for locating specimens and getting an overview of the sample.
    High Power20x to 40xSuitable for detailed observation and analysis of cellular structures.
    Oil Immersion100xUsed with a special immersion oil to achieve the highest magnification, essential for studying minute details such as bacteria and subcellular structures.

    Eyepiece: The Gateway to Microscopic Realms

    The eyepiece, also known as the ocular lens, further magnifies the image produced by the objective. Typically featuring 10x magnification, it plays a crucial role in enhancing the observer’s view and facilitating detailed analysis.

    TypeMagnificationUse
    10x10xStandard eyepiece magnification, providing a clear and well-detailed view of the specimen.
    15x/20x15x/20xSpecialized eyepieces for enhanced magnification, useful in situations demanding increased detail.

    Stage: Secure Platform for Observation

    The stage is the platform where the specimen is placed for observation. Equipped with stage clips or a mechanical stage, it ensures the stable positioning of the specimen, allowing for easy manipulation and precise examination.

    TypeUse
    Fixed StageSuitable for stable specimens that do not require frequent adjustments.
    Mechanical StageFacilitates precise movement of the specimen, allowing for controlled scanning and examination.

    Condenser: Illuminating the Microscopic Canvas

    Positioned beneath the stage, the condenser is responsible for focusing and concentrating light onto the specimen. Adjustable diaphragms control the amount of light reaching the specimen, influencing contrast and brightness.

    TypeUse
    Abbe CondenserCommonly found in most microscopes, suitable for routine microscopy applications.
    Darkfield CondenserEnhances contrast by illuminating the specimen with oblique light, ideal for transparent or unstained specimens.
    Phase Contrast CondenserUtilized in phase contrast microscopy to visualize subtle differences in refractive indices within the specimen, making transparent structures visible.

    Light Source: Illuminating the Invisible

    The light source, often located below or within the microscope, illuminates the specimen for observation. Understanding the various types of light sources aids in optimizing the illumination for clear and detailed imaging.

    TypeUse
    Tungsten BulbStandard light source for routine microscopy, emitting a warm light suitable for most specimens.
    LEDEnergy-efficient alternative with adjustable intensity, providing cool and even illumination.
    HalogenProduces a bright and white light, ideal for demanding applications such as fluorescence microscopy.

    By comprehending the distinct uses of each light microscope part, from objectives to the light source, we unlock the potential to unravel the mysteries concealed within the microscopic world. These components work in harmony, enabling us to navigate the microcosm with precision and clarity.
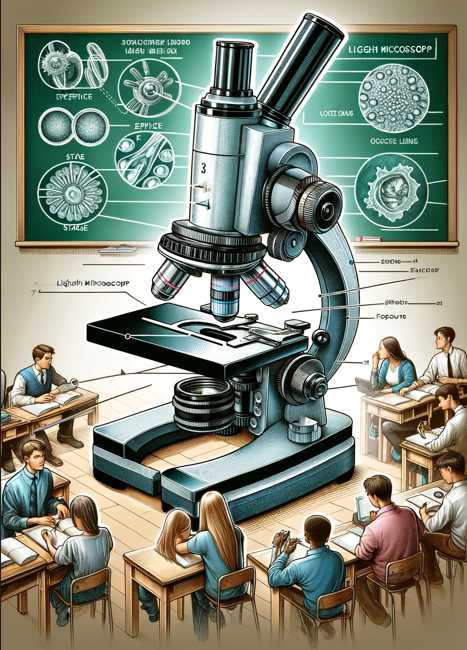
    How to use a light microscope: Follow these easy steps below 

    Light microscopes are powerful tools that open a window into the invisible world of the microcosm. Whether you’re a student, researcher, or enthusiast, mastering the art of using a light microscope is essential for unlocking the secrets hidden within tiny specimens.

    Step 1: Setting Up the Microscope

    Begin by assembling the microscope components. Follow these simple steps to ensure a proper setup:

    ActionDescription
    Place the microscopePosition the microscope on a stable surface with sufficient space for the stage and easy access to controls.
    Adjust the light sourceEnsure the light source is turned on and properly directed toward the condenser.
    Set the objectivesStart with the lowest magnification objective in place, securing it in the revolving nosepiece.

    Step 2: Preparing the Specimen

    Proper preparation of the specimen is crucial for obtaining clear and detailed images. Follow these steps:

    ActionDescription
    Place the specimen on the stageSecure the specimen on the center of the stage using stage clips or a mechanical stage for precise positioning.
    Adjust the focusUse coarse focus to bring the specimen into view. Then, use fine focus for sharp and detailed focusing.
    Choose the right objectiveSelect the appropriate objective lens based on the magnification needed for your specimen.

    Step 3: Navigating the Microscopic World
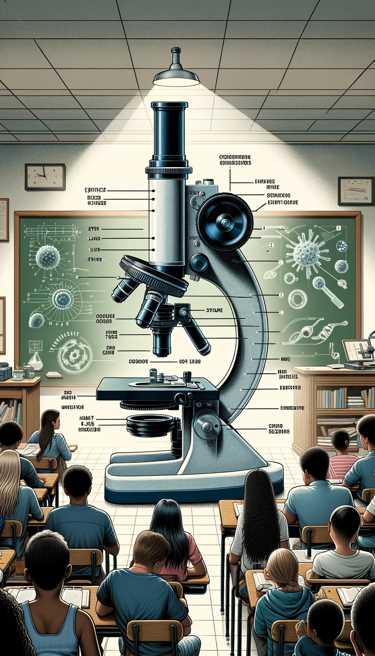
    Once your specimen is in place, it’s time to explore the microcosm. Follow these steps for effective navigation:

    ActionDescription
    Use the stage controlsManipulate the mechanical stage or stage controls to scan the specimen systematically.
    Adjust the condenser and diaphragmOptimize the condenser and diaphragm settings to control the amount and angle of light reaching the specimen.
    Capture and record observationsUtilize the eyepiece and camera attachments to observe and document the microscopic details.

    Step 4: Care and Maintenance

    Proper care ensures the longevity and efficiency of your light microscope. Follow these steps:

    ActionDescription
    Power off and unplugAfter use, turn off the microscope and unplug it to conserve energy and prevent damage.
    Clean the lensesUse lens cleaning solution and lens paper to gently clean the objective and eyepiece lenses.
    Store in a protective caseWhen not in use, store the microscope in a dust-free and secure case to prevent damage and contamination.

    By following these easy steps, you can confidently use a light microscope to explore the hidden wonders of the microcosm. Whether you’re a beginner or seasoned user, these guidelines will enhance your microscopy experience and ensure accurate observations.

    Unlocking Clarity: Mastering Sample Preparation Techniques for Light Microscopy

    Effective sample preparation is the cornerstone of successful light microscopy, enabling researchers to unveil the intricate details of specimens that would otherwise remain hidden. This comprehensive guide outlines key techniques, from fixation to troubleshooting, ensuring you achieve clear and detailed images.

    Overview of Sample Preparation Methods for Light Microscopy

    Before diving into the specific techniques, it’s essential to understand the diverse methods available for sample preparation in light microscopy. Different specimens may require tailored approaches. Here’s a brief overview:

    MethodDescription
    Wet MountA simple and quick technique involving placing the specimen in a liquid on a slide, covered with a coverslip. Suitable for live and unstained specimens.
    SmearInvolves spreading a thin layer of the specimen onto a slide for examination, commonly used for blood or bacterial samples.
    SectioningUsed for solid specimens, involves slicing or sectioning the material thinly to allow light to pass through.
    Fixation and EmbeddingPreserves the structure of cells or tissues by fixing them in a solution and embedding them in a solid medium for sectioning.

    Fixation, Staining, and Mounting Procedures

    Achieving optimal results in light microscopy often involves a sequence of crucial steps. Let’s delve into the procedures of fixation, staining, and mounting:

    StepDescription
    FixationImmersing the specimen in a fixative, such as formaldehyde, to preserve its structure and prevent decay.
    StainingIntroducing dyes or stains to enhance contrast and highlight specific structures or components within the specimen.
    MountingPlacing the prepared specimen on a glass slide and covering it with a coverslip using a mounting medium to secure and protect the specimen.

    Importance of Proper Sample Preparation in Obtaining Clear and Detailed Images

    The quality of your microscopic images is directly influenced by the precision of your sample preparation. Understanding the significance of each step ensures that your observations are accurate and meaningful:

    AspectImportance
    Preserving StructureFixation maintains the integrity of cellular structures, preventing distortion and decay during observation.
    Enhancing ContrastStaining enhances contrast, making specific features more visible and aiding in the identification of structures.
    Securing the SpecimenProper mounting ensures that the specimen remains in place during observation, preventing movement and blurring.

    Troubleshooting Common Issues in Sample Preparation

    Even with meticulous care, issues may arise during sample preparation. Here are common problems and their solutions:

    IssueSolution
    Air BubblesGently tap the coverslip to remove air bubbles, or use a fine needle to release trapped air along the edges.
    Uneven StainingEnsure uniform distribution of the stain and adjust staining times. Consider using different staining techniques.
    Tissue DistortionReview fixation procedures and ensure proper embedding. Experiment with alternative fixatives for better preservation.

    Tips and Best Practices for Optimal Results

    Microscopy, an intricate dance between precision and curiosity, demands not just technical know-how but a nuanced approach. Elevate your microscopy experience with these tips and best practices that span from enhancing quality to avoiding common pitfalls.

    ৪ Tips for Enhancing the Quality of Your Microscopy Work

    Quality microscopy requires attention to detail and a keen eye. Follow these tips to elevate the caliber of your observations:

    TipDescription
    Keep Lenses CleanRegularly clean objective and eyepiece lenses using appropriate solutions to prevent debris and ensure clarity.
    Calibrate Your MicroscopePeriodically check and calibrate your microscope to ensure accurate magnification and reliable measurements.
    Choose the Right ObjectiveSelect the appropriate objective for your sample to achieve the desired level of magnification and clarity.
    Adjust IlluminationFine-tune the light intensity and focus to optimize illumination for your specific specimen.

    Best Practices for Efficient and Effective Microscope Use

    Efficiency in microscopy not only saves time but also enhances the overall experience. Adopt these best practices for smooth and effective microscope use:

    Best PracticeDescription
    Start with Low MagnificationBegin observations with a low-magnification objective, gradually progressing to higher magnifications as needed.
    Use Both EyesUtilize both eyes when looking through the microscope to enhance depth perception and reduce eye strain.
    Keep Detailed RecordsMaintain a detailed log of your observations, settings, and any abnormalities encountered for future reference.
    Engage in Regular MaintenanceConduct routine maintenance, including cleaning lenses and checking for loose parts, to ensure optimal performance.

    Common Pitfalls to Avoid in Light Microscopy

    Navigating the world of microscopy comes with its share of challenges. Be mindful of these common pitfalls to safeguard against potential issues:

    PitfallDescription
    Inadequate Sample PreparationEnsure thorough sample preparation to avoid distortion, artifacts, or misinterpretation of the specimen.
    Ignoring Proper IlluminationImproper illumination can lead to poor image quality; adjust the condenser and diaphragm for optimal lighting.
    Rushing Through FocusingPatience is key; rushing through focusing can result in missed details. Take the time to achieve optimal focus.
    Neglecting Regular MaintenanceLack of regular maintenance can lead to equipment issues and compromise the quality of your microscopy work.

    Specialized Light Microscopy for Specific Samples

    In the realm of light microscopy, specialized techniques tailored for distinct sample types open up new dimensions of exploration. These methods, each designed to address unique challenges, empower researchers to uncover intricate details in specific samples.

    A. Fluorescence Microscopy: Illuminating the Invisible

    Fluorescence microscopy is a powerful technique that involves using fluorescent dyes to label specific structures within a sample. When exposed to light of a specific wavelength, these labels emit fluorescence, allowing for detailed visualization. This method is particularly effective for studying live cells, cellular processes, and molecular interactions.

    AdvantagesApplications
    High SensitivityCellular and molecular imaging
    Multiplexing CapabilitiesProtein localization and tracking
    Live Cell ImagingDynamic processes within living cells

    B. Phase Contrast Microscopy: Revealing Transparency

    Phase contrast microscopy enhances the contrast of transparent specimens by exploiting differences in refractive indices. This method is ideal for observing live cells, unstained biological materials, and other transparent samples without the need for elaborate staining procedures.

    AdvantagesApplications
    Detailed ObservationLive cell imaging
    No Staining RequiredObservation of unstained biological specimens
    Improved ContrastTransparent and low-contrast samples

    C. Differential Interference Contrast (DIC) Microscopy: Capturing 3D Structures

    DIC microscopy, also known as Nomarski interference contrast, provides three-dimensional imaging by detecting changes in optical path length. It is particularly useful for studying highly transparent samples such as live cells, tissues, and subcellular structures.

    AdvantagesApplications
    3D Imaging CapabilityObservation of living cells and dynamic cellular processes
    Enhanced ContrastVisualizing transparent and low-contrast specimens
    Improved Depth PerceptionDetailed examination of cellular and subcellular structures

    D. Darkfield Microscopy: Unveiling Subtle Details

    Darkfield microscopy employs oblique illumination to enhance contrast and visualize specimens against a dark background. This technique is valuable for highlighting fine details and observing transparent or unstained samples.

    AdvantagesApplications
    High ContrastObservation of bacteria, live cells, and small organisms
    Reveals Subtle StructuresDetection of small particles and fine details
    Minimal Background InterferenceHighlighting objects with low inherent contrast

    These specialized light microscopy methods offer a spectrum of possibilities for researchers aiming to study specific samples with precision and depth. Tailoring the technique to the nature of the specimen enhances the accuracy and richness of the observed data.

    4 Things that are usually done wrong when using a light microscope:

    1. You don’t adjust your lighting for different refractions (magnification) of samples in the case of complex specimens or if some elements on the material may have curved shapes, which will affect observation under certain conditions like condensation-coating, etc.

    2. Be careful when adjusting the adjustable foot of a stage so that it doesn’t apply more pressure to harmful materials like paper and other non-supporting objects.

    3. Don’t leave samples sit at room temperature; healthy specimens should always be observed in warm conditions, which would help maintain specimen clarity as well as tissue elasticity for examination better results or longer observation time under certain circumstances; however, do not keep them at extreme temperatures or immature specimens can be distorted.

    4. Always use a typing liquid with most filtering materials to maintain the quality of samples (e.g., water or saline, ethanol), while using some critical or aggressive chemicals (such as acid) could potentially damage their structural integrity even if appropriately handled a light microscope often has glass slides on which various types specimen are placed for observation at certain times within an examination process.

    Hence, it is essential that you check those glass slides for any contamination of the type or “changing color” that may be caused by non-organic materials, such as solvents (e.g., oils), oil pastes and their residues, etc.

    What are the advantages of light microscopes?

    Light microscopes are used to examine tiny objects in the form of a magnified image. They are used primarily for biological specimens, including cells and tissues, but can also be used on materials like crystals or minerals.

    Advantages of light microscopes:

    They can be cheaper than other microscopes because they don’t require a high-voltage source or bulky equipment. 

    Light microscopes have a lower resolution than other types of microscopes, meaning that more time is needed to produce an image, and there is less detail. 

    Light microscopes have better portability than most other microscopes because they don’t need a power source or bulky equipment.

    Every time you need to work the microscopes, a Magnifying Lamp and control do not have to be taken out.

    They can be mounted on different machines, including cameras, scanners, microtomes, and electron-optical traps. 

    Their magnification range varies from low (2x) to high (200x).

    They are easy to use and have less noise than other microscopes.

    What are the disadvantages of light microscopes?

    Light microscopes are the most commonly used type of microscope in research labs and classrooms.

    However, there are some disadvantages as well

    Main disadvantages of light microscopes:

    Objects can only be seen with a magnification of about 200, microscope slides are fragile and do not last long when placed under the microscope. Although I magnify by 500x, the sample is still just an extended hand for your eyes, you may want to consider binoculars (e.g., magic eye viewer) so that you can also see what’s in front of or behind.

    The cases do not allow air circulation, and cloning gel or other conservant media has to be used. It takes a week before it reaches optimal condition when bacteria and fungi might have already destroyed the sample.

    Light transmission can be uneven, meaning that certain parts of a specimen may be seen well and other factors not so well.

    The most obvious problem is their light sensitivity: they (the microscope slides) are delicate and easily destroyed by strobe flashes which act as additional light sources once installed in your cock-pit. The best free book evaluating microscopic tissue samples for damage from laser radiation.

    One person can go through the same scope at any given time, so it will force you to have to wait in order with somebody else if the room is not large enough.

    These microscopes are more technical, and it comes down to the projector. Because they use light instead of visible light, they can project images on anything in the direct path of their lens.

    You cannot use them to view the biological matter, as they require a live specimen. Light microscopes require that the sample be placed in aluminum foil which can lead to contamination issues if not done carefully and correctly.

    Light microscopes are limited in the magnification range, especially when compared to scanning electron microscopes. Light microscopes require lenses because they do not focus light.

    What is the difference between a light microscope and an electron microscope?

    A light microscope is an optical microscope that uses an objective lens or 10X objective to magnify distant objects and illuminate them sufficiently for an observer to see them. This type of microscope must use illumination by transmitted or reflected light, not direct electromagnetic radiation. Light microscopes are used in industrial and scientific applications such as cell biology, biomaterials, histology, microbiology, and medical pathology.

    An electron microscope uses a beam of electrons to illuminate specimens and images. Because the beam passes through many lenses (see below), a high-resolution image may be produced provided enough incident photons make it past lens elements, which usually is not an acceptable probability for objects at microscopic distances.

    Also, because electron microscopes cannot view wide-angle fields of view or correct for chromatic aberrations in illumination sources like low-intensity incandescent light bulbs, whose wavelengths vary much during their useful lifetime, the resolution of an electron microscope is limited by what lenses can be included in the specimen-mounting apparatus.

    Main difference between a light microscope and an electron microscope

    Resolving power 

    An electron microscope has a resolving power of approximately 100,000 times that of a light microscope. This means that an electron microscope can see objects at a much smaller scale than a light microscope can.

    Specimen preparation

    Preparing a specimen with a light microscope takes approximately 10 minutes while preparing a sample with an electron microscope takes about 30 minutes.

    Objective lens

    A light microscope uses an objective lens with a wide aperture to collect light and magnify the image.

    An electron microscope uses an objective lens with a narrow aperture that focuses electrons on the specimen, thereby providing high-resolution imaging of some objects that are too small for standard optical microscopes.

    Maximum Magnification

    Using the microscope helped you to see cells and bacteria better. Nowadays, scientists use several different types of microscopes to study other things. The electron microscope looks at tiny samples or pictures that cannot be seen with a light microscope.

    Is a light microscope illuminated only with sunlight?

    No, a light microscope is illuminated with a halogen lamp. Halogen lamps provide excellent illumination for both fluorescent and darkfield microscopy.

    Halogen lamps are widely used in optical instrumentation due to their low heat output, compact size, and wide range of spectral results.

    Resources and References

    In the pursuit of mastering light microscopy, a wealth of knowledge is at your fingertips. Here are some recommended resources and references to deepen your understanding and refine your skills:

    A. Books:

    1. “Molecular Biology of the Cell” by Bruce Alberts et al.
      • This comprehensive textbook covers cell biology, including microscopy techniques, with clear explanations and illustrations.
      • Link to the book
    2. “Microscopy Techniques” by M. A. Hayat
      • An in-depth guide on various microscopy techniques, including light microscopy, electron microscopy, and their applications.
      • Link to the book

    B. Online Tutorials and Videos:

    1. MicroscopyU by Olympus Life Science:
      • An extensive online resource offering tutorials, webinars, and interactive tools covering various microscopy techniques.
      • MicroscopyU
    2. Khan Academy – Introduction to Cells:
      • A free online course providing an overview of cell biology, microscopy, and the fundamentals of light microscopy.
      • Khan Academy – Cells

    C. Scientific Journals:

    1. “Journal of Microscopy”
      • A peer-reviewed journal publishing articles on the theory and practice of microscopy.
      • Journal Homepage
    2. “Microscopy and Microanalysis”
      • A journal covering a broad range of microscopy techniques and applications.
      • Journal Homepage

    D. Research Papers:

    1. “Principles and Applications of Light Microscopy” by B. J. Berland et al.
      • A seminal paper discussing the principles and applications of light microscopy.
      • Link to the paper
    2. “Fluorescence Microscopy: A Concise Guide” by P. J. Verveer et al.
      • An informative paper on the principles and applications of fluorescence microscopy.
      • Link to the paper
  • How Does a Microscope Work? An In-Depth Guide To Magnification

    We all know that magnifying glasses allow us to see more clearly, but what does this mean? A magnification of 100x can make something about 5cm tall look like it’s about 40cm tall. And a microscope lets you see objects that are even smaller than that!
    The best way to understand the science behind a microscope is by looking at the mechanism that makes it work. Microscopes and their use are interesting and complex topics, and this article explores an in-depth guide to how a microscope works.

    Before exploring how a microscope functions, we must first address the available types.

    Types Of Microscopes:

    Overview of Different Microscope Types

    Microscopes are instrumental in magnifying the invisible, with various types tailored to specific applications. This overview provides a glimpse into the diverse world of microscopes, each wielding its unique capabilities.

    Light Microscopes

    Introduction: As a novice explorer of the microscopic, the journey often begins with light microscopes. These instruments utilize visible light to illuminate specimens, allowing for a detailed examination of biological samples and materials.

    Applications:

    • Invaluable in Biology: Light microscopes are workhorses in biology, enabling scientists to study the intricate structures of cells, tissues, and microorganisms.
    • Material Science Insight: Their simplicity makes them a go-to tool in material science, aiding in the analysis of material composition and structure.

    Advantages:

    • Accessibility: Light microscopes are widely accessible, making them essential for educational settings and routine laboratory work.
    • Real-time Observation: Ideal for observing living specimens in real-time, providing a dynamic view of biological processes.

    Electron Microscopes

    Paradigm Shift: Venturing further into the microscopic frontier, the transition to electron microscopes marks a paradigm shift. These instruments employ beams of electrons instead of visible light, propelling microscopy into the nanoscale.

    Nanoscale Revelation:

    • Unparalleled Resolution: Electron microscopes unveil intricate details at the nanoscale, offering unprecedented resolution for studying atomic and molecular structures.
    • Nanotechnology Marvel: Revolutionizing fields like nanotechnology, electron microscopes play a pivotal role in designing and analyzing nanomaterials.

    Applications:

    • Materials Science Precision: In materials science, electron microscopes facilitate precise characterization of materials, contributing to advancements in semiconductor technology and metallurgy.
    • Biological Frontiers: In biology, electron microscopes delve into the ultrastructure of cells, revealing details beyond the capability of light microscopes.

    In navigating the world of microscopes, understanding the nuances of light and electron microscopes is paramount. Each type, with its distinctive features, contributes uniquely to scientific exploration, offering a glimpse into realms previously hidden from our sight.

    Fundamental Principles of Microscopy

    Microscopy, a science of discovery, is anchored in fundamental principles that govern the magnification and resolution of microscopic images. In this exploration, we delve into these core principles, understanding the mechanisms that bring the unseen into focus.

    Magnification

    Magnification is the bedrock of microscopy, enabling us to explore the microscopic world with enhanced clarity. The process of magnification involves increasing the apparent size of an object, allowing for a detailed examination beyond the limits of our natural vision.

    Key Components of Magnification:

    ComponentDescription
    Objective LensPrimary magnifying lens near the specimen.
    EyepieceFurther magnification through the eyepiece.
    Total MagnificationCalculated by multiplying objective and eyepiece magnifications.

    Significance of Magnification: Understanding magnification is pivotal. As an amateur microscopist, I discovered that higher magnification reveals finer details, providing a more comprehensive view of the specimen’s structure.

    Resolution

    Resolution, the microscope’s ability to distinguish between two closely spaced objects, is equally crucial. While magnification brings objects closer, resolution ensures that these objects are distinct entities rather than a blur.

    Factors Influencing Resolution:

    FactorDescription
    Wavelength of Light/ElectronsSmaller wavelength allows higher resolution.
    Numerical ApertureDetermines the resolving power of the objective lens.

    Importance of Resolution: Resolution became a fascinating aspect of my journey. I realized that even with high magnification, poor resolution could compromise the clarity of the observed details. Achieving optimal resolution is vital for a comprehensive understanding of the microscopic world.

    Parts of a Microscope and their Functions

    Microscopes are complex instruments, weaving together various components to unlock the mysteries of the microscopic world. Understanding the interplay between these components is essential for harnessing the full potential of these scientific marvels.

    Optical Microscopes

    Optical microscopes, often the starting point in microscopy, employ visible light to illuminate and magnify specimens. As I delved into the intricacies, I discovered the synergy of components that form the backbone of optical microscopy.

    Key Components:

    ComponentDescription
    Objective LensPrimary lens near the specimen, providing magnification.
    EyepieceFurther magnifies the image for observation.
    CondenserFocuses and directs light onto the specimen.
    DiaphragmRegulates the amount of light reaching the specimen.

    Functionality:

    1. Objective Lens:
      • Varied Magnification: Different objective lenses offer varying levels of magnification.
      • Numerical Aperture: Influences resolution and light-gathering ability.
    2. Eyepiece:
      • Additional Magnification: Multiplies the magnification obtained from the objective lens.
      • Observation Interface: Where the observer views the magnified specimen.
    3. Condenser:
      • Light Focus: Concentrates light onto the specimen for optimal illumination.
      • Aperture Control: Adjusts the size of the aperture to regulate light intensity.
    4. Diaphragm:
      • Light Regulation: Controls the amount of light passing through the specimen.
      • Enhances Contrast: Adjustments aid in improving contrast for better visibility.

    Electron Microscopes

    Electron microscopes, representing a technological leap, utilize beams of electrons for imaging, achieving unparalleled resolution at the nanoscale. My exploration into electron microscopy unveiled a realm of advanced components.

    Key Components:

    ComponentDescription
    Electron GunEmits a focused beam of electrons.
    Magnetic LensesFocus and steer the electron beam.
    Detector SystemsCapture and convert electrons into an image.

    Functionality:

    1. Electron Gun:
      • Electron Emission: Generates a focused beam of electrons.
      • Beam Control: Directs electrons towards the specimen.
    2. Magnetic Lenses:
      • Focusing Electrons: Magnetic fields focus and steer the electron beam.
      • Precision Control: Achieves high-resolution imaging at the nanoscale.
    3. Detector Systems:
      • Electron Detection: Capture electrons transmitted through or scattered by the specimen.
      • Image Conversion: Converts electron signals into a visible image.

    Navigating the components of microscopes is akin to deciphering a symphony of precision. Whether in the realm of optical or electron microscopy, each component plays a unique role, contributing to the clarity and detail of the microscopic images that captivate scientific minds.

    How does a Microscope work?

    How Microscopes Produce Images

    The production of microscopic images is a complex yet fascinating process, involving intricate mechanisms that transform minuscule details into visible wonders. Understanding the nuances of this process is key to appreciating the beauty and depth of microscopic exploration.

    Light Microscopes

    Light microscopes, relying on visible light to illuminate specimens, orchestrate a symphony of components to produce clear and magnified images. My journey through the workings of light microscopy revealed the elegance behind the creation of these images.

    Key Processes:

    ProcessDescription
    IlluminationLight source provides illumination for the specimen.
    LensesObjective and eyepiece lenses magnify and focus the image.
    Image FormationInterplay of lenses creates a magnified and observable image.

    Illumination and Lenses:

    1. Illumination:
      • Light Source: Provides a steady stream of light to illuminate the specimen.
      • Condenser Lens: Focuses and directs light onto the specimen for optimal visibility.
    2. Lenses:
      • Objective Lens: Magnifies the specimen, capturing details for observation.
      • Eyepiece Lens: Further magnifies the image for the observer.
    3. Image Formation:
      • The coordinated action of lenses produces a magnified and focused image for observation.
      • Adjustments to focus and magnification contribute to image clarity.

    Electron Microscopes

    In the realm of electron microscopy, the process takes a quantum leap into the nanoscale, where beams of electrons replace visible light. This shift introduces an intricate dance of electrons to create images with unprecedented resolution.

    Key Processes:

    ProcessDescription
    Electron Beam GenerationElectron gun emits a focused beam of electrons.
    Electron InteractionElectron beam interacts with the specimen, revealing details.
    Image DetectionDetector systems capture electron signals and convert them into an image.

    Electron Beam and Interaction:

    1. Electron Beam Generation:
      • Electron Gun: Emits a focused and controlled beam of electrons.
      • Magnetic Lenses: Focus and steer the electron beam with precision.
    2. Electron Interaction:
      • The electron beam interacts with the specimen, revealing intricate details at the nanoscale.
      • Scattering and transmission of electrons provide information about the specimen’s structure.
    3. Image Detection:
      • Detector systems capture the transmitted or scattered electrons.
      • Conversion of electron signals into a visible image completes the imaging process.

    In both light and electron microscopes, the production of images is a carefully choreographed process, where the manipulation of light or electrons transforms the invisible into the visible, allowing us to explore the hidden realms of the microscopic universe.

    5 Tips for Maximizing Your Microscope Experience

    Microscope use is an art that combines precision and technique to unlock the mysteries of the microscopic world. Whether you are a novice or seasoned microscopist, these tips will enhance your microscopy experience, ensuring optimal results.

    1. Proper Handling and Care

    Microscopes are delicate instruments requiring careful handling. Always use both hands when carrying or adjusting the microscope to prevent damage. Regular cleaning, especially of lenses, ensures clear and accurate imaging. Proper storage in a dust-free environment protects the instrument’s longevity.

    2. Optimizing Illumination and Focus

    Adjusting illumination and focus is an art that significantly impacts image quality. Start with low light and gradually increase to prevent specimen damage. Use fine and coarse adjustments for precise focusing, ensuring a crisp and clear image for observation.

    3. Choosing the Right Objective Lens

    Selecting the appropriate objective lens is pivotal for obtaining the desired magnification and resolution. Begin with low magnification for an overall view, then progressively move to higher magnifications for detailed observations. Always clean lenses before switching objectives.

    4. Utilizing Immersion Oil Effectively

    In certain microscopy techniques, immersion oil enhances resolution. When using oil immersion objectives, apply a small amount of oil to the specimen slide. Ensure the oil has the same refractive index as the lens for optimal imaging and wipe it off carefully after use to prevent contamination.

    5. Record Keeping and Documentation

    Maintaining a detailed record of observations is crucial for research and analysis. Use a microscope camera or smartphone attachment to capture images. Annotate findings, including magnification levels and specimen details. This not only aids in data analysis but also serves as a valuable reference for future studies.

    Implementing these tips transforms microscope use into a refined skill, enhancing the quality and longevity of your microscope and ensuring a rewarding exploration of the microscopic realm.

    How do Digital microscopes work?

    Components of Digital Microscopes

    ComponentDescription
    Digital CameraIntegrated camera captures images of the specimen. The camera resolution impacts the clarity of the digital image.
    Objective LensFunctions similarly to traditional microscopes, providing magnification and focusing capabilities. The choice of the objective lens influences the overall optical performance.
    Illumination SourceLight source, often LED, provides consistent illumination for the specimen. Some digital microscopes offer adjustable illumination settings for optimizing image quality.
    Digital Image SensorConverts light information into digital signals. The type and quality of the image sensor influence the final image’s resolution and sensitivity.
    Processor and SoftwareThe processor manages image processing tasks, and software applications handle image capture, storage, and analysis. Advanced software allows users to enhance and manipulate captured images.
    Display ScreenDigital microscopes feature built-in screens or connect to external monitors. The display screen allows real-time observation and analysis of specimens, eliminating the need for traditional eyepieces.

    Functionality of Digital Microscopes

    1. Image Capture and Processing:
      • The digital camera captures high-resolution images of the specimen.
      • The digital image sensor converts the captured light information into digital signals.
    2. Image Display and Analysis:
      • The processed digital image is displayed on the microscope’s built-in screen or an external monitor.
      • Digital microscopes often feature advanced software for real-time analysis, annotation, and manipulation of captured images.
    3. Storage and Sharing:
      • Captured images are stored digitally, eliminating the need for physical slides.
      • Digital microscopes enable easy sharing of images through electronic means, facilitating collaboration and remote analysis.
    4. Adjustable Illumination:
      • LED illumination sources provide consistent and adjustable lighting for optimal specimen visibility.
      • Users can control illumination sett

    How does an electron microscope work?

    Electron microscopes are devices that use a beam of electrons to illuminate an object and then capture images of the object.

    The electron beam is shot at the sample and can be manipulated by changing its trajectory with magnetic lenses or a position sensor. The light scattering by the electrons causes interference patterns on a detector used to reconstruct an image.

    What is the importance of lenses in a microscope?

    The lens is an essential part of a microscope and helps to focus light from the object being observed onto the detector. The lens also affects how much light the instrument collects and how much magnification can be achieved.

    A good quality microscope will have two lenses, one for illuminating light and collecting it (also called an objective). In most cases, this objective is fixed to the body of the microscope and not removable. This means that when using a microscope with interchangeable objectives, one must first remove this set objective before switching to another one on the other side of the body or in another compartment.

    What is fluorescence microscopy?

    Fluorescence microscopy is a type of microscopy that uses a laser to excite fluorescent molecules, which emit light in response. This allows the fluorescence microscope to visualize cells and tissues in real time or over long periods.

    The advantage of fluorescence microscopy is that it provides high-resolution images with minimal phototoxicity and damage to living tissue. It also offers 3D imaging, which can be used for many purposes, such as cancer diagnosis, studying cellular behavior, or determining cell function.

    It would be best to use this technique to have a fluorophore and the appropriate wavelength laser light source.

    Do microscopes need electricity?

    Yes, microscopes need electricity, and this is because they are electronic devices that use electric signals to operate and observe things at the nanometer scale.

    Microscopes use light or electron beams to illuminate objects and then use the light reflected from these objects to form an image on a monitor.

    How does magnification work in a microscope?

    Magnification is the process of making something appear larger. You can do that by either increasing the size of an object or reducing the distance between a subject and an observer.

    Magnification can be achieved in a microscope by moving one or more lenses to different focal lengths.

    When looking through a microscope, there are two ways that magnification can occur:

    1)    The light from your sample enters the microscope through a condenser lens, reducing its numerical aperture (NA). The objective lens then moves closer to the model to collect more light. In this case, you will see an increase in magnification because more light is coming into your field of view and less going out.

    2)    The second way that magnification occurs in microscopes is by using a tube lens instead of a condenser lens. Tube lenses work like telephoto lenses when placed at the front end of your microscope tube.

    What do dead cells look like under a microscope?

    Dead cells look like faded, dry structures that have lost shape and are no longer alive.

    Under a microscope, dead cells can be seen to lack a nucleus and other cellular organelles. They also show signs of cell death, such as dendrites or spines, which generally help transfer healthy cells’ electrical signals.

    What does it mean if a micrograph is false-colored?

    When an image is falsely colored, it means that different colors have been assigned to other regions in the image to be easier for the viewer to identify them.

    Micrographs are pictures of microscopic structures that are obtained by using a microscope. The images obtained from these micrographs can be false-colored to help the viewers visualize certain features and systems.

    How does a microscope use light?

    A microscope uses light in two ways:

    1. To illuminate the specimen under observation and allow it to be seen.

    2. To collect images of the specimen and provide a digital record of its structure.

    What does the diaphragm do on a microscope?

    The diaphragm is a thin membrane that controls the amount of light passing through an optical system. It is a simple mechanical device used in microscopy and other fields, including astronomy.

    The diaphragm is attached to the objective lens on most microscopes and can be moved from side to side. It is used with both low-power (low magnification) and high-power (high magnification) objectives.

    How far can a microscope zoom in?

    According to Wikipedia, microscopes with a minimum magnification of 100x have been invented, and they’re capable of zooming into an object that is only 0.5mm wide (1/20th of an inch).

    There are two main ways to measure the distance between two objects.

    The first is with a ruler. You can use this method by holding a ruler on top of your object and measuring the length in millimeters or inches, then multiplying that number by 100 to find out how far away it is from you.

    The second way is to put your eye at one end of the microscope lens and measure the size of your image on the other side. That will give you an idea of how far away your object is.

    What is the iris diaphragm on a microscope?

    The iris diaphragm is a type of aperture stop in the lens of a microscope. It limits the amount of light that enters the objective lens and can be set to any desired level by adjusting its size or location.

    What can you see with a 250x microscope?

    A 250x microscope is an optical microscope that can magnify up to 250 times its original size. This microscope type is used to view small specimens, such as cells or other minute objects.

    If you want to see something with a 250x microscope, you must use the lens adapter on the objective lens and attach it to your camera to capture images from your perspective.

    What is the smallest object ever seen through a microscope?

    The smallest object ever seen through a microscope is an atom.

    A micrograph is a photograph of an object that is magnified frequently to be seen clearly. It’s called “micro.” Because the image has been made with a microscope, making it look like a miniature copy of what’s in front of the lens.

    An electron microscope can show objects as small as molecules and atoms.

    Final words:

    Microscopes are used to magnify objects to make them visible. There are various types of microscopes, and each one has its purpose. In this blog post, we will be discussing the difference between a compound microscope and a stereo microscope. If you would like to learn more about these two types of microscopes, please take some time to read through the article below!

    If you’re a student or have been studying science for some time, you may already know how a microscope works. But if you’re new to this field, it’s probably worth knowing what’s going on under the hood. This blog post should help you understand the essential parts and their functions for magnification and light paths. What is your opinion about magnifications?

    Let us know in the comments below!

    Resources and References

    For those eager to delve further into the captivating world of microscopy, a wealth of resources awaits. Books such as “Microscopy: A Very Short Introduction” by Terence Allen and “Introduction to Light Microscopy” by Randy O. Wayne provide comprehensive insights. Online platforms like MicroscopyU offer interactive tutorials and reference materials. Academic journals such as the “Journal of Microscopy” and “Microscopy Research and Technique” provide in-depth research articles. This article serves as a stepping stone, and these resources offer a continuous journey, providing nuanced perspectives and expanding your understanding of microscopy’s intricacies.

  • How to Clean Nikon Lens: A Complete Cleaning Guide to Follow

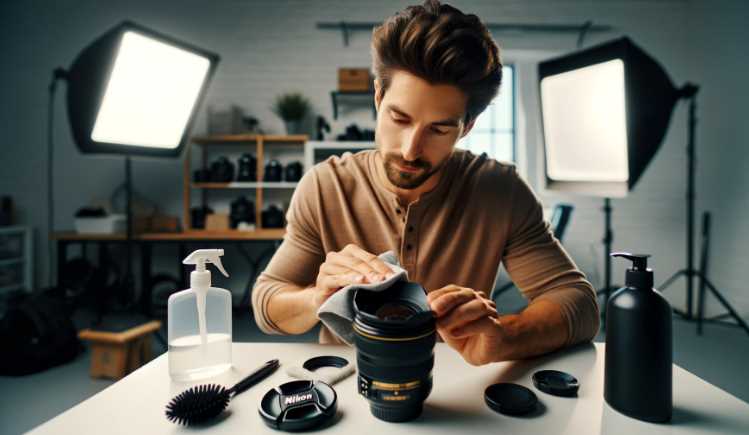
    Nikon lenses require special cleaning procedures to ensure the best performance and prevent damage to the camera. This article will provide information on how to clean a Nikon lens and tips on keeping your lenses working at their best.

    When you are on the move, the last thing you want to do is stop and search for a cleaning kit. So if you are looking for a quick lens cleaner with everything you need to clean your lenses, consider buying K&F Complete Lens Cleaner Kit. It comes with 23 different cleaning tools, from soft brushes to microfiber cloths and even a silicone pad.

    K&F Concept Professional Lens Cleaning Kit for DSLR & Mirrorless Cameras with APS-C/Full-Frame Sensor Cleaning Swabs/Lens Cleaner/Gloves/Camera Blower/Lens Pen Brush/Microfiber Cloths/Carrying Case
    • ✨Professional Lens Cleaning Kit✨ Dslr cleaning kit includes Lens Cleaning Pen + Camera Air Blower + Cleaning Liquid + 16mm APS-C Sensor Cleaning Swab*2 + 24mm APS Full Frame Sensor Cleaning Swab*8 + Large cleaning cloth*2 + Small vacuum cleaning cloth*6 + Anti-static gloves*1 + storage bag *1
    • 📷Sensor Cleaning Swabs📷 Microfiber lens sensor cleaning Swabs are packed individually in vac-sealed packaging. Compatible with 16mm APS-C sensors and 24mm Full Frame Sensors. Flexible grip makes the tongue fit the sensor without harming it, effectively prevent debris.
    • ✨Air Blower + Anti-static Gloves✨ The camera air blower will direct a stream of air to blow away dirt and dust from your lenses or camera sensor. Anti-static Gloves strengthen the grip, the finger part of the glove is PU coated, prevent static electricity, increase friction & avoid fingerprint.
    • 📸15ml Cleaning Liquid + Re-usable Spray Bottle📸 Ammonia Free, Toxic Free, and has low VOC. Safe for cleaning lenses with anti-reflective coating, sunglass, binoculars, or camera. Adopt vacuum pump head, effective for cleaning and maintaining the optical lens.
    • ✨Microfibre Cleaning Cloths + Lens Pen✨ Lens cleaning pen can gently remove dirt and dust on hard-to-reach areas. Microfiber cloth leaves zero scratches or marks. The carbon tip can remove stubborn stains.

    Understanding Nikon Lens Components

    To truly master the art of lens cleaning, it’s essential to comprehend the intricate components that constitute Nikon lenses. Picture this: you’re out in the field, capturing the golden hues of a sunset or the delicate details of a flower, and suddenly, you notice a speck on your lens. Understanding the lens anatomy becomes the first step in ensuring that every shot is as crisp and clear as your vision.

    Nikon lenses consist of several crucial elements, each playing a specific role in delivering exceptional image quality. The glass elements, meticulously crafted by Nikon’s optical engineers, are the heart of the lens. These elements, arranged in precise configurations, determine factors such as focal length and aperture, influencing the final image.

    Moving beyond the glass, the lens barrel provides structural support, housing the delicate components securely. It’s a testament to Nikon’s commitment to durability and reliability. Understanding the robustness of the barrel helps in handling the lens with the right amount of care during the cleaning process.

    The lens mount, often overlooked, is a critical connection point between the lens and the camera body. Ensuring this interface remains clean is paramount for maintaining optimal communication between the lens and the camera. The contacts on both the lens and the camera need special attention, as any contamination can lead to communication errors and affect autofocus performance.

    As a photographer who has experienced the frustration of spots and smudges impacting the final image, I’ve learned the importance of identifying vulnerable areas prone to these nuisances. Dust may find its way onto the glass elements, and fingerprints can obscure the view. Recognizing these potential problem areas becomes the foundation for a targeted and effective lens cleaning routine.

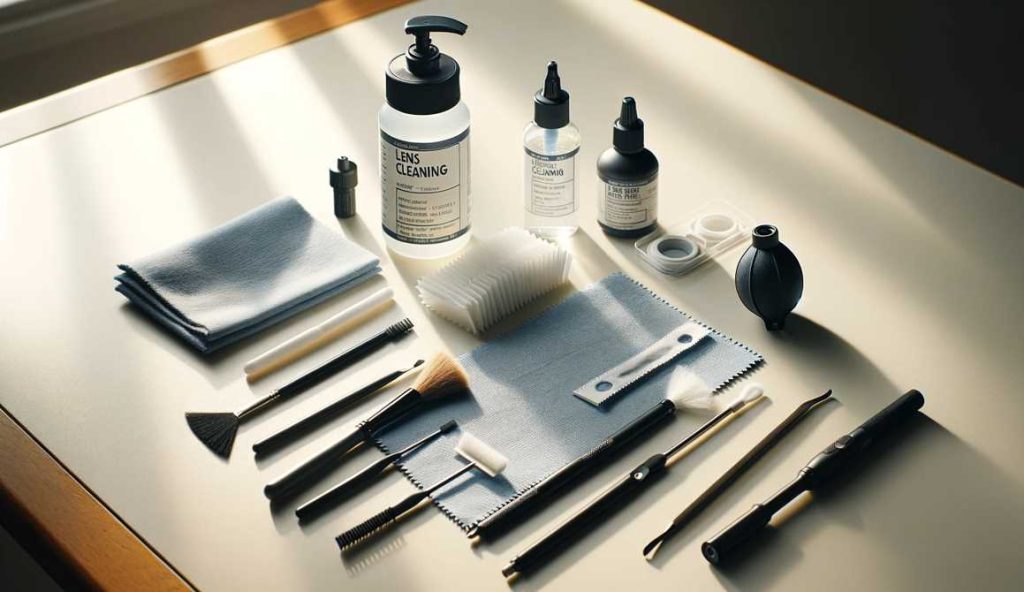
    Lens Cleaning Kit Overview

    Here’s a breakdown of the indispensable tools that have become my allies in preserving the clarity of my Nikon lenses:

    ToolPurpose
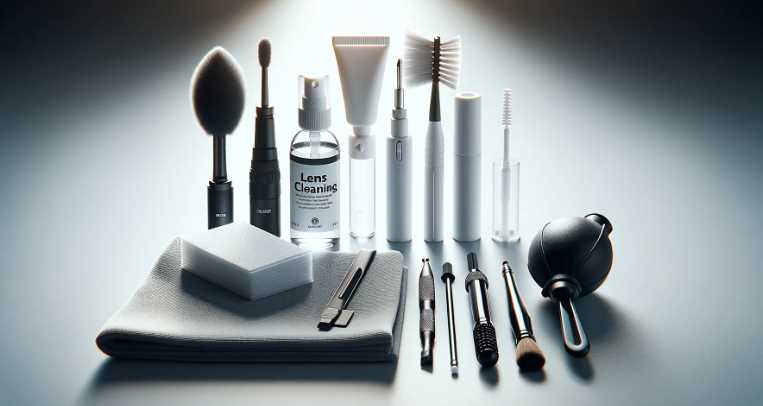
    Microfiber ClothsThese soft and lint-free cloths are perfect for gently wiping away smudges and fingerprints without scratching the lens surface.
    Lens Cleaning SolutionA specially formulated solution designed for lenses, aiding in the removal of stubborn stains and ensuring a streak-free finish.
    Lens BrushA gentle brush with fine bristles for removing loose particles like dust and sand, preventing scratches during the cleaning process.
    Air BlowerThis tool uses a burst of air to dislodge any loose debris, particularly useful for clearing dust from the lens and hard-to-reach areas.

    Each tool in the kit serves a unique purpose, contributing to the overall effectiveness of the lens cleaning process. As a photographer who has experienced the frustrations of using inadequate tools, investing in a quality lens cleaning kit is a game-changer.

    Importance of Using Specialized Tools

    Nikon lenses are precision instruments, and treating them with the care they deserve involves using tools designed specifically for the task. The microfiber cloths ensure a gentle touch, avoiding scratches that could compromise image quality. The lens cleaning solution, tailored for delicate optics, dissolves oils and stubborn stains without leaving residue.

    Equally crucial is the lens brush, which aids in the removal of loose particles. Its fine bristles navigate the contours of the lens surface without causing damage. The air blower, with its controlled burst of air, becomes a trusty companion in clearing away dust, ensuring a pristine environment for lens cleaning.

    Follow this step-by-step process, accompanied by a table highlighting key considerations:

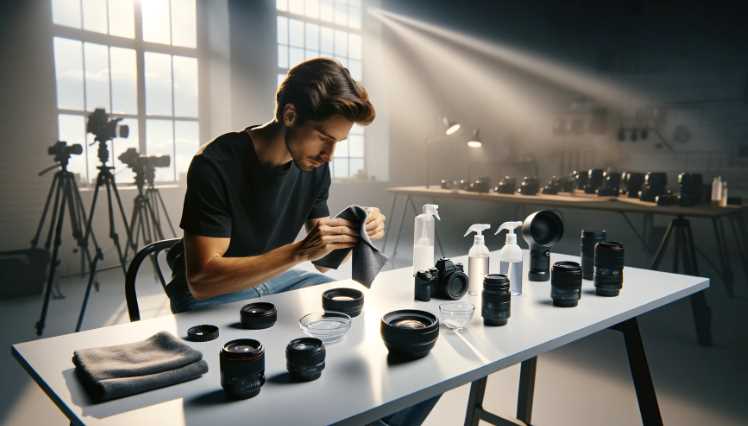
    Step-by-Step Workspace Preparation

    1. Select a Clean and Dust-Free Area:
      • Choose a workspace away from high-traffic areas to minimize dust and contaminants.
      • Ensure proper ventilation to prevent the accumulation of airborne particles.
    2. Organize Essential Tools:
      • Lay out your lens cleaning kit, including microfiber cloths, lens cleaning solution, lens brush, and air blower.
      • Use a designated, clean surface for tool placement.
    3. Set Up Adequate Lighting:
      • Position a bright, but not harsh, light source to illuminate the lens and reveal any smudges or particles.
      • Natural daylight or LED lights with a color temperature close to daylight are ideal.
    4. Remove Potential Hazards:
      • Clear the workspace of any items that could pose a risk to your lens or impede your movements.
      • Keep liquids, food, or other potentially damaging materials away from the cleaning area.

    Let’s explore these guidelines through a comprehensive table and accompanying text.

    Dos and Don’ts of Lens Cleaning

    DosDon’ts
    Do Handle Lenses with Care:Don’t Use Excessive Force:
    Hold lenses by the barrel, avoiding the glass elements.Applying excessive pressure can damage delicate components.
    DosDon’ts
    Do Use Quality Microfiber Cloths:Don’t Use Rough or Dirty Materials:
    Employ soft, lint-free microfiber cloths to avoid scratches.Avoid using materials like regular tissues or paper towels that may scratch the lens.
    DosDon’ts
    Do Inspect Your Lens Before Cleaning:Don’t Ignore Stubborn Stains:
    Conduct a pre-cleaning inspection to identify dirt and smudges.Persistent stains may require professional assistance; don’t risk causing further damage.
    DosDon’ts
    Do Use a Lens Cleaning Solution:Don’t Apply Liquids Directly:
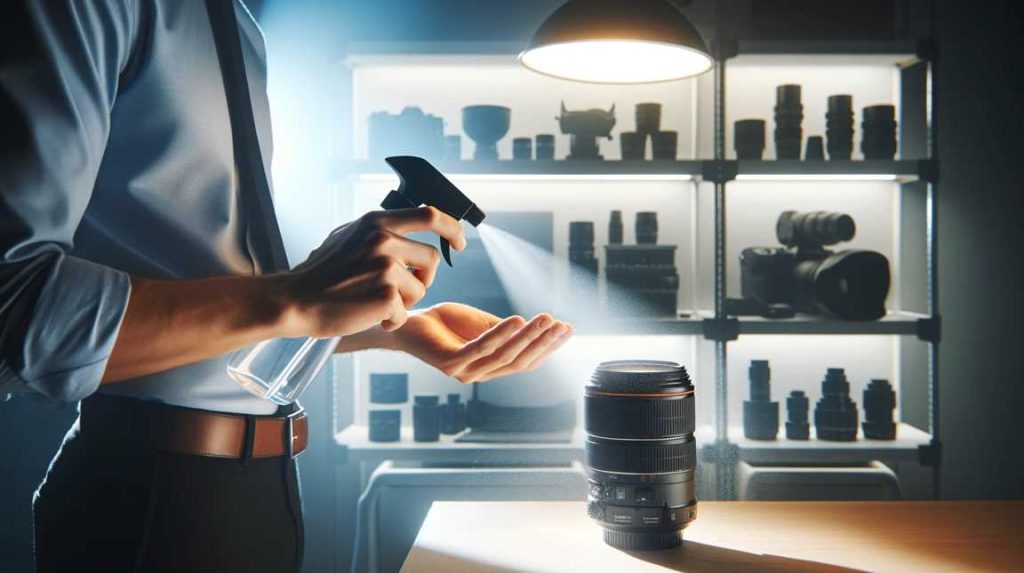
    Apply a small amount of specialized cleaning solution to a cloth.Avoid applying liquids directly to the lens to prevent excess moisture seeping into the lens barrel.
    DosDon’ts
    Do Store Lenses Properly:Don’t Expose Lenses to Extreme Conditions:
    Store lenses in a clean, dry, and protective environment.Avoid exposing lenses to extreme temperatures or humidity.

    Mastering these dos and don’ts has been integral to my lens maintenance routine. By adhering to these principles, I’ve not only preserved the integrity of my Nikon lenses but also enhanced the quality of my photographic endeavors. These guidelines, born from experience, ensure that every cleaning session is a step towards longevity and peak performance for your valuable gear.

    Workspace Preparation Table

    StepActionConsiderations
    1Select a Clean and Dust-Free AreaChoose a low-traffic zone with good ventilation.
    2Organize Essential ToolsLay out tools on a clean, designated surface.
    3Set Up Adequate LightingPosition a bright, non-harsh light source.
    4Remove Potential HazardsClear workspace of items that could damage the lens.

    This systematic approach ensures a controlled and optimized environment for lens cleaning. By adhering to these steps and considerations, you create a workspace that minimizes the risk of introducing new contaminants and maximizes your efficiency in maintaining the pristine condition of your Nikon lenses.

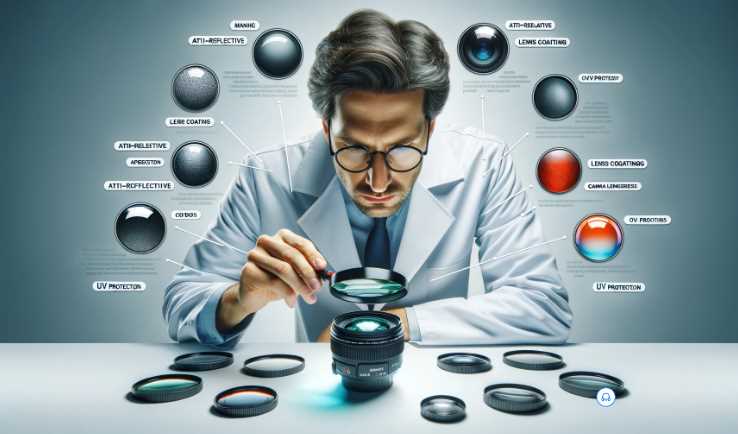
    Importance of Understanding Lens Coatings

    Nikon lenses are meticulously coated to minimize reflections, enhance contrast, and repel water. Preserving these coatings requires a gentle touch and an understanding of their vulnerability.

    Tips for Maintaining Lens Coatings

    1. Avoid Abrasive Cleaning: Utilize soft microfiber cloths and lens cleaning solutions specifically designed for coated optics. Abrasive materials can compromise these coatings, leading to a decline in performance.
    2. Mindful Wiping Techniques: When wiping the lens, use gentle circular motions. Start from the center and move outward, ensuring an even distribution of the cleaning solution. This approach helps to lift contaminants without causing undue stress on the coatings.
    3. Regular Inspection: Perform routine inspections to identify any signs of coating degradation or damage. Early detection allows for timely intervention, preventing further deterioration.
    4. Store Lenses Properly: Proper storage in a dry and dust-free environment is essential. Lens caps and protective cases shield the coatings from potential scratches and environmental factors.
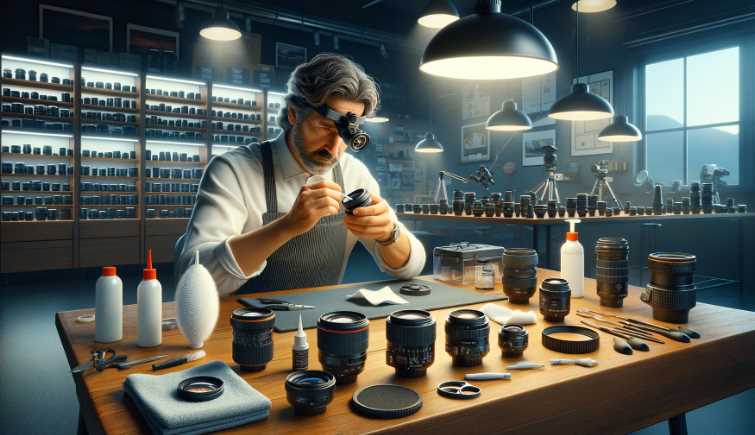
    My experience has taught me that a little extra care in handling and cleaning goes a long way in preserving the coatings on Nikon lenses. By incorporating these practices into your routine, you not only safeguard your investment but also ensure that your lenses consistently deliver the stunning image quality that Nikon is renowned for.

    5 Tips for Cleaning Specific Lens Types

    Different types of lenses demand tailored cleaning approaches to ensure optimal performance. Drawing from my personal experiences, here are five tips for cleaning specific Nikon lens types:

    1. Prime Lenses:

    • Tip: Prime lenses with a fixed focal length often have a wider aperture, making them more susceptible to dust and debris.
    • Cleaning Approach: Pay extra attention to the front and rear elements. Use a lens brush and gentle circular motions to remove any loose particles.

    2. Zoom Lenses:

    • Tip: Zoom lenses have multiple moving parts, potentially trapping more dust.
    • Cleaning Approach: Extend the lens fully and inspect for any trapped particles. Use an air blower to dislodge dust from the crevices before proceeding with regular cleaning.

    3. Wide-Angle Lenses:

    • Tip: Wide-angle lenses often capture expansive scenes, making any imperfections more noticeable.
    • Cleaning Approach: Focus on the large front element, ensuring it’s free from smudges. Be meticulous in cleaning as any marks may affect the entire field of view.

    4. Telephoto Lenses:

    • Tip: Telephoto lenses have extended focal lengths, and maintaining precision is crucial for optimal performance.
    • Cleaning Approach: Handle these lenses with extra care. Use a lens brush and air blower before applying a lens cleaning solution to ensure a thorough cleanse without compromising stability.

    5. Specialized Lenses (e.g., Macro, Fisheye):

    • Tip: Specialized lenses often have unique features that require special attention.
    • Cleaning Approach: Understand the specific needs of your lens type. For macro lenses, focus on the intricate details, while fisheye lenses may require extra care due to their unique curvature. Adjust your cleaning approach accordingly.

    These tips reflect the nuanced cleaning requirements of various Nikon lenses. By customizing your cleaning routine based on the lens type, you ensure that each piece of equipment receives the care it deserves, ultimately contributing to consistent and high-quality photographic results.

    Let’s delve into troubleshooting these challenges with a table outlining common problems and effective solutions.

    Troubleshooting Common Lens Issues

    IssuePossible CausesSolution
    Fungus and Mold GrowthProlonged exposure to moisture and inadequate storage.Isolate the affected lens. Store in a dry, dehumidified environment. Consult professional cleaning if severe.
    Moisture and CondensationSudden temperature changes or exposure to high humidity.Allow the lens to acclimate to the environment gradually. Use a lens hood to minimize condensation.
    Minor Scratches and BlemishesEveryday wear and tear or contact with abrasive surfaces.Apply a specialized lens polishing compound in circular motions to reduce the visibility of scratches.
    Auto-Focus IssuesContaminated lens contacts or damage to internal components.Clean lens contacts with a soft cloth. If issues persist, consult professional repair services.
    Lens Calibration ProblemsMisalignment affecting accurate focus.Use camera’s AF micro-adjustment feature or seek professional calibration services.

    Fungus and Mold Growth

    Fungus and mold can thrive in humid environments, leading to lens deterioration. If detected, isolate the affected lens immediately and store it in a dry, dehumidified space. Seeking professional cleaning is advisable for severe cases.

    Moisture and Condensation

    Abrupt temperature changes or exposure to high humidity can result in moisture and condensation. Allow the lens to acclimate gradually, and use a lens hood to minimize condensation.

    Minor Scratches and Blemishes

    Daily wear can cause minor scratches. Apply a specialized lens polishing compound in circular motions to minimize their visibility and restore optical clarity.

    Auto-Focus Issues

    Contaminated lens contacts or internal damage can hinder autofocus functionality. Clean lens contacts using a soft cloth, and if issues persist, consider professional repair services.

    Lens Calibration Problems

    Misalignment affecting accurate focus requires attention. Utilize the camera’s AF micro-adjustment feature or seek professional calibration services to ensure precise focusing.

    By understanding these common lens issues and employing the appropriate solutions, photographers can troubleshoot effectively and maintain the performance of their Nikon lenses over time.

    Can I Clean the Outside and Inside of My Nikon Lens?

    Yes, you can clean the outside and inside of your Nikon lens.

    To clean the outside of your lens, ensure it is dry before using a microfiber cloth to wipe away dust and dirt. For stubborn dirt, use a slightly damp cloth or water sprayer to remove surface grime.

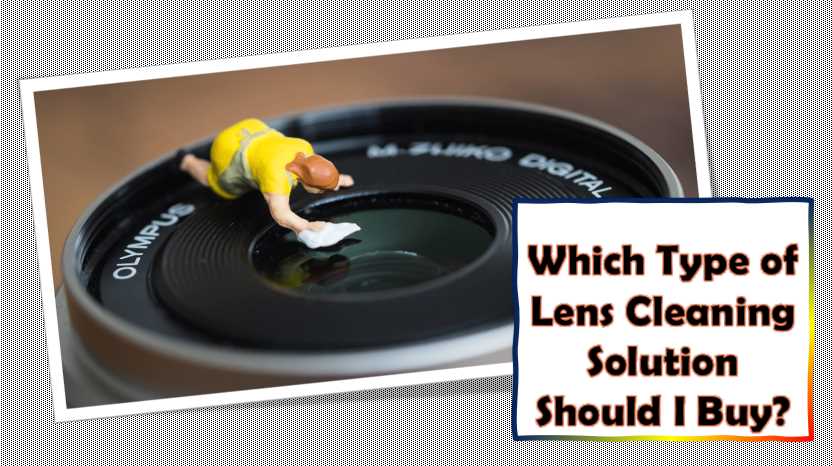
    Which Type of Lens Cleaning Solution Should I Buy?

    Which Type of Lens Cleaning Solution Should I Buy

    There are two types of lens-cleaning solutions:

    1. Water-based cleaners

    2. Oil-based cleaners

    Water-based cleaners contain ingredients such as water, soap, and alcohol that can break down dirt and other contaminants on the surface of your lenses. They also have a smaller chance of causing damage to your lens than oil-based solutions because they don’t contain any abrasive particles or solvents that could scratch or etch the surface of your lenses.

    Oil-based cleaners are suitable for removing grease and fingerprints because they can penetrate deep into the pores in the lens surface without being affected by oils or lubricants that can cause smudges and streaks on the lens.

    We have listed some best and safe cleaning lens kits to clean the Lens body correctly:

    Many cleaning products are available in the market, but it is always better to stick with trusted brands like Nikon.

    Some of the benefits of using these branded products are:

    • They have been tested and approved by experts and contain no harmful chemicals.
    • A good reputation in the market for their quality, reliability, performance, and durability.
    • Come with a money-back guarantee if you are unsatisfied with them.

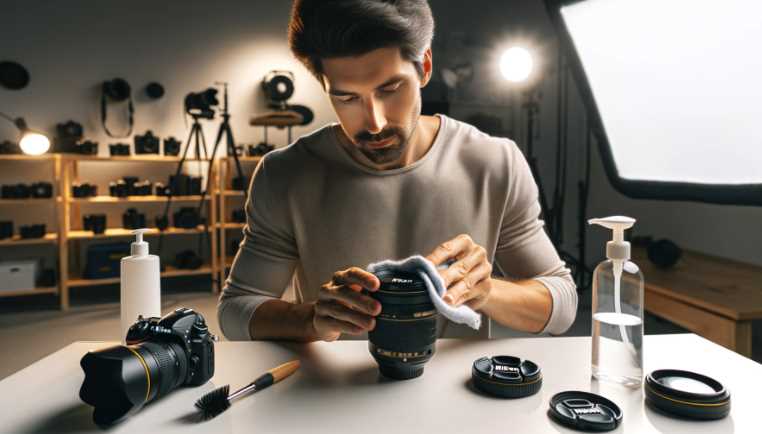
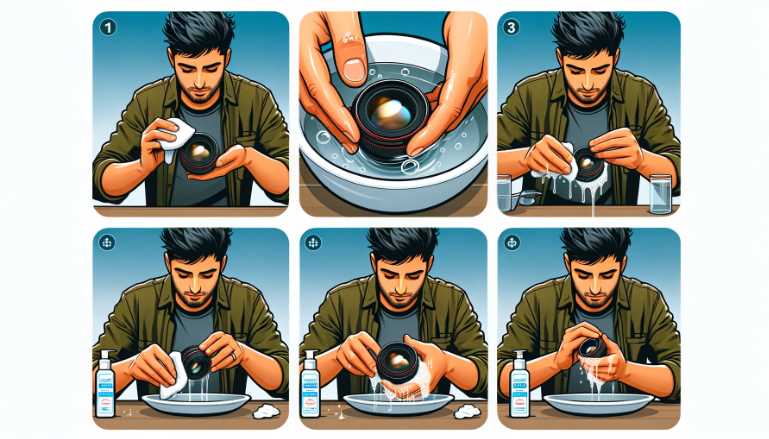
    How Should I Clean my Nikon Lens with Cleaning kits?

    Now, let’s talk about how to clean your Nikon lens. First, detach the lens from the camera. Next, you need a manual blower to remove those pesky particles that get stuck behind the lens. Use the soft-bristled brush to remove the dust on the lens’s surface.

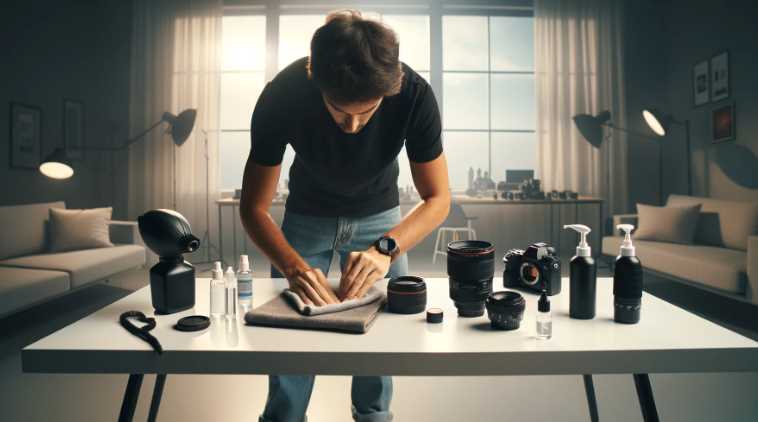
    Gently clean your Nikon lens with a cleaning wipe/lens tissue. Then, gently apply a light coating of liquid cleaning spray to a microfiber cloth and rub it gently on the surface of the lens. The oil, smudges, dirt, and fingerprints will quickly come off.

    See! It’s that easy! But these are just the necessary cleaning process. We will discuss every cleaning process for your Nikon Lens in more detail.

    Using the Air Blower

    First, you must use the manual hand air blower to remove all the light dust from the Nikon Lens surface. But kindly ensure that your Air Blower’s brand is good enough to produce the perfect air pressure for much better cleaning results. You can use our recommended Giottos Rocket Air Blower for excellent cleaning results. Now you can create the ideal amount of air pressure with your air blower and clean all those light dirt and dust from the lens surface. Blow it from a few centimeters away.

    Soft Bristled lens Brush.

    Now let’s use our Soft Bristled Brush to clean the remaining hard dust spots and dirt from the Nikon Lens Surface. But you should ensure your Soft Bristle Brush is made with camel or goat hair. It will save your Nikon Lens from getting scratched. Also, you can use the LensPen NLP-1 cleaning brush. It will give a superior solution.

    Cleaning Wipes

    You can use the Zeiss Lens Cleaning Wipes as we recommended. Because it’s super convenient, it gives spotless clean, Cost-effective while purchasing. Now use these wipes to gently clean the lens surface and remove the rear dust spots. Please do not rub it with too much force. It will help to remove all the dust marks from your Nikon lens surface.

    Using the Liquid Lens Cleaning Solution Spray and Microfiber Cloths

    We already recommended the Zeiss Lens Cleaning Spray and Eco-Fused Microfiber Cleaning cloths. These products are highly rated and 100% safe for applying on your Nikon Lens. Here’s how you will use them: spray some Zeiss Lens Cleaner on those cleaning cloths, then rub them on your Nikon Lens body surface in a circular motion for five to ten seconds.

    Finally, for the finishing touch, take another dry Zeiss microfiber cloth/ lens tissue and gently wipe all over the lens body surface two times for a great ending to your complete cleaning session. 

    Tips:
    Keep your lens clean with lens tissue, and keep the rear cover on the lens. Dust can get in there, but it’s difficult to clean the lens if you remove the screws. Rear covers are always good for keeping dust out of your camera, so they are necessary for maintaining quality photography.

    Can I Clean Nikon Camera Lens with Alcohol?

    Yes, you can clean a Nikon lens with alcohol. However, this is not recommended because it will degrade the quality of your pictures and potentially damage the camera lens.

    To clean a camera lens with alcohol:

    1) Take off the Nikon lens cap and wipe the outside of the lens with a soft cloth to remove any dirt or dust particles.

    2) Fill a small bowl with water and add 1-2 drops of dish soap to make a soapy solution.

    3) Dip an old toothbrush into the soapy solution and gently scrub away any stubborn stains on your camera lens that have been left behind by fingerprints or other contaminants that have settled on your Nikon lens over time.

    How do you clean the dust out of a Nikon lens?

    There are a few ways to clean the dust off your camera lens.

    1. Cleaning it with a cloth is probably the most convenient method, but it is not always practical. A cloth can be used to wipe off the surface of the lens, or in some cases, it can be dipped into a cleaning solution.

    2. Using a cleaning kit: Most of these kits have a soft brush and blower that you use to blow air onto the lens, which then dislodges dust particles and other debris from the surface of your lens.

    3. Vacuum cleaner: If you don’t want to invest in one specifically for this purpose, then any vacuum cleaner will do, as long as it has an attachment designed for small objects like camera lenses (most regular vacuums don’t).

    What household item can I use to clean my Nikon camera lens?

    A practical method of cleaning a camera lens is to use a microfiber cloth. Another option would be to use a lens cleaning fluid that you can buy at any camera store.

    You can also clean your lens with baby wipes, but this should only be done when necessary as it may not work as well and could scratch the surface of your lens.

    How do you clean a blurry camera lens?

    1. Put the camera lens in a bowl of hot water and then add a few drops of dish soap.

    2. Using your fingers, rub the dirt from the lens with a wet cloth or paper towel until you can see through it again.

    3. Put rubbing alcohol on a cotton ball and wipe away any remaining grime from the lens before putting it back into your camera body.

    How do I open my camera lens to clean it?

    Your camera’s lens is generally on the front of the camera, so it’s easy to get at.

    First, ensure you have turned off your camera and removed any memory cards from the slot.

    Next, remove the battery if it is still in place. This will prevent accidental damage to your camera while cleaning.

    Now you can use a cotton swab dipped in rubbing alcohol or other similar cleaning solution to gently clean away dust and debris from around the lens barrel. You may also use a microfiber cloth with a bit of soap added to give it extra scrubbing power.

    Does dust lens affect image quality?

    Nikon lenses are not affected by dust and have a special coating that repels dirt and dust particles.

    There is no harm in cleaning your lens with a soft cloth or tissue to remove any small particles that may be on the lens.

    How much does Nikon charge for lens cleaning?

    Nikon charges $59.95 for the kit, which includes one lens (you can buy multiple kits). The shipping cost is included in the price of the equipment, so it would be $59.95 + shipping per camera lens that you need to clean with this kit.

    How do you remove fungus from a Nikon lens?

    There are a few ways to remove fungus from a Nikon lens.

    First, you can try cleaning the lens with water and rubbing alcohol. You should also ensure that there is no moisture present on the surface of the lens when you start cleaning it.

    Another way to remove fungus is by using canned air. Simply blow into the airstream at high speed and watch as any fungus particles get sucked up by the air stream and deposited in your trash can or another designated place for disposal.
    Finally, if you have a Nikon DSLR camera body with a removable mirror, you can replace the mirror assembly without having to do anything else to fix this problem.

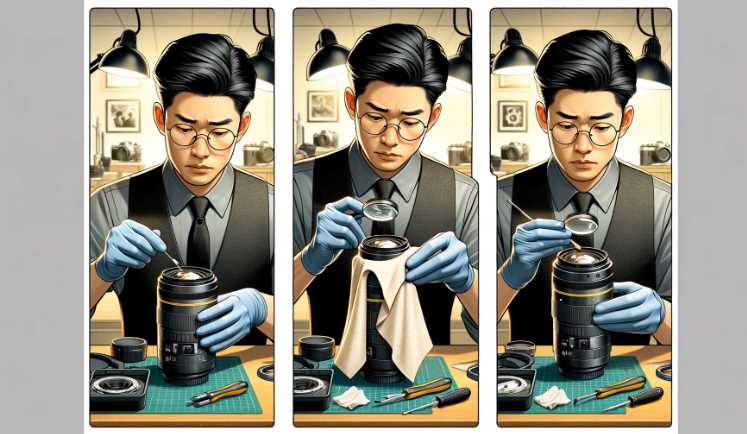
    How do you clean the inside of this lens?

    The inside of a Nikon lens is not easily accessible, so the best way to clean it is to use a brush or cleaning cloth and lens tissue.

    However, if you don’t have these items at hand, then you can use the following steps:

    1. Remove any filters from the lens.

    2. Turn off your camera and remove the battery if possible.

    3. Take out your camera’s memory card (if there is one) and put it in an empty slot on your computer or other devices that can read memory cards.

    4. Hold the lens’s front element over an air-tight container with just enough water to cover it but no more than halfway up its side, like a small bowl or dish, for example.

    How to clean the lens Nikon D90?

    To clean the lens of your Nikon D90, you need to:

    Take out the camera battery.

    Ensure that the lens is not attached to the camera body or any other lenses on it.

    Wipe off any dirt or dust with a microfiber cloth and ensure no streaks on the glass surface.

    If there are streaks, use a wet lens tissue or cloth with water and then dry it using another dry lens tissue or cloth until all smudges have been removed from the surface of the lens glass.

    Apply a drop of neutral detergent solution (NDS) onto a microfiber cloth and apply it to the front element of your lens for about 30 seconds before wiping off any residue left behind by NDS onto another clean piece of microfiber cloth so as not to leave any streaks behind on your viewfinder screen, flash window, etc.

    How often should you clean your lens?

    You should clean your camera, lens, or binoculars every time you use them. It is recommended that you do this every time you are done using them to avoid any unwanted build-up of dust and dirt on the lenses.

    If you are shooting indoors, you should clean your lens after each use, and if you are shooting outdoors, it is recommended to clean the lens after every 10-15 shoots.

    Final Words:

    Now that we’re all done with this discussion, you should better understand how to clean your Nikon Lens. You can clean the outside and inside of your lens with these methods. Be careful when cleaning the inner parts of the lens, but most importantly, be gentle. Follow these instructions and use our recommended cleaning kits to achieve the best results. A good idea would be to clean your lens twice per week.

  • Step-by-Step Guide on How to Care for Camera Lenses (Video Explained)

    Step-by-Step Guide on How to Care for Camera Lenses (Video Explained)

    If you want to know how to clean a camera lens, then you are in the right place. Who doesn’t like photography?  Almost every person loves to capture their beautiful moments. But professional photographers need good DSLR cameras and clean lenses to capture those stunning images. So, cleaning the DSLR lens is crucial for any photographer who wants to capture a perfect photo.

    But we must know the proper way of cleaning the DSLR lens. Maintaining the DSLR is important but cleaning the lens is more critical. If there is any dust or particles on the camera’s lens, it’ll ruin the whole image quality.  

    Which brand’s DSLR lens cleaner will be best?

    There are so many brands that sell the DSLR lens cleaning kit. Choosing the best cleaning kit for your precious DSLR camera is confusing. But don’t worry at all; we listed some best lens cleaners that are excellent and affordable.

    So, these are some cleaning kits of popular brands that are highly rated and affordable. 

    Understanding Camera Lenses

    Camera lenses are marvels of optical engineering, comprising multiple elements that work in harmony to capture the perfect shot. To truly appreciate the significance of lens cleaning, let’s delve into the key components that make up these optical wonders.

    Lens Elements and Functions:

    Element TypeFunction
    Convex LensFocuses light onto the camera sensor.
    Concave LensAdjusts the focal length for zooming.
    ApertureControls the amount of light entering the lens.
    Lens CoatingReduces glare, reflections, and enhances image contrast.

    Understanding the functions of these elements is vital for realizing the impact that contaminants can have on your lens. Dust, fingerprints, and smudges not only compromise the clarity of your images but can also interfere with the delicate balance of these elements.

    Vulnerability to Contaminants:

    Camera lenses are exposed to various environmental factors, making them susceptible to contaminants such as:

    1. Dust and Sand: Fine particles can settle on the lens surface, affecting image quality.
    2. Fingerprints: Oils from fingertips can leave smudges, degrading the clarity of the lens.
    3. Moisture: Humidity and moisture can lead to fungal growth on lens elements.

    This vulnerability emphasizes the importance of regular lens maintenance to ensure optimal performance.

    Impact on Image Quality:

    The table below illustrates the potential impact of contaminants on image quality:

    ContaminantImpact on Image Quality
    DustCauses hazy spots and reduces overall sharpness.
    FingerprintsResults in blurred or distorted areas in the image.
    Moisture/FungusLeads to spots, discoloration, and a loss of contrast.

    Appreciating the intricate nature of camera lenses and the potential consequences of neglecting their care underscores the necessity of regular cleaning into your photographic routine.

    Signs of a Dirty Lens

    Capturing the perfect shot requires more than just a keen eye; it demands a lens that’s as clear as your vision. Recognizing the signs of a dirty lens is crucial for maintaining the integrity of your photographs. Let’s explore the visible indicators that signal it’s time to give your lens some TLC.

    Visible Signs of a Dirty Lens:

    SignsDescription
    Blurred ImagesUnexplained blurriness, especially in specific areas, indicates a dirty or smudged lens surface.
    Loss of ContrastA reduction in the sharpness of colors and contrast may result from contaminants affecting the lens coating.
    Visible Spots or StreaksDust particles or fingerprints can manifest as visible spots or streaks on your images.
    Autofocus IssuesDifficulty in achieving precise autofocus can be a symptom of a dirty lens interfering with the camera’s sensors.

    Impact on Autofocus and Overall Functionality:

    Recognizing these signs is not merely about aesthetics; it’s about understanding how a dirty lens can impact your camera’s functionality. The table below illustrates the potential consequences:

    IssueImpact on Camera Functionality
    Autofocus ProblemsSluggish or inaccurate autofocus performance, leading to missed shots.
    Exposure InconsistencyContaminants can affect light transmission, resulting in inconsistent exposure levels.
    Reduced Image QualityOverall degradation of image quality, affecting the clarity and sharpness of photos.

    By staying vigilant to these signs, you can address lens cleanliness promptly, ensuring your camera performs at its best. In the next section, we’ll explore the essential tools needed for effective lens cleaning, allowing you to restore crystal clarity to your photographic endeavors.

    Tools and Materials for Lens Cleaning

    Maintaining the cleanliness of your camera lens requires the right tools and materials. Over the years, as a photographer, I’ve experimented with various cleaning supplies, and I’ve discovered the essentials that every photographer should have in their cleaning kit. Let’s dive into the world of lens cleaning tools and materials.

    Essential Lens Cleaning Tools:

    ToolDescription
    Microfiber ClothSoft, lint-free cloth for gentle wiping without scratching the lens surface.
    Lens Cleaning SolutionSpecifically formulated solution to remove smudges, fingerprints, and other contaminants.
    Lens BrushA delicate brush for removing loose particles before using the cleaning solution.
    Air BlowerA tool for blowing away dust and debris from the lens surface.
    Lens TissuesThin, disposable tissues designed for lens cleaning purposes.

    Lens Cleaning Kits:

    Cleaning Kit ComponentsPurpose
    Lens PenCombines a brush and a cleaning tip in a compact, pen-like design for quick cleaning on the go.
    Lens Cleaning WipesPre-moistened wipes for convenient and efficient cleaning, especially useful in the field.
    Lens Cleaning PenA dual-sided tool with a brush and a cleaning pad for thorough and precise cleaning.

    Tips for Selecting Cleaning Tools:

    1. Compatibility: Ensure the tools are suitable for your lens type (e.g., coated or uncoated).
    2. Gentleness: Opt for tools that are gentle to prevent scratches or damage to lens coatings.
    3. Quality: Invest in high-quality tools to ensure effectiveness and longevity.

    DIY Lens Cleaning Solution:

    IngredientPurpose
    Isopropyl Alcohol (90%)Disinfects and removes stubborn contaminants.
    Distilled WaterDilutes the alcohol for a safe cleaning solution.

    Mixing your cleaning solution ensures control over the ingredients, especially important for sensitive lens coatings.

    Preparing for Lens Cleaning

    Embarking on the journey of lens cleaning requires more than just having the right tools; it involves careful preparation to ensure a successful and safe cleaning process. Drawing from my experiences, here’s a step-by-step guide to preparing for lens cleaning:

    1. Select a Clean Workspace:
      • Choose a well-lit and dust-free environment to minimize the risk of additional contaminants landing on your lens during the cleaning process.
    2. Turn Off Your Camera:
      • Power off your camera to prevent any accidental mishaps during the cleaning. This ensures the safety of both your camera and the lens.
    3. Remove Loose Particles:
      • Before applying any cleaning solution, use a soft lens brush or air blower to remove loose dust and debris from the lens surface. This helps prevent scratching during the wiping process.
    4. Inspect for Stubborn Stains:
      • Identify any persistent stains or smudges on the lens. Stubborn contaminants may require extra attention during the cleaning process.
    5. Check Lens Coating:
      • If your lens has specialized coatings, such as anti-glare or multi-coatings, take note of them. Some cleaning solutions may be better suited for coated lenses.
    6. Organize Your Cleaning Tools:
      • Lay out your cleaning tools and materials within easy reach. Having everything organized ensures a smooth and efficient cleaning process.
    7. Review Camera Manual:
      • Consult your camera manual for any specific guidelines or recommendations for cleaning your particular lens model. Manufacturers often provide valuable insights.

    10 Step-by-Step Lens Cleaning Guide

    Embarking on the journey of cleaning your camera lens may seem daunting, but fear not. In this step-by-step guide, I’ll walk you through the process, providing insights from my own experiences as a photographer. Follow these steps for a thorough and effective lens cleaning.

    Step 1: Gather Your Tools

    Before you begin, ensure you have all the necessary tools within reach. Refer to the table below for a quick checklist:

    ToolPurpose
    Microfiber ClothGentle wiping without scratching the lens.
    Lens Cleaning SolutionRemoves smudges, fingerprints, and contaminants.
    Lens BrushRemoves loose particles before cleaning.
    Air BlowerBlows away dust and debris from the lens.
    Lens TissuesDisposable tissues for precise cleaning.

    Step 2: Power Off Your Camera

    Before diving into the cleaning process, turn off your camera. This ensures safety for both your equipment and the lens during the cleaning.

    Step 3: Remove Loose Particles

    Use a lens brush or air blower to gently remove any loose dust or debris from the lens surface. This initial step prevents scratching during the cleaning process.

    Step 4: Apply Lens Cleaning Solution

    Dampen a corner of your microfiber cloth with the lens cleaning solution. Be cautious not to oversaturate the cloth. Refer to the table for a quick overview of the cleaning solution components:

    IngredientPurpose
    Isopropyl Alcohol (90%)Disinfects and removes stubborn contaminants.
    Distilled WaterDilutes the alcohol for a safe cleaning solution.

    Step 5: Wipe the Lens Surface

    Gently wipe the lens surface using the dampened corner of the microfiber cloth. Use circular motions, starting from the center and moving outward. This helps to evenly distribute the cleaning solution and remove contaminants.

    Step 6: Address Stubborn Stains

    For stubborn stains or smudges, you may need to apply a bit more pressure. Be cautious not to exert excessive force, especially if dealing with sensitive lens coatings.

    Step 7: Dry the Lens

    Switch to the dry part of the microfiber cloth to ensure a streak-free finish. Again, use gentle circular motions, maintaining a consistent pressure.

    Step 8: Inspect for Residue

    Inspect the lens for any residue or streaks. If necessary, repeat the cleaning process with a fresh microfiber cloth until the lens is spotless.

    Step 9: Check Lens Coating

    If your lens has specialized coatings, ensure that the cleaning solution used is compatible. Some coatings may require specific cleaning solutions or extra care to avoid damage.

    Step 10: Final Inspection

    Power on your camera and visually inspect the lens through the viewfinder. Check for any anomalies in image quality or autofocus performance. If everything looks clear, you’ve successfully cleaned your lens.

    By following these steps with care and attention to detail, you’ll maintain the integrity of your camera lens and ensure that each shot captures the clarity and brilliance it deserves. In the next section, we’ll explore specific tips for cleaning different types of lenses, from primes to zooms and specialized lenses.

    Cleaning Specific Lens Types

    Not all lenses are created equal, and the approach to cleaning them may vary based on their types and features. As a photographer, I’ve navigated through cleaning different lenses, and here are specific tips for maintaining the clarity of various lens types:

    Cleaning Prime Lenses:

    Prime lenses, known for their fixed focal lengths, are relatively straightforward to clean. Follow the general lens cleaning guide, paying special attention to the glass elements. The lack of a zoom mechanism simplifies the process, allowing for precise cleaning without the need for extra adjustments.

    Cleaning Zoom Lenses:

    Zoom lenses, with their adjustable focal lengths, require a bit more attention. During the cleaning process, extend and retract the lens to access all parts of the glass. Be cautious around the zoom ring, ensuring that no cleaning solution or debris is lodged in the crevices. Cleaning a zoom lens may take a bit more time, but the effort ensures uniform image quality across different focal lengths.

    Special Considerations for Specialized Lenses:

    Specialized lenses, such as macro, fisheye, or tilt-shift lenses, may have unique characteristics that demand careful cleaning. For macro lenses with intricate focusing mechanisms, exercise extra caution to avoid disrupting delicate components. Fisheye lenses with curved glass may require additional attention to ensure every part of the lens is thoroughly cleaned. Tilt-shift lenses, known for their complex optics, benefit from meticulous cleaning to preserve their precision.

    Always refer to the manufacturer’s guidelines for specific lens types, especially if they have proprietary coatings or features that require particular care. By understanding the nuances of cleaning different lens types, you’ll ensure that each lens in your collection continues to deliver exceptional image quality. In the next section, we’ll explore the dos and don’ts of lens cleaning, offering insights to avoid common pitfalls and maintain the longevity of your lenses.

    Lens Cleaning Dos and Don’ts

    Effectively cleaning camera lenses requires a delicate touch and adherence to best practices. Below, I’ve outlined the crucial dos and don’ts to ensure the longevity and optimal performance of your lenses.

    Dos:

    ActionReason
    Use Gentle MovementsGentle circular motions prevent scratches and ensure even cleaning.
    Check CompatibilityEnsure cleaning solutions and tools are compatible with your lens coatings.
    Follow Manufacturer GuidelinesAdhere to any specific cleaning recommendations provided by the lens manufacturer.
    Inspect RegularlyRoutinely inspect your lenses for signs of dust, smudges, or other contaminants.

    Don’ts:

    ActionReason
    Use Excessive ForceApplying too much pressure can damage lens coatings or elements.
    Neglect Environmental FactorsAvoid cleaning in dusty or windy environments to prevent additional contaminants.
    Use Inappropriate Cleaning MaterialsUsing rough cloths or household cleaners can scratch and damage the lens.
    Over-CleanExcessive cleaning can wear down lens coatings, impacting image quality over time.

    Routine Lens Maintenance

    Ensuring the longevity and peak performance of your camera lenses goes beyond sporadic cleaning—it involves incorporating routine maintenance into your photography habits. As a photographer, I’ve learned that a proactive approach can prevent issues before they compromise your shots. Consider the following tips for routine lens maintenance:

    1. Regular Inspections: Periodically check your lenses for any signs of dust, smudges, or damage.
    2. Scheduled Cleaning: Establish a cleaning schedule based on your usage frequency to prevent the accumulation of contaminants.
    3. Dust-Free Storage: Store your lenses in a clean and dry environment, preferably in a dedicated camera bag with proper padding.
    4. Lens Caps: Always use lens caps when not actively shooting to protect the lens from dust and scratches.
    5. Avoid Direct Sunlight: Prolonged exposure to direct sunlight can damage lens coatings, so store your lenses in shaded areas when not in use.

    How to run a dirt-checking test on a DSLR lens?

    Following two simple methods, you can quickly check any dirt or particles on your DSLR camera lens. 

    Method One:

    Set the focused mood to the manual perspective on your DSLR camera. Now slowly turn the focus ring to infinity. Now you can quickly see those tiny dust and dirt in the viewfinder.

    Method Two:

    Take some photos of bare surfaces. Capturing the Black/white background is the best option—capture a light contextual and a dark background. Now sift through these photos. If there is any dust, it’ll show up. 

    How to clean a DSLR lens with a cleaning kit?

    DSLR lens cleaning kits are beneficial. Many profitable brands are selling suitable cleaning kits for DSLR lenses. But we recommend the highest-rated products on Amazon, Walmart, or eBay. Usually, these kits have five accessories inside one set: an air blower, soft-bristled brushes, cleaning wipes, microfiber cloth, and cleaning fluid. Now let’s explore the proper way of cleaning the DSLR camera lens with cleaning tools. 

    CAUTION: You must wear rubber gloves before cleaning the DSLR lens kit.

    Step One:

    Take the air blower to blow the light dust from the DSLR lens. Blow it from a few centimeters away, and it will work nicely. 

    Step Two:

    Take the soft-bristled brush and clean the dust from the DSLR lens. But make sure the soft-bristled brush is made of camel or goat hair to avoid scratches while cleaning the DSLR lens.

    Step Three:

    Rub the cleansing wipes gently on the lens surface and throw them away immediately. Because reusing the cleaning wipes may damage your DSLR lens.

    Step Four:  

    Add a few drops of cleaning fluid on the microfiber cloth and rub it in a circular motion on the lens surface. It will remove oil, smudges, fingerprints, dust, and dirt. 

    Now finally, you’ve finished cleaning your DSLR lens. That is the correct and proper method of cleaning the DSLR lens with cleaning tools.

    How can I keep my camera lens or filter clean?

    Here are some easiest and best methods to keep your DSLR lens clean.

    You must permanently attach the lens cap after finishing capturing photos.

    Do not keep or place your lenses in dusty or dirty areas. Always store them inside your camera bag. 

    While changing lenses, please avoid windy places or weather; the dust can quickly enter your lenses by finding flow.

    When changing the camera lenses, please tilt down your DSLR camera to avoid dust and dirt.

    Always keep a microfiber cloth inside your camera bag. Clean the lens with a microfiber cloth after ending your photography session.

    Please follow these steps daily to help keep your DSLR lenses clean.

    Can I clean my camera lens without lens cleaning solutions?

    Yes, you can also clean your camera lens without the cleaning solution, but it’ll not be as perfect as the previous method.

    Can I clean my camera lens without lens cleaning solutions

    1.  Take a lens tissue or soft cloth and gently wipe it over the camera lens. After cleaning all those light specks of dust, throw away that tissue.

    2.  If there is still dirt or dust, try cleaning them with cotton buds. It will help a lot and will give a better result.

    3.  Now, take lens tissue or cloth, spray a small amount of regular glass cleaner liquid on that tissue, and wipe it over the DSLR lens in a circular motion. It will clean most of the oil and smudges. Do not spray too much liquid, as it can harm your DSLR lens.

    4.  Take a soft dry cloth. Make sure it’s 100% cotton, and wipe the lens again. Now you can see the lens is pretty much cleaned properly. 

    5.  You can use this process to clean your filter.

    You can apply this method if you don’t have cleaning kits, but we always recommend cleaning kits for the perfect cleaning process. 

    WARNING!

    There are some issues you will face while you are cleaning the DSLR lens. Sometimes there are watermarks on the DSLR lens because of applying too much cleaning fluid during the cleaning process. Please try to use a minimum amount of lens cleaning solution while cleaning, and never apply the liquid cleaner directly on the camera lens because it will harm your DSLR lens and leave some watermarks on the lens.

    Do not use a cleaning kit for a very long time. Most people make this mistake. If your cleaning kit becomes old or dirty, please throw it away kindly. Dirty and old cleaning kits ruin your cleaning process and will harm your DSLR Lens. 

    Always check the quality of the soft-bristled brush before cleaning it. Ensure your Soft-bristled brush is made with high-grade materials like camel or goat hair. You can also buy your soft-bristled brushes separately. Sometimes the all-in-one cleaning kit doesn’t come with an excellent soft-bristled brush.

    Try to clean your DSLR lens every day with a microfiber cloth. Always carry a good quality microfiber cloth inside your camera bag. Just wiping the DSLR lens with the microfiber cloths will not take too much time, and keep your DSLR lens always clean.

    Never skip the weekly cleaning session of your DSLR lens. Avoiding or skipping your camera lens cleaning sessions can create a big problem while capturing photos. 

    Do not try to clean your camera lens in too hurry. Always clean the DSLR lens on a weekly holiday. Cleaning your camera lens with endurance will give a much better result.

    Try to avoid making any fingerprints.

    So, these were some warnings you should check out and maintain. You can now quickly clean your DSLR lens with care and achieve good image quality. 

    Tips: If your DSLR camera lens becomes too dirty, please try not to clean it at home. Usually, take your camera lens to a professional DSLR lens cleaner.

    Final words:

    In this article, you learn about camera lenses and the cleaning process. We recommend cleaning a camera lens with the help of professionals. For regular users, try cleaning the lens every night, before and after use. We talk with many professionals; they clean lenses every night and deep clean once a week. They always keep a blower with them. You can also keep a blower for emergencies or better image quality.

    When you are free, clean your lens with a soft hand. Do not break lens glass while cleaning. If you are in a hurry, then usually take a clean towel and wipe it. But avoid cleaning in a rush. 

    We will try to give you all the information and follow all instructions. We hope this article will be helpful to you. 

    Resources and References

    For further guidance on lens cleaning and maintenance, explore the following resources and references:

    1. Lens Cleaning Products:
      • LensPen: A versatile cleaning tool with a brush and a cleaning tip.
      • ZEISS Lens Cleaning Kit: Specifically designed for ZEISS lenses, ensuring effective and safe cleaning.
    2. Online Tutorials:
    3. Manufacturer Guidelines:
    4. Photography Forums: