Category: Binoculars

  • Top 10 Things to Consider Before Buying Your First Set of Binoculars (Video Included)

    Top 10 Things to Consider Before Buying Your First Set of Binoculars (Video Included)

    When a person wants to buy a Binocular, he gets confused about which one will be appropriate for him and which one won’t. People have different purposes for buying binoculars; some may want to use them for regular use, like sports watching, hiking, or for some holiday uses.

    Before starting, we will show you some significant facts and features you should consider before buying your pair of binoculars:
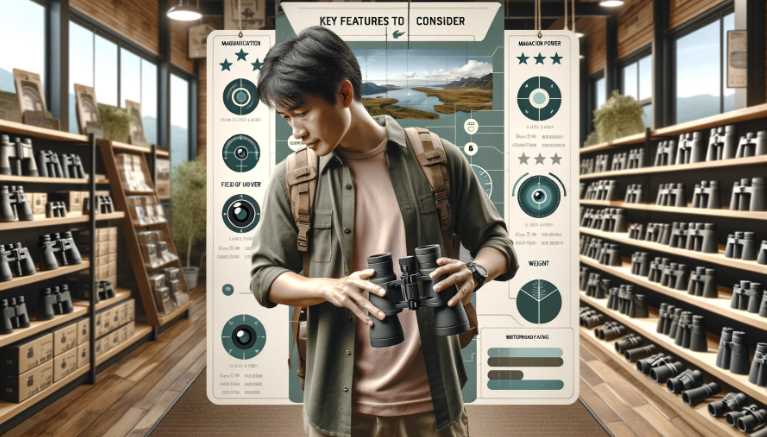
    Understanding Binocular Specifications

    Key Features to Consider

    Embarking on the journey to select the perfect binoculars involves unraveling a tapestry of specifications, each contributing to the overall viewing experience.

    1. Objective Lens Diameter

    The size of the objective lens plays a pivotal role in light gathering. A larger objective lens allows more light to enter, resulting in a brighter and clearer image. However, it’s essential to strike a balance, considering that larger lenses can make the binoculars heavier and bulkier, impacting portability. For a versatile choice, opt for an objective lens diameter ranging from 42mm to 50mm.

    2. Magnification Power

    While it might be tempting to go for higher magnification, it’s crucial to understand the trade-offs. Higher magnification can result in a more detailed view, but it also amplifies hand movements, making it challenging to maintain a steady image. For general-purpose use, magnification power between 8x and 10x is recommended, providing a sweet spot between zoom and stability.

    3. Field of View

    The field of view refers to the width of the area visible through the binoculars at a specific distance. A wider field of view is advantageous, especially when observing fast-moving subjects or scanning vast landscapes. Finding the right balance between magnification and field of view is key to an immersive experience. Aim for a field of view between 300ft and 400ft at 1000 yards.

    4. Exit Pupil

    The exit pupil is the diameter of the light beam exiting the eyepiece. Understanding this specification is crucial for optimizing low-light performance. To ensure a bright image in various lighting conditions, select binoculars with an exit pupil diameter that matches or slightly exceeds your eyes’ dilation. A range between 4mm and 5mm is generally considered ideal.

    5. Close Focus Distance

    For nature enthusiasts and bird watchers, the ability to focus on close objects is paramount. A close focus distance of 6ft to 10ft allows you to observe intricate details, making your binoculars versatile for a range of activities.
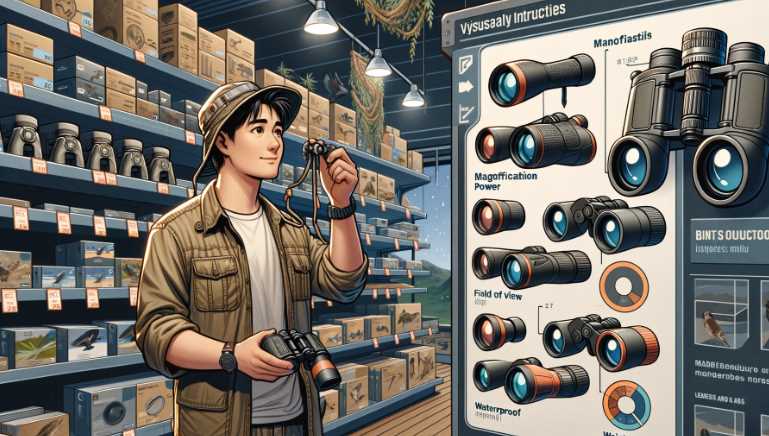
    Key Binocular Specifications

    SpecificationIdeal Range
    Objective Lens Diameter42mm – 50mm
    Magnification Power8x – 10x
    Field of View300ft – 400ft at 1000 yards
    Exit Pupil4mm – 5mm
    Close Focus Distance6ft – 10ft

    In the intricate dance of these specifications lies the secret to finding binoculars tailored to your specific needs. As you consider these factors, envision the breathtaking scenes that await you, framed with precision through the lenses of your chosen binoculars.

    Types of Binoculars
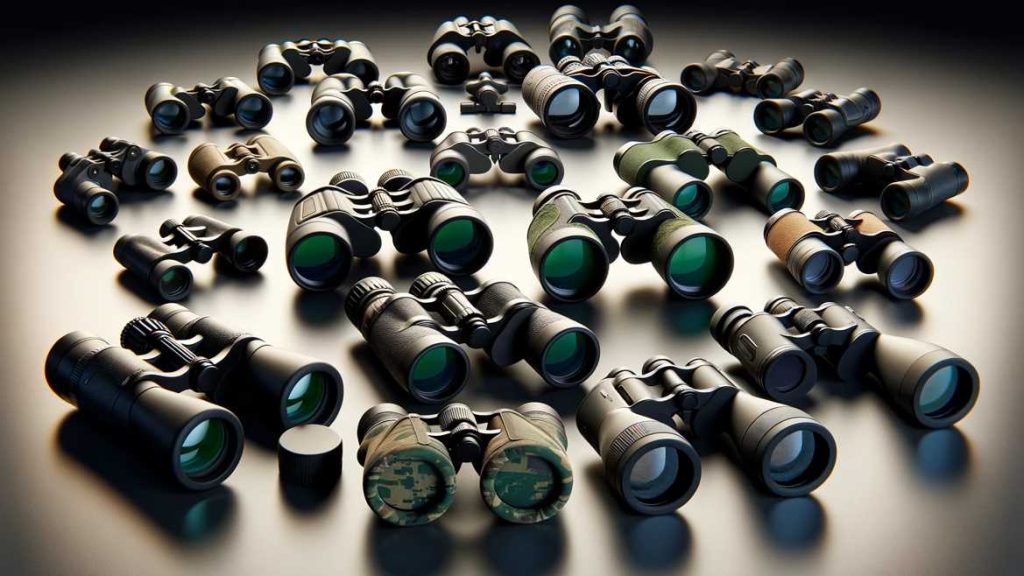
    Choosing the Right Type

    Selecting the type of binoculars is akin to choosing the lens through which you’ll view the world. Understanding the nuances between various types ensures you find the perfect match for your unique preferences and activities.

    1. Porro Prism vs. Roof Prism

    The prism design is a fundamental element influencing the shape and performance of binoculars. Porro prism binoculars have a traditional, offset design, providing enhanced depth perception. On the other hand, roof prism binoculars are more streamlined and compact, making them an excellent choice for those prioritizing portability. Consider your preferences – whether you value a classic design or a more modern, space-efficient build.

    2. Compact vs. Full-Size Binoculars

    The choice between compact and full-size binoculars revolves around balancing size and performance. Compact binoculars are travel-friendly, easily fitting into pockets or small bags. However, they may sacrifice some image quality compared to their full-size counterparts, which offer larger objective lenses for improved clarity. Consider your intended activities – are you seeking a travel companion or a dedicated tool for detailed observations?

    3. Zoom vs. Fixed Magnification

    The debate between zoom and fixed magnification revolves around versatility and stability. Zoom binoculars allow you to adjust the magnification, offering flexibility in various scenarios. However, this versatility often comes at the cost of stability, as higher magnifications amplify hand movements. Fixed magnification binoculars, while limiting in terms of versatility, provide a steadier image. Consider your priorities – do you prioritize adaptability or a rock-solid viewing experience?
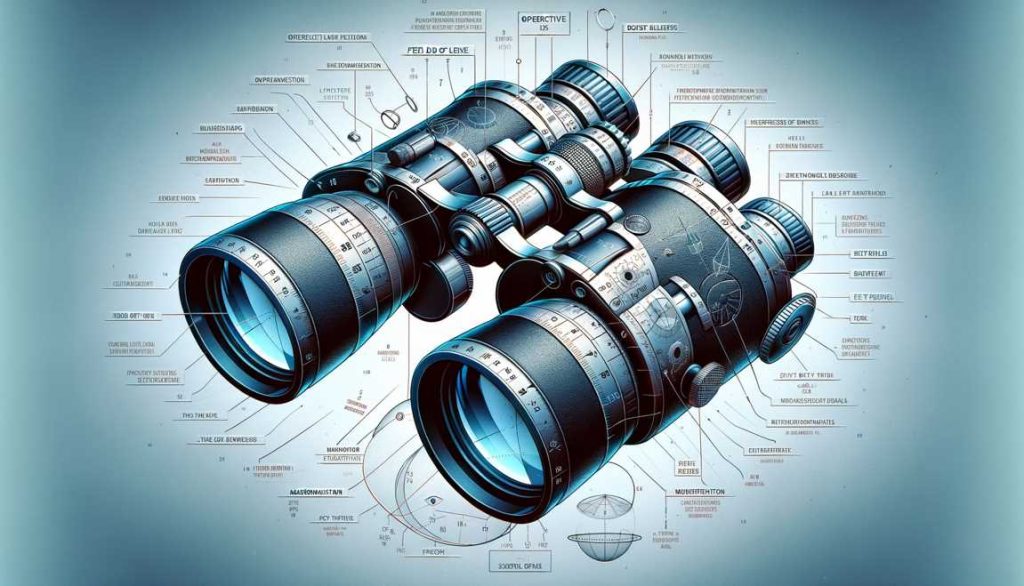
    Types of Binoculars

    Binocular TypeProsCons
    Porro PrismEnhanced depth perceptionBulkier design
    Roof PrismStreamlined, compactPotentially more expensive
    CompactTravel-friendlySacrifice some image quality
    Full-SizeBetter image qualityBulkier and heavier
    ZoomVersatility in magnificationPotential compromise in image stability
    Fixed MagnificationSteadier imageLimited versatility

    As you delve into the world of binocular types, imagine the scenarios each design is tailored for. Picture yourself on a mountaintop with compact binoculars, or immersed in the details of nature with a pair of full-size binoculars.

    Consideration of Lens Coatings

    Coated, Fully Coated, Multi-Coated, and Fully Multi-Coated Lenses

    The magic behind the clarity and brilliance of binocular vision lies in the application of specialized lens coatings. These coatings serve as the unsung heroes, enhancing light transmission, reducing glare, and ensuring that every detail is vividly captured.

    1. Coated Lenses

    Binoculars with coated lenses have a single layer of coating on at least one lens surface. While this basic coating provides some improvement in image quality by reducing light loss, it is considered the entry-level option in lens coating.

    2. Fully Coated Lenses

    A step up from coated lenses, fully coated binoculars have all air-to-glass surfaces coated with a single layer. While still a budget-friendly option, fully coated lenses provide better light transmission and improved image brightness.

    3. Multi-Coated Lenses

    Multi-coated lenses feature multiple layers of coating on at least one lens surface. This enhances light transmission, reduces reflections, and results in brighter, sharper images. Binoculars with multi-coated lenses strike a balance between performance and affordability.

    4. Fully Multi-Coated Lenses

    Considered the pinnacle of lens coatings, fully multi-coated binoculars have all air-to-glass surfaces coated with multiple layers. This comprehensive coating significantly improves light transmission, contrast, and color fidelity, ensuring a superior viewing experience even in challenging lighting conditions.

    The choice of lens coatings depends on your budget, intended use, and desired level of optical performance. While fully multi-coated binoculars are the gold standard, fully coated or multi-coated options can still deliver excellent results for casual or budget-conscious users.

    Lens Coating Types

    Lens Coating TypeDescriptionIdeal Use
    CoatedSingle layer on at least one lens surfaceEntry-level
    Fully CoatedAll air-to-glass surfaces coated with a single layerBudget-friendly
    Multi-CoatedMultiple layers on at least one lens surfaceBalanced performance
    Fully Multi-CoatedAll air-to-glass surfaces coated with multiple layersSuperior optical performance

    Evaluating Build and Design

    Durability and Ergonomics

    Choosing binoculars with a robust build and ergonomic design is essential for ensuring longevity and comfort during use.

    1. Build Material (Metal vs. Plastic)
      • The choice between metal and plastic for the construction of binoculars involves a trade-off between durability and weight.
      • Metal builds, often made of aluminum or magnesium alloys, provide sturdiness suitable for rugged outdoor activities but come with a higher weight.
      • High-quality plastics, on the other hand, strike a balance between durability and reduced weight, making them suitable for extended use without causing undue strain.
    2. Waterproof and Fogproof Features
      • Opting for binoculars with waterproof and fogproof features is crucial, especially for outdoor enthusiasts facing varying weather conditions.
      • Nitrogen purging, a common feature, prevents internal fogging, ensuring clear vision in diverse environments.
      • Waterproofing safeguards against unexpected rain or accidental submersion, making them reliable companions in all weather scenarios.
    3. Grip and Comfort
      • The ergonomic design of binoculars contributes significantly to user comfort during extended use.
      • Textured grips and well-designed contours enhance the overall handling experience, providing a secure hold and reducing the likelihood of accidental drops.

    Binocular Build and Design Comparison

    FeatureMetal BuildPlastic Build
    DurabilityExcellent durability for rugged use.Good durability with reduced overall weight.
    WeightHeavier due to the robust metal construction.Lighter, ideal for extended use without strain.
    Weather ResistanceOften equipped with superior weather seals.Reliable in various weather conditions.
    CostHigher cost due to the premium materials.Generally more affordable without sacrificing quality.
    ComfortMay be heavier for extended use.Lighter design contributes to user comfort.

    This table provides a quick comparison between metal and plastic builds, aiding in the decision-making process based on individual preferences and the intended use of the binoculars. Choose the build material that aligns with your priorities, ensuring a durable and comfortable optical companion for your adventures.

    Weight and Size Considerations

    Balancing Portability and Performance

    The weight and size of binoculars are crucial considerations that can significantly impact your overall experience, especially during extended use or travel.

    1. Impact of Weight on Extended Use
      • The weight of binoculars directly affects comfort during prolonged use.
      • Heavier models may cause fatigue, limiting the enjoyment of extended observations such as birdwatching or stargazing.
      • Consider your intended use – if you plan on carrying them for extended periods, opt for a more lightweight design.
    2. Compactness for Travel
      • Travel-friendly binoculars strike a delicate balance between compactness and performance.
      • Compact models are designed for easy portability, making them ideal for activities like hiking or sightseeing.
      • However, keep in mind that compactness often involves some trade-offs, such as a narrower field of view or slightly reduced image brightness.

    When choosing binoculars, envision how you plan to use them. If your adventures involve a lot of movement or if you appreciate the convenience of easily stowing them in a backpack, lean towards a lighter and more compact design. On the other hand, if you prioritize optical performance and plan to set up for longer observations, a slightly heavier but more feature-rich model might be the better choice.

    Adjustability and Focus System

    Smooth Adjustments for Precision

    The adjustability and focus system of binoculars are critical factors that contribute to the clarity and ease of use during observations.

    1. Central Focus vs. Individual Eyepiece Focus
      • Central Focus: Convenient for quick adjustments, central focus systems simultaneously adjust both barrels with a single mechanism.
      • Individual Eyepiece Focus: Ideal for more precise customization, allowing independent adjustment of each eyepiece to accommodate differences in vision between the eyes.
    2. Diopter Adjustment
      • Diopter adjustment is a valuable feature for users with varying eyesight.
      • This individualized setting compensates for the differences between your eyes, ensuring a sharp and focused image without the need for constantly readjusting the central focus.
    3. Twist-Up Eyecups for Eyeglass Wearers
      • Twist-up eyecups are designed for flexibility, accommodating users with or without eyeglasses.
      • By twisting the eyecups up or down, users can achieve the optimal distance between the eyepiece and their eyes, ensuring a comfortable viewing experience.

    Binocular Adjustability and Focus System Comparison

    FeatureCentral Focus SystemIndividual Eyepiece Focus System
    Ease of UseQuick and convenient adjustments.Precision customization for individual preferences.
    Diopter AdjustmentMay have a diopter adjustment but often less customizable.Allows for individualized diopter adjustments for each eyepiece.
    Eyeglass WearersMight require additional adjustments for eyeglass wearers.Ideal for eyeglass wearers with adjustable eyecups.
    SuitabilityWell-suited for general use and quick observations.Preferred for activities requiring fine-tuned adjustments.
    Common Use CasesBirdwatching, sports events, and general observations.Stargazing, wildlife photography, and activities requiring precise focus.

    This table serves as a quick reference guide to help you choose between a central focus system and an individual eyepiece focus system based on your preferences and specific needs.

    Low Light Performance

    Twilight Factor and Exit Pupil

    Optimizing low light performance in binoculars is crucial for activities like stargazing or dawn and dusk observations.

    1. Understanding Low Light Conditions
      • Twilight factor is a key consideration for low light performance, taking into account both magnification and objective lens diameter.
      • Higher twilight factors, calculated by multiplying magnification by the square root of the objective lens diameter, indicate better performance in low light conditions such as dawn or dusk.
    2. Ideal Specifications for Low Light Observation
      • Choosing binoculars with a larger objective lens diameter enhances low light performance.
      • A larger exit pupil, calculated by dividing the objective lens diameter by the magnification, is advantageous for low light conditions, providing a brighter and clearer image.

    Binocular Low Light Performance Comparison

    FeatureLarger Objective Lens DiameterLarger Exit Pupil
    AdvantagesEnhanced light-gathering ability.Brighter image in low light conditions.
    Twilight Factor CalculationHigher twilight factor for improved performance.Considerable impact on low light observations.
    Low Light ScenariosIdeal for dawn, dusk, and stargazing.Excellent performance in dimly lit environments.
    Common Magnification RangesOften found in lower magnification ranges.Compatible with various magnification options.
    SuitabilityWell-suited for activities requiring extended low light observations.Versatile for different low light scenarios.

    This table provides a comparative overview, allowing you to assess the impact of larger objective lens diameter and exit pupil on low light performance. Consider your specific use cases, especially if you anticipate engaging in activities where optimal performance in low light conditions is essential.

    Setting a Budget

    Finding the Balance

    While the allure of high-end binoculars is undeniable, setting a realistic budget is crucial for a satisfying purchase.

    1. Price Range for Different Needs
      • Entry-level binoculars can offer excellent value for casual users, providing adequate performance for general observations.
      • Higher budgets unlock advanced features, superior optics, and durable builds, catering to the needs of enthusiasts and professionals.
    2. Balancing Features and Cost
      • Assess your priorities and align them with your budget.
      • Consider features that are essential for your specific activities to find a balance between performance and cost.

    Binocular Budget Considerations

    Budget RangeFeatures and Considerations
    Entry-Level (<$200)– Suitable for casual users and beginners.
    – Adequate performance for general observations.
    Mid-Range ($200-$500)– Improved optics and build quality.
    – Suitable for enthusiasts seeking enhanced performance.
    High-End (>$500)– Advanced features, superior optics, and durable builds.
    – Ideal for professionals and those with specific requirements.

    This table provides a quick overview of budget considerations, helping you align your financial investment with the features that matter most to you.

    Maintenance and Care Tips

    Prolonging the Life of Your Binoculars

    Investing in binoculars is not just about the initial purchase; it’s a commitment to their care and maintenance. Proper handling and routine maintenance ensure that your binoculars provide clear and crisp views for years to come.

    1. Cleaning and Storage Guidelines
      • Use a lens cleaning kit designed for optics to remove dust, fingerprints, and smudges gently.
      • Avoid using abrasive materials like tissues or clothing that may scratch the lenses.
      • Blow away loose particles before cleaning to prevent scratching.
      • Store binoculars in a protective case when not in use to shield them from dust, moisture, and accidental damage.
      • Keep the lens caps on when not actively using the binoculars to prevent dust accumulation.
    2. Avoiding Common Mistakes
      • Refrain from touching the lenses with bare fingers as natural oils can degrade lens coatings.
      • Be cautious when adjusting the interpupillary distance, ensuring smooth movements to avoid strain on the hinges.
      • Avoid exposing binoculars to extreme temperatures, as rapid changes can lead to internal fogging.
      • Regularly check for any signs of wear and tear, such as loose screws or misaligned optics.
      • If binoculars get wet, wipe them dry immediately to prevent water damage, and allow them to air-dry completely before storing.

    Binocular Maintenance and Care Tips

    Maintenance TaskRecommended Action
    Cleaning Lenses– Use a lens cleaning kit for gentle and thorough cleaning.
    – Avoid abrasive materials and ensure lenses are dust-free before cleaning.
    Storage Practices– Store binoculars in a protective case to shield them from dust and moisture.
    – Keep lens caps on when not in use to prevent dust accumulation.
    Handling and Adjustment– Be cautious when adjusting interpupillary distance to avoid strain on hinges.
    – Check for signs of wear and tear, such as loose screws or misaligned optics.
    Temperature Considerations– Avoid exposing binoculars to extreme temperatures to prevent fogging.
    Dealing with Moisture– Wipe binoculars dry immediately if they get wet; allow them to air-dry completely.
    Avoiding Fingerprints– Refrain from touching lenses with bare fingers to prevent oil buildup.

    This table serves as a practical guide to maintaining and caring for your binoculars, ensuring their longevity and optimal performance. Incorporating these simple yet effective practices will help you get the most out of your investment and continue enjoying clear and vibrant observations.

    Facts & features you need to consider before choosing:

    LENS SIZESMAGNIFICATION NUMBERPRISM TYPEIMAGE QUALITY
    FIELD OF VIEWEYE RELIEF NUMBEREXIT PUPIL NUMBERPURPOSE OF USE
    OPTICAL COATINGFOCUS QUALITYSIZE & WEIGHTRUBBER COATING
    BRANDCOSTDURABILITYACCESSORIES

    Significance of Binocular Numbers  & Terminologies:
    How to Choose Binoculars

    You will see some numbers on Binoculars. These are significant numbers, and you also need to know some technical terminology of binoculars. Here, we will give a good idea about them. We will try to explain it quickly; thus, you can get it easily.

    NUMBERS & TERMINOLOGIES YOU MUST KNOW BEFORE CHOOSING

      Magnification Number  In a 10×60 Binocular, 10x is the magnification number. You will see the image ten times closer than its actual distance. More magnification power decreases stability, and an unstable focus can reduce image quality.
      Objective lensesThe number after the magnification number defines the objective size. For example, in a 10×60 Binocular, the accurate mirror is 60mm. The bigger objective lenses make the image brighter, and even when viewing the night sky, it produces a more brilliant image quality.
         Prism TypeTwo types of prisms are designed for binoculars, such as PORRO PRISM and ROOF PRISM. Roof prism binoculars are relatively modern, whereas Porro prism binoculars are older versions. Binoculars with roof prisms are more compact binoculars than the Porro ones. Because they use some single straight prism, on the other hand, the Porro is not straight.
    Exit – Pupil NumberThe exit-pupil number is the amount of light that allows you to see that item you want to notice from the binoculars. The exit-pupil number should be more than 4.
      FoVFoV -Field of view is the image size or the number of horizontal photos you can watch from your Binoculars. More than 300 feet is an average viewing field from a binocular. A wide field of view is always better for finding objects. There is the angle of view also in a pair of binoculars. The field of view and angle of view determines the same amount of horizontal space.
    Eye Relief NumberIf you wear glasses, this number is essential to you. The eye-relief number should be at least 15mm. This number matches the distance between your eyes and the binocular eyecups. It is also called eye relief distance.

    We will start with the general uses, and then one by one, we will guide the definite and professional users.

    BINOCULARS FOR EVERYDAY NORMAL USES
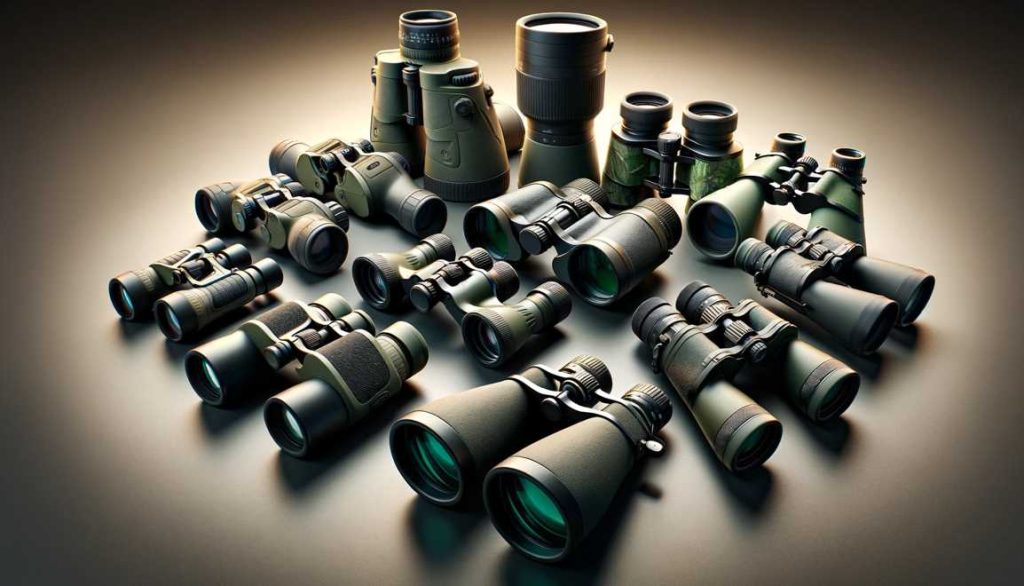
         Magnification Number8x magnification is perfect for close focus, like hiking or sports watching in the stadium, but for cinema watching in a cinema hall, 7x magnification is enough. Though you can use an 8x magnification binocular in the cinema hall. So, 8x magnifications are the best option for your general uses.
    Objective lensFor general uses, the lens size should be less than 30mm. An 8×28 pair of binoculars will be best for everyday use.
    Other important facts: FoV, Exit-pupil numberThe average FoV(field of view) should be 300 feet or more and should be durable. We recommend you buy the water-resistant binoculars version if you can afford it. 8×28 versions will be the best for general use.

    How to Choose Binoculars for Birding?

    Magnification NumberAn 8x magnification number is the best for bird watchers. But you can also take a 10x version if you are an expert user because higher magnification needs an expert hand to keep it stable.
    Objective lens42mm is the best lens size for bird watchers. So, an 8×42 binocular is an excellent choice for bird-watching.
    Other important facts: Fov, Exit pupil numberThree hundred thirty feet is the best field of view for bird watching. It will be easier for you to track any birds with that amount of field of view. Find a durable one with perfect features.

    How to Choose Binoculars for Wildlife-viewing or Hunting?

    Magnification Number8x to 10x is better for hunting. 8x magnification is perfect for many people, whereas you can choose a higher magnification version, like 10x, if you want to use it from more distance. Sometimes, you may need more magnification. Thus, an 8×32, 8×42, or 10×42 is the best option. You have to choose according to your needs.
    Objective lenses32mm – 42mm is the perfect size for wildlife viewing or hunting. It also depends on your needs; if you want to use it in poor light conditions, you need bigger lenses. On the other hand, for daylight, you can use 32mm enough.
    Other important facts: Fov, Exit pupil numberAn average FoV of 300-375 feet is enough. But if you need more or less FoV, you can take it and choose the appropriate angle of view. Try to buy fog proof and waterproof binoculars. It will be best for rough uses if you can get or afford a multi-coated binocular. Find the best brand which will give you the best quality at an affordable price.

    How to Choose Binocular For Boating?

    Magnification Number7x magnification is the ideal size for Marine uses. Because a ship or a boat is never steady. That’s why, even If you use any support to make your binoculars stable, you will not succeed. So for better image stabilization, we recommend you use lower magnification.
    Objective lenses50mm is a standard and ideal accurate size. A 7×50 binocular will be the best for boating and Marine uses to get better image quality.
    Other important facts: Fov, Exit pupil number385-foot FoV is better for boating or Marine uses. Find the best brand, depending on how much you want to spend. Make sure that your models are waterproof binoculars. As you wish to use them for boating, waterproof binoculars and multi-coated versions should be your priority.

    How to Choose Binoculars for Skywatching or Astronomy?

    Magnification Number8x to 10x is the average good magnification number for beginners. It will give you a good night sky viewing experience. Better eyepiece lenses (ocular lenses) are suggested for astronomy binoculars because you will not use your binoculars for astronomy at close focus.
      Objective lens50mm and 56mm are better for beginners, giving a satisfactory result with bright images. Consequently, 8×56 and 10×50 are the best options because they have larger lenses and the right ocular lens size. On the other hand, if you are an expert sky-watchers and want some intense results and want to have binoculars for astronomy unique experiences, the 25×100 binoculars are recommended. Astronomy binoculars have more considerable magnification power because their ocular lens (eyepiece) is more powerful and has a bigger objective size.
    Other important facts: Fov, Exit pupil numberA field view of 300 feet is enough for astronomy binoculars. You have to use a stand or tripod to get stability. If you want to use it roughly, we suggest buying multi-coated and water-resistant binoculars. Find the best quality according to your price range.

    10 Things to consider when Buying Binoculars

    You should consider a few things when buying binoculars, including your level of expertise and the type of activities you will use them for. Top-of-the-line optics may not be necessary if you’re an expert hunter or fisherman. However, if you plan on using your binoculars to see wildlife or scenic views while hiking or traveling, better optics will make the experience more enjoyable.

    Size and weight

    Binoculars come in different sizes and weights, so it’s essential to find the right pair. Generally, the larger the binoculars are, the brighter they will be. Smaller binoculars are also perfect for close-up viewing or use when hiking or camping.
    Regarding weight, heavier binoculars are usually better because they will stay on your head when you look through them. They won’t bounce around as much, so you’ll have less trouble seeing what you’re looking at. Additionally, a heavier binocular will typically take more time to become foggy or blurry, so you’ll be able to see more detail overall.

    Field of view

    Paying attention to the field of view (FOV) is essential. This is the area in which you can see clearly. The higher the FOV, the more details you’ll be able to see.

    Some binoculars have a wide FOV, while others have a narrow FOV. It’s essential to choose the right type of binoculars for your needs. If you’re planning on using them for hunting or bird watching, you’ll want a wide FOV binocular because it will give you a better overall view. If you’re using them for general observation, then a narrower FOV will be more appropriate.

    Types

    Binoculars come in different types of lenses and strengths:

    Monoculars are just glasses that allow you to see one image at a time. They’re suitable for viewing close-up objects or for reading documents.

    Binoculars provide an enhanced view by splitting the image into two separate images that can be viewed separately. They’re ideal for viewing larger objects and landscapes.

    Telescopic binoculars have a long lens that allows you to see further away. They’re best suited for viewing wildlife or distant scenery.

    Multi-purpose binoculars allow you to use them for different purposes, like birdwatching or hunting. They have a wide range of magnifications for close-up and distant viewing.

    Batteries

    Low-quality batteries can cause the optics to become foggy, reducing your visibility when looking through them. Worse yet, if the battery pack is defective, it could explode and cause serious injuries.

    So how do you know if the batteries in your binoculars are of high quality? The best way to check is to take them into a shop and have them tested. Alternatively, you can try them by putting them into a flashlight and seeing if the light goes out. 

    If the binoculars work correctly with a flashlight, they’re likely good enough for outdoor use. However, if they don’t work with a flashlight, it’s best to replace the batteries with better ones.

    Eye cups and adjustments

    Knowing the different types of eyecups and their corresponding adjustments is essential. Here are a few things to keep in mind:

    – Monoculars have one eyepiece that you look through, while binoculars have two. 

    – Eye cups on monoculars are typically smaller than those on binoculars, which translates to a more immersive experience. 

    – The size and shape of the eye cups also affect how well they fit your eyes. If your eyes are close together or more prominent in diameter than average, you’ll want to get binoculars with large eye cups to accommodate these characteristics. 

    – Most monoculars have a focusing ring that controls the distance between the viewer and the observed object. This ring is usually located near the eyepiece; however, some models come with a built-in focuser separate from the eyepiece. 

    – Most monoculars also have a diopter (or dioptre) adjustment that allows you to correct for poor vision at different distances. 

    – Binocular straps can make it easier to hold onto your binoculars while observing; they can also help distribute weight evenly across your shoulders so that you don’t fatigue as quickly as possible.

    Tripods and mounts

    A tripod is an essential piece of equipment for anyone who wants to use binoculars for observation. It helps stabilize the binoculars so that they are not constantly moving, which gives you a steadier view and makes it less likely that you’ll miss something important.

    There are a few different types of mounts available, but the two most popular ones are bolt-on mounts and rifle scopes mounts. Bolt-on mounts are quick and easy to use, but they can be bulky and require some drilling or mounting skill. Rifle scope mounts are more compact and easier to use, but they may not be as stable as bolt-on mounts. 

     whichever type of mount you choose, make sure that it is compatible with your binoculars and your specific shooting style. It’s also essential to make sure that the mount can hold your weight; if it can’t, it may not be able to keep up with your movements when you’re looking through the binoculars.

    Warranty and support

    Binoculars come with a warranty that covers defects in the glass or optics, but it’s important to know what type of warranty is offered. Some warranties only cover defects caused by manufacturing or design flaws, while others cover any imperfections.

    It’s also important to know what kind of support is available should you need it. will the manufacturer be able to help you fix your binoculars if they’re not working correctly? Will they be able to provide advice on how best to use them? 

    Overall, it’s a good idea to research the warranty and support offered by a particular brand before making a purchase. This way, you’ll have peace of mind knowing that you’re getting a product that will last and be easy to use.

    Lens coating

    This protection that’s applied to the lenses to prevent them from coming into contact with dirt, dust, and other elements.

    There are a few different types of lens coatings, and each has its benefits and drawbacks. One popular type is anti-reflective coating, which helps reduce glare and improves visibility in low-light conditions. There are also water-repellant coatings that help keep water off the lenses, preserving them against damage from rain or moisture. 

    The best way to find out what kind of lens coating your binoculars have is to look for it on the product packaging or online reviews. If you’re unsure, it’s always worth getting a second opinion from a friend or family before making your purchase.

    Portable and Waterproof Rating

    When you’re looking to buy binoculars, make sure that they are portable and water-resistant. This is especially important if you plan on taking them hiking or camping.

    Another thing to consider is the Waterproof rating. Make sure that the binoculars you purchase have a rating of IPX8 or higher to protect them from rain, splashing water, and even immersion in up to two meters of water for up to 30 minutes.

    Optical quality and Magnification

    Optical quality measures how clear and sharp the images are in your binoculars. High-quality binoculars will produce images that are clear and free from distortion, which makes it easier to see details.

    Magnification is the power of your lenses to magnify distant objects. The higher the magnification, the closer you’ll be able to see things. However, too much magnification can also lead to problems like eyestrain and headaches. So, ensure you find a pair of binoculars with the correct magnification.

    PRISM: Which prism should you choose, PORRO or ROOF?

    It depends on your demands and your budget. If you want lightweight and compact Binoculars, a roof prism will be better for you. On the other hand, if you don’t want to spend too much money, you are a budget buyer; the Porro prism will be better because the roof prism is more expensive than the Porro prism.

    Last Words: 

    We are all budget buyers. We all want the best quality in our budget. We think that you also want the best binoculars within your budget. Now you know choosing binoculars according to your needs. So, first of all, find out which brand gives you the best quality at an affordable price. Then select a binocular in pursuance of your choice, considering all its features. First, look for durable, rubber-coated, weather-resistant binoculars with larger exit pupils, good optical design, sharper focus, a right angle of view, and produce quality images.  Finally, buy your favorite Binocular. After purchasing, always use a neck strap for your binoculars’ safety and a lens cleaner to betterment your binoculars.

  • How to Fix Binoculars: With Double Vision (Video Explained)

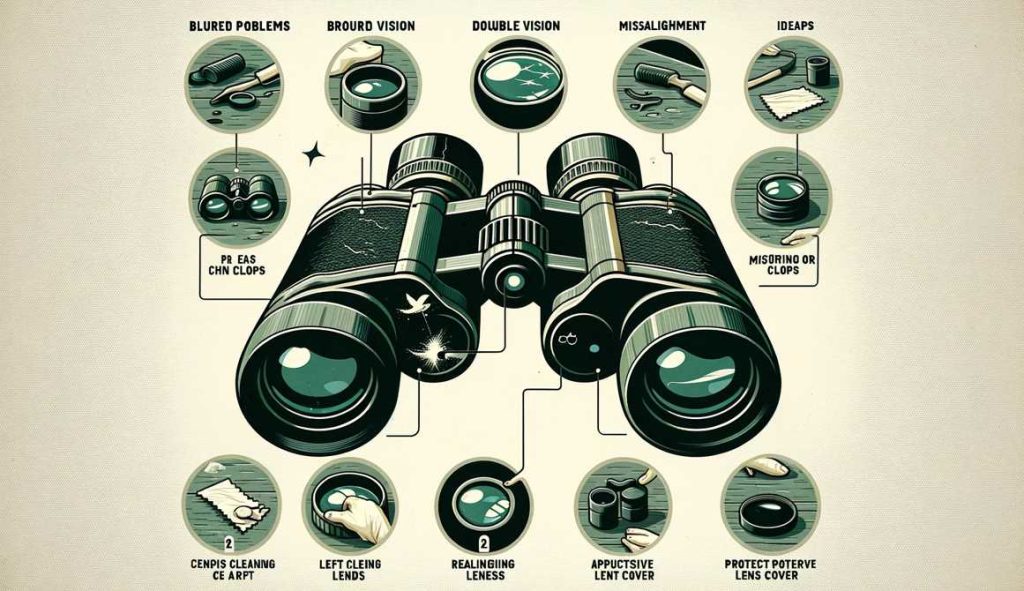
    Binoculars are an adventurer’s best companion, offering a closer look at the wonders of the world. However, even the most reliable binoculars can suffer from a common woe—double vision. In this guide, we embark on a journey to unravel the mysteries behind double vision, exploring its causes and providing practical solutions. Get ready to delve into the world of binocular optics and discover the joy of crisp, clear vision through your trusted binoculars.

    Understanding the Causes of Double Vision

    Misalignment of Binoculars

    Ever felt like your binoculars were playing tricks on you, producing two images instead of one? This could be due to misalignment. Imagine a mischievous misalignment causing chaos in the optical world of your binoculars. Fear not, we’ll decode this mystery and set things right.

    Effects on Vision

    Misalignment isn’t just a minor inconvenience; it significantly impacts your viewing experience. Expect blurred images and headaches if your binoculars are not in perfect harmony.

    Faulty Diopter Adjustment

    The diopter adjustment is your binoculars’ secret weapon for personalized clarity. Let’s uncover the importance of this adjustment and how a misaligned diopter can lead to the dreaded double vision.

    Signs of Diopter Misalignment

    Have you ever turned the diopter adjustment wheel, hoping for visual nirvana, only to be met with frustration? Learn to identify the signs of diopter misalignment and regain control over your binoculars.

    Lens Issues

    Your binoculars’ lenses are like windows to the world. However, scratches and dirt can turn these windows into a foggy mess. Join us as we explore common lens issues and how they contribute to double vision.

    Lens Coating Problems

    Lens coatings enhance image quality, but what if they’re compromised? Discover the impact of coating problems and how to address them for crystal-clear views.

    Internal Prism Misalignment

    Hidden within your binoculars are prisms responsible for image orientation. If these prisms fall out of line, expect distorted views. Let’s uncover the intricacies of prism misalignment and its consequences.

    Identifying Prism Issues

    Prism misalignment is like a mischievous character causing havoc in a novel. Learn to identify the signs and regain control of your binoculars’ storyline.

    Diagnostic Steps for Double Vision

    Self-Assessment of Double Vision

    Embark on a self-assessment journey to understand the nuances of double vision. This section provides a quick test and helps you decipher whether your binoculars are playing tricks on you.

    Conducting a Quick Test

    Grab your binoculars and follow our step-by-step guide to conduct a quick test. It’s time to take charge and assess the situation firsthand.

    Checking Diopter Adjustment

    The diopter adjustment may hold the key to unlocking a world of visual clarity. Discover the importance of this adjustment and learn how to check if your diopter is misaligned.

    Recommended Tools

    Armed with the right tools, you can be a binocular detective, solving the mystery of diopter misalignment. Gather your toolkit and get ready for a hands-on experience.

    Inspecting Lenses

    Your binoculars’ lenses deserve a keen eye. Learn how to inspect and clean them, ensuring they remain pristine for optimal viewing experiences.

    Recommended Cleaning Solutions

    Cleaning your lenses isn’t just a chore—it’s an art. Explore our recommended cleaning solutions and techniques for maintaining spotless lenses.

    Identifying Lens Coating Damage

    Scratched or damaged coatings can hinder your viewing pleasure. Let’s delve into the world of lens coatings and how to address damage effectively.

    Prism Alignment Verification

    Prism misalignment might be the culprit behind your double vision woes. This section provides simple tests to verify prism alignment and restore order to your binocular world.

    Understanding Prism Systems

    Unlock the secrets of prism systems and understand how they influence your binoculars’ performance. It’s time to demystify prism alignment.

    Simple Tests for Prism Misalignment

    Conducting tests for prism misalignment is an adventure in itself. Join us on this journey, armed with knowledge and a determination to conquer double vision.

    DIY Fixes for Common Issues

    Realigning Binoculars

    Misaligned binoculars can be realigned without professional help. This section guides you through the process, turning you into a binocular engineer.

    Tools Required

    Gather your tools, and let’s embark on a DIY adventure. Realigning binoculars is within your grasp, and we’re here to guide you every step of the way.

    Diopter Adjustment Tips

    The diopter adjustment isn’t just a knob; it’s your ticket to personalized viewing. Discover tips and tricks for perfecting the diopter adjustment and reclaiming control over your binocular vision.

    Proper Diopter Adjustment Technique

    Mastering the diopter adjustment technique is like discovering a secret code. Unravel the mystery and unlock the full potential of your binoculars.

    Addressing Diopter Stiffness

    Is your diopter adjustment wheel resisting your attempts at clarity? Learn how to address diopter stiffness and ensure smooth adjustments for optimal viewing.

    Cleaning and Maintaining Lenses

    Your binoculars’ lenses deserve the utmost care. Explore effective cleaning techniques and maintenance tips to keep your lenses in pristine condition.

    Recommended Cleaning Solutions

    Not all cleaning solutions are created equal. Dive into our recommendations for cleaning solutions that nurture your lenses, ensuring a lifetime of clear views.

    Preventing Scratches

    Prevention is the best cure for scratched lenses. Discover practical tips to safeguard your binoculars from scratches and maintain optical excellence.

    Prism Realignment Techniques

    Prism misalignment doesn’t have to be a daunting challenge. Equip yourself with the knowledge and techniques to realign prisms, restoring order to your binocular world.

    Resolving Prism Misalignment

    Ready to tackle prism misalignment head-on? This section provides step-by-step instructions, turning you into a prism alignment expert.

    Professional Repair vs. DIY

    While DIY fixes are empowering, there are times when professional help is the best solution. Explore the factors to consider when deciding between DIY fixes and seeking professional repair services.

    Advanced Troubleshooting Techniques

    Internal Mechanism Inspection

    Venture into the inner workings of your binoculars with an internal mechanism inspection. This section provides a detailed guide to opening your binoculars and identifying internal components.

    Opening the Binoculars

    Opening your binoculars might feel like entering a forbidden realm. Fear not, as we guide you through the process with precision and care.

    Identifying Internal Components

    Become acquainted with the internal components of your binoculars. This knowledge empowers you to troubleshoot issues and ensures a deeper understanding of your optical companion.

    Repairing Coating Damage

    Coating damage can be a thorn in your optical adventures. Explore DIY coating repair kits and professional solutions to address coating damage effectively.

    DIY Coating Repair Kits

    DIY enthusiasts, rejoice! Discover coating repair kits that empower you to tackle damage with confidence. It’s time to revive your binoculars’ coatings and enhance your viewing pleasure.

    Professional Solutions

    For those seeking the expertise of professionals, this section outlines the options available for repairing coating damage. Make informed decisions for the optimal restoration of your binoculars.

    Seeking Professional Help

    There comes a time when professional intervention is necessary. Learn when to contact a professional and how to choose a reliable repair service to entrust with your optical companion.

    When to Contact a Professional

    Certain issues are beyond the scope of DIY fixes. Understand the red flags that indicate it’s time to seek professional help for your binoculars.

    Choosing a Reliable Repair Service

    Not all repair services are created equal. Arm yourself with knowledge on selecting a reliable repair service that prioritizes the health and longevity of your binoculars.

    Warranty Considerations

    Binocular warranties are more than just pieces of paper. Explore the importance of warranties and the availability of manufacturer repair services for added peace of mind.

    Checking Binocular Warranty

    Before embarking on repairs, ensure you understand your binoculars’ warranty. This section provides insights into checking your warranty and leveraging manufacturer services.

    Manufacturer’s Repair Services

    Discover the support offered by manufacturers when it comes to repairing your binoculars. Uncover the benefits of utilizing manufacturer repair services for a seamless experience.

    If your binoculars are not adjusting or focusing correctly, you can take a few simple steps to solve the issue. It is essential to understand that binoculars must be adjusted frequently to function at their best. Here are five tips on how to fix common problems with your binoculars:

    1) Check if the rubber eyecups are stuck down – If the eyecups won’t move, it’s likely that they’re stuck down and need some force applied before they will start moving again. To fix this, you may need to use a pair of pliers or bend them slightly using heat from an iron.

    2) Clean lens surfaces – Dust and debris on lenses can cause blurry images and difficulty in adjusting focus. Remove dust particles by gently wiping both sides of each lens with a microfiber cloth dampened in mild dishwashing detergent (or contact liquid cleaner). Make sure all traces of soap residue is removed before putting the lenses back together.

    Diopter Setting Adjustment

    3) Adjust diopter levels – Diopters allow users to adjust image brightness while looking through their glasses. Hence, every person has an optimal viewing experience during different activities or conditions, such as bright sunlight glare or indoors under fluorescent lighting bulbs, which often cause discomfort because people have sensitive eyesight. Most electronic screens emit different blue light waves compared with natural daylight hours outside when outdoor scenes look more crisp due mainly Blue Green Yellow lights waves.

    4) Replace front lens element – This process is only necessary if the user notices difficulty seeing through the eyepieces, especially at close range. If you have difficulty viewing things up close and it appears something is wrong with your lenses, it is best to have them professionally cleaned and inspected before replacing the front lens element.

    5) Replace focusing ring gears – The focus rings on most binoculars use rubber or metal gears that can become damaged from being bumped, dropped, or subject to other harsh treatment such as windblown sand, etc. For your binoculars to adjust accurately when focusing, the gears must be in good condition and free from any damage.

    A binocular is an optical instrument that helps us see an object nearly and clearly. But if you use binoculars for a long time, you may face some difficulties. You may notice some problems with binocular lenses, prisms, and diopter rings.

    Because of these problems, you can’t be able to see an object comfortably. To get rid of these, you must identify and fix the exact problem immediately.

    But if your binoculars are broken, you can’t be able to fix them or recover them. Then you have to buy new binoculars for appropriate vision. You can fix your binoculars by following the procedures that are given below.

    Fixing binocular lenses:

    If there is a problem with binocular lenses, you may face problems focusing. Sometimes lenses are displaced for many reasons. It would be best to fix your binocular lenses to place them in the correct position—the steps are given below to fix your binocular lenses.

    Firstly, you must collect all lens screwdrivers to open small and medium screws in your binoculars. You can manage this from a shop. You can buy this to use in the future.

    You should carefully open the binocular screws with a screwdriver and the tiny lens screw with the necessary screwdriver.

    Sometimes, you mayn’t find some lens screws because these are situated under a rubber coat. You should remove those rubber coats with a thin iron stick or knife to find the screw.

    Then you should open those screws. Typically screws are situated at the right side of the lens.

    After opening the screws, you have to take the lenses and wash them with soapy water. Then, you have to keep the lenses on a dry and fresh cloth to dry.

    After drying, you should take lenses and place them at the center. You have to tighten the screw with the screwdriver to keep them in the actual position. You have to avoid touching on lenses.

    After finishing these procedures, you should taste your binoculars to check lenses and focus. Yet if you face any trouble, you will have to recheck your binocular lenses and change their position to clear vision and direction.

    [If these lenses are broken, you will have to use new lenses instead of those]

    Fixing binocular prisms:

    Binocular prisms help you to see the actual size and images. These mixed images from both sides support the brain with binocular vision. If you face binary vision problems in binoculars, it may happen to binocular prism problem. Procedures are given below to fix binocular prisms.

    You must collect or buy a set of screwdrivers to open the screw of binoculars and binocular prisms.

    You should open the screw of a binocular and find the prism location and prism screws. You see 2 screws for each prism. These screws are hidden under a rubber coat or soft cover in some prisms. You have to remove this cover.

    You should place a target within 50 meters or 100 meters. Then you have to tighten or lose screws according to their necessity. If you see objects so small, they will have to tighten screws. Otherwise, you have to lose your screws. After doing this, you should again see the target with binoculars. If you find any difficulty again, you will have to fix your screw according to its necessity.

    If you notice displacement of binocular prisms, you will have to open screws and place prisms correctly. Then you have to adjust the screws with a screwdriver.

    [If these prisms are hampered or damaged, you’ll have to change these prisms and add new prisms]

    Fixing binocular diopter ring:

    Sometimes binocular focusing ring or diopter ring felt so hard at the time rotating. You’ll have to fix your binocular focusing ring if you face this difficulty.

    You have to open the diopter ring with a screwdriver.

    You should take fresh soft clothes and a stick. Add the cloths at the bottom of the stick and remove dust from the ring.

    You must take some oily cream or grease and spread it in the focusing ring. Then you should add this again on your binoculars.

    [You should avoid those grease which spread bad smell]

    Frequently asked questions and answers

    How should you use your binoculars?

    You should use your binoculars properly and carefully.

    1. Never keep your binoculars in a wet place for a long time. Because it causes fungus problems.

    2. Don’t use your binoculars in stormy or bad weather.

    3. You should not touch your binocular lenses.

    4. Always fix your binoculars immediately when you face problem.

    5. You shouldn’t look at the sun directly by using binoculars.

    6. Always clean your binoculars regularly.

    7. Avoid dropping binoculars.

    Why do you face double vision problems?

    You may face double vision problems because of binocular prisms problem and their displacement. You can remove this problem by fixing prisms.

    Why do you face focusing problems?

    When the lenses deviate from their correct places, then you face a focusing problem. By fixing lenses, you can get rid of this problem. But do not touch the lenses with your hands.

    Do binoculars go bad?

    Yes, binoculars can go wrong. When the lenses, prisms, or focusing knobs are broken, your prisms go bad.

    Can you fix your binoculars at home?

    Yes, you can fix your binoculars at home. If you collect the necessary elements and know the procedures, you can fix and repair your binoculars at home.

    After all, binoculars are such optical instruments by which you can see an object big and clear. But, if there is any problem with binoculars, you can’t get this opportunity. To get this opportunity again, you should fix and repair your binoculars.

    Final Words

    As we conclude this journey through the intricacies of fixing binoculars with double vision, remember that the world of optics is an adventure waiting to be explored. Armed with the knowledge gained, you’re now equipped to troubleshoot issues, perform DIY fixes, and make informed decisions about seeking professional help. Let the clear views and vivid details enrich your future adventures, whether you’re birdwatching, stargazing, or enjoying a live event. Happy exploring!

    Resources and References

    1. Recommended Cleaning Solutions
    2. DIY Repair Kits
    3. Binocular Maintenance Guides
    4. Manufacturer’s Manuals
  • How To Adjust Binoculars: A Complete Guide to Getting Perfect Viewing Experience with Double Vision

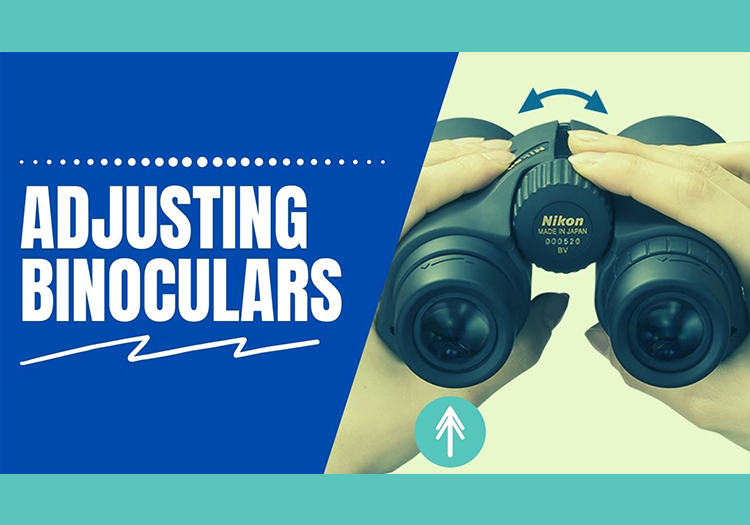
    Adjusting binoculars may seem like a straightforward task, but the impact it has on your viewing experience is profound. Picture this: you’re on a nature hike, the rustling leaves, the distant calls of birds, and there, in the distance, a magnificent eagle soars. Now, imagine your disappointment if the view through your binoculars is blurred, distorted, or gives you a splitting headache. This guide aims to unravel the mysteries of adjusting binoculars, ensuring you never miss a moment of the awe-inspiring beauty around you.

    When you look at something through binoculars, two different images are formed in your eyes. The left eye views the same image as the right eye. But, for a few seconds after looking through binoculars, both images merge into one and disappear. This is called double vision. The merging of images creates an optical illusion that you can use to your advantage while using binoculars to get a better view of things.

    The fundamentals of a good binocular are that it should be bright, clear, and regular as you view an object from afar. This is only possible if both lenses of the binoculars are correctly focused. This process is complicated because your eyesight also affects how the binoculars are adjusted. If the binoculars are not appropriately focused, they may be better or worse than another person’s binoculars.

    Understanding Binocular Anatomy

    Before embarking on the journey of adjustment, let’s dissect the binocular itself. It’s not just a device; it’s a marvel of engineering. Binoculars consist of objective lenses, prisms, and eyepieces intricately woven to bring the world closer to your eyes. The focusing mechanism and the elusive diopter adjustment add layers to this optical symphony. Understanding these components is the first step towards unleashing the full potential of your binoculars.

    Basic Setup and Initial Inspection

    Choosing the Right Stage: Setting Up for Success

    The first step before you embark on the exciting journey of adjusting your binoculars is finding the perfect stage. Think of it like preparing for a grand performance. Choose a stable surface that minimizes vibrations. A sturdy table or a specialized tripod designed for binoculars can be your stage. This seemingly simple decision lays the foundation for an uninterrupted exploration of the world through your lenses.

    The Importance of a Clear Canvas: Initial Inspection

    Now that your stage is set, it’s time to inspect your binoculars. This step is akin to preparing your canvas for a masterpiece. Cleanliness is not just a virtue; it’s the key to a clear vision. Invest in a good lens cleaning kit, and delicately rid your lenses of smudges or dust. Imagine spotting a rare bird in flight, only to have the image distorted by a fingerprint on your lens. Prevention is the key to uninterrupted visual bliss.

    Binocular Inspection Checklist

    Checklist ItemAction
    Cleanliness of LensesUse a lens cleaning kit
    Physical Damage CheckInspect for dents or misalignment
    Stability of SurfaceChoose a vibration-free setting

    C. Interpupillary Distance Adjustment: Tailoring to Your Eyes

    Now that your stage is set, and your lenses are pristine, it’s time to customize the show for your eyes. Interpupillary Distance (IPD) is the key to this personalization. Imagine your eyes as the audience, and adjusting the IPD is like ensuring everyone gets the best seat in the house. Look through your binoculars at a distant object, adjust the width until you see a single, unified image, and voilà – the stage is set for a personalized spectacle.

    Interpupillary Distance Adjustment Steps

    1. Look through binoculars at a distant object.
    2. Adjust the width until you see a single image.
    3. Ensure the fit is comfortable for your eyes.

    This process ensures that your binoculars align perfectly with the unique distance between your eyes, providing a comfortable and immersive viewing experience.

    In this crucial phase of the adjustment journey, imagine yourself as a conductor fine-tuning the instruments before the grand symphony. With your stage set, lenses pristine, and the IPD customized, you’re now ready to dive into the heart of the optical masterpiece that awaits.

    Interpupillary Distance Adjustment

    Finding Your Optical Sweet Spot: The Importance of Interpupillary Distance

    Adjusting the Interpupillary Distance (IPD) of your binoculars is a personalized touch, like customizing a suit to fit perfectly. Your eyes are unique, and so is the distance between them. The IPD is the bridge that connects the optical world to your eyes, and finding the right setting ensures a seamless viewing experience.

    Imagine you’re in a theatre – a binocular is like having your own pair of opera glasses. Now, picture the discomfort of having those glasses set too wide, forcing your eyes into a strained position. Alternatively, envision them set too narrow, causing double vision and a perplexing viewing experience. Adjusting the IPD is the magical moment when you transform your binoculars into bespoke eyewear, tailored specifically for your eyes.

    The Dance of Alignment: Step-by-Step Guide to IPD Adjustment

    Let’s delve into the practical steps of adjusting the Interpupillary Distance. It’s a delicate dance where precision matters.

    Interpupillary Distance Adjustment Steps

    1. Look through binoculars at a distant object: Choose a focal point that allows your eyes to relax and focus effortlessly.
    2. Adjust the width until you see a single image: Slowly move the binoculars closer or farther apart until the images merge into one, creating a seamless view.
    3. Ensure the fit is comfortable for your eyes: The goal is not just a unified image but a setting that feels natural and strain-free for your eyes.

    This process ensures that your binoculars align perfectly with your unique eye distance, providing not only a clear and unified image but also a comfortable and enjoyable viewing experience.

    Focusing Mechanism: Sharpening Your View

    A. Unveiling the Optical Magic: The Central Focus Wheel

    As you stand on the brink of a breathtaking landscape, your binoculars transform into a magical gateway with the central focus wheel as the key. Picture it as the wizard’s staff, ready to conjure clarity from the blur. The central focus wheel is your bridge to a sharper, more detailed world. Understanding and mastering its use is the next step in your journey towards binocular expertise.

    The Symphony of Clear Imagery: Step-by-Step Guide to Focusing

    Let’s demystify the process of using the central focus wheel, the maestro orchestrating the symphony of clarity in your binoculars.

    Focusing Mechanism Guide

    StepAction
    1Locate the central focus wheel
    2Look at a distant object
    3Turn the wheel until the image is sharp and clear

    Adding Your Note: The Diopter Adjustment

    Let’s introduce the diopter adjustment, the personalized note in this optical symphony. It’s akin to tuning a musical instrument, ensuring harmony in the varied strengths of your eyes. This added step is the final touch to tailor your binoculars to your unique vision.

    Diopter Adjustment Steps

    • Locate the diopter adjustment ring: Often positioned on one of the eyepieces.
    • Keep one eye closed: Focus on a distant object with the open eye.
    • Adjust the diopter until the image is sharp: This compensates for any difference in vision between your eyes.

    This trifecta of adjustments – central focus wheel, diopter adjustment, and Interpupillary Distance – transforms your binoculars from mere optical instruments into personalized windows to the world. As you turn the central focus wheel, witness the once-blurred landscape crystallize before your eyes.

    Common Issues and Troubleshooting

    A. Navigating the Optical Maze: Identifying Common Issues

    In the midst of your binocular adventure, you may encounter common issues that could momentarily cloud your optical joy. Picture this: you’re tracking a distant eagle, and suddenly, the view blurs, or you see double. Fear not, for these are challenges with straightforward solutions. Identifying these issues is the first step in the troubleshooting journey.

    B. Troubleshooting Binocular Issues: A Practical Guide

    Troubleshooting Binocular Issues

    IssueSolution
    Double VisionAdjust Interpupillary Distance (IPD)
    BlurrinessFine-tune central focus and diopter adjustment
    Headache or Eye StrainEnsure IPD matches your natural eye distance
    1. Double Vision: Adjust Interpupillary Distance (IPD): If you’re seeing double, it’s likely that the IPD isn’t set correctly. Go back to the personalized adjustment of IPD, ensuring a single, merged image.
    2. Blurriness: Fine-tune central focus and diopter adjustment: Blurriness may result from misalignment in both the central focus and diopter settings. Turn the central focus wheel and adjust the diopter until the image is clear.
    3. Headache or Eye Strain: Ensure IPD matches your natural eye distance: If prolonged use of binoculars leads to discomfort, double-check that the IPD setting matches your natural eye distance. This simple adjustment can alleviate strain and headaches.

    By systematically troubleshooting these common issues, you become the master of your optical fate. It’s akin to being a detective, solving mysteries in the world of optics. Now, armed with these solutions, continue your exploration with the confidence that, even if a challenge arises, you have the tools to swiftly overcome it and revel in the wonders of the world through your binoculars.

    Advanced Adjustments for Specialized Use

    A. Beyond the Basics: Unlocking Advanced Features

    As you delve deeper into the realm of binocular mastery, you’ll encounter advanced features that elevate your viewing experience to new heights. Imagine stabilizing your view on a shaky boat or exploring a vast landscape without distortion. These advanced adjustments are not mere embellishments but tools designed to enhance your binoculars for specialized scenarios.

    Advanced Binocular Adjustments

    FeaturePurpose
    Image StabilizationMinimizes shakes and vibrations for a steady viewing experience
    Field FlattenerReduces distortion towards the edges, providing a flat field of view
    1. Image Stabilization: If you find yourself in motion, be it on a boat or while tracking a moving subject, activate image stabilization. This feature minimizes shakes and vibrations, ensuring a steady and clear view.
    2. Field Flattener: Especially useful for wide-field observations, a field flattener reduces distortion towards the edges of your view. This results in a flat field of view, allowing you to enjoy every detail of a panoramic landscape without optical distortions.

    B. Tips for Optimal Use in Specialized Scenarios

    Consider these tips as you venture into utilizing advanced features:

    • Experiment and Learn: Take the time to experiment with these advanced adjustments in various scenarios to understand their impact fully.
    • Refer to Manufacturer’s Guide: Consult your binocular manufacturer’s guide for specific instructions and tips tailored to your model.
    • Adjust as Needed: Fine-tune settings based on the specific conditions of your observation, whether it’s a rocking boat or an expansive field.

    5 Tips for Aligning Prisms

    Aligning prisms in your binoculars is like tuning the instruments in an orchestra; each adjustment brings you closer to the perfect harmony of a clear, crisp image. Here are five tips to guide you through the delicate process of prism alignment:

    1. Understanding Prism Alignment Importance: Before diving into the adjustments, comprehend the role of prisms in delivering a pristine image. Misaligned prisms can distort the view and lead to discomfort, so aligning them is crucial for an optimal visual experience.
    2. Start with a Distant Object: Choose a distant, well-defined object as your focal point. This provides a clear reference point for aligning the prisms, allowing you to notice even subtle changes in the image as you make adjustments.
    3. Adjust One Prism at a Time: Begin the alignment process by focusing on one prism at a time. This methodical approach ensures that you have precise control over each adjustment, preventing overcorrection and maintaining a balanced view.
    4. Use Natural Light for Reference: Take advantage of natural light sources, such as the sun or the sky, to illuminate your chosen object. This enhances the visibility of details and aids in more accurate prism alignment.
    5. Fine-Tune for Comfort: As you align the prisms, pay attention to the overall comfort of the view. The goal is not just alignment but an adjustment that feels natural to your eyes, providing a comfortable and immersive experience.

    Adjusting Space: How do I change the distance between the eyepiece?

    There are two ways to change the distance between the eyepiece in binoculars.

    First, you can use a compass and measure the angle of your head to find the distance between your eyes.

    Second, you can attach another piece of paper or card to each eyepiece and place them so that they are parallel, and then mark where they meet on the other side.

    The average eye-to-eye distance between two people is called the interpupillary distance (IPD). The IPD usually ranges from 65mm to 75mm, with 66mm being the most common. Find the closest eye-to-eye distance using your binoculars at the typical viewing place.

    Hold the barrel of the binoculars firmly and slide them closer or farther until you can see a complete circular view of what you are viewing. You’ll need to switch the left eye with the right look to check for barrel alignment. If there is an IPD value, write it down so you can refer to it later.

    You might need to readjust the binoculars when looking at a nearby object. With practice, it’s a matter of a few seconds.

    Adjusting Eyecups: How do I adjust my binocular eyecups?

    There are two different ways to adjust your binocular eyecups.

    On the left, you will see a small button that can be pushed in and twisted clockwise or counterclockwise.

    On the right, there is a knob that can be turned up or down to tighten or loosen the tension on the eyecup.

    The eyecups on binoculars can be adjusted by either twisting the eyecup itself or the barrel.

    To adjust your eyecups, you will need to twist the barrel of your binoculars. This is done by gripping the binoculars’ bodies with one hand and gently turning them so that you are confusing the barrel in one direction and then another. The adjustment knob should have a “click” as it turns, indicating that it has been set into place.

    If adjusting your eyecups is too tricky, they may be changed by using a screwdriver to loosen or tighten each side of each socket until they are both aligned properly with your eyes.

    Eyecaps can be adjusted to the user’s needs to achieve a better viewing performance. With the great variety of eyecaps, such as rubber eyecaps, pop-up eyecaps, and twist-up eyecaps, it is easier to adjust them to one’s needs. Eyeglass wearers should use twisted down or folded eyecaps, and non-eyeglass wearers should use twisted up or unfolded eyecaps.

    Focusing the lenses: How do I adjust the focus on my binoculars?

    You need to use a focusing ring to adjust the focus on your binoculars. There are two types of focusing rings: fixed and continuous.

    The first type is a circular or arc-shaped metal ring that can be used to focus in any direction on an extensive range of distances. This type is usually called a “magnifying” lens because it enlarges the image when focused at close ranges.

    The second type is an adjustable system with two screws that allow for fine focus adjustment over short or large distances by turning either screw clockwise or counterclockwise, depending on the amount of adjustment needed. These types are often called “azimuthal” lenses because they allow you to view objects in any direction without changing the focal length of the lenses.

    If the object appears cloudy, the lens’s focus must be changed. Try seeing a thing that is 10-20 yards away.

    There are three types of focusing systems:

    Center focus with diopter adjustment

    Individual focus, in which each eyepiece is focused separately

    Fixed focus, which is permanently prefocused for a striking distance of view.

    The most typical type is the center-focusing binoculars. Most of the time, there is a separate diopter.

    The most common type of binoculars is the center-focusing binoculars. They usually have a diopter adjustment knob beside the center-focus wheel. This adjustment is used to make up for the difference in how each of the viewer’s eyes sees the surrounding area.

    The diopter adjustment is a scale with a plus or minus sign for the setting on the opposite of the zero markers. It might be on the opposite side of the eyepiece and adjusts the lens based on your eye’s needs. Some models might have a different function of the central focusing system, but it all depends on the model and where it lies.

    In the case of Non-Diopter Focusing Side

    By putting your hand or a lens cover, cover the front of the objective lens on the binocular side that does not have the diopter setting (the left side). The left side, which should be the diopter setting, focuses on a distant object by turning the center-focus wheel until the image of the object viewed becomes clear and sharp.

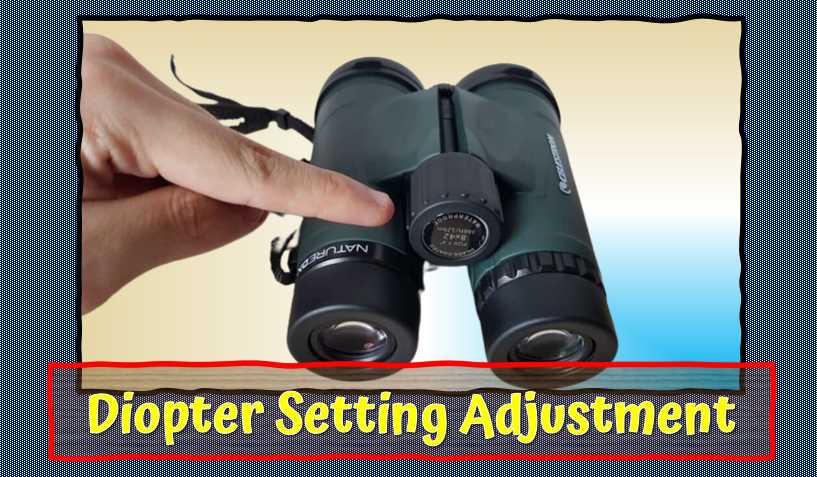
    Diopter Setting Adjustment: How do you adjust binocular diopters?

    Diopter Setting Adjustment

    Binocular diopters are the individual lenses that sit in front of each eye. You can use it to correct any vision problems caused by refractive errors, and these can be adjusted on a microscope or binoculars.

    To adjust binocular diopters:

    Take the glasses off and remove the center cover lens from one of the eyepieces (the one you want to adjust).

    Look through your eyepiece at an object as close as possible without having it touch your face or nose so that you see two things simultaneously and focus on one while adjusting the other.

    With your thumb, turn both pieces clockwise until they come into sharp focus with no blurriness (you will know when this happens because it will feel different).

    To change the center-focus wheel setting, use the objective lens on the side with the diopter. Cover up the back of the lens, and that object should be in focus on the left eye. Then, use the diopter to get it sharp again.

    Adjust the diopter to sharpen your images. When you can see things well, your diopter is not adjusted correctly. The process begins by finding the right setting for the left eye, then the right eye. If this process is reversed, you will never get perfect focus.

    We recommend adjusting the focus in the following order: left, right, up, and down. This way, if your focus is off when you change the diopter setting in the opposite direction, you will at least have a better starting point than when you adjusted it one way.

    How to adjust binoculars with double vision?

    This term refers to the incorrect perception of additional images when viewing through binoculars or other vision-limiting devices. Great care should be exercised when adjusting binoculars with the double vision to ensure that adjustment does not worsen the issue. Any unnecessary strain on the eye’s muscles can potentially cause micro-perforations, leading to double vision.

    How to adjust binoculars with double vision?

    When adjusting binoculars with double vision, the observer must ensure that along both horizontal and vertical axes, there are no tension spots; only when moving from side to side should any adjustments be applied toward increasing or decreasing magnification. It is also important not to adjust because this could result in either one or both eyes being immobile, which can cause even steeper anteroposterior displacement.

    The following are the methods most commonly used to help combat double vision:

    Addressing Vertical Bifocal Avoidance  (aka Dyaneums ). Binoculars with this setting allude to their users so that they will be less likely to suffer from double vision when attempting double-vision correction for astigmatism or hyperopia. This can be done by covering the optics with a piece of cotton wool or tissue paper and applying some pressure to the eyes. This is better than using mobile binoculars because it reduces friction for both eye movements.

    Using Parallel Bifocals  (aka Zwiebacks ). In some instances, many people find that they have difficulty reading print when wearing bifocal lenses because there may be a residual disparity between each lens, making it difficult to distinguish between letters or, even worse, they may experience double vision between each lens, which confuses as to whether the lenses are reading 30/60 or 20/80.

    To help reduce this incompatibility with bifocals there is a practice of using parallel prisms to aid better optics during viewing. Refracting prisms have particular benefits when used in conjunction with field glasses because although anisometropic individuals may not be able to work out exactly if they are using a negative or positive lens they will still have better optical relief, especially when the distance between each is approximately equal.

    The more pressure one places on the left eye can induce parallel prismatic action, giving rise to a ‘crossed prism’ effect resulting in no side-to-side disparity during reading. Although using this method it becomes important that head movements are handled properly so as not to give rise to acuity loss.

    By utilizing this method, it is only possible to obtain bifocal and not multifocal benefits, but with the advent of non-discriminatory lenses since 1989 users can now use both together if they so desire. And although most contact wearers need a large lens (between 9–15 diopters), field glasses can be designed in such a way that they are virtually unnoticeable.

    How do you stop seeing doubles through binoculars?

    If you are looking through binoculars and see double images, the first thing to do is take a break from them.

    Another solution is to change the distance between the binoculars and the object you are trying to view. If you need a closer view, move closer and vice versa.

    If none work, try wiping your lenses with a dry cloth or tissue. You may also need to adjust your eye alignment so that each eye sees one image instead of two images.

    What are the reasons for binoculars going bad?

    Binoculars can go bad for several reasons. The most common reason is that the lenses are fogged or dirty and need to be cleaned or replaced. Another possible cause is that the ocular lens has detached from the binocular body due to damage.

    Unreasonable use of ultraviolet light: The lenses are fragile and susceptible to damage from UV light rays that can come from a sun lamp or the sun itself.

    Excessive humidity: Too much moisture in the air can cause condensation on the lenses, which leads to mold growth and eventual decay.

    Neglecting cleaning: It is important to clean your binoculars regularly as well as store them in a cool, dry place away from sources of heat and sunlight.

    The manufacturer will usually cover if the binocular creates any damage within its guaranteed time as accidental damage.

    How does adjusting a diopter in one eye affect the other eye’s image?

    Adjusting a diopter in one eye affects the other eye’s image because it changes the distance between your eyes.

    This is because the optic nerve sends signals to both eyes, but each signal travels at different speeds. So when you adjust your diopter in one eye, the optic nerve sends signals to both eyes at different speeds, so they will not be able to distinguish an image from each other.

    Which way does a diopter move when turned?

    You can adjust a diopter as a lens to focus the view through binoculars. When turning it, the diopter moves away from or towards your eye, depending on which way you turn it.

    So basically, when adjusting binoculars, you will have to move the diopter in one direction or another, depending on which way you turn it.

    What is the best way to focus binoculars with or without a diopter?

    Focus the binoculars by using your thumb to rotate the objective lens ring. The magnification is increased when you are looking through the eyepiece, but it decreases when you are looking through the ocular.

    The best way to focus binoculars with or without a diopter is:

    Place one hand on each eyepiece and objective lens ring, respectively, then gently rotate them until they click into place.

    Next, tilt both lenses upwards, so their barrels are parallel to each other and adjust them until they are perfectly focused on an object at least 10 feet away from you.

    Is it possible to adjust binoculars with glasses?

    Yes, it is possible to adjust binoculars with glasses.

    First, put on your glasses and then use the strap around your head to tighten them as much as possible. Then loosen the strap and turn it around, so it goes over your head. The strap should now be in front of you instead of behind you. This will give you enough slack to adjust the binoculars with your glasses on comfortably.

    Do you look through binoculars with both eyes?

    No, it is recommended to look through binoculars with one eye at a time. This will ensure that both eyes stay focused on the same point and you don’t end up straining your neck or looking like a fool.

    What happens when you look through binoculars backward?

    When you look through binoculars backward, you can see the reverse of what you are seeing. So if you were to look at a tall building, you would see the shorter side of the building and not the top of it.

    How to adjust vortex binoculars?

    Vortex Binoculars are very precise regarding FOV and magnification, but they may be bulky to carry.

    To adjust the angle of the binoculars, you will need to rotate them forwards or backward on their hinge.

    If you look down at your Vortex Binocular, it should appear as a vertical line. Position the high-end of this line under your hand like an “L”. It’s easy to tell if you are aiming correctly or not by looking up from below.

    If the viewing angle is too broad (appears lopsided), rotate the binoculars forward until they match roughly in height. They are entirely horizontal, where each image meets across axes on both glass surfaces.

    If you’re aiming for axis correct, your view should appear very even in width and height across the binoculars’ viewing area. The two images of a star or faint object will “bug out” at various angles to each other because they do not sit symmetrically on either glass surface more than 15 degrees off-axis. Viewing angle too narrow: rotate down 15 degrees.

    How to adjust the diopter on your Vortex binoculars?

    The diopter adjustment on the ground glass of your binoculars will let you change how much the image seems to be in focus. This can help alleviate eye strain, increase visibility and compensate for eyeglasses or contact lenses that may not be clear.

    You should adjust carefully and then check on the road. All RVV binoculars have a diopter adjustment that can also be performed with an eyeglass screwdriver, a fore-and-aft punch (or any object of similar length), and some good eyesight after adjusting the focus according to standard procedure.

    Be sure not to damage or scratch your Vortex glass during this process!

    An eyeglass screwdriver is needed to understand better how you move these tiny but essential parts. You will need to work out how far forward or aft you want the adjustment with this tool and then use a standard screwdriver to bring these associated tools together by sliding them into one another through their centers. Use your thumb on top of both screws (marked in red) but do not try to turn the head of either!

    How to adjust Swarovski binoculars?

    Adjusting Swarovski binoculars is not particularly difficult despite their high price tag and optical quality. Getting them into the perfect focus for your eyesight takes a few minutes.

    There are many ways to adjust Swarovski binoculars. Some of the most common processes include:

    First, remove the eyepiece covers from your Swarovski binoculars’ eyes by gently pulling them out with your fingers and hands until they click into place. 

    Next, turn each eyepiece fully counterclockwise until you feel it lock into place (it should be tight). 

    Turn each eye individually clockwise while holding down the power button simultaneously to ensure that they remain locked in place before proceeding to step 4 below. 

    Now adjust one eyepiece by turning it clockwise one-half or one full rotation at a time until you achieve your desired level of focus and brightness in both eyes (this will vary depending on how many settings you have on your Swarovski binoculars).

    How to adjust binoculars for the right and left eyes?

    To adjust binoculars for the right and left eyes, you need to do the following:

    Adjust the objective lens of the binoculars by moving it in or out until the cross hairs are positioned on a distant object.

    Adjust eye focus by adjusting eyepieces to a comfortable position that simultaneously provides clear vision through both lenses.

    Align the eyepiece with their respective objective lenses so that they are parallel to each other and perpendicular to the ground at eye level when looking through them at infinity (parallel) or near point-of-view (perpendicular).

  • 15 Tips I Follow to Store Binoculars Every Time (Video Explained)

    15 Tips I Follow to Store Binoculars Every Time (Video Explained)

    Sometimes I get asked if my binoculars are waterproof or if they can take a fall. The answer to both of these questions is yes. Today, I want to talk about the proper way to store your binoculars to last a long time so that the lenses do not get damaged.

    There are some ways to store your binoculars, and you should know the main factors that affect their storage. These factors are the lens, the size of the binoculars, and the types of materials they’re made of. These three critical elements determine what storage method is best for your binoculars.

    Here are 15 tips on storing your binoculars securely and efficiently. Whether you’re a beginner or a seasoned binocular hunter, you’ll find something helpful in this list. Don’t wait – try out some of these tips today and see the difference!

    1. Store in a cool & dry place

    To keep your binoculars in top condition, ensure they are stored in a dry and cool place. If they are either wet or too warm, the lenses will fog up and degrade the optics. Also, if the binoculars are stored in a humid or salty environment, the lenses will become coated with film, reducing the clarity of the view.

    Exposure to moisture can cause damage to the optics, and excessive heat can cause the lenses to warp. I never store my binoculars near a source of intense light – like a window – as this can damage the lenses. Finally, ensure the caps are tight to prevent dust and other particles from entering.

    2. Cleaning after each use

    After each use of your binoculars, it is essential to clean them off to prevent any dirt, dust, or debris from accumulating and causing visual impairment. There are three easy and effective ways to clean your binoculars: wiping them down with a cloth, using lens tissue, or using a binocular cleaner.

    To clean the lenses using a cloth, wipe them down with a dry cloth. I always avoid pieces, as they are sensitive to water and can be damaged. Wiping down the body also helps remove any dirt or dust that may have accumulated.

    For binoculars that use lens tissue, remove the tissue and wipe the lenses clean. If you deeseebinocular cleaner, apply the cleaner to a cloth and wipe down the lenses and body.

    3. Never store binoculars with the lens caps on

    This issue is a common mistake that can damage your binoculars. By storing your binoculars with the lens caps on, you should put unnecessary strain on the optics and lenses, and this can cause them to become scratched, fogged up, or even torn. I recommend yoremovinghe the lens caps before storing your binoculars to free the lenses from ansangstd debris.

    4. Store in a case if possible

    Binoculars are a great way to see things in detail, but they can also be delicate. If you can store them in a case, that will be much better for their protection. A protective case can help prevent marks and other damage, n itoprotecte lenses from dirt and scattering. Some people prefer to store their binoculars in a case, while others prefer to keep them in a backpack or shoulder bag.

    While storing your binoculars in a case, choose a storage container that is sturdy and weatherproof. You should select a big-sized container to fit your binoculars and some extra lenses, batteries, and other accessories.

    If you choose a backpack or shoulder bag, pack the bag properly and ensure that the binoculars are well-secured. You can secure your binoculars by using a strap, placing them in a pocket, or using a bungee cord.

    5. Always keep eyepieces facing down

    I often made this common mistake as an amateur astronomer, nd andd to pay serious consequences. B—ByStoringournoculars with the eyepieces facing down, p puts them risk of damage. The eyepieces are the lenses that magnify the view, ;,hey are damaged, they will not function properly. In addition, the lenses can become scratched and damaged if they constantly touch the.

    Instead, store your binoculars with the eyepieces facing up. This way, they will be protected from scratches and other damage. Plus, the lenses will be less likely to touch each other and will be able to function correctly.

    6. Put inthem a place where they don’t get knocked over or scratched

    One way to keep your binoculars in peak condition is to store them where they will not be knocked over or scratched. Some people store their binoculars in a cabinet or drawer, while others put them in a storage container. It is essential to choose a storage container that is sturdy enough to protect your binoculars and has a lid to keep dust and dirt out.

    7. Use a protective lens cloth when cleaning lenses

    Cleaning your binocular lenses is essential to keep them in optimal condition, but using a protective lens cloth can help to ensure that the lenses are not damaged. It would be best to use a lens cloth to clean the lenses; it should not be used to dry them or wipe down the entire binocularsss.

    A lens cloth is made of soft, non-absorbent material that can easily remove without leaving any residue. Simply place the rag over the lenses and gently wipe away any dirt, dust, or fingerprints. Immediately rinse the cloth with clean water and dry it off before storing your binoculars.

    8. Never use broken binoculars

    Never use broken binoculars

    While binoculars can be used in a pinch, it is always best to avoid using them if they are damaged iThis issue can lead to difficulty seeing, but it is also unsafe. When binoculars are not functioning correctly, they may not be able to focus effectively. In addition, the lenses may be able to move independently, which can lead to damage or injury.

    If you need to use binoculars, always macure them properly. Tie them down if necessary to avoid them from being accidentally dropped or mishandled. Finally, always be watchful when viewing wildlife or other objects close up, as these items may be more dangerous when viewed through binoculars.

    9. Do not expose  to extreme temperatures

    Binoculars can be exposed to extreme temperatures, which can damage the lenses. Exposure to extreme temperatures can also cause thnoculars to fail. If you are going your binoculars in cold weather conditions, it is best to keep them in a warm place. It is best to keep them in a cool place in hot weather conditions.

    10. Keep the binocular batteries fresh by replacing rethem gularly

    Binocular batteries last anywhere from six to twelve months, so it is crucial to replace them regularly. This practice will help maintain optimal performance and extend the life of your equipment. You can check the battery level and replace them when necessary.

    11. Keep the instruction booklet nearby

    This practice is beneficial if you are a first-time using binoculars. Trying to to figure out how to store binos can be frustrating when you don’t have any instructions, and having the booklet nearby can save you a lot of time and frustration. Additionally, if you ever have questions about the installation or use of the binoculars, the booklet can provide answers.

    12. Never put them in the dishwasher or use harsh chemicals

    IfLikeost people, you probably take your binoculars and telescopes out for a spin once in a while. However, if you don’t take proper precautions, you could be damaging them. Binoculars and telescopes should never be put in the dishwasher, as the harsh chemicals can damage the lenses. They should also be kept from harsh chemicals, such as bleach and chlorine, as they could damage the lelensoatings.

    13. Keep away from children or pets

    Binoculars can be a fun and educational toy for children and pets alike, but it is essential to be aware of their dangers. Make sure to store your binoculars away from where children or pets can get to them. This exercise includes places like the kitchen counter, dresser, or anywhere they can reach them. If you must store your binoculars where children or pets can access them, maep them locked up and out of their reach.

    14. Keep track of the serial number to verify the authenticity of the binoculars

    It is necessary to keep track of the serial number of your binoculars if you need to verify the bino’s authenticity. This preparation is essential if you buy a binocularsss for recreational purposes, as unscrupulous sellers may try to sell you a fake product. By keeping track of the serial number, you can easily verify the authenticity of your purchase. Additionally, if there is ever a problem with the binoculars, you can quickly contact the manufacturer for help.

    15. Don’t hit binoculars against anything hard

    This incident is a common mistake that new binocular users make. Hitting binoculars against something hard can damage the lenses, rendering them useless. Instead, gently place the binoculars down on a soft surface and use the focusing wheel to adjust them to your desired viewing distance. Please do not use your fingers to adjust the binoculars, as you could damage them further.

    Common Mistakes in Binocular Storage: Unveiling the Pitfalls

    Embarking on a Journey of Binocular Care

    My personal journey with binoculars has been an adventure marked by breathtaking landscapes and awe-inspiring encounters. However, this exploration was not without its pitfalls. The revelation that binoculars are sensitive to environmental factors hit home when I discovered a once-crystal-clear view obscured by a foggy haze. Avoiding such mishaps requires a keen awareness of the common mistakes many enthusiasts unwittingly make in storing their binoculars.

    1. Exposure to Extreme Temperatures

    The Silent Culprit

    Binoculars, like any optical device, are sensitive to temperature extremes. Subjecting them to scorching heat or freezing cold can wreak havoc on the delicate internal components, leading to issues like lens warping and misalignment. A table outlining the temperature ranges safe for binocular storage can serve as a quick reference guide for enthusiasts, preventing unintentional damage caused by the silent culprit of extreme temperatures.

    Temperature RangeBinocular Storage Recommendation
    Below FreezingStore in a temperature-controlled environment. Avoid sudden temperature changes.
    Extreme HeatKeep away from direct sunlight. Store in a cool, shaded place.

    2. Neglecting Humidity Levels

    The Invisible Adversary

    Humidity, the unseen adversary of optical instruments, can lead to irreversible damage such as fungus growth on lenses. Neglecting humidity levels is a common mistake that can transform a pristine pair of binoculars into a breeding ground for fungi. A subheading detailing the impact of humidity on binoculars, followed by a list of preventative measures, can empower enthusiasts to combat this invisible adversary effectively.

    Impact of Humidity on Binoculars:

    • Fungus Growth on Lenses
    • Degradation of Optical Coatings

    Preventative Measures:

    • Store binoculars in a dry environment
    • Use desiccants or moisture-absorbing materials in storage cases
    • Regularly inspect and clean lenses for signs of moisture

    In unraveling the nuances of common mistakes in binocular storage, enthusiasts can navigate their way to a clearer, longer-lasting viewing experience. By addressing the impact of temperature extremes and humidity, this exploration ensures that each adventure is met with a pristine, fog-free view through the lenses of discovery.

    Long-term Storage Considerations: Safeguarding Binoculars for the Future

    Preserving the Visionary Tools for Tomorrow’s Adventures

    Binoculars, as steadfast companions in our journeys, have a way of capturing not just images but memories etched in time. Yet, there are moments when we need to bid them temporary farewells during periods of extended storage. In this section, we unveil the intricacies of long-term storage, offering insights from detaching parts to the cautious removal of batteries in electronic models. These considerations ensure our binoculars remain ready for action when the call of adventure resounds.

    1. Detaching Parts for Safekeeping

    Preserving the Whole by Safeguarding the Parts

    Long-term storage demands meticulous care, and detaching certain parts of your binoculars can prevent wear and tear over time. A table can efficiently illustrate which parts are detachable and the recommended approach for safekeeping.

    Detachable PartsRecommended Approach
    EyecupsRemove and store separately in a protective case.
    Neck StrapDetach and store in the binocular case.
    Lens Covers/CapsKeep them on when possible; store extras in case of loss.

    2. Cautious Removal of Batteries in Electronic Models

    Preserving the Power for Future Adventures

    For binoculars blessed with electronic components, the longevity of battery life is crucial. Long-term storage requires a cautious approach to battery removal to prevent leakage and potential damage. A subheading can detail the significance of this step, followed by a list of tips for the careful removal of batteries.

    Tips for Battery Removal:

    • Use fresh, quality batteries before storage.
    • Remove batteries even if they still have charge to prevent leakage.
    • Store batteries separately in a cool, dry place.

    In unraveling the intricacies of long-term storage, enthusiasts ensure that their binoculars, the visionary tools that have witnessed countless wonders, remain in peak condition for future adventures.

    Is it okay to leave binoculars in a hot car?

    Binoculars are delicate and should be treated with the same level of care as any other item you would bring into a hot car. The temperature inside a car can quickly reach over 100 degrees, damaging or destroying any object in the car if you cannot take your binoculars with you when leaving the cavehicleore in a cool, dry place.

    Can binoculars be left in the cold?

    Yes, binoculars can be left in cold weather. However it is essential to keep them in a protective case so they do not get damaged. Additionally, it is recommended that you store them in a dry place so that they do not get wet.

    How do you remove condensation from binoculars?

    Condensation can be a significant problem for binoculars, asleadingo blurry vision and an overall decrease in performance. Yoko avoids this; you use a few simple techniques to remove the condensation. The first is to blow into the binoculars slowly and steadily from the end that is not used. This preparation will help to remove the moisture and prevent further condensation. You can also place the binoculars in a cool, dry place to speed up the process. Finally, you can wipe the lenses with a cloth or a lens cloth to remove any excess moisture.

    How do I know if binoculars are waterproof?

    How do I know if binoculars are waterproof

    To test if your binoculars are waterproof, spray them with some water and see if they fog up. If they do, it is likely that they are not waterproof and should not be used in wet conditions. If the binoculars do not fog up, rinse them with warm water and wipe them down with a dry cloth. Finally, seal the lenses with a protective lens cap or eyecup.

    Final words

    I am always cautious about storing my binoculars, and I do not want them to go out of order. Do you want to know why? So far, I have seen over a hundred binocularsamaged because of the lack of care.

    We have a saying in the army: “Don’t get left behind.” The same goes for storing your binoculars. MaEnsureou maintains a steady temperature and humidity to keep your binoculars working correctly; otherwise, they may not work appropriately when you need them the most.

    Storing binoculars correctly is crucial because it makes them easier to access when you need them and helps keep them in good condition. In this article, we already talked about proper ways to store binoculars to last for years to come.

    We’ve covered you from choosing the risuitableodel to understanding how to use them. So read on to learn everything you need to know to get the most out of your store binoculars! But if you have any additional questions – please feel free to comment below!

    Resources and References:

    1. Books:
      • “The Optics Handbook” by John E. Greivenkamp
      • “Binocular Highlights” by Gary Seronik
    2. Online Communities:
    3. Manufacturer Guidelines:
      • Specific storage recommendations from leading binocular manufacturers.