If you want to know how to clean a camera lens, then you are in the right place. Who doesn’t like photography? Almost every person loves to capture their beautiful moments. But professional photographers need good DSLR cameras and clean lenses to capture those stunning images. So, cleaning the DSLR lens is crucial for any photographer who wants to capture a perfect photo.
But we must know the proper way of cleaning the DSLR lens. Maintaining the DSLR is important but cleaning the lens is more critical. If there is any dust or particles on the camera’s lens, it’ll ruin the whole image quality.
| Image | Product | Detail | Price |
|---|---|---|---|
 | 13 in 1 Fiber Optic Cleaning Tool kit |
| See on Amazon |
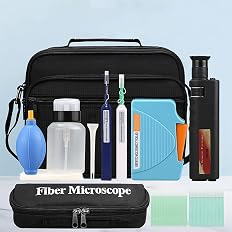 | YICIZOL Optic Fiber Cleaning Inspection Kits |
| See on Amazon |
 | Camera Lens Cleaning Kit, 10-in-1 Camera Cleaning Kit |
| See on Amazon |
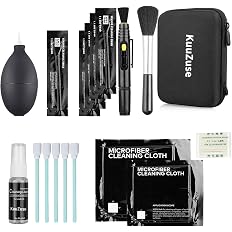 | Professional DSLR Camera Cleaning Kit |
| See on Amazon |
 | AmScope MLA-Kim Microscope Maintenance Kit |
| See on Amazon |
Which brand’s DSLR lens cleaner will be best?
There are so many brands that sell the DSLR lens cleaning kit. Choosing the best cleaning kit for your precious DSLR camera is confusing. But don’t worry at all; we listed some best lens cleaners that are excellent and affordable.
So, these are some cleaning kits of popular brands that are highly rated and affordable.
Understanding Camera Lenses
Camera lenses are marvels of optical engineering, comprising multiple elements that work in harmony to capture the perfect shot. To truly appreciate the significance of lens cleaning, let’s delve into the key components that make up these optical wonders.
Lens Elements and Functions:
| Element Type | Function |
|---|---|
| Convex Lens | Focuses light onto the camera sensor. |
| Concave Lens | Adjusts the focal length for zooming. |
| Aperture | Controls the amount of light entering the lens. |
| Lens Coating | Reduces glare, reflections, and enhances image contrast. |
Understanding the functions of these elements is vital for realizing the impact that contaminants can have on your lens. Dust, fingerprints, and smudges not only compromise the clarity of your images but can also interfere with the delicate balance of these elements.
Vulnerability to Contaminants:
Camera lenses are exposed to various environmental factors, making them susceptible to contaminants such as:
- Dust and Sand: Fine particles can settle on the lens surface, affecting image quality.
- Fingerprints: Oils from fingertips can leave smudges, degrading the clarity of the lens.
- Moisture: Humidity and moisture can lead to fungal growth on lens elements.
This vulnerability emphasizes the importance of regular lens maintenance to ensure optimal performance.
Impact on Image Quality:
The table below illustrates the potential impact of contaminants on image quality:
| Contaminant | Impact on Image Quality |
|---|---|
| Dust | Causes hazy spots and reduces overall sharpness. |
| Fingerprints | Results in blurred or distorted areas in the image. |
| Moisture/Fungus | Leads to spots, discoloration, and a loss of contrast. |
Appreciating the intricate nature of camera lenses and the potential consequences of neglecting their care underscores the necessity of regular cleaning into your photographic routine.
Signs of a Dirty Lens
Capturing the perfect shot requires more than just a keen eye; it demands a lens that’s as clear as your vision. Recognizing the signs of a dirty lens is crucial for maintaining the integrity of your photographs. Let’s explore the visible indicators that signal it’s time to give your lens some TLC.
Visible Signs of a Dirty Lens:
| Signs | Description |
|---|---|
| Blurred Images | Unexplained blurriness, especially in specific areas, indicates a dirty or smudged lens surface. |
| Loss of Contrast | A reduction in the sharpness of colors and contrast may result from contaminants affecting the lens coating. |
| Visible Spots or Streaks | Dust particles or fingerprints can manifest as visible spots or streaks on your images. |
| Autofocus Issues | Difficulty in achieving precise autofocus can be a symptom of a dirty lens interfering with the camera’s sensors. |
Impact on Autofocus and Overall Functionality:
Recognizing these signs is not merely about aesthetics; it’s about understanding how a dirty lens can impact your camera’s functionality. The table below illustrates the potential consequences:
| Issue | Impact on Camera Functionality |
|---|---|
| Autofocus Problems | Sluggish or inaccurate autofocus performance, leading to missed shots. |
| Exposure Inconsistency | Contaminants can affect light transmission, resulting in inconsistent exposure levels. |
| Reduced Image Quality | Overall degradation of image quality, affecting the clarity and sharpness of photos. |
By staying vigilant to these signs, you can address lens cleanliness promptly, ensuring your camera performs at its best. In the next section, we’ll explore the essential tools needed for effective lens cleaning, allowing you to restore crystal clarity to your photographic endeavors.
Tools and Materials for Lens Cleaning
Maintaining the cleanliness of your camera lens requires the right tools and materials. Over the years, as a photographer, I’ve experimented with various cleaning supplies, and I’ve discovered the essentials that every photographer should have in their cleaning kit. Let’s dive into the world of lens cleaning tools and materials.
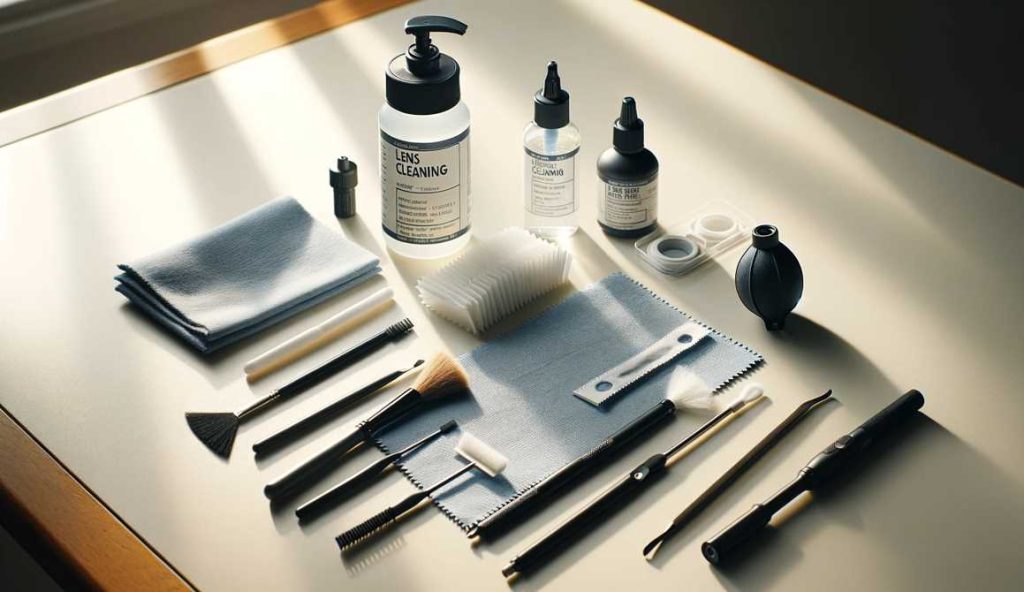
Essential Lens Cleaning Tools:
| Tool | Description |
|---|---|
| Microfiber Cloth | Soft, lint-free cloth for gentle wiping without scratching the lens surface. |
| Lens Cleaning Solution | Specifically formulated solution to remove smudges, fingerprints, and other contaminants. |
| Lens Brush | A delicate brush for removing loose particles before using the cleaning solution. |
| Air Blower | A tool for blowing away dust and debris from the lens surface. |
| Lens Tissues | Thin, disposable tissues designed for lens cleaning purposes. |
Lens Cleaning Kits:

| Cleaning Kit Components | Purpose |
|---|---|
| Lens Pen | Combines a brush and a cleaning tip in a compact, pen-like design for quick cleaning on the go. |
| Lens Cleaning Wipes | Pre-moistened wipes for convenient and efficient cleaning, especially useful in the field. |
| Lens Cleaning Pen | A dual-sided tool with a brush and a cleaning pad for thorough and precise cleaning. |
Tips for Selecting Cleaning Tools:
- Compatibility: Ensure the tools are suitable for your lens type (e.g., coated or uncoated).
- Gentleness: Opt for tools that are gentle to prevent scratches or damage to lens coatings.
- Quality: Invest in high-quality tools to ensure effectiveness and longevity.
DIY Lens Cleaning Solution:
| Ingredient | Purpose |
|---|---|
| Isopropyl Alcohol (90%) | Disinfects and removes stubborn contaminants. |
| Distilled Water | Dilutes the alcohol for a safe cleaning solution. |
Mixing your cleaning solution ensures control over the ingredients, especially important for sensitive lens coatings.
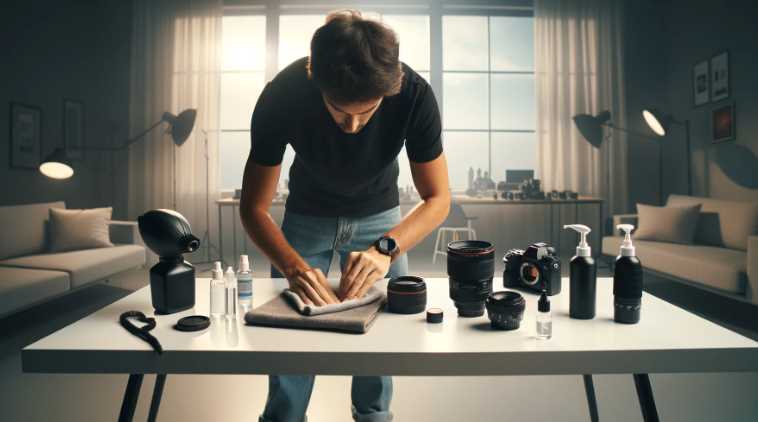
Preparing for Lens Cleaning
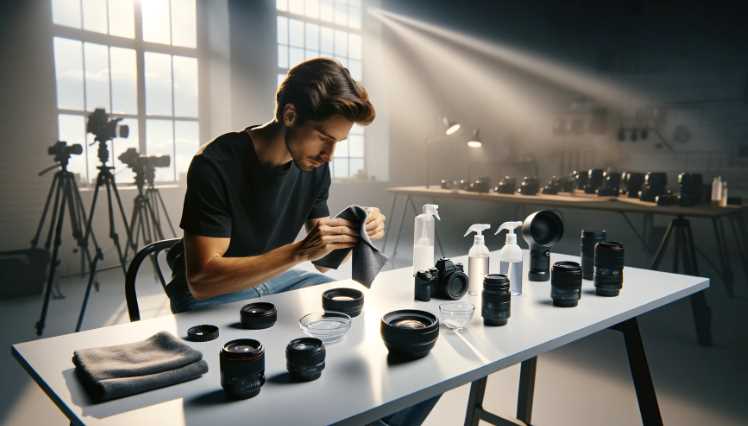
Embarking on the journey of lens cleaning requires more than just having the right tools; it involves careful preparation to ensure a successful and safe cleaning process. Drawing from my experiences, here’s a step-by-step guide to preparing for lens cleaning:
- Select a Clean Workspace:
- Choose a well-lit and dust-free environment to minimize the risk of additional contaminants landing on your lens during the cleaning process.
- Turn Off Your Camera:
- Power off your camera to prevent any accidental mishaps during the cleaning. This ensures the safety of both your camera and the lens.
- Remove Loose Particles:
- Before applying any cleaning solution, use a soft lens brush or air blower to remove loose dust and debris from the lens surface. This helps prevent scratching during the wiping process.
- Inspect for Stubborn Stains:
- Identify any persistent stains or smudges on the lens. Stubborn contaminants may require extra attention during the cleaning process.
- Check Lens Coating:
- If your lens has specialized coatings, such as anti-glare or multi-coatings, take note of them. Some cleaning solutions may be better suited for coated lenses.
- Organize Your Cleaning Tools:
- Lay out your cleaning tools and materials within easy reach. Having everything organized ensures a smooth and efficient cleaning process.
- Review Camera Manual:
- Consult your camera manual for any specific guidelines or recommendations for cleaning your particular lens model. Manufacturers often provide valuable insights.
10 Step-by-Step Lens Cleaning Guide
Embarking on the journey of cleaning your camera lens may seem daunting, but fear not. In this step-by-step guide, I’ll walk you through the process, providing insights from my own experiences as a photographer. Follow these steps for a thorough and effective lens cleaning.
Step 1: Gather Your Tools
Before you begin, ensure you have all the necessary tools within reach. Refer to the table below for a quick checklist:
| Tool | Purpose |
|---|---|
| Microfiber Cloth | Gentle wiping without scratching the lens. |
| Lens Cleaning Solution | Removes smudges, fingerprints, and contaminants. |
| Lens Brush | Removes loose particles before cleaning. |
| Air Blower | Blows away dust and debris from the lens. |
| Lens Tissues | Disposable tissues for precise cleaning. |
Step 2: Power Off Your Camera
Before diving into the cleaning process, turn off your camera. This ensures safety for both your equipment and the lens during the cleaning.
Step 3: Remove Loose Particles
Use a lens brush or air blower to gently remove any loose dust or debris from the lens surface. This initial step prevents scratching during the cleaning process.
Step 4: Apply Lens Cleaning Solution

Dampen a corner of your microfiber cloth with the lens cleaning solution. Be cautious not to oversaturate the cloth. Refer to the table for a quick overview of the cleaning solution components:
| Ingredient | Purpose |
|---|---|
| Isopropyl Alcohol (90%) | Disinfects and removes stubborn contaminants. |
| Distilled Water | Dilutes the alcohol for a safe cleaning solution. |
Step 5: Wipe the Lens Surface
Gently wipe the lens surface using the dampened corner of the microfiber cloth. Use circular motions, starting from the center and moving outward. This helps to evenly distribute the cleaning solution and remove contaminants.
Step 6: Address Stubborn Stains
For stubborn stains or smudges, you may need to apply a bit more pressure. Be cautious not to exert excessive force, especially if dealing with sensitive lens coatings.
Step 7: Dry the Lens
Switch to the dry part of the microfiber cloth to ensure a streak-free finish. Again, use gentle circular motions, maintaining a consistent pressure.
Step 8: Inspect for Residue
Inspect the lens for any residue or streaks. If necessary, repeat the cleaning process with a fresh microfiber cloth until the lens is spotless.
Step 9: Check Lens Coating
If your lens has specialized coatings, ensure that the cleaning solution used is compatible. Some coatings may require specific cleaning solutions or extra care to avoid damage.
Step 10: Final Inspection
Power on your camera and visually inspect the lens through the viewfinder. Check for any anomalies in image quality or autofocus performance. If everything looks clear, you’ve successfully cleaned your lens.
By following these steps with care and attention to detail, you’ll maintain the integrity of your camera lens and ensure that each shot captures the clarity and brilliance it deserves. In the next section, we’ll explore specific tips for cleaning different types of lenses, from primes to zooms and specialized lenses.
Cleaning Specific Lens Types
Not all lenses are created equal, and the approach to cleaning them may vary based on their types and features. As a photographer, I’ve navigated through cleaning different lenses, and here are specific tips for maintaining the clarity of various lens types:
Cleaning Prime Lenses:
Prime lenses, known for their fixed focal lengths, are relatively straightforward to clean. Follow the general lens cleaning guide, paying special attention to the glass elements. The lack of a zoom mechanism simplifies the process, allowing for precise cleaning without the need for extra adjustments.
Cleaning Zoom Lenses:
Zoom lenses, with their adjustable focal lengths, require a bit more attention. During the cleaning process, extend and retract the lens to access all parts of the glass. Be cautious around the zoom ring, ensuring that no cleaning solution or debris is lodged in the crevices. Cleaning a zoom lens may take a bit more time, but the effort ensures uniform image quality across different focal lengths.
Special Considerations for Specialized Lenses:
Specialized lenses, such as macro, fisheye, or tilt-shift lenses, may have unique characteristics that demand careful cleaning. For macro lenses with intricate focusing mechanisms, exercise extra caution to avoid disrupting delicate components. Fisheye lenses with curved glass may require additional attention to ensure every part of the lens is thoroughly cleaned. Tilt-shift lenses, known for their complex optics, benefit from meticulous cleaning to preserve their precision.
Always refer to the manufacturer’s guidelines for specific lens types, especially if they have proprietary coatings or features that require particular care. By understanding the nuances of cleaning different lens types, you’ll ensure that each lens in your collection continues to deliver exceptional image quality. In the next section, we’ll explore the dos and don’ts of lens cleaning, offering insights to avoid common pitfalls and maintain the longevity of your lenses.
Lens Cleaning Dos and Don’ts
Effectively cleaning camera lenses requires a delicate touch and adherence to best practices. Below, I’ve outlined the crucial dos and don’ts to ensure the longevity and optimal performance of your lenses.
Dos:
| Action | Reason |
|---|---|
| Use Gentle Movements | Gentle circular motions prevent scratches and ensure even cleaning. |
| Check Compatibility | Ensure cleaning solutions and tools are compatible with your lens coatings. |
| Follow Manufacturer Guidelines | Adhere to any specific cleaning recommendations provided by the lens manufacturer. |
| Inspect Regularly | Routinely inspect your lenses for signs of dust, smudges, or other contaminants. |
Don’ts:
| Action | Reason |
|---|---|
| Use Excessive Force | Applying too much pressure can damage lens coatings or elements. |
| Neglect Environmental Factors | Avoid cleaning in dusty or windy environments to prevent additional contaminants. |
| Use Inappropriate Cleaning Materials | Using rough cloths or household cleaners can scratch and damage the lens. |
| Over-Clean | Excessive cleaning can wear down lens coatings, impacting image quality over time. |
Routine Lens Maintenance

Ensuring the longevity and peak performance of your camera lenses goes beyond sporadic cleaning—it involves incorporating routine maintenance into your photography habits. As a photographer, I’ve learned that a proactive approach can prevent issues before they compromise your shots. Consider the following tips for routine lens maintenance:
- Regular Inspections: Periodically check your lenses for any signs of dust, smudges, or damage.
- Scheduled Cleaning: Establish a cleaning schedule based on your usage frequency to prevent the accumulation of contaminants.
- Dust-Free Storage: Store your lenses in a clean and dry environment, preferably in a dedicated camera bag with proper padding.
- Lens Caps: Always use lens caps when not actively shooting to protect the lens from dust and scratches.
- Avoid Direct Sunlight: Prolonged exposure to direct sunlight can damage lens coatings, so store your lenses in shaded areas when not in use.

How to run a dirt-checking test on a DSLR lens?
Following two simple methods, you can quickly check any dirt or particles on your DSLR camera lens.
Method One:
Set the focused mood to the manual perspective on your DSLR camera. Now slowly turn the focus ring to infinity. Now you can quickly see those tiny dust and dirt in the viewfinder.
Method Two:
Take some photos of bare surfaces. Capturing the Black/white background is the best option—capture a light contextual and a dark background. Now sift through these photos. If there is any dust, it’ll show up.
How to clean a DSLR lens with a cleaning kit?
DSLR lens cleaning kits are beneficial. Many profitable brands are selling suitable cleaning kits for DSLR lenses. But we recommend the highest-rated products on Amazon, Walmart, or eBay. Usually, these kits have five accessories inside one set: an air blower, soft-bristled brushes, cleaning wipes, microfiber cloth, and cleaning fluid. Now let’s explore the proper way of cleaning the DSLR camera lens with cleaning tools.
| CAUTION: You must wear rubber gloves before cleaning the DSLR lens kit. |
Step One:
Take the air blower to blow the light dust from the DSLR lens. Blow it from a few centimeters away, and it will work nicely.
Step Two:
Take the soft-bristled brush and clean the dust from the DSLR lens. But make sure the soft-bristled brush is made of camel or goat hair to avoid scratches while cleaning the DSLR lens.
Step Three:
Rub the cleansing wipes gently on the lens surface and throw them away immediately. Because reusing the cleaning wipes may damage your DSLR lens.
Step Four:
Add a few drops of cleaning fluid on the microfiber cloth and rub it in a circular motion on the lens surface. It will remove oil, smudges, fingerprints, dust, and dirt.
Now finally, you’ve finished cleaning your DSLR lens. That is the correct and proper method of cleaning the DSLR lens with cleaning tools.
How can I keep my camera lens or filter clean?
Here are some easiest and best methods to keep your DSLR lens clean.
You must permanently attach the lens cap after finishing capturing photos.
Do not keep or place your lenses in dusty or dirty areas. Always store them inside your camera bag.
While changing lenses, please avoid windy places or weather; the dust can quickly enter your lenses by finding flow.
When changing the camera lenses, please tilt down your DSLR camera to avoid dust and dirt.
Always keep a microfiber cloth inside your camera bag. Clean the lens with a microfiber cloth after ending your photography session.
Please follow these steps daily to help keep your DSLR lenses clean.
Can I clean my camera lens without lens cleaning solutions?
Yes, you can also clean your camera lens without the cleaning solution, but it’ll not be as perfect as the previous method.
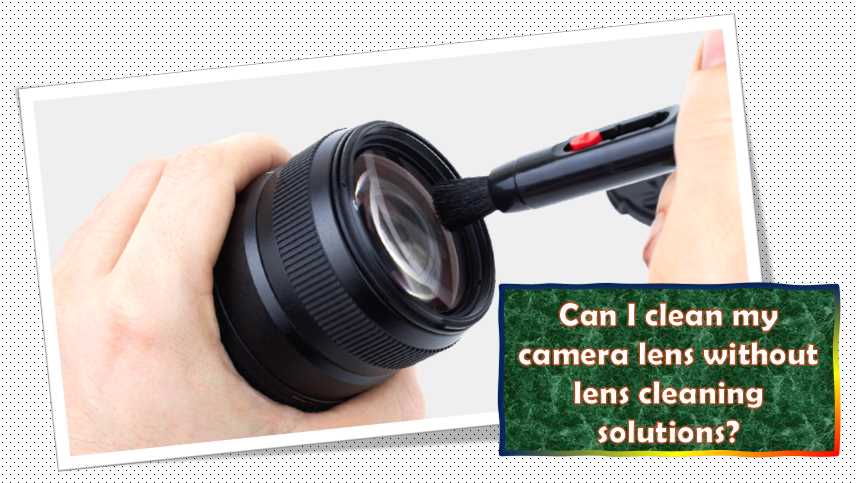
1. Take a lens tissue or soft cloth and gently wipe it over the camera lens. After cleaning all those light specks of dust, throw away that tissue.
2. If there is still dirt or dust, try cleaning them with cotton buds. It will help a lot and will give a better result.
3. Now, take lens tissue or cloth, spray a small amount of regular glass cleaner liquid on that tissue, and wipe it over the DSLR lens in a circular motion. It will clean most of the oil and smudges. Do not spray too much liquid, as it can harm your DSLR lens.
4. Take a soft dry cloth. Make sure it’s 100% cotton, and wipe the lens again. Now you can see the lens is pretty much cleaned properly.
5. You can use this process to clean your filter.
You can apply this method if you don’t have cleaning kits, but we always recommend cleaning kits for the perfect cleaning process.
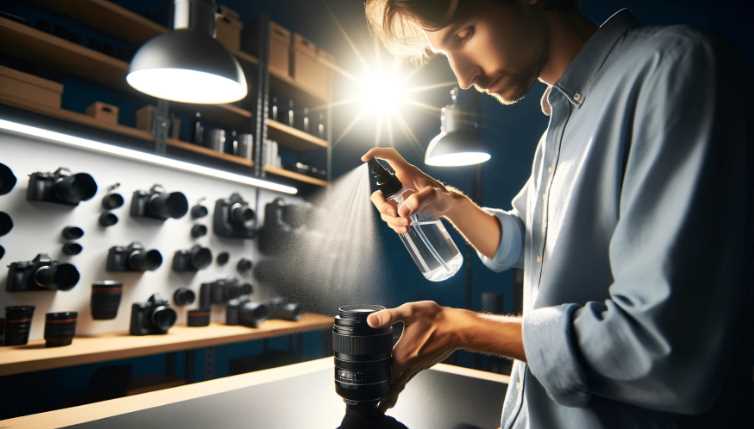
WARNING!
There are some issues you will face while you are cleaning the DSLR lens. Sometimes there are watermarks on the DSLR lens because of applying too much cleaning fluid during the cleaning process. Please try to use a minimum amount of lens cleaning solution while cleaning, and never apply the liquid cleaner directly on the camera lens because it will harm your DSLR lens and leave some watermarks on the lens.
Do not use a cleaning kit for a very long time. Most people make this mistake. If your cleaning kit becomes old or dirty, please throw it away kindly. Dirty and old cleaning kits ruin your cleaning process and will harm your DSLR Lens.
Always check the quality of the soft-bristled brush before cleaning it. Ensure your Soft-bristled brush is made with high-grade materials like camel or goat hair. You can also buy your soft-bristled brushes separately. Sometimes the all-in-one cleaning kit doesn’t come with an excellent soft-bristled brush.
Try to clean your DSLR lens every day with a microfiber cloth. Always carry a good quality microfiber cloth inside your camera bag. Just wiping the DSLR lens with the microfiber cloths will not take too much time, and keep your DSLR lens always clean.
Never skip the weekly cleaning session of your DSLR lens. Avoiding or skipping your camera lens cleaning sessions can create a big problem while capturing photos.
Do not try to clean your camera lens in too hurry. Always clean the DSLR lens on a weekly holiday. Cleaning your camera lens with endurance will give a much better result.
Try to avoid making any fingerprints.
So, these were some warnings you should check out and maintain. You can now quickly clean your DSLR lens with care and achieve good image quality.
Tips: If your DSLR camera lens becomes too dirty, please try not to clean it at home. Usually, take your camera lens to a professional DSLR lens cleaner.
Final words:
In this article, you learn about camera lenses and the cleaning process. We recommend cleaning a camera lens with the help of professionals. For regular users, try cleaning the lens every night, before and after use. We talk with many professionals; they clean lenses every night and deep clean once a week. They always keep a blower with them. You can also keep a blower for emergencies or better image quality.
When you are free, clean your lens with a soft hand. Do not break lens glass while cleaning. If you are in a hurry, then usually take a clean towel and wipe it. But avoid cleaning in a rush.
We will try to give you all the information and follow all instructions. We hope this article will be helpful to you.
Resources and References
For further guidance on lens cleaning and maintenance, explore the following resources and references:
- Lens Cleaning Products:
- LensPen: A versatile cleaning tool with a brush and a cleaning tip.
- ZEISS Lens Cleaning Kit: Specifically designed for ZEISS lenses, ensuring effective and safe cleaning.
- Online Tutorials:
- B&H Photo Video – How to Clean Your Camera Lenses: A step-by-step video tutorial on lens cleaning techniques.
- DPReview – Camera and Lens Care: Comprehensive tips on caring for your camera and lenses.
- Manufacturer Guidelines:
- Canon – Lens Maintenance: Canon’s official guide to lens cleaning and maintenance.
- Nikon – Lens Care: Nikon’s recommendations for proper lens care.
- Photography Forums:
- Photography Stack Exchange: An active community where photographers share tips and advice on lens care.

I am an enthusiastic student of optics, so I may be biased when I say that optics is one of the most critical fields. It doesn’t matter what type of optics you are talking about – optics for astronomy, medicine, engineering, or pleasure – all types are essential.
Table of Contents