Author: Fahim Foysal

  • What Does Chlamydia Look Like under Microscope? Unseen Details Revealed

    What Does Chlamydia Look Like under Microscope? Unseen Details Revealed

    Chlamydia is a bacteria that cannot be seen with the naked eye. Under a microscope, Chlamydia appears as small, round, or oval-shaped cells.

    Chlamydia trachomatis is an obligate intracellular bacterium, meaning it can only survive and replicate inside host cells. When observed under a microscope, Chlamydia cells typically appear as small, gram-negative, cocci or rod-shaped structures. However, the exact appearance can vary depending on the stage of the chlamydial life cycle.

    Chlamydia has a unique developmental cycle involving two forms: the infectious elementary body (EB) and the replicative reticulate body (RB). The elementary body is the infective form, while the reticulate body is responsible for replication. These forms can be distinguished under a microscope based on their size and morphology.

    Aspect Characteristics
    Size Approximately 0.2 to 1.5 micrometers in diameter
    Shape Can appear as cocci or rod-shaped structures
    Staining Gram-negative
    Life Cycle Two forms: Elementary Body (EB) and Reticulate Body (RB)
    Infectious Stage Elementary Body (smaller, more compact)
    Replicative Stage Reticulate Body (larger, less compact)
    Intracellular Growth Obligate intracellular bacterium

    The Basics of Chlamydia

    What Does Chlamydia Look Like under Microscope

    Chlamydia is a common sexually transmitted disease (STD) caused by the bacterium Chlamydia trachomatis. It can infect both men and women, and leads to serious reproductive and other health problems if left untreated. One of the key methods used by scientists to understand and diagnose Chlamydia is through microscopic examination. But, what does Chlamydia look like under a microscope? Let’s explore the unique visual characteristics of this bacterium.


    Observing Chlamydia Under the Microscope

    When examining Chlamydia under a microscope, there are several stages and morphological forms you may observe:

    Elementary Bodies (ebs)

    The infectious form of Chlamydia is known as elementary bodies (EBs). Under a high-powered microscope, EBs appear as tiny, dense, spherical particles. They are small, typically around 0.2 to 0.3 micrometers in diameter. Because of their size and shape, they can sometimes be mistaken for viruses.

    Reticulate Bodies (rbs)

    Reticulate bodies (RBs) are the non-infectious, replicative form of Chlamydia. They are larger than EBs, roughly 1 micrometer in diameter, and less dense. RBs are observed within the host cell’s inclusion bodies, which are essentially membrane-bound vacuoles utilized by the bacteria for replication.

    Inclusion Bodies

    Inclusion bodies are a hallmark of Chlamydial infection. They are formed within infected eukaryotic cells and consist of a mass of reticulate bodies and elementary bodies. Under light microscopy, these inclusions appear as irregularly shaped, larger structures within the host cell.

    Comparison of Chlamydia Morphological Forms
    Form Appearance under Microscope Diameter Location
    Elementary Bodies (EBs) Dense, spherical particles 0.2 – 0.3 µm Outside host cells, infectious
    Reticulate Bodies (RBs) Less dense, larger than EBs About 1 µm Within inclusion bodies, non-infectious
    Inclusion Bodies Irregularly shaped, large structures Varies Inside host cells

    Staining Techniques to Visualize Chlamydia

    In order to properly visualize Chlamydia under a microscope, various staining techniques are used. The most common staining technique is the Giemsa stain, which colors the inclusions formed by the bacteria, making them more visible against the background of host cells. The immunofluorescence technique can also be used, where fluorescent dyes are attached to antibodies that specifically bind to Chlamydia, resulting in brightly colored inclusions under fluorescent microscopy.

    How is Chlamydia Diagnosed Microscopically?

    Microscopic Diagnosis:

    Diagnosing Chlamydia microscopically involves examining samples collected from the infected site under a microscope. The most common method is staining the samples using specific techniques.

    MethodDescription
    Direct Immunofluorescence (DFA-IF)Uses fluorescent antibodies to detect Chlamydia
    Nucleic Acid Amplification Tests (NAAT)Detects Chlamydia DNA for high sensitivity

    Sample Collection:

    Samples for microscopic diagnosis are typically collected from the infected site, such as the cervix, urethra, or rectum. In women, a cervical swab is commonly used, while men may undergo a urethral swab. These samples are then processed for microscopic examination.

    Sample TypeCollection Site
    Cervical Swab (Women)Cervix
    Urethral Swab (Men)Urethra
    Rectal SwabRectum

    Microscopic Examination:

    The collected samples are examined under a microscope after appropriate staining. Direct Immunofluorescence (DFA-IF) involves using fluorescent antibodies that specifically bind to Chlamydia antigens, making the bacteria visible under fluorescence microscopy. Nucleic Acid Amplification Tests (NAAT) detect Chlamydia DNA, providing a highly sensitive and specific diagnostic approach.

    TechniqueAdvantages
    DFA-IFRapid, specific, and visual confirmation
    NAATHigh sensitivity; detects Chlamydia DNA

    Limitations:

    While microscopic diagnosis is valuable, it may have limitations, such as potential false negatives. Sensitivity can vary, and the timing of sample collection in relation to infection can impact results. It’s essential to consider these factors when interpreting microscopic findings.

    In conclusion, microscopic diagnosis of Chlamydia involves examining stained samples collected from the infected site. Techniques like Direct Immunofluorescence (DFA-IF) and Nucleic Acid Amplification Tests (NAAT) enhance the accuracy of Chlamydia detection under a microscope. If you suspect a Chlamydia infection, consult a healthcare professional for appropriate testing and guidance.

    How Effective are Antibiotics in Treating Chlamydia?

    Antibiotic Treatment:

    Chlamydia is typically treated with antibiotics, and the choice of antibiotic depends on factors such as the patient’s health, allergies, and the presence of coinfections.

    AntibioticTreatment Duration
    AzithromycinSingle oral dose
    DoxycyclineTwice daily for seven days

    Efficacy:

    Both Azithromycin and Doxycycline are highly effective in treating Chlamydia. They work by inhibiting the growth and replication of the bacteria, ultimately clearing the infection. It’s crucial to complete the full course of antibiotics as prescribed by a healthcare professional to ensure complete eradication of the bacteria.

    AntibioticMechanism of Action
    AzithromycinInhibits bacterial protein synthesis
    DoxycyclineInhibits bacterial protein synthesis

    Follow-up Testing:

    After completing the antibiotic treatment, follow-up testing is recommended to confirm the eradication of the infection. This ensures that the antibiotics were effective and that there is no lingering Chlamydia presence.

    Follow-up TestingPurpose
    Nucleic Acid AmplificationConfirms eradication of Chlamydia

    Preventing Re-infection:

    To prevent re-infection, individuals treated for Chlamydia should abstain from sexual activity until the full course of antibiotics is completed. Additionally, notifying and treating sexual partners is essential to prevent the spread of the infection.

    Recap

    Understanding what Chlamydia looks like under the microscope is crucial for its diagnosis and treatment. It allows healthcare professionals to identify the presence of the bacteria and to discriminate between Chlamydia and other STDs with similar symptoms. Microscopic analysis is an essential tool in the arsenal of medical microbiology for both research and clinical diagnostics.

  • Are Atoms Visible under Electron Microscope? Find Out How!

    Are Atoms Visible under Electron Microscope? Find Out How!

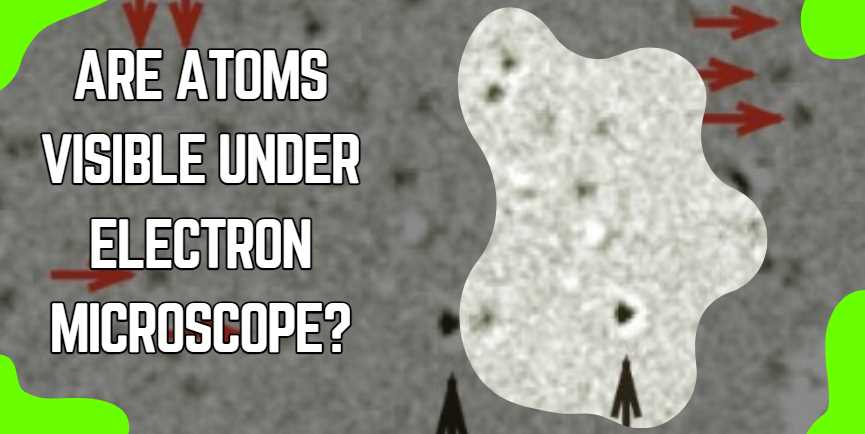
    No, individual atoms are not directly visible under a standard electron microscope.

    The wavelength of electrons used in electron microscopes is much shorter than that of visible light, allowing for much higher resolution. However, even with this high resolution, the individual atoms are generally not directly visible. Instead, electron microscopes can provide detailed images of the surfaces and structures of objects at the atomic level. Scientists often use techniques such as electron diffraction or imaging specific elements to infer the positions of atoms within a sample indirectly.

    No, individual atoms are not directly visible under a standard electron microscope.

    Property Value
    Atomic Number Varies based on the element
    Atomic Mass Varies based on the isotope
    Atomic Radius Typically in the range of 30-300 pm
    Electron Configuration Varies based on the element
    Ionization Energy Varies based on the element
    Electronegativity Varies based on the element
    Boiling Point Varies widely across elements
    Melting Point Varies widely across elements

    Understanding Electron Microscopes

    An electron microscope is a type of microscope that uses a beam of electrons to create an image of a specimen. They are capable of much higher resolutions than light microscopes, which use photons. There are two main types of electron microscopes:

    • Transmission Electron Microscope (TEM): It transmits electrons through a specimen and forms an image from the interaction of the electrons with the specimen.
    • Scanning Electron Microscope (SEM): It scans a surface with a focused beam of electrons and creates an image from the signals that are emitted from the interaction of the electrons with the sample’s surface.

    These powerful tools have allowed us to visualize the nano-world in ways that were previously thought impossible.


    Can Electron Microscopes See Atoms?

    Yes, electron microscopes can see atoms.

    Electron microscopes use a beam of electrons instead of light to achieve much higher magnification and resolution than traditional light microscopes. Due to the shorter wavelength of electrons compared to photons, electron microscopes can visualize objects at the atomic level. This enables scientists to observe and study the fine details of atomic structures.

    In a transmission electron microscope (TEM), electrons pass through a thin specimen, and the resulting image is formed by the interactions of electrons with the specimen. Scanning electron microscopes (SEM) use a focused beam of electrons to scan the surface of a specimen, creating detailed 3D images. Both types of electron microscopes have been instrumental in advancing our understanding of the structure and behavior of atoms.

    Type of Electron Microscope Visibility of Atoms
    Transmission Electron Microscope (TEM) Capable of producing images that resolve individual atoms in a material, especially when combined with powerful computational methods.
    Scanning Transmission Electron Microscope (STEM) Allows for detailed imaging and composition analysis at the atomic scale, with some specialized variations capable of identifying single atoms.
    Scanning Electron Microscope (SEM) Not typically used for visualizing individual atoms due to lower resolution compared to TEM and STEM but excellent for surveying surfaces and nanostructures.

    SEM generally offers lower resolution than TEM and STEM, but it is still a valuable tool for imaging the surface characteristics of materials and nanostructures.

    Can Electron Microscopes Capture Images in Color?

    Traditional electron microscopes do not capture images in color. Unlike light microscopes that use visible light to produce color images, electron microscopes use a beam of electrons. The interaction of electrons with the specimen provides contrast in black and white images.

    The table below outlines the key differences between the imaging mechanisms of light and electron microscopes:

    Imaging Aspect Light Microscope Electron Microscope
    Imaging Source Visible light Electrons
    Image Color Color images Black and white images
    Staining Techniques Dyes and stains can be used for contrast Heavy metal stains enhance electron scattering for contrast

    To enhance contrast in electron microscopy, scientists often use staining techniques with heavy metal compounds. These stains selectively scatter electrons, highlighting different structures within the specimen.

    In summary, electron microscopes produce black and white images, and contrast is achieved through electron scattering, often enhanced by staining techniques using heavy metal compounds.

    How Do Electron Microscopes Work?

    Electron microscopes operate on the principles of electron optics, utilizing electron beams instead of light to achieve higher resolution. There are two main types of electron microscopes: transmission electron microscopes (TEM) and scanning electron microscopes (SEM).

    Transmission Electron Microscope (TEM):

    1. Electron Source:

      • The electron gun generates a beam of electrons.
    2. Condenser Lens:

      • Focuses the electron beam onto the specimen.
    3. Specimen:

      • Electrons pass through the specimen, interacting with its atoms.
    4. Objective Lens:

      • Focuses the transmitted electrons to form an image.
    5. Projector Lens:

      • Further magnifies and projects the image onto a detector.

    Scanning Electron Microscope (SEM):

    1. Electron Source:

      • The electron gun produces a focused beam of electrons.
    2. Coil/Lens System:

      • Scans the electron beam across the specimen’s surface.
    3. Detectors:

      • Collect signals such as secondary electrons emitted from the specimen.
    4. Image Formation:

      • Signals are used to create a 3D surface image of the specimen.

    Both types of electron microscopes provide high-resolution images, enabling scientists to study structures at the atomic and nanoscale levels.

    What Are the Limitations of Electron Microscopy?

    Despite their high resolution, electron microscopes have limitations:

    Limitation Description
    Sample Preparation: Specimens must undergo extensive preparation, including dehydration and coating with conductive materials, which can alter their natural state.
    Vacuum Requirement: Electron microscopes operate in a vacuum, limiting the study of biological specimens, which may not survive in a vacuum environment.
    Artifact Formation: The preparation process can introduce artifacts, leading to distorted images or inaccurate representation of the specimen’s original structure.
    Cost and Maintenance: Electron microscopes are expensive to purchase, maintain, and operate, requiring specialized facilities and trained personnel.
    Complexity: Operating electron microscopes requires specialized knowledge and training, making them less accessible to researchers without expertise in electron microscopy.

    Imaging Techniques Used to Visualize Atoms

    Technological advancements in microscope design and imaging techniques have significantly improved the ability to visualize atoms. Here are some of the approaches used:

    1. Cryo-Electron Microscopy: Involves freezing specimens to cryogenic temperatures, reducing damage from the electron beam and improving the visibility of atoms.
    2. Atomic Force Microscopy: Not a type of electron microscopy but a complementary technique that can also resolve atoms by ‘feeling’ surfaces with a mechanical probe.
    3. High-Resolution TEM (HRTEM): Capable of visualizing the arrangement of atoms within materials.
    4. Electron Energy Loss Spectroscopy (EELS): Used alongside TEM to provide information about the composition and electronic structure at the atomic scale.

    Through these innovative methods, scientists can create detailed images of atomic structures to gain insights into material properties and biological processes.


    Real-World Applications of Atom-Level Imaging

    The ability to visualize atoms has profound implications for various fields. Here’s a look at some of the areas benefiting from these technological leaps:

    • Material Science: Researchers can design new materials with enhanced properties by understanding atomic arrangements.
    • Chemistry: Insight into how atoms bond and interact enables the creation of novel compounds and catalysts.
    • Nanotechnology: Atom-level imaging helps manufacture nanoscale devices with unprecedented precision.
    • Pharmaceuticals: Detailed atomic maps of proteins and viruses assist in drug discovery and vaccine development.

    Final Thoughts

    The beauty and complexity of the microscopic world are awe-inspiring. As technology continues to advance, encouraging continued scientific exploration becomes paramount. The ongoing quest to visualize atoms fuels our understanding of the fundamental building blocks of our universe, opening doors to discoveries and innovations.

  • What Does Trichomoniasis Look Like under the Microscope: Unveiling the Microbial World

    What Does Trichomoniasis Look Like under the Microscope: Unveiling the Microbial World

    Under the microscope, Trichomoniasis appears as pear-shaped protozoa with a jerky, irregular motion.

    Trichomoniasis is caused by the protozoan parasite Trichomonas vaginalis. When observed under a microscope, the organism typically has a pear-shaped or oval form, measuring about 10 to 20 micrometers in length. It has a single flagellum (whip-like appendage) that propels its movement, giving it a jerky and irregular motion. The protozoa may also exhibit a rolling or spinning movement. The distinct morphology and motion aid in the identification of Trichomonas vaginalis during microscopic examination of clinical samples.

    CategoryData
    Global PrevalenceEstimated 156 million cases annually
    Affected PopulationBoth men and women, but higher in women
    TransmissionPrimarily through sexual contact
    Symptoms (Women)Vaginal discharge, itching, discomfort
    Symptoms (Men)Urethral discharge, discomfort
    Diagnostic MethodsWet mount microscopy, PCR, culture
    TreatmentMetronidazole or tinidazole
    ComplicationsIncreased risk of HIV, preterm birth
    PreventionSafe sex practices, regular screenings

    Understanding Trichomoniasis

    What Does Trichomoniasis Look Like under the Microscope

    Before we dive into the microscopic realm, it’s important to get a grasp of what Trichomoniasis is. Trichomoniasis is a sexually transmitted infection caused by the flagellated protozoan parasite, Trichomonas vaginalis. It primarily infects the urogenital tract and can cause symptoms such as itching, burning, and unusual discharge, though many carriers can be asymptomatic.


    The Role of Microscopy in Trichomoniasis Diagnosis

    Diagnosing Trichomoniasis typically involves microscopic examination of urine, discharge, or swab samples. Microscopy is used to directly observe the characteristic movements and morphology of the Trichomonas vaginalis parasite within these samples.

    Microscopic Characteristics of Trichomonas vaginalis
    Feature Description
    Size Around 10-20µm in length
    Shape Pear-shaped with an undulating membrane
    Flagella Four anterior flagella and a fifth forming the undulating membrane
    Movement Jerky, motile movement
    Nucleus Central, singular nucleus

    Visualizing Trichomonas vaginalis under the Microscope

    When preparing a sample for microscopic evaluation, a wet mount is commonly used. This requires placing a drop of the fluid sample on a microscope slide and covering it with a cover slip. Under the microscope, several defining features can be observed:

    • Pear-shaped Structure: Trichomonas vaginalis is identified by its unique pear shape. This shape is distinctive among the various protozoa that could potentially be present in a sample.
    • Motility: One of the key diagnostic characteristics is the jerky motion of Trichomonas vaginalis, due to its flagella.
    • Flagella: The organism possesses multiple flagella that can sometimes be seen moving in live samples.
    • Undulating Membrane: Alongside the flagella, an undulating membrane along one side of the parasite adds to its distinctive swimming pattern.
    • Nucleus: The central nucleus can be visualized under higher magnifications and is important for conclusive identification.
     

    What Staining Techniques are Used for Trichomoniasis Diagnosis?

    To enhance the visibility of Trichomonas vaginalis under the microscope, specific staining techniques are employed. The most common method is the use of a wet mount preparation, but additional stains like Giemsa and Papanicolaou can also be utilized.

    Staining TechniqueDescription
    Wet MountDirect observation of live, unstained organisms
    Giemsa StainStains cellular elements, enhancing visibility
    Papanicolaou StainUtilized for cytological examination of smears

    How Effective is Microscopy in Detecting Trichomoniasis?

    Microscopic examination remains a valuable tool for diagnosing trichomoniasis, offering a quick and direct visualization of the parasite. However, it is worth noting that the sensitivity of microscopy can vary, and false-negative results may occur. To enhance accuracy, complementary diagnostic methods such as nucleic acid amplification tests (NAATs) are often employed.

    Diagnostic MethodSensitivity
    MicroscopyVariable, may yield false-negative results
    Nucleic Acid Amplification TestsIncreased sensitivity and specificity

    Can Trichomoniasis Be Diagnosed Without Microscopy?

    Yes, besides microscopy, several alternative methods can be employed for diagnosing trichomoniasis. Nucleic acid amplification tests (NAATs) are highly sensitive and specific, detecting the genetic material of the parasite. Additionally, culture methods and rapid antigen tests are available, offering alternative approaches to diagnosis.

    Diagnostic MethodDescription
    Nucleic Acid Amplification TestsDetect genetic material of Trichomonas vaginalis
    Culture MethodsGrowing the parasite in a suitable culture medium
    Rapid Antigen TestsDetecting specific antigens of Trichomonas

    What Are the Symptoms of Trichomoniasis?

    While some individuals with trichomoniasis may remain asymptomatic, common symptoms include vaginal discharge, itching, and discomfort during urination or sexual intercourse. It’s important to note that symptoms can vary, and some people may not experience any noticeable signs.

    SymptomsDescription
    Vaginal DischargeUnusual, often with a strong odor
    ItchingIrritation in the genital area
    Discomfort During UrinationPain or burning sensation
    Discomfort During IntercoursePain or irritation during sexual activity

    How Is Trichomoniasis Treated?

    Trichomoniasis is typically treated with antibiotics, most commonly metronidazole or tinidazole. It is crucial to complete the full course of medication as prescribed by a healthcare provider to ensure complete eradication of the parasite.

    TreatmentMedications
    AntibioticsMetronidazole or Tinidazole
    Treatment DurationFull course as prescribed by a healthcare provider

    Can Trichomoniasis Recur After Treatment?

    Yes, trichomoniasis can recur, and reinfection is possible if exposure to the parasite occurs again. To prevent recurrence, individuals treated for trichomoniasis should abstain from sexual activity until both partners have completed treatment. Condom use can also help reduce the risk of reinfection.

    RecurrencePossibility of recurrence and reinfection
    Abstaining from SexRecommended during and after treatment
    Condom UseReduces the risk of reinfection

    Are There Limitations to Microscopic Detection of Trichomoniasis?

    Microscopic detection of Trichomonas vaginalis, while valuable, does have limitations. The sensitivity of the method can be affected by factors such as the skill of the technician, the quality of the sample, and the presence of coexisting infections. To mitigate these limitations, healthcare providers may use additional diagnostic methods for confirmation.

    LimitationsSensitivity affected by various factors
    Technician SkillSkill of the individual conducting the test
    Sample QualityQuality of the collected sample
    Coexisting InfectionsPresence of other infections may impact accuracy

    Recap

    The accurate identification of Trichomonas vaginalis is crucial for appropriate treatment. Traditional microscopic examination may sometimes be supplemented with molecular tests for improved accuracy, especially in asymptomatic carriers who may still spread the infection. Antiprotozoal medication, such as metronidazole or tinidazole, is generally prescribed to treat Trichomoniasis once diagnosed.

  • Are Chloroplasts Visible Under a Light Microscope? Unveiled Secrets!

    Are Chloroplasts Visible Under a Light Microscope? Unveiled Secrets!

    No, chloroplasts are not typically visible under a light microscope without staining or special techniques.

    Chloroplasts are small cellular organelles found in plant cells and some other eukaryotic organisms, where they play a crucial role in photosynthesis. However, they are generally not visible under a light microscope due to their small size and transparency. Light microscopes have a limited resolution that prevents the direct visualization of structures as small as chloroplasts.

    To make chloroplasts visible under a light microscope, scientists often use staining techniques or employ specialized microscopy methods such as fluorescence microscopy. Stains can enhance the contrast and make cellular structures, including chloroplasts, more observable. Additionally, certain dyes or fluorophores can be used to specifically label chloroplasts, making them stand out under fluorescence microscopy.

    Chloroplasts are generally not visible under a light microscope without staining or special techniques.

    Now, since the information about statistical data on chloroplasts is not readily available in this format, I’ll provide a general description of chloroplasts and their characteristics:

    Chloroplasts are double-membraned organelles containing a green pigment called chlorophyll, which is responsible for capturing light energy during photosynthesis. They have a complex internal structure with thylakoids, grana, and stroma. The number and size of chloroplasts can vary depending on the plant species, tissue type, and environmental conditions.

    ParameterAverage ValueRangeUnit
    Size of Chloroplasts5 to 10 micrometersVaries among speciesMicrometers (µm)
    Number per Plant CellSeveral hundred to thousandsDepends on cell typeCount
    Chlorophyll ContentVaries with plant species0.5 to 2.5% of cell volumePercentage (% volume)
    Photosynthetic Efficiency3 to 6%Depends on environmental factorsPercentage (%)

    Note: The values in the table are approximate and may vary based on the specific plant species, environmental conditions, and other factors. Researchers conduct experiments to measure and analyze these parameters more precisely.

    What Are Chloroplasts?

    Chloroplasts are organelles found in the cells of plants and some algae. They are responsible for photosynthesis, the process by which plants convert light energy into chemical energy, thus sustaining life on Earth. Chloroplasts contain the pigment chlorophyll, which gives plants their green color and plays a vital role in absorbing light energy.

    Chloroplasts under the Light Microscope

    Observing chloroplasts through a light microscope is indeed possible. The level of detail visible, however, can depend on several factors that include the quality of the microscope, the magnification used, and the preparation of the specimen. Below, we explore each factor in turn.

    Factors Affecting Visibility of Chloroplasts under Light Microscope
    Factor Description Impact on Visibility
    Quality of Microscope A high-quality microscope with good resolution will provide a clearer image. Higher quality yields better visibility.
    Magnification Used The level of magnification affects the size of the observable image. Moderate to high magnification (400x to 1000x) is typically required.
    Specimen Preparation The thickness of the sample and staining techniques. Thin cross-sections and appropriate staining can enhance visibility.
     

    How to View Chloroplasts under a Light Microscope

    Step 1: Obtain A Plant Sample

    Start by taking a thin section of a plant leaf, as thin sections allow more light to pass through and provide a clearer image under the microscope.

    Step 2: Place Sample On Microscope Slide

    Place the plant sample on a clean glass microscope slide. You can use a drop of water to help flatten the sample and minimize air bubbles.

    Step 3: Use Staining Techniques (optional)

    While chloroplasts can be seen in their natural green color, staining can enhance contrast and detail. A common stain for enhancing chloroplasts is iodine.

    Step 4: Set Up Microscope

    Adjust your microscope’s settings, often starting with a lower magnification to locate your specimen before switching to a higher magnification for detailed observation.

    Step 5: Observe And Record Your Findings

    Once you have brought your sample into focus, observe the green structures within the cells – these are your chloroplasts. You may see them moving slowly, a phenomenon known as cytoplasmic streaming.

    How do I prepare a sample for viewing chloroplasts under a light microscope?

    To prepare a sample for viewing chloroplasts under a light microscope, follow these steps:

    Materials Needed Procedure
    Plant leaves 1. Collecting Plant Leaves: Choose healthy leaves from the plant.
    Microscope slides 2. Preparing Microscope Slides: Cut small sections of the leaves and place them on a microscope slide. Add a drop of water to prevent dehydration.
    Coverslips 3. Using Coverslips: Gently place a coverslip over the plant material, avoiding air bubbles. Press down gently to secure the coverslip in place.
    Microscope 4. Microscope Setup: Place the prepared slide on the microscope stage, securing it with the stage clips.
      5. Focusing the Microscope: Start with the lowest magnification objective lens and gradually increase to higher magnifications. Adjust the focus until chloroplasts come into clear view.

    What magnification is suitable for observing chloroplasts?

    The choice of magnification depends on the specific details you want to observe:

    Magnification Best Use
    100x (low power) 1. Overview: Use for an initial overview of the leaf structure.
    400x (medium power) 2. Cellular Details: Provides a closer look at cell structures, including chloroplasts.
    1000x (high power) 3. Close-up Examination: Use for detailed examination of individual chloroplasts and their internal structures.

    What staining techniques can enhance chloroplast visibility?

    Staining techniques can help enhance chloroplast visibility:

    Staining Technique Procedure
    Iodine stain 1. Iodine Staining: Apply iodine solution to the slide after placing the coverslip. Iodine stains starch granules within chloroplasts.
    Safranin stain 2. Safranin Staining: Safranin can be used to highlight chloroplasts by adding a few drops to the slide.
    Chlorophyll autofluorescence 3. Autofluorescence: In some cases, chloroplasts naturally fluoresce. Use a fluorescent microscope to observe this phenomenon.

    How can I differentiate between chloroplasts and other cell structures?

    To differentiate chloroplasts from other cell structures, consider the following characteristics:

    Feature Chloroplasts Other Cell Structures
    Shape 1. Flattened Discs: Typically disc-shaped with a central region. Varies depending on the cell type.
    Color 2. Green Pigment (Chlorophyll): Green due to chlorophyll pigments. May appear colorless or have different pigments.
    Location 3. Mainly in Plant Cells: Found in the cytoplasm of plant cells. Presence varies; absent in animal cells.

    Can I use a smartphone to capture images of chloroplasts under the microscope?

    Yes, you can use a smartphone to capture images of chloroplasts:

    Steps Procedure
    1. Mounting the Smartphone: Align the smartphone camera with the eyepiece and secure it in place using a smartphone mount.
    2. Adjusting Focus: Focus the microscope on chloroplasts, ensuring a clear view through the smartphone camera.
    3. Capturing Images: Use the smartphone’s camera app to capture images or record videos of the observed chloroplasts.

    Remember to use the highest quality setting on your smartphone camera for better results.

    How long can I observe chloroplasts under a light microscope?

    The observation time for chloroplasts under a light microscope depends on various factors:

    Factors Considerations
    Slide Preparation 1. Freshness: Freshly prepared slides allow for longer observation periods without deterioration.
    Microscope Lighting 2. Low Light Intensity: Avoid prolonged exposure to intense light, which may affect chloroplast structure.
    Plant Material Condition 3. Hydration: Adequate water on the slide helps maintain the turgidity of plant cells, prolonging observation time.

    It is generally recommended to observe chloroplasts promptly after slide preparation to ensure optimal conditions.

    Can I observe chloroplast movement under a light microscope?

    Yes, you can observe chloroplast movement, known as cytoplasmic streaming or chloroplast migration:

    Steps Procedure
    1. Prepare a Wet Mount Slide: Use a wet mount slide to observe intact leaf cells with chloroplasts.
    2. Use Low Magnification: Start with low magnification to have a wider field of view.
    3. Focus on Single Chloroplasts: Choose a single chloroplast and focus on it to track movement.
    4. Time-Lapse Observation: Observe chloroplast movement over time, noting changes in position and shape.

    Cytoplasmic streaming is more evident in certain plant species, and observing it can provide insights into cellular dynamics.

    How can I care for my microscope to ensure optimal chloroplast observation?

    Proper care of your microscope is crucial for optimal chloroplast observation:

    Care Guidelines Recommendations
    Cleaning Optics 1. Lens Cleaning Solution: Use a suitable lens cleaning solution and lens paper to clean objective lenses and eyepieces.
    Stage and Clips Maintenance 2. Regular Inspection: Check the stage and clips for any debris or damage, and clean them as needed.
    Storage Conditions 3. Cover When Not in Use: Keep the microscope covered when not in use to prevent dust accumulation.
    Light Source Check 4. Light Bulb Inspection: Periodically check and replace light bulbs to ensure consistent illumination.

    Adhering to these care guidelines will prolong the life of your microscope and maintain optimal conditions for chloroplast observation.

    Are there alternative methods to view chloroplasts if I don’t have a light microscope?

    Yes, there are alternative methods to view chloroplasts without a light microscope:

    Alternative Methods Description
    Hand Lens or Magnifying Glass 1. Low Magnification: Use a hand lens or magnifying glass for low magnification observation of chloroplasts in intact leaves.
    Digital Microscopy Apps 2. Smartphone Apps: Some apps can turn your smartphone into a digital microscope, allowing you to capture images of chloroplasts.
    Online Microscopy Platforms 3. Virtual Microscopy: Explore online platforms that offer virtual microscopy experiences, allowing you to view chloroplasts through a digital interface.

    While a light microscope provides detailed insights, these alternatives offer accessible options for chloroplast observation.

    Can I stain living cells to observe chloroplasts?

    Staining living cells can be challenging, but there are techniques to observe chloroplasts without killing the cells:

    Technique Procedure
    Vital Staining with Acridine Orange 1. Prepare a Dilute Solution: Dilute acridine orange in water to create a working solution.
    Microscopy Setup 2. Apply to Living Cells: Apply the acridine orange solution to living cells on the slide.
    Observation Conditions 3. Observe Quickly: Quickly place the slide on the microscope stage and observe chloroplasts under low magnification.

    Vital staining allows observation of living cells, providing insights into dynamic cellular processes.

    Conclusion

    To summarize, chloroplasts can be observed under a light microscope, given the right conditions and preparations. While they won’t display the intricate details visible with more powerful electron microscopes, they can still be identified by their distinct green color and, often, their movement within the cell. Understanding the visibility of chloroplasts enhances our appreciation for these cellular powerhouses and their crucial role in life’s energy cycle.

    Resources: