Category: Info

  • How Does a Microscope Work? An In-Depth Guide To Magnification

    We all know that magnifying glasses allow us to see more clearly, but what does this mean? A magnification of 100x can make something about 5cm tall look like it’s about 40cm tall. And a microscope lets you see objects that are even smaller than that!
    The best way to understand the science behind a microscope is by looking at the mechanism that makes it work. Microscopes and their use are interesting and complex topics, and this article explores an in-depth guide to how a microscope works.

    Before exploring how a microscope functions, we must first address the available types.

    Types Of Microscopes:
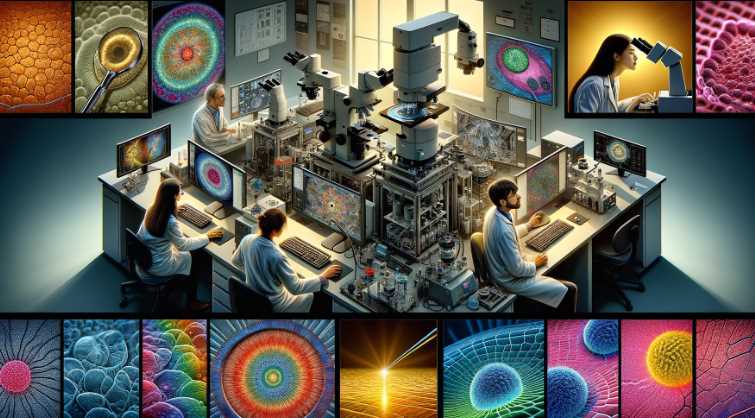
    Overview of Different Microscope Types

    Microscopes are instrumental in magnifying the invisible, with various types tailored to specific applications. This overview provides a glimpse into the diverse world of microscopes, each wielding its unique capabilities.

    Light Microscopes

    Introduction: As a novice explorer of the microscopic, the journey often begins with light microscopes. These instruments utilize visible light to illuminate specimens, allowing for a detailed examination of biological samples and materials.

    Applications:

    • Invaluable in Biology: Light microscopes are workhorses in biology, enabling scientists to study the intricate structures of cells, tissues, and microorganisms.
    • Material Science Insight: Their simplicity makes them a go-to tool in material science, aiding in the analysis of material composition and structure.

    Advantages:

    • Accessibility: Light microscopes are widely accessible, making them essential for educational settings and routine laboratory work.
    • Real-time Observation: Ideal for observing living specimens in real-time, providing a dynamic view of biological processes.

    Electron Microscopes

    Paradigm Shift: Venturing further into the microscopic frontier, the transition to electron microscopes marks a paradigm shift. These instruments employ beams of electrons instead of visible light, propelling microscopy into the nanoscale.

    Nanoscale Revelation:

    • Unparalleled Resolution: Electron microscopes unveil intricate details at the nanoscale, offering unprecedented resolution for studying atomic and molecular structures.
    • Nanotechnology Marvel: Revolutionizing fields like nanotechnology, electron microscopes play a pivotal role in designing and analyzing nanomaterials.

    Applications:

    • Materials Science Precision: In materials science, electron microscopes facilitate precise characterization of materials, contributing to advancements in semiconductor technology and metallurgy.
    • Biological Frontiers: In biology, electron microscopes delve into the ultrastructure of cells, revealing details beyond the capability of light microscopes.

    In navigating the world of microscopes, understanding the nuances of light and electron microscopes is paramount. Each type, with its distinctive features, contributes uniquely to scientific exploration, offering a glimpse into realms previously hidden from our sight.

    Fundamental Principles of Microscopy
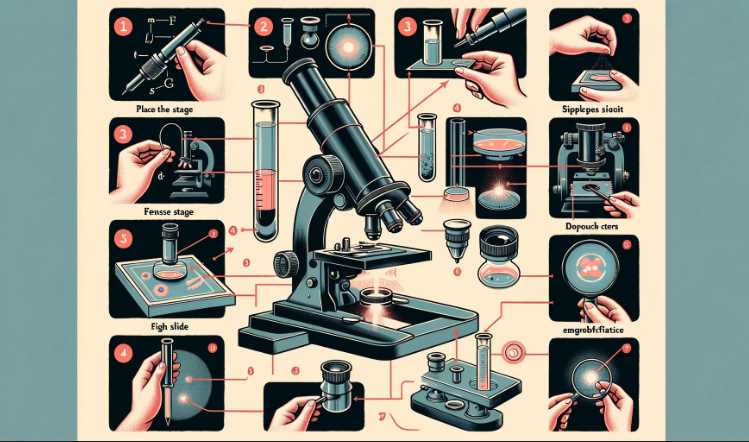
    Microscopy, a science of discovery, is anchored in fundamental principles that govern the magnification and resolution of microscopic images. In this exploration, we delve into these core principles, understanding the mechanisms that bring the unseen into focus.

    Magnification

    Magnification is the bedrock of microscopy, enabling us to explore the microscopic world with enhanced clarity. The process of magnification involves increasing the apparent size of an object, allowing for a detailed examination beyond the limits of our natural vision.

    Key Components of Magnification:

    ComponentDescription
    Objective LensPrimary magnifying lens near the specimen.
    EyepieceFurther magnification through the eyepiece.
    Total MagnificationCalculated by multiplying objective and eyepiece magnifications.

    Significance of Magnification: Understanding magnification is pivotal. As an amateur microscopist, I discovered that higher magnification reveals finer details, providing a more comprehensive view of the specimen’s structure.

    Resolution

    Resolution, the microscope’s ability to distinguish between two closely spaced objects, is equally crucial. While magnification brings objects closer, resolution ensures that these objects are distinct entities rather than a blur.

    Factors Influencing Resolution:

    FactorDescription
    Wavelength of Light/ElectronsSmaller wavelength allows higher resolution.
    Numerical ApertureDetermines the resolving power of the objective lens.

    Importance of Resolution: Resolution became a fascinating aspect of my journey. I realized that even with high magnification, poor resolution could compromise the clarity of the observed details. Achieving optimal resolution is vital for a comprehensive understanding of the microscopic world.

    Parts of a Microscope and their Functions
    Microscopes are complex instruments, weaving together various components to unlock the mysteries of the microscopic world. Understanding the interplay between these components is essential for harnessing the full potential of these scientific marvels.

    Optical Microscopes

    Optical microscopes, often the starting point in microscopy, employ visible light to illuminate and magnify specimens. As I delved into the intricacies, I discovered the synergy of components that form the backbone of optical microscopy.

    Key Components:

    ComponentDescription
    Objective LensPrimary lens near the specimen, providing magnification.
    EyepieceFurther magnifies the image for observation.
    CondenserFocuses and directs light onto the specimen.
    DiaphragmRegulates the amount of light reaching the specimen.

    Functionality:

    1. Objective Lens:
      • Varied Magnification: Different objective lenses offer varying levels of magnification.
      • Numerical Aperture: Influences resolution and light-gathering ability.
    2. Eyepiece:
      • Additional Magnification: Multiplies the magnification obtained from the objective lens.
      • Observation Interface: Where the observer views the magnified specimen.
    3. Condenser:
      • Light Focus: Concentrates light onto the specimen for optimal illumination.
      • Aperture Control: Adjusts the size of the aperture to regulate light intensity.
    4. Diaphragm:
      • Light Regulation: Controls the amount of light passing through the specimen.
      • Enhances Contrast: Adjustments aid in improving contrast for better visibility.

    Electron Microscopes

    Electron microscopes, representing a technological leap, utilize beams of electrons for imaging, achieving unparalleled resolution at the nanoscale. My exploration into electron microscopy unveiled a realm of advanced components.

    Key Components:

    ComponentDescription
    Electron GunEmits a focused beam of electrons.
    Magnetic LensesFocus and steer the electron beam.
    Detector SystemsCapture and convert electrons into an image.

    Functionality:

    1. Electron Gun:
      • Electron Emission: Generates a focused beam of electrons.
      • Beam Control: Directs electrons towards the specimen.
    2. Magnetic Lenses:
      • Focusing Electrons: Magnetic fields focus and steer the electron beam.
      • Precision Control: Achieves high-resolution imaging at the nanoscale.
    3. Detector Systems:
      • Electron Detection: Capture electrons transmitted through or scattered by the specimen.
      • Image Conversion: Converts electron signals into a visible image.

    Navigating the components of microscopes is akin to deciphering a symphony of precision. Whether in the realm of optical or electron microscopy, each component plays a unique role, contributing to the clarity and detail of the microscopic images that captivate scientific minds.

    How does a Microscope work?
    How Microscopes Produce Images

    The production of microscopic images is a complex yet fascinating process, involving intricate mechanisms that transform minuscule details into visible wonders. Understanding the nuances of this process is key to appreciating the beauty and depth of microscopic exploration.

    Light Microscopes

    Light microscopes, relying on visible light to illuminate specimens, orchestrate a symphony of components to produce clear and magnified images. My journey through the workings of light microscopy revealed the elegance behind the creation of these images.

    Key Processes:

    ProcessDescription
    IlluminationLight source provides illumination for the specimen.
    LensesObjective and eyepiece lenses magnify and focus the image.
    Image FormationInterplay of lenses creates a magnified and observable image.

    Illumination and Lenses:

    1. Illumination:
      • Light Source: Provides a steady stream of light to illuminate the specimen.
      • Condenser Lens: Focuses and directs light onto the specimen for optimal visibility.
    2. Lenses:
      • Objective Lens: Magnifies the specimen, capturing details for observation.
      • Eyepiece Lens: Further magnifies the image for the observer.
    3. Image Formation:
      • The coordinated action of lenses produces a magnified and focused image for observation.
      • Adjustments to focus and magnification contribute to image clarity.

    Electron Microscopes

    In the realm of electron microscopy, the process takes a quantum leap into the nanoscale, where beams of electrons replace visible light. This shift introduces an intricate dance of electrons to create images with unprecedented resolution.

    Key Processes:

    ProcessDescription
    Electron Beam GenerationElectron gun emits a focused beam of electrons.
    Electron InteractionElectron beam interacts with the specimen, revealing details.
    Image DetectionDetector systems capture electron signals and convert them into an image.

    Electron Beam and Interaction:

    1. Electron Beam Generation:
      • Electron Gun: Emits a focused and controlled beam of electrons.
      • Magnetic Lenses: Focus and steer the electron beam with precision.
    2. Electron Interaction:
      • The electron beam interacts with the specimen, revealing intricate details at the nanoscale.
      • Scattering and transmission of electrons provide information about the specimen’s structure.
    3. Image Detection:
      • Detector systems capture the transmitted or scattered electrons.
      • Conversion of electron signals into a visible image completes the imaging process.

    In both light and electron microscopes, the production of images is a carefully choreographed process, where the manipulation of light or electrons transforms the invisible into the visible, allowing us to explore the hidden realms of the microscopic universe.

    5 Tips for Maximizing Your Microscope Experience
    Microscope use is an art that combines precision and technique to unlock the mysteries of the microscopic world. Whether you are a novice or seasoned microscopist, these tips will enhance your microscopy experience, ensuring optimal results.

    1. Proper Handling and Care

    Microscopes are delicate instruments requiring careful handling. Always use both hands when carrying or adjusting the microscope to prevent damage. Regular cleaning, especially of lenses, ensures clear and accurate imaging. Proper storage in a dust-free environment protects the instrument’s longevity.

    2. Optimizing Illumination and Focus

    Adjusting illumination and focus is an art that significantly impacts image quality. Start with low light and gradually increase to prevent specimen damage. Use fine and coarse adjustments for precise focusing, ensuring a crisp and clear image for observation.

    3. Choosing the Right Objective Lens

    Selecting the appropriate objective lens is pivotal for obtaining the desired magnification and resolution. Begin with low magnification for an overall view, then progressively move to higher magnifications for detailed observations. Always clean lenses before switching objectives.

    4. Utilizing Immersion Oil Effectively

    In certain microscopy techniques, immersion oil enhances resolution. When using oil immersion objectives, apply a small amount of oil to the specimen slide. Ensure the oil has the same refractive index as the lens for optimal imaging and wipe it off carefully after use to prevent contamination.

    5. Record Keeping and Documentation

    Maintaining a detailed record of observations is crucial for research and analysis. Use a microscope camera or smartphone attachment to capture images. Annotate findings, including magnification levels and specimen details. This not only aids in data analysis but also serves as a valuable reference for future studies.

    Implementing these tips transforms microscope use into a refined skill, enhancing the quality and longevity of your microscope and ensuring a rewarding exploration of the microscopic realm.

    How do Digital microscopes work?
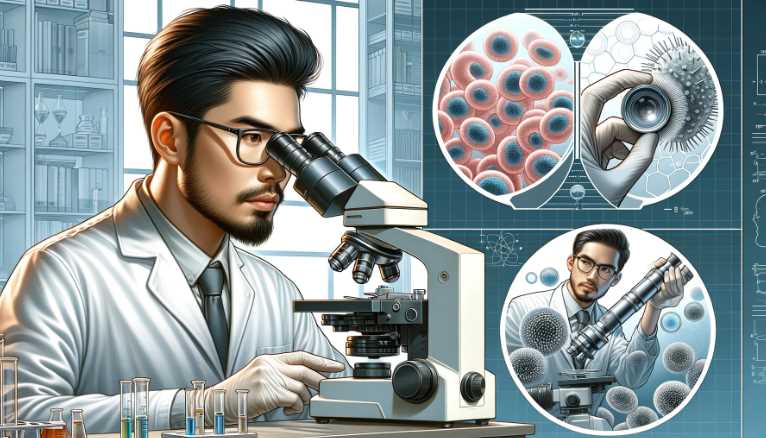
    Components of Digital Microscopes

    ComponentDescription
    Digital CameraIntegrated camera captures images of the specimen. The camera resolution impacts the clarity of the digital image.
    Objective LensFunctions similarly to traditional microscopes, providing magnification and focusing capabilities. The choice of the objective lens influences the overall optical performance.
    Illumination SourceLight source, often LED, provides consistent illumination for the specimen. Some digital microscopes offer adjustable illumination settings for optimizing image quality.
    Digital Image SensorConverts light information into digital signals. The type and quality of the image sensor influence the final image’s resolution and sensitivity.
    Processor and SoftwareThe processor manages image processing tasks, and software applications handle image capture, storage, and analysis. Advanced software allows users to enhance and manipulate captured images.
    Display ScreenDigital microscopes feature built-in screens or connect to external monitors. The display screen allows real-time observation and analysis of specimens, eliminating the need for traditional eyepieces.

    Functionality of Digital Microscopes

    1. Image Capture and Processing:
      • The digital camera captures high-resolution images of the specimen.
      • The digital image sensor converts the captured light information into digital signals.
    2. Image Display and Analysis:
      • The processed digital image is displayed on the microscope’s built-in screen or an external monitor.
      • Digital microscopes often feature advanced software for real-time analysis, annotation, and manipulation of captured images.
    3. Storage and Sharing:
      • Captured images are stored digitally, eliminating the need for physical slides.
      • Digital microscopes enable easy sharing of images through electronic means, facilitating collaboration and remote analysis.
    4. Adjustable Illumination:
      • LED illumination sources provide consistent and adjustable lighting for optimal specimen visibility.
      • Users can control illumination sett

    How does an electron microscope work?

    Electron microscopes are devices that use a beam of electrons to illuminate an object and then capture images of the object.

    The electron beam is shot at the sample and can be manipulated by changing its trajectory with magnetic lenses or a position sensor. The light scattering by the electrons causes interference patterns on a detector used to reconstruct an image.

    What is the importance of lenses in a microscope?
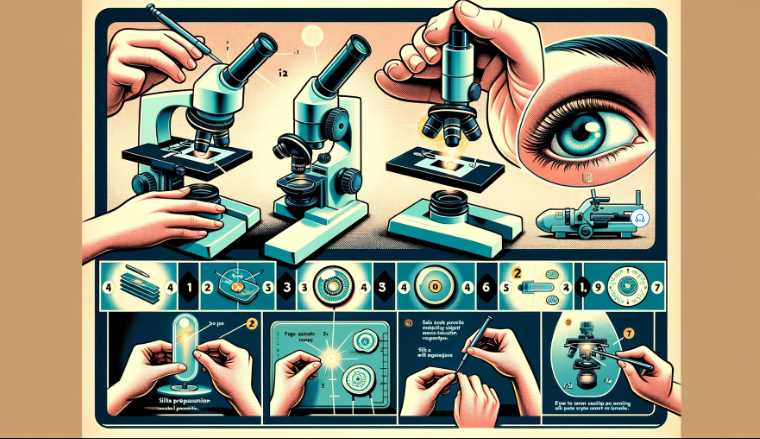
    The lens is an essential part of a microscope and helps to focus light from the object being observed onto the detector. The lens also affects how much light the instrument collects and how much magnification can be achieved.

    A good quality microscope will have two lenses, one for illuminating light and collecting it (also called an objective). In most cases, this objective is fixed to the body of the microscope and not removable. This means that when using a microscope with interchangeable objectives, one must first remove this set objective before switching to another one on the other side of the body or in another compartment.

    What is fluorescence microscopy?

    Fluorescence microscopy is a type of microscopy that uses a laser to excite fluorescent molecules, which emit light in response. This allows the fluorescence microscope to visualize cells and tissues in real time or over long periods.

    The advantage of fluorescence microscopy is that it provides high-resolution images with minimal phototoxicity and damage to living tissue. It also offers 3D imaging, which can be used for many purposes, such as cancer diagnosis, studying cellular behavior, or determining cell function.

    It would be best to use this technique to have a fluorophore and the appropriate wavelength laser light source.

    Do microscopes need electricity?

    Yes, microscopes need electricity, and this is because they are electronic devices that use electric signals to operate and observe things at the nanometer scale.

    Microscopes use light or electron beams to illuminate objects and then use the light reflected from these objects to form an image on a monitor.

    How does magnification work in a microscope?

    Magnification is the process of making something appear larger. You can do that by either increasing the size of an object or reducing the distance between a subject and an observer.

    Magnification can be achieved in a microscope by moving one or more lenses to different focal lengths.

    When looking through a microscope, there are two ways that magnification can occur:

    1)    The light from your sample enters the microscope through a condenser lens, reducing its numerical aperture (NA). The objective lens then moves closer to the model to collect more light. In this case, you will see an increase in magnification because more light is coming into your field of view and less going out.

    2)    The second way that magnification occurs in microscopes is by using a tube lens instead of a condenser lens. Tube lenses work like telephoto lenses when placed at the front end of your microscope tube.

    What do dead cells look like under a microscope?

    Dead cells look like faded, dry structures that have lost shape and are no longer alive.

    Under a microscope, dead cells can be seen to lack a nucleus and other cellular organelles. They also show signs of cell death, such as dendrites or spines, which generally help transfer healthy cells’ electrical signals.

    What does it mean if a micrograph is false-colored?

    When an image is falsely colored, it means that different colors have been assigned to other regions in the image to be easier for the viewer to identify them.

    Micrographs are pictures of microscopic structures that are obtained by using a microscope. The images obtained from these micrographs can be false-colored to help the viewers visualize certain features and systems.

    How does a microscope use light?

    A microscope uses light in two ways:

    1. To illuminate the specimen under observation and allow it to be seen.

    2. To collect images of the specimen and provide a digital record of its structure.

    What does the diaphragm do on a microscope?
    The diaphragm is a thin membrane that controls the amount of light passing through an optical system. It is a simple mechanical device used in microscopy and other fields, including astronomy.

    The diaphragm is attached to the objective lens on most microscopes and can be moved from side to side. It is used with both low-power (low magnification) and high-power (high magnification) objectives.

    How far can a microscope zoom in?

    According to Wikipedia, microscopes with a minimum magnification of 100x have been invented, and they’re capable of zooming into an object that is only 0.5mm wide (1/20th of an inch).

    There are two main ways to measure the distance between two objects.

    The first is with a ruler. You can use this method by holding a ruler on top of your object and measuring the length in millimeters or inches, then multiplying that number by 100 to find out how far away it is from you.

    The second way is to put your eye at one end of the microscope lens and measure the size of your image on the other side. That will give you an idea of how far away your object is.

    What is the iris diaphragm on a microscope?

    The iris diaphragm is a type of aperture stop in the lens of a microscope. It limits the amount of light that enters the objective lens and can be set to any desired level by adjusting its size or location.

    What can you see with a 250x microscope?

    A 250x microscope is an optical microscope that can magnify up to 250 times its original size. This microscope type is used to view small specimens, such as cells or other minute objects.

    If you want to see something with a 250x microscope, you must use the lens adapter on the objective lens and attach it to your camera to capture images from your perspective.

    What is the smallest object ever seen through a microscope?

    The smallest object ever seen through a microscope is an atom.

    A micrograph is a photograph of an object that is magnified frequently to be seen clearly. It’s called “micro.” Because the image has been made with a microscope, making it look like a miniature copy of what’s in front of the lens.

    An electron microscope can show objects as small as molecules and atoms.

    Final words:

    Microscopes are used to magnify objects to make them visible. There are various types of microscopes, and each one has its purpose. In this blog post, we will be discussing the difference between a compound microscope and a stereo microscope. If you would like to learn more about these two types of microscopes, please take some time to read through the article below!

    If you’re a student or have been studying science for some time, you may already know how a microscope works. But if you’re new to this field, it’s probably worth knowing what’s going on under the hood. This blog post should help you understand the essential parts and their functions for magnification and light paths. What is your opinion about magnifications?

    Let us know in the comments below!

    Resources and References

    For those eager to delve further into the captivating world of microscopy, a wealth of resources awaits. Books such as “Microscopy: A Very Short Introduction” by Terence Allen and “Introduction to Light Microscopy” by Randy O. Wayne provide comprehensive insights. Online platforms like MicroscopyU offer interactive tutorials and reference materials. Academic journals such as the “Journal of Microscopy” and “Microscopy Research and Technique” provide in-depth research articles. This article serves as a stepping stone, and these resources offer a continuous journey, providing nuanced perspectives and expanding your understanding of microscopy’s intricacies.

  • Can Electron Microscopes See Color? Unraveling the Monochromatic Mystery of Electron Microscopy

    Can Electron Microscopes See Color? Unraveling the Monochromatic Mystery of Electron Microscopy

    No, electron microscopes cannot see color like our eyes or optical microscopes can. Electron microscopes use a beam of electrons instead of visible light to achieve much higher magnification and resolution. The images produced by electron microscopes are typically in black and white.

    The electrons in an electron microscope interact with the sample differently than light does in an optical microscope. Instead of detecting different colors, electron microscopes rely on variations in electron density within the sample to create contrast in the images. Different materials within the sample will interact with the electron beam differently, leading to variations in brightness and darkness in the final image.

    While color is not directly visualized in electron microscope images, scientists can use techniques such as false coloring or image processing to enhance certain features or highlight specific sample elements. However, these colorations are added artificially and do not represent the sample’s natural color.

    Differences between optical microscopes and electron microscopes in terms of color:

    AspectOptical MicroscopesElectron Microscopes
    Illumination SourceVisible lightElectron beam
    MagnificationLimited magnification (up to ~2000x)High magnification (up to millions)
    ResolutionLimited resolution (limited by wavelength of light)High resolution (sub-nanometer scale)
    Color ImagingTrue color imagingBlack and white imaging
    Principle of ImagingLight interacts with sample, and different wavelengths correspond to different colorsElectrons interact with sample, and contrast is based on electron density differences
    Sample InteractionLimited penetration; suitable for observing live and stained samplesGreater penetration; used for imaging internal structures of specimens, but usually requires sample preparation
    Artificial ColorizationTrue color representationFalse colorization for image enhancement or highlighting specific features
    ApplicationsBiological and medical research, material science, etc.Material science, nanotechnology, biology, etc.

    This table provides a concise overview of the key differences between optical and electron microscopes in terms of color imaging and other relevant aspects.

    Monochromatic Nature of Electron Microscopy

    As we delve into the fascinating world of electron microscopy, one of the fundamental aspects that captures our attention is its inherently monochromatic nature. Unlike the vivid spectrum of colors that our eyes perceive in everyday life, electron microscopes present us with images that exist solely in shades of gray. This monochromatic essence stems from the unique interaction between electrons and matter, revealing a grayscale representation of the microscopic landscape.

    Table 1: A Visual Comparison of Monochromatic and Color Imaging

    AspectMonochromatic ImagingColor Imaging (False Color)
    RepresentationGrayscale representation of structuresArtificially assigned colors to enhance detail
    Nature of InformationHighlights contrasts in intensityAdds a visual layer for different structures
    Scientific AccuracyReflects the true interaction of electronsIntroduces an interpretive element

    Exploring this monochromatic nature firsthand, I was struck by the subtleties and nuances that unfolded within the grayscale imagery. Each shade of gray became a storyteller, revealing the intricate details of the nanoscale world. It’s essential to appreciate that the monochromatic palette doesn’t diminish the significance of the information conveyed; rather, it offers a unique perspective on the structural intricacies of the specimens under examination.

    Table 2: Common Staining Techniques for Contrast Enhancement

    Staining TechniquePurposeExamples of Applications
    Heavy Metal StainingEnhances contrast by absorbing electronsBiological specimens in TEM
    Immunogold LabelingTargets specific molecules for contrast enhancementCell biology and molecular studies
    Negative StainingCreates a halo effect around specimensViruses and macromolecular complexes

    In my exploration, I witnessed the application of various staining techniques aimed at accentuating contrast in electron microscopy. Heavy metal staining, immunogold labeling, and negative staining emerged as crucial tools in revealing the intricacies of biological specimens, showcasing the artistry involved in enhancing contrast.

    Understanding the monochromatic nature of electron microscopy doesn’t merely involve acknowledging its grayscale output but also appreciating the wealth of information embedded in each shade. It invites us to perceive the microcosm through a different lens, where the absence of color doesn’t diminish the richness of the narrative but rather amplifies the intricate details that would otherwise go unnoticed.

    Role of Contrast in Electron Microscopy

    In the mesmerizing realm of electron microscopy, the role of contrast emerges as a linchpin in revealing the intricacies of the microscopic universe. Understanding the contrast mechanisms inherent in electron microscopy is pivotal for scientists and researchers navigating the grayscale landscapes captured by these powerful instruments.

    Contrast Mechanisms in Electron Microscopy: Electron microscopes operate on the principle of exploiting differences in electron density within specimens. As electrons interact with the specimen, variations in density give rise to contrast. High-density regions, such as heavy metals in biological samples, appear darker, while low-density regions appear brighter. This inherent contrast forms the basis of imaging in electron microscopy.

    Staining Techniques for Contrast Enhancement: To further enhance contrast and highlight specific structures, staining techniques are employed. These techniques involve introducing substances that interact differentially with electrons. Heavy metal stains, for instance, absorb electrons, creating a darker contrast in specific areas. Immunogold labeling targets specific molecules, providing a contrast boost in molecular studies.

    Impact of Contrast on Perception: Contrast isn’t merely a technical aspect; it profoundly influences how we perceive details in electron microscope images. The subtle variations in grayscale contribute to the visual narrative, allowing scientists to discern intricate features within specimens. My own experiences revealed that mastering the art of contrast interpretation is akin to deciphering a grayscale code that unlocks the secrets of the nanoscale.

    Color in Scanning Electron Microscopy (SEM)

    Delving into the captivating world of Scanning Electron Microscopy (SEM), we encounter the intriguing concept of color, a departure from the monochromatic norm. While SEM inherently captures images in grayscale, the introduction of color, albeit artificial, adds a layer of interpretation and visual appeal.

    Explanation of False Color Imaging in SEM: False color imaging in SEM involves the assignment of colors to different features or materials within the specimen. Unlike true color, where colors represent the actual hues of the imaged objects, false color is a visual enhancement strategy. During my exploration of SEM, I witnessed firsthand how this technique can transform the interpretation of microscale structures, turning a grayscale image into a vivid representation.

    Table 1: Pros and Cons of False Color Imaging in SEM

    AspectProsCons
    Enhances VisualizationFacilitates easier identification of specific structuresMay introduce subjective interpretations
    Highlights Structural DetailsEmphasizes differences between materials, aiding in detailed analysisRequires careful consideration to avoid misrepresentation
    Adds Visual AppealMakes images more visually engaging, enhancing presentations and publicationsMay mislead if not accompanied by proper context

    Applications and Limitations of Assigning Colors to SEM Images: Assigning colors to SEM images extends beyond mere aesthetic appeal; it serves practical purposes in scientific communication. Colors can represent variations in material composition, crystal orientation, or surface properties. However, it’s crucial to acknowledge the limitations. During my exploration, I learned that false color, while valuable, should be approached with caution. Misinterpretation may arise if viewers assume the colors represent true material hues.

    Role of Post-Processing in Introducing Color to SEM Images: Post-processing plays a pivotal role in introducing color to SEM images. Specialized software allows scientists to apply false color schemes selectively. This step involves a delicate balance, ensuring that the introduced colors enhance clarity without compromising the accuracy of the underlying grayscale information.

    Challenges in Adding True Color to Electron Microscopy

    As we navigate the intricate realm of electron microscopy, the quest to introduce true color faces formidable challenges. The very physics governing electron interactions and the technical limitations inherent in the imaging process create barriers to achieving a faithful representation of colors within microscopic specimens.

    Explanation of Challenges: The primary challenge lies in the nature of electron interactions with matter. Electrons, being charged particles, exhibit a wavelength much shorter than visible light. This fundamental distinction renders traditional color representation impossible. The grayscale output in electron microscopy results from the intensity of electron interactions, creating an inherent monochromatic nature.

    Table 1: Challenges in Adding True Color to Electron Microscopy

    ChallengeExplanation
    Wavelength DiscrepancyElectron wavelength is much shorter than visible light, limiting the color spectrum available
    Lack of Absorption SpectraUnlike photons, electrons lack distinct absorption spectra for different materials
    Quantum InterferenceQuantum effects at the nanoscale complicate the introduction of true color

    Technical Limitations and the Physics Behind Monochromatic Imaging: Technical constraints further compound the challenge of introducing true color to electron microscopy. The very principles of electron imaging, relying on intensity variations, contribute to the monochromatic output. My exploration into the technical intricacies revealed the delicate balance required to preserve imaging resolution while attempting to incorporate color information.

    Advances in Research Aiming to Overcome Challenges: Despite these challenges, ongoing research endeavors aim to overcome the limitations of true color representation in electron microscopy. Innovations such as spectral imaging, which captures a spectrum of wavelengths at each pixel, and the integration of advanced detectors offer promising avenues. Witnessing these advancements firsthand instilled a sense of optimism, as scientists push the boundaries of technology to bring color to the nanoscale.

    5 Tips for Effective Interpretation of Electron Microscopy Images

    Navigating the intricate details captured by electron microscopes demands a nuanced approach to ensure accurate and insightful interpretation. Here are five tips gleaned from personal experience:

    1. Understand the Monochromatic Nature: Embrace the grayscale world of electron microscopy, recognizing that each shade of gray conveys valuable information about the specimen’s density and composition.
    2. Consider Contrast Mechanisms: Delve into the contrast mechanisms at play, as variations in electron density contribute to the grayscale palette. Grasp how staining techniques accentuate these contrasts to reveal subtle details.
    3. Beware of False Color Interpretations: Exercise caution when color is introduced. Understand that false color doesn’t represent true material hues and may influence subjective interpretations.
    4. Context is Key: Provide context to your observations. Communicate the scale, the nature of staining, and any post-processing involved to avoid misinterpretations by others.
    5. Continuous Learning: Electron microscopy evolves, and new techniques emerge. Stay abreast of the latest advancements, attend workshops, and engage with the scientific community to enhance your interpretative skills.

    Final Words

    The monochromatic nature of electron microscopy, coupled with the ongoing quest for true color representation, unveils a captivating journey into the unseen. From exploring contrast mechanisms to introducing color in SEM, each facet reveals electron microscopy’s artistic and scientific dimensions. My firsthand experiences underscore the intricate balance required for accurate interpretation. As technology advances and researchers push the boundaries, the grayscale canvas of electron microscopy continues to yield profound insights into the nanoscale world, promising a future where the unseen becomes vibrantly visible.

    Resources and References

    1. Alberts, B., Johnson, A., Lewis, J., et al. (2002). Molecular Biology of the Cell.
    2. Reimer, L. (2013). Transmission Electron Microscopy: Physics of Image Formation and Microanalysis.
    3. Goldstein, J., Newbury, D., Joy, D., et al. (2017). Scanning Electron Microscopy and X-ray Microanalysis.
    4. Crewe, A. V. (1969). “The scanning electron microscope.” Science, 166(3906), 751-753.
  • What Toenail Fungus Reveals Under a Microscope: A Closer Look

    What Toenail Fungus Reveals Under a Microscope: A Closer Look

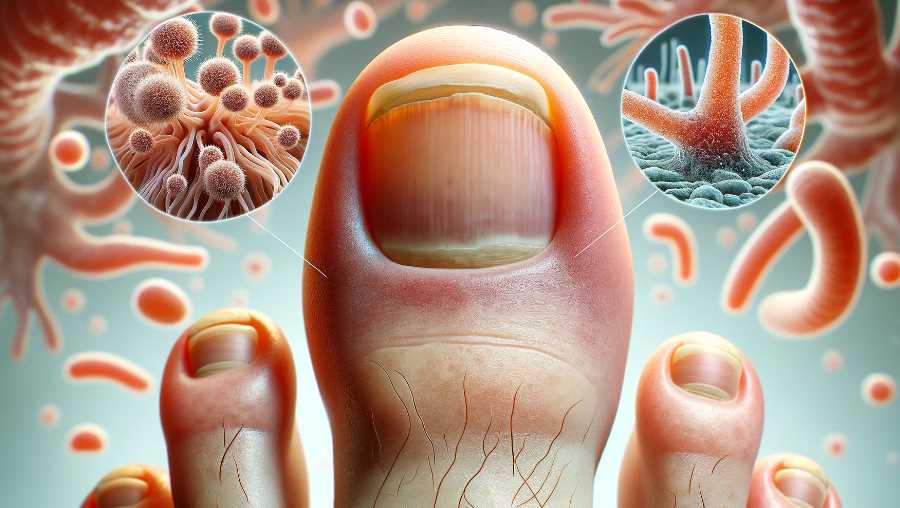
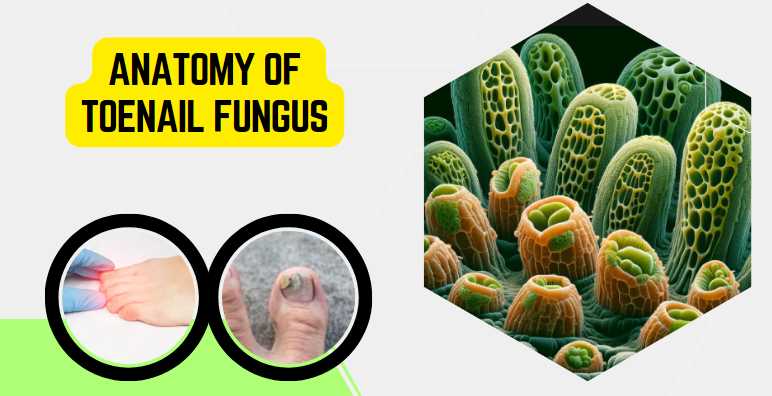
    Toenail fungus, also known as onychomycosis, is a common fungal infection that affects the toenails. The responsible fungi, usually dermatophytes or yeast, can invade the nail bed and cause various changes to the nail’s appearance. When examined under a microscope, the following characteristics may be observed:

    1. Hyphae: Fungal hyphae are the thread-like structures that make up the body of the fungus. These hyphae may be visible under a microscope and can penetrate the affected toenail tissues.
    2. Spores: Fungal spores, also known as conidia, are reproductive structures that allow the fungus to spread and reproduce. They may be present in various forms, such as chains or clusters, and their size and shape can provide clues about the specific type of fungus causing the infection.
    3. Color and Texture: The color and texture of the toenail tissue can be observed. In cases of toenail fungus, the affected nail may appear discolored, usually yellow or brown, and may become thickened or brittle. The presence of fungal elements contributes to these changes.
    4. Invasion of Nail Tissues: The microscopic examination may reveal the extent of the fungus’s invasion into the nail tissues. Fungi can invade the nail plate, nail bed, and surrounding structures, leading to visible damage.
    5. Identification of Fungal Species: In some cases, a laboratory may culture the fungus from a nail sample to identify the specific species responsible for the infection. This can help in determining the most effective treatment.

    Here’s a simple table summarizing some features:

    FeatureMicroscopic Observation
    HyphaeBranched, thread-like structures penetrating the nail tissue.
    SporulationPresence of spores or conidia, which are reproductive structures.
    Color and Texture ChangesDiscoloration (yellow or brown) and changes in texture (thickening, brittleness).
    Invasion of Nail TissueFungus may invade the nail plate, nail bed, and surrounding tissues, causing visible damage.

    Keep in mind that a definitive diagnosis often requires laboratory testing, such as a fungal culture or polymerase chain reaction (PCR) analysis.

    Anatomy of Toenail Fungus

    Overview of Fungal Infection

    Toenail fungus, scientifically known as onychomycosis, is a common ailment affecting millions worldwide. This fungal infection is primarily caused by dermatophytes, a group of fungi that thrive in warm and moist environments. Candida and molds can also contribute to toenail fungal infections. As someone who has grappled with this condition, I understand the urgency of unraveling its complexities.

    Types of Fungi Causing Toenail Infections

    Type of FungiCommon Characteristics
    DermatophytesThrive in warm, moist environments
    CandidaOpportunistic fungus, can affect nails
    MoldsVariety of species contributing to infections

    Factors Contributing to Toenail Fungus

    Several factors create a conducive environment for toenail fungus to take root and thrive. Personal hygiene, exposure to damp conditions, and compromised immune systems are key contributors. Reflecting on my own experience, it’s evident that understanding these factors is crucial for effective prevention and management.

    Factors Contributing to Toenail Fungus

    Contributing FactorImpact on Toenail Fungus
    Poor Hygiene PracticesFungal growth due to unclean conditions
    Damp EnvironmentsFungi thrive in moist, warm areas
    Weakened Immune SystemReduced ability to combat fungal infections

    Physical Characteristics of Infected Toenails

    Identifying toenail fungus goes beyond recognizing visible symptoms. Under the microscope, the physical characteristics of infected toenails reveal intricate details about the severity and type of infection. Personally observing these characteristics has provided valuable insights into the nature of the condition.

    Physical Characteristics of Infected Toenails

    CharacteristicDescription
    DiscolorationYellowing, brown spots, or white streaks
    ThickeningIncreased nail thickness, brittleness
    Distorted ShapeAltered nail shape and structure
    Debris AccumulationBuildup of debris under the nail
    Separation from Nail BedLifting of the nail from the nail bed

    Understanding the intricacies of toenail fungus at a microscopic level equips individuals with the knowledge to address the infection comprehensively. This insight extends beyond recognizing symptoms to understanding the very nature of the fungi causing the condition and the environmental factors that contribute to its persistence.

    Microscopic Examination

    Techniques for Microscopic Analysis

    Microscopic examination is the key to unraveling the hidden world of toenail fungus. Two primary techniques — light microscopy and electron microscopy — play a pivotal role in visualizing the intricate details of fungal structures. Having undergone these examinations myself, I can attest to the transformative power of these techniques in understanding the microscopic landscape of toenail infections.

    Techniques for Microscopic Analysis

    Microscopic TechniqueResolutionApplication
    Light MicroscopyLower magnificationExamining overall nail and fungal structures
    Electron MicroscopyHigher magnificationDetailed examination of fungal elements
    1. Light Microscopy

    Light microscopy provides a broad overview of toenail fungus, allowing for the observation of general structures and the interaction between fungi and nail tissues. While it may lack the resolution of electron microscopy, it remains a valuable tool in initial assessments.

    2. Electron Microscopy

    Electron microscopy, with its higher magnification capabilities, takes us deeper into the microscopic world. It enables the visualization of fine details, including individual fungal cells, providing insights that are invaluable for accurate diagnosis and treatment planning.

    Visualizing Fungal Structures

    Understanding toenail fungus requires a close examination of its building blocks. The visualizing of fungal structures under the microscope unveils a hidden landscape teeming with life. This section explores the two fundamental aspects of fungal structures: hyphae and mycelium, and spores and conidia.

    Fungal Structures Under Microscopic Analysis

    Fungal StructureDescription
    Hyphae and MyceliumThread-like structures and their collective mass
    Spores and ConidiaReproductive structures responsible for fungal spread
    1. Hyphae and Mycelium

    Hyphae are the essential building blocks of toenail fungus, forming intricate networks known as mycelium. Light microscopy allows for the observation of these structures, offering insights into the extent and density of the fungal invasion within the nail.

    2. Spores and Conidia

    Spores and conidia represent the reproductive elements of toenail fungus. These microscopic entities play a crucial role in the spread of the infection. Electron microscopy, with its high resolution, enables a detailed examination of these structures, aiding in the identification of specific fungal species.

    Insights from Microscopic Observations

    Identifying Fungal Species

    Microscopic observations offer a gateway to precise identification of fungal species responsible for toenail infections. Having personally experienced the anticipation that comes with awaiting these results, I can attest to the significance of this aspect of microscopic analysis. Light microscopy provides a preliminary view, while electron microscopy delves into finer details, aiding in the differentiation of various fungal species.

    Common Fungal Species Identified Through Microscopy

    Fungal SpeciesCharacteristics
    TrichophytonFine hyphae, often causing white or yellow discoloration
    CandidaOvoid yeast cells, associated with a whitish appearance
    AspergillusSeptate hyphae, linked to green or black discoloration

    Understanding the Severity of Infection

    Microscopic findings not only identify the culprit but also unveil the extent of toenail fungus infection. Examining the density and distribution of hyphae and mycelium provides critical insights into the severity of the condition. This firsthand understanding has reinforced the importance of early detection and intervention.

    Microscopic Indicators of Infection Severity

    Severity LevelMicroscopic Indicators
    MildSparse hyphae, limited mycelium presence
    ModerateIncreased hyphae density, expanding mycelium network
    SevereDense hyphal invasion, extensive mycelium throughout the nail

    Link between Microscopic Findings and Symptoms

    Microscopic observations form a bridge between the hidden world of fungi and the visible symptoms experienced by individuals. Understanding this link is crucial for tailoring effective treatment plans. For instance, the presence of spores and conidia might indicate a higher risk of spreading the infection. Recognizing this connection empowers both patients and healthcare professionals to make informed decisions about the most appropriate course of action.

    Connecting Microscopic Findings with Visible Symptoms

    Microscopic FindingsCorresponding Visible Symptoms
    High Hyphal DensityThickening, discoloration, and distortion of the nail
    Presence of Spores and ConidiaIncreased risk of spreading to adjacent nails or skin
    Reduced Hyphal DensityPotential signs of treatment effectiveness

    In summary, microscopic observations provide a comprehensive understanding of toenail fungus, from identifying the specific fungal species to assessing the severity of infection and establishing a direct link with visible symptoms. This knowledge forms the cornerstone for effective diagnosis and personalized treatment strategies.

    Factors Affecting Toenail Fungus Growth

    Toenail fungus is a resilient intruder, and understanding the factors that fuel its growth is paramount for effective prevention and management. Drawing from personal experiences, I’ve come to recognize three key influencers—environmental conditions, host factors, and lifestyle choices—that significantly impact toenail fungus development.

    Environmental Conditions

    The environment in which our feet reside plays a crucial role in toenail fungus growth. Dark, damp, and warm conditions create an ideal breeding ground for fungi. Public places like swimming pools, gyms, and communal showers often harbor these conditions, contributing to the increased risk of infection. Acknowledging the role of environmental factors empowers individuals to be vigilant in spaces where the risk of exposure is heightened.

    Environmental Conditions and Toenail Fungus Growth

    Environmental FactorInfluence on Toenail Fungus Growth
    HumidityFungi thrive in moist environments
    Poor VentilationLimited airflow promotes fungal growth
    Shared SpacesIncreased risk of exposure in communal areas

    Host Factors

    Individual susceptibility to toenail fungus varies, with certain host factors influencing the likelihood of infection. Weakened immune systems, pre-existing health conditions, and genetic predispositions can contribute to an increased vulnerability to fungal invasions. As I navigated my own battle with toenail fungus, understanding these host factors became crucial in crafting a holistic approach to treatment and prevention.

    Host Factors and Toenail Fungus Susceptibility

    Host FactorImpact on Toenail Fungus Susceptibility
    Weakened Immune SystemReduced ability to fend off fungal infections
    Pre-existing ConditionsCertain health issues increase susceptibility
    GeneticsFamilial predisposition may elevate risk

    Impact of Lifestyle Choices

    Our daily habits and choices also significantly influence toenail fungus growth. Personal hygiene practices, footwear choices, and exposure to potential sources of infection all contribute to the equation. Reflecting on my own journey, modifying certain lifestyle choices played a pivotal role in preventing recurrence and fostering overall nail health.

    Lifestyle Choices and Toenail Fungus Impact

    Lifestyle ChoiceInfluence on Toenail Fungus Growth
    Hygiene PracticesRegular cleaning reduces the risk of infection
    Footwear SelectionBreathable, dry footwear discourages fungal growth
    Exposure to Risky EnvironmentsAwareness and precautions in communal spaces

    Treatment Approaches Based on Microscopic Analysis

    Microscopic analysis not only aids in the diagnosis of toenail fungus but also serves as a compass guiding treatment decisions. In my journey, the insights gained through this analysis have played a pivotal role in navigating the diverse landscape of treatment options.Antifungal Medications

    1. Topical Treatments

    Microscopic analysis helps determine the extent of surface-level fungal invasion, guiding the choice of topical treatments. Antifungal nail creams, ointments, and lacquers become viable options for infections that are limited to the nail’s surface. Through personal experience, I found that consistent application, coupled with regular nail trimming, is essential for effective topical treatment.

    2. Oral Medications

    For more severe cases, where microscopic observations reveal deep-rooted fungal networks, oral medications come into play. These systemic antifungal drugs circulate through the bloodstream, reaching the nail bed and effectively targeting the infection at its source. However, the decision to opt for oral medications should be carefully considered, taking into account potential side effects and individual health factors.

    Antifungal Medications and Microscopic Guidance

    Treatment TypeMicroscopic Guidance
    Topical TreatmentsLimited fungal invasion on the nail surface
    Oral MedicationsDeep-rooted fungal networks requiring systemic treatment

    Surgical Interventions

    1. Nail Removal

    In cases where toenail fungus has caused irreparable damage and microscopic analysis reveals extensive invasion, surgical interventions may be necessary. Nail removal, either partial or complete, becomes a viable option. This procedure allows for the direct treatment of the underlying infection, facilitating the application of antifungal medications to the nail bed.

    2. Laser Therapy

    Laser therapy, guided by microscopic insights, has emerged as a promising non-invasive option. Laser light targets the fungal cells, disrupting their structure and inhibiting growth. Microscopic analysis aids in determining the effectiveness of laser therapy, providing a targeted approach for cases where traditional treatments may fall short.

    Surgical Interventions and Microscopic Guidance

    InterventionMicroscopic Guidance
    Nail RemovalExtensive fungal invasion requiring direct treatment
    Laser TherapyTargeted approach for cases where traditional treatments may fall short

    Prevention Strategies Informed by Microscopic Understanding

    Armed with insights from microscopic analysis, effective prevention strategies can be tailored to create an inhospitable environment for toenail fungus. As someone who has witnessed the microscopic intricacies of this condition, I understand the significance of proactive measures in maintaining optimal foot health.

    Personal Hygiene Practices

    Microscopic analysis reveals the vulnerability of nails to fungal invasions under certain conditions. Prioritizing meticulous personal hygiene practices becomes a fundamental aspect of prevention. Regularly cleaning and drying the feet, especially in between the toes, minimizes the risk of fungal growth. Trimming nails with clean tools and avoiding sharing personal grooming items are additional steps informed by microscopic understanding.

    Footwear and Sock Choices

    Microscopic examination sheds light on how fungi thrive in dark, damp environments. Choosing breathable footwear that allows proper ventilation can significantly reduce the risk of toenail fungus. Opting for moisture-wicking socks, preferably made from natural fabrics, aids in keeping feet dry. These preventive measures, grounded in microscopic insights, contribute to creating an environment where fungi struggle to flourish.

    Regular Check-ups and Early Intervention

    Microscopic analysis not only aids in diagnosis but emphasizes the importance of regular check-ups. Periodic visits to healthcare professionals, especially for those with a history of toenail fungus, can facilitate early detection of potential issues. This proactive approach enables swift intervention, preventing the escalation of fungal infections. Early identification of microscopic indicators prompts timely treatment, reducing the impact on nail health.

    Role of Research in Advancing Microscopic Diagnosis

    Microscopic diagnosis of toenail fungus has witnessed significant advancements through ongoing research endeavors. These developments not only deepen our understanding of the condition but also pave the way for more accurate diagnosis and targeted treatment options.

    Recent Studies on Toenail Fungus

    Recent studies delve into the molecular and genetic aspects of toenail fungus, unraveling new insights into the diverse species responsible for infections. These findings inform the refinement of diagnostic criteria, aiding in the identification of specific fungal strains through microscopic analysis.

    Technological Innovations in Microscopy

    Cutting-edge technological innovations in microscopy, such as high-resolution imaging and advanced staining techniques, have revolutionized the field. These innovations enable a more detailed and precise examination of fungal structures, enhancing the diagnostic capabilities of microscopic analysis.

    Future Prospects for Improved Diagnosis and Treatment

    The ongoing trajectory of research holds promise for improved toenail fungus diagnosis and treatment. Future prospects include the development of rapid diagnostic tools, targeted therapies based on individual fungal profiles, and advancements in preventive measures. The collaborative efforts of researchers, clinicians, and technologists contribute to a future where microscopic diagnosis becomes even more precise and impactful in the management of toenail fungus.

    Final Words

    Embarking on the microscopic journey into toenail fungus has unraveled a hidden world beneath the surface. From identifying fungal species to understanding the severity of infection and linking microscopic findings to visible symptoms, this exploration provides a holistic perspective. Microscopic analysis not only guides treatment decisions but also informs preventive strategies. As research continues to advance the field, promising future prospects for improved diagnosis and treatment beckon. Armed with these insights and resources, individuals can navigate their path to healthier toenails, fostering a proactive approach to foot health and overall well-being.

    Resources and References

    For those seeking a deeper understanding of toenail fungus and microscopic diagnosis, the following resources and references provide valuable insights:

    1. American Academy of Dermatology (AAD)
    2. Centers for Disease Control and Prevention (CDC)
    3. Journal of Medical Mycology
  • What Does Giardia Look Like under  Microscope: Unveiling the Invisible

    What Does Giardia Look Like under Microscope: Unveiling the Invisible

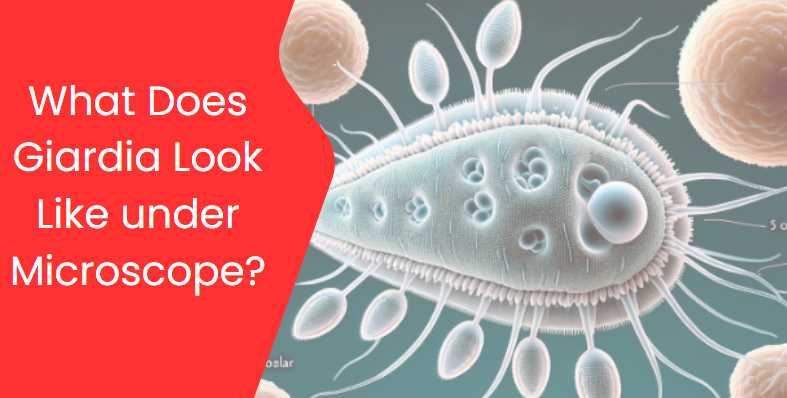
    Giardia is a microscopic parasite that causes a diarrheal illness known as giardiasis in humans. The organism exists in two forms: a motile, pear-shaped trophozoite and a non-motile, oval-shaped cyst. When examining Giardia under a microscope, you would typically observe the trophozoite and cyst stages. Here’s a brief description of each:

    1. Trophozoite Stage:
      • Shape: The trophozoite is pear-shaped or teardrop-shaped.
      • Size: It is relatively large for a single-celled organism, measuring about 10 to 20 micrometers in length.
      • Features: The trophozoite has a characteristic appearance with a pair of nuclei that are visible under the microscope. The organism is flagellated, meaning it has hair-like structures called flagella that it uses for movement.
    2. Cyst Stage:
      • Shape: The cyst is oval or round.
      • Size: It is smaller than the trophozoite, typically around 8 to 12 micrometers in diameter.
      • Features: The cyst is the dormant, resistant form of Giardia. It has a protective outer shell that allows it to survive outside the host in harsh conditions. Inside the cyst, you can find the infective structures that, when ingested, can cause infection.

    When examining a sample under the microscope, special staining techniques are often used to enhance the visibility of Giardia. One commonly used staining method is the trichrome stain, which helps highlight the characteristic features of the trophozoite and cyst stages.

    Key Characteristics of Giardia under Microscope:

    1. Shape: Giardia trophozoites, the active and feeding form of the parasite, typically have a pear or teardrop shape. They are approximately 10 to 20 micrometers in length and 5 to 15 micrometers in width.
    2. Nuclei: Giardia trophozoites have two distinct nuclei, which are often visible under high magnification. The nuclei are positioned close to the center of the organism.
    3. Flagella: Giardia possesses flagella, whip-like appendages that extend from the body. These flagella are used for movement and contribute to the parasite’s distinctive appearance. There are four pairs of flagella: two anterior, two lateral, one caudal, and one ventral.
    4. Attachment Disk: The ventral side of Giardia trophozoites contains an adhesive structure called the ventral disk, which helps the parasite attach to the intestinal lining.
    5. Cysts: In addition to the trophozoite form, Giardia can also exist in a cyst form, which is a dormant and more resistant stage. Cysts are typically round and have a thick, protective wall. The cyst form is responsible for the transmission of Giardia between hosts.

    When diagnosing giardiasis, stool samples are often examined under a microscope to detect the presence of Giardia trophozoites or cysts. The appearance of Giardia under the microscope can vary slightly, but the characteristics mentioned above are typical for this parasitic organism. Keep in mind that the exact details may vary based on the staining methods used and the specific conditions of the microscope examination.

    Giardia: A Microscopic Perspective

    Giardia, a microscopic protozoan parasite, belongs to the genus Giardia and falls under the family Giardiidae. This classification places it among diplomonads, highlighting its unique biological features. Understanding the general characteristics of Giardia is crucial for effective microscopic observation and comprehensive knowledge of its behavior.

    Table: General Characteristics of Giardia

    CharacteristicDetails
    Classification and TaxonomyGenus: Giardia; Family: Giardiidae
    Habitat and PrevalenceIntestinal tracts of humans and animals; Global prevalence, especially in areas with poor sanitation and water treatment

    Classification and Taxonomy

    Giardia’s taxonomic classification places it within the genus Giardia, highlighting its distinct biological characteristics. The family Giardiidae further categorizes it among diplomonads, showcasing its evolutionary relationships within the microbial world.

    Habitat and Prevalence

    Giardia predominantly inhabits the intestinal tracts of humans and various animals. Its prevalence is notable on a global scale, with a higher incidence observed in regions characterized by inadequate sanitation and water treatment. This distribution emphasizes the relevance of understanding Giardia’s general characteristics for global health considerations.

    Lifecycle of Giardia

    Giardia’s lifecycle is a fascinating process involving two main stages: trophozoites and cysts. This intricate life cycle plays a pivotal role in the transmission and infection dynamics of Giardia.

    Table: Lifecycle of Giardia

    StageDescription
    Trophozoite StageActive, feeding stage; pear-shaped with flagella and adhesive discs; resides in the small intestine of the host
    Cyst StageInactive, survival stage; oval-shaped with a protective cyst wall; formed as a response to harsh environmental conditions

    Trophozoite and Cyst Stages

    1. Trophozoite Stage: This is the active, feeding stage of Giardia. Trophozoites are pear-shaped, measuring approximately 10-20 micrometers in length. They possess flagella and adhesive discs, aiding in attachment to the host’s intestinal wall.
    2. Cyst Stage: The cyst stage is an inactive, survival form of Giardia. Cysts are oval-shaped and exhibit a robust cyst wall, providing protection against harsh environmental conditions. Cysts are formed as a response to factors like dehydration, facilitating transmission between hosts.

    Transmission and Infection

    The transmission of Giardia primarily occurs through the ingestion of cysts, which are resistant to environmental challenges. Once ingested, cysts release trophozoites in the host’s small intestine, leading to infection. Understanding these stages is vital for developing effective strategies for prevention, diagnosis, and treatment of Giardia infections.

    Microscopic Techniques for Giardia Observation

    Microscopic observation of Giardia requires a careful and systematic approach to ensure accurate identification and analysis. This section explores the essential techniques involved in observing Giardia under a microscope, encompassing sample collection, preparation, staining methods, and the overall importance of employing proper microscopy techniques.

    A. Sample Collection and Preparation

    Table: Sample Collection and Preparation

    TechniqueDetails
    Sample CollectionFecal samples are commonly collected for Giardia observation, ensuring representation of the intestinal environment.
    Sample PreservationImmediate fixation or refrigeration helps prevent deterioration of the sample, preserving the integrity of Giardia cysts and trophozoites.
    Concentration TechniquesCentrifugation or sedimentation may be employed to concentrate parasites, enhancing their visibility during microscopy.

    Proper sample collection and preparation are foundational steps in the microscopic observation of Giardia. Fecal samples, often the primary source, should be collected meticulously to ensure representative specimens. Immediate fixation or refrigeration of samples is crucial to prevent degradation and maintain the viability of Giardia cysts and trophozoites. Additionally, concentration techniques such as centrifugation help enhance the concentration of parasites, facilitating more accurate observations under the microscope.

    B. Staining Methods for Enhanced Visibility

    Table: Staining Methods for Giardia Observation

    Staining MethodDescription
    Direct Wet MountInvolves placing a fresh sample directly on a microscope slide with a cover slip; provides a quick observation of motile trophozoites.
    Modified Iron-Hematoxylin StainingUtilizes a staining solution containing iron and hematoxylin to enhance contrast and visibility of Giardia cysts and trophozoites.
    Immunofluorescence StainingUtilizes specific antibodies labeled with fluorescent dyes to target Giardia antigens, allowing for highly specific and sensitive detection under fluorescence microscopy.
    1. Direct Wet Mount: This technique offers a rapid observation method by placing a fresh sample directly on a microscope slide with a cover slip. It allows for the visualization of motile trophozoites, providing quick insights into Giardia activity.
    2. Modified Iron-Hematoxylin Staining: In this method, a staining solution containing iron and hematoxylin is used to enhance the contrast and visibility of Giardia cysts and trophozoites. This staining technique improves the clarity of cellular structures for more detailed microscopic examination.
    3. Immunofluorescence Staining: Immunofluorescence staining employs specific antibodies labeled with fluorescent dyes. This highly targeted approach allows for the specific and sensitive detection of Giardia antigens under fluorescence microscopy. Immunofluorescence staining is particularly valuable for enhancing specificity in identifying Giardia.

    C. Importance of Proper Microscopy Techniques

    The success of Giardia observation hinges on employing proper microscopy techniques.

    Table: Importance of Proper Microscopy Techniques

    AspectDetails
    Accuracy in IdentificationProper techniques enhance accuracy in identifying Giardia cysts and trophozoites, reducing the risk of misdiagnosis.
    Timely DiagnosisEfficient microscopy techniques contribute to timely diagnosis, enabling prompt initiation of appropriate treatment for giardiasis.
    Research AdvancementsContinuous refinement of microscopy techniques supports ongoing research, leading to advancements in our understanding of Giardia and related diseases.

    Proper microscopy techniques are paramount for accurate identification and timely diagnosis of Giardia. The use of accurate methods ensures precision in differentiating Giardia from other microorganisms, reducing the likelihood of misdiagnosis. Additionally, these techniques contribute to ongoing research advancements, fostering a deeper understanding of Giardia and its impact on human health.

    Microscopic Techniques for Giardia Observation

    Microscopic observation of Giardia is a meticulous process that involves specific techniques for sample collection, preparation, and staining to enhance visibility. These techniques are crucial for accurate identification, aiding in the diagnosis and understanding of Giardia-related diseases.

    A. Sample Collection and Preparation

    Sample Collection and Preparation Table

    TechniqueDetails
    Fecal Sample CollectionCollect fecal samples meticulously to ensure a representative specimen.
    Sample PreservationImmediately fix or refrigerate samples to prevent degradation and maintain viability.
    Concentration TechniquesUtilize centrifugation or sedimentation to enhance the concentration of parasites.

    Proper sample collection is fundamental for successful Giardia observation. Fecal samples, commonly used for this purpose, should be collected carefully to ensure they represent the intestinal environment accurately. Immediate fixation or refrigeration of samples is essential to prevent degradation, preserving the integrity of Giardia cysts and trophozoites. Concentration techniques such as centrifugation enhance the visibility of parasites under the microscope.

    B. Staining Methods for Enhanced Visibility

    Staining Methods Table

    Staining MethodDescription
    Direct Wet MountPlace a fresh sample directly on a microscope slide with a cover slip for a quick observation of motile trophozoites.
    Modified Iron-Hematoxylin StainingUse a staining solution containing iron and hematoxylin to enhance contrast and visibility of Giardia cysts and trophozoites.
    Immunofluorescence StainingUtilize specific antibodies labeled with fluorescent dyes to target Giardia antigens, allowing for highly specific and sensitive detection under fluorescence microscopy.
    1. Direct Wet Mount: This technique involves placing a fresh sample directly on a microscope slide with a cover slip. It offers a rapid observation method, allowing for the visualization of motile trophozoites and providing quick insights into Giardia activity.
    2. Modified Iron-Hematoxylin Staining: This method employs a staining solution containing iron and hematoxylin to enhance the contrast and visibility of Giardia cysts and trophozoites. The staining improves the clarity of cellular structures for more detailed microscopic examination.
    3. Immunofluorescence Staining: This technique uses specific antibodies labeled with fluorescent dyes. It allows for the specific and sensitive detection of Giardia antigens under fluorescence microscopy, enhancing specificity in identifying Giardia.

    C. Importance of Proper Microscopy Techniques

    Importance of Proper Microscopy Techniques Table

    AspectDetails
    Accuracy in IdentificationProper techniques enhance accuracy in identifying Giardia cysts and trophozoites, reducing the risk of misdiagnosis.
    Timely DiagnosisEfficient microscopy techniques contribute to timely diagnosis, enabling prompt initiation of appropriate treatment for giardiasis.
    Research AdvancementsContinuous refinement of microscopy techniques supports ongoing research, leading to advancements in our understanding of Giardia and related diseases.

    Proper microscopy techniques play a pivotal role in the accurate identification of Giardia. These techniques contribute to reducing the risk of misdiagnosis by enhancing accuracy in differentiating Giardia from other microorganisms. Timely diagnosis is facilitated through efficient microscopy techniques, enabling the prompt initiation of appropriate treatment for giardiasis.

    What Does Giardia Look Like?

    A. Detailed Description of Giardia Morphology

    Understanding the detailed morphology of Giardia is essential for accurate identification under a microscope. Giardia exists in two primary forms: trophozoites and cysts.

    1. Trophozoite Appearance

    a. Size and Shape

    Trophozoites, the active and feeding stage of Giardia, typically measure between 10-20 micrometers in length. Their pear-shaped bodies are easily distinguishable, and this size range allows for efficient movement within the host’s small intestine.

    b. Flagella and Adhesive Discs

    Giardia trophozoites exhibit characteristic flagella—hair-like structures that protrude from the body. These flagella play a crucial role in the motility of the parasite. Additionally, adhesive discs located at the anterior end of the trophozoite aid in attachment to the host’s intestinal wall, facilitating colonization.

    2. Cyst Characteristics

    a. Wall Structure

    Giardia cysts represent the dormant, survival stage of the parasite. They possess a resilient cyst wall that provides protection against environmental challenges. This cyst wall is essential for the transmission of Giardia between hosts.

    b. Size and Shape

    Cysts are typically smaller than trophozoites and exhibit an oval shape. Their smaller size contributes to the ease of transmission and dissemination in various environments.

    B. High-Resolution Microscopy Images

    To provide a visual representation of Giardia morphology, high-resolution microscopy images are invaluable. These images offer a closer look at the intricate details of trophozoites and cysts, allowing for a more comprehensive understanding of their structural features.

    High-Resolution Microscopy Images Table

    StageImage Description
    TrophozoitePear-shaped trophozoite with visible flagella and discs.
    CystOval-shaped cyst with a distinct and protective wall.

    C. Comparison with Other Microscopic Organisms

    Giardia exhibits unique features that distinguish it from other microscopic organisms commonly encountered in various environments. A comparative analysis highlights these distinctions.

    Comparison Table

    CharacteristicGiardiaOther Microorganisms
    MotilityFlagella-driven motilityVaried modes of locomotion
    AttachmentAdhesive discs for host attachmentAttachment mechanisms vary widely
    Life CycleAlternation between trophozoite and cyst stagesDiverse life cycles among different organisms
    Size10-20 micrometers (trophozoites)Size ranges widely across microorganisms

    Giardia’s flagella-driven motility, adhesive discs for host attachment, and unique life cycle set it apart from other microscopic organisms. Size variations, attachment mechanisms, and diverse life cycles among different organisms highlight the diversity within the microscopic world.

    Identifying Giardia-Associated Diseases

    A. Giardiasis and Its Symptoms

    Giardiasis, the disease caused by the protozoan parasite Giardia, manifests with a range of symptoms affecting the gastrointestinal system. Recognizing these symptoms is crucial for prompt diagnosis and effective treatment.

    Giardiasis Symptoms Table

    SymptomDescription
    DiarrheaFrequent, loose, and often foul-smelling bowel movements
    Abdominal CrampsIntermittent or continuous discomfort in the abdomen
    NauseaFeeling of queasiness or an urge to vomit
    DehydrationReduced fluid levels in the body due to persistent diarrhea
    Weight LossUnintentional weight loss resulting from malabsorption

    B. Link Between Giardia Morphology and Disease Severity

    The morphology of Giardia plays a significant role in determining the severity of associated diseases. Variations in the appearance of trophozoites under microscopic observation may correlate with the intensity of infection and clinical symptoms.

    Understanding Giardia morphology allows healthcare professionals to assess the potential impact on the patient’s health. For instance, an increased number of trophozoites or specific morphological characteristics may indicate a more severe infection, guiding clinicians in tailoring appropriate treatment strategies.

    C. Importance of Early Detection Through Microscopy

    Early detection of Giardia through microscopy is paramount for several reasons. Microscopic observation allows for the identification of Giardia cysts and trophozoites in clinical samples, confirming the presence of the parasite in the patient’s gastrointestinal tract.

    Importance of Early Detection Table

    AspectDetails
    Prompt TreatmentEarly detection enables timely initiation of specific anti-Giardia medications.
    Prevention of TransmissionIdentifying Giardia early helps implement preventive measures to limit further spread.
    Reduction of Disease SeverityEarly intervention may mitigate the severity of giardiasis, preventing complications.
    Public Health SurveillanceSwift identification supports public health efforts in monitoring and controlling outbreaks.

    Swift identification of Giardia through microscopy facilitates the prompt initiation of specific anti-Giardia medications, reducing the duration and severity of symptoms. Additionally, early detection aids in implementing preventive measures to limit further transmission, protecting both individual patients and the broader community. By reducing disease severity, early intervention can prevent complications associated with giardiasis, contributing to improved patient outcomes.

    3 Tips for Efficient Giardia Observation

    A. Proper Microscope Usage

    Efficient Giardia observation begins with mastering microscope usage. Regular calibration and maintenance ensure optimal performance. Adjusting lighting and focus settings enhances clarity, aiding in the identification of Giardia cysts and trophozoites.

    B. Sample Handling and Preparation Tips

    Meticulous sample handling is crucial. Ensure accurate representation by collecting fecal samples carefully. Immediate fixation or refrigeration prevents sample degradation, preserving Giardia integrity. Utilize concentration techniques like centrifugation for enhanced visibility during microscopy.

    C. Common Challenges and Troubleshooting

    Be prepared to tackle common challenges encountered during Giardia observation. Issues such as debris interference or insufficient staining require troubleshooting. Regularly check equipment and adjust techniques to overcome challenges, ensuring accurate and reliable results in Giardia identification.

    Facts and Statistics

    A. Key Facts about Giardia

    1. Ubiquitous Parasite: Giardia is a ubiquitous protozoan parasite that infects the small intestine of humans and animals, causing giardiasis.
    2. Waterborne Transmission: The primary mode of transmission is through contaminated water sources, emphasizing the importance of water hygiene.
    3. Resilient Cysts: Giardia exists in two stages, with cysts being the dormant, environmentally resistant form, allowing for survival outside a host.

    B. Statistics on Global Prevalence and Incidence

    1. Worldwide Distribution: Giardia has a global presence, affecting both developed and developing countries, with varying degrees of prevalence.
    2. High Incidence in Developing Regions: Developing regions often experience higher incidences due to inadequate sanitation and limited access to clean water.
    3. Common Waterborne Outbreaks: Waterborne outbreaks contribute significantly to the prevalence of giardiasis, emphasizing the importance of clean water initiatives.

    C. Impact on Vulnerable Populations

    1. Children and Immunocompromised Individuals: Giardia infections can have severe consequences for vulnerable populations, particularly children and those with compromised immune systems.
    2. Malnutrition and Growth Impairment: Chronic giardiasis in children may lead to malnutrition and growth impairment, affecting long-term health.
    3. Increased Susceptibility in Immunocompromised Individuals: Immunocompromised individuals, such as those with HIV/AIDS, face a higher risk of prolonged and severe Giardia infections, posing additional health challenges.

    Understanding these facts and statistics is crucial for public health initiatives, emphasizing the need for global efforts in sanitation, clean water provision, and targeted interventions to protect vulnerable populations.

    Final Words

    In exploring Giardia under a microscope, we unveiled its distinct trophozoite and cyst stages, each with unique morphological features. High-resolution microscopy images provided a visual journey into the microscopic world of Giardia, showcasing its pear-shaped trophozoites and oval-shaped cysts.

    Microscopic studies are pivotal in deciphering Giardia-related diseases. Accurate identification through microscopy guides effective treatment, early detection prevents transmission, and ongoing research enhances our understanding. The microscope remains a powerful tool in unraveling the mysteries of Giardia, contributing significantly to public health efforts worldwide.

    Resources and References

    A. Recommended Textbooks and Journals

    1. Textbooks:
      • “Parasitic Diseases” by Despommier et al.
      • “Medical Microbiology” by Murray et al.
    2. Journals:
      • “Journal of Parasitology”
      • “Clinical Microbiology Reviews”

    B. Online Resources and Databases

    1. Websites:
    2. Databases:

    C. Citations for Scientific Studies and Research Papers

    1. Scientific Studies:
      • Thompson RCA, Hopkins RM, Homan WL. “Nomenclature and genetic groupings of Giardia infecting mammals.” Parasitology Today, 2000.
    2. Research Papers:
      • Adam RD. “Biology of Giardia lamblia.” Clinical Microbiology Reviews, 2001.

    These resources provide a comprehensive foundation for studying Giardia, from authoritative textbooks and journals to online databases and key scientific studies.