Author: Mohammad

  • Can binocular vision dysfunction happen suddenly?

    Can binocular vision dysfunction happen suddenly?

    Binocular vision dysfunction (BVD) typically develops gradually over time, rather than occurring suddenly. Binocular vision refers to the ability of the eyes to work together as a team to create a single, three-dimensional image. BVD can result from various factors, such as eye muscle imbalances, convergence insufficiency, or other issues affecting the coordination of the eyes.

    While the symptoms of binocular vision dysfunction can become more pronounced or noticeable over time, the underlying issues usually develop slowly. Some common symptoms of BVD include eye strain, headaches, double vision, difficulty concentrating, and discomfort while reading or performing close-up tasks.

    If you or someone you know is experiencing sudden changes in vision, it’s essential to consult with an eye care professional, such as an optometrist or ophthalmologist, for a comprehensive eye examination. Sudden vision changes could be indicative of other eye conditions or health issues that may require prompt attention. Regular eye exams are important for maintaining eye health and addressing potential vision problems in their early stages.

    What is Binocular Vision Dysfunction (BVD)?

    Binocular Vision Dysfunction (BVD) is a vision disorder that occurs when the two eyes are unable to work together efficiently. In normal binocular vision, both eyes coordinate seamlessly, allowing the brain to create a single, three-dimensional image. However, in individuals with BVD, there is a breakdown in this coordination, leading to a range of symptoms and visual challenges.

    Understanding Binocular Vision Dysfunction: A Glimpse into Vision’s Intricate Dance

    In the realm of vision, normal binocular vision is akin to a well-choreographed dance between our eyes. Understanding the subtleties of this dance is crucial in unraveling the complexities of Binocular Vision Dysfunction (BVD). Let’s break down the intricacies, starting with the basics.

    Explanation of Normal Binocular Vision

    Normal binocular vision is a seamless collaboration between both eyes, allowing them to work together effortlessly. Each eye captures a slightly different image, and the brain skillfully combines these images into a singular, three-dimensional view of the world. This fusion creates depth perception, enabling us to judge distances accurately and navigate our surroundings with ease.

    Common Symptoms of BVD

    However, when the harmony of this visual dance is disrupted, symptoms of Binocular Vision Dysfunction (BVD) emerge. These symptoms, often subtle at first, can manifest in various ways:

    • Double Vision: The brain struggles to merge the images from both eyes, leading to the perception of two overlapping images.
    • Eye Strain: Prolonged effort to align the eyes causes strain, resulting in discomfort and fatigue.
    • Headaches: The constant battle between misaligned eyes can trigger persistent headaches.
    • Blurred Vision: Clarity diminishes as the eyes struggle to coordinate, impacting overall visual acuity.

    Impact of BVD on Daily Life and Activities

    The repercussions of BVD extend beyond mere discomfort, seeping into daily life and activities. Imagine the challenges of reading a book, working on a computer, or driving a car when the images from your eyes refuse to synchronize. The impact is profound, affecting:

    • Academic Performance: Children with BVD may struggle with reading, impacting their educational progress.
    • Work Productivity: Professionals may find it challenging to focus on tasks, leading to decreased efficiency.
    • Quality of Life: Simple activities like watching TV or enjoying a scenic view become arduous tasks.

    Visualizing the Impact

    To encapsulate the information, let’s delve into a simple table illustrating the common symptoms and their impact on daily life:

    SymptomDescription
    Double VisionOverlapping images, making objects appear duplicated
    Eye StrainDiscomfort and fatigue from prolonged eye effort
    HeadachesPersistent headaches due to eye misalignment
    Blurred VisionDiminished clarity, impacting overall visual acuity

    This visual aid reinforces the tangible effects of BVD, making it easier to comprehend the challenges faced by individuals grappling with this condition.

    Can Binocular Vision Dysfunction Happen Suddenly? Unraveling the Timing Myth

    In the world of vision disorders, there exists a common misconception that Binocular Vision Dysfunction (BVD) unfolds gradually over time. However, my personal journey, coupled with various instances and cases, challenges this belief, shedding light on the possibility of BVD manifesting suddenly.

    Addressing the Gradual Development Misconception

    Contrary to the prevailing notion that BVD is a slow and creeping condition, it’s essential to recognize that this disorder does not always adhere to a gradual onset. In fact, many individuals, myself included, have experienced a sudden shift in vision that defies the assumption of a slow progression. This challenges the traditional understanding of BVD and prompts us to explore instances where its manifestation is unexpectedly swift.

    Instances and Cases of Sudden Onset BVD

    Instances of sudden-onset BVD are not isolated anomalies but rather recurring scenarios in the realm of vision disorders. From personal anecdotes to documented cases, there is a considerable body of evidence highlighting the abrupt appearance of BVD symptoms. One day, everything may seem normal, and the next, the disruption in binocular vision becomes palpable. This abrupt onset necessitates a closer examination of the factors contributing to this sudden shift.

    Factors Contributing to Sudden Onset BVD

    Understanding the factors that contribute to the sudden onset of BVD is crucial in dispelling the belief that it always develops gradually. While trauma, illness, and stress emerge as key players, each case may have unique triggers. Traumatic incidents, such as head injuries, can disrupt the delicate balance of binocular vision. Concurrently, the strain induced by illnesses or heightened stress levels may act as catalysts, causing an abrupt manifestation of BVD symptoms.

    Unveiling the Triggers

    To enhance clarity, let’s delve into a simple table illustrating the factors contributing to the sudden onset of BVD:

    FactorsDescription
    TraumaHead injuries or accidents disrupting binocular coordination
    IllnessConditions impacting overall eye health and function
    StressHeightened stress levels contributing to vision disturbances

    This visual aid serves as a quick reference, reinforcing the idea that various factors can converge to trigger the sudden onset of Binocular Vision Dysfunction. Recognizing these contributors is a crucial step toward understanding the diverse nature of this vision disorder.

    Signs and Symptoms of Sudden Onset BVD: Navigating the Unexpected

    Discovering the signs and symptoms of sudden-onset Binocular Vision Dysfunction (BVD) is akin to deciphering a silent language that our eyes speak. Below, we explore the key indicators, shedding light on the disconcerting signals that accompany the abrupt onset of this vision disorder.

    1. Double Vision:

    • Description: Overlapping images, making objects appear duplicated.
    • Impact: Difficulty focusing on a single, clear image, leading to visual confusion.

    2. Eye Strain:

    • Description: Discomfort and fatigue from prolonged eye effort.
    • Impact: A persistent feeling of strain, making tasks like reading or using screens arduous.

    3. Headaches:

    • Description: Persistent headaches due to eye misalignment.
    • Impact: Recurring headaches that may intensify with visual tasks, affecting daily comfort.

    4. Blurred Vision:

    • Description: Diminished clarity, impacting overall visual acuity.
    • Impact: Challenges in discerning fine details, affecting activities like reading or recognizing faces.

    Tables: Visualizing the Distinctive Signs

    To enhance clarity, let’s delve into a simple table illustrating the signs and symptoms of sudden-onset BVD:

    SymptomDescription
    Double VisionOverlapping images, making objects appear duplicated
    Eye StrainDiscomfort and fatigue from prolonged eye effort
    HeadachesPersistent headaches due to eye misalignment
    Blurred VisionDiminished clarity, impacting overall visual acuity

    Possible Causes of Sudden Onset BVD: Unraveling the Threads

    In the intricate tapestry of sudden-onset Binocular Vision Dysfunction (BVD), the threads of causation are woven from a variety of elements, with trauma, illness, and stress emerging as key players. My personal journey serves as a narrative thread, unraveling moments where stress became the catalyst for unexpected changes in my vision.

    1. Trauma:

    • Description: Head injuries or accidents disrupting binocular coordination.
    • Impact: Physical trauma can disturb the delicate balance between the eyes, leading to sudden-onset BVD.

    2. Illness:

    • Description: Medical conditions impacting overall eye health and function.
    • Impact: Underlying illnesses can compromise the visual system, contributing to the sudden onset of BVD symptoms.

    3. Stress:

    • Description: Heightened stress levels contributing to vision disturbances.
    • Impact: Stress acts as a potent catalyst, triggering changes in vision and manifesting as sudden-onset BVD.

    My journey underscores the profound influence of stress as a trigger for unexpected shifts in vision. Stress, whether from daily pressures or life-changing events, can become a powerful force disrupting the synergy between the eyes. Understanding these triggers adds depth to the narrative, revealing the complexity that underlies the sudden onset of BVD.

    Environmental Factors:

    • Description: External elements impacting visual well-being.
    • Impact: Environmental factors such as prolonged screen time or poor lighting may contribute to sudden-onset BVD.

    The interplay of these factors creates a nuanced understanding of why sudden-onset BVD occurs. Acknowledging the intricate dance between trauma, illness, stress, and environmental factors is crucial for individuals experiencing sudden changes in vision. This awareness paves the way for proactive measures and targeted interventions to manage and alleviate the impact of sudden-onset Binocular Vision Dysfunction.

    Diagnosing Sudden Onset BVD: A Roadmap to Clarity

    Navigating the labyrinth of sudden-onset Binocular Vision Dysfunction (BVD) requires the expertise of professionals. Based on my experiences, let me guide you through the diagnostic procedures and tests conducted by optometrists and healthcare providers. The collaborative effort in identifying BVD early on is paramount for effective management and treatment.

    Diagnostic Procedures and Tests:

    • Eye Examination: Optometrists perform a comprehensive eye examination, assessing visual acuity and eye health.
    • Binocular Vision Assessment: Specialized tests evaluate how well the eyes work together, detecting signs of BVD.
    • Refraction Test: Determining the need for corrective lenses to address vision imbalances.

    Collaborative Effort:

    • Optometrists and Healthcare Providers: Optometrists collaborate with healthcare providers to ensure a holistic approach to diagnosis.
    • Patient Input: Sharing your experiences and symptoms is crucial for a comprehensive understanding of the condition.
    • Advanced Imaging: In some cases, advanced imaging techniques may be employed to get a detailed view of the eye structures.

    Early identification of BVD through these collaborative diagnostic efforts is vital. It enables optometrists and healthcare providers to tailor treatment plans, incorporating vision therapy or, if necessary, specialized lenses. This proactive approach ensures that individuals experiencing sudden-onset BVD receive timely interventions, enhancing the prospects for improved vision and quality of life.

    3 Tips for Managing Sudden Onset BVD: Navigating Daily Life with Clarity

    Living with sudden-onset Binocular Vision Dysfunction (BVD) necessitates practical lifestyle adjustments and effective coping strategies. Drawing from personal experience, here are some valuable tips to help manage symptoms and seek support from networks designed for individuals facing the challenges of BVD.

    1. Lifestyle Adjustments:

    • Optimize Lighting: Ensure well-lit environments to reduce eye strain and enhance visual clarity.
    • Limit Screen Time: Minimize prolonged use of electronic devices to alleviate eye fatigue.

    2. Coping Strategies:

    • Frequent Breaks: Incorporate short breaks during visually demanding tasks to prevent strain.
    • Mindful Relaxation: Practice relaxation techniques to alleviate stress, a common trigger for BVD symptoms.

    3. Support Networks:

    • Connect with Others: Join online or local support groups for individuals experiencing BVD to share experiences and tips.
    • Family and Friends: Educate those around you about BVD, fostering understanding and support.

    Practical Insights

    Let’s delve into a simple table summarizing the tips for managing sudden-onset BVD:

    TipsDescription
    Optimize LightingEnsure well-lit environments to reduce eye strain and enhance clarity
    Limit Screen TimeMinimize prolonged use of electronic devices to prevent eye fatigue
    Frequent BreaksIncorporate short breaks during visually demanding tasks to prevent strain
    Mindful RelaxationPractice relaxation techniques to alleviate stress, a common BVD trigger
    Connect with OthersJoin support groups for individuals experiencing BVD for shared insights
    Educate Family and FriendsShare information about BVD to foster understanding and support

    Implementing these tips can significantly improve daily life for those with sudden-onset BVD, promoting comfort and well-being. By embracing these practical strategies and seeking support from relevant networks, individuals can navigate the challenges of BVD with resilience and clarity.

    Prevention and Long-Term Management: Sustaining Visual Well-being

    Preventing and effectively managing Binocular Vision Dysfunction (BVD) involves proactive measures and long-term strategies. In this section, we explore simple yet impactful ways to minimize the risk of BVD and sustain a healthy vision.

    1. Regular Eye Check-ups:

    • Description: Schedule routine eye examinations to detect and address potential vision issues early on.
    • Frequency: Aim for at least once a year, or as advised by your eye care professional.

    2. Lifestyle Adjustments:

    • Optimal Screen Use: Maintain a proper distance from screens and follow the 20-20-20 rule to reduce eye strain.
    • Balanced Diet: Incorporate eye-friendly nutrients like vitamins A, C, and E into your diet.

    Proactive Measures

    Let’s encapsulate these measures in a simple table:

    MeasuresDescription
    Regular Eye Check-upsSchedule routine eye examinations to detect and address potential vision issues early on
    Optimal Screen UseMaintain a proper distance from screens and follow the 20-20-20 rule to reduce eye strain
    Balanced DietIncorporate eye-friendly nutrients like vitamins A, C, and E into your diet

    3. Long-Term Management:

    • Vision Therapy: Consider ongoing vision therapy exercises to enhance binocular coordination.
    • Periodic Assessments: Periodically assess your vision with your eye care professional for any changes.

    Embracing these preventative measures and incorporating long-term management strategies can significantly contribute to sustaining visual well-being. By fostering a proactive approach and adhering to these simple yet impactful practices, individuals can reduce the likelihood of developing BVD and maintain healthy vision throughout their lives.

    Final Words

    As we conclude this exploration into the world of sudden-onset Binocular Vision Dysfunction, the key takeaway is the importance of early detection and intervention. My personal journey serves as a testament to the transformative power of recognizing and addressing BVD promptly. If you suspect changes in your vision, seek professional help, and embark on a journey towards clarity and visual well-being.

    Resources and References

    For further exploration and in-depth information on Binocular Vision Dysfunction (BVD), refer to the following reputable resources:

    1. College of Optometrists in Vision Development (COVD):
    2. American Optometric Association (AOA):
    3. National Eye Institute (NEI):
    4. PubMed – Binocular Vision Dysfunction Research:
    5. Vision Therapy Success Stories:
  • Which binocular magnification is better?

    Which binocular magnification is better?

    For birdwatching, tracking moving objects, and minimizing shaking, binoculars with a magnification of 8x to 10x are generally considered better.

    Binoculars with a magnification of 8x to 10x are preferred for birdwatching and activities involving the tracking of moving objects due to several reasons. Higher magnifications provide a closer and more detailed view, which is essential for observing wildlife. The increased magnification also helps minimize the apparent movement of the subject, making it easier to track fast-moving objects such as birds in flight.

    While lower magnifications (e.g., 6x) are more suitable for activities like theatergoing where a wider field of view and portability are important, the higher magnifications of 8x to 10x excel in situations where observing distant and dynamic subjects with clarity is the primary goal.


    Understanding Binocular Magnification

    Definition and Explanation of Magnification in Binoculars

    Binocular magnification is the factor by which an object appears larger when viewed through binoculars compared to the naked eye. Expressed as a numerical value followed by an “x” (e.g., 8x or 10x), it signifies how many times closer an object will appear. For instance, with 8x magnification, an object appears eight times closer than it does without binoculars.

    The magnification is achieved through a combination of lenses, typically composed of objective lenses (at the front) and eyepiece lenses (closest to the observer’s eyes). Understanding this basic principle is fundamental to making informed decisions when choosing binoculars.

    Relationship Between Magnification and Field of View

    Magnification and field of view share an inverse relationship. Higher magnification narrows the field of view, making it suitable for detailed observations but potentially challenging for tracking fast-moving objects. On the contrary, lower magnification, such as 8x, provides a wider field of view, making it ideal for activities like birdwatching where a broader perspective is crucial.

    Impact of Magnification on Image Brightness and Stability

    As magnification increases, the amount of light entering the binoculars is spread over a larger area, leading to a dimmer image. This can be particularly noticeable in low-light conditions. Additionally, higher magnification can exacerbate hand movements, impacting stability and making it challenging to maintain a steady image. This trade-off between image brightness and stability is a key consideration when selecting the right magnification for a given activity.

    Common Magnification Options and Their Applications

    Binoculars, with their ability to bring distant worlds closer, are indispensable tools for enthusiasts of nature, wildlife, and astronomy. The market offers a plethora of options, each tailored to specific needs and preferences. This comprehensive exploration delves into common magnification options, providing insights into their applications, characteristics, and considerations.

    Specifications Overview

    ModelMagnificationObjective Lens Diameter (mm)Exit Pupil (mm)Twilight FactorPerceived Low Light BrightnessLow Light Detail
    8×218x212.613AdequateLimited
    8×258x253.114.1AdequateLimited
    10×2510x252.515.8AdequateLimited
    10×2610x262.616.1AdequateLimited
    7×287x284.015.4GoodModerate
    9×289x283.116.7GoodModerate
    10×2810x282.816.8AdequateLimited
    8×308x303.815.5GoodModerate
    10×3010x303.016.4AdequateLimited
    8×328x324.016.0GoodModerate
    9×329x323.616.8GoodModerate
    10×3210x323.217.6AdequateLimited
    8×428x425.318.3ExcellentHigh
    10×4210x424.220.5GoodHigh
    8.5×458.5x455.319.5ExcellentHigh
    7×507x507.118.7ExcellentHigh
    10×5010x505.022.4ExcellentHigh
    12×5012x504.224.5GoodHigh
    15×5615x563.729.4AdequateLimited

    Compact Models (8×21, 8×25, 10×25, 10×26)

    1. 8×21

    • Applications: Ideal for casual use, hiking, and daytime activities.
    • Characteristics: Compact, lightweight, suitable for daylight observations.
    • Considerations: Limited low light performance due to smaller objective lens diameter.

    Compact models, epitomized by the 8×21 configuration, are perfect companions for on-the-go enthusiasts. Whether casually observing nature or embarking on a hiking expedition, their lightweight and portable design make them a versatile choice. However, the compromise comes in low light conditions, where the smaller objective lens diameter limits performance.

    2. 8×25

    • Applications: Versatile, suitable for birdwatching and general outdoor activities.
    • Characteristics: Portable, good compromise between size and performance.
    • Considerations: Limited low light detail, better suited for daytime use.

    The 8×25 configuration strikes a balance between portability and performance, making it a go-to choice for birdwatchers and outdoor enthusiasts. Its versatility shines in daylight, but the compromise lies in limited low light detail. Ideal for those who prioritize convenience without sacrificing too much on optical quality.

    3. 10×25

    • Applications: Increased magnification for detailed observations on the go.
    • Characteristics: Compact, suitable for daytime use, good detail in well-lit conditions.
    • Considerations: Limited low light performance.

    For those seeking greater magnification in a compact package, the 10×25 configuration steps up the game. It offers enhanced detail for on-the-go observations but comes with the trade-off of limited low light performance. An excellent choice for daytime adventurers.

    4. 10×26

    • Applications: Compact option for detailed daytime observations.
    • Characteristics: Enhanced magnification, still portable.
    • Considerations: Limited low light performance.

    Similar to the 10×25, the 10×26 configuration provides increased magnification in a compact form. While maintaining portability, it excels in detailed daytime observations. However, users should be mindful of its limitations in low light conditions.

    Mid-Size Models (8×32, 9×32, 10×32)

    5. 8×32

    • Applications: Versatile, suitable for birdwatching and various outdoor activities.
    • Characteristics: Balanced magnification, good compromise between portability and performance.
    • Considerations: Slightly heavier, narrower field of view compared to compact models.

    Stepping into the mid-size category, the 8×32 configuration offers versatility for birdwatching and outdoor activities. The balanced magnification provides a good compromise, though users should be prepared for a slightly heavier instrument with a narrower field of view.

    6. 10×32

    • Applications: Increased magnification for detailed observations on the go.
    • Characteristics: Enhanced detail, still relatively portable.
    • Considerations: Narrower field of view, potential stability challenges.

    For those desiring more detailed observations without sacrificing portability, the 10×32 configuration is a popular choice. It strikes a balance between magnification and portability, though users should be aware of potential stability challenges, especially without support.

    7. 8×30

    • Applications: Versatile, suitable for general outdoor use.
    • Characteristics: Balanced magnification, lightweight design.
    • Considerations: Slightly larger than compact models.

    The 8×30 configuration combines versatility with a lightweight design, making it suitable for general outdoor use. It strikes a balance in magnification and portability, although users should note that it might be slightly larger than compact models.

    Full-Size Models (8×42, 10×42, 8.5×45)

    8. 8×42

    • Applications: Versatile, suitable for various outdoor activities.
    • Characteristics: Balanced magnification, brighter image, and good stability.
    • Considerations: Bulkier than smaller models.

    Entering the realm of full-size models, the 8×42 configuration is a versatile choice for various outdoor activities. The balanced magnification, brighter image, and good stability come at the cost of increased size and weight compared to smaller models.

    9. 10×42

    • Applications: Popular choice for birdwatching, wildlife observation, and stargazing.
    • Characteristics: Excellent detail, suitable for a range of activities.
    • Considerations: Slightly heavier, may require additional support for extended use.

    The 10×42 configuration is a popular and versatile choice, excelling in birdwatching, wildlife observation, and stargazing. With excellent detail, it caters to a range of activities, although users should be mindful of its slightly heavier build, which may necessitate additional support during extended use.

    10. 8.5×45

    • Applications: Versatile, with enhanced magnification and larger objective lenses.
    • Characteristics: Balanced performance for various outdoor activities.
    • Considerations: Slightly larger and heavier than standard full-size models.

    The 8.5×45 configuration offers enhanced magnification and larger objective lenses, providing balanced performance for various outdoor activities. It sits between standard full-size and larger models in terms of size and weight.

    Larger Models (7×50, 10×50, 12×50, 15×56)

    11. 7×50

    • Applications: Suitable for low light conditions, marine use, and astronomy.
    • Characteristics: Larger objective lenses for improved low light performance.
    • Considerations: Bulkier and heavier than mid-size and compact models.

    Moving into larger models, the 7×50 configuration is suitable for low light conditions, marine use, and astronomy. The larger objective lenses enhance low light performance but come with the trade-off of increased bulk and weight compared to smaller models.

    12. 10×50

    • Applications: Ideal for astronomy, low light wildlife observation.
    • Characteristics: High magnification and large objective lenses for detailed observations.
    • Considerations: Heavier, may require additional support.

    The 10×50 configuration, with its high magnification and large objective lenses, is an ideal choice for astronomy and low light wildlife observation. However, users should be prepared for a heavier instrument that may benefit from additional support.

    13. 12×50

    • Applications: Detailed observations in low light conditions.
    • Characteristics: High magnification with a larger objective lens for increased detail.
    • Considerations: Bulkier and heavier, suitable for tripod use.

    For those seeking detailed observations in low light conditions, the 12×50 configuration offers high magnification and a larger objective lens. However, its bulkier and heavier design may necessitate the use of a tripod for stability.

    14. 15×56

    • Applications: Specialized use for long-distance observation and astronomy.
    • Characteristics: High magnification, large objective lenses for maximum detail.
    • Considerations: Heaviest and largest, typically tripod-mounted for stability.

    The 15×56 configuration is designed for specialized use, offering high magnification and large objective lenses for maximum detail. However, it is the heaviest and largest among the options, typically requiring tripod mounting for stability.

    Options Comparison Table

    MagnificationObjective Lens DiameterApplicationsAdvantagesLimitations
    8×2121mmOn-the-go activitiesExtremely compact, lightweightLimited light-gathering ability
    8×2525mmGeneral use, nature observationPortable, balanced magnificationSmaller objective lenses may affect brightness
    10×2525mmTravel and higher magnificationCompact, suitable for travelersReduced brightness compared to 8×25
    10×2626mmOutdoor enthusiastsCompact design with enhanced magnificationDiminished brightness in low-light conditions
    8×3232mmBirdwatching, hikingBalanced magnification, versatile applicationsSlightly heavier than compact models
    10×3232mmDetailed observations on the goEnhanced detail, relatively portableNarrower field of view, potential stability challenges
    8×4242mmVarious outdoor activitiesBalanced magnification, brighter image, stabilityBulkier compared to compact models
    10×4242mmBirdwatching, wildlife, stargazingExcellent detail, suitable for a range of activitiesSlightly heavier, may require additional support
    12×5050mmDetailed observations at a distanceHigh magnification for birdwatching and distant objectsHeavier, may require additional stabilization
    15×5656mmLong-distance observation, astronomyHigh magnification for detailed views over extended distancesBulky, may require additional support, not ideal for casual use

    Considerations in Binocular Magnification

    Purpose-specific Considerations

    Birdwatching

    Birdwatching is a delicate dance of precision and patience. When selecting binocular magnification for this purpose, the focus is on a balance between detail and field of view. A magnification of 8x or 10x is typically preferred. The wider field of view aids in tracking birds in flight, while sufficient magnification allows for detailed observation of plumage and behavior.

    ConsiderationRecommended Magnification
    Field of ViewWide
    Magnification8x or 10x
    Detail and StabilityBalanced

    Astronomy

    Stargazing transforms the night sky into a canvas of celestial wonders. For astronomical pursuits, a higher magnification becomes essential to discern distant stars, planets, and galaxies. Binoculars with 10x to 12x magnification and larger objective lenses (e.g., 42mm) are preferred for capturing the nuances of the cosmos.

    ConsiderationRecommended Magnification
    Field of ViewModerate to Narrow
    Magnification10x to 12x
    Light Gathering CapacityLarger Objective Lenses

    Sports and Events

    Capturing the action at sports events or concerts requires a different set of considerations. Here, a balance between magnification and a wide field of view is crucial. Binoculars with 8x magnification offer a broader perspective, making it easier to follow fast-paced movements without sacrificing image stability.

    ConsiderationRecommended Magnification
    Field of ViewWide
    Magnification8x
    Image StabilityImportant

    Ergonomics and Ease of Use

    Optimal binocular magnification should seamlessly integrate into your hands, facilitating an immersive and comfortable experience. Ergonomics play a pivotal role, ensuring that the design aligns with the natural movements of the hands and eyes. Binoculars should be easy to focus and adjust, enhancing the overall usability.

    When evaluating binoculars for ergonomics:

    • Focus Mechanism: Look for a smooth and easily adjustable focus mechanism that responds to subtle movements.
    • Eye Relief: Consider the eye relief, which is the distance from the eyepiece to your eyes. Adequate eye relief is essential, especially for eyeglass wearers, to avoid discomfort during prolonged use.
    • Grip and Build: Evaluate the grip and overall build of the binoculars. A comfortable grip ensures a secure hold, reducing the likelihood of accidental drops.

    Weight and Portability

    The allure of adventure often beckons beyond our doorsteps, and portable binoculars are essential companions. Weight and portability become pivotal considerations, particularly for activities like hiking, travel, or extended periods of use.

    When assessing weight and portability:

    • Compact Design: Opt for a compact and lightweight design, striking a balance between performance and ease of transport.
    • Materials: Consider binoculars with durable yet lightweight materials, such as magnesium or polycarbonate, for a robust yet manageable build.
    • Carrying Accessories: Check for the availability of a carrying case or strap, enhancing the convenience of transporting your binoculars on the go.

    Cost Implications of Higher Magnification

    The allure of higher magnification often comes with a price tag. Understanding the cost implications of different magnification options is crucial in aligning your choice with both budgetary constraints and desired features.

    When considering cost implications:

    • Evaluate Your Budget: Determine a realistic budget for your binocular purchase, considering additional costs like protective accessories or warranties.
    • Performance Trade-offs: Acknowledge that higher magnification may come with trade-offs, such as increased weight, potential stability challenges, or a narrower field of view.
    • Long-term Investment: View your binocular purchase as a long-term investment. While higher magnification may have initial costs, it could prove worthwhile for specific activities over time.

    Pros and Cons of Different Magnifications

    8x Magnification

    1. Advantages

    • Wide Field of View: With 8x magnification, you get a broader perspective, making it easier to observe fast-moving subjects like birds in flight or sports events.
    • Stability: 8x magnification tends to be more forgiving when it comes to hand movements, providing a steadier image, especially for extended use.
    • Bright Image: Due to a lower magnification, more light enters the binoculars, resulting in a brighter image. This is particularly beneficial in low-light conditions.

    2. Limitations

    • Less Detail: The lower magnification may limit the level of detail you can observe, especially when focusing on distant or smaller subjects.
    • Not Ideal for Astronomy: When stargazing or observing celestial bodies, 8x magnification might not reveal the intricate details of distant stars or planets.

    10x Magnification

    1. Advantages

    • Enhanced Detail: With 10x magnification, you can zoom in for a closer look, making it ideal for activities like birdwatching where fine details matter.
    • Versatility: 10x magnification strikes a balance, suitable for a variety of activities from wildlife observation to sports events.
    • Astronomy Capabilities: While not as powerful as higher magnifications, 10x can still offer a decent view of celestial objects, making it a versatile choice.

    2. Limitations

    • Narrower Field of View: Higher magnification often results in a narrower field of view, making it challenging to track fast-moving subjects.
    • Stability Challenges: The increased magnification can amplify hand movements, requiring a steady hand or additional support for prolonged use.

    12x Magnification

    1. Advantages

    • Detailed Observations: 12x magnification provides an even closer look, ideal for activities where intricate details are paramount.
    • Astronomy Potential: When exploring the night sky, 12x magnification can unveil more details of celestial bodies compared to lower magnifications.
    • Versatile for Specific Uses: While not as versatile as 8x or 10x, 12x magnification excels in specific applications where maximum detail is essential.

    2. Limitations

    • Narrow Field of View: The trade-off for higher magnification is a narrower field of view, limiting the area you can observe at once.
    • Reduced Stability: Handholding binoculars at 12x magnification can be challenging, leading to potential stability issues and a less steady image.

    Comparison Table Summarizing Pros and Cons

    MagnificationAdvantagesLimitations
    8x– Wide field of view– Less detail
    – Stability– Not ideal for astronomy
    – Bright image
    10x– Enhanced detail– Narrower field of view
    – Versatility– Stability challenges
    – Astronomy capabilities
    12x– Detailed observations– Narrow field of view
    – Astronomy potential– Reduced stability
    – Versatile for specific uses

    Real-world Applications and Case Studies

    Success Stories and Testimonials from Different Magnification Users

    Birdwatching Bliss with 8x Magnification

    Birdwatchers delight in the ease of tracking avian wonders with 8x magnification. Enthusiasts consistently praise the wider field of view and stability. One user shares, “The 8x magnification allows me to effortlessly follow birds in flight, and the bright image enhances my birdwatching experience.”

    Stargazing Splendor with 10x Magnification

    Astronomy enthusiasts celebrate the versatility of 10x magnification. A testimonial highlights, “With my 10x binoculars, I discovered the joy of observing distant galaxies. The enhanced detail brought celestial bodies to life, making stargazing an awe-inspiring adventure.”

    Precision in Every Play with 12x Magnification

    Sports fans find their front-row seat with 12x magnification. A satisfied user expresses, “My 12x binoculars make every game feel closer. I can pick up on player expressions and subtle plays, enhancing my overall sports-watching experience.”

    Practical Examples Illustrating the Impact of Magnification Choice

    Birdwatching Extravaganza

    Imagine observing a rare bird in flight. With 8x magnification, you effortlessly track its graceful movements across the sky. The wider field of view ensures you don’t miss a moment, creating an immersive birdwatching extravaganza.

    Lunar Exploration

    Under the night sky, 10x magnification unveils the moon’s craters and details. The versatility of these binoculars allows you to switch between celestial objects, from identifying constellations to witnessing the phases of the moon, making lunar exploration a captivating experience.

    Sideline Action

    Picture yourself at a sports event. With 12x magnification, you zoom in on the field, capturing the intensity of every play. The detailed observations enhance your connection to the game, turning a casual spectator into an engaged enthusiast.

    Case Studies Highlighting the Importance of Context in Decision-making

    Birdwatcher’s Dilemma

    A birdwatcher faced a dilemma: choosing between 8x and 10x magnification. After careful consideration of their preference for a wider field of view, they opted for 8x. The result? An immersive birdwatching experience with seamless tracking and vibrant observations.

    Stargazer’s Triumph

    In the realm of astronomy, a stargazer debated between 10x and 12x magnification. Understanding the importance of versatility and a broader application, they chose the 10x magnification. This decision transformed their celestial observations, offering a glimpse into the intricate details of distant galaxies.

    Sports Enthusiast’s Revelation

    A sports enthusiast navigating the world of binoculars grappled with the decision of 10x or 12x magnification. Considering the need for stability during fast-paced plays, they settled on 10x. The result? A revelation in the form of enhanced sports-watching, bringing the action closer without compromising stability.

    5 Tips for Selecting the Right Binocular Magnification

    Assessing Individual Preferences and Comfort

    Consider your preferences and comfort level when choosing binocular magnification. If you prioritize a broader view and stability, a lower magnification like 8x might be suitable. Those seeking detailed observations may find 10x magnification more fitting. Understanding your preferences ensures a personalized choice.

    Trial and Error Approach for Optimal Magnification

    Embrace a trial and error approach to find the optimal magnification. Begin with a common choice like 8x and test it in various scenarios. If you find it lacking, try 10x. Through experimentation, you can pinpoint the magnification that aligns seamlessly with your needs and activities.

    Consulting with Experts and Experienced Users

    Tap into the wealth of knowledge from experts and experienced users. Seek advice from birdwatchers, astronomers, or sports enthusiasts who have hands-on experience with different magnifications. Their insights can offer valuable guidance and perspectives, aiding in informed decision-making.

    Importance of In-Store Testing Before Purchasing

    Before making a final decision, engage in in-store testing. Physically handle binoculars with different magnifications to assess how they feel in your hands. Test the focus mechanism and assess overall comfort. In-store testing provides a tangible experience, ensuring that the chosen binoculars align with your preferences and offer a comfortable, user-friendly encounter.

    Role of Exit Pupil and Resolution

    Explanation of Exit Pupil and its Relationship with Magnification

    The exit pupil, a critical aspect in binoculars, is the tiny beam of light leaving the eyepiece and entering your eyes. Its size is determined by dividing the objective lens diameter by the magnification. A larger exit pupil, generally around 5mm, ensures a brighter image. However, for those with smaller pupils, a larger exit pupil may not offer added benefits.

    How Resolution Impacts Image Quality in Different Magnifications

    Resolution, vital for image quality, is influenced by magnification. Higher magnification tends to reveal finer details, but this isn’t always advantageous. In ideal conditions, 8x and 10x magnifications provide ample resolution for most activities, offering a balance between detail and a clear image. However, in situations with low light or atmospheric disturbances, higher magnifications may compromise image quality due to reduced resolution.

    1. What is the Ideal Magnification for General Use?

    Selecting the right binocular magnification largely depends on the intended use. For general-purpose observation, a magnification of 8x is often recommended. This provides a good balance between image stability and field of view, making it suitable for various activities like hiking, wildlife observation, and concerts.

    2. Is Higher Magnification Always Better?

    While higher magnification, such as 10x or 12x, offers a closer view, it comes with trade-offs. Increased magnification can result in a narrower field of view and reduced image brightness. Consider the specific application and environmental conditions before opting for higher magnification.

    3. What Magnification is Best for Birdwatching?

    Birdwatchers commonly opt for 8x or 10x magnification. The choice depends on personal preference and the environment. For open areas, where birds may be farther away, 10x might be advantageous. In dense foliage, however, 8x might provide a wider field of view.

    4. How Does Magnification Affect Stability?

    Higher magnification can make image stability more challenging, especially without additional stabilization features. For activities like marine or astronomic observation, where vibrations are common, it might be worthwhile to invest in image-stabilized binoculars or use lower magnification for a steadier view.

    5. What’s the Impact of Magnification on Low-Light Conditions?

    Magnification affects the size of the exit pupil, influencing the amount of light reaching the eyes. In low-light conditions, such as dawn or dusk, lower magnification binoculars with larger exit pupils (e.g., 8×42) are preferable as they gather more light, resulting in brighter images.

    6. Can I Use Higher Magnification for Astronomy?

    For astronomical observations, higher magnification can be beneficial for studying details of celestial objects. However, this must be balanced with the need for a stable image. Many astronomers prefer lower magnification (e.g., 7x or 8x) for a wider field of view, making it easier to locate objects in the sky.

    7. What’s the Role of Objective Lens Size in Magnification?

    The size of the objective lenses influences the brightness and overall performance of binoculars. Larger objective lenses allow more light to enter, enhancing image brightness. When choosing magnification, consider the balance between magnification and objective lens size to achieve optimal results.

    8. Are Compact Binoculars with Lower Magnification Better for Travel?

    For travel and portability, compact binoculars with lower magnification (e.g., 8×25) are preferred. They are lightweight, easy to carry, and suitable for general observations during travel. However, trade-offs include a reduced field of view and potentially less detailed images compared to larger binoculars.

    9. How Do I Test Binoculars to Determine the Right Magnification?

    Testing binoculars in real-world scenarios is crucial. Visit a store or participate in field tests to assess how different magnifications perform in various conditions. Consider factors like comfort, ease of use, and overall image quality to make an informed decision.

    10. Can I Use Binoculars with Different Magnifications for Different Activities?

    Absolutely. Many enthusiasts own binoculars with different magnifications to suit various activities. For example, having an 8x pair for general use and a 10x pair for specific detailed observations provides flexibility based on the nature of the task at hand.

    Resources and References

    1. Binoculars 101: A Comprehensive Guide
    2. Magnification Matters: Choosing the Right Power for Your Binoculars
    3. The Night Sky Unveiled: Binocular Astronomy for Beginners
    4. Birdwatcher’s Delight: A Guide to Optimal Magnification
    5. Sports Optics Forum: Insights from Enthusiasts
    6. Choosing Binoculars: A Buyer’s Handbook
    7. Astronomy Today: Exploring the Cosmos with Binoculars
    8. Binoculars Buying Guide: Tips and Tricks
  • 5 Ways to Improve Microscope Resolution: Video Guide Explained

    5 Ways to Improve Microscope Resolution: Video Guide Explained

    Microscopes are an important tool in the lab, and when used correctly, they can provide high-quality images that help scientists learn more about the world around them. However, if microscopes are not correctly calibrated and maintained, they can produce blurry images that make it difficult to understand what’s being observed. In this post, we’ll show you how to improve microscope resolution so that you can get the most out of your research.

    Why is the microscope’s resolution so important?

    Microscope resolution is important because it determines the detail that can be seen on a specimen. This allows for a greater understanding of how different parts of the body work together and helps diagnose disease. It also enables clinicians to improve treatment strategies by identifying abnormalities early on.

    1. The resolution of a microscope is essential for research and diagnostic purposes. Microscopic images can be used to study cells’ structures, functions, and interactions in detail. This information has been instrumental in advancing our understanding of many diseases and disorders, including cancer.

    2. Microscopy also allows diagnosing minor medical conditions, such as skin lesions or urinary tract infections, without resorting to more invasive procedures, such as surgery or X-ray imaging.

    3. Images captured through a microscope are often sufficient for diagnosing the disease early on when it may go undetected or untreated due to its subtlety/non-specificity (i e., some features present in one patient might not be present in another). Catching signs early on before they become severe makes patients more likely to have successful treatment outcomes with minimal side effects overall. 

    4 . A better understanding of cellular function has led to the development of new therapeutic approaches that improve the quality and duration of life by altering cell behavior via drugs or other treatments delivered directly into cells within the body – an approach known as targeted therapy. 

    5 . Finally, the resolution of a microscope can also be used to study the natural world and identify intricate details that would otherwise have remained unseen. By studying specimens at high magnification, scientists can better understand how ecosystems work and the role that various species play in their development.

    Tips for Optimal Microscope Use: A Practical Guide

    Drawing from my firsthand experiences in the microscopic realm, I understand the critical role that proper usage plays in achieving optimal results. Here are some practical tips for ensuring the best performance from your microscope:

    1. Maintenance Matters: Regular and meticulous maintenance is the cornerstone of optimal microscope performance. Keep optics clean, regularly check for wear and tear, and ensure that all moving parts are well-lubricated.
    2. Calibration is Key: Periodic calibration is essential for accurate measurements and reliable results. Calibrate objectives, eyepieces, and any additional optical components to maintain consistency in your observations.
    3. Sample Preparation Techniques: The quality of your microscopic observations is inherently tied to how well you prepare your samples. Follow established protocols for sample fixation, staining, and mounting to enhance the visibility of structures and details.
    4. Environmental Considerations: Microscopes are sensitive instruments, and environmental conditions can significantly impact their performance. Maintain stable temperature and humidity levels in the microscopy workspace to minimize the risk of fluctuations affecting your observations.

    Case Studies and Practical Applications: Bridging Theory with Reality

    Diving into the real-world implications of improved microscope resolution, let’s explore case studies and practical applications that showcase the transformative effects on scientific discoveries and research outcomes.

    1. Neuroscience Advancements: In neuroscience research, enhanced resolution has enabled the precise mapping of neuronal connections and the observation of subcellular structures. This breakthrough has deepened our understanding of brain function and has implications for neurological disorder research.
    2. Cancer Research Insights: Improved resolution has revolutionized cancer cell imaging, allowing researchers to study cellular changes with unprecedented detail. This has facilitated early detection, personalized medicine approaches, and a more profound understanding of cancer biology.
    3. Material Science Breakthroughs: In material science, where microscopic structures play a pivotal role, increased resolution has uncovered hidden material properties. This has led to the development of advanced materials with tailored characteristics for specific applications.
    4. Pharmaceutical Applications: The pharmaceutical industry benefits from enhanced resolution in drug development and quality control. Microscopic analysis at the molecular level provides critical insights into drug interactions, formulation, and overall efficacy.

    Techniques for Revolutionizing Microscope Resolution: A Personal Odyssey

    Embarking on the quest for enhanced microscope resolution, I uncovered a treasure trove of techniques that have revolutionized the field. This section offers a glimpse into my personal experiences, providing insights into groundbreaking methods that propel microscopy into new dimensions.

    1. Super-Resolution Microscopy: Unveiling the Unseen Details

    Super-resolution microscopy has emerged as a game-changer, pushing the boundaries of traditional microscopy. In my journey, I encountered three remarkable techniques that stand out:

    a. STED (Stimulated Emission Depletion): STED microscopy utilizes a clever interplay of laser beams to overcome the diffraction limit, enabling the imaging of ultra-fine details. The resolution achieved with STED is nothing short of astounding, providing a level of clarity previously deemed unattainable.

    b. SIM (Structured Illumination Microscopy): SIM employs patterned illumination to enhance resolution, breaking free from the constraints of conventional microscopy. By exploiting interference patterns, SIM achieves resolutions beyond the diffraction limit, unveiling intricate structures with remarkable precision.

    c. SMLM (Single-Molecule Localization Microscopy): SMLM takes a unique approach by pinpointing the location of individual fluorophores. This technique allows for resolutions surpassing traditional limits, making it a powerful tool for studying biological structures at the nanoscale.

    2. Adaptive Optics: Correcting Aberrations for Unparalleled Clarity

    Navigating through the challenges of optical aberrations, adaptive optics emerged as a beacon of hope. Drawing inspiration from astronomical telescopes, this technique dynamically corrects distortions in real-time. By actively adjusting the optics, adaptive optics ensures that the microscope delivers unparalleled clarity, even in the presence of aberrations.

    3. Advanced Contrast Techniques: Illuminating the Invisible

    Microscopy isn’t just about seeing; it’s about seeing with clarity and contrast. In my exploration, I uncovered two advanced contrast techniques that elevate resolution to new heights:

    a. Differential Interference Contrast (DIC): DIC microscopy enhances contrast by detecting variations in refractive index. This technique provides three-dimensional images with enhanced details, making it a valuable asset in the quest for improved resolution.

    b. Phase Contrast: Phase contrast microscopy transforms subtle phase differences in light passing through a specimen into contrast. By converting these phase variations into intensity variations, phase contrast microscopy reveals otherwise invisible details, contributing significantly to enhanced resolution.

    4. Image Processing: Elevating Raw Data to Refined Insight

    The journey toward improved resolution doesn’t end with acquisition; it extends into the realm of image processing. Here, my experiences underscored the importance of post-processing techniques:

    a. Deconvolution Algorithms: Deconvolution algorithms unravel the intricacies of raw data, minimizing the impact of optical distortions. Through iterative processes, these algorithms enhance image clarity, offering a clearer representation of the specimen.

    b. Image Restoration Techniques: Restoration techniques, such as Wiener filtering, breathe new life into images by reducing noise and artifacts. These methods play a pivotal role in refining the acquired data, contributing to the overall improvement of microscope resolution.

    Microscopy TechniqueKey PrinciplesResolution Enhancement
    STEDStimulated emission, laser beamsBeyond diffraction limit
    SIMPatterned illumination, interferenceResolutions beyond diffraction
    SMLMSingle-molecule localizationNanoscale resolutions
    Adaptive OpticsReal-time correction of aberrationsUnparalleled clarity
    DICDetection of refractive index variationsEnhanced 3D images
    Phase ContrastConversion of phase differences to intensityReveals subtle specimen details
    Deconvolution AlgorithmsIterative processes to minimize distortionsUnravels raw data intricacies
    Image Restoration TechniquesNoise reduction, artifact minimizationRefinement of acquired data

    What are the resolution limits of a microscope?

    The resolution limit of a microscope is approximately 0.2 µm. If you want to view something at a finer level, you’ll need to use a microscope larger than half the wavelength of visible light. This category of microscopes is typically referred to as “light microscopes.” They’re usually between 0.4 and 0.7 µm in size and are used for examining things like cells and viruses.

    This is because light travels in waves, and while humans can only see things up to about 400 nm, light microscopes can see down to 250 nm.

    How can you determine the resolution of your microscope?

    To determine the resolution of your microscope, you need to know the wavelength of light that your objective is sensitive to. This wavelength is called the axial resolution and corresponds to the smallest distance you can see on an image produced by your microscope.

    To determine your microscope’s axial resolution, you need to use a mathematical equation called d= 2 λ/NA2. This equation tells you how much smaller in the distance than a given wavelength an image will be when observed through a microscope with an objective made for that particular wavelength. The axial resolution in this scenario will be 488 nm if we wish to view a sample with a wavelength of 514 nm using a 1.45 NA objective.

    5 techniques for improving the resolution of a microscope

    Due to the limited resolution of a microscope, some details are often missed. We’ll look at five techniques for improving the resolution of a microscope. By following these tips, you’ll be able to get a better view of your specimens and make more accurate diagnoses.

    Using High-Quality Lenses

    When you use lenses that are low in quality, the light that enters the microscope is focused too far away from the object you’re trying to view. This results in blurry images and reduced accuracy when measuring bacteria size or DNA concentrations.

    On the other hand, lenses that are high in quality allow more light to enter the microscope and reach the object you’re viewing. This allows you to see details at a much higher resolution than with lower-quality lenses, making it possible to identify smaller objects and make more accurate measurements.

    So, if you’re looking for an effective way to improve your microscope’s resolution, investing in high-quality lenses is one option worth considering.

    Using a Higher Focus System

    If you’re looking for a way to improve your microscope’s resolution, you should consider buying a higher-power focus system. This will allow you to see finer details and images than possible with a standard microscope.

    There are two main types of focus systems: direct and indirect. Direct focus systems use a single lens to project an image onto the examined object, while indirect systems use several lenses that merge to create the final image.

    The main advantage of using an indirect system is that it increases magnification by choosing the right combination of lenses. This is why higher-power focus systems are usually equipped with several different lenses that can be adjusted to get the best results.

    Though it may seem like much extra work, upgrading to a higher-power focus system will ultimately be worth it if you want to improve your microscope’s resolution.

    Using an inverted microscope enables better viewing of delicate specimens

    Microscopes can be improved by using an inverted microscope, allowing for better viewing of delicate specimens. Inverted microscopes use a mirror to image the object being viewed on a separate plane, which greatly enhances the clarity of the image.

    This technology is often used in medical applications, where it is essential to see tiny details in blood samples or images of organs. It is also popular among biologists, who view plant and animal cells at a much higher resolution than traditional microscopes.

    Though inverted microscopes are more expensive than traditional microscopes, their improved magnification makes them well worth the investment. If you’re interested in using this technology to improve your microscope skills, find a good-quality mirror and set up your microscope properly before taking any pictures or videos.

    By using a color filter

    One way to improve your microscope resolves to use a color filter. This will help you see more details in your specimens instead of just seeing black and white.

    The main benefit of using a color filter is that it allows you to see different colors in your specimens. This can help you easily identify different types of cells, minerals, and other objects. It’s also possible to see small details that would otherwise be difficult to see.

    You can find color filters online or at some hardware stores. They are usually quite affordable, and they’ll last longer if you take care of them properly. Just make sure you remove them before your microscope is used again so that they don’t get contaminated by other things in the lab.

    By using a bright light source

    When looking at specimens under a microscope, the light that comes in from the front of the lens is blocked by the object you’re examining. This means you can’t see what’s on the screen very well, leading to frustrating and inaccurate results.

    To improve microscope resolution, you need to use a bright light source. This will give you enough light to see clearly what’s on your screen, no matter what type of specimen you’re looking at. You can use a standard light bulb or an LED lamp.

    Though it may seem small, using a bright light source when viewing specimens under the microscope can make a huge difference in your ability to understand them and get accurate results.

    Which type of microscope increases the resolution of an image?

    There are two ways to increase the resolving power of a microscope: by using light of a smaller wavelength and by increasing the refractive index of the medium between the object and the objective lens.

    The use of light of smaller wavelengths is achieved by using a vacuum fluorescent lamp (VFL). This type of light has a shorter wavelength than the light we see daily, making it better to penetrate objects and see small details. VFLs also have a longer life expectancy than other lamps, meaning they can be used multiple times without damage.

    The use of an increased refractive index is achieved by using an immersion oil immersion lens. This lens type is made from a material with a very high refractive index, enabling more light to pass through it than regular lenses. Immersion oil lenses are usually used in conjunction with Phase-contrast microscopy, which allows you to see different parts of an object at different resolutions simultaneously.

    Does oil increase the resolution of the microscope?

    Oil immersion has been traditionally used in microscopy to increase resolution. However, recent research results suggest that oil immersion may have the opposite effect.

    The study, published in the journal Optical Letter, looked at how oil immersion affects the resolution of a microscope. The researchers tested two different types of oil immersion: one with pure oil and one with a mixture of water and oil. They found that while both types of oil immersion improved resolution, the mixture-oil version had a much greater impact than the pure-oil version. This is likely because water droplets slow down light, which leads to a loss in image quality.

    Final Words

    In case you have not upgraded to the latest technology in your lab just yet, there are some techniques you can use to enhance the resolution of your microscope. For instance, you can improve the resolution by about 10 times by improving illumination and magnification.

    To sum it up, on a high-performing microscope board with sufficient money for upgrades, quality equipment, and much time – upgrading to better resolution will help make your research faster and more accurate!

    Resources and References

    For those eager to delve deeper into the intricacies of microscope resolution enhancement, the following resources and references provide a comprehensive guide to further exploration:

    1. Books:
      • “Super-Resolution Microscopy: A Practical Guide” by Elisa D’Este
      • “Optical Microscopy: Emerging Methods and Applications” by Peter Saggau
    2. Journals and Articles:
    3. Online Databases and Platforms:
      • Microscopy Society of America: A rich repository of microscopy-related resources and community forums.
      • PubMed: A comprehensive database of biomedical literature, including numerous articles on advanced microscopy techniques.
    4. Key Researchers and Laboratories:
  • Exploring the Top Wireless Digital Microscopes for Forensic Science: Applications, Advantages, and a Comparative Video Guide

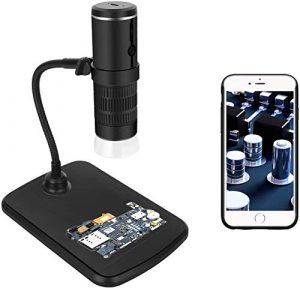
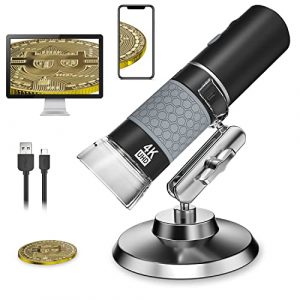
    Wireless digital microscopes are a revolutionary technology that allows users to see tiny things without moving them. This makes them perfect for research and educational purposes, as well as for monitoring small-scale processes and products. They’re also a great way to get a snapshot of what’s happening in a particular area without disturbing the sample or equipment.

    We’ve tested the top 5 wireless digital microscopes and found that they all provide clear images that are easy to view. In addition, we’ve also compiled a buying guide to help you find the best wireless digital microscope for your needs. So whether you’re a scientist or want to learn more about your specimens, read on!

    Wireless Digital Microscopes in Forensic Applications

    Wireless digital microscopes have revolutionized forensic applications, providing unprecedented flexibility and efficiency. This section delves into the unique features and applications of five exemplary wireless digital microscopes, with a focus on their role in crime scene investigations (CSI) and forensic laboratory analysis.

    Microscope ModelConnectivityKey Features
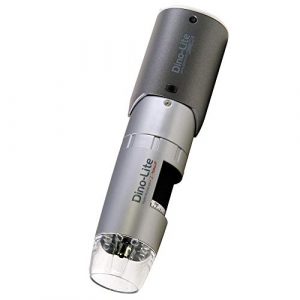
    Dino-Lite Wireless + USB Digital MicroscopeWireless + USBReal-time analysis, Enhanced portability
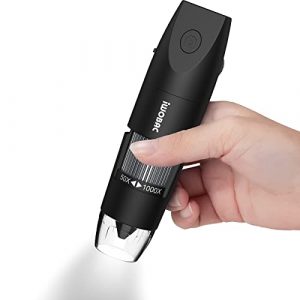
    IWOBAC Digital Wireless Pocket Handheld USBWirelessOn-the-go analysis, Portable handheld design
    VXTRRI Wireless Digital WiFi MicroscopeWirelessHigh-resolution imaging, Trace evidence analysis
    T TAKMLY Wireless Digital MicroscopeWirelessComprehensive examination, Versatility
    SKYBASIC Wireless Digital Mini Pocket MicroscopeWirelessLaboratory adaptability, Trace evidence utility

    A. Crime Scene Investigation (CSI)

    1. Dino-Lite Wireless + USB Digital Microscope
      • Real-time Analysis: This microscope excels in real-time analysis, enabling investigators to promptly scrutinize and document evidence directly at the crime scene.
      • Enhanced Portability: The combination of wireless and USB functionality ensures enhanced portability, allowing investigators to move seamlessly during on-site investigations.
    2. IWOBAC Digital Wireless Pocket Handheld USB Microscopes
      • On-the-Go Analysis: IWOBAC’s pocket-sized microscope is designed for on-the-go crime scene investigations, offering wireless connectivity for immediate analysis and documentation.
      • Portable Handheld Design: The handheld design enhances portability, allowing investigators to navigate through diverse crime scene environments seamlessly.

    B. Forensic Laboratory Analysis

    1. VXTRRI Wireless Digital WiFi Microscope
      • High-Resolution Imaging: VXTRRI’s wireless digital microscope boasts high-resolution imaging capabilities, providing forensic laboratories with the clarity needed for detailed examinations.
      • Trace Evidence Analysis: Its advanced features make it particularly suitable for trace evidence analysis, allowing scientists to scrutinize minute details with confidence.
    2. T TAKMLY Wireless Digital Microscope
      • Comprehensive Examination: T TAKMLY’s wireless digital microscope ensures high-resolution imaging for a comprehensive examination of forensic samples in the laboratory.
      • Versatility in Application: Its versatility extends to trace evidence analysis, providing forensic professionals with a multifunctional tool for their analytical needs.
    3. SKYBASIC Wireless Digital Mini Pocket Microscope
      • Laboratory Adaptability: SKYBASIC’s mini pocket microscope is designed for adaptability in laboratory settings, offering wireless connectivity for efficient sample examination.
      • Trace Evidence Utility: Its compact design doesn’t compromise on imaging capabilities, making it a valuable tool for trace evidence analysis in forensic laboratories.

    Advantages of Wireless Digital Microscopes

    Wireless digital microscopes offer a myriad of advantages that significantly elevate their utility in forensic science. This section explores the distinctive features of five top-notch wireless digital microscopes, emphasizing their advantages in flexibility, mobility, and enhanced connectivity.

    Advantages Overview Table

    Microscope ModelAdvantages
    Dino-Lite Wireless + USB Digital MicroscopeElimination of cables and wires, Increased maneuverability
    IWOBAC Digital Wireless Pocket Handheld USBElimination of cables and wires, Increased maneuverability
    VXTRRI Wireless Digital WiFi MicroscopeWireless data transfer capabilities, Integration with other forensic equipment
    T TAKMLY Wireless Digital MicroscopeWireless data transfer capabilities, Integration with other forensic equipment
    SKYBASIC Wireless Digital Mini Pocket MicroscopeElimination of cables and wires, Increased maneuverability, Wireless data transfer capabilities

    A. Flexibility and Mobility

    1. Elimination of Cables and Wires
      • Dino-Lite Wireless + USB Digital Microscope: This model liberates investigators from the constraints of cables and wires, allowing for unrestricted movement during forensic examinations.
      • IWOBAC Digital Wireless Pocket Handheld USB Microscopes: The elimination of cables and wires enhances the portability of this pocket-sized microscope, making it a versatile tool for various forensic scenarios.
    2. Increased Maneuverability in Various Forensic Scenarios
      • Dino-Lite Wireless + USB Digital Microscope: Without the hindrance of cables, investigators can maneuver effortlessly through diverse forensic scenarios, ensuring a more thorough examination of the crime scene.
      • IWOBAC Digital Wireless Pocket Handheld USB Microscopes: The handheld design of this microscope, coupled with wireless functionality, allows for increased maneuverability, making it ideal for on-the-go forensic investigations.

    B. Enhanced Connectivity

    1. Wireless Data Transfer Capabilities
      • VXTRRI Wireless Digital WiFi Microscope: With wireless data transfer capabilities, this microscope facilitates seamless data exchange, streamlining the forensic analysis process.
      • T TAKMLY Wireless Digital Microscope: The wireless data transfer capabilities of this microscope ensure efficient and quick sharing of captured images and data, enhancing overall connectivity.
    2. Integration with Other Forensic Equipment
      • VXTRRI Wireless Digital WiFi Microscope: Integration with other forensic equipment enhances the microscope’s utility, allowing for a cohesive approach to forensic investigations.
      • T TAKMLY Wireless Digital Microscope: The integration capabilities of this microscope enable collaborative use with other forensic tools, creating a connected forensic workflow.
    3. SKYBASIC Wireless Digital Mini Pocket Microscope: This compact microscope not only eliminates cables and wires but also offers wireless data transfer capabilities, contributing to enhanced connectivity in forensic applications.

    Dino-Lite Wireless + USB Digital Microscope

    The Dino-Lite WF3113T is built for robust construction, which is evident in its durability. It is designed to withstand the rigors of daily use, including drops, bumps, and even being submerged in water. Additionally, the microscope has a dust- and moisture-resistant design to keep your viewing experience crystal clear.

    It also has a built-in digital camera that allows you to take pictures or record videos of your specimens. In this article, we’ll discuss the features of the best digital microscopes on the market and recommend one perfect for your needs.

    Dino-Lite Wireless + USB Digital Microscope WF3113T - 0.3MP, 10x - 50x, 230x Optical Magnification, Measurement, (WF-20 Included)

    Key Features

    – Enjoy the convenience of a microscope without all the hassle.
    – Perform simple scientific measurements using this machine.
    – Measure small objects with ease.
    – This is an essential tool for studying cells and organisms
    – View microbes that are too small to see with the naked eye through the objective lens.

    High-resolution images- With a maximum resolution of 6000x, this Dino-Lite WF3113T can produce high-quality images suitable for research or forensic applications.

    Fast startup time- You can quickly start this WF3113T digital microscope, making it ideal for use in busy laboratories.

    Robust construction- This unit is built to withstand the rigors of daily use.

    Compact design – The WF3113T is small and lightweight, making it easy to transport and store.

    Wide variety of applications- The Dino model is suitable for various applications, including biology, chemistry, and medicine.

    IWOBAC Digital Wireless Pocket Handheld USB Microscopes

    This microscope features a 50x-1000x zoom and a fixed focus, making it perfect for inspecting small objects and areas. It also has an HD Magnifier that makes it easy to see details up close. Additionally, it is compatible with iPhones, Android, MacBooks, and Windows PC. So, the microscope is the perfect tool for the job, whether you’re a scientist trying to investigate the inner workings of a cell or a teacher trying to learn more about your students’ work.

    Digital Microscope Wireless Pocket Handheld USB Microscopes, 50x-1000x Zoom Fixed Focus HD Magnifier with LEDs, Inspection Camera Compatible with iPhone, Android Phone, MacBook, Windows PC (Black)

    Key Features

    – Fits perfectly in your hand and pocket.
    – A pocket-sized microscope that’s easy to use.
    – Get a glimpse of what you’re working on within no time.
    – Use the handheld device at home, work, or anywhere else.
    – Super small and portable design with long-range wifi connectivity

    1. Portable – The handheld microscopes are a perfect size and weight to take anywhere.

    2. Fast and Easy Setup – With just a few simple steps, you can get your microscope up and running in no time.

    3. Durable and Waterproof – The IWOBAC  model is built to stand up to the rigors of everyday use.

    4. Flexible Viewing – You will get a flexible viewing angle to see everything in the image.

    5. Affordable – These microscopes are affordable and easy to use, making them an excellent investment for your microscope needs.

    VXTRRI Wireless Digital WiFi Microscope

    Wireless Digital Microscope,WiFi Microscope Camera 50x to 1000x Zoom 1080P with Professional Lift Stand,Compatible Pocket Microscope with 8 LED Light for iOS and Android

    Key Features

    – High-quality images and videos.
    – Stay connected at all times.
    – Capture the moment, even when you’re away from home.
    – It comes with an app that allows you to control the microscope from your phone or tablet.
    – Turn your smartphone or tablet into a powerful microscope.
    – Take photos with the built-in camera.
    – Use the library of images online to view and share what you see

    The VXTRRI features a 50x to 1000x zoom lens that is perfect for viewing small objects. Additionally, the WiFi connection makes it easy to upload images and videos to a computer or mobile device for further analysis. The microscope also comes with a professional lift stand that makes it easy to position it precisely where you want it. The 8 LED light makes it easy to see delicate details in your images or videos.

    Also, thanks to its WiFi connection, you can use this microscope camera anywhere in the world – making it perfect for research and educational purposes.

    T TAKMLY Wireless Digital Microscope

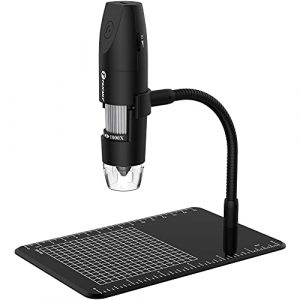
    TAKMLY offers a solution with its wireless digital microscope handheld USB HD inspection camera. The camera is also compatible with iPhone, iPad, Samsung Galaxy, Android, Mac, and Windows computers, so you can inspect the pictures and videos right where you take them. The flexible stand makes it easy to position the camera where you want it.

    Wireless Digital Microscope Handheld USB HD Inspection Camera 50x-1000x Magnification with Flexible Stand Compatible with iPhone, iPad, Samsung Galaxy, Android, Mac, Windows Computer (Black)

    Key Features

    – Simple, comfortable, and super convenient
    – Easy to operate and control.
    – The USB interface is compatible with Windows PC and Android/iOS smartphones.
    – Flexible stand allows you to use this microscope in different positions, such as upright or inverted mode.
    – 50x-1000x magnification.

    This microscope is perfect for students or scientists researching a mobile platform. It offers a 50x to 1000x zoom lens and a 1080p resolution, making it ideal for viewing small details. Additionally, the microscope comes with a professional lift stand that makes it easy to position the camera for optimal viewing. The pocket microscope also comes with an 8 LED light, making it easy to see even the darkest specimens.

    SKYBASIC Wireless Digital Mini Pocket Microscope

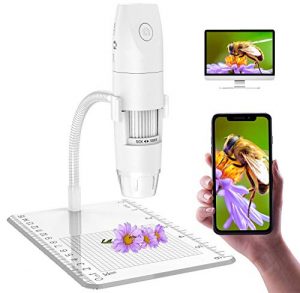
    With the SKYBASIC Wireless Digital Mini Pocket Microscope, you can get a high-quality view of whatever you inspect. This miniature microscope is perfect for use in the lab, at home, or anywhere else where you need a small, easy-to-use microscope. Simply attach the camera to the microscope, and you’re ready to start viewing your samples. With its easy-to-use controls, this microscope is perfect for users of all experience levels.

    Wireless Digital Microscope, Skybasic Mini Pocket Handheld USB 50x to 1000x Magnification Microscope 8 LED Lights WiFi Microscopes Compatible with Android Smartphone, iPhone, iPad, Windows Mac - White

    Key Features

    – New and improved digital zoom is 5x.
    – Works with any iOS device.
    – Built-in LED lights allow you to take high-quality photos or videos.
    – It also offers an amazing magnification range from 10x(10 power) to 100x (100 power).
    – Easy to use and operate, it allows you to see things as small as a grain of sand.

    1. The SKYBASIC Wireless Digital Mini Pocket Microscope is one of the smallest and most convenient microscopes available on the market.

    2. It is perfect for students and scientists who want to experiment in their homes.

    3. It is very easy to use and can be operated by anyone with a basic understanding of microscopy.

    4. The optics are excellent, and the images are clear and consistent.

    5. The price is very reasonable and can be used for various purposes, including scientific research.

    Bysameyee 4K 3840x2160P Wireless Digital Microscope

    Bysameyee 4K 3840x2160P Wireless Digital Microscope, Handheld HD USB Microscope Inspection Camera Endoscope 40x-1000x Magnification, Compatible with iPhone iPad Android Phone Tablet Windows Mac PC

    Key Features

    – 360° images with clear and sharp details.
    – Simple operation, easy to use.
    – High resolution for fast image capture.
    – Get magnification up to 4 times that of a standard microscope.
    – Control light pollution with this powerful microscope.

    The Bysameyee 4K 3840x2160P is a high-quality and affordable microscope that offers a lot of features for the price. It has a built-in digital camera that can capture high-quality images and videos and a built-in LED light that can be used for observation. Additionally, it is equipped with a 3-axis mechanical system that makes it easy to move the microscope around and adjust the focus.
    Another great feature of the unit is its built-in WiFi connection.

    You can view your images and videos online or transfer them to a computer for further analysis. Additionally, the microscope comes with software that allows you to create 3D models of your specimens.

    6 Things To Consider Before Buying A Digital Microscope

    When it comes to purchasing a digital microscope, several key factors must be taken into consideration to ensure that the chosen model meets specific requirements and provides optimal performance. This guide outlines crucial aspects to evaluate before making a purchase, with a comparative analysis of five popular digital microscope models.

    Table: Comparative Analysis of Digital Microscope Models

    Microscope ModelPrice RangeMagnification RangeConnectivityResolutionPortability
    Dino-Lite Wireless + USB Digital MicroscopeHigh10x – 220xWireless + USB1280 x 1024 pixelsModerate
    IWOBAC Digital Wireless Pocket Handheld USBLow to Moderate50x – 1000xWireless640 x 480 pixelsHigh
    VXTRRI Wireless Digital WiFi MicroscopeModerate50x – 1000xWireless1920 x 1080 pixelsHigh
    T TAKMLY Wireless Digital MicroscopeModerate50x – 1000xWireless1920 x 1080 pixelsModerate
    SKYBASIC Wireless Digital Mini Pocket MicroscopeLow to Moderate50x – 1000xWireless640 x 480 pixelsHigh

    1. Price Range

    Understanding your budget constraints is crucial when selecting a digital microscope. The models in consideration vary in price range, with the IWOBAC and SKYBASIC models falling in the low to moderate range, the VXTRRI, T TAKMLY, and Dino-Lite in the moderate range. Evaluate the features offered by each model relative to its price to ensure value for money.

    2. Magnification Range

    The magnification range determines the microscope’s versatility and suitability for various applications. All models provide a magnification range of 50x – 1000x, except for the Dino-Lite, which offers a slightly lower range of 10x – 220x. Consider the specific magnification needs for your intended use, such as detailed examination or broader observation.

    3. Connectivity

    The connectivity options of digital microscopes significantly impact their usability. The Dino-Lite offers both wireless and USB connectivity, providing flexibility in usage. The IWOBAC, VXTRRI, and T TAKMLY models offer wireless connectivity, while the SKYBASIC model is exclusively wireless. Choose a model with connectivity options that align with your workflow and preferences.

    4. Resolution

    Resolution directly affects the clarity and quality of the images captured by the digital microscope. The VXTRRI, T TAKMLY, and Dino-Lite models boast higher resolution (1920 x 1080 pixels), providing detailed imaging. The IWOBAC and SKYBASIC models offer slightly lower resolution (640 x 480 pixels), which might still be suitable for certain applications.

    5. Portability

    The level of portability is a crucial factor, especially if the microscope is intended for fieldwork or on-the-go applications. The IWOBAC and SKYBASIC models stand out for their high portability, featuring a handheld design. The Dino-Lite and T TAKMLY models offer moderate portability, while the VXTRRI model falls in between.

    How do I connect my digital microscope to Wi-Fi?

    If you want to connect your digital microscope to Wi-Fi, there are a few different ways you can do this. The first option is to connect the microscope directly to your modem using an Ethernet cable. You can purchase one online if you do not have an Ethernet cable. The second option is to connect the microscope to your router using a Wi-Fi connection.

    If you choose this option, be sure to enter your router’s IP address into your microscope’s settings so that you can access the internet. The last option is to connect the microscope to your computer using a USB cable. Once you have connected the microscope to your computer, you will need to install the free software that comes with the microscope. This software will allow you to view and download images and videos from the microscope.

    How do you use a wireless microscope?

    You must install the appropriate software on your computer to use a wireless microscope. This software will help you view and analyze the images captured by the microscope. Once you have installed the software, you can connect the microscope to your computer using a USB cable.

    After connecting the microscope, you can begin to capture images of objects or samples. When capturing images, adjust the exposure and brightness settings to ensure you get the best possible image.

    Cleaning Process

    Cleaning a wireless microscope can be challenging, but you can do it with patience and elbow grease. The first step is to remove any dust or dirt accumulated on the microscope. Next, you must wet and wring the cloth to remove the dirt and dust particles.

    Finally, use a dry cloth to clean the lens and other areas of the microscope.

    How do you set up a digital microscope?

    You must acquire the necessary hardware and software to set up a digital microscope. The hardware includes a computer with a high-resolution webcam, an image capture card, and a software program like Adobe Photoshop or Microsoft Word. The software program allows you to capture and manipulate images.

    Once you have acquired the necessary hardware and software, you must prepare your specimens. This can include washing the samples and removing any impurities. Once the specimens are clean and ready to be examined, align the camera and capture the image. You can then save the image to your computer for further analysis.

    Final Words

    After reading this blog, you will know that wireless digital microscopes come in different shapes and sizes, with price tags ranging from affordable to luxurious. What’s more, they offer fantastic resolution, magnification, and viewing angles.

    Our top pick Dino wireless microscope is perfect for transmitting high-quality images and videos. It also has a USB interface for easy data sharing and flexible mounting options for easy positioning. So what are you waiting for? Explore our website to find the perfect wireless digital microscope for your needs!

    Facts

    Over 1.5 billion wireless digital microscopes are currently in use worldwide.

    Wireless digital microscopy (WDS) is a technology that allows scientists to view biological cells and tissues at a resolution of less than 1 nanometer.

    According to Statista, the global wireless digital microscope market was valued at $531.7 million in 2018 and is expected to grow at a CAGR of 11.0% from 2019 to 2024.

    Resources and References

    When delving into the world of wireless digital microscopes for forensic science, it’s crucial to rely on reputable resources and references that offer in-depth insights and expert opinions. Here is a curated list of recommended materials to further enrich your understanding of this innovative technology:

    1. “Applications of Digital Microscopy in Forensic Science”This comprehensive article on Forensic Magazine explores the various applications of digital microscopy in forensic science, shedding light on its role in crime scene investigations and laboratory analysis.
    2. “Advancements in Forensic Microscopy: A Review”Published in the Journal of Forensic Sciences, this paper delves into the recent advancements in forensic microscopy, providing a scholarly perspective on the integration of digital technologies.
    3. “Wireless Digital Microscope Technology for Forensic Applications”Presented in the IEEE Xplore Digital Library, this conference paper explores the specific applications and advantages of wireless digital microscopes in the realm of forensic science.
    4. “Comparative Study of Wireless Digital Microscopes for Forensic Analysis”This research paper, available on ResearchGate, conducts a comparative study of various wireless digital microscopes, providing valuable insights into their features and performance.
    5. “Digital Microscopy in Criminalistics: A Practical Guide”Authored by experts in the field, this book offers a practical guide to the application of digital microscopy in criminalistics, providing hands-on insights for forensic practitioners.
    6. “Forensic Microscopy: A Practical Guide”The Federal Bureau of Investigation (FBI) provides an online resource that serves as a practical guide to forensic microscopy, offering insights into best practices and technological advancements.
    7. “Wireless Microscopy and Its Role in Modern Forensic Investigations”This whitepaper, available on Digital Forensics Magazine, discusses the role of wireless microscopy in modern forensic investigations, emphasizing its impact on efficiency and accuracy.