When was the last time you looked through a microscope? If you’re like most people, it’s been a while. But we still don’t understand plenty of things about the microscopic world. This can be very frustrating for students and researchers who want to use microscopes but don’t know how to get started or what equipment they’ll need.
There’s a slew of microscopes, but the two main models are polarizing and stereo. In my case, most people use a polarizing microscope to examine surfaces closely — like concrete samples or stamps. They’re also helpful for tasks that require a bit more focus. For instance, you can use them to study tissue samples during an operation or dissect a frog during a high school biology class.
Using a microscope is fun, but it’s hard to get started. There are so many resources out there, and you can spend hours trying to find the right ones. Luckily, we’ve put together this list of tools, tips, and tricks to help you get started.
So let’s look at what you need to know about using a microscope.
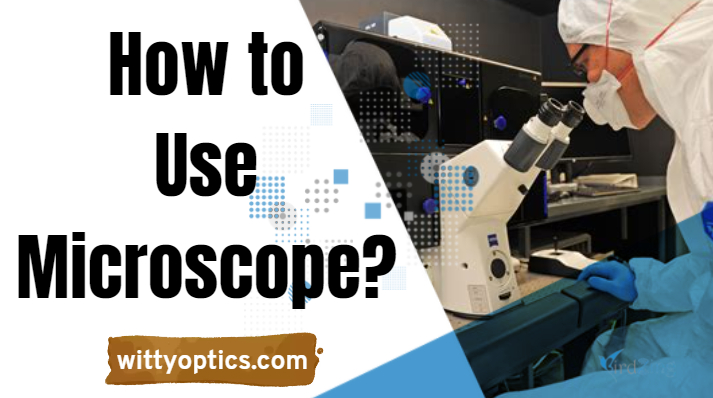
5 steps: How to Use a Microscope?
1. Choose a microscope appropriate for your level of expertise and the type of work you will be doing.
2. Install the lens on the microscope according to the manufacturer’s instructions.
3. Set up your lighting, mount, and stage following your microscope’s user manual.
4. According to the manufacturer’s instructions, connect your camera or video recorder to the eyepiece and switch it on.
5. Get an object, place it under a microscope lens and observe!
How do you use a microscope for beginners?
The best way to use a microscope for beginners is to understand the device’s essential functions.
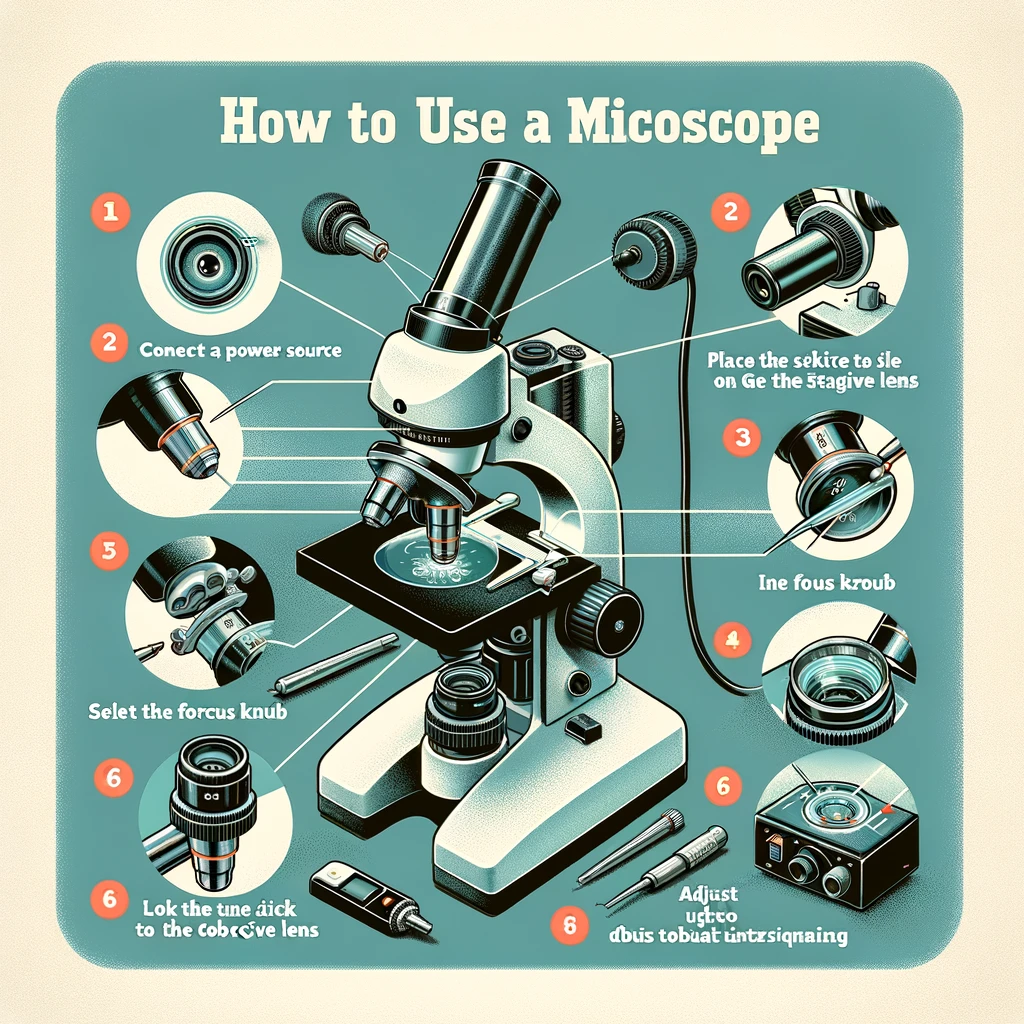
First, identify the parts of the microscope.
Eyepiece: This allows you to see what is in front of it without moving your head or hands from where they are at.
Objective lens: This lens has a single aperture that allows light to pass through into the scope, adjusted with a diaphragm and filter wheel on some models.
Stage Plate: The stage moves up and down along with the objective lens to always remain in focus on whatever you are looking at while observing.
Light source: This device gets light from the upper spectrum, such as ultraviolet, or lower ones, like artificial light.
Sturdy base/table: for you to rest your scope on when doing science experiments and observations
Diopter: This is where you adjust the microscope to focus on a different object, and it’s marked with numbers, so you know what you’re doing.
Stereo Head: This is like the lens for your camera phone, and it’s the eye of your microscope.
Bottom Lighting: The bottom lighting provides consistent lighting for viewing flat, opaque items. Perfect for viewing fresh fish and seafood since the skin’s rough texture will not appear shiny and glistening from top lighting.
Stage Clips: The stage clips are an essential part of the microscope as they hold the slide in place and make it easier to manipulate. Some stereo microscopes have fixed stages mounted on a larger stand, while others have a movable set that can be attached or removed as per requirement.
Lighting Controls: This helps you adjust the light going through the specimen.
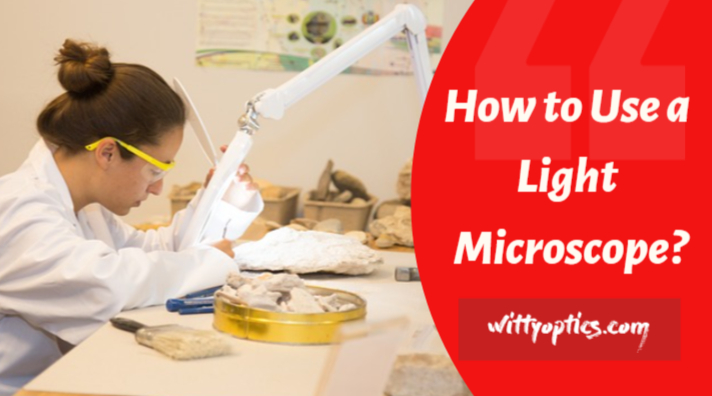
How to use it safely?
To use a light microscope safely, the user should always focus the light beam on any surface that is not close to their eye. If they focus on a surface near their eye, they risk damaging it and possibly distorting their vision permanently. The microscope’s lens should never be touched. Glass slides should be placed on a firm, flat surface.
If the microscope is zoomed in too much, it may strain the objective lens. Experimentation with magnification and positioning of images can allow one to learn how best to use their new toy safely without damaging anything, achieving outstanding results!
The benefits of using a light microscope are endless. It can examine cell structure, bacteria, and other microorganisms in the body.
If you are using a light microscope, use the lamp power to match the magnification of your microscope.
When focusing on a specimen, take note of the position closest to the focal plane.
Use binoculars for more accurate viewing and better depth perception when working with specimens in 3D space.
If there is an insect or other object in your field of view, don’t try to focus on it; move it out of view before proceeding with your work!
Always remember to be safe when handling a microscope!
What are the benefits of using a microscope?

Using a microscope can help you in many ways, such as:
1. Microscopes can help you to see things that are too small for the naked eye to see.
2. They can be used to study cells and tissues under various conditions, essential for understanding how the body works.
3. Microscopes allow scientists to view viruses and other pathogens in detail, which helps develop new vaccines or treat diseases at an early stage.
4. Microscopes have been used to study ice nucleation behavior, galaxy clusters, binary stars, craters on planets like Earth, and more!
5. They are essential tools for chemistry or physics research – they can help researchers identify molecules and particles by their shapes and sizes and examine reactions in tiny containers called drops (<100 nm).
6 . Microscopes are used in various industries, including pharmaceuticals, food science and technology, automotive manufacturing, materials research, and more.
How to use a Stereo Microscope: 7 Steps to Follow
Stereo microscopes are handy tools that let you view things in a much more detailed manner. Here’s a quick guide on using a stereo microscope to help you observe microscopic objects or biological specimens.
Prepare your specimen, take it to the stage plate, and switch on the light. The two lights have different purposes; the one at the bottom is used when looking at transparent objects, and the one at the top is used when looking at opaque objects. Make sure you evaluate your surroundings and choose the right one!
Look through the eyepieces to check your specimen is in focus. But what if it’s not? Simple! Use the focus knob to bring your sample into sharp relief. If your selection looks pale or translucent, place it on the black stage plate to make it easier to see, or use some black printer paper as an alternative.
It is important to view an object with both eyes to see it more clearly. With two eyes, your body can see in more detail. However, peripheral sight is also needed when adjusting, observing, and proceeding.
Place your eye up to the eyepiece and notice two overlapping lines of vision. Pull the eyepiece away to increase the distance, or push it toward you to decrease it. When you merge those two circles into one circular shape, you know that the correct interpapillary length has been set.
You can use a diopter, which decreases the difference in vision between your two eyes. Next, cover one eye and focus on the microscope. Then, position the eyepiece (the diopter with the knob) over the other eye. Make sure you focus sharply on what you want to see.
Subsequently, position the diopter over your other eye. Next, focus on the item you want to view with your vision while covering your other eye. Finally, adjust the eyepiece with the diopter until you have a clear picture. You won’t need to use the focus knob for this completion.
When you move your sample, make sure to adjust the knob. When looking at the 3D image, you will not change every feature simultaneously.
Now, you’re ready to use your microscope and view your sample. If your selection is alive and has escaped from the petri dish, put the lid on the petri dish to keep it from getting away.
Looking through a magnifying glass, you can’t see a blurry circle. But when you combine different lenses, the magnification becomes clearer.
There are three leading microscopes: optical, electron, and scanning probe microscopes. Optical microscopes use a series of lenses to magnify specimens, and an electron microscope uses a beam of electrons to produce a better image than an optical microscope. A scanning probe microscope uses a series of probes to measure properties on a surface.
Different parts of the compound microscope and their uses are:
The following table outlines the key parts of a compound microscope and their respective uses:
| Microscope Part | Description | Function/Use |
|---|---|---|
| Eyepiece (Ocular) | The lens you look through at the top of the microscope. | Magnifies the image from the objective lens. |
| Objective Lenses | A set of lenses located on the rotating nosepiece. | Provides various levels of magnification. |
| Nosepiece | The rotating structure that holds the objective lenses. | Allows for easy switching between objectives. |
| Stage | The flat platform where the slide is placed. | Supports the slide for observation. |
| Stage Clips | Clips on the stage to secure the slide in place. | Prevents the slide from moving during observation. |
| Coarse Focus Knob | The larger of the two focusing knobs, often on the outer part of the body. | Used for initial, rough focusing of the specimen. |
| Fine Focus Knob | The smaller of the two focusing knobs, often located inside the coarse focus knob. | Allows for precise focusing of the specimen. |
| Condenser Lens | Located beneath the stage; focuses light onto the specimen. | Improves image contrast and sharpness. |
| Illuminator | The light source, often located under the stage. | Provides light for illuminating the specimen. |
| Diaphragm | Adjusts the amount of light that reaches the specimen. | Regulates contrast and brightness of the image. |
| Arm | The curved part that connects the base to the microscope head. | Provides support and a comfortable grip for carrying. |
| Base | The bottom of the microscope; provides stability. | Serves as a foundation for the entire microscope. |
| Mechanical Stage | A movable stage with knobs for precise slide positioning. | Facilitates controlled movement of the specimen. |
While a compound microscope may look quite similar to an optical microscope, it has several differences. Here is a list of the essential parts of a compound microscope and its uses.
Eyepieces (used for viewing the specimen)
Diopter adjustment (used to focus on and view objects)
Nosepiece (fits over the eyepiece)
Objective lens – where you use to see things up close
The Stage- This is where you place your specimen.
Stage clip- to keep your stage in place and prevent shaking.
Mechanical stage- used for making sure your specimen stays in the spotlight.
Condenser- Used to ensure the light stays focused and doesn’t fall off.
Condenser Focus Knob- Used to move the condenser to control the light focus on specimens.
Iris Diaphragm — controls the amount of light that enters the microscope
Illuminator — lights up the object you’re inspecting
Brightness Adjustment — adjusts the amount of light that reaches your eye so that you can see clearly
Fine Adjustment and Coarse Adjustment – are used for focusing the microscope.
Stage Controls – used to move the slide to view different parts.
Aperture – the opening through which light travels into the microscope to view samples.
How to use a Compound Microscope: 4 Easy Steps to Follow
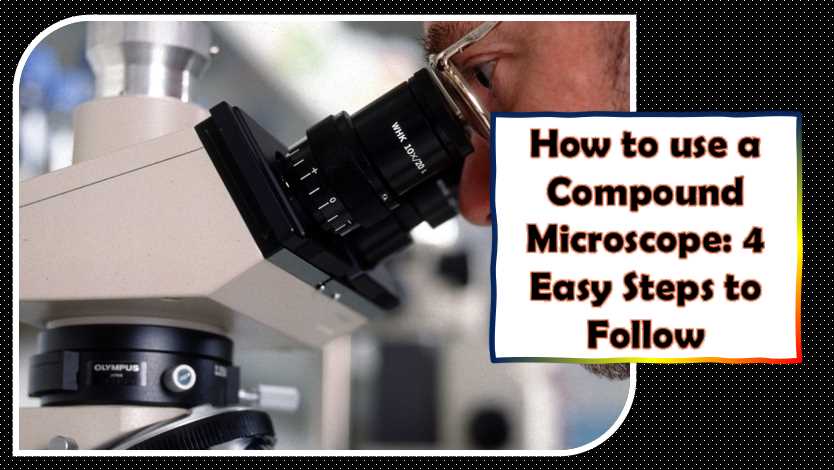
Microscopes are one of the most helpful science, medicine, and engineering tools. These tools provide us with a deeper understanding of the world around us. Here’s how to use a compound microscope.
After switching on the illuminator, start with dim light and slowly increase it to your preference. This practice should prevent the bulbs from heating up too fast.
If you are using a mechanical Stage or Stage, place your sample in one fixed position. This process will help ensure that the model does not move during the experiment.
Remove the objective lens from the microscope and rotate it so that you can see through the eyepiece. You will see a microscopic image of your specimen displayed on the microscope’s base.
Now direct your empty eye downwards. Use the focus knob on the left-hand side of the microscope to move your specimen into view.
Note: A dimmer switch allows you to control the brightness of your bulb, not the opening of the iris diaphragm. Move the nosepiece for the objective lenses to change the magnification level according to your needs. That will help you focus on the part of your sample most relevant to you.
Look through the microscope’s eyepieces and adjust how much light comes in using the diaphragm.
Turn this knob with your hand; turning clockwise will bring it into focus.
The fine adjustment knob is the little metal knob on the side of the microscope — twist it to focus your specimen. Try doing this as quickly as possible, or the high magnification objective could also hit the slide. Start again with a lower magnification if it gets difficult to focus.
Every microscope has a nosepiece — turn it to change what you’re looking at.
Always check if your microscope comes with a rack stop. If you don’t have one, you’ll want to get one. The rack stop is essential because it will prevent the objective lenses from lowering into the slide, and this action can be dangerous to both the slide and the specimen.
Troubleshooting Common Issues (500 words)
Microscopy, while a powerful tool, can encounter various issues that might hinder your observations. Understanding common problems and their solutions is crucial for efficient microscope usage.
Blurry or Unclear Images
One of the most common issues users face is blurry or unclear images. This problem can arise from improper focusing or dirty lenses. To resolve this:
- Clean Lenses: Ensure that the microscope lenses are clean. Use a lens cleaning solution and specialized lens paper to gently wipe away any dirt or smudges.
- Proper Focusing: Practice fine-tuning the focus. Utilize both coarse and fine focus adjustments to achieve optimal clarity. Additionally, ensure the specimen is appropriately positioned on the stage.
Uneven Illumination
Inconsistent lighting across the specimen can obscure details and affect the quality of your observations. To address uneven illumination:
- Adjust the Condenser: The condenser plays a crucial role in focusing and directing light onto the specimen. Adjust the condenser to achieve uniform illumination.
- Lighting Settings: Experiment with the lighting settings. Sometimes, a simple adjustment of the light intensity can eliminate uneven illumination.
Dirt or Debris on Lenses
Dirty lenses compromise the quality of images and may introduce artifacts into your observations. To maintain clear lenses:
- Regular Cleaning: Make it a habit to clean the lenses regularly. After each use, gently wipe the lenses with a clean, soft cloth.
- Proper Cleaning Materials: Use appropriate lens cleaning solutions and lens paper. Avoid using tissues or other materials that may scratch the lenses.
Mechanical Issues
Microscopes, like any precision instrument, may encounter mechanical problems. To troubleshoot mechanical issues:
- Lubrication: Lack of lubrication can lead to friction and hinder smooth movement. Follow the manufacturer’s recommendations for lubricating moving parts.
- Consult the User Manual: If issues persist, consult the microscope’s user manual. It often provides guidance on common mechanical problems and their solutions.
Electrical Issues
In some cases, electrical problems may arise, affecting the microscope’s functionality. If you encounter electrical issues:
- Check Power Source: Ensure that the microscope is properly connected to a stable power source. Fluctuations in power can lead to malfunctions.
- Inspect Cables: Examine power cables and connections for any damage. Faulty cables can disrupt the electrical supply to the microscope.
Image Distortion
Distorted images can result from misaligned optics or other technical issues. To address image distortion:
- Optical Alignment: Regularly check and align the microscope optics. Misaligned optics can lead to distorted images.
- Quality of Specimen: Ensure the specimen is prepared correctly. Distortion may occur if the sample is unevenly mounted or damaged.
By addressing these common issues, users can enhance the effectiveness of their microscopy sessions. Regular maintenance and troubleshooting practices contribute to a seamless and productive microscopy experience. Remember, when in doubt, consult the microscope’s user manual or seek assistance from knowledgeable experts.
Care and Maintenance of Microscopes
Microscopes are delicate instruments that require careful maintenance to ensure optimal performance and longevity. Regular care practices contribute to clear and accurate observations. Here’s a comprehensive guide on the care and maintenance of microscopes, including essential tasks, recommended frequencies, and a maintenance checklist.
Cleaning Lenses and Microscope Body
Frequency: After each use
Microscope lenses are susceptible to dust, fingerprints, and debris, which can compromise image quality. Regular cleaning is essential for maintaining clear optics.
Cleaning Lenses
- Materials Needed:
- Lens cleaning solution
- Lens paper or microfiber cloth
- Procedure:
- Apply a small amount of lens cleaning solution to the lens.
- Gently wipe the lens in a circular motion using a clean piece of lens paper or a microfiber cloth.
- Caution:
- Avoid using tissues or abrasive materials that may scratch the lenses.
Cleaning Microscope Body
- Materials Needed:
- Soft, dry cloth
- Procedure:
- Wipe the microscope body with a soft, dry cloth to remove dust and prevent accumulation.
- Caution:
- Avoid using cleaning solutions directly on the microscope body to prevent damage.
Table 1: Cleaning Materials
| Cleaning Task | Recommended Materials |
|---|---|
| Cleaning Lenses | Lens cleaning solution, lens paper or microfiber cloth |
| Cleaning Microscope Body | Soft, dry cloth |
Storage Guidelines
Frequency: Monthly
Proper storage is crucial for protecting microscopes from environmental factors that can impact their performance.
- Storage Location:
- Store the microscope in a clean, dry environment to prevent dust accumulation.
- Use a dust-free case or cover when the microscope is not in use.
- Protection from Light and Temperature:
- Avoid exposing the microscope to direct sunlight, as it can damage optics and components.
- Store the microscope away from extreme temperatures and humidity.
Table 2: Storage Guidelines
| Storage Consideration | Recommendations |
|---|---|
| Storage Location | Clean, dry environment |
| Protection from Light | Avoid direct sunlight exposure |
| Protection from Temperature | Store away from extreme temperatures and humidity |
Periodic Maintenance Checks
Frequency: Annually
Regular checks on the microscope’s mechanical components help identify potential issues before they affect performance.
- Lubrication:
- Follow the manufacturer’s recommendations for lubricating moving parts.
- Ensure proper lubrication to prevent friction and ensure smooth movement.
- Optical Alignment:
- Regularly check and align the microscope optics to maintain optimal image quality.
Table 3: Periodic Maintenance Checklist
| Maintenance Task | Frequency |
|---|---|
| Lubricating Moving Parts | Annually |
| Optical Alignment | Annually |
Aligning Optics
Frequency: As needed
Misaligned optics can lead to distorted or unclear images. Regularly checking and aligning optics ensures consistently high-quality observations.
- Checking Alignment:
- Use a calibration slide or grid to assess the alignment of the microscope’s optics.
- Consult the user manual for specific alignment procedures.
- Adjustment:
- If misalignment is detected, carefully follow the manufacturer’s instructions for adjusting the optics.
Table 4: Alignment Guidelines
| Alignment Task | Frequency |
|---|---|
| Checking Alignment | As needed |
| Adjustment | As needed |
By incorporating these care and maintenance practices into your routine, you can prolong the life of your microscope and ensure that it consistently delivers accurate and high-quality results. Regular attention to cleaning, storage, and periodic checks will contribute to a reliable and efficient microscopy experience. Remember to consult the manufacturer’s guidelines and user manual for microscope-specific care instructions.
Sample Preparation for Microscopy (500 words)
Microscopic observation is only as good as the quality of the prepared sample. Whether you are a student exploring biological specimens or a researcher in a cutting-edge laboratory, proper sample preparation is critical for obtaining clear and informative images. This guide outlines essential steps, techniques, and considerations for preparing samples for microscopy.
Handling and Cleaning Slides
Frequency: Before each use
Slides serve as the foundation for your microscopy observations. Proper handling and cleaning are crucial to prevent artifacts and ensure accurate results.
Handling Slides
- Clean Hands: Always start with clean hands to avoid transferring oils or debris to the slides.
- Use Slide Holders: When manipulating slides, use slide holders to minimize direct contact with the glass.
Cleaning Slides
- Materials Needed:
- Lens cleaning solution
- Lens paper or lint-free wipes
- Procedure:
- Apply a small amount of lens cleaning solution to the slide.
- Gently wipe the slide with a clean piece of lens paper or a lint-free wipe.
Table 1: Handling and Cleaning Materials
| Task | Recommended Materials |
|---|---|
| Handling Slides | Clean hands, slide holders |
| Cleaning Slides | Lens cleaning solution, lens paper or lint-free wipes |
Applying Specimens to Slides
Frequency: As needed
The method of applying specimens to slides depends on the nature of the sample. Different techniques are employed for live specimens, preserved specimens, and non-aqueous specimens.
Wet Mounts
- Place Specimen: Put a small drop of water or mounting medium on the center of the slide.
- Add Specimen: Gently place the specimen in the liquid, ensuring it remains centered.
- Cover Slip: Carefully lower a coverslip onto the specimen, avoiding air bubbles.
Dry Mounts
- Position Specimen: Place the specimen directly onto the center of the slide.
- Cover Slip: Add a coverslip over the specimen, ensuring it is flat and free of air bubbles.
Table 2: Sample Application Techniques
| Sample Type | Recommended Technique |
|---|---|
| Wet Specimens | Wet Mounts |
| Preserved Specimens | Dry Mounts |
| Non-Aqueous Specimens | Dry Mounts |
Staining Techniques
Frequency: As needed
Staining enhances contrast, making specific structures or components more visible under the microscope. The choice of stain depends on the specimen and the structures you want to highlight.
Simple Stains
- Prepare Stain Solution: Dilute the chosen stain in a solvent like water or alcohol.
- Apply Stain: Place a drop of the stain on the specimen and let it sit for a specified time.
- Rinse and Dry: Rinse excess stain off the slide and allow it to dry before observation.
Differential Stains
- Apply Primary Stain: Apply the primary stain to the specimen.
- Apply Counterstain: Add a contrasting stain to highlight different structures.
- Rinse and Dry: Rinse off excess stain and allow the slide to dry before examination.
Table 3: Staining Techniques
| Staining Technique | Purpose |
|---|---|
| Simple Stains | Uniform color for basic observation |
| Differential Stains | Highlight specific structures or cells |
Proper sample preparation is a cornerstone of successful microscopy. By following these guidelines and tailoring your approach to the specific requirements of your samples, you can enhance the quality and reliability of your microscopic observations. Remember to adapt these techniques based on the nature of your specimens and the goals of your microscopy study.
What are the different methods for preparing a specimen?
There are five different ways to take a specimen: Dry and wet mount, squash, smear, and staining. The easiest way is to dry-mount the sample. This method is suitable for seeing the more common airborne particles (invisible to the naked eye), hair, and feathers.
There are some other methods for preparing a specimen.
The most common ways of preparing a specimen are by taking it from the source, collecting it from nature, or making an impression.
The first method is taken from the source, where you collect specimens in their natural state as they grow on living organisms like plants and animals.
The second method involves gathering samples from polluted places like lakes and rivers.
The third method involves getting impressions of tissues or parts of tissues that can be preserved in a plastic mold.
Why do you see black-and-white images in electron microscopes?
That’s because electron microscopes only operate using electron beams. You see, standard microscopes that use visible light to image specimens give you a colored image (you know, like the one you might’ve seen in school). Electron microscopes don’t use light, though — they use electrons — and electrons are invisible (or if you’re a long-time reader of this blog, we can say that electrons are tiny).
What Type of Microscope is Best to See Cells?
Compound microscopes are the best to use if you want to see cells, especially if they’re a bit fiddly or out of the ordinary. The images you’ll see with compound microscopes are two-dimensional, and you won’t be able to view cells under stereo microscopes — their low magnification prevents this.
What are the dos and don’ts of immersion oil in the microscope?
Using immersion oil in the microscope is helpful for taking high-quality pictures. However, it should be used carefully and cautiously because of some dos and donts of immersion oil in the microscope.
The dos of using immersion oil in the microscope are:
The oils must be explicitly made for microscopes to have good resistance to heat, water, light, etc.
They must also be appropriate for optics that may require an airtight seal between the optic body and lens mount to prevent contamination or damage to them while they are being viewed through the microscope.
You should never view your image on a white background, reducing contrast and visibility due to the reflection of light from other surfaces like paper or walls surrounding your scope stand or benchtop surface, which can easily cause glare.
How do we take care of the microscope?
To take care of the microscope, you should use a soft cloth to clean it and store it in a case.
First, turn the power off and remove the eyepieces from the microscope. Clean the microscope’s body by wiping it down with a soft cloth soaked in warm water and soap. Then dry it with a clean towel.
Next, wipe each eyepiece individually with a damp cloth or paper towel before placing them back into their respective sockets on the microscope body. After cleaning each eyepiece, replace them with separate sockets. Please turn on your scope to ensure it works correctly before returning any other parts to your instrument.
What two parts do you place your hands on while carrying a microscope?
You place your hands on two parts when carrying a microscope.
The first part is the microscope’s base, which supports the instrument’s weight and prevents it from moving. The second part is called the tube rings, which can be adjusted to accommodate different sizes of tubes.
How do you use immersion oil on a microscope?
To use immersion oil on a microscope, you must ensure that the scope is clean and dry.
Once done, you can add the required immersion oil to the eyepiece chamber’s bottom. This will help avoid condensation from building up between the two glass lenses attached to either side of your lens tube.
If you have an open-backed or half-open camera, it is best to use an immersion oil bottle with a long spout to pour enough oil into your camera at once without getting any on your hands.
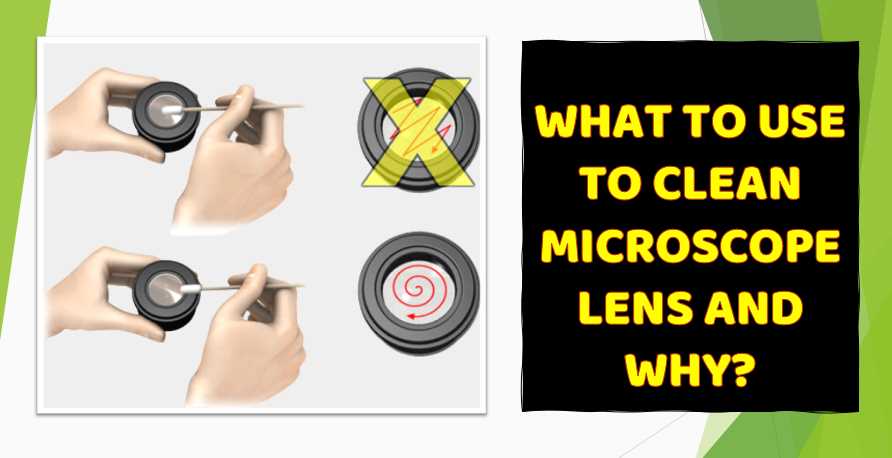
How do you clean a dirty microscope lens?
If you are using a wet lens, you can use your hands to gently scrub the lens surface with a cotton swab or tissue. If you use a dry lens, put some water on it and wipe it off with a clean cloth.
If neither of these methods works, remove the microscope slide from the scope and try cleaning with soapy water or rubbing alcohol in an eyepiece case or cap.
You can clean a dirty microscope lens using a mixture of detergent and water, and you will need to use the same amount of detergent as you would for washing your clothes.
To prepare this solution, put some soap in a bowl and fill it with water. Next, dip the lens into soapy water and rinse it with plain water. Let it dry before replacing it on your microscope stand or taking it out of the light-proof container.
What are some common problems that can occur when using a microscope, and how do you troubleshoot them?
There are several common problems that can occur when using a microscope. Here are some of the most frequently encountered issues and potential solutions:
Blurry or distorted images: This may be due to improper focus or alignment of the microscope’s lenses or other optical components. Try adjusting the focus knob and checking the alignment of the lenses to see if this helps. Also, ensure that the sample is positioned properly and that the microscope’s stage controls are adjusted appropriately.
Insufficient illumination: If the sample appears too dark or the image lacks contrast, this may be due to insufficient illumination. Check that the light source is properly positioned and adjusted, and that the microscope’s brightness and contrast settings are properly configured.
Dust or debris on the lenses: Over time, dust or debris may accumulate on the microscope’s lenses, leading to reduced clarity or resolution. To address this, use a soft brush or lens cloth to gently remove any visible debris from the lenses. Avoid using harsh or abrasive cleaners that may damage the lenses.
Sample contamination or damage: If the sample appears distorted or contaminated, this may be due to improper handling or preparation. Check that the sample was properly prepared and that all equipment used during sample preparation and handling was properly sterilized.
Incorrect magnification: If the image appears too small or too large, this may be due to incorrect magnification settings. Check the magnification controls and adjust as needed to achieve the desired level of magnification.
Uneven illumination: If the image appears unevenly illuminated or exhibits areas of shadow, this may be due to uneven illumination from the light source. Adjust the position and angle of the light source to achieve more even illumination of the sample.
Eye strain or discomfort: Using a microscope for prolonged periods of time can lead to eye strain or discomfort. Take frequent breaks and adjust the microscope’s brightness and contrast settings to reduce eye strain.
By identifying and addressing these common issues, you can ensure that your microscope is functioning properly and that you are able to obtain clear, accurate images of your samples.
How do you properly position and adjust the microscope’s illumination settings for optimal viewing?
Proper positioning and adjustment of the microscope’s illumination settings are essential for obtaining optimal viewing of samples. Here are some general steps to follow:
Position the microscope: Begin by positioning the microscope on a stable, level surface. Adjust the height and angle of the microscope so that it is comfortable to use and provides a clear view of the sample.
Turn on the light source: Turn on the microscope’s light source, which is typically located below the stage or in the base of the microscope. Adjust the intensity of the light to achieve the desired level of illumination.
Adjust the angle and position of the light source: Depending on the type of microscope, you may need to adjust the angle or position of the light source to achieve optimal illumination of the sample. For example, in a stereo microscope, you may need to adjust the position of the ring light to achieve even illumination across the sample.
Adjust the diaphragm: Many microscopes have a diaphragm located below the stage that can be adjusted to control the amount of light that reaches the sample. Adjust the diaphragm to achieve the desired level of illumination.
Use filters: Some microscopes have filters that can be used to adjust the color or wavelength of the light used to illuminate the sample. Use these filters as needed to achieve the desired level of contrast and clarity.
Use polarizers: If your microscope has polarizers, you can adjust their orientation to control the amount and direction of light that reaches the sample. This can be particularly useful for observing samples with birefringent properties, such as crystals.
Avoid glare: When adjusting the microscope’s illumination settings, be careful to avoid creating glare or reflections on the sample. This can interfere with your ability to obtain clear, accurate images.
By following these steps, you can properly position and adjust the microscope’s illumination settings to achieve optimal viewing of your samples. Remember to take your time and make adjustments carefully to ensure the best possible results.
What are some important safety precautions to keep in mind when using a microscope, such as handling hazardous materials or avoiding eye strain?
When using a microscope, it is important to observe certain safety precautions to avoid injury and protect your health. Here are some of the most important safety precautions to keep in mind:
Avoid eye strain: Microscope work can be taxing on the eyes, so it is important to take frequent breaks and adjust the microscope’s brightness and contrast settings as needed to reduce eye strain. Also, make sure that the microscope’s eyepieces are properly adjusted to match your individual vision.
Handle hazardous materials carefully: Some materials that are viewed under a microscope can be hazardous to your health, such as infectious agents or chemicals. Wear appropriate personal protective equipment (PPE), such as gloves and a lab coat, and handle hazardous materials in a designated area with proper ventilation.
Use caution when handling glass slides and coverslips: Glass slides and coverslips can break or shatter, causing cuts or other injuries. Handle them carefully and use caution when inserting or removing them from the microscope.
Avoid touching the lenses: Touching the microscope’s lenses can damage them and lead to distorted or blurry images. Use a soft brush or lens cloth to clean the lenses, and avoid using harsh or abrasive cleaners.
Turn off the microscope when not in use: When you are finished using the microscope, be sure to turn it off and unplug it to prevent accidental injury or damage.
Maintain good posture: Sitting in the same position for prolonged periods of time can lead to back and neck strain. Maintain good posture and take frequent breaks to stretch and move around.
Keep the microscope clean and well-maintained: Regularly clean and maintain the microscope to ensure that it is functioning properly and to prevent the buildup of dust and debris.
By observing these safety precautions, you can minimize the risk of injury or illness when using a microscope and ensure that you are able to obtain clear, accurate images of your samples.
How do you use a microscope to observe and analyze samples, such as cells or tissues?
Observing and analyzing samples with a microscope requires several steps, including sample preparation, focusing, and adjusting the microscope’s settings. Here is a general guide to using a microscope to observe and analyze samples:
Sample preparation: Depending on the type of sample, you may need to prepare it for observation by fixing, staining, or sectioning it. Follow established protocols for sample preparation to ensure accurate and consistent results.
Place the sample on the microscope stage: Once the sample is prepared, place it on the microscope stage and secure it in place using clips or other accessories as needed.
Adjust the objective lens: Choose the appropriate objective lens for the sample you are observing and adjust it to the lowest magnification level. Use the coarse focus knob to move the objective lens closer to the sample until it is in focus.
Adjust the illumination: Adjust the microscope’s illumination settings to achieve optimal viewing of the sample. Use the diaphragm, filters, and polarizers as needed to adjust the brightness, contrast, and color of the image.
Increase the magnification: Once the sample is in focus at low magnification, gradually increase the magnification level by rotating the nosepiece and selecting higher magnification objective lenses. Use the fine focus knob to adjust the focus as needed.
Analyze the sample: Use the microscope to observe and analyze the sample, looking for features such as cell structure, organelles, and other characteristics. Take notes or make sketches of what you observe, and document your findings using photographs or other imaging techniques.
Carefully remove the sample: When you are finished observing the sample, carefully remove it from the microscope stage and dispose of it properly according to established protocols.
By following these steps, you can use a microscope to observe and analyze samples with accuracy and precision. Remember to take your time and make adjustments carefully to ensure the best possible results.
What are some common staining techniques used in microscopy, and how do they help enhance visualization of samples?
Staining techniques are commonly used in microscopy to enhance visualization of samples by adding contrast and color to specific structures or components. Here are some common staining techniques used in microscopy:
Hematoxylin and eosin (H&E) staining: H&E staining is a common staining technique used to visualize the structures of cells and tissues. Hematoxylin stains the nuclei blue-purple, while eosin stains the cytoplasm and extracellular matrix pink.
Gram staining: Gram staining is used to differentiate bacterial cells based on their cell wall structure. Gram-positive bacteria stain purple, while gram-negative bacteria stain pink.
Periodic acid-Schiff (PAS) staining: PAS staining is used to detect the presence of complex carbohydrates, such as glycogen, in cells and tissues. The stained carbohydrates appear magenta or pink.
Immunofluorescence staining: Immunofluorescence staining uses fluorescent dyes and antibodies to label specific molecules or structures within cells or tissues. The labeled molecules appear as bright, fluorescent colors under a microscope.
Oil Red O staining: Oil Red O staining is used to visualize lipid droplets within cells. The stained lipid droplets appear as red-orange dots.
Wright’s staining: Wright’s staining is used to visualize blood cells, such as red and white blood cells, and to identify abnormal cells. The stained cells appear in various shades of purple and pink.
Staining techniques help to enhance visualization of samples by providing contrast between different structures or components within cells and tissues. By selectively staining certain structures or molecules, staining techniques allow researchers and clinicians to better observe and analyze specific features of interest.
How do you troubleshoot and repair common issues with a microscope, such as misalignment or malfunctioning components?
Here are some common issues that can occur with a microscope and troubleshooting tips for resolving them:
Blurry image: If the image appears blurry, check the focus knob and adjust it as needed to bring the image into focus. Also, check the objective lens and ensure that it is clean and free from debris or smudges. If the issue persists, check the eyepieces and make sure they are properly aligned.
Misalignment: If the image appears misaligned, check the stage and ensure that it is level and properly aligned with the objective lens. Also, check the eyepieces and make sure they are properly aligned. If the issue persists, consult the microscope manual or contact a technician for assistance.
Malfunctioning components: If a component of the microscope, such as the light source or the stage, is not working properly, check the connections and power source. Ensure that all connections are secure and that the power source is functioning properly. If the issue persists, consult the microscope manual or contact a technician for assistance.
Poor illumination: If the image appears too dark or too bright, adjust the diaphragm or the light source to increase or decrease the illumination. Also, check the filters and polarizers and ensure that they are properly adjusted.
Dirty or scratched lenses: If the lenses are dirty or scratched, clean them with a soft, lint-free cloth or lens paper. If the lenses are scratched, they may need to be replaced.
When troubleshooting and repairing issues with a microscope, it is important to be patient and careful to avoid causing additional damage. Consult the microscope manual for specific instructions and diagrams, and consider contacting a technician or professional for assistance if you are unsure of how to proceed.
Final Words:
Microscopes are a handy tool for anyone interested in science, medicine, or forensics. They allow you to see things that would otherwise be invisible to the naked eye, and they can be used for various purposes, from examining insects to inspecting your teeth. This guide will help you learn how to use a microscope safely and effectively and which types of microscopes are best suited for different tasks.
But how do you use one? In this blog post, we’ve outlined the five steps to using a microscope. We’ve also included tips on using a stereo and compound microscope, and we’ll be adding more in the future! If you have questions about a microscope’s work, feel free to ask below. We’ll respond as soon as we can.

I am an enthusiastic student of optics, so I may be biased when I say that optics is one of the most critical fields. It doesn’t matter what type of optics you are talking about – optics for astronomy, medicine, engineering, or pleasure – all types are essential.
Table of Contents

Pingback: 5 Best Microscope For Soil Biology: Reviews With Expert Recommendation
Pingback: 5 Best Labomed Dental Microscope Review: A Complete Buying Guide 2022
Pingback: 5 Best Microscope For Veterinary Use: Reviews With Buying Guide
Pingback: 5 Best Microscope For Laboratory: Reviews With Buying Guide in 2022
Pingback: Best Microscope for Adults: Complete Buying Guide with Comparison in 2022
Pingback: 5 Best Starter Microscope: Comparison With Buying Guide in 2022
Pingback: 5 Best Chinese Microscopes: A Complete Buying Guide in 2022
Pingback: 5 Best Mobile Phone Microscope: Comparison with Buying Guide in 2022
Pingback: 5 Best Most Commonly Used Microscopes We Tested in the Last 2 weeks: Comparison With Video
Pingback: Simple Microscopes: History, Parts with Functions, How Does it Work, Benefits
Pingback: 10 Best Microscope for Students: Reviews and Buying Guide
Pingback: A Guide to Recognizing Good Quality Microscope for Students & What You Should Look For
Pingback: 5 Best Vanguard Microscope Review: A Complete Buying Guide 2022
Pingback: 6 Reasons Why You Need Microscope For Parasites: What It Is and How To Use It (Video Guide)
Pingback: We Tested Wireless Digital Microscopes to See If They Work: Including a Comparison with Video Guide
Pingback: 5 Best Microscope For Photomicrography: A Complete Buying Guide with Comparison
Pingback: 5 Best Digital Microscope for Biology: Buying Guide for High School and College Student
Pingback: 5 Best AmScope Microscope: Comparison With A Complete Buying Guide
Pingback: 5 Most Popular Discovery Channel Smartphone Microscope: The Ultimate Video Guide Explained
Pingback: 5 Best Microscope with USB: Comparison with Buying Guide in 2022
Pingback: I review Advanced Microscope. After testing over 30 of them, Check 5 Best Models for most researchers With Buying Guide
Pingback: How To Choose the Most Magnifying Microscope: An Infographic Guide With Buying Guide
Pingback: 5 Best Stereo Microscope For Entomology: The Under $100 Version (With Video)
Pingback: Navigating Histological Landscapes with Microscopic Precision: Microscopes for Histological Studies
Pingback: Lumagny MP7545: The Best Portable Microscope For High-Quality Stains: Instructions Explained
Pingback: 5 Things You Need To Know About Microscopes for 10-Year-Olds on a Scientific Journey
Pingback: The Lens of Learning: Digital Microscopes in Modern Classroom Science