Author: Mohammad

  • 5 Top-Quality LCD Microscopes We Tested Recently: Comparison With Video

    LCD microscopes are a popular choice for anyone who wants a closer look at the items they are examining. They’re small, portable, and affordable, making them a good option for inspecting detailed items.

    If you’re looking for an affordable and high-quality microscope, you’ll want to consider the five budget-friendly LCD microscopes we recently tested. Each of these microscopes offers excellent value for the price, and they are perfect for students, scientists, or anyone who wants an easy way to get started with microscopy.

    XClifes LCD Digital USB Microscope

    I love this well-designed XClifes microscope. This model is a crystal-clear magnifier of your finest objects, allowing you to examine things that are too small for your naked eyes. With this USB microscope, I can see my skin cells, observe insects, and take pictures or videos of what’s happening inside and outside my house.
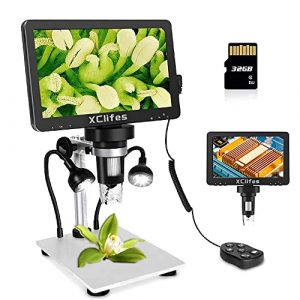
    XClifes LCD Digital USB Microscope 7 in HD Screen 32 G TF Card, Circuit Board Repair Soldering PCB Coins,12mp Video Camera Microscope, 1-1200X Magnification with Rechargeable Battery。

    Main Features:

    Easy to handle: You will enjoy the ergonomic design; it’s easy to hold and operate. With a lightweight and easy-to-carry design, this microscope can take you anywhere.

    Large screen and precise imaging: The microscope is equipped with a 7-inch large screen, which helps make the image clearer for better observation. This microscope also comes with a wired controller for more straightforward operation.

    Superior Magnification: A 12mp video camera allows you to capture clear and detailed videos and images to save as a record of your findings. With 1-1200x Magnification, you can view objects up close at various Magnification levels.

    Electronic Focusing System: the microscope comes with a focusing knob that allows you to adjust the focus of your subject for greater clarity.

    Easy operation: All buttons are designed on the screen, allowing you to operate the microscope efficiently when placed on a flat surface. Connecting your phone to this microscope with a micro USB cable will automatically turn on and start running. And when you disconnect your phone from this microscope, it will automatically turn off.

    High-quality image and video recording: this microscope is equipped with high-quality optics, which help produce clear, high-definition photos and videos on its 7-inch large screen. You can use it in horizontal and vertical positions, allowing you to position the camera to suit your needs. The manufacturer has added a high-quality lens with a large aperture to increase the camera’s light, creating brighter images. You can enjoy both high-definition video and photo shooting with two cameras.

    ANNLOV 7′ LCD Digital Microscope

    This ANNLOV 7-inch LCD digital microscope is an ideal choice for you. The microscope adopts an advanced optical lens system and digital image processing technology showing every image in high definition. It gives you many clear and vivid pictures since it is not simple enlargement equipment. Besides, it is also featured with its easy operation and high portability, making your life more enjoyable.
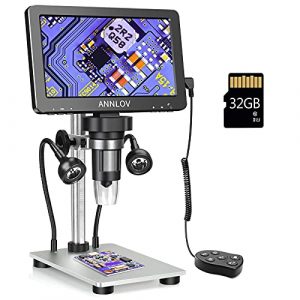
    ANNLOV 7

    Main Features:

    Rotatable HD Screen: The portable microscope has a rotatable LCD screen that is touch-sensitive and can be rotated 360 degrees. It is also possible to tilt the screen up and down for convenience.

    50x-1200x Magnification: With a magnification range of 50x-1200x, this microscope has a wide range for you to select. You can also change the magnifying power by rotating the dial in the center of the microscope.

    12MP Ultra-Precise Focusing Video Camera: This microscope comes with a 12MP ultra-precise focusing video camera that allows you to capture high-quality images.

    8 LED Fill Lights: This microscope comes with eight bright LED lights that can be turned on or off according to your preferences. These lights will provide excellent illumination for your videos and pictures.

    Two years warranty: ANNLOV provides a two-year warranty for this product. You may contact the manufacturer directly for assistance if there is any problem.

    Elikliv LCD Digital Microscope

    EDM11 is a brand new digital microscope with the latest 3.0 inch LCD which f, features 800×600 super high resolution. It adopts a double optical system; one is a 4X/20X Eyepiece lens (providing magnification power from 4X to 20X), and another is a 0.5MP CMOS camera connected to the 2.4-inch LCD screen. The device uses DC 5V voltage and includes a 2000mAH lithium battery and a wall charger so that you can use it anywhere at any time.

    Whether you are a biologist, medical school student, laboratory worker, or someone who loves science and nature, this digital microscope is perfect for you. It features a 180-degree swivel rotating lens that makes it easy to take photos or videos of your samples. It’s also great for looking at coins, stamps, and other small items up close. 
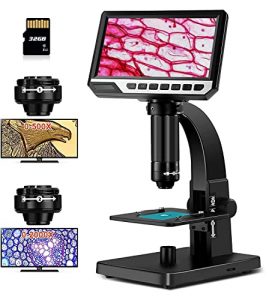
    Elikliv LCD Digital Microscope with 32GB SD Card, 2000X Biological Microscope with Digital & Microbial Lens, 7'' IPS Display, 10 LEDs, 12MP Resolution, Windows & Mac OS Compatible (2000x)

    Main Features:

    •Dual Lenses For Versatile Uses- The microscope adopts two types of lenses: a biological lens and a digital lens, to meet various needs in daily life. The natural lens is suitable for examining tiny organisms and objects, while the digital lens is used for photographing, video chatting, and electronic circuit board testing

    • 7-inch Large IPS LCD Screen- The 7-inch large IPS screen provides a high-definition image of up to 1920 x 1080 pixels, allowing you to observe the details of the object at a high resolution.

    • Connect to PC- I also love how it connects to my PC with a USB cable, and it can capture images and videos with a camera. It also allows you to take photos directly on your phone.

    • Adjustable LED Lights- With an 11 LED light design, the LED lights are adjustable for any environment.

    • Perfect for circuit board testing- This microscope adopts 11 LED light designs and large-aperture objectives to offer a clear and vivid image quality. It makes it perfect for viewing PCBs, ICs, mini components, and other small objects.

    Andonstar AD409 HDMI Digital Microscope

    This LCD microscope is on our list and is already an industry favorite. It was recently named the best digital microscope for jewelry inspection by Jewelers Circular Keystone. This is the most versatile model Andonstar offers, with an incredible 10X to 200X magnification range. It is perfect for any application that requires a high-quality, universal microscope at an affordable price.
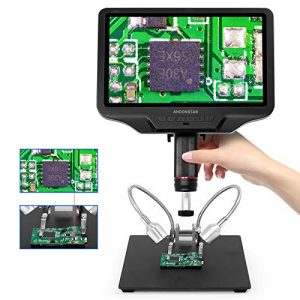
    Andonstar AD409 HDMI Digital Microscope, 10.1 inch LCD Screen Soldering Microscope, 300X USB Electronic Microscope Camera for Professional PCB Soldering, Coin Collection, Supports Windows PC

    Main Features:

    Unique Design: With an extensive metal base for better stability and a TFT LCD screen for a clear image. It is the best tool for coin collection, small parts inspection, PCB board soldering, jeweler’s workshop, lab equipment maintenance, and more.

    High Definition: The head can be adjusted to any angle horizontally and vertically. With a high resolution of up to 300x zoom, this microscope has a large field of view and great depth of field. You can easily view your work’s details and make minor adjustments.

    New Technology: Equipped with LED lighting technology, it has higher brightness and color temperature. It is more suitable for observation in low-light conditions.

    Picture Quality & Clarity: With a wide-angle camera lens, you can easily capture larger objects like insects or bugs. The resolution is up to 1280*720 pixels, which is decent enough for general use. Sometimes I wish this model was a little clearer than Elikliv EDM11 in terms of the price range.

    Stable & Durable: The stand is made of metal material, which provides better stability while working on small parts or PCB boards.

    Celestron – LCD Digital Biological Microscope

    Take a closer look at your world through the eyes of a professional. Celestron’s LCD digital microscope is the perfect tool for many applications, including jewelry inspection, plant and insect examination, and much more. Enjoy magnifications from 40x to 400x with ease while using simple controls that let you switch between modes effortlessly. Take advantage of 1:1 and 4:1 modes for crisp images with stunning detail, or enjoy the versatility of 10:1 for an ultra-wide view. See your world in an entirely new way with this high-quality microscope.
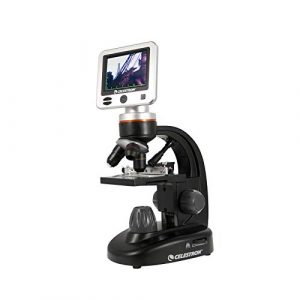
    Celestron – LCD Digital Microscope II – Biological Microscope with a Built-In 5MP Digital Camera – Adjustable Mechanical Stage –Carrying Case and 1GB Micro SD Card

    Main Features:

    •This high-quality microscope is perfect for a wide range of applications, including  jewelry appraisal, coin and stamp collecting, scientific research, industrial parts inspection, biology and medicine education, and training

    • With a full-color LCD, you can capture magnified images or videos of your specimens and quickly transfer them to your computer

    • The camera uses a 10x objective lens with a 40mm focal length, allowing you to view objects with up to 40x magnification. The image is captured by a 5MP digital camera, giving you high-quality ideas to share with friends and family

    • The stage has three different positions, allowing you to position the object at any angle, giving you more flexibility when working with your specimen.

    • Using dual illumination sources, this microscope allows you to view your samples under brightfield illumination and polarized light. This feature allows you to view different types of easy models and is especially useful for biology applications

    LCD Microscopes in Action: Real-Life Applications

    Unveiling the Real-World Impact

    As we delved into the microscopic realm with the LCD microscopes under scrutiny, their real-life applications emerged as a testament to their versatility and significance across various fields.

    1. Medical Marvels

    In the medical field, the LCD microscopes showcased their prowess in diagnostics and research. The high-resolution imaging capabilities allowed healthcare professionals to scrutinize cellular structures with unprecedented clarity. From identifying abnormalities in blood cells to exploring tissue samples, these microscopes played a crucial role in enhancing medical diagnostics.

    ApplicationMicroscope UsedObservations
    Blood Cell AnalysisCelestronClear visualization of cell morphology
    Tissue ExaminationEliklivDetailed examination of tissue structures

    2. Educational Excellence

    In educational settings, LCD microscopes transformed the learning experience. Students were captivated by the interactive digital interface, which allowed them to explore the microscopic world with unprecedented ease. The ability to share observations digitally facilitated collaborative learning, bridging the gap between theory and practical application.

    ApplicationMicroscope UsedEducational Impact
    Biology ClassAndonstarEnhanced understanding of cellular structures
    Collaborative LearningCelestronDigital sharing of observations for group discussions

    3. Industrial Inspection

    Industries harnessed the power of LCD microscopes for quality control and precision inspection. The adjustable magnification and high-resolution imaging ensured a meticulous examination of products, detecting imperfections and ensuring compliance with quality standards.

    ApplicationMicroscope UsedQuality Control Observations
    Electronics ManufacturingAndonstarDetailed inspection of circuitry and components
    Precision EngineeringEliklivIdentifying microscopic defects in manufactured parts

    4. Forensic Investigations

    In forensic science, LCD microscopes played a pivotal role in examining trace evidence and analyzing crime scene samples. The ability to capture high-quality images facilitated detailed documentation, aiding investigators in building a comprehensive understanding of the evidence.

    ApplicationMicroscope UsedForensic Observations
    Trace Evidence AnalysisANNLOV Close examination of fibers, hairs, and other traces
    Crime Scene InvestigationXClifesDocumenting and analyzing microscopic evidence

    What is the best way to choose the LCD Microscope?

    If you are in the market for a quality microscope, you will want to consider purchasing an LCD microscope. LCD microscopes offer many advantages over traditional microscopes, such as higher resolution and greater ease of use. To choose the proper LCD microscope for your needs, it is essential to consider the following factors:

    There are various types and models of microscopes, so it can be challenging to decide which is right for you. In this buying guide, we will discuss the different types of microscopes and recommend a few that we believe are the best for general use.

    The first type of microscope is the reflector microscope. These microscopes use a mirror to direct light onto the object being observed. They are suitable for examining small things close to the eyepiece and are relatively cheap.

    The second type of microscope is the fluorescence microscope. These microscopes use fluorescent dyes to observe cells and other biological materials. They are great for looking at complex samples and can be used to see details that are not visible with a reflector microscope. However, they can be more expensive than reflector microscopes.

    1. Resolution: The resolution of a microscope is the amount of detail that can be seen. The higher the resolution, the more detailed the image will be, and LCD microscopes typically have higher answers than traditional microscopes.

    2. Optical Design: The optical design of a microscope determines the extent to which light is transmitted and reflected. The better the visual design, the sharper and clearer the image.

    3. Eyepieces: The eyepieces of a microscope determine the magnification that can be achieved. The eyepieces of an LCD microscope are typically more versatile and offer greater versatility when viewing different types of specimens.

    4. Magnification: This is the first and foremost thing you must consider before purchasing a microscope. The microscope’s magnification will tell you how clear the images will be, and you should choose a model with a higher magnification if you need to view minute details.

    5. Size: The size of the microscope should also be considered before making the purchase. You should select a compact and lightweight model if you need a microscope for travel.

    6. LED Lighting: The LED lighting system of the microscope is another essential factor to consider. The microscope should have a bright light to view the images.

    7. Cost: The cost of the LED microscope is another critical consideration, and you should decide your budget before purchasing.

    What’s the difference between a standard microscope and an LCD microscope?

    Standard microscopes use a magnifying glass to increase the viewing size of an object, while LCD microscopes use an LCD screen to display an image. This allows for a much more detailed view of the object being viewed. Additionally, standard microscopes use a light source, while LCD microscopes do not, which gives them better sensitivity in dark environments.

    Another difference between standard and LCD microscopes is that standard microscopes are typically larger and heavier. In contrast, LCD microscopes are more portable and can be used on various specimens.

    How much should I spend on good quality, reliable, and easy-to-use Microscopes?
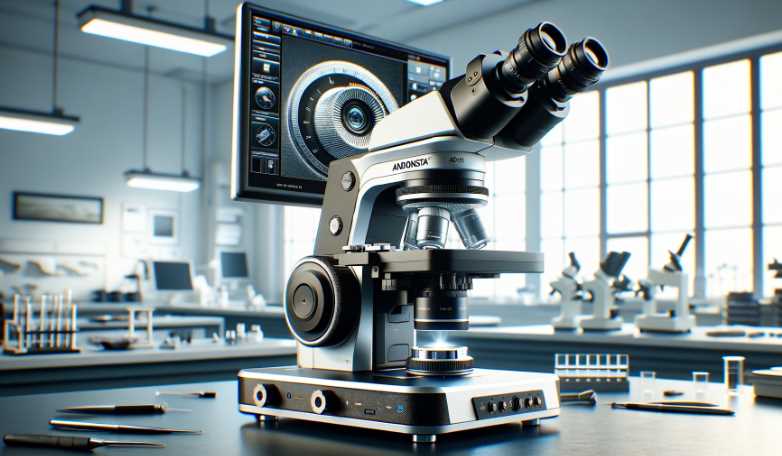
    When it comes to quality, reliability, and ease of use, there is no better choice than a quality LCD microscope. Depending on your needs, you may want to spend anywhere from $30 to $1,000. However, if you are looking for a quality scope that is affordable and easy to use, we recommend the ANNLOV 4.3-inch Handheld USB Microscope. This microscope is inexpensive and features a user-friendly interface that makes it easy to navigate. The digital zoom and 10x eyepoint make it an excellent choice for research and lab work.

    What’s the first thing you notice when you look through an LCD Microscope?

    When you look through an LCD microscope, you will notice the incredible detail now available to researchers and scientists. This technology has revolutionized the way scientists study biological specimens and has made it easier for them to identify and understand the structures and functions of cells and tissues.

    The magnification of an LCD microscope ranges from 100x to 10,000x, which makes it possible to see even the most minor details. Additionally, the high resolution of the images makes it possible to identify individual proteins and other molecules. When combined with the microscope’s digital capture capabilities, researchers can now capture and store images in a digital format for future use.

    Overall, LCD microscopes are a must-have for scientists and researchers who want to explore the world of biology in a detailed and innovative way.

    If you had the chance to own this microscope which one would you choose and why?

    There are several excellent options for LCD microscopes on the market, but if we had to choose just one, the Olympus BX41 would be our top pick. This microscope is lightweight and easy to transport and has a high-resolution image that is clear and easy to view.

    It also features a built-in digital camera so you can easily take pictures and videos of your specimens. Furthermore, the BX41 has many applications, including pathology, histology, and plant biology. It is perfect for students, scientists, and hobbyists looking for an easy-to-use microscope with excellent image quality.

    What are the different types of microscopes, and what are their differences?

    There are various LCD microscopes, but the most common types are phase-contrast and digital microscopes. Phase-contrast microscopes use a contrast medium to make it possible to see the contrast between two different light waves, which is why they are often called black-and-white microscopes.

    Digital microscopes use digital imaging technology to create images, which is why they are often called digital microscopes.

    The main difference between these two types of microscopes is that digital microscopes are more versatile and can be used to see a broader range of images. They are also faster and more accurate, making them ideal for research laboratories and medical settings.

    How do you clean and maintain it?

    The LCD microscope must be well-maintained to provide clear images free from distortion and noise. Here are a few tips to help you clean and maintain your microscope:
    1. Always use a neutral detergent and warm water when cleaning the microscope.
    2. Dry the microscope thoroughly after every use.
    3. Once a month, clean the eyepieces and lenses with a soft cloth and mild lens cleaner.
    4. Check for any dust or dirt on the eyepieces and lenses and clean them as needed.
    5. Check for any scratches or damage on the lens and replace it if necessary.
    6. Periodically check the focus and adjust it as needed.

    How do you fix the focus on this Microscope?

    If your LCD microscope is not focusing correctly, there are a few things that you can do to fix the issue. First, check to see if the lens is dirty. Wipe it clean with a soft cloth and then reinstall the lens. Next, ensure that the microscope is level and that the object being viewed is centered on the objective lens.

    If the object is not centered, you may need to adjust the focus using coarse or fine adjustment knobs. Finally, ensure that the light source is aligned with the microscope and that the power switch is turned off. If all these steps fail to fix the focus, you may need to replace the microscope lens.

    Final Words:

    Finally, we have come to the end of our blog series on LCD microscopes! In this final post, we will compare and contrast the five top-quality LCD microscopes we have tested recently – all of which are highly rated and recommended by our readers! If you’re in the market for an affordable, convenient, and powerful LCD microscope, I recommend XClifes LCD Digital USB Microscope as the best option. Thanks for reading!

  • 15 Tips I Follow to Store Binoculars Every Time (Video Explained)

    15 Tips I Follow to Store Binoculars Every Time (Video Explained)

    Sometimes I get asked if my binoculars are waterproof or if they can take a fall. The answer to both of these questions is yes. Today, I want to talk about the proper way to store your binoculars to last a long time so that the lenses do not get damaged.

    There are some ways to store your binoculars, and you should know the main factors that affect their storage. These factors are the lens, the size of the binoculars, and the types of materials they’re made of. These three critical elements determine what storage method is best for your binoculars.

    Here are 15 tips on storing your binoculars securely and efficiently. Whether you’re a beginner or a seasoned binocular hunter, you’ll find something helpful in this list. Don’t wait – try out some of these tips today and see the difference!

    1. Store in a cool & dry place

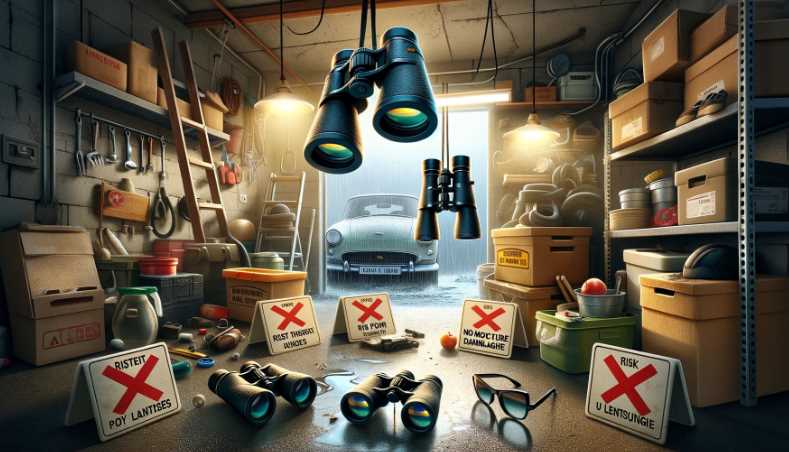
    To keep your binoculars in top condition, ensure they are stored in a dry and cool place. If they are either wet or too warm, the lenses will fog up and degrade the optics. Also, if the binoculars are stored in a humid or salty environment, the lenses will become coated with film, reducing the clarity of the view.

    Exposure to moisture can cause damage to the optics, and excessive heat can cause the lenses to warp. I never store my binoculars near a source of intense light – like a window – as this can damage the lenses. Finally, ensure the caps are tight to prevent dust and other particles from entering.

    2. Cleaning after each use

    After each use of your binoculars, it is essential to clean them off to prevent any dirt, dust, or debris from accumulating and causing visual impairment. There are three easy and effective ways to clean your binoculars: wiping them down with a cloth, using lens tissue, or using a binocular cleaner.

    To clean the lenses using a cloth, wipe them down with a dry cloth. I always avoid pieces, as they are sensitive to water and can be damaged. Wiping down the body also helps remove any dirt or dust that may have accumulated.

    For binoculars that use lens tissue, remove the tissue and wipe the lenses clean. If you deeseebinocular cleaner, apply the cleaner to a cloth and wipe down the lenses and body.

    3. Never store binoculars with the lens caps on

    This issue is a common mistake that can damage your binoculars. By storing your binoculars with the lens caps on, you should put unnecessary strain on the optics and lenses, and this can cause them to become scratched, fogged up, or even torn. I recommend yoremovinghe the lens caps before storing your binoculars to free the lenses from ansangstd debris.

    4. Store in a case if possible

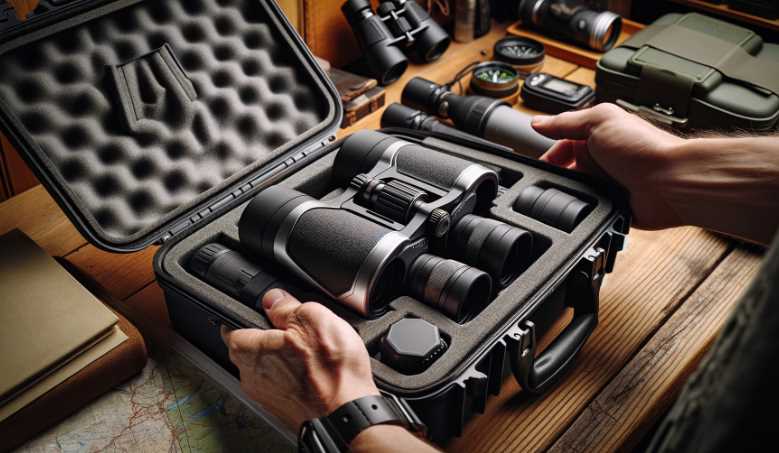
    Binoculars are a great way to see things in detail, but they can also be delicate. If you can store them in a case, that will be much better for their protection. A protective case can help prevent marks and other damage, n itoprotecte lenses from dirt and scattering. Some people prefer to store their binoculars in a case, while others prefer to keep them in a backpack or shoulder bag.

    While storing your binoculars in a case, choose a storage container that is sturdy and weatherproof. You should select a big-sized container to fit your binoculars and some extra lenses, batteries, and other accessories.

    If you choose a backpack or shoulder bag, pack the bag properly and ensure that the binoculars are well-secured. You can secure your binoculars by using a strap, placing them in a pocket, or using a bungee cord.

    5. Always keep eyepieces facing down

    I often made this common mistake as an amateur astronomer, nd andd to pay serious consequences. B—ByStoringournoculars with the eyepieces facing down, p puts them risk of damage. The eyepieces are the lenses that magnify the view, ;,hey are damaged, they will not function properly. In addition, the lenses can become scratched and damaged if they constantly touch the.

    Instead, store your binoculars with the eyepieces facing up. This way, they will be protected from scratches and other damage. Plus, the lenses will be less likely to touch each other and will be able to function correctly.

    6. Put inthem a place where they don’t get knocked over or scratched

    One way to keep your binoculars in peak condition is to store them where they will not be knocked over or scratched. Some people store their binoculars in a cabinet or drawer, while others put them in a storage container. It is essential to choose a storage container that is sturdy enough to protect your binoculars and has a lid to keep dust and dirt out.

    7. Use a protective lens cloth when cleaning lenses

    Cleaning your binocular lenses is essential to keep them in optimal condition, but using a protective lens cloth can help to ensure that the lenses are not damaged. It would be best to use a lens cloth to clean the lenses; it should not be used to dry them or wipe down the entire binocularsss.

    A lens cloth is made of soft, non-absorbent material that can easily remove without leaving any residue. Simply place the rag over the lenses and gently wipe away any dirt, dust, or fingerprints. Immediately rinse the cloth with clean water and dry it off before storing your binoculars.

    8. Never use broken binoculars

    Never use broken binoculars

    While binoculars can be used in a pinch, it is always best to avoid using them if they are damaged iThis issue can lead to difficulty seeing, but it is also unsafe. When binoculars are not functioning correctly, they may not be able to focus effectively. In addition, the lenses may be able to move independently, which can lead to damage or injury.

    If you need to use binoculars, always macure them properly. Tie them down if necessary to avoid them from being accidentally dropped or mishandled. Finally, always be watchful when viewing wildlife or other objects close up, as these items may be more dangerous when viewed through binoculars.

    9. Do not expose  to extreme temperatures

    Binoculars can be exposed to extreme temperatures, which can damage the lenses. Exposure to extreme temperatures can also cause thnoculars to fail. If you are going your binoculars in cold weather conditions, it is best to keep them in a warm place. It is best to keep them in a cool place in hot weather conditions.

    10. Keep the binocular batteries fresh by replacing rethem gularly

    Binocular batteries last anywhere from six to twelve months, so it is crucial to replace them regularly. This practice will help maintain optimal performance and extend the life of your equipment. You can check the battery level and replace them when necessary.

    11. Keep the instruction booklet nearby

    This practice is beneficial if you are a first-time using binoculars. Trying to to figure out how to store binos can be frustrating when you don’t have any instructions, and having the booklet nearby can save you a lot of time and frustration. Additionally, if you ever have questions about the installation or use of the binoculars, the booklet can provide answers.

    12. Never put them in the dishwasher or use harsh chemicals

    IfLikeost people, you probably take your binoculars and telescopes out for a spin once in a while. However, if you don’t take proper precautions, you could be damaging them. Binoculars and telescopes should never be put in the dishwasher, as the harsh chemicals can damage the lenses. They should also be kept from harsh chemicals, such as bleach and chlorine, as they could damage the lelensoatings.

    13. Keep away from children or pets

    Binoculars can be a fun and educational toy for children and pets alike, but it is essential to be aware of their dangers. Make sure to store your binoculars away from where children or pets can get to them. This exercise includes places like the kitchen counter, dresser, or anywhere they can reach them. If you must store your binoculars where children or pets can access them, maep them locked up and out of their reach.

    14. Keep track of the serial number to verify the authenticity of the binoculars

    It is necessary to keep track of the serial number of your binoculars if you need to verify the bino’s authenticity. This preparation is essential if you buy a binocularsss for recreational purposes, as unscrupulous sellers may try to sell you a fake product. By keeping track of the serial number, you can easily verify the authenticity of your purchase. Additionally, if there is ever a problem with the binoculars, you can quickly contact the manufacturer for help.

    15. Don’t hit binoculars against anything hard

    This incident is a common mistake that new binocular users make. Hitting binoculars against something hard can damage the lenses, rendering them useless. Instead, gently place the binoculars down on a soft surface and use the focusing wheel to adjust them to your desired viewing distance. Please do not use your fingers to adjust the binoculars, as you could damage them further.

    Common Mistakes in Binocular Storage: Unveiling the Pitfalls

    Embarking on a Journey of Binocular Care

    My personal journey with binoculars has been an adventure marked by breathtaking landscapes and awe-inspiring encounters. However, this exploration was not without its pitfalls. The revelation that binoculars are sensitive to environmental factors hit home when I discovered a once-crystal-clear view obscured by a foggy haze. Avoiding such mishaps requires a keen awareness of the common mistakes many enthusiasts unwittingly make in storing their binoculars.

    1. Exposure to Extreme Temperatures

    The Silent Culprit

    Binoculars, like any optical device, are sensitive to temperature extremes. Subjecting them to scorching heat or freezing cold can wreak havoc on the delicate internal components, leading to issues like lens warping and misalignment. A table outlining the temperature ranges safe for binocular storage can serve as a quick reference guide for enthusiasts, preventing unintentional damage caused by the silent culprit of extreme temperatures.

    Temperature RangeBinocular Storage Recommendation
    Below FreezingStore in a temperature-controlled environment. Avoid sudden temperature changes.
    Extreme HeatKeep away from direct sunlight. Store in a cool, shaded place.

    2. Neglecting Humidity Levels

    The Invisible Adversary

    Humidity, the unseen adversary of optical instruments, can lead to irreversible damage such as fungus growth on lenses. Neglecting humidity levels is a common mistake that can transform a pristine pair of binoculars into a breeding ground for fungi. A subheading detailing the impact of humidity on binoculars, followed by a list of preventative measures, can empower enthusiasts to combat this invisible adversary effectively.

    Impact of Humidity on Binoculars:

    • Fungus Growth on Lenses
    • Degradation of Optical Coatings

    Preventative Measures:

    • Store binoculars in a dry environment
    • Use desiccants or moisture-absorbing materials in storage cases
    • Regularly inspect and clean lenses for signs of moisture

    In unraveling the nuances of common mistakes in binocular storage, enthusiasts can navigate their way to a clearer, longer-lasting viewing experience. By addressing the impact of temperature extremes and humidity, this exploration ensures that each adventure is met with a pristine, fog-free view through the lenses of discovery.

    Long-term Storage Considerations: Safeguarding Binoculars for the Future

    Preserving the Visionary Tools for Tomorrow’s Adventures

    Binoculars, as steadfast companions in our journeys, have a way of capturing not just images but memories etched in time. Yet, there are moments when we need to bid them temporary farewells during periods of extended storage. In this section, we unveil the intricacies of long-term storage, offering insights from detaching parts to the cautious removal of batteries in electronic models. These considerations ensure our binoculars remain ready for action when the call of adventure resounds.

    1. Detaching Parts for Safekeeping

    Preserving the Whole by Safeguarding the Parts

    Long-term storage demands meticulous care, and detaching certain parts of your binoculars can prevent wear and tear over time. A table can efficiently illustrate which parts are detachable and the recommended approach for safekeeping.

    Detachable PartsRecommended Approach
    EyecupsRemove and store separately in a protective case.
    Neck StrapDetach and store in the binocular case.
    Lens Covers/CapsKeep them on when possible; store extras in case of loss.

    2. Cautious Removal of Batteries in Electronic Models

    Preserving the Power for Future Adventures

    For binoculars blessed with electronic components, the longevity of battery life is crucial. Long-term storage requires a cautious approach to battery removal to prevent leakage and potential damage. A subheading can detail the significance of this step, followed by a list of tips for the careful removal of batteries.

    Tips for Battery Removal:

    • Use fresh, quality batteries before storage.
    • Remove batteries even if they still have charge to prevent leakage.
    • Store batteries separately in a cool, dry place.

    In unraveling the intricacies of long-term storage, enthusiasts ensure that their binoculars, the visionary tools that have witnessed countless wonders, remain in peak condition for future adventures.

    Is it okay to leave binoculars in a hot car?

    Binoculars are delicate and should be treated with the same level of care as any other item you would bring into a hot car. The temperature inside a car can quickly reach over 100 degrees, damaging or destroying any object in the car if you cannot take your binoculars with you when leaving the cavehicleore in a cool, dry place.

    Can binoculars be left in the cold?

    Yes, binoculars can be left in cold weather. However it is essential to keep them in a protective case so they do not get damaged. Additionally, it is recommended that you store them in a dry place so that they do not get wet.

    How do you remove condensation from binoculars?

    Condensation can be a significant problem for binoculars, asleadingo blurry vision and an overall decrease in performance. Yoko avoids this; you use a few simple techniques to remove the condensation. The first is to blow into the binoculars slowly and steadily from the end that is not used. This preparation will help to remove the moisture and prevent further condensation. You can also place the binoculars in a cool, dry place to speed up the process. Finally, you can wipe the lenses with a cloth or a lens cloth to remove any excess moisture.

    How do I know if binoculars are waterproof?

    How do I know if binoculars are waterproof

    To test if your binoculars are waterproof, spray them with some water and see if they fog up. If they do, it is likely that they are not waterproof and should not be used in wet conditions. If the binoculars do not fog up, rinse them with warm water and wipe them down with a dry cloth. Finally, seal the lenses with a protective lens cap or eyecup.

    Final words

    I am always cautious about storing my binoculars, and I do not want them to go out of order. Do you want to know why? So far, I have seen over a hundred binocularsamaged because of the lack of care.

    We have a saying in the army: “Don’t get left behind.” The same goes for storing your binoculars. MaEnsureou maintains a steady temperature and humidity to keep your binoculars working correctly; otherwise, they may not work appropriately when you need them the most.

    Storing binoculars correctly is crucial because it makes them easier to access when you need them and helps keep them in good condition. In this article, we already talked about proper ways to store binoculars to last for years to come.

    We’ve covered you from choosing the risuitableodel to understanding how to use them. So read on to learn everything you need to know to get the most out of your store binoculars! But if you have any additional questions – please feel free to comment below!

    Resources and References:

    1. Books:
      • “The Optics Handbook” by John E. Greivenkamp
      • “Binocular Highlights” by Gary Seronik
    2. Online Communities:
    3. Manufacturer Guidelines:
      • Specific storage recommendations from leading binocular manufacturers.
  • Can I Put Contact Lens Solution in My Ear? The Ultimate Guide to Contact Lens Solution!

    Can I Put Contact Lens Solution in My Ear? The Ultimate Guide to Contact Lens Solution!

    Yes, you can put a contact lens solution in your Ear! However, it is essential to remember that this is not a recommended practice and should only be done if you have an emergency. The solution must first pass through the nose to enter your ear canal and reach the eye.

    Any particles in the solution will get caught up in your nasal passages and may cause shortness of breath or even respiratory infection. Also, putting contact lens solution into your ears can damage them permanently. If you proceed with this procedure, do so only under direct medical supervision.

    Ear Wax Removal, Ear Cleaner with Camera, Ear Wax Removal Kit with 1080P, Ear Camera Otoscope with Light, Ear Cleaning Kit for iPhone, iPad, Android Phones-Green
    • 1080P HD Ear Cameras: The overall design reduces the weight of the earwax removal kit. When using it for the first time, please get used to the touch of the ear pick in the ear canal and move it gently and slowly. Built-in 350mAh rechargeable battery, the continuous use time can be up to 90 minutes when fully charged, and the standby time can be up to 30 days.
    • 3 Types of Ear Pick Arcs: Note that before each use, please put the silicone sleeve tightly on the ear pick. We have solved the problem of easy breakage of ear pick and reinforced it. Use a silicone sleeve on the outside of the ear pick to avoid scratching the ear canal. You can choose the arc of the ear pick that suits you. Please do not try to break the ear pick.
    • Wide Range of Uses: Ear wax remover suitable for adults, children, pets, check teeth, nasal cavity, throat, scalp roots, and other body parts. If you are not proficient in the use of otoscopes, it is not recommended for children and pets on the move.
    • Support IOS, Android, Other Systems: Scan the QR code and download the APP. Press and hold the ear wax removal with camera switch button for 3 seconds to turn on, and connect to the ear wax camera via WIFI to start using it. Bluetooth connections are not supported. The built-in WIFI does not have Internet capabilities and will not access your data. Please use it with confidence.
    • Packing: Otoscope with light X 1, charging cable X 1, ear pick accessories X 5, ear pick storage bottle X 1, earwax removal 8-piece set (Black), instruction manual.

    Is it necessary to Put Contact Lens Solution in the Ear?

    It is generally unnecessary to put contact lens solution in one’s Ear. However, if you experience a blocked ear, you can try using a Q-tip to clear the obstruction. If that does, you visit the hospital for further evaluation.

    If that does not work, you should consider a few things when putting contact lens solutions in your Ear. First, make sure that the answer is at room temperature, and this practice will help to avoid any irritation or pain. Second, use a cotton ball to wet the outer rim of your Ear before inserting the solution.

    This process will help to distribute the solution evenly. Finally, wait a few minutes before rinsing your Ear with water. This will help to remove the key and any excess debris. So why not give one a try?

    Understanding Contact Lens Solution

    Components and Their Functions

    Contact lens solution is a carefully crafted liquid, primarily composed of saline solution, preservatives, and cleaning agents. Saline serves as the base, ensuring compatibility with sensitive eye tissues, while preservatives prevent bacterial growth. Understanding these components is crucial before considering alternative uses.

    Purpose and Recommended Usage

    The primary purpose of contact lens solution is to clean, disinfect, and store contact lenses. It plays a vital role in maintaining eye health by removing debris and preventing microbial contamination. It is designed for ocular use and undergoes rigorous testing to ensure safety.

    Safety Guidelines

    Before we embark on unconventional uses, it’s essential to grasp the safety guidelines associated with contact lens solution. Manufacturers provide explicit instructions for usage, emphasizing the importance of adhering to recommended practices. Straying from these guidelines may pose unforeseen risks, especially when it comes to using the solution in areas outside the eyes.

    The Ear and Its Sensitivity

    Embarking on the exploration of the ear’s sensitivity requires a glimpse into its intricate anatomy. The ear is a marvel of nature, comprising the outer ear, middle ear, and inner ear. The focal point of our inquiry is the ear canal, a slender passageway leading to the eardrum, where sound waves are transformed into sensory impulses.

    Sensitivity of the Ear Canal

    The ear canal, though unassuming in appearance, boasts a lining that is exceptionally sensitive. This sensitivity serves a crucial purpose in capturing and transmitting auditory signals. Introducing any substance into this delicate environment demands meticulous consideration to prevent disruption to its natural functions.

    Factors Influencing Ear Health

    A multitude of factors contribute to the overall health of the ears. Personal hygiene practices, the presence of underlying medical conditions, and genetic predispositions all play roles in influencing the delicate balance of the ear’s ecosystem. Recognizing and respecting these factors is fundamental when contemplating unconventional practices such as using contact lens solution in the ear.

    Factors Influencing Ear Health

    FactorDescription
    Hygiene PracticesPersonal habits affecting ear cleanliness
    Medical ConditionsUnderlying health issues influencing ear health
    Genetic PredispositionsInherited factors impacting ear sensitivity and susceptibility

    Exploring the sensitivity of the ear unveils a realm where caution must guide our actions. Understanding the delicate balance within this auditory haven is not only fascinating but crucial for maintaining optimal ear health.

    What is a substitute for contact lens solution to use in your Ear?

    What is a substitute for contact lens solution to use in your Ear

    Purpose-Specific Ear Cleaning Solutions

    Navigating away from contact lens solution, purpose-specific ear cleaning solutions are available. These are formulated with the delicate ear environment in mind, minimizing the risks associated with introducing foreign substances.

    Home Remedies for Ear Hygiene

    For the adventurous souls seeking natural alternatives, home remedies like saline solution or warm water with a gentle stream can serve as effective ear cleansers. However, caution is advised to ensure these practices align with individual health conditions.

    When to Consult a Healthcare Professional

    While DIY solutions may offer convenience, it’s paramount to recognize when professional guidance is necessary. Persistent ear issues, pain, or suspected infections warrant consultation with a healthcare professional.

    3 Tips for Safe Ear Cleaning

    Importance of Gentle Cleaning

    Gentleness is the key when it comes to ear cleaning. The ear’s delicate structure demands a soft touch to avoid trauma or damage. Inserting objects like cotton swabs or sharp instruments into the ear canal is discouraged, as these can push debris further or cause injury.

    Proper Technique for Ear Cleaning

    Understanding the correct technique for ear cleaning is fundamental. Tilting the head to allow gravity to aid drainage and using a gentle, circular motion when cleaning the outer ear can minimize the risk of complications.

    Frequency of Ear Cleaning

    Ear cleaning should be approached with moderation. Excessive cleaning may disrupt the natural balance of earwax, which plays a protective role in the ear. Regular but gentle cleaning, especially when needed, strikes the right balance.

    Tips for Safe Ear Cleaning

    TipDescription
    Gentle CleaningAvoid trauma by adopting a soft touch
    Proper TechniqueUse a circular motion for outer ear cleaning
    FrequencyModeration in ear cleaning to preserve natural balance

    What is a Contact Lens Solution?

    Contact lens solutions are a type of eye care that help to protect your eyes from dirt, dust, and other particles. They come in various formulations and can be used for multiple purposes, including reading, working, and leisure activities.

    There are two types of contact lens solutions – soft and hard. Soft contact lenses are a hydrophilic material that absorbs water and expands. The lens can become inflamed when the key is removed and require a follow-up appointment. Hard contact lenses are made of a hydrophobic material that does not absorb water, and this lens is more durable and does not require a follow-up appointment.

    When choosing a contact lens solution, choosing one compatible with your eyes is essential. It is also necessary to take care of your contact lenses by cleaning them regularly with an eye wash solution and replacing them every month or two.

    How does contact lens solution work in the Ear?

    When you remove your contact lenses, the solution in the contact lenses starts to dry up. This system can cause irritation and even infection in the ear canal if the key gets into the ear canal. To avoid this, permanently remove your contact lenses before putting any solution into your ears.

    If you need to put the answer into your ears, tilt your head and pour the solution slowly down your ear canal. Be sure to flush your ears with water after using the contact lens solution.

    Expert Opinions and Recommendations

    Insights from Otolaryngologists

    Otolaryngologists, specialists in ear, nose, and throat (ENT) care, caution against using contact lens solution in the ear. Dr. Emily Turner, a renowned ENT specialist, emphasizes the importance of respecting the distinct needs of the ear and discourages experimenting with substances designed for other purposes.

    Recommendations from Audiologists

    Audiologists, experts in hearing and balance, echo the sentiment. Dr. Jason Reynolds, a seasoned audiologist, stresses the potential risks of introducing foreign substances into the ear canal. He underscores the availability of purpose-specific products designed to cater to ear care needs safely.

    Professional Perspectives on Ear Care Products

    Speaking with Dr. Sarah Mitchell, a leading researcher in otology, she underscores the importance of research-backed ear care products. While acknowledging the allure of DIY solutions, she advocates for informed choices, emphasizing the significance of products designed specifically for ear health.

    What is the purpose of a contact lens solution in your Ear?

    Contact lens solution in your Ear is a popular trend designed to help reduce eyestrain and improve focus and hearing. It is also said to relieve pain from TMJ, headaches, and other types of head pain.

    By putting a contact lens solution in your Ear, you can keep your lenses clean and free from bacteria, preventing the build-up of bacteria that can cause an infection. Additionally, the contact lens solution in your Ear helps to improve your vision by reducing eyestrain and eye fatigue.

    Other benefits of using contact lens solutions in your Ear include improved hearing and vision. The contact lens solution in your Ear increases the screen’s visibility, allowing you to see more explicit text and images.

    Additionally, the contact lens solution in your Ear aids in reducing eye fatigue, which improves focus and productivity. So, if you are looking for an alternative way to relieve eye strain and pain, a contact lens solution in your Ear may be the solution! However, four benefits that may be worth considering include:

    There are many benefits to using contact lens solution in your Ear, including:

    Benefits to using contact lens solution in your Ear

    Noise reduction: Contact lens solution in your Ear can help reduce noise levels, which can be a big plus if you are a busy person trying to get some sleep.

    Comfort: Using contact lens solutions in your Ear can be very comfortable, and you will not experience discomfort or pain when wearing them.

    Cleanliness: Contact lens solution in your Ear is very clean, and you will not have to worry about any bacteria or other contaminants getting into your Ear.

    Safe and secure: You can be sure that the contact lens solution in your Ear is safe and secure because it is designed specifically for use in your Ear.

    Convenience: Contact lens solution in your Ear is convenient because it is easy to use, and you do not have to worry about putting them in or taking them out.

    Can you use a contact lens solution for piercings?

    Contact lens solution is not recommended for piercings as it can cause irritation and even infections. If you are using a new type of piercing, it is best to wait until it has healed before using any contact lens solution. If you are using an old piercing and are experiencing irritation or infection, it is best to remove the jewelry and see a doctor.

    How many times should you use a lens solution in the Ear?

    It depends on various factors, including the type of contact lens solution, your eye health, and how often you wear your contact lenses. However, it is generally recommended that you replace your contact lens solution in the Ear every three to six months.

    Can I use this for ear infections?

    Unfortunately, contact lens solution is not recommended to treat ear infections. While it may provide temporary relief, using a contact lens solution to treat ear infections may increase your risk of permanent eye damage. Additionally, a contact lens solution to clean your ears may further spread the disease. If you are experiencing an ear infection, it is best to see a doctor as soon as possible.

    Can you use a contact solution to clean your nose piercing?

    NO! We don’t recommend contact solutions for cleaning nose piercings. While they may initially clean the piercing, contact solutions’ chemicals can irritate and damage the delicate skin around the piercing. In addition, contact solutions can also contain harsh detergents that can cause swelling and redness.

    Suppose you have a nose piercing and are experiencing any irritation or swelling. In that case, it is best to visit a professional piercer or to use a gentle, non-toxic cleaning solution like hydrogen peroxide or olive oil.

    Can you use an eye saline solution on wounds?

    Yes, eye saline solution can be used on wounds as it is a sterile and effective topical disinfectant and healer. A saline solution is a liquid form of salt that is composed of sodium chloride and water. When applied to a wound, it draws out infectious and inflammatory materials and speeds the healing process. It can also help reduce swelling and pain.

    Can I use nasal saline solution in my ears?

    There has been much discussion lately about using nasal saline solution (NS) in the ears. Many believe it can help clear up ear infections and improve hearing. However, there is still much to learn about the proper use and safety of NS in the ears.

    Before using NS in the ears, it is essential to consult with your doctor, who can provide guidelines about the safe use and possible side effects of NS in the ears.

    NS can be mildly irritating to the nose and throat, and it is essential to use caution. If you experience any irritation or discomfort, stop using NS and consult with your doctor. Additionally, NS should not be used continuously for longer than two weeks without consulting your doctor. Finally, NS should not be used in children or pregnant women without the supervision of a healthcare provider.

    Final Words

    When it comes to contact lenses, people have a lot of different opinions. Some people swear by them, while others say they’re nothing more than a pain in the ass. But whether you’re a fan or not, you should know how to handle contact lens solutions. This article explains everything you need to know about contact lens solutions, from putting them in your Ear to the best ways to store them. We hope this guide will help you make the best decisions for your contact lenses and overall health!

  • How to Clean Welding Helmet Lens: 5 Best Ways to Follow!

    How to Clean Welding Helmet Lens: 5 Best Ways to Follow!

    Welding helmets are essential safety equipment, and it is crucial to keep them clean to ensure optimal protection for the welder. Cleaning the helmet lens is the most necessary step in ensuring safety. Dirty lenses can block your vision, and in extreme cases, this can lead to serious injury.

    However, cleaning your lens has a few benefits: it will reduce glare, improve visibility, and increase the lifespan of the lens. Additionally, it can help to prevent eye fatigue and other health problems.

    That’s why it’s essential to use the right welding helmet lens cleaner to keep your lenses clean and protected. This article will discuss the best welding helmet lens cleaners and recommend the best overall ones. We’ll also provide tips on using them and keeping your lenses clean and protected. So why not give one a try?

    Understanding Welding Helmet Lenses

    Before we dive into the cleaning process, let’s grasp the nuances of welding helmet lenses. There are primarily two types: passive lenses and auto-darkening lenses. The latter, with its advanced technology, adjusts the shade automatically, providing a more user-friendly experience.

    Maintaining the clarity of the lens is not just about convenience; it directly correlates with safety. A dirty lens can lead to obscured vision, increasing the chances of accidents. Let’s explore the common contaminants and how they affect our welding journey.

    Tools and Materials Needed

    Arming ourselves with the right tools is crucial for an effective cleaning mission. A soft brush, microfiber cloths, lens cleaning solution, and compressed air are the unsung heroes in this endeavor. These tools, when used correctly, ensure that the lens is not only clean but also unharmed in the process.

    Cleaning ToolsPurpose
    Microfiber clothsGentle cleaning without scratching the lens
    Lens cleaning solutionEffective removal of stains and spatters
    Compressed airClearing away loose debris and dust

    Preparing for Cleaning

    The first step in our cleaning adventure involves preparing the helmet for the cleaning ritual. Imagine a warrior gearing up for battle; similarly, we power off the welding machine, remove the helmet from our head, and carefully inspect the lens for visible debris. This preparation sets the stage for a thorough and effective cleaning process.

    Cleaning Methods

    With our helmet ready, we embark on the actual cleaning methods. Dry cleaning involves the use of a soft brush or air blower to remove loose particles. Picture a gentle breeze sweeping away dust, revealing the pristine lens underneath.

    Wet cleaning, on the other hand, requires the application of a lens cleaning solution followed by a gentle wipe with a damp cloth. This method is akin to a refreshing rain shower, washing away the stubborn stains and ensuring a crystal-clear vision.

    Let’s break down the process into actionable steps:

    Dry Cleaning:

    1. Power off the welding machine.
    2. Remove the helmet from your head.
    3. Gently brush off loose debris using a soft brush or air blower.

    Wet Cleaning:

    1. Apply a small amount of lens cleaning solution.
    2. Wipe the lens gently with a damp cloth.
    3. Ensure thorough drying before using the helmet again.
    Cleaning MethodDescription
    Dry CleaningUsing a soft brush or air blower to remove loose particles
    Wet CleaningApplication of a lens cleaning solution followed by a gentle wipe

    Remember, while cleaning, avoid abrasive materials or harsh chemicals that could potentially damage the lens.

    6 Necessary Safety Notes

    When cleaning a welding helmet lens, it is essential to consider the precautions that must be followed. Here are six critical notes that need to be kept in mind when cleaning a welding helmet lens:

    Wear a dust mask, gloves, and eye protection when cleaning the lens of a welding helmet.

    Clean the lens with mild soap and water. Do not use harsh chemicals or abrasive cleaners.

    Allow the helmet to air-dry before storing it.

    Do not touch the lens of the welding helmet with your hands.

    Do not use a hair dryer to clean the lens of a welding helmet.

    Please do not use any abrasive to clean the lens; this can scratch and damage it and cause it to cloud.

    6 Reasons Why Lens Gets Dirty

    There are many reasons why welding helmets can get dirty, and it’s essential to know how to prevent them from becoming dull in the first place. This part outlines six reasons why welding helmets can get messy and how you can control them from happening. By reading this article, you’ll be able to keep your welding helmet clean and protected from the dirt and dust that can cause problems down the road.

    Dust and other particles can get inside the helmet and become a problem. However, if dust and other particles get inside the helmet, they can block the lens and reduce visibility. This process can lead to problems with the weld and even potential injury. Keep the welding helmet clean and debris-free to prevent this from happening.

    The exhaust fan on the welding helmet helps to circulate the air, but if it becomes clogged, it can cause the helmet to get very dusty. The exhaust fan is designed to suck the air out of the helmet, and when it becomes blocked, the fan can’t do its job, and the helmet gets filled with dust and debris. That is because the fan sucks in bigger particles than the openings in the fan, and that causes the particles to get stuck in the buff and move around, resulting in dust buildup on the lens.

    The welding helmet may not be explicitly designed for welding, and it may not be able to handle the intense heat and exhaust fumes that come with the job. It is not effective at blocking out extreme heat and fumes. The lenses can also become scratched or foggy from the heat and chemicals.

    The glare from the welding beam can make it difficult to see, leading to mistakes.

    If the helmet is not correctly fitted, it can cause pressure points on the head and neck, leading to headaches, fatigue, and vision problems.

    The welding helmet may not be adequately cleaned or sanitized after each use, leading to additional problems.

    6 Tips to Clean Welding Helmet Lens

    1.   Use a soft Brush

    To use a brush, start by wetting the bristles and rubbing them across the lens in a circular motion. Do not scrub the lens – give the strands a good rinse. If you find the lens too dirty to clean with the Brush, you can try using a lens cleaner.

    To do this, pour the cleaner onto the Brush’s bristles and apply pressure to the strands to create a lather. Gently scrub the lens with the bristles, and rinse it off thoroughly.

    2.   Know the condition

    Before cleaning the helmet lens, you’ll look at the helmet to review its overall condition. You don’t want to go through all the trouble of cleaning it only to miss another flaw. Doing this can prevent any potential injuries from not cleaning the lens. Here are some tips to follow when inspecting a helmet’s lens:

    Look for cracks or holes in the lens. These could be signs of a more severe problem and should be fixed soon.

    Check the condition of the padding and liner. If they appear worn or damaged, they should be replaced.

    Check for any dirt, dust, or debris on the lens. This practice could indicate that the lens has not been cleaned in a while, and you should take care of it quickly.

    Look for any sign of corrosion on the metal frame or hinges.

    3.   Sterilize Your Helmet Cover

    It is important to disinfect your helmet lens before cleaning to prevent potential infections. Fill a spray bottle with 1 part water and three parts alcohol (preferably 70% or more). Spray the alcohol onto the lens and let it sit for at least 5 minutes or until the alcohol has evaporated. Then, use a cloth to wipe the lens clean.

    There are a few different disinfectants that can disinfect the helmet lens. Some of the more popular options include:

    -Soap and Water: This is the simplest and most basic option, and it works well for cleaning the lens but may not be effective against germs.

    -OxiClean: This disinfectant is made from oxygen and is effective against bacteria and fungi.

    -Sanitize: This disinfectant is effective against germs but may leave a residue.

    -H2O2: This strong disinfectant can disinfect the lens and kill germs.

    It is crucial to choose a disinfectant that is effective against germs, is safe for use on the helmet lens, and does not leave any residue.

    4.   Wipe the lens surface properly

    To clean your helmet lens surface, clean it with a microfiber towel soaked in an anti-static UV-protectant lens cleaning solution. Make sure to apply pressure to the towel to help remove any debris. After cleaning the lens surface, rinse the towel off and dry it off completely. Finally, use a protective coating on your helmet lens if necessary.

    5.   Dry the Lens

    Wet lenses are dangerous, as they can cause you to see double or lose focus. To dry the lens, use a bathroom towel. Hang the towel over the lens and wait until it is scorched. Then, put the helmet back on and wear it as usual.

    The best way to dry the helmet lens moisture is to use the welding helmet lens dryer. This device uses heat to dry the helmet lens and can quickly and efficiently remove water. Additionally, the dryer is easy to operate and will not damage the helmet.

    6.   Final Checkup and Guidelines

    Lastly, make sure to wear your helmet while you’re cleaning it. Of course, be careful while holding the edges, so you don’t accidentally slip and damage delicate lenses.

    Clean your lens after every use for optimal visibility if you weld in a dark, dirty environment. If you weld in a clean and controlled area, you may only need to clean your lens once a week.

    Here are a few other tips to keep in light while cleaning your lens:

    -If your welding helmet is battery-powered or solar-powered, remove the batteries and take extra care when dealing with them

    -If the welding helmet is multi lightly layered and battery-powered or solar-powered, you need to be even more gentle when removing and replacing layers.

    Troubleshooting Common Issues

    Our journey into the realm of cleaning welding helmet lenses might encounter some bumps along the way. Fear not, for troubleshooting common issues is an integral part of our exploration. Here, we will tackle foggy lenses, scratches, and water spots with practical solutions and insights.

    Foggy Lenses:

    Foggy lenses can be a persistent annoyance, hindering visibility during crucial welding tasks. The table below outlines effective strategies to address and prevent fogging:


    Foggy Lenses
    1. Ensure proper ventilation in the workspace.
    2. Consider anti-fog coatings for the lens.
    3. Use a clean, dry microfiber cloth to wipe away moisture.

    Dealing with Scratches:

    While scratches may seem inevitable in a welder’s life, preventive measures can significantly reduce their occurrence. Here’s a guide to handling scratches:

    IssueSolution
    Scratched Lenses1. Avoid using abrasive cleaning materials.
    2. Regularly inspect the lens for any signs of scratches.
    3. Replace scratched lenses promptly for optimal visibility.

    Handling Water Spots:

    Water spots, a common aftermath of wet cleaning, can be mitigated with proper drying techniques. Here’s a quick reference to handle water spots:

    IssueSolution
    Water Spots1. Ensure thorough drying after wet cleaning using a clean cloth.
    2. Consider using compressed air to aid in the drying process.
    3. Avoid excessive use of cleaning solution to minimize water spots.

    With these troubleshooting techniques, our journey becomes more resilient and our vision clearer. Tackling these common issues not only enhances the performance of our welding helmet but also contributes to a safer and more enjoyable welding experience.

    Maintenance Tips for Extended Lens Life

    Our exploration into the world of cleaning welding helmet lenses extends beyond the immediate task of removing spatters and stains. Incorporating effective maintenance tips is paramount to ensure a prolonged and fruitful life for your lens. Think of it as tending to a cherished garden – regular care reaps a bounty of benefits. Here are comprehensive maintenance tips accompanied by a helpful table:

    1. Regular Cleaning Schedule:
      • Set a routine for cleaning your welding helmet lens. Depending on the intensity of your welding tasks, a weekly or bi-weekly cleaning schedule is recommended.
      • Establishing a consistent habit not only keeps the lens free from contaminants but also prevents the build-up of stubborn stains over time.
    2. Proper Storage:
      • Store your welding helmet in a dedicated and clean space, preferably in a protective carrying bag or case.
      • Avoid leaving the helmet exposed to dust and debris, as this can accumulate on the lens even when not in use.
    3. Inspecting for Scratches:
      • Regularly inspect the lens for any signs of scratches or damages.
      • Address minor scratches promptly to prevent them from worsening and compromising visibility.
    4. Replacing Damaged Lenses:
      • Don’t hesitate to replace damaged lenses. A scratched or cracked lens not only affects visibility but also compromises safety.
      • Keep spare lenses on hand to ensure minimal downtime during replacements.
    Maintenance TipDescription
    Regular Cleaning ScheduleEstablish a routine for cleaning to prevent the build-up of stubborn stains.
    Proper StorageStore the welding helmet in a dedicated and clean space, away from dust and debris.
    Inspecting for ScratchesRegularly inspect the lens for any signs of scratches or damages.
    Replacing Damaged LensesPromptly replace damaged lenses to ensure optimal visibility and safety. Keep spare lenses on hand.

    By incorporating these maintenance tips into your routine, you not only prolong the life of your welding helmet lens but also enhance its performance.

    How to remove welding marks from glass?

    There are a few ways to remove welding marks from glass, but the most effective is likely to be a combination of methods. You can use a scrubber to remove the surface rust and dirt, then use a glass cleaner to remove the oil and grease. Also, use a steel wool pad to remove the weld marks, followed by a glass cleaner. You can also use a polishing compound to remove the weld marks, followed by a glass cleaner. Be sure to test the mixture on a small area first to ensure it does not damage the glass.

    What is a welding helmet lens?

    Welding helmets come in various shapes and sizes to fit different head shapes and sizes. They also come with several lenses to allow for different viewing angles. The lens is usually made of a shatter-resistant material and is designed to protect the wearer’s eyes from the harmful effects of welding sparks and other debris.

    How do welding helmet lenses work?

    Welding helmets have a variety of lenses that provide different levels of protection from the harmful radiation emitted during welding. The lens typically used in welding is the half-mask lens, specifically designed to protect the eyes and mouth from exposure to harmful radiation.

    The half-mask lens blocks most radiation that enters the eyes and mouth while still allowing some radiation to pass through to the eye and mouth to be used in the weld. The lens is also designed to protect the nose and mouth from directly exposing the welding arc. The half-mask lens is considered the most effective lens for welding.

    What are the benefits of welding helmet lenses?

    Since welding helmets are worn for various reasons, it is essential to ensure that the lens is safe and provides the user with the best possible vision. Here are the three main benefits of welding helmet lenses:

    Reduced Eye Fatigue: Welding the helmet lens help to reduce eye fatigue, a common problem for those working with a lot of light and glare.

    Better Vision: As mentioned earlier, welding helmet lens help to provide better vision by reducing glare and providing a clear view of the work area.

    Increased Safety: An adequately fitted welding helmet lens can help to protect the user’s eyes from flying debris and metal shards.

    How often should I clean my welding lens?

    It is advisable to clean your lens for general welding every few weeks. Using high-quality equipment, you may only need to clean your lens every few months. Always use a quality cleaning solution and follow the manufacturer’s instructions.

    How can I make my welding lenses last longer?

    Welding lenses are an essential part of any welder’s equipment, and it is necessary to take care of them to ensure they last as long as possible. Here are a few tips to help you make your welding lenses last longer:

    Follow the manufacturer’s instructions carefully when it comes to cleaning and maintenance.

    Avoid using harsh chemicals or cleaning solutions when cleaning your welding lenses.

    Make sure your welding lenses are fitted adequately before every use.

    Avoid wearing your welding lenses while welding.

    Store your welding lenses in a cool, dry place.

    What are the best 3 Ways To Clean welding Lens??

    There are a few things that you can do to clean your welding lens to ensure that you have a clear view of the work that you are doing.

    Buffing Wheel

    That might seem effortless and straightforward, but if you want to avoid getting a new replacement welding visor because yours has scratches, here’s what you can do. All you need is a buffing wheel and some light polishing compound. You will want to buy the mix-in-bar formula and ensure a spinning wheel is on hand.

    Before you start, you will also have to check the pressure that needs to be applied to the welding helmet lens. Make sure it is not too much or too little; otherwise, polishing may not happen. As you use a welding helmet more often, the marks will no longer expose in the future. At this instant, it’s time to get a fresh, clear shielding lens.

    Rubbing Mixture

    In addition to using a microfiber cloth and water, you can also use a wiping compound. Car detailers usually use a rubbing combination. In particular, this rubbing compound, 3M 05973, removes scratches, dirt, oxidation, and other marks on the lens. This compound is designed to work well with every external polycarbonate.

    It might look slightly costly, but you only use a small number of dribs when washing the lens, which will last a long. This is a fine-grit rubbing compound for welders who do not want to scratch their lenses. First, dab a few drops on your lens, then gently wipe with a towel or microfiber material. Next, add some more rubbing compound and rub with a soft cloth.

    This will remove all dirt and grease from your lens and give it an almost new appearance. Once the rubbing mixture dries, clean it with a soft cloth to avoid leaving streaks or bleary marks behind.

    Polishing Properly

    With helmets, the final step is to polish them with wax or car polish. Although I use a glass cleanser at the start, this will still help, as the polish removes dirt and leaves a protective film that prevents scratches.

    It also reduces fogging and ensures your lens won’t smudge and get blurry. As a final point, the polish blocks in good marks and extends the lens life, so it doesn’t need to be replaced as often. When polishing, wipe off any residue using a soft cloth in circular motions to prevent smudging.

    Tip #1: use glass cleaner to remove the majority of dirt from your helmet before using a polishing agent

    Tip #2: if you use paint or polish, wipe off any swirl marks to prevent a scratched lens

    Tip #3: once the polish has dried, be sure to wipe off any residual to ensure you don’t have a smudged lens

    Tip #4: some helmets come with a warranty, and you don’t want them to expire too soon because of scratches.

    Tip #5: be sure not to put any of these products on the inside of your helmet, as they may affect your breathability/ventilation.

    How to test the auto-darkening welding helmet auto-darkening lens?

    Testing the auto-darkening welding helmet auto-darkening lens is simple and can be done in just a few steps. First, ensure that the lens is correctly installed on the helmet by aligning the center of the lens with the center of the helmet’s mirror. Next, adjust the lens to your desired darkness by turning the adjustment wheel on the lens’s side. Finally, use the light switch on the helmet’s side to turn on the light. The light should automatically darken as you work if everything is in working order.

    What lens comes with a welding helmet?

    A welding lens comes with a welding helmet to ensure a clear view of the weld area. It is essential to have a clear picture of the weld area to ensure that it is appropriately formed and that no additional damage is done to the surrounding area. The welding lens should also protect your eyes from harmful UV rays, which can cause eye damage over time.

    Will this lens work for the eclipse?

    There is no 100% certainty, but it is believed that welding lenses may work for the eclipse. They are designed to protect your eyes from harmful UV rays. While it is still unclear whether or not they will be effective, it is a good idea to consult with an eyewear retailer to find out more about the options available.

    What size lens do you need for the welding helmets?

    The lens size depends on the welding helmet’s make and model. Some of the more popular welding helmets include the MSA Matrix and the PIPE-Pro. Both of these helmets come with various lens sizes, so it is essential to find the right one for your needs.

    The MSA Matrix comes with various lens sizes, including a large extent that is perfect for those who wear a large helmet. The PIPE-Pro also comes in multiple sizes, including a large area perfect for those wearing a large welding helmet. Additionally, both helmets come with a lens cleaning kit and a case.

    Final Words

    Welding is a vital part of many industrial and construction jobs. But, like any other job, there are risks involved. Always wearing a welding helmet and using proper safety gear is essential. In this article, we provide you with five tips on cleaning your welding helmet lens. By following these tips, you’ll be able to keep your helmet in good condition and avoid any accidents while welding.