In the 21st century, optical microscopes have transformed from a niche scientific tool to a powerful technology that engineers, scientists, designers, and many others use. These days, they are commonly found in colleges and universities offices, labs, and classrooms worldwide.
This guide will show you what optical microscopes are, how they work, and how to use them. You’ll learn about the history of microscopes and optical lenses and some of the best microscope brands in the market today. You’ll also learn about various types of magnification used in different situations.
| Image | Product | Detail | Price |
|---|---|---|---|
 | Carson MicroBrite Plus 60x-120x LED Lighted Pocket Microscope |
| See on Amazon |
 | Elikliv LCD Digital Coin Microscope |
| See on Amazon |
 | AmScope M150 Series Portable Compound Microscope |
| See on Amazon |
 | PalliPartners Compound Microscope for Adults & Kids |
| See on Amazon |
 | Skybasic 50X-1000X Magnification WiFi Portable Handheld Microscopes |
| See on Amazon |
What is an Optical Microscope?
“An optical microscope is a device which uses light to magnify, and this allows the microscope user to see objects that are too small or too far away to be seen by the unaided eye.”
In layman’s terms, an optical microscope is a device that makes it possible to magnify and view something without having to look at it with your naked eye, and it does this through lenses and other optics used in the equipment.
How Does an Optical Microscope Work?
An optical microscope uses lenses to bend and focus light, then used to magnify an object. It typically consists of a tube that can be rotated on its axis and moved up and down.

The light source is usually either a bulb or a tungsten-halogen lamp.
The magnification power of an optical microscope depends on the number of lenses used in it: there are three types commonly found in microscopes—plano-convex, plano-concave, and meniscus (or compound) convex.
There are two types of Optical microscopes:
Simple Microscope and compound Microscope
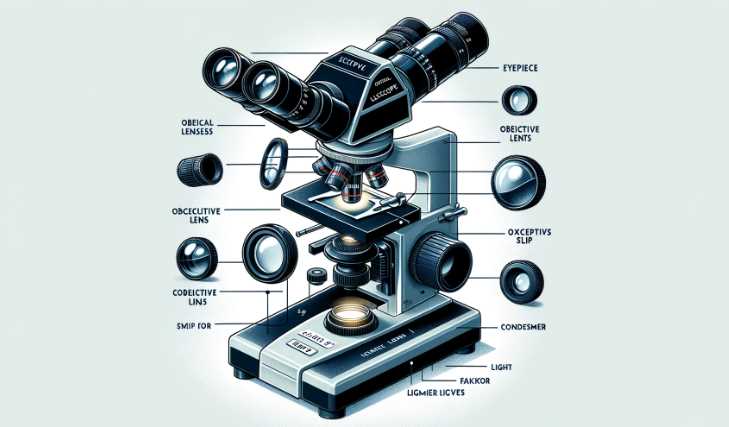
Parts and functions Optical Microscope
An optical microscope is a device used in science and technology to magnify objects. The light is collected by the objective lens, which focuses on a diopter lens that refocuses the light onto a translucent support slide. A motor turns two or more focusing knobs under the sample to obtain clear images of the observed object. Let’s take a look at the different parts of an optical microscope.
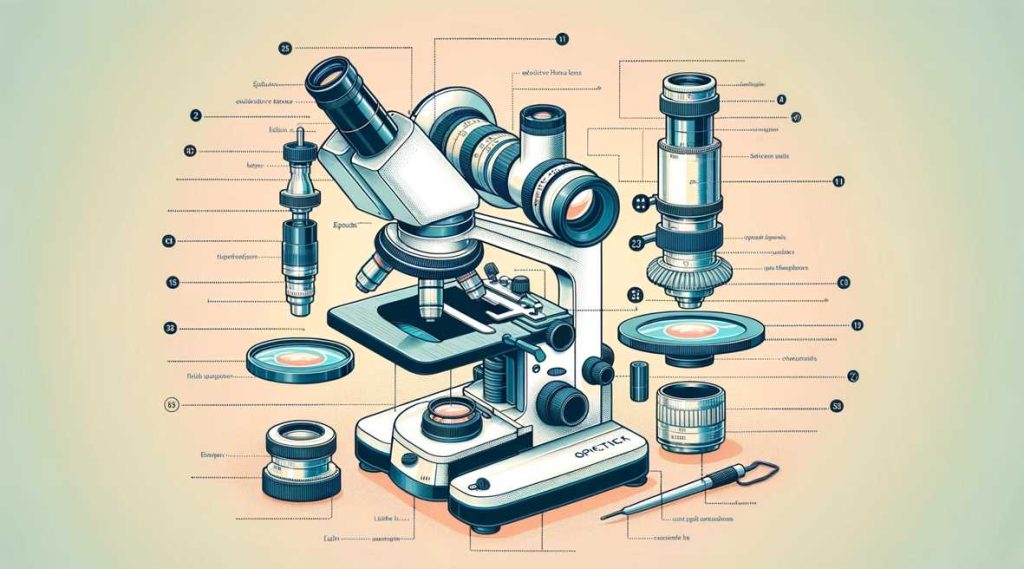
How many parts that an optical microscope have?
An optical microscope has three structural parts: the objective, the eyepieces, and the tube.
The objective is the end of the microscope’s main body that remains near your eye and locks onto what you are looking at. The eyepieces are two lenses that rest on either side of your eyes; they form a magnifying glass that allows you to see things in more detail. Finally, the tube is a hollow beam that supports the parts when looking at your object with an eyepiece.
An eyepiece is the lens of a microscope that gathers and focuses light, which is then projected onto the object being examined. The eyepiece is crucial because it can magnify your image, making it appear larger and more precise.
This could be vital for more accurate observations of microscopic objects. A good microscope will have two or three lenses, one in each eyepiece, so you can see an exact portrayal of what’s on the slide with no interference from other features.
The objective lens, revolver, or revolving nose piece that accompanies an optical microscope ensures that the light from the specimen is directed precisely at the surface of the detector (CCD, CMOS, etc.), significantly decreasing the ratio between bright- and dark-field conditions. This helps to increase contrast for certain specimens in microscopy procedures such as cell phenotype and tissue architecture measurements.
Optical microscopes allow for magnification by using a focusing knob near the eyepiece, and the knob prevents the exaggeration of what can be seen through the lenses. It is also used as another type of control while looking around; this allows users to maintain the desired focus on their object and use the ridges on the knob to find things that go away at low magnification levels, such as bacteria or tissue.
The stage is where items are held to be viewed through the microscope, and this function also makes exchanging information with another investigator or technician easier. The stage is part of an optical instrument that holds a specimen (we’re getting a little ahead of ourselves, though) while allowing us to view that specimen without touching it. It’s also necessary to exchange samples and manage the various other investigation aspects.
A light source is needed to see anything in an optical microscope. The technologies used with the astronomical power of magnification made it possible for humans to understand how things were working in space, on Earth, and objects.
A diaphragm and a condenser are two device components in microscopes. Both purposes are to collect light in the form of an image for viewing. As light enters the eyepiece, it travels through a series of lenses to bring its intensity up to a level humans can view.
The primary function of the mechanical stage is to move the specimen up and down concerning the objective lens. The basis for this work is a needle with a conical shape. The center of this needle is set at the in-focus position while its ends are fixed by tension springs. When one end descends into an Optics case, it displaces the dish of light at its vertex further away so that it only collects in an intangible sheet of glass.
Advanced Techniques in Optical Microscopy
Exploring the Microcosmos goes beyond conventional optical microscopy, delving into advanced techniques that redefine our perception of the microscopic world. In this section, we unravel the principles, applications, and unique advantages of three cutting-edge methodologies: Confocal Microscopy, Super-Resolution Microscopy, and Total Internal Reflection Fluorescence Microscopy (TIRF).
A. Confocal Microscopy
1. Principle of Confocal Imaging
Confocal microscopy operates on the principle of eliminating out-of-focus light to enhance image clarity and resolution. The key feature lies in the use of a pinhole aperture, strategically placed in front of the detector, allowing only the light originating from the focal plane to pass through. This confining of light results in sharper images and improved optical sectioning, providing a three-dimensional view of the specimen.
Table 1: Advantages of Confocal Microscopy
| Advantage | Explanation |
|---|---|
| Improved Resolution | By excluding out-of-focus light, confocal microscopy achieves higher resolution images. |
| Optical Sectioning | Precise control over focal planes allows detailed imaging of specific layers within samples. |
| Reduction of Background Noise | The elimination of stray light enhances signal-to-noise ratio, improving image quality. |
| 3D Image Reconstruction | Stacking multiple optical sections facilitates the creation of detailed three-dimensional reconstructions. |
2. Applications in Biology and Medicine
Confocal microscopy finds extensive applications in the fields of biology and medicine, revolutionizing our understanding of cellular structures and dynamic processes.
Table 2: Applications of Confocal Microscopy in Biology and Medicine
| Application | Description |
|---|---|
| Cellular Imaging | Visualizing intracellular structures with high precision, aiding in cell biology research. |
| Live Cell Imaging | Tracking dynamic processes in real-time, enabling the observation of cellular activities in live cells. |
| Neuroscience | Investigating neural structures and functions at a cellular level, contributing to neuroscientific studies. |
| Pathology | Enhancing diagnostic capabilities through detailed imaging of tissues, improving pathology assessments. |
B. Super-Resolution Microscopy
1. Breaking the Diffraction Limit
The fundamental limitation of traditional optical microscopes, imposed by the diffraction of light, is transcended by super-resolution microscopy. These techniques utilize ingenious approaches to pinpoint features below the diffraction limit, enabling researchers to explore nanoscale structures with unprecedented detail.
Table 3: Key Features of Super-Resolution Microscopy
| Feature | Description |
|---|---|
| Overcoming Diffraction Limit | Techniques like STED, PALM, and STORM surpass the diffraction limit, achieving resolutions beyond traditional microscopy. |
| Nanoscale Imaging | Capturing structures as small as a few nanometers, providing insights into molecular and cellular intricacies. |
| Single Molecule Resolution | Resolving individual molecules within a sample, essential for studies in molecular biology and biochemistry. |
2. Examples: STED, PALM, and STORM
Table 4: Examples of Super-Resolution Microscopy Techniques
| Technique | Description |
|---|---|
| STED (Stimulated Emission Depletion) | Utilizes a depletion beam to quench fluorescence in the outer regions, confining excitation to a nanoscale focal spot. |
| PALM (Photoactivated Localization Microscopy) | Activates and localizes individual fluorophores, creating a super-resolved image by reconstructing point sources. |
| STORM (Stochastic Optical Reconstruction Microscopy) | Employs photo-switchable fluorophores to capture individual molecules in different activation states, enabling high-resolution imaging. |
C. Total Internal Reflection Fluorescence Microscopy (TIRF)
1. Principle and Applications
Total Internal Reflection Fluorescence Microscopy (TIRF) leverages the principle of total internal reflection to selectively illuminate a thin section near the sample surface. This creates a high-contrast, near-surface imaging technique, particularly beneficial for visualizing events at the cell membrane or interfaces.
Table 5: TIRF Microscopy Applications
| Application | Description |
|---|---|
| Single Molecule Studies | Facilitating studies at the single-molecule level, enabling observations of dynamic molecular interactions near the surface. |
| Cell Membrane Dynamics | Visualizing dynamic processes at the cell membrane, such as vesicle trafficking and membrane protein dynamics. |
| Live Cell Imaging | Minimizes photobleaching and phototoxicity, making TIRF microscopy ideal for long-term live-cell imaging. |
2. Advantages in Single Molecule Studies
Table 6: Advantages of TIRF Microscopy in Single Molecule Studies
| Advantage | Explanation |
|---|---|
| High Sensitivity | TIRF selectively illuminates the immediate vicinity of the sample surface, enhancing sensitivity for single molecule detection. |
| Reduced Phototoxicity | Focused illumination minimizes light exposure to deeper regions, reducing potential harm to live cells during imaging. |
| Enhanced Signal-to-Noise Ratio | The confinement of excitation light results in a higher signal-to-noise ratio, improving the clarity of single molecule signals. |
How do you use an Optical Microscope?
The optical microscope is used to magnify an object up to 1000 times, and it has two lenses placed in front of the other and a light source on the side. This device can take images quickly, and well-focused pictures from smaller samples or parts would generally be challenging to view before magnification. Here are some tips for how to prepare an optical microscope for use:
To use an Optical Microscope, you need to place an object between the eye lens and a focusing knob on the side of the instrument.
To complete this process, you will then turn a dial on top.
This process increases and amplifies what is viewed in terms of brightness and focus, making it easier to see an image.
What is the difference between optical and electron microscopes?
An electron microscope creates magnified images of objects on a flat surface. The photos form as electrons are focused onto the object from an electron beam at a higher voltage and density. An optical microscope projects illumination onto objects through lenses and filters to gather focused images of smaller parts that may be too small or distant for the eye alone to see.
The difference between optical microscopy and electron microscopic is that the former utilizes lenses and filters, whereas the latter uses an electron beam.
Light Source
The optical microscope uses light energy to magnify objects, and these photons yield the electrons an opportunity to interact with a specimen, which delivers information that scientists can use. In contrast, electron microscopes use particles of electrons whirling around a magnetic field instead of light.
Type of lens
An optical microscope uses a short lens and light to produce magnified images of thin objects. An electron microscope lacks a lens but instead uses an advanced electromagnetic lens. Differences in magnification range when using the two microscopes; it is estimated that there are roughly 1,500 times more particles in an electron micrograph than in the sample under observation with an optical microscope. Although the optical microscope was invented and is more commonly used, electron microscopes are essential to modern biology.
Work efficiency
When studying with a microscope, optical microscopes are primarily used for staring at tiny objects such as bacteria, cells, thin slices of blood vessels, and tissue. The Electron microscope produces high-quality images of a wide range of specimens because it uses electrons to provide an electron beam that can be focused like light. This allows us to analyze materials that are not possible using the optical microscope and gives much more detail in the clarity of images.
Price Range
An optical microscope is much cheaper than an electron microscope because it only has a single lens, whereas it has many lenses. To make matters worse, an electron microscope can quickly go up to $200,000, while a basic optical microscope can be bought for less than $1,000.
Magnification Power
The magnification power of an optical microscope is about 1000 times to produce an image of the object. On the other hand, an electron microscope has a magnification power up to 10,00,000 times.
How do you clean an Optical Microscope?
To clean an Optical Microscope, one should first ensure that the dust particles to be removed are not trapped in the microscope components. One should also ensure that all harsh chemicals are cleaned off the examined materials before performing a cleaning process. The most common method of cleaning an optical microscope is distilled water, microfiber cloths, or tissue paper.
What is the optical microscope’s light source?
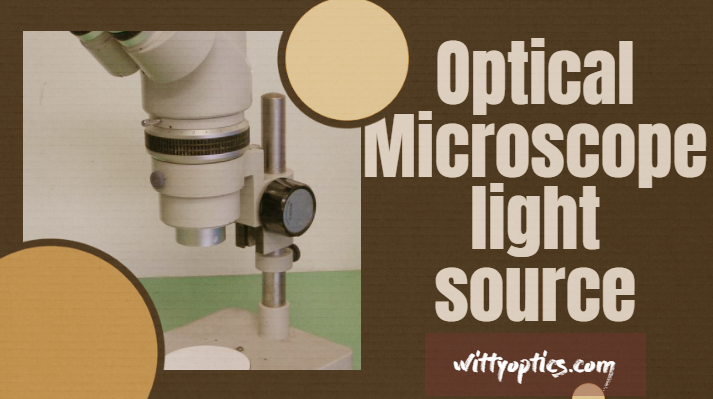
The light source of an optical microscope is an acceptable point light source called an arc lamp. The lamp operates by ionizing a bright filament through a spark gap in the presence of an argon or xenon gas.
A fiber-optic cable sends this radiation to one or two condenser lenses that focus and direct it onto the sample, typically placed at 45 degrees from the lens. Infrared light is created through a thermocouple and is sent down the fiber optic cord to relay information about specific objects.
How many lenses does an optical microscope have?
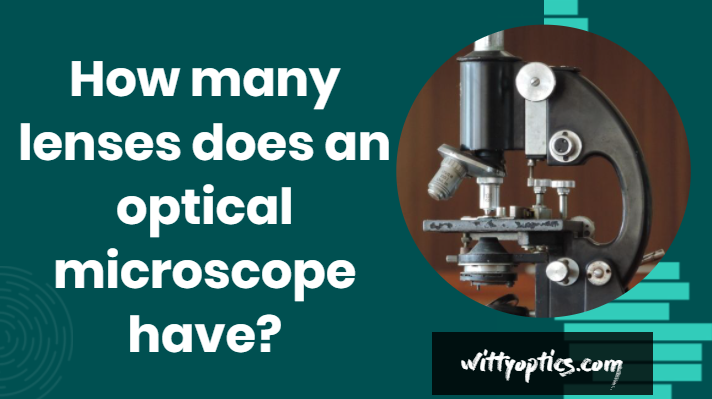
An optical microscope has three lenses:
1. The objective lens is a transparent, round, and concave lens that collects light from an object under examination. It can be fixed or movable, and it focuses this light onto the object, creating an image of it.
2. The eyepiece lens projects a magnified image of the object onto the ocular lens or eyepiece so the user can view it.
3. The ocular lens adjusts its focus to match the image projected onto it by the eyepiece lens to form a clear picture for viewing on-screen or printout.
What types of lenses are used in an optical microscope?
There are many types of lenses used in an optical microscope. The most common type is the spherical lens, which comprises a combination of spheres, cones, and air spaces. This type has a wide field of view, making it easier to see small objects through the microscope.
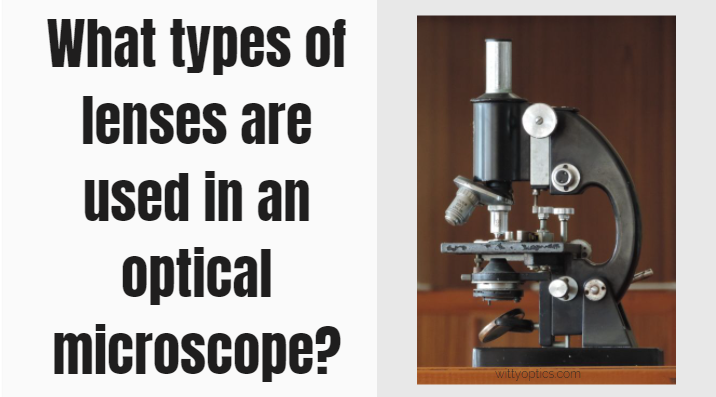
Some other types include:
1. Planar lenses: These are flat, thin lenses that can be rotated around their axis to focus on different field parts at different magnifications. They are often used for viewing specimens in three dimensions.
2. Fluorite lens: Fluorite is a mineral that forms in parallel layers, with one layer being transparent and the other having a colorless fluoride coating. This lens has unique properties because it exhibits no chromatic aberration (distortion caused by differences between wavelengths). It allows for high magnification without vignetting (blackening or blurring due to lack of light) and does not suffer from chromatic aberration over its entire focal length range.
3. Polarizing lens: A polarizing filter consists of two crossed sheets of glass or plastic with layers oriented at right angles. One sheet contains linear polarizers that align with incoming light waves, while the other sheet contains circular polarizers that rotate according to the position of incoming light waves.
What are examples of optical microscopes?
Optical microscopes are used to observe objects too small for the naked eye. These include living cells, blood samples, and even tissue specimens.
There are many examples of an optical microscope:
1. Nikon Confocal Microscope:
This microscope has a high-quality lens with a 10x magnification power, making it ideal for scanning live-cell samples and other biological materials in detail. It can also provide 3D images by simultaneously capturing the 3D spatial relationship between two or more objects at different depths.
2. Olympus FV10 High-Resolution Digital Video Microscope:
This microscope has a high-resolution digital video camera capable of shooting videos at 1920 x 1080 pixels which can be captured as an image file using a USB memory stick or SD card on your computer after the capture session is complete.
How is the Magnification Process Calculated?
When an image is created and then reflected through different types of lenses, it will go from being blurry (that’s what your naked eye sees) to clear as you approach twenty times magnification! So that means if magnification was 10x before, but now it has been set to 20x, your image would increase by 1000.
How are Optical Microscopes Used in Practice?
Optical microscopes come with various interchangeable lenses depending on the use they will be put under. For example, when working in applied sciences (e.g., biology and medicine), you’ll require lenses that can withstand high pressures from gasses such as oxygen or nitrogen for your experiment. However, for artistic purposes like photography, you will need lenses to produce clear images.
The type of optical lens also differs based on its use. Using a standard Nikon lens over telephoto lenses is an advantage because they reduce blurriness during long exposure shots and other applications. Fewer focus errors occur, making finding the proper object in a field of view easier.
Can you see DNA with an optical microscope?
Yes, but not in detail with an optical microscope.
DNA is a molecule that contains genetic information in the form of code. It comprises two long chains, or double helixes, of nucleotides bonded together by base pairs. The nucleotides are the nitrogenous bases adenine (A), guanine (G), cytosine (C), and thymine (T).
The first step to seeing DNA would be to make it visible under a light microscope. It must be extracted from cells and then suspended in solution to do this. Once the cells have been removed from the body, they can be fixed using ethanol for permanent preservation before being stained with either ethidium bromide or acridine orange stain.
What are the limitations of an optical microscope?
The limitations of an optical microscope are:
The image quality is not as good as the electron microscope.
The specimen is not immersed in water to facilitate examination of the microscopic surface details and eliminate unwanted background interference.
It does not have high resolution or magnification capabilities like an electron microscope.
How much does an optical microscope cost?
An entry-level, basic microscope would typically cost around $500, whereas a more advanced model with digital imaging, image stabilization, and automatic focus adjustment would be closer to $2,000.
What is the resolution of an optical microscope?
An optical microscope has a numerical aperture (NA) of 0.25-0.75 and uses light to magnify objects.
The resolution is the number of pixels in an image that can be seen at a given magnification level or size, typically expressed as width by height.
The higher the NA, the better resolution you will have when viewing with your microscope and, therefore, a higher-quality image.
What is the most common type of optical microscope?
The most common type of optical microscope is the compound microscope.
This type of microscope has a single lens and can magnify objects up to x100, the magnification power. Ernst Abbe invented this device in the 17th century and designed its original design and construction.
What is the maximum magnification of an optical microscope?
The most significant possible magnification for a microscope would be around 1000x because the beam diameter would have to be just under 1mm.
Is an optical microscope a light microscope?
Yes, an optical microscope is a light microscope, and they are different types of microscopes that work in slightly different ways.
An optical microscope uses an objective lens to project an image of the sample onto a digital screen or film. Any light source, such as a tungsten-halogen lamp, LED, or sunlight can illuminate the model. The reflected light is collected on the objective lens using mirrors and lenses to form a magnified image.
A light microscope uses a condenser lens with two objectives instead of an optical microscope. The condenser lens collects all the available light from above and below it onto a single focused point at the end of its tube called the illumination point.
Why is an optical microscope not suitable for the characterization of nanomaterials?
An optical microscope is not suitable for the characterization of nanomaterials due to its limited resolution and magnification. Optical microscopes can only see features smaller than about 200 nm, which is too small for many types of nanoparticles.
This limitation makes it difficult to distinguish between different materials and determine their properties and toxicity.
Additionally, because optical microscopy does not involve any exposure to the material being examined, there is a higher risk of causing harm if incorrect conclusions are drawn regarding the safety or toxicity of nanoparticles.
Can you see nanoparticles with an optical microscope?
Yes, it is possible to see nanoparticles with an optical microscope.
Nanoparticles are particles with a diameter of 1-100 nanometers, and Nanoparticles are tiny and can be seen using an optical microscope. They can also be studied using other microscopes such as electron microscopes and scanning electron microscopes.
8 Optical Microscope Maintenance Tips

1. Clean the lenses of your microscope regularly with a soft, lint-free cloth or tissue paper.
2. Replace the cleaning fluid and clean lens covers regularly.
3. Keep an eye out for water droplets on the lenses as they are one of the leading causes of spots, so use a blower to dry them up before they have time to create permanent damage.
4. Make sure that you never leave your microscope unattended while it is turned on or plugged in, and make sure that all cords are kept away from heat sources such as radiators or lamps where they can cause fires if left too close together or under clothes where they can cause burns due to heating up quickly during use without you noticing anything first
5. Check whether any objects inside your microscope may be blocking light from entering by using a piece of white paper to block off the light at one end, then turning on your lamp at the other end and seeing if anything is visible through the eyepiece there
6. If you’re using filters (which will give different results depending on what type), remember that each filter has its specific angle, which must be adjusted when replacing it for it to work properly again after being removed for cleaning
7. Avoid touching lenses with oil-based substances like makeup remover or lip balm, as this can cause permanent damage
8. Always put your finished product back into its original case so it doesn’t get scratched while traveling between labs
Invention History of Optical Microscope
Optical microscopes were created in the 17th century. They were the first devices to observe microscopic objects such as electrons, bacteria, or plant cells without destroying them. It was called a microscope by scientists, and they do not have the same meaning as it is used today.
It was widely used in early microscopy to discover some bacteria and insect cells that are microscopic and large enough for their structure to be seen with unaided vision. In 1733 a physician named Antonie van Leeuwenhoek made his first-ever recorded observation under antiseptic conditions, showing invisible objects on blood agar that were living and vital cells.
Delicate Procedures of Electron Microscopy
Two years later, in 1739, he used the microscope with cell culture and found he could see even smaller objects such as erythrocytes or red blood cells made from plant cellulose (exactly what microscopes are for?) However, this will not teach him the function of these tiny bodies until more would go by for many decades.
However, the first use of this type of device can be traced back to 1761 in Sweden, where a Swedish mineralogist using copper tissue and silver grainen eyepieces would make a draft-like photo (now called stone negative) for two gold sparkles.
These were also found in his eye and showed these items curiously shaped like hexagons with round balls on each corner made up of parallel lines that didn’t turn out after some time.

Still, his grainen photo was a picture of living plant cells.
In 1802, Italian physicist Joseph Fraunhofer further refined his photosensitive properties. Then by just changing something in its design, it would make him discover more things, such as shadows that could never have been seen before with unaided vision, such as shiny hairs moving among leaves on vines at night, or how insects were located inside the roots though invisible to the naked eye.
Before 1830, people used these devices in ways similar to modern-day magnification tools such as binoculars and telescopes today. However, with advanced technologies and innovations made for hundreds of years, optical microscopes have improved dramatically.
Read on for some interesting facts about their history! Aside from being useful in medical or industry settings where microscopic analysis is required ( such as to diagnose blood poisoning), optical microscopes are now used by many others, such as artists, biologists, zoologists, and more.
Who discovered an optical Microscope for the first time?
Janssen and Lipperhey discovered the optical microscope, described in 1665.
This device could magnify objects more than 100 times and replace primitive microscopes that were previously used. They had built the first microscope when other mechanical devices, such as clocks and pendulum clocks were pretty new. Janssen’s reflections-lens microscope designs were beneficial for working on experiments of the most significant importance.
Final Words:
Optical Microscopes have been around for a long time, but they have only recently become popular among hobbyists and scientists. You can use an optical microscope to look at things like insects, crystals, or even the insides of plants.
It’s also helpful in taking photographs of fine details in objects. Optical microscopes are very simple to use and maintain; you need a light source and a glass slide. If you’re interested in getting started with this equipment, check out our best microscopes for beginners!
If you’re interested in learning more about the history and how to use an optical microscope, we recommend you look at our blog post! We’ve also included helpful links and resources for those looking to purchase one for themselves or someone else this holiday season! Which type of microscope do you prefer? Let us know in the comments below if we should add any topics.

I am an enthusiastic student of optics, so I may be biased when I say that optics is one of the most critical fields. It doesn’t matter what type of optics you are talking about – optics for astronomy, medicine, engineering, or pleasure – all types are essential.
Table of Contents
Pingback: How Does a Microscope Work? An In-Depth Guide To Magnification & Slit Diagrams!
Pingback: 5 Best Microscope For Soil Biology: Reviews With Expert Recommendation
Pingback: 5 Best Labomed Dental Microscope Review: A Complete Buying Guide 2022
Pingback: 5 Best Vanguard Microscope Review: A Complete Buying Guide 2022
Pingback: Top 5 Best Microscope For Parasites - Reviews with Complete Buying Guide
Pingback: 5 Best Microscope For Laboratory: Reviews With Buying Guide in 2022
Pingback: 5 Best Digital Microscope for Biology: Buying Guide for High School and College Student
Pingback: Best Microscope for Adults: Complete Buying Guide with Comparison in 2022
Pingback: 5 Best Starter Microscope: Comparison With Buying Guide in 2022
Pingback: Buying Guide For Best Chinese Microscopes In [2022]
Pingback: 5 Best AmScope Microscope: Comparison With A Complete Buying Guide
Pingback: 5 Best Mobile Phone Microscope: Comparison with Buying Guide in 2022
Pingback: 5 Best LCD Microscope We Tested Recently: Comparison With Buying Guide
Pingback: 5 Best Most Commonly Used Microscopes We Tested in the Last 2 weeks: Comparison With Buying Guide
Pingback: I’ve tested over 20 Top-Quality Computer Microscope: This AmScope model is the best one you can buy
Pingback: Lumagny MP7545 Lighted Microscope Review: Instructions Explained
Pingback: We Tested Wireless Digital Microscopes to See If They Work: Including Comparison with Video Guide
Pingback: 5 Most Popular Weed Microscope: Comparison with Video Guide
Pingback: Seeing the Unseen: 5 Best Advanced Microscopes for Visualizing Atoms and Molecules
Pingback: A Quick Guide for Choosing Most Powerful Light Microscope For Your Research Needs: 5 Models We Tested
Pingback: 5 Must-Know Facts About Most Powerful Optical Microscope