Blog

  • Are Electron Microscope Images Coloured? Unveiling the Truth!

    Are Electron Microscope Images Coloured? Unveiling the Truth!


    No, electron microscope images are not inherently colored. By default, these images are captured in black and white, reflecting the monochromatic nature of the electron signals used in imaging. The grayscale representation offers high contrast and detailed views of microscopic structures. However, scientists often apply color to these images through pseudocoloring techniques for specific purposes. Pseudocoloring helps highlight distinct features or materials within the specimen, aiding in the interpretation and communication of scientific findings. The choice of colors is strategic and does not signify inherent colors present in the specimens. While artistic renderings and false coloration techniques exist, the core of electron microscope imaging lies in its ability to provide precise, high-resolution, and uncolored representations of the microscopic world.

    The Basics of Electron Microscopy

    Delving into the microscopic universe, electron microscopy serves as a transformative tool, revealing intricacies beyond the reach of traditional optical microscopes. Understanding the fundamentals of electron microscopy is essential to appreciate its capabilities and applications.

    Types of Electron Microscopes

    Electron microscopes come in diverse types, each tailored to specific scientific needs. The three primary types are Transmission Electron Microscope (TEM), Scanning Electron Microscope (SEM), and Scanning Transmission Electron Microscope (STEM). Each type offers unique advantages, allowing scientists to explore different aspects of specimens in unprecedented detail.

    Types of Electron Microscopes

    Electron Microscope TypeCharacteristics
    Transmission Electron Microscope (TEM)Penetrates thin specimens for detailed internal structures
    Scanning Electron Microscope (SEM)Provides 3D surface images with excellent depth of field
    Scanning Transmission Electron Microscope (STEM)Combines features of TEM and SEM for versatility

    How Electron Microscopes Work

    1. Electron Beam Generation:
      • Electron microscopes use electron guns to generate focused beams of electrons.
      • Magnetic lenses focus these beams onto the specimen.
    2. Interaction with Specimens:
      • When the electron beam strikes the specimen, interactions with atoms generate signals.
    3. Detection of Signals:
      • Detectors capture signals like secondary electrons, backscattered electrons, and transmitted electrons.
    4. Image Formation:
      • Captured signals are translated into high-resolution images, providing detailed views of specimen structures.

    Characteristics of Electron Microscope Images

    Characteristics of Electron Microscope Images

    AspectDescription
    High ResolutionExceptional detail and clarity
    Monochromatic NatureNative images are black and white
    Depth of FieldSEM provides excellent depth perception
    Internal StructuresTEM reveals internal structures in fine detail

    Electron microscope images stand out for their high resolution, monochromatic default state, and the ability to unveil internal structures with precision.

    Advantages and Limitations

    • Advantages:
      • High resolution for detailed imaging.
      • Capability to explore internal structures.
      • SEM excels in revealing fine surface details.
    • Limitations:
      • Meticulous sample preparation is essential.
      • Vacuum conditions are required.
      • Artefacts may be introduced during sample processing.

    Innovations in Electron Microscopy

    Continual innovations enhance electron microscopy’s capabilities:

    • Cryo-Electron Microscopy (Cryo-EM):
      • Allows imaging of biological specimens in their native state.
      • Minimizes damage from sample preparation.
    • Correlative Light and Electron Microscopy (CLEM):
      • Integrates data from light and electron microscopy for comprehensive analysis.
      • Bridges information across macro and micro scales.

    Understanding these basics sets the stage for exploring the colorful and captivating world of electron microscope images, debunking misconceptions and appreciating the intersection of science and art at the microscopic level.

    Black and White: The Native State of Electron Microscope Images

    Contrary to popular belief, the native state of electron microscope images is monochromatic, devoid of the vibrant hues that often characterize other imaging techniques. Electron microscopy relies on the interaction of electron beams with specimens and the subsequent capture of signals emitted during this interaction. The result is a raw, high-resolution image that is inherently black and white.

    Characteristics of Native Electron Microscope Images

    AspectDescription
    Monochromatic NatureLack of inherent color in native images
    Electron Signal InteractionDetectors capturing electron signals
    Raw RepresentationUnaltered depiction of specimen structures

    The monochromatic nature of these images arises from the fundamental principles of electron microscopy. Electron beams, focused onto the specimen, interact with the atoms present. Detectors capture the signals generated by this interaction, forming an image that faithfully represents the structural details without the introduction of artificial colors.

    These native black and white images offer a stark beauty, emphasizing the intricate details of the microscopic world. The absence of color allows scientists to focus on the structural information, discerning the fine nuances within cells, materials, or any specimen under examination.

    Appreciating the native state of electron microscope images is crucial for accurate interpretation and communication of scientific findings. While the absence of color might seem surprising to those new to the field, it underscores the precision and objectivity inherent in electron microscopy, where the focus is on revealing the true nature of microscopic structures. As we delve deeper into the world of electron microscopy, it becomes evident that the beauty lies not in the colors that adorn the images but in the rich tapestry of details that monochromatic images unveil.

    Pseudocoloring in Electron Microscopy

    In the realm of electron microscopy, the quest to unveil intricate details often extends beyond the limitations of black and white images. Pseudocoloring emerges as a powerful technique, enabling scientists to enhance visibility, highlight specific features, and convey additional information in electron microscope images.

    Pseudocoloring involves the deliberate assignment of colors to different parts of an image, creating a visually enriched representation without altering the inherent grayscale nature of electron microscope images. This technique is particularly valuable when researchers seek to emphasize specific elements within a specimen.

    The application of pseudocoloring is not arbitrary; instead, it adheres to scientific principles. By assigning distinct colors to different structures or materials, scientists can create a more intuitive visual interpretation of the microscopic world. For instance, in a biological sample, cell membranes may be pseudocolored in one hue, while organelles or other structures are represented in contrasting colors.

    Pseudocoloring Techniques

    TechniquePurpose
    Heatmap PseudocoloringEmphasizes variations in temperature or intensity
    Rainbow PseudocoloringEnhances contrast by assigning colors across the spectrum
    Grayscale with Color HighlightsRetains black and white base while accentuating specific details

    Heatmap pseudocoloring is often employed to visualize variations in temperature or intensity within a specimen, providing a gradient of colors that intuitively represent different levels. Rainbow pseudocoloring, on the other hand, enhances contrast by assigning colors across the visible spectrum, making subtle differences more apparent.

    Pseudocoloring is not limited to scientific utility; it also serves an essential communicative role. By introducing colors, researchers can create images that are not only scientifically informative but also visually engaging. This aids in effective communication of complex findings to diverse audiences, from fellow scientists to students and the general public.

    While pseudocoloring undeniably enhances the interpretability of electron microscope images, researchers must use it judiciously. The colors assigned should accurately reflect the scientific context, ensuring that the visual representation aligns with the underlying data. In navigating the microscopic landscape with pseudocoloring, scientists embark on a journey where art and science converge, bringing forth a richer understanding of the hidden world magnified by electron microscopy.

    False Coloration and Artistic Rendering in Electron Microscopy

    Beyond the realm of pseudocoloring, electron microscopy offers another layer of visual complexity through techniques such as false coloration and artistic rendering. These approaches elevate scientific images beyond mere representations, transforming them into captivating works that marry the precision of science with the aesthetics of art.

    False Coloration:

    False coloration involves the intentional application of colors to an image, departing from the natural grayscale representation. Unlike pseudocoloring, where colors are assigned based on scientific principles, false coloration allows for more subjective choices. This technique is commonly employed to emphasize specific details or highlight different elements within a specimen.

    False coloration often serves to enhance contrast and clarity, making subtle structures more discernible to the human eye. For example, in biological samples, false coloration may be used to distinguish between different cell types or to highlight areas of interest such as cellular organelles.

    Artistic Rendering:

    Artistic rendering takes electron microscope images to a different realm, where scientific visualization meets creative expression. While the primary goal of scientific imaging is to accurately represent the specimen, artistic rendering allows for a departure from strict realism. This technique involves applying artistic elements such as shading, texture, and even unconventional colors to create visually striking representations.

    Examples of Artistic Rendering:

    1. Neuronal Connections:
      • False coloration is used to distinguish between neural pathways, creating a visually appealing representation of the intricate connections within the brain.
    2. Cellular Landscape:
      • Artistic rendering transforms a typical cellular landscape into a visually engaging masterpiece, where scientific accuracy converges with creative expression.

    Artistic rendering not only produces aesthetically pleasing images but also invites viewers to appreciate the beauty inherent in the microscopic world. It bridges the gap between science and art, making complex scientific concepts more accessible to a broader audience.

    Both false coloration and artistic rendering contribute to the narrative of scientific discovery. They go beyond the mere documentation of structures and delve into the realm of visual storytelling. These techniques play a crucial role in communicating the wonder of the microscopic universe, fostering a deeper appreciation for the beauty concealed within the seemingly mundane world magnified by electron microscopy.

    Factors Influencing Coloration in Electron Microscopy

    The introduction of color to electron microscope images is a deliberate process influenced by various factors. Understanding these factors is crucial for accurately interpreting the visual information conveyed through the vibrant hues that adorn the microscopic world.

    Specimen Composition:

    The materials constituting the specimen play a pivotal role in influencing coloration. Different substances interact with electrons in distinctive ways, leading to variations in the colors observed. For instance, biological specimens may exhibit different colors based on the composition of cellular structures or the presence of specific molecules.

    Imaging Techniques:

    The choice of imaging techniques in electron microscopy can significantly impact color representation. Different techniques, such as transmission electron microscopy (TEM) and scanning electron microscopy (SEM), may produce varied color schemes. The interaction of electrons with specimens and the subsequent detection methods contribute to the diversity of colors observed in the final images.

    Post-processing:

    The coloration of electron microscope images is not solely determined during the imaging process but can be further modified during post-processing. Adjustments in contrast, brightness, and color balance can influence the final appearance of the image. Researchers often fine-tune these parameters to enhance the visual clarity and emphasize specific features within the specimen.

    Factors Influencing Coloration

    FactorInfluence on Color Representation
    Specimen CompositionDifferent materials may exhibit distinct colors
    Imaging TechniquesVaried techniques may result in different color schemes
    Post-processingAdjustment of contrast and brightness impacts color

    Navigating the intricacies of coloration in electron microscopy requires a nuanced understanding of these factors. The interplay between specimen composition, imaging techniques, and post-processing intricacies contributes to the rich palette of colors that brings the microscopic world to life. As scientists continue to refine their methods, the resulting images become not only scientific tools but also visual masterpieces that capture the essence of the microscopic realm in vibrant detail.

    Common Misconceptions about Color in Electron Microscopy

    Misconceptions often surround the representation of color in electron microscope images, stemming from assumptions and unfamiliarity with the underlying principles. Let’s address and debunk some of these common misconceptions:

    Debunked Misconceptions

    MisconceptionClarification
    Inherent Color in Electron ImagesElectron microscope images are naturally black and white
    Unrestricted PseudocoloringPseudocoloring is deliberate and guided by scientific principles
    1. Inherent Color in Electron Images:
      • Misconception: Assuming that electron microscope images inherently possess color.
      • Clarification: Native electron microscope images are monochromatic, capturing the grayscale nuances of specimen structures. Color is introduced through deliberate techniques.
    2. Unrestricted Pseudocoloring:
      • Misconception: Believing that pseudocoloring involves arbitrary assignment of colors.
      • Clarification: Pseudocoloring follows scientific principles, with colors assigned purposefully to enhance visibility and convey specific information without distorting the underlying data.

    Understanding these misconceptions is essential for appreciating the accuracy and intentionality involved in the coloration of electron microscope images. By dispelling these myths, we foster a more informed interpretation of the mesmerizing visuals that emerge from the microscopic world.

    6 Tips for Interpreting Electron Microscope Images

    Interpreting electron microscope images requires a nuanced approach to fully grasp the intricate details captured at the microscopic level. Here are six tips to enhance your understanding:

    1. Recognize Pseudocoloring:
      • Be aware that colors introduced to electron microscope images through pseudocoloring are intentional and serve a specific purpose. Understanding this technique aids in accurate interpretation.
    2. Understand the Native State of Images:
      • Acknowledge that native electron microscope images are monochromatic. This awareness helps in distinguishing between inherent features and those highlighted through coloration techniques.
    3. Context Matters:
      • Consider the scientific context in which the images are presented. Colors may be used to emphasize specific structures or materials, providing vital clues to the researcher’s intended focus.
    4. Be Mindful of Artistic Rendering:
      • Understand the distinction between scientifically accurate representation and artistic rendering. While the former is based on data, the latter introduces creative elements for visual appeal.
    5. Consider Specimen Composition:
      • Different materials within a specimen may naturally exhibit distinct colors. Take into account the inherent properties of the materials being imaged for a more accurate interpretation.
    6. Stay Informed About Imaging Techniques:
      • Different electron microscopy techniques may produce varied color schemes. Familiarize yourself with the imaging method used to capture the images, as this influences the visual outcome.

    3 Major Challenges in Electron Microscopy Imaging

    While electron microscopy has revolutionized our ability to visualize the microscopic world, it is not without its challenges. Three major hurdles persist in the field:

    1. Color Representation:
      • The debate over standardized colorization in scientific imaging remains ongoing. Establishing consistent color representation is challenging, as different labs may employ varied methods, impacting the reproducibility and comparability of results.
    2. Technological Advancements:
      • Despite continuous innovations, electron microscopy faces technological limitations. Improving spatial resolution, reducing specimen damage during imaging, and enhancing imaging speed are ongoing challenges that researchers strive to overcome.
    3. Standardization in Electron Microscopy:
      • The field lacks standardized protocols for colorization and imaging procedures. The absence of uniform standards hinders collaboration and makes it challenging to establish a universal language for interpreting electron microscope images. Efforts to standardize practices are underway but remain a complex endeavor.

    Do Electron Microscope Images Have Inherent Color?

    Electron microscope images are inherently monochromatic. The default representation is black and white, devoid of inherent color. This monochromatic nature arises from the fundamental principles of electron microscopy, where electron beams interact with specimens to create high-resolution images captured in grayscale.

    How are Colors Introduced to Electron Microscope Images?

    Colors are introduced through deliberate processes such as pseudocoloring and false coloration. Pseudocoloring involves assigning colors to specific features, enhancing visibility without altering the native grayscale. False coloration, on the other hand, allows for more subjective color choices, often used to highlight structures or create visually engaging representations.

    Is Pseudocoloring Arbitrary, or Does it Follow Scientific Principles?

    Pseudocoloring is not arbitrary; it follows scientific principles. Colors are assigned purposefully to enhance the interpretation of specific features within a specimen. This intentional approach ensures that the coloration aligns with the scientific context and aids accurate interpretation.

    Can Electron Microscope Images Be in True Color?

    True color, as perceived by the human eye, is not present in electron microscope images. These images are formed by capturing electron signals, resulting in a monochromatic representation. The introduction of color is a deliberate and strategic process aimed at enhancing scientific interpretation.

    What is the Difference Between Pseudocoloring and False Coloration?

    Pseudocoloring and false coloration both involve introducing color to electron microscope images, but they differ in their approach. Pseudocoloring follows scientific principles, assigning colors deliberately, while false coloration allows for more subjective and artistic color choices to enhance contrast and visual appeal.

    Are There Different Techniques for Pseudocoloring?

    Various techniques are employed for pseudocoloring in electron microscopy. Heatmap pseudocoloring emphasizes variations in temperature or intensity. Rainbow pseudocoloring enhances contrast with a spectrum of colors, and grayscale with color highlights retains a black and white base while accentuating specific details. These techniques cater to different imaging needs and objectives.

    Why Use Coloration in Electron Microscopy?

    Coloration in electron microscopy serves multiple purposes. It enhances visibility, making specific features more discernible. It allows for the conveyance of additional information, aiding in the interpretation of complex structures. Moreover, coloration adds a visual dimension to microscopic images, making them more accessible and engaging for a broader audience.

    What is the Role of Artistic Rendering in Electron Microscopy?

    Artistic rendering in electron microscopy involves creative embellishments to scientific images. While scientific accuracy remains crucial, artistic rendering adds aesthetic elements, such as shading and texture, contributing to visually striking representations. This approach bridges the gap between science and art, making microscopic imagery more captivating.

    Are Electron Microscope Images Ever in True Color?

    True color, as perceived by the human eye, is not inherent in electron microscope images. The introduction of color is a deliberate process, whether through pseudocoloring, false coloration, or other techniques. This deliberate approach ensures that the colors used in the images serve a scientific purpose, aligning with the researcher’s objectives.

    What Challenges Exist in Representing Color in Electron Microscopy?

    Challenges in representing color in electron microscopy include debates on standardized colorization, technological limitations, and the lack of universal standards. Achieving consistency in color representation remains a complex task, requiring ongoing efforts to enhance imaging technology and establish standardized practices for accurate and reproducible results.

    Final Words

    As we conclude our journey into the world of electron microscope images, the truth becomes evident—electron microscope images are not inherently colored. Instead, deliberate processes such as pseudocoloring and artistic rendering bring these microscopic wonders to life. Armed with newfound knowledge, we can appreciate the marriage of science and art that defines the captivating images revealing the hidden beauty of the microscopic realm.

    Resources and References

    For those eager to delve deeper into the realm of electron microscopy, the following resources provide a wealth of knowledge and insight:

    1. “Principles of Electron Optics: Applied Geometrical Optics” by Peter W. Hawkes
      • This comprehensive book delves into the principles of electron optics, providing a solid foundation for understanding the intricacies of electron microscopy.
    2. “Introduction to Electron Microscopy” by John J. Bozzola and Lonnie D. Russell
      • An excellent introductory text covering the fundamentals of electron microscopy, from basic principles to advanced techniques.
    3. “Cryo-EM: A Unique Tool for the Visualization of Macromolecular Complexity” by Sriram Subramaniam
      • This seminal article, published in Nature, explores the application of cryo-electron microscopy in visualizing macromolecular structures.
    4. “Current Trends in SPM Instrumentation for Nanoscale Imaging and Spectroscopy” by Andrea Schwartz and Enrico Gnecco
      • A valuable resource on scanning probe microscopy, offering insights into nanoscale imaging and spectroscopy techniques.

    These references, coupled with the firsthand experiences shared in this article, offer a comprehensive understanding of the intricacies surrounding the coloration of electron microscope images. Whether you are a novice or an experienced researcher, these resources provide valuable insights into the evolving field of electron microscopy.

  • What Does Skeletal Muscle Look Like under Microscope: A Microscopic Marvel

    What Does Skeletal Muscle Look Like under Microscope: A Microscopic Marvel

    Observing skeletal muscle under a microscope unveils a mesmerizing world of intricate structures and dynamic interactions. The detailed examination of muscle tissue provides insights into its composition, organization, and functional elements. Here’s a closer look at what skeletal muscle looks like under a microscope:

    1. Muscle Fibers:

      • At the cellular level, skeletal muscle is composed of long, cylindrical cells known as muscle fibers. These fibers exhibit a striated appearance under the microscope due to the orderly arrangement of contractile units called sarcomeres.
    2. Sarcomeres:

      • The sarcomere is the fundamental unit of muscle contraction and relaxation. When viewed under high magnification, sarcomeres reveal alternating dark and light bands. The dark bands, called A bands, consist of overlapping myosin and actin filaments, while the light bands, called I bands, contain actin filaments.
    3. Connective Tissue:

      • Delicate layers of connective tissue, such as endomysium, perimysium, and epimysium, surround and support the muscle fibers. Under the microscope, these structures appear as thin, fibrous layers intertwining with the muscle fibers.
    4. Neuromuscular Junctions:

      • Microscopic examination also unveils neuromuscular junctions, where nerve endings communicate with muscle fibers. This critical point of contact is essential for transmitting signals that initiate muscle contraction.
    5. Fiber Types:

      • Different fiber types, such as slow-twitch (Type I) and fast-twitch (Type II) fibers, exhibit distinctive microscopic features. Slow-twitch fibers appear darker due to higher myoglobin content, while fast-twitch fibers appear lighter with fewer mitochondria.
    6. Mitochondria and Organelles:

      • Electron microscopy reveals the subcellular details, including the abundance of mitochondria. These organelles, often referred to as the powerhouse of the cell, are responsible for energy production and play a crucial role in muscle function.
    7. Blood Vessels:

      • Microscopic examination allows for the visualization of blood vessels within the muscle tissue. The network of capillaries ensures oxygen and nutrient supply to the muscle fibers, supporting their metabolic needs.
    8. Adaptations to Exercise:

      • Through microscopic analysis, researchers can observe adaptations in muscle microstructure in response to exercise. These adaptations include changes in fiber size, increased capillarity, and alterations in the distribution of mitochondria.

    In essence, exploring skeletal muscle under a microscope is a journey into the marvels of cellular architecture. The nuanced details revealed through microscopic examination contribute to our understanding of muscle physiology, pathology, and the adaptive responses that shape this remarkable tissue.

    Basics of Skeletal Muscle

    As I journeyed into the microscopic world of skeletal muscle, the foundational understanding of these intricate structures became the cornerstone of my exploration.

    Composition of Skeletal Muscle Tissue

    At the core of skeletal muscles lies a remarkable composition of muscle fibers, connective tissue, blood vessels, and nerves. This symphony of elements orchestrates the complex dance of voluntary movements.

    Muscle Fibers

    Muscle fibers, elongated cells responsible for contraction, are the building blocks of skeletal muscle. These fibers house the machinery for muscle function, including myofibrils, the contractile units within each cell.

    Connective Tissue

    Weaving through the muscle fibers are layers of connective tissue that provide structural support. The endomysium, a delicate layer, envelops individual muscle fibers. Perimysium surrounds bundles of muscle fibers, forming fascicles. Lastly, the robust epimysium encases the entire muscle, ensuring cohesion and protection.

    Voluntary Muscle Control

    One of the captivating aspects revealed under the microscope is the voluntary nature of skeletal muscles. Unlike smooth muscles, which function involuntarily, skeletal muscles respond to conscious commands. This voluntary control is made possible by the intricate network of nerves intertwining with muscle fibers.

    Microscopic Features

    Sarcomeres

    The microscopic marvels known as sarcomeres define the functional units of skeletal muscles. Comprising thin actin and thick myosin filaments, these repeating structures dictate muscle contraction. The alternating dark and light bands visible under the microscope are a testament to the precise organization of sarcomeres.

    Neuromuscular Junctions

    Zooming in further, the microscopic theater unveils neuromuscular junctions. These specialized points of contact between nerve endings and muscle fibers play a pivotal role in transmitting signals for muscle contraction. Witnessing this microscopic dialogue adds a layer of appreciation for the intricate communication within our bodies.

    Fiber Types and Characteristics

    Fiber Type Contraction Speed Fatigue Resistance Key Function
    Slow-twitch (Type I) Slow High Endurance and Sustained Activity
    Fast-twitch (Type II) Fast Low Rapid, Powerful Contractions

    Understanding these fiber types, each with its unique characteristics, provides insights into the diverse roles that skeletal muscles play in our daily activities.

    In essence, the basics of skeletal muscle, when unraveled under the microscope, showcase the harmony of structural elements and the marvel of voluntary control. This foundational knowledge sets the stage for a deeper exploration of the microscopic intricacies within our muscles.

    Microscopic Techniques for Muscle Examination

    Diving into the microscopic realm of skeletal muscle, I found myself captivated by the array of techniques that unveil the intricate details hidden within muscle tissues. These techniques, ranging from traditional histology to advanced electron microscopy, are the lenses through which we gain insight into the microscopic landscape of our muscles.

    Traditional Histology

    Staining Methods

    Histology, the study of tissues, is the bedrock of microscopic examination. Staining methods enhance the visibility of cellular structures, making them stand out under the microscope. H&E (hematoxylin and eosin) staining, a standard in histology, reveals the general architecture of muscle tissues, distinguishing cell nuclei and cytoplasm.

    Immunohistochemistry

    For a more targeted exploration, immunohistochemistry comes into play. This technique employs antibodies to detect specific proteins within the muscle tissue. It allows for the identification of cellular components, such as myosin and actin filaments, enabling a more detailed analysis of the molecular makeup.

    Electron Microscopy

    Transmission Electron Microscopy (TEM)

    Taking the exploration to a finer scale, transmission electron microscopy (TEM) offers unparalleled resolution. This technique allows us to visualize structures at the subcellular level. Under TEM, the sarcomeres, mitochondria, and other organelles reveal their intricate details, providing a deeper understanding of the ultrastructure of skeletal muscle.

    Scanning Electron Microscopy (SEM)

    On the surface level, scanning electron microscopy (SEM) provides a three-dimensional view of the muscle tissue. SEM captures the external features of the tissue, offering insights into the surface morphology of muscle fibers. This technique is particularly valuable for studying the topography of the tissue and the arrangement of fibers.

    Fluorescence Microscopy

    Live Imaging

    Fluorescence microscopy, with its ability to visualize specific molecules labeled with fluorescent dyes, adds a dynamic dimension to the study of muscle tissues. Live imaging allows researchers to observe real-time cellular processes, providing valuable insights into the dynamic behavior of muscle cells during contraction and relaxation.

    Table: Comparison of Microscopic Techniques

    Technique Resolution Key Features
    Traditional Histology Moderate Provides an overview of tissue architecture with basic staining methods.
    Immunohistochemistry Variable Allows for the identification of specific proteins within the muscle tissue.
    Transmission Electron Microscopy High Offers ultrastructural details at the subcellular level.
    Scanning Electron Microscopy High Provides a three-dimensional view of the surface morphology of muscle tissue.
    Fluorescence Microscopy Variable Enables live imaging and visualization of specific molecules within the tissue.

    Practical Tips for Effective Microscopic Examination

    1. Careful Tissue Sectioning: Properly prepared tissue sections are crucial for accurate microscopic observation. Precision in sectioning ensures that the desired structures are visible.

    2. Optimal Staining Techniques: Choosing the right stain is paramount. Different stains highlight specific cellular components, providing clarity in the microscopic image.

    3. Calibration and Maintenance of Equipment: Regular calibration and maintenance of microscopes and imaging equipment are essential for obtaining reliable and consistent results.

    4. Integration of Multiple Techniques: Combining different microscopic techniques enhances the depth of analysis. For instance, integrating immunohistochemistry with electron microscopy provides both molecular and structural insights.

    Variations in Skeletal Muscle Fiber Types

    As my exploration of skeletal muscle continued under the microscope, the diversity within muscle fibers emerged as a captivating aspect of their microscopic landscape. Skeletal muscles, far from being homogenous, exhibit distinct fiber types that influence their function and performance.

    Slow-Twitch (Type I) Fibers

    Under the lens, slow-twitch fibers revealed their characteristic features. These fibers, also known as Type I, contract slowly but sustainably. Their microscopic appearance is marked by a higher density of mitochondria, the cellular powerhouses responsible for energy production. The abundance of mitochondria is a testament to the endurance capabilities of slow-twitch fibers, making them well-suited for activities requiring prolonged effort, such as long-distance running or cycling.

    Fast-Twitch (Type II) Fibers

    In contrast, the fast-twitch fibers, or Type II fibers, presented a different microscopic profile. These fibers contract rapidly but fatigue more quickly. Under the microscope, the distinguishing feature is a lower mitochondrial density compared to slow-twitch fibers. Instead, fast-twitch fibers boast a higher concentration of glycolytic enzymes, emphasizing their role in activities demanding bursts of power, like weightlifting or sprinting.

    Microscopic Variations

    Microscopically, slow-twitch fibers showcase a darker appearance due to the higher myoglobin content, a protein responsible for oxygen storage. This characteristic enhances their ability to utilize oxygen efficiently, contributing to their endurance.

    On the other hand, fast-twitch fibers appear lighter under the microscope due to lower myoglobin content. The reliance on anaerobic metabolism, without significant oxygen utilization, marks these fibers as powerhouses for short bursts of intense activity.

    Practical Implications

    Understanding these microscopic variations in muscle fiber types is not only academically intriguing but also holds practical implications. Athletes and fitness enthusiasts can tailor their training regimens based on the predominant fiber types in their muscles. For example, an endurance athlete may focus on activities that engage and optimize slow-twitch fibers, while a sprinter may prioritize training that targets fast-twitch fibers.

    Adaptations in Response to Training

    Remarkably, the microscopic landscape of muscle fibers is not fixed. Training-induced adaptations can alter the composition of muscle fibers. Endurance training, for instance, may prompt an increase in the number and efficiency of slow-twitch fibers.

    3 Factors Affecting Skeletal Muscle Microstructure

    The microscopic tapestry of skeletal muscle is not static; rather, it weaves a dynamic narrative influenced by various factors that leave their imprint on its microstructure. As I delved into the intricate details under the microscope, it became apparent that several elements shape the landscape of skeletal muscle at the cellular level.

    Exercise and Physical Activity

    Regular physical activity emerged as a prominent factor influencing skeletal muscle microstructure. Through the lens, I observed the effects of exercise on muscle fibers—adaptations such as increased mitochondrial density and altered fiber type composition. The microscopic changes reflected the muscle’s response to the demands placed upon it, showcasing the remarkable plasticity inherent in skeletal muscles.

    Aging and Microscopic Alterations

    Aging, another influential factor, cast its effects on the microscopic landscape of muscle tissue. Microscopic observations unveiled changes such as a decline in muscle mass, alterations in fiber type distribution, and disruptions in the integrity of connective tissue. These age-related modifications underscored the importance of considering the dynamic nature of skeletal muscle microstructure over the lifespan.

    Diseases Impacting Microstructure

    Certain diseases cast a shadow on the microscopic canvas of skeletal muscle. Conditions such as muscular dystrophy, myopathies, and neuromuscular disorders were evident in the alterations observed under the microscope. Microscopic analysis served as a diagnostic tool, unraveling the structural aberrations associated with these conditions and aiding in the understanding of their pathophysiology.

    Practical Tips for Microscopic Observation

    Navigating the microscopic landscape of skeletal muscle requires a keen eye, precision, and a thoughtful approach. As I honed my skills in microscopic observation, several practical tips emerged to ensure accurate and insightful analysis.

    1. Tissue Preparation and Sectioning Techniques:

      • The foundation of successful microscopic observation lies in meticulous tissue preparation. Optimal sectioning techniques ensure that the tissue slices are thin and free from artifacts, allowing for clear and accurate observations. Uniformly sliced sections enhance the visibility of key structures, facilitating a comprehensive analysis of muscle microstructure.
    2. Stain Selection for Enhanced Visibility:

      • The choice of stains significantly influences the clarity of microscopic images. Tailoring stain selection to specific cellular components enhances visibility. For instance, using hematoxylin and eosin (H&E) stains provides a general overview of tissue architecture, while immunohistochemistry allows for the targeted visualization of proteins. Thoughtful stain selection amplifies the microscopic details relevant to the research or diagnostic goals.
    3. Regular Calibration and Maintenance of Equipment:

      • Microscopes and imaging equipment are intricate tools that require regular calibration and maintenance. Ensuring that the equipment is in optimal condition guarantees the accuracy and consistency of microscopic observations. Regular calibration checks, lens cleaning, and alignment adjustments contribute to reliable results.
    4. Integration of Multiple Techniques:

      • The combination of various microscopic techniques enriches the depth of analysis. Integrating immunohistochemistry with traditional histology or electron microscopy provides a multi-dimensional perspective. This synergistic approach allows for a comprehensive understanding of both structural and molecular aspects, offering a more nuanced insight into skeletal muscle microstructure.
    5. Documentation and Record Keeping:

      • Accurate documentation is fundamental for reproducibility and future reference. Detailed notes on the experimental setup, staining protocols, and observed structures ensure that findings can be validated and built upon. Comprehensive record-keeping also aids in the identification of patterns or anomalies over time.

    Case Studies and Examples

    In the realm of skeletal muscle microscopy, real-world case studies and examples vividly illustrate the practical applications of microscopic analysis in diverse fields, from sports science to pathology.

    1. Athlete Performance Optimization:

      • Microscopic analysis has been instrumental in tailoring training regimens for elite athletes. By examining muscle biopsies, researchers can identify the predominant fiber types in an athlete’s muscles. This information guides personalized training programs, optimizing performance based on the specific demands of their sport.
    2. Neuromuscular Disorders Diagnosis:

      • Microscopic examination plays a crucial role in diagnosing neuromuscular disorders. For example, muscle biopsies from individuals with muscular dystrophy reveal characteristic structural abnormalities under the microscope. These findings aid in confirming diagnoses, understanding disease progression, and developing targeted therapeutic interventions.
    3. Rehabilitation Monitoring:

      • Post-injury or surgery, microscopic analysis of muscle tissue provides valuable insights into the effectiveness of rehabilitation. Observing changes in fiber type composition and connective tissue integrity helps assess the progress of recovery, guiding adjustments to rehabilitation protocols for optimal outcomes.
    4. Research on Age-Related Changes:

      • Studies examining age-related changes in muscle microstructure contribute to our understanding of sarcopenia, the age-related loss of muscle mass. Microscopic observations of muscle biopsies from different age groups reveal alterations in fiber size, distribution, and connective tissue, shedding light on the mechanisms underlying age-related muscle decline.

    These case studies underscore the practical significance of microscopic analysis in various domains. From enhancing athletic performance to aiding in medical diagnoses and rehabilitation, microscopic insights into skeletal muscle microstructure have far-reaching implications, showcasing the integral role of this technique in advancing both scientific knowledge and clinical practice.

    Current Advancements in Muscle Microscopy

    The dynamic field of muscle microscopy continues to evolve, driven by technological advancements that push the boundaries of resolution and functionality. One notable development is the integration of super-resolution microscopy techniques. These methods, such as structured illumination microscopy (SIM) and stimulated emission depletion microscopy (STED), break the traditional resolution limits, enabling researchers to visualize cellular structures with unprecedented clarity.

    Additionally, advancements in live-cell imaging bring a dynamic dimension to muscle microscopy. Techniques like confocal microscopy and two-photon microscopy allow researchers to observe real-time cellular processes, capturing the dynamic behavior of muscle cells during contraction and relaxation. These technological strides not only enhance our understanding of muscle microstructure but also open new avenues for studying physiological processes in vivo, promising exciting possibilities for both research and clinical applications.

    What Does Skeletal Muscle Look Like under a Microscope: A Microscopic Marvel

     Conclusion

    The intricate structure of skeletal muscle when observed under a microscope is nothing short of remarkable. These observations not only deepen our basic scientific understanding but are also crucial in medical contexts for diagnosing and treating muscle-related conditions. With advances in microscopic techniques and imaging technology, we continue to unlock more secrets held within our muscles, one fiber at a time.

    Resources and References

    For those eager to embark on their own microscopic adventure, the following resources provide a roadmap to further exploration:

    1. Alberts B, Johnson A, Lewis J, et al. (2002). “Molecular Biology of the Cell.” 4th edition. Garland Science.
    2. Junqueira LC, Carneiro J. (2003). “Basic Histology: Text & Atlas.” 11th edition. McGraw-Hill Education.
    3. Goldspink G. (2005). “Mechanical signals, IGF-I gene splicing, and muscle adaptation.” Physiology (Bethesda).

    These references offer a comprehensive foundation for delving deeper into the microscopic wonders of skeletal muscle.

  • What Do the Binocular Numbers Mean: Ultimate Guide to Know the Binocular Numbers and Terminology

    What Do the Binocular Numbers Mean: Ultimate Guide to Know the Binocular Numbers and Terminology

    Binocular is a widespread word, and everyone knows what a Binocular is. But the numbers we see on a binocular or the terminology of a Binocular is relatively unknown for beginners. Even then, The first thing you need to know before buying Binoculars is the significance of the terminology and the numbers we see on it.

    Because there are various types of Binoculars, these are made for different kinds of uses. You may want to use them for birding, hunting, astronomy, boating, or wildlife viewing. So, the numbers matter. This article will show you the significance of these numbers. We will show it understandably; thus, you can understand it quickly.

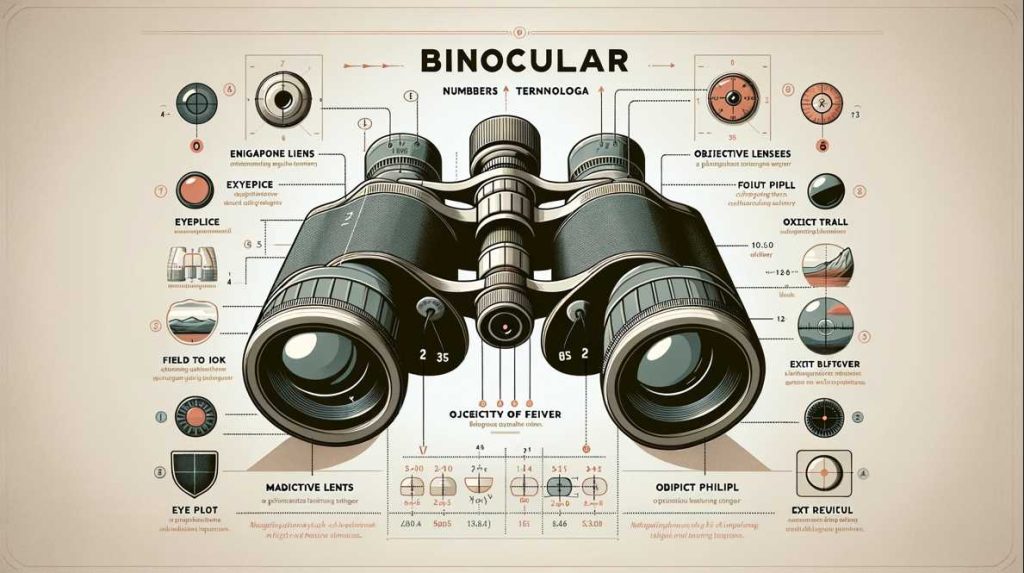
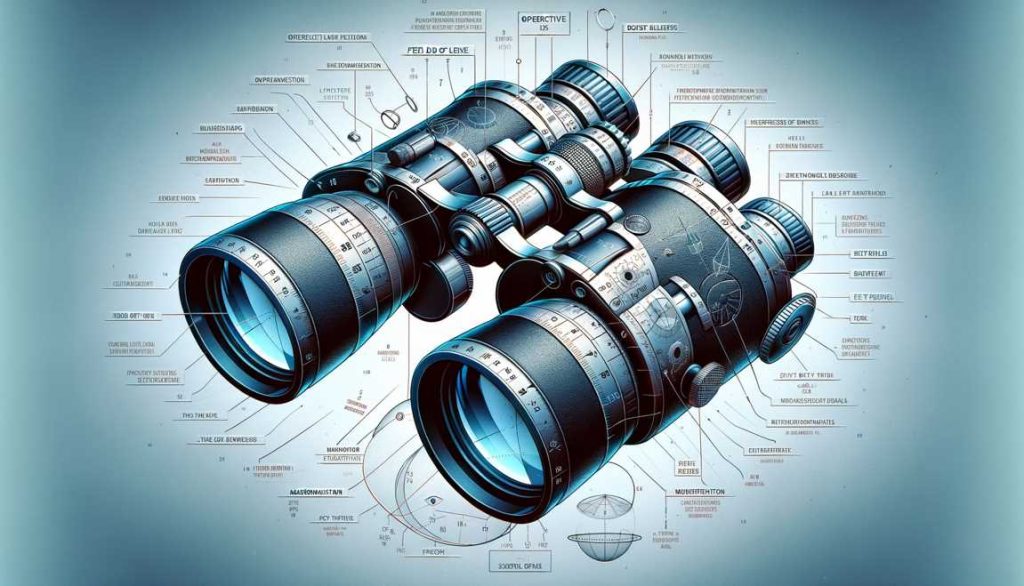
    There are many facts to know, like magnification – numbers, size of lenses, viewing angles, exit – pupil – numbers, eye – relief – numbers, the – field – view, and focusing. We will give you the ultimate idea about everything related to numbers and the terminology of a Binocular one by one.

    Binocular Numbers and Terminology Explained

    Understanding the Magnification

    Let’s delve into the fundamental aspect of binoculars—the magnification. Beyond being just a numerical value, magnification is the gateway to a closer, more detailed view of the world.

    1. Definition of Magnification: At its core, magnification represents how much larger an object appears through binoculars compared to the naked eye. It’s expressed as a number followed by an ‘x’ (e.g., 8×42), with the ‘8’ indicating that the object will appear eight times closer than it would to the unaided eye.

    2. Significance of Magnification in Binoculars: Magnification is a critical factor in choosing binoculars based on your intended use. For general-purpose observations, an 8x magnification is often recommended, providing a good balance between detail and stability. However, if you require more detailed observations, such as wildlife or birdwatching, a 10x or even 12x magnification might be preferable.

    3. Common Magnification Numbers and Their Applications: Let’s explore common magnification numbers and their applications through Table 1.

    Popular Magnifications and Their Applications

    Specifications Overview

    ModelMagnificationObjective Lens Diameter (mm)Exit Pupil (mm)Twilight FactorPerceived Low Light BrightnessLow Light Detail
    8×218x212.613AdequateLimited
    8×258x253.114.1AdequateLimited
    10×2510x252.515.8AdequateLimited
    10×2610x262.616.1AdequateLimited
    7×287x284.015.4GoodModerate
    9×289x283.116.7GoodModerate
    10×2810x282.816.8AdequateLimited
    8×308x303.815.5GoodModerate
    10×3010x303.016.4AdequateLimited
    8×328x324.016.0GoodModerate
    9×329x323.616.8GoodModerate
    10×3210x323.217.6AdequateLimited
    8×428x425.318.3ExcellentHigh
    10×4210x424.220.5GoodHigh
    8.5×458.5x455.319.5ExcellentHigh
    7×507x507.118.7ExcellentHigh
    10×5010x505.022.4ExcellentHigh
    12×5012x504.224.5GoodHigh
    15×5615x563.729.4AdequateLimited

    Compact Models (8×21, 8×25, 10×25, 10×26)

    1. 8×21 – Your On-the-Go CompanionApplications: Ideal for casual use, hiking, and daytime activities.Characteristics: Compact, lightweight, suitable for daylight observations.Considerations: Limited low light performance due to smaller objective lens diameter.Compact models, like the 8×21, are perfect for on-the-go enthusiasts. Their lightweight design makes them versatile for casual observation and hiking. However, be aware of the compromise in low light conditions due to the smaller objective lens diameter.
    2. 8×25 – Versatility in a Compact PackageApplications: Versatile, suitable for birdwatching and general outdoor activities.Characteristics: Portable, good compromise between size and performance.Considerations: Limited low light detail, better suited for daytime use.The 8×25 configuration strikes a balance between portability and performance, making it a go-to choice for birdwatchers and outdoor enthusiasts. Ideal for daytime use, it ensures versatility without sacrificing too much on optical quality.
    3. 10×25 – Enhanced Magnification On the GoApplications: Increased magnification for detailed observations on the go.Characteristics: Compact, suitable for daytime use, good detail in well-lit conditions.Considerations: Limited low light performance.For greater magnification in a compact package, the 10×25 configuration steps up the game. Perfect for daytime adventurers, it provides enhanced detail while maintaining portability, though low light performance is limited.
    4. 10×26 – Detailed Daytime Observations, Compact DesignApplications: Compact option for detailed daytime observations.Characteristics: Enhanced magnification, still portable.Considerations: Limited low light performance.Similar to the 10×25, the 10×26 configuration excels in detailed daytime observations with increased magnification. However, users should be mindful of its limitations in low light conditions.

    Mid-Size Models (8×32, 9×32, 10×32)

    1. 8×32 – Versatility with Balanced MagnificationApplications: Versatile, suitable for birdwatching and various outdoor activities.Characteristics: Balanced magnification, good compromise between portability and performance.Considerations: Slightly heavier, narrower field of view compared to compact models.Stepping into the mid-size category, the 8×32 configuration offers versatility for birdwatching and outdoor activities. While balanced in magnification, users should be prepared for a slightly heavier instrument.
    2. 10×32 – Detailed Observations Without Sacrificing PortabilityApplications: Increased magnification for detailed observations on the go.Characteristics: Enhanced detail, still relatively portable.Considerations: Narrower field of view, potential stability challenges.For those desiring more detailed observations without sacrificing portability, the 10×32 configuration strikes a balance but may pose stability challenges without additional support.
    3. 8×30 – Versatile Lightweight DesignApplications: Versatile, suitable for general outdoor use.Characteristics: Balanced magnification, lightweight design.Considerations: Slightly larger than compact models.The 8×30 configuration combines versatility with a lightweight design, suitable for general outdoor use. While slightly larger than compact models, it maintains a balance in magnification and portability.

    Full-Size Models (8×42, 10×42, 8.5×45)

    1. 8×42 – Balanced Magnification for Various ActivitiesApplications: Versatile, suitable for various outdoor activities.Characteristics: Balanced magnification, brighter image, and good stability.Considerations: Bulkier than smaller models.Entering the realm of full-size models, the 8×42 configuration is a versatile choice for various outdoor activities. Balanced magnification and good stability come at the cost of increased size and weight.
    2. 10×42 – Popular Choice for Varied ObservationsApplications: Popular choice for birdwatching, wildlife observation, and stargazing.Characteristics: Excellent detail, suitable for a range of activities.Considerations: Slightly heavier, may require additional support for extended use.The 10×42 configuration excels in birdwatching, wildlife observation, and stargazing with excellent detail. However, users should be mindful of its slightly heavier build, which may require additional support during extended use.
    3. 8.5×45 – Enhanced Performance in a Balanced Package

    Applications: Versatile, with enhanced magnification and larger objective lenses.

    Characteristics: Balanced performance for various outdoor activities.

    Considerations: Slightly larger and heavier than standard full-size models.

    The 8.5×45 configuration offers enhanced magnification and larger objective lenses for balanced performance in various outdoor activities. It sits between standard full-size and larger models in terms of size and weight.

    Larger Models (7×50, 10×50, 12×50, 15×56)

    1. 7×50 – Optimal for Low Light Conditions and Astronomy

    Applications: Suitable for low light conditions, marine use, and astronomy.

    Characteristics: Larger objective lenses for improved low light performance.

    Considerations: Bulkier and heavier than mid-size and compact models.

    Moving into larger models, the 7×50 configuration is ideal for low light conditions, marine use, and astronomy. Larger objective lenses enhance low light performance, but users should be prepared for increased bulk and weight.

    1. 10×50 – High Magnification for Astronomy and Wildlife Observation

    Applications: Ideal for astronomy, low light wildlife observation.

    Characteristics: High magnification and large objective lenses for detailed observations.

    Considerations: Heavier, may require additional support.

    The 10×50 configuration, with its high magnification and large objective lenses, is ideal for astronomy and low light wildlife observation. However, its heavier build may benefit from additional support.

    1. 12×50 – Detailed Observations in Low Light Conditions

    Applications: Detailed observations in low light conditions.

    Characteristics: High magnification with a larger objective lens for increased detail.

    Considerations: Bulkier and heavier, suitable for tripod use.

    For those seeking detailed observations in low light conditions, the 12×50 configuration offers high magnification and a larger objective lens. Its bulkier design may require tripod use for stability.

    1. 15×56 – Specialized Use for Maximum Detail

    Applications: Specialized use for long-distance observation and astronomy.

    Characteristics: High magnification, large objective lenses for maximum detail.

    Considerations: Heaviest and largest, typically tripod-mounted for stability.

    The 15×56 configuration is designed for specialized use, offering high magnification and large objective lenses for maximum detail. However, it is the heaviest and largest among the options, typically requiring tripod mounting for stability.

    4. Practical Implications: Understanding magnification practically means appreciating its impact on your viewing experience. Higher magnifications provide more detailed images but can be challenging to stabilize without additional support. On the other hand, lower magnifications offer a wider field of view and are often preferred for activities where a stable image is crucial.

    5. Choosing the Right Magnification: Consider your specific needs when selecting binoculars. A higher magnification might be suitable if you anticipate observing subjects from a distance or want to bring details closer. However, for activities like birdwatching, where a broader view is often necessary, a moderate magnification like 8x might be the perfect fit.

    Understanding magnification transforms your binoculars from mere optical instruments to personalized windows into the world around you. The balance between detail and stability that magnification offers is the key to unlocking the full potential of your binoculars.

    Decoding Objective Lens Diameter

    As we navigate the intricate world of binocular numbers, our next stop is the objective lens diameter—a crucial aspect that plays a defining role in the performance of your binoculars.

    1. Explanation of Objective Lens Diameter: Objective lens diameter is denoted by the second number in the binocular specification, such as 8x42. It represents the diameter of the front lenses in millimeters. In simple terms, a larger objective lens diameter means more light-gathering capability.

    2. Relationship Between Objective Lens Diameter and Light Gathering: The correlation between objective lens diameter and light gathering is elemental. Larger lenses capture more light, making binoculars with bigger objective lenses ideal for low-light conditions. This feature is especially advantageous during dawn, dusk, or in environments with reduced natural light.

    3. Impact of Objective Lens Diameter on Field of View: While the primary function of the objective lens is light gathering, it also influences the field of view. Larger objective lenses tend to provide a wider field of view, enabling you to capture more of your surroundings at a glance.

    4. Practical Considerations: Let’s break down the practical considerations of objective lens diameter through Table 2.

    Table 2: Objective Lens Diameter and Light Gathering

    Objective Lens Diameter (mm)Light Gathering Capability
    32Standard
    42Enhanced
    50+Excellent

    5. Choosing the Right Objective Lens Diameter: When selecting binoculars, the optimal objective lens diameter depends on your intended use. For general-purpose observations, a standard 32mm might suffice. If you’re an avid nature enthusiast or astronomer, consider stepping up to 42mm or larger for enhanced performance.

    6. Balancing Size and Performance: It’s important to note that while a larger objective lens diameter contributes to improved performance, it also increases the overall size and weight of the binoculars. Consider a balance between enhanced performance and portability based on your preferences and activities.

    Grasping the Exit Pupil

    Now, let’s turn our attention to the often-overlooked but crucial element in the binocular equation—the exit pupil. Like a beam of light emerging from the eyepiece, the exit pupil sheds light on low-light performance and comfort during extended use.

    1. Definition and Importance of Exit Pupil: The exit pupil is a tiny circle of light that appears in the eyepiece when you hold binoculars at arm’s length. It’s calculated by dividing the objective lens diameter by the magnification (e.g., 42/8 for 8×42). This seemingly simple number has profound implications for your viewing experience.

    2. Calculating Exit Pupil Size: To calculate the exit pupil size, you can use the formula:

    Exit Pupil=Objective Lens DiameterMagnificationExit Pupil=MagnificationObjective Lens Diameter​

    This calculation results in a number measured in millimeters, representing the diameter of the exit pupil. A larger exit pupil generally translates to a brighter image, particularly beneficial in low-light conditions.

    3. How Exit Pupil Affects Low-Light Performance: The exit pupil directly influences a binocular’s performance in low-light situations. In scenarios such as dawn, dusk, or stargazing, where natural light is scarce, a larger exit pupil, typically above 5mm, ensures that your eyes receive more light, leading to brighter and clearer images.

    4. Practical Considerations: Let’s bring the concept of exit pupil into practical considerations through Table 3.

    Table 3: Exit Pupil and Low-Light Performance

    Exit Pupil (mm)Low-Light Performance
    < 5Limited brightness
    5-7Adequate brightness
    > 7Excellent brightness

    5. Choosing the Right Exit Pupil: Consider your preferred activities and the lighting conditions in which you’ll use your binoculars. For stargazers or those who enjoy early morning birdwatching, a larger exit pupil is advisable for an optimal viewing experience.

    Understanding and grasping the exit pupil opens the door to a world where the nuances of low-light situations are unveiled. As we continue our journey through the intricacies of binocular numbers, each element contributes to the tapestry of a viewing experience that is not just clear but also tailored to your preferences and needs.

    Field of View Unveiled

    Field of View

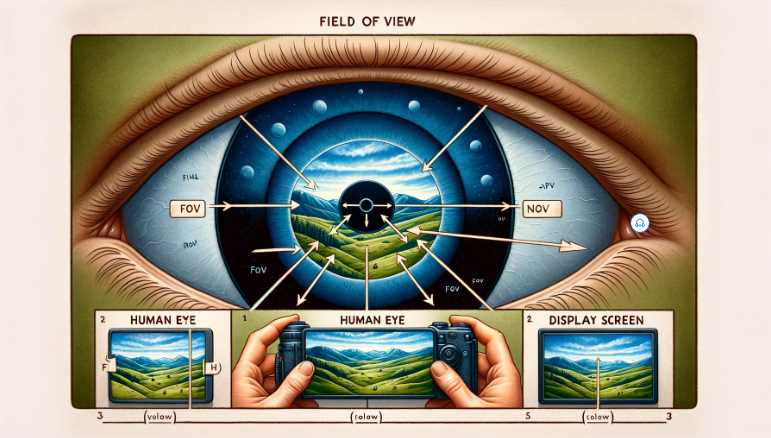
    As we progress in our exploration of binocular numbers, our focus now shifts to the often underestimated yet vital aspect—field of view. This parameter determines how much of the scene you can capture at a glance, influencing the immersive quality of your observations.

    1. Definition of Field of View: Field of view (FOV) is a measure of the width of the observable area seen through the binoculars. It’s often expressed in degrees or feet at a specific distance. A wider field of view allows you to take in more of your surroundings without having to move the binoculars.

    2. Different Types of Field of View: There are generally three types of field of view—wide, standard, and narrow.

    • Wide FOV: Ideal for activities like birdwatching and sports events where a broad view is essential.
    • Standard FOV: A balanced choice for general-purpose observations, offering a blend of detail and width.
    • Narrow FOV: Suited for specific scenarios like astronomy or long-distance viewing, providing a more focused and detailed view.

    3. Practical Implications of Field of View: The practical implications of field of view are crucial for choosing binoculars that align with your intended activities. A wider field of view is advantageous for tracking fast-moving subjects, while a narrower field is beneficial for detailed observations.

    4. Choosing the Right Field of View: Tailor your choice based on the nature of your observations:

    • Wide FOV: Birdwatching, sports events
    • Standard FOV: General-purpose
    • Narrow FOV: Astronomy, long-distance viewing

    5. Summary of Field of View Types: Summarizing the types of field of view through Table

    Field of ViewBest Use
    WideBirdwatching, sports
    StandardGeneral-purpose
    NarrowAstronomy, long-distance

    Understanding field of view is akin to widening the canvas of your visual exploration. The choice between wide, standard, or narrow field of view is a personal one, influenced by the specific activities you cherish.

    Factors Influencing Binocular Performance

    Coating and Prisms: Enhancing Clarity and Performance

    In the intricate realm of binoculars, the coatings on lenses and the prisms nestled within play a crucial role in shaping the quality of your viewing experience. Let’s delve into the significance of these elements and how they contribute to the optical prowess of your binoculars.

    Lens Coatings: Unveiling the Layers of Brilliance

    When you gaze through a pair of binoculars, the clarity and vividness of the image are significantly influenced by lens coatings. Manufacturers apply coatings to reduce reflections, increase light transmission, and enhance contrast. Here are some common types of lens coatings you might encounter:

    1. Fully Coated: A single layer of coating on all air-to-glass surfaces. While an improvement over uncoated lenses, fully coated binoculars may still experience glare and reduced clarity in challenging lighting conditions.
    2. Multi-Coated: Featuring multiple layers on at least one lens surface, multi-coated binoculars provide enhanced light transmission and improved image quality. These are a popular choice for users seeking a balance between performance and cost.
    3. Fully Multi-Coated: The pinnacle of lens coatings, fully multi-coated binoculars boast multiple layers on all air-to-glass surfaces. This meticulous treatment minimizes glare, maximizes light transmission, and ensures a crisp, bright view in various lighting scenarios.
    Common Lens Coatings
    Coating TypeDescription
    Fully CoatedSingle layer on all air-to-glass surfaces
    Multi-CoatedMultiple layers on at least one lens surface
    Fully Multi-CoatedMultiple layers on all air-to-glass surfaces

    Prisms: Directing Light for Optimal Viewing

    Prisms inside binoculars serve a crucial role in erecting the image and folding the optical path, ensuring a more compact design. Two primary types of prisms, roof and Porro prisms, are commonly used, each with its advantages:

    1. Roof Prisms: Known for their streamlined design, roof prisms result in a more compact and straight-barreled binocular. They often appeal to users looking for a slim and easily portable option.
    2. Porro Prisms: Characterized by their offset barrel design, Porro prisms provide a wider separation between the objective lenses, contributing to a more immersive three-dimensional view. Binoculars with Porro prisms are often favored for their depth perception and wide field of view.

    Understanding Eye Relief: The Gateway to Comfortable Viewing

    In the intricate landscape of binocular specifications, eye relief stands out as a critical factor for ensuring a comfortable and enjoyable viewing experience. Let’s unravel the mysteries of eye relief, exploring its definition, importance, and optimal considerations.

    Defining Eye Relief

    Eye relief refers to the distance between the eyepiece lens and your eyes while still maintaining a full field of view. This distance is crucial for individuals who wear glasses, ensuring that they can see the entire image without vignetting or loss of clarity.

    Importance of Optimal Eye Relief

    Optimal eye relief is essential for several reasons:

    1. Comfort: Long viewing sessions can strain the eyes. Adequate eye relief allows for a comfortable viewing experience without the need to press your eyes against the eyepiece.
    2. Eyeglass Wearers: For those who wear glasses, eye relief is especially critical. It allows individuals to enjoy the full field of view without removing their glasses, accommodating different visual needs.
    3. Safety: Maintaining a proper distance between the eyepiece and your eyes is not only about comfort but also safety. Adequate eye relief prevents the risk of injury, especially during rapid or unexpected movements.

    Optimal Eye Relief Range

    While specific preferences may vary, a general guideline for optimal eye relief falls within the range of 12-15mm. This range ensures that users, with or without glasses, can comfortably view the entire field without compromising on image quality.

    Eye Relief Recommendations
    User TypeOptimal Eye Relief Range
    Non-Eyeglass Wearer12-15mm
    Eyeglass Wearer15mm or more

    Tips for Eyeglass Wearers

    For those who wear glasses, consider the following tips to maximize your viewing experience:

    • Adjustable Eyecups: Opt for binoculars with adjustable eyecups. Twist-up eyecups provide flexibility in achieving the right eye relief, ensuring a comfortable fit with or without glasses.
    • Long Eye Relief Models: Explore binocular models specifically designed for eyeglass wearers. These often feature longer eye relief to accommodate the additional distance created by glasses.

    What is Meant By Magnification Numbers?

    When you buy a Binocular, you first see some numbers like 10×50 or 12×60. Seeing these numbers, you feel like these are significant numbers, but the problem is you don’t know the significance of these numbers.

    Here, the primary number, such as 10x & 12x, defines the strength of magnification. More magnification power helps you to see the object more closely. Here, 10x means you will see the object ten times closer than its actual distance, and 12x means you will see the object 12 times closer than its actual distance. The eyepiece magnifies the distance between the binoculars and the objects.

    But with more magnifying power comes difficulty in controlling the steadiness. So, it would be best if you used some support to get much stability for the Binoculars with ultra magnifying power. You can adjust the magnifying power manually with zoom binoculars.

    What is Meant by the Numbers After the Magnification Number?

    The number after the magnification number refers to the size of the objective lens. It is also called an aperture. A common word, proper? It is a common word for the camera section. Yes, cameras and Binoculars both work with lenses. You can know the lens size of your pair of binoculars by these numbers.

    For example, In a Binocular with 12×60 numbers, there will be 60mm objective lenses. So, this number defines your binocular lens size. With bigger lenses, your binoculars will look more prominent. If you want to see a brighter image, you will need bigger lenses.

    You know that objective lens diameter collects the lights. So, the bigger aperture will give you better image quality. Again, if you want to see the night sky, a more significant objective diameter will help you better image quality because the aperture’s job is light gathering.

    So, the numbers after the magnification numbers define the sizes of the objective lenses. The numbers can vary, and the size of the lenses as well. You have to choose your Binocular according to your needs.

    Confusion Regarding Magnification Number and Aperture

    Still, the numbers can confuse you. Like, you may think that what numbers between 12×40 and 12×60 will be better for seeing the beautiful sky at night? As we discussed earlier, 12x defines how close the object will be, and 40 60 defines how clearer, brighter, and broader the image will be. So, it’s clear that 12×60 will give you more superior viewing experience and be better for night sky watching and daylight viewing.

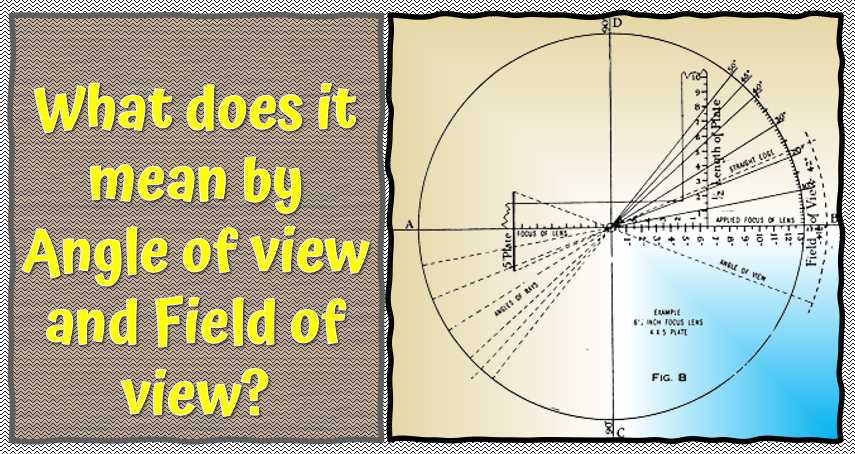
    AoV & FoV: What does it mean by Angle of view and Field of view?

    We will explain the angle of view first, then the field of view, and after completing the explanation, we will clear your confusion between them.

    What does it mean by Angle of view and Field of view

    The angle of view is described in degrees. It refers to the amount of horizontal view you can see with your binoculars. More degrees will allow you to see a broader picture. If you want the right viewing angle, the degrees should be more than 6. Sometimes, you may see some higher numbers. No tension. Here the company used the actual amount of AoV. For example, you may see 90 degrees, but the manufacturer multiplied the Aov with the Magnification number of Binoculars.

    For Instance: a 12×60 binocular with 7.5 degrees Aov will get 90 Degrees’ actual AoV by multiplying (7.5 x 12 = 90).

    The main difference between Aov and FoV is, Aov is written in degrees, whereas Fov is in feet or meters. But both of them refer to the same thing, the size of the image you will see from your binoculars. So, the higher field of view means you will get a bigger picture. But don’t forget that more powerful magnification will decrease the viewing field because more magnification gives you a closer view. You will get a limited view if you want to watch it closely. More than 300 feet is enough FoV for Binoculars.

    Confusion: 

    We have seen that the purposes of the angle of view and field of view are quite similar. Though they are not the same, you can convert Aov into FoV. To convert Aov into Fov, you must multiply the Aov by 52.5.

    For example: suppose your Aov is 7.5 degrees; you want to convert it into FoV, then multiply it by 52.5.

                52.5 x 7.5= 393.75. So, here the field of view is 393.75.

    What is the Exit Pupil Diameter?

    EPN (Exit pupil – number) defines the amount of light that sees the object. It is essential because you need perfect light to see any particular image. You must divide the objective lens sizes with magnification numbers to know the exit pupil size.

    For instance: You have a 12×60 Binocular. The exit pupil number is 5 (60/12 = 5). Or, to compare the sizes between two binoculars, you can see the difference by merely holding them together. But I think the calculation is the more comfortable and perfect process to know the numbers of exit pupil size.

    Try to get a Binocular with a more considerable amount of exit pupil numbers. But most of the time, more than 4mm is okay. More exit pupil diameter is better for low light conditions because it gives you more light to see the objects.

    What is the Closest Focus distance Number?

    Above, we discussed how far you can see, how much brighter the afar image can be, and how wider you can see. But you need to know another important thing to get a luminous image quality: the minimum focus distance. The minimum focus distance to focus is around 4 meters.

    What is Eye Relief?

    This ERN (eye relief – number) is essential for people who wear glasses. It informs your eye’s distance from the eyecups and helps you to adjust it. 15mm eye relief is enough. So before buying, confirm that it has enough eye relief if you wear glasses because the image quality also depends on eye relief distance (number).

    Type of prism: What are the kinds of prism used in Binoculars?

    Manufacturers use a different type of prism design as optical elements in a pair of binoculars. Porro prism mirrors and Roof prism mirrors are two prism types.

    Common Myths and Misconceptions: Dispelling Binocular Fallacies

    Embarking on the journey to choose the perfect binoculars, one often encounters a myriad of myths and misconceptions that can cloud the decision-making process. Let’s debunk some of these common fallacies to ensure you navigate the world of binoculars with clarity.

    Myth: Higher Magnification is Always Better

    Contrary to popular belief, higher magnification is not a universal panacea for all viewing needs. While it may seem tempting to go for the maximum magnification available, it comes with trade-offs. High magnification exacerbates image shake, making it challenging to maintain a steady view without the aid of additional stabilization tools. Moreover, it narrows the field of view, potentially making it harder to locate and track moving subjects.

    Myth: Bigger Objective Lenses Guarantee Better Image Quality

    While larger objective lenses contribute to enhanced light-gathering capability, assuming that bigger is always better can lead to misconceptions. A balance between objective lens size, magnification, and the quality of lens coatings is crucial. A well-coated smaller lens may outperform a larger, uncoated lens in terms of image brightness and clarity.

    Myth: All Coatings Are the Same

    Not all coatings are created equal. The type and quality of coatings on binocular lenses significantly impact image quality. Binoculars labeled as “coated” may have a single layer, while “fully multi-coated” models boast multiple layers on all air-to-glass surfaces. Understanding these distinctions ensures you make an informed decision when choosing binoculars.

    Table 7: Dispelling Binocular Myths

    MythReality
    Higher magnification is always betterTrade-offs in stability and field of view
    Bigger objective lenses mean better qualityBalance with magnification and lens coatings
    All coatings are the sameDifferences in types and quality of coatings

    By dispelling these common myths, you can approach the selection of binoculars with a clear perspective. Understanding the nuances of magnification, lens size, and coatings will empower you to make a choice that aligns with your specific needs and ensures a rewarding visual experience.

    Final Words 

    Now, you are familiar with a binocular’s numbers and terminology. Remember these tips in short: you will get less FoV with more significant magnification, big objective lenses are helpful for the low light condition, and ensure a higher than 4mm exit pupil number for enough light to see.

    If you are a beginner and not an expert binocular holder, you are requested to avoid more than a 12x magnification number because a powerful binocular can hamper your viewing experience. We hope you have a clear idea about Binocular numbers and terminology. Now you can buy a binocular like an expert.

  • Top 10 Things to Consider Before Buying Your First Set of Binoculars (Video Included)

    Top 10 Things to Consider Before Buying Your First Set of Binoculars (Video Included)

    When a person wants to buy a Binocular, he gets confused about which one will be appropriate for him and which one won’t. People have different purposes for buying binoculars; some may want to use them for regular use, like sports watching, hiking, or for some holiday uses.

    Before starting, we will show you some significant facts and features you should consider before buying your pair of binoculars:

    Understanding Binocular Specifications

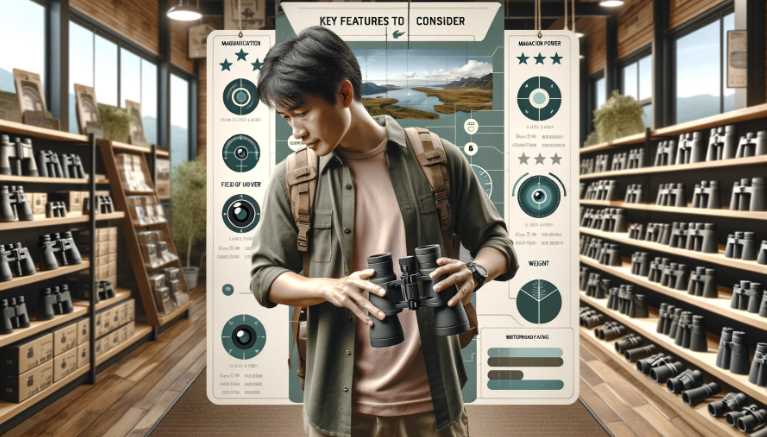
    Key Features to Consider

    Embarking on the journey to select the perfect binoculars involves unraveling a tapestry of specifications, each contributing to the overall viewing experience.

    1. Objective Lens Diameter

    The size of the objective lens plays a pivotal role in light gathering. A larger objective lens allows more light to enter, resulting in a brighter and clearer image. However, it’s essential to strike a balance, considering that larger lenses can make the binoculars heavier and bulkier, impacting portability. For a versatile choice, opt for an objective lens diameter ranging from 42mm to 50mm.

    2. Magnification Power

    While it might be tempting to go for higher magnification, it’s crucial to understand the trade-offs. Higher magnification can result in a more detailed view, but it also amplifies hand movements, making it challenging to maintain a steady image. For general-purpose use, magnification power between 8x and 10x is recommended, providing a sweet spot between zoom and stability.

    3. Field of View

    The field of view refers to the width of the area visible through the binoculars at a specific distance. A wider field of view is advantageous, especially when observing fast-moving subjects or scanning vast landscapes. Finding the right balance between magnification and field of view is key to an immersive experience. Aim for a field of view between 300ft and 400ft at 1000 yards.

    4. Exit Pupil

    The exit pupil is the diameter of the light beam exiting the eyepiece. Understanding this specification is crucial for optimizing low-light performance. To ensure a bright image in various lighting conditions, select binoculars with an exit pupil diameter that matches or slightly exceeds your eyes’ dilation. A range between 4mm and 5mm is generally considered ideal.

    5. Close Focus Distance

    For nature enthusiasts and bird watchers, the ability to focus on close objects is paramount. A close focus distance of 6ft to 10ft allows you to observe intricate details, making your binoculars versatile for a range of activities.

    Key Binocular Specifications

    SpecificationIdeal Range
    Objective Lens Diameter42mm – 50mm
    Magnification Power8x – 10x
    Field of View300ft – 400ft at 1000 yards
    Exit Pupil4mm – 5mm
    Close Focus Distance6ft – 10ft

    In the intricate dance of these specifications lies the secret to finding binoculars tailored to your specific needs. As you consider these factors, envision the breathtaking scenes that await you, framed with precision through the lenses of your chosen binoculars.

    Types of Binoculars

    Choosing the Right Type

    Selecting the type of binoculars is akin to choosing the lens through which you’ll view the world. Understanding the nuances between various types ensures you find the perfect match for your unique preferences and activities.

    1. Porro Prism vs. Roof Prism

    The prism design is a fundamental element influencing the shape and performance of binoculars. Porro prism binoculars have a traditional, offset design, providing enhanced depth perception. On the other hand, roof prism binoculars are more streamlined and compact, making them an excellent choice for those prioritizing portability. Consider your preferences – whether you value a classic design or a more modern, space-efficient build.

    2. Compact vs. Full-Size Binoculars

    The choice between compact and full-size binoculars revolves around balancing size and performance. Compact binoculars are travel-friendly, easily fitting into pockets or small bags. However, they may sacrifice some image quality compared to their full-size counterparts, which offer larger objective lenses for improved clarity. Consider your intended activities – are you seeking a travel companion or a dedicated tool for detailed observations?

    3. Zoom vs. Fixed Magnification

    The debate between zoom and fixed magnification revolves around versatility and stability. Zoom binoculars allow you to adjust the magnification, offering flexibility in various scenarios. However, this versatility often comes at the cost of stability, as higher magnifications amplify hand movements. Fixed magnification binoculars, while limiting in terms of versatility, provide a steadier image. Consider your priorities – do you prioritize adaptability or a rock-solid viewing experience?

    Types of Binoculars

    Binocular TypeProsCons
    Porro PrismEnhanced depth perceptionBulkier design
    Roof PrismStreamlined, compactPotentially more expensive
    CompactTravel-friendlySacrifice some image quality
    Full-SizeBetter image qualityBulkier and heavier
    ZoomVersatility in magnificationPotential compromise in image stability
    Fixed MagnificationSteadier imageLimited versatility

    As you delve into the world of binocular types, imagine the scenarios each design is tailored for. Picture yourself on a mountaintop with compact binoculars, or immersed in the details of nature with a pair of full-size binoculars.

    Consideration of Lens Coatings

    Coated, Fully Coated, Multi-Coated, and Fully Multi-Coated Lenses

    The magic behind the clarity and brilliance of binocular vision lies in the application of specialized lens coatings. These coatings serve as the unsung heroes, enhancing light transmission, reducing glare, and ensuring that every detail is vividly captured.

    1. Coated Lenses

    Binoculars with coated lenses have a single layer of coating on at least one lens surface. While this basic coating provides some improvement in image quality by reducing light loss, it is considered the entry-level option in lens coating.

    2. Fully Coated Lenses

    A step up from coated lenses, fully coated binoculars have all air-to-glass surfaces coated with a single layer. While still a budget-friendly option, fully coated lenses provide better light transmission and improved image brightness.

    3. Multi-Coated Lenses

    Multi-coated lenses feature multiple layers of coating on at least one lens surface. This enhances light transmission, reduces reflections, and results in brighter, sharper images. Binoculars with multi-coated lenses strike a balance between performance and affordability.

    4. Fully Multi-Coated Lenses

    Considered the pinnacle of lens coatings, fully multi-coated binoculars have all air-to-glass surfaces coated with multiple layers. This comprehensive coating significantly improves light transmission, contrast, and color fidelity, ensuring a superior viewing experience even in challenging lighting conditions.

    The choice of lens coatings depends on your budget, intended use, and desired level of optical performance. While fully multi-coated binoculars are the gold standard, fully coated or multi-coated options can still deliver excellent results for casual or budget-conscious users.

    Lens Coating Types

    Lens Coating TypeDescriptionIdeal Use
    CoatedSingle layer on at least one lens surfaceEntry-level
    Fully CoatedAll air-to-glass surfaces coated with a single layerBudget-friendly
    Multi-CoatedMultiple layers on at least one lens surfaceBalanced performance
    Fully Multi-CoatedAll air-to-glass surfaces coated with multiple layersSuperior optical performance

    Evaluating Build and Design

    Durability and Ergonomics

    Choosing binoculars with a robust build and ergonomic design is essential for ensuring longevity and comfort during use.

    1. Build Material (Metal vs. Plastic)
      • The choice between metal and plastic for the construction of binoculars involves a trade-off between durability and weight.
      • Metal builds, often made of aluminum or magnesium alloys, provide sturdiness suitable for rugged outdoor activities but come with a higher weight.
      • High-quality plastics, on the other hand, strike a balance between durability and reduced weight, making them suitable for extended use without causing undue strain.
    2. Waterproof and Fogproof Features
      • Opting for binoculars with waterproof and fogproof features is crucial, especially for outdoor enthusiasts facing varying weather conditions.
      • Nitrogen purging, a common feature, prevents internal fogging, ensuring clear vision in diverse environments.
      • Waterproofing safeguards against unexpected rain or accidental submersion, making them reliable companions in all weather scenarios.
    3. Grip and Comfort
      • The ergonomic design of binoculars contributes significantly to user comfort during extended use.
      • Textured grips and well-designed contours enhance the overall handling experience, providing a secure hold and reducing the likelihood of accidental drops.

    Binocular Build and Design Comparison

    FeatureMetal BuildPlastic Build
    DurabilityExcellent durability for rugged use.Good durability with reduced overall weight.
    WeightHeavier due to the robust metal construction.Lighter, ideal for extended use without strain.
    Weather ResistanceOften equipped with superior weather seals.Reliable in various weather conditions.
    CostHigher cost due to the premium materials.Generally more affordable without sacrificing quality.
    ComfortMay be heavier for extended use.Lighter design contributes to user comfort.

    This table provides a quick comparison between metal and plastic builds, aiding in the decision-making process based on individual preferences and the intended use of the binoculars. Choose the build material that aligns with your priorities, ensuring a durable and comfortable optical companion for your adventures.

    Weight and Size Considerations

    Balancing Portability and Performance

    The weight and size of binoculars are crucial considerations that can significantly impact your overall experience, especially during extended use or travel.

    1. Impact of Weight on Extended Use
      • The weight of binoculars directly affects comfort during prolonged use.
      • Heavier models may cause fatigue, limiting the enjoyment of extended observations such as birdwatching or stargazing.
      • Consider your intended use – if you plan on carrying them for extended periods, opt for a more lightweight design.
    2. Compactness for Travel
      • Travel-friendly binoculars strike a delicate balance between compactness and performance.
      • Compact models are designed for easy portability, making them ideal for activities like hiking or sightseeing.
      • However, keep in mind that compactness often involves some trade-offs, such as a narrower field of view or slightly reduced image brightness.

    When choosing binoculars, envision how you plan to use them. If your adventures involve a lot of movement or if you appreciate the convenience of easily stowing them in a backpack, lean towards a lighter and more compact design. On the other hand, if you prioritize optical performance and plan to set up for longer observations, a slightly heavier but more feature-rich model might be the better choice.

    Adjustability and Focus System

    Smooth Adjustments for Precision

    The adjustability and focus system of binoculars are critical factors that contribute to the clarity and ease of use during observations.

    1. Central Focus vs. Individual Eyepiece Focus
      • Central Focus: Convenient for quick adjustments, central focus systems simultaneously adjust both barrels with a single mechanism.
      • Individual Eyepiece Focus: Ideal for more precise customization, allowing independent adjustment of each eyepiece to accommodate differences in vision between the eyes.
    2. Diopter Adjustment
      • Diopter adjustment is a valuable feature for users with varying eyesight.
      • This individualized setting compensates for the differences between your eyes, ensuring a sharp and focused image without the need for constantly readjusting the central focus.
    3. Twist-Up Eyecups for Eyeglass Wearers
      • Twist-up eyecups are designed for flexibility, accommodating users with or without eyeglasses.
      • By twisting the eyecups up or down, users can achieve the optimal distance between the eyepiece and their eyes, ensuring a comfortable viewing experience.

    Binocular Adjustability and Focus System Comparison

    FeatureCentral Focus SystemIndividual Eyepiece Focus System
    Ease of UseQuick and convenient adjustments.Precision customization for individual preferences.
    Diopter AdjustmentMay have a diopter adjustment but often less customizable.Allows for individualized diopter adjustments for each eyepiece.
    Eyeglass WearersMight require additional adjustments for eyeglass wearers.Ideal for eyeglass wearers with adjustable eyecups.
    SuitabilityWell-suited for general use and quick observations.Preferred for activities requiring fine-tuned adjustments.
    Common Use CasesBirdwatching, sports events, and general observations.Stargazing, wildlife photography, and activities requiring precise focus.

    This table serves as a quick reference guide to help you choose between a central focus system and an individual eyepiece focus system based on your preferences and specific needs.

    Low Light Performance

    Twilight Factor and Exit Pupil

    Optimizing low light performance in binoculars is crucial for activities like stargazing or dawn and dusk observations.

    1. Understanding Low Light Conditions
      • Twilight factor is a key consideration for low light performance, taking into account both magnification and objective lens diameter.
      • Higher twilight factors, calculated by multiplying magnification by the square root of the objective lens diameter, indicate better performance in low light conditions such as dawn or dusk.
    2. Ideal Specifications for Low Light Observation
      • Choosing binoculars with a larger objective lens diameter enhances low light performance.
      • A larger exit pupil, calculated by dividing the objective lens diameter by the magnification, is advantageous for low light conditions, providing a brighter and clearer image.

    Binocular Low Light Performance Comparison

    FeatureLarger Objective Lens DiameterLarger Exit Pupil
    AdvantagesEnhanced light-gathering ability.Brighter image in low light conditions.
    Twilight Factor CalculationHigher twilight factor for improved performance.Considerable impact on low light observations.
    Low Light ScenariosIdeal for dawn, dusk, and stargazing.Excellent performance in dimly lit environments.
    Common Magnification RangesOften found in lower magnification ranges.Compatible with various magnification options.
    SuitabilityWell-suited for activities requiring extended low light observations.Versatile for different low light scenarios.

    This table provides a comparative overview, allowing you to assess the impact of larger objective lens diameter and exit pupil on low light performance. Consider your specific use cases, especially if you anticipate engaging in activities where optimal performance in low light conditions is essential.

    Setting a Budget

    Finding the Balance

    While the allure of high-end binoculars is undeniable, setting a realistic budget is crucial for a satisfying purchase.

    1. Price Range for Different Needs
      • Entry-level binoculars can offer excellent value for casual users, providing adequate performance for general observations.
      • Higher budgets unlock advanced features, superior optics, and durable builds, catering to the needs of enthusiasts and professionals.
    2. Balancing Features and Cost
      • Assess your priorities and align them with your budget.
      • Consider features that are essential for your specific activities to find a balance between performance and cost.

    Binocular Budget Considerations

    Budget RangeFeatures and Considerations
    Entry-Level (<$200)– Suitable for casual users and beginners.
    – Adequate performance for general observations.
    Mid-Range ($200-$500)– Improved optics and build quality.
    – Suitable for enthusiasts seeking enhanced performance.
    High-End (>$500)– Advanced features, superior optics, and durable builds.
    – Ideal for professionals and those with specific requirements.

    This table provides a quick overview of budget considerations, helping you align your financial investment with the features that matter most to you.

    Maintenance and Care Tips

    Prolonging the Life of Your Binoculars

    Investing in binoculars is not just about the initial purchase; it’s a commitment to their care and maintenance. Proper handling and routine maintenance ensure that your binoculars provide clear and crisp views for years to come.

    1. Cleaning and Storage Guidelines
      • Use a lens cleaning kit designed for optics to remove dust, fingerprints, and smudges gently.
      • Avoid using abrasive materials like tissues or clothing that may scratch the lenses.
      • Blow away loose particles before cleaning to prevent scratching.
      • Store binoculars in a protective case when not in use to shield them from dust, moisture, and accidental damage.
      • Keep the lens caps on when not actively using the binoculars to prevent dust accumulation.
    2. Avoiding Common Mistakes
      • Refrain from touching the lenses with bare fingers as natural oils can degrade lens coatings.
      • Be cautious when adjusting the interpupillary distance, ensuring smooth movements to avoid strain on the hinges.
      • Avoid exposing binoculars to extreme temperatures, as rapid changes can lead to internal fogging.
      • Regularly check for any signs of wear and tear, such as loose screws or misaligned optics.
      • If binoculars get wet, wipe them dry immediately to prevent water damage, and allow them to air-dry completely before storing.

    Binocular Maintenance and Care Tips

    Maintenance TaskRecommended Action
    Cleaning Lenses– Use a lens cleaning kit for gentle and thorough cleaning.
    – Avoid abrasive materials and ensure lenses are dust-free before cleaning.
    Storage Practices– Store binoculars in a protective case to shield them from dust and moisture.
    – Keep lens caps on when not in use to prevent dust accumulation.
    Handling and Adjustment– Be cautious when adjusting interpupillary distance to avoid strain on hinges.
    – Check for signs of wear and tear, such as loose screws or misaligned optics.
    Temperature Considerations– Avoid exposing binoculars to extreme temperatures to prevent fogging.
    Dealing with Moisture– Wipe binoculars dry immediately if they get wet; allow them to air-dry completely.
    Avoiding Fingerprints– Refrain from touching lenses with bare fingers to prevent oil buildup.

    This table serves as a practical guide to maintaining and caring for your binoculars, ensuring their longevity and optimal performance. Incorporating these simple yet effective practices will help you get the most out of your investment and continue enjoying clear and vibrant observations.

    Facts & features you need to consider before choosing:

    LENS SIZESMAGNIFICATION NUMBERPRISM TYPEIMAGE QUALITY
    FIELD OF VIEWEYE RELIEF NUMBEREXIT PUPIL NUMBERPURPOSE OF USE
    OPTICAL COATINGFOCUS QUALITYSIZE & WEIGHTRUBBER COATING
    BRANDCOSTDURABILITYACCESSORIES

    Significance of Binocular Numbers  & Terminologies:

    How to Choose Binoculars

    You will see some numbers on Binoculars. These are significant numbers, and you also need to know some technical terminology of binoculars. Here, we will give a good idea about them. We will try to explain it quickly; thus, you can get it easily.

    NUMBERS & TERMINOLOGIES YOU MUST KNOW BEFORE CHOOSING

      Magnification Number  In a 10×60 Binocular, 10x is the magnification number. You will see the image ten times closer than its actual distance. More magnification power decreases stability, and an unstable focus can reduce image quality.
      Objective lensesThe number after the magnification number defines the objective size. For example, in a 10×60 Binocular, the accurate mirror is 60mm. The bigger objective lenses make the image brighter, and even when viewing the night sky, it produces a more brilliant image quality.
         Prism TypeTwo types of prisms are designed for binoculars, such as PORRO PRISM and ROOF PRISM. Roof prism binoculars are relatively modern, whereas Porro prism binoculars are older versions. Binoculars with roof prisms are more compact binoculars than the Porro ones. Because they use some single straight prism, on the other hand, the Porro is not straight.
    Exit – Pupil NumberThe exit-pupil number is the amount of light that allows you to see that item you want to notice from the binoculars. The exit-pupil number should be more than 4.
      FoVFoV -Field of view is the image size or the number of horizontal photos you can watch from your Binoculars. More than 300 feet is an average viewing field from a binocular. A wide field of view is always better for finding objects. There is the angle of view also in a pair of binoculars. The field of view and angle of view determines the same amount of horizontal space.
    Eye Relief NumberIf you wear glasses, this number is essential to you. The eye-relief number should be at least 15mm. This number matches the distance between your eyes and the binocular eyecups. It is also called eye relief distance.

    We will start with the general uses, and then one by one, we will guide the definite and professional users.

    BINOCULARS FOR EVERYDAY NORMAL USES

         Magnification Number8x magnification is perfect for close focus, like hiking or sports watching in the stadium, but for cinema watching in a cinema hall, 7x magnification is enough. Though you can use an 8x magnification binocular in the cinema hall. So, 8x magnifications are the best option for your general uses.
    Objective lensFor general uses, the lens size should be less than 30mm. An 8×28 pair of binoculars will be best for everyday use.
    Other important facts: FoV, Exit-pupil numberThe average FoV(field of view) should be 300 feet or more and should be durable. We recommend you buy the water-resistant binoculars version if you can afford it. 8×28 versions will be the best for general use.

    How to Choose Binoculars for Birding?

    Magnification NumberAn 8x magnification number is the best for bird watchers. But you can also take a 10x version if you are an expert user because higher magnification needs an expert hand to keep it stable.
    Objective lens42mm is the best lens size for bird watchers. So, an 8×42 binocular is an excellent choice for bird-watching.
    Other important facts: Fov, Exit pupil numberThree hundred thirty feet is the best field of view for bird watching. It will be easier for you to track any birds with that amount of field of view. Find a durable one with perfect features.

    How to Choose Binoculars for Wildlife-viewing or Hunting?

    Magnification Number8x to 10x is better for hunting. 8x magnification is perfect for many people, whereas you can choose a higher magnification version, like 10x, if you want to use it from more distance. Sometimes, you may need more magnification. Thus, an 8×32, 8×42, or 10×42 is the best option. You have to choose according to your needs.
    Objective lenses32mm – 42mm is the perfect size for wildlife viewing or hunting. It also depends on your needs; if you want to use it in poor light conditions, you need bigger lenses. On the other hand, for daylight, you can use 32mm enough.
    Other important facts: Fov, Exit pupil numberAn average FoV of 300-375 feet is enough. But if you need more or less FoV, you can take it and choose the appropriate angle of view. Try to buy fog proof and waterproof binoculars. It will be best for rough uses if you can get or afford a multi-coated binocular. Find the best brand which will give you the best quality at an affordable price.

    How to Choose Binocular For Boating?

    Magnification Number7x magnification is the ideal size for Marine uses. Because a ship or a boat is never steady. That’s why, even If you use any support to make your binoculars stable, you will not succeed. So for better image stabilization, we recommend you use lower magnification.
    Objective lenses50mm is a standard and ideal accurate size. A 7×50 binocular will be the best for boating and Marine uses to get better image quality.
    Other important facts: Fov, Exit pupil number385-foot FoV is better for boating or Marine uses. Find the best brand, depending on how much you want to spend. Make sure that your models are waterproof binoculars. As you wish to use them for boating, waterproof binoculars and multi-coated versions should be your priority.

    How to Choose Binoculars for Skywatching or Astronomy?

    Magnification Number8x to 10x is the average good magnification number for beginners. It will give you a good night sky viewing experience. Better eyepiece lenses (ocular lenses) are suggested for astronomy binoculars because you will not use your binoculars for astronomy at close focus.
      Objective lens50mm and 56mm are better for beginners, giving a satisfactory result with bright images. Consequently, 8×56 and 10×50 are the best options because they have larger lenses and the right ocular lens size. On the other hand, if you are an expert sky-watchers and want some intense results and want to have binoculars for astronomy unique experiences, the 25×100 binoculars are recommended. Astronomy binoculars have more considerable magnification power because their ocular lens (eyepiece) is more powerful and has a bigger objective size.
    Other important facts: Fov, Exit pupil numberA field view of 300 feet is enough for astronomy binoculars. You have to use a stand or tripod to get stability. If you want to use it roughly, we suggest buying multi-coated and water-resistant binoculars. Find the best quality according to your price range.

    10 Things to consider when Buying Binoculars

    You should consider a few things when buying binoculars, including your level of expertise and the type of activities you will use them for. Top-of-the-line optics may not be necessary if you’re an expert hunter or fisherman. However, if you plan on using your binoculars to see wildlife or scenic views while hiking or traveling, better optics will make the experience more enjoyable.

    Size and weight

    Binoculars come in different sizes and weights, so it’s essential to find the right pair. Generally, the larger the binoculars are, the brighter they will be. Smaller binoculars are also perfect for close-up viewing or use when hiking or camping.
    Regarding weight, heavier binoculars are usually better because they will stay on your head when you look through them. They won’t bounce around as much, so you’ll have less trouble seeing what you’re looking at. Additionally, a heavier binocular will typically take more time to become foggy or blurry, so you’ll be able to see more detail overall.

    Field of view

    Paying attention to the field of view (FOV) is essential. This is the area in which you can see clearly. The higher the FOV, the more details you’ll be able to see.

    Some binoculars have a wide FOV, while others have a narrow FOV. It’s essential to choose the right type of binoculars for your needs. If you’re planning on using them for hunting or bird watching, you’ll want a wide FOV binocular because it will give you a better overall view. If you’re using them for general observation, then a narrower FOV will be more appropriate.

    Types

    Binoculars come in different types of lenses and strengths:

    Monoculars are just glasses that allow you to see one image at a time. They’re suitable for viewing close-up objects or for reading documents.

    Binoculars provide an enhanced view by splitting the image into two separate images that can be viewed separately. They’re ideal for viewing larger objects and landscapes.

    Telescopic binoculars have a long lens that allows you to see further away. They’re best suited for viewing wildlife or distant scenery.

    Multi-purpose binoculars allow you to use them for different purposes, like birdwatching or hunting. They have a wide range of magnifications for close-up and distant viewing.

    Batteries

    Low-quality batteries can cause the optics to become foggy, reducing your visibility when looking through them. Worse yet, if the battery pack is defective, it could explode and cause serious injuries.

    So how do you know if the batteries in your binoculars are of high quality? The best way to check is to take them into a shop and have them tested. Alternatively, you can try them by putting them into a flashlight and seeing if the light goes out. 

    If the binoculars work correctly with a flashlight, they’re likely good enough for outdoor use. However, if they don’t work with a flashlight, it’s best to replace the batteries with better ones.

    Eye cups and adjustments

    Knowing the different types of eyecups and their corresponding adjustments is essential. Here are a few things to keep in mind:

    – Monoculars have one eyepiece that you look through, while binoculars have two. 

    – Eye cups on monoculars are typically smaller than those on binoculars, which translates to a more immersive experience. 

    – The size and shape of the eye cups also affect how well they fit your eyes. If your eyes are close together or more prominent in diameter than average, you’ll want to get binoculars with large eye cups to accommodate these characteristics. 

    – Most monoculars have a focusing ring that controls the distance between the viewer and the observed object. This ring is usually located near the eyepiece; however, some models come with a built-in focuser separate from the eyepiece. 

    – Most monoculars also have a diopter (or dioptre) adjustment that allows you to correct for poor vision at different distances. 

    – Binocular straps can make it easier to hold onto your binoculars while observing; they can also help distribute weight evenly across your shoulders so that you don’t fatigue as quickly as possible.

    Tripods and mounts

    A tripod is an essential piece of equipment for anyone who wants to use binoculars for observation. It helps stabilize the binoculars so that they are not constantly moving, which gives you a steadier view and makes it less likely that you’ll miss something important.

    There are a few different types of mounts available, but the two most popular ones are bolt-on mounts and rifle scopes mounts. Bolt-on mounts are quick and easy to use, but they can be bulky and require some drilling or mounting skill. Rifle scope mounts are more compact and easier to use, but they may not be as stable as bolt-on mounts. 

     whichever type of mount you choose, make sure that it is compatible with your binoculars and your specific shooting style. It’s also essential to make sure that the mount can hold your weight; if it can’t, it may not be able to keep up with your movements when you’re looking through the binoculars.

    Warranty and support

    Binoculars come with a warranty that covers defects in the glass or optics, but it’s important to know what type of warranty is offered. Some warranties only cover defects caused by manufacturing or design flaws, while others cover any imperfections.

    It’s also important to know what kind of support is available should you need it. will the manufacturer be able to help you fix your binoculars if they’re not working correctly? Will they be able to provide advice on how best to use them? 

    Overall, it’s a good idea to research the warranty and support offered by a particular brand before making a purchase. This way, you’ll have peace of mind knowing that you’re getting a product that will last and be easy to use.

    Lens coating

    This protection that’s applied to the lenses to prevent them from coming into contact with dirt, dust, and other elements.

    There are a few different types of lens coatings, and each has its benefits and drawbacks. One popular type is anti-reflective coating, which helps reduce glare and improves visibility in low-light conditions. There are also water-repellant coatings that help keep water off the lenses, preserving them against damage from rain or moisture. 

    The best way to find out what kind of lens coating your binoculars have is to look for it on the product packaging or online reviews. If you’re unsure, it’s always worth getting a second opinion from a friend or family before making your purchase.

    Portable and Waterproof Rating

    When you’re looking to buy binoculars, make sure that they are portable and water-resistant. This is especially important if you plan on taking them hiking or camping.

    Another thing to consider is the Waterproof rating. Make sure that the binoculars you purchase have a rating of IPX8 or higher to protect them from rain, splashing water, and even immersion in up to two meters of water for up to 30 minutes.

    Optical quality and Magnification

    Optical quality measures how clear and sharp the images are in your binoculars. High-quality binoculars will produce images that are clear and free from distortion, which makes it easier to see details.

    Magnification is the power of your lenses to magnify distant objects. The higher the magnification, the closer you’ll be able to see things. However, too much magnification can also lead to problems like eyestrain and headaches. So, ensure you find a pair of binoculars with the correct magnification.

    PRISM: Which prism should you choose, PORRO or ROOF?

    It depends on your demands and your budget. If you want lightweight and compact Binoculars, a roof prism will be better for you. On the other hand, if you don’t want to spend too much money, you are a budget buyer; the Porro prism will be better because the roof prism is more expensive than the Porro prism.

    Last Words: 

    We are all budget buyers. We all want the best quality in our budget. We think that you also want the best binoculars within your budget. Now you know choosing binoculars according to your needs. So, first of all, find out which brand gives you the best quality at an affordable price. Then select a binocular in pursuance of your choice, considering all its features. First, look for durable, rubber-coated, weather-resistant binoculars with larger exit pupils, good optical design, sharper focus, a right angle of view, and produce quality images.  Finally, buy your favorite Binocular. After purchasing, always use a neck strap for your binoculars’ safety and a lens cleaner to betterment your binoculars.